全网首发CentOS 7.6安装openGauss 6.0.2 LTS企业版(单机)
我的操作系统版本CentOS Linux release 7.6.1810 (Core)
openGauss现已正式发行 6.0.2 LTS 版本,下面就开始在Centos7.6安装openGauss 6.0.2 (LTS)来体验一下。
各种准备规划不赘述了,参考官方即可。
废话少说,直接记录安装过程,为精简少发截图:
安装依赖包,执行:
yum install -y bzip2 libaio-devel flex bison ncurses-devel glibc-devel patch readline-devel初期大概参考官方的安装文档:初始化安装环境 | openGauss文档 | openGauss社区
修改系统参数,规范的操作应该按照官方的文档配置,我大概配置几个参数:
编辑 /etc/sysctl.conf:# 添加以下内容
kernel.sem = 250 32000 100 999
kernel.shmall = 197951838
kernel.shmmax = 197951838000
fs.file-max = 7672460
net.ipv4.ip_local_port_range = 26000 65535
修改用户资源限制 /etc/security/limits.conf:
soft stack 3072*
hard stack 3072*
soft nofile 65536*
hard nofile 65536*
soft nproc 65536*
hard nproc 65536
vi /etc/default/grub
在GRUB_CMDLINE_LINUX= 后添加 transparent_hugepage=never
然后执行 grub2-mkconfig -o /boot/grub2/grub.cfg 重新编译grub,关闭透明大页
检查透明大页是否禁用:
cat /proc/meminfo |grep Huge创建用户组和用户,因为这台机器之前安装有2.0版本,因此有些和官方的不一样
groupadd dbgroup
useradd -g dbgroup opengauss
密码设置。
创建openGauss-All-6.0.2目录用于解压文件:
mkdir openGauss-All-6.0.2
创建 opengauss 用于安装数据库:
mkdir opengauss
上传安装包,解压安装包:
tar -zxvf openGauss-All-6.0.2-CentOS7-x86_64.tar.gz -C openGauss-All-6.0.2再进入解压目录执行:
cd openGauss-All-6.0.2
tar -zxvf openGauss-OM-6.0.2-CentOS7-x86_64.tar.gzcd /home/opengauss/openGauss-All-6.0.2/script/gspylib/etc/conf
复制模板 创建XML配置文件
cp cluster_config_template.xml /home/opengauss/openGauss
cd /home/opengauss/openGauss
mv cluster_config_template.xml cluster_config.xml
根据官方文档说明修改:
修改 vi cluster_config.xml
<?xml version="1.0" encoding="UTF-8"?>
<ROOT>
<CLUSTER>
<PARAM name="clusterName" value="openGaussDB" />
<PARAM name="nodeNames" value="pg-xc3" /><PARAM name="gaussdbAppPath" value="/home/opengauss/openGauss/app" />
<PARAM name="gaussdbLogPath" value="/home/opengauss/openGauss/log" />
<PARAM name="tmpMppdbPath" value="/home/opengauss/openGauss/tmp"/>
<PARAM name="gaussdbToolPath" value="/home/opengauss/openGauss/om" />
<PARAM name="corePath" value="/home/opengauss/openGauss/corefile"/>
<PARAM name="backIp1s" value="192.168.18.113"/></CLUSTER>
<DEVICELIST>
<DEVICE sn="node1">
<PARAM name="name" value="pg-xc3"/>
<PARAM name="azName" value="AZ1"/>
<PARAM name="azPriority" value="1"/>
<PARAM name="backIp1" value="192.168.18.113"/>
<PARAM name="sshIp1" value="192.168.18.113"/>
<!-- <PARAM name="cmsNum" value="1"/>
<PARAM name="cmServerPortBase" value="15000"/>
<PARAM name="cmServerListenIp1" value="192.168.0.1,192.168.0.2,192.168.0.3"/>
<PARAM name="cmServerHaIp1" value="192.168.0.1,192.168.0.2,192.168.0.3"/>
<PARAM name="cmServerLevel" value="1"/>
<PARAM name="cmServerRelation" value="node1_hostname,node2_hostname,node3_hostname"/>
<PARAM name="cmDir" value="/opt/huawei/data/cmserver"/>
-->
<PARAM name="dataNum" value="1"/>
<PARAM name="dataPortBase" value="15406"/>
<PARAM name="dataNode1" value="/home/opengauss/openGauss/data/dn"/>
<PARAM name="dataNode1_syncNum" value="0"/>
</DEVICE></DEVICELIST>
</ROOT>
因为2.0版本已经占用15400、15403、15405端口,这里设置端口为15406
注意主机名 nodeNames 要和系统配置的名称一样,不然报错:
[GAUSS-51620] : Failed to obtain local instance information. It is not a host name pg-xc3.
预安装检查采用非交互模式执行前置:
cd /home/opengauss/openGauss-All-6.0.2/script
./gs_preinstall -U opengauss -G dbgroup -X /home/opengauss/openGauss/cluster_config.xml --non-interactive
(执行预安装后opengauss用户的.bashrc好像自动加载数据库的环境配置)
报错1:
提示Warning: The opengauss user does not have permission to set crontab.
给opengauss加授权使用crontab, vi /etc/cron.allow
omm
opengauss
报错2:
[GAUSS-52301] : Failed to check OS parameters. Core_pattern file can not use abrt-hook-ccpp to dump core.OpenGauss 在安装时会检查系统的 core_pattern 配置。如果 core_pattern 中使用了 abrt-hook-ccpp(这是 CentOS/RHEL/Fedora 等系统中常见的默认配置),OpenGauss 会拒绝安装,因为:
abrt-hook-ccpp 是一个用户态程序钩子,用于捕获崩溃并启动 ABRT(Automatic Bug Reporting Tool)。
OpenGauss 要求 core_pattern 必须是一个纯文件路径格式(如 /corefiles/core-%e-%p-%t),而不是调用外部程序(如 |/usr/libexec/abrt-hook-ccpp ...)。
这是为了确保 core dump 行为可控、可预测,避免因外部程序失败导致 core 文件无法生成。
解决方法:
你需要修改系统的 core dump 模式,禁用 abrt-hook-ccpp,改用直接写文件的方式。
步骤 1:检查当前 core_pattern
cat /proc/sys/kernel/core_pattern如果输出类似:
|/usr/libexec/abrt-hook-ccpp %s %c %p %u %g %t e %P %I %h %k %H %m %C %e %E %f %u %g %s %t %p %P %h %a %A %k %K %m %M %n %N %o %O %i %I %e %E %f %u %g %s %t %p %P %h %a %A %k %K %m %M %n %N %o %O
开头有 | 符号,表示使用了程序重定向,这就是问题所在。
通过配置 sysctl.conf
编辑 /etc/sysctl.conf:
sudo vi /etc/sysctl.conf在文件末尾添加一行:
kernel.core_pattern = /corefile/core-%e-%p-%t
保存退出。
sysctl -p然后再预安装检查:
cd /home/opengauss/openGauss-All-6.0.2/script
./gs_preinstall -U opengauss -G dbgroup -X /home/opengauss/openGauss/cluster_config.xml --non-interactive
都成功没报错,然后重启操作系统。
执行安装:
cd /home/opengauss/openGauss-All-6.0.2/script
gs_install -X /home/opengauss/openGauss/cluster_config.xml
提示设置数据库密码,太简单的密码不行,至少8位含大小写字母和数字。
输出报文:
Parsing the configuration file.Successfully checked gs_uninstall on every node.Check preinstall on every node.Successfully checked preinstall on every node.Creating the backup directory.Successfully created the backup directory.begin deploy..Installing the cluster.begin prepare Install Cluster..Checking the installation environment on all nodes.begin install Cluster..Installing applications on all nodes.Successfully installed APP.begin init Instance..encrypt cipher and rand files for database.Please enter password for database:Please repeat for database:begin to create CA cert filesThe sslcert will be generated in /home/opengauss/openGauss/app/share/sslcert/omNO cm_server instance, no need to create CA for CM.Non-dss_ssl_enable, no need to create CA for DSSCluster installation is completed.Configuring.Deleting instances from all nodes.Successfully deleted instances from all nodes.Checking node configuration on all nodes.Initializing instances on all nodes.Updating instance configuration on all nodes.Check consistence of memCheck and coresCheck on database nodes.Configuring pg_hba on all nodes.Configuration is completed.The cluster status is Normal.Successfully started cluster.Successfully installed application.end deploy..
安装完成后,看安装目录占用空间大概1.7G。data 目录有637M
安装验证
执行 gs_om -t status 查看状态
更详细信息:gs_om -t status --detail
登录数据库:
gsql -d postgres -p 15406
或者
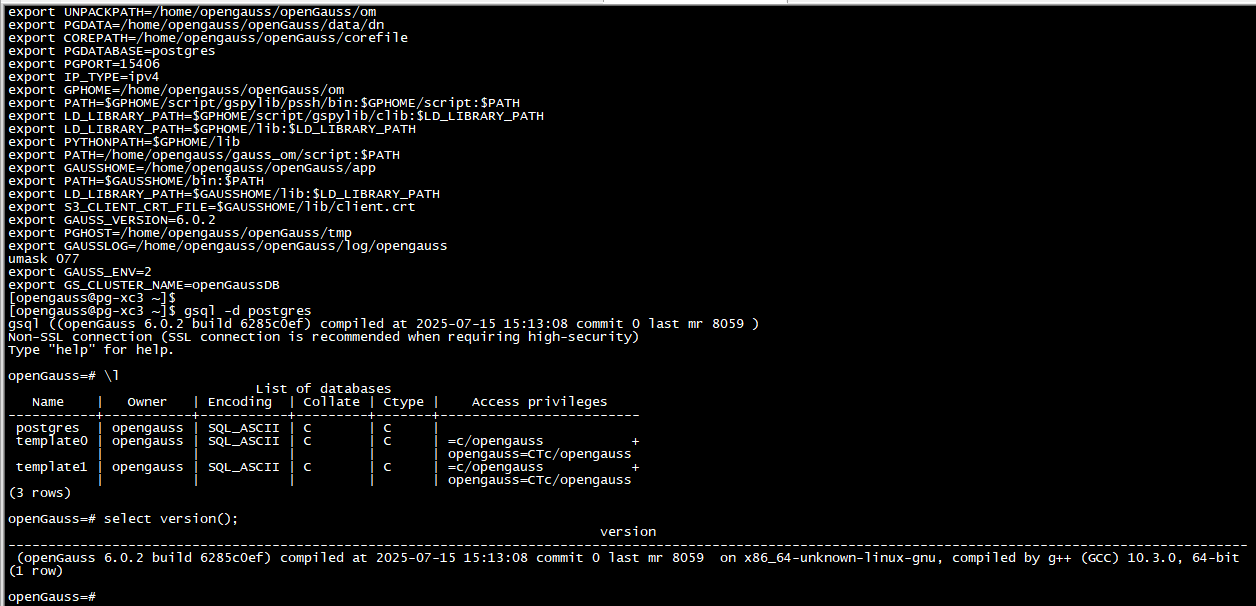
gsql -d postgres列出服务器上所有数据库的名称、所有者、字符集编码以及使用权限。(斜杠和字母l)
openGauss=# \l
openGauss=# select version();
创建一个数据库:
CREATE DATABASE mydb WITH ENCODING 'GBK' template = template0;停止openGauss:
gs_om -t stop最后发个截图