CentOS 7.9 升级 GLibc 2.34
声明
- 目标
OS:CentOS : 7.9
| 软件 | 版本 | 地址 | 目的 |
|---|---|---|---|
glibc | 2.34 | 阿里云 镜像地址 | 使用libtorch 2.6需要 |
gcc | 11.2.1 | 使用yum安装 | 升级glibc需要 |
g++ | 11.2.1 | 使用yum安装 | 升级glibc需要 |
python | 3.6.8 | 使用yum安装 | 升级glibc需要 |
bison | 3.0.4 | 使用yum安装 | 升级glibc需要 |
make | 4.4 | 镜像地址 | 升级glibc需要 |
cmake | 3.21.3 | github地址 | 编译C++项目[可选] |
1. 查看版本
1.1 glibc版本
[root@ server]# ldd --version
ldd (GNU libc) 2.17
Copyright (C) 2012 Free Software Foundation, Inc.
This is free software; see the source for copying conditions.  There is NO
warranty; not even for MERCHANTABILITY or FITNESS FOR A PARTICULAR PURPOSE.
Written by Roland McGrath and Ulrich Drepper
1.2 使用libtorch需要的版本
[root@ server]# ldd /root/server/libtorch/lib/libtorch_cpu.so | grep libstdc++
/root/server/libtorch/lib/libtorch_cpu.so: /lib64/libc.so.6: version `GLIBC_2.28' not found (required by /root/server/libtorch/lib/libtorch_cpu.so)
/root/server/libtorch/lib/libtorch_cpu.so: /lib64/libm.so.6: version `GLIBC_2.27' not found (required by /root/server/libtorch/lib/libtorch_cpu.so)
/root/server/libtorch/lib/libtorch_cpu.so: /lib64/libm.so.6: version `GLIBC_2.23' not found (required by /root/server/libtorch/lib/libtorch_cpu.so)
/root/server/libtorch/lib/libtorch_cpu.so: /lib64/libm.so.6: version `GLIBC_2.29' not found (required by /root/server/libtorch/lib/libtorch_cpu.so)
/root/server/libtorch/lib/libtorch_cpu.so: /lib64/libm.so.6: version `GLIBC_2.29' not found (required by /root/server/libtorch/lib/libc10.so)libstdc++.so.6 => /root/server/gcc_12.1.0/lib64/libstdc++.so.6 (0x00007fc345bbb000)
- 可以发现有多个
动态链接库是找不到的
1.3 查看升级glibc 2.34的依赖
[root@ glibc-2.34]# cat /root/server/glibc-2.34/INSTALL | grep -E "newer|later"this option if you want to compile the GNU C Library with a newerlater.  Note that when CET is enabled, the GNU C Library requiresIntel Pentium Pro or newer.  With '--enable-cet', it is an error toto build without this option (for example, if building with a newer
The tests (and later installation) use some pre-existing files of the* GNU 'make' 4.0 or newer* GCC 6.2 or newerbuilding the GNU C Library, as newer compilers usually produceof release, this implies GCC 7.4 and newer (excepting GCC 7.5.0,* GNU 'binutils' 2.25 or laterbinutils 2.26 or newer.* GNU 'texinfo' 4.7 or later* GNU 'bison' 2.7 or later* GNU 'sed' 3.02 or newer* Python 3.4 or later* GDB 7.8 or later with support for Python 2.7/3.4 or later* GNU 'gettext' 0.10.36 or later
to have the header files from a 3.2 or newer kernel around for
reference.  (For the ia64 architecture, you need version 3.2.18 or newer
1.4 安装无需源码编译的软件
yum install -y devtoolset-11-gcc devtoolset-11-gcc-c++ devtoolset-11-binutils bison python3 openssl-devel unzip bzip2
echo "source /opt/rh/devtoolset-11/enable" >> /etc/profile
source /etc/profile
yum install devtoolset-11*可能会遇到的问题
参考文章
- 添加源
yum install -y centos-release-scl*
- 编辑源
/etc/yum.repos.d/CentOS-SCLo-scl.repo
# CentOS-SCLo-sclo.repo
#
# Please see http://wiki.centos.org/SpecialInterestGroup/SCLo for more
# information[centos-sclo-sclo]
name=CentOS-7 - SCLo sclo
# baseurl=http://mirror.centos.org/centos/7/sclo/$basearch/sclo/
# mirrorlist=http://mirrorlist.centos.org?arch=$basearch&release=7&repo=sclo-sclo
baseurl=https://mirrors.aliyun.com/centos/7/sclo/$basearch/sclo/
gpgcheck=0
enabled=1
gpgkey=file:///etc/pki/rpm-gpg/RPM-GPG-KEY-CentOS-SIG-SCLo[centos-sclo-sclo-testing]
name=CentOS-7 - SCLo sclo Testing
baseurl=http://buildlogs.centos.org/centos/7/sclo/$basearch/sclo/
gpgcheck=0
enabled=0
gpgkey=file:///etc/pki/rpm-gpg/RPM-GPG-KEY-CentOS-SIG-SCLo[centos-sclo-sclo-source]
name=CentOS-7 - SCLo sclo Sources
baseurl=http://vault.centos.org/centos/7/sclo/Source/sclo/
gpgcheck=1
enabled=0
gpgkey=file:///etc/pki/rpm-gpg/RPM-GPG-KEY-CentOS-SIG-SCLo[centos-sclo-sclo-debuginfo]
name=CentOS-7 - SCLo sclo Debuginfo
baseurl=http://debuginfo.centos.org/centos/7/sclo/$basearch/
gpgcheck=1
enabled=0
gpgkey=file:///etc/pki/rpm-gpg/RPM-GPG-KEY-CentOS-SIG-SCLo
- 编辑源
/etc/yum.repos.d/CentOS-SCLo-scl-rh.repo
# CentOS-SCLo-rh.repo
#
# Please see http://wiki.centos.org/SpecialInterestGroup/SCLo for more
# information[centos-sclo-rh]
name=CentOS-7 - SCLo rh
#baseurl=http://mirror.centos.org/centos/7/sclo/$basearch/rh/
#mirrorlist=http://mirrorlist.centos.org?arch=$basearch&release=7&repo=sclo-rh
baseurl=https://mirrors.aliyun.com/centos/7/sclo/$basearch/rh/
gpgcheck=0
enabled=1
gpgkey=file:///etc/pki/rpm-gpg/RPM-GPG-KEY-CentOS-SIG-SCLo[centos-sclo-rh-testing]
name=CentOS-7 - SCLo rh Testing
baseurl=http://buildlogs.centos.org/centos/7/sclo/$basearch/rh/
gpgcheck=0
enabled=0
gpgkey=file:///etc/pki/rpm-gpg/RPM-GPG-KEY-CentOS-SIG-SCLo[centos-sclo-rh-source]
name=CentOS-7 - SCLo rh Sources
baseurl=http://vault.centos.org/centos/7/sclo/Source/rh/
gpgcheck=1
enabled=0
gpgkey=file:///etc/pki/rpm-gpg/RPM-GPG-KEY-CentOS-SIG-SCLo[centos-sclo-rh-debuginfo]
name=CentOS-7 - SCLo rh Debuginfo
baseurl=http://debuginfo.centos.org/centos/7/sclo/$basearch/
gpgcheck=1
enabled=0
gpgkey=file:///etc/pki/rpm-gpg/RPM-GPG-KEY-CentOS-SIG-SCLo
- 直接
yum install -y devtoolset-11-gcc就可以,无需make cache
1.5 查看gcc对应的libstdc++动态链接库
strings /usr/lib64/libstdc++.so.6 | grep GLIBCXX
2. 安装make
$ cd /root/src/ && wget https://mirrors.nju.edu.cn/gnu/make/make-4.4.tar.gz
$ tar -zxf make-4.4.tar.gz
$ cd make-4.4
$ ./configure --prefix=/usr/local/make
$ make -j$(nproc) && make install
$ mv /usr/bin/make /usr/bin/make.bak
$ ln -sfv /usr/local/make/bin/make /usr/bin/make
2.1 安装cmake [可选]
$ cd /root/src/ && wget https://github.com/Kitware/CMake/releases/download/v3.21.1/cmake-3.21.1.tar.gz
$ tar -zxf cmake-3.21.1.tar.gz
$ cd cmake-3.21.1
$ ./bootstrap && make -j$(nproc) && make install
$ mv /usr/bin/cmake /usr/bin/cmake.bak
$ ln -sfv /usr/local/bin/cmake /usr/bin/cmake
3. 编译glibc
$ cd /root/src/ && wget https://mirrors.aliyun.com/gnu/glibc/glibc-2.34.tar.gz
$ tar -zxf glibc-2.34.tar.gz
$ cd glibc-2.34 && mkdir build && cd build
$ export CFLAGS="-g -O2 -march=x86-64"
$ ../configure --prefix=/usr --disable-profile --enable-add-ons --with-headers=/usr/include --with-binutils=/opt/rh/devtoolset-11/root/usr/bin
$ make -j$(nproc) && make install
3.1 小插曲
gcc: relocation error: /lib64/libc.so.6: symbol __tunable_get_val, version GLIBC_PRIVATE not defined in file ld-linux-x86-64.so.2 with link time reference
解决方案
- 查看
/lib64目录下的libc-2.17.so,此时可能ls已经无法使用
$ sln /lib64/libc[按下Tab键]
- 系统会提示补全文件名
libc-2.**.so
- 手动完成替换
格式 : LD_PRELOAD=/lib64/libc-2.17.so sln [glibc源码编译的build绝对路径]/.so. /lib64/.so.
- [/lib64/libc-2.17.so]是第1步补全的结果
- [root/src/glibc-2.34/build]是本人的glibc源码编译的build绝对路径,需替换未自己的
LD_PRELOAD=/lib64/libc-2.17.so sln /root/src/glibc-2.34/build/libc.so.6                 /lib64/libc.so.6
LD_PRELOAD=/lib64/libc-2.17.so sln /root/src/glibc-2.34/build/dlfcn/libdl.so.2          /lib64/libdl.so.2
LD_PRELOAD=/lib64/libc-2.17.so sln /root/src/glibc-2.34/build/nptl/libpthread.so.0      /lib64/libpthread.so.0
LD_PRELOAD=/lib64/libc-2.17.so sln /root/src/glibc-2.34/build/elf/ld-linux-x86-64.so.2  /usr/lib64/ld-linux-x86-64.so.2
3.2 继续
cd /root/src/glibc-2.34/build && make install
3.3 成功结果
LD_SO=ld-linux-x86-64.so.2 CC="gcc -B/opt/rh/devtoolset-11/root/usr/bin/" /usr/bin/perl scripts/test-installation.pl /root/src/glibc-2.34/build/
Your new glibc installation seems to be ok.
make[1]: Leaving directory '/root/src/glibc-2.34
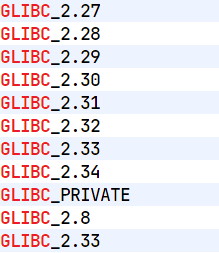
查看GLIBC版本
strings /lib64/libc.so.6 | grep ^GLIBC
4. 途中遇到的问题
4.1 升级失败后yum无法使用
- 原因
RPM 数据库损坏 导致的,需要重建 RPM 数据库
进程在等待状态
$ rm -f /var/lib/rpm/__db.*
$ rpm --rebuilddb
$ rpm -qa | head
$ yum clean all && yum makecache
4.2 as 不支持 -gdwarf-4 选项
- 错误信息
#  汇编器 as 不支持 -gdwarf-4 选项
/usr/bin/as: unrecognized option '--gdwarf-4'
- 原因
gcc 和 binutils 版本不匹配,导致传递了 as 不支持的参数
解决方案
- 使用
devtoolset-11-gcc匹配的binutils
--with-binutils=/opt/rh/devtoolset-11/root/usr/bin
4.3 glibc未开启编译优化
- 错误信息
#error "glibc cannot be compiled without optimization"
- 原因
编译时未默认未开启优化
解决方案
- 编译加优化
export CFLAGS="-g -O2 -march=x86-64"
- march :指本机的指令集架构,通过命令
uname -m来查看
4.4 找不到nss_test2
参考文章 2.4
vim /root/src/glibc-2.34/scripts/test-installation.pl
5. 一键升级脚本
须知
- 在脚本执行结束后,会报错如3.1所示
- 可能遇到4.4问题,解决就好
- 其他可能存在的问题,暂时还没遇到
- 使用本方式升级glibc有风险,请知悉
5.1 创建脚本
touch ~/update.sh
chmod +x ~/update.sh
脚本内容如下所示
5.2 执行脚本
#!/bin/bash
# CentOS 7.9 GLibc 2.34 一键升级脚本
# 警告:此操作有风险,建议在测试环境验证后再在生产环境使用set -e # 遇到错误自动退出
exec > >(tee -i glibc_upgrade.log) 2>&1 # 记录所有输出到日志文件# 初始化变量
SRC_DIR="/root/src"
GLIBC_VERSION="2.34"
GCC_TOOLSET="devtoolset-11"# 1. 验证环境
echo "=== 验证操作系统环境 ==="
if [ ! -f /etc/centos-release ] || ! grep -q "7\.9" /etc/centos-release; thenecho "错误:此脚本仅适用于 CentOS 7.9"exit 1
fiif [ "$(id -u)" -ne 0 ]; thenecho "错误:请使用 root 用户执行此脚本"exit 1
fi# 2. 配置阿里云基础源 (关键优化点)
echo "=== 配置阿里云基础源 ==="
mv /etc/yum.repos.d/CentOS-Base.repo /etc/yum.repos.d/CentOS-Base.repo.bak
curl -o /etc/yum.repos.d/CentOS-Base.repo https://mirrors.aliyun.com/repo/Centos-7.repo
sed -i -e '/mirrors.cloud.aliyuncs.com/d' -e '/mirrors.aliyuncs.com/d' /etc/yum.repos.d/CentOS-Base.repo
yum clean all
yum makecache# 3. 安装基础依赖
echo "=== 安装基础依赖包 ==="
yum install -y wget tar gzip make bzip2 curl# 4. 配置SCL源
echo "=== 配置 SCL 软件源 ==="
cat > /etc/yum.repos.d/CentOS-SCLo-scl.repo <<EOF
[centos-sclo-sclo]
name=CentOS-7 - SCLo sclo
baseurl=https://mirrors.aliyun.com/centos/7/sclo/\$basearch/sclo/
gpgcheck=0
enabled=1
EOFcat > /etc/yum.repos.d/CentOS-SCLo-scl-rh.repo <<EOF
[centos-sclo-rh]
name=CentOS-7 - SCLo rh
baseurl=https://mirrors.aliyun.com/centos/7/sclo/\$basearch/rh/
gpgcheck=0
enabled=1
EOF# 5. 安装编译工具链
echo "=== 安装 GCC 11 工具链 ==="
yum install -y centos-release-scl
yum install -y ${GCC_TOOLSET}-gcc ${GCC_TOOLSET}-gcc-c++ ${GCC_TOOLSET}-binutils bison python3# 启用 GCC 11
echo "source /opt/rh/${GCC_TOOLSET}/enable" >> /etc/profile
source /etc/profile# 6. 安装 make 4.4 (使用阿里云镜像)
echo "=== 编译安装 make 4.4 ==="
mkdir -p ${SRC_DIR}
cd ${SRC_DIR}
wget https://mirrors.aliyun.com/gnu/make/make-4.4.tar.gz
tar -zxf make-4.4.tar.gz
cd make-4.4
./configure --prefix=/usr/local/make
make -j$(nproc)
make install# 替换系统 make
mv /usr/bin/make /usr/bin/make.bak
ln -sf /usr/local/make/bin/make /usr/bin/make# 7. 备份关键库文件
echo "=== 备份关键系统库 ==="
LIBS_TO_BACKUP=("/lib64/libc.so.6""/lib64/libdl.so.2""/lib64/libpthread.so.0""/usr/lib64/ld-linux-x86-64.so.2"
)BACKUP_DATE=$(date +%Y%m%d)
for lib in "${LIBS_TO_BACKUP[@]}"; doif [ -f "$lib" ]; thencp -v "$lib" "${lib}.bak-${BACKUP_DATE}"fi
done# 8. 编译安装 glibc 2.34 (使用阿里云镜像)
echo "=== 编译安装 glibc ${GLIBC_VERSION} ==="
cd ${SRC_DIR}
wget https://mirrors.aliyun.com/gnu/glibc/glibc-${GLIBC_VERSION}.tar.gz
tar -zxf glibc-${GLIBC_VERSION}.tar.gz
cd glibc-${GLIBC_VERSION}
mkdir build && cd build# 设置编译参数
export CFLAGS="-g -O2 -march=x86-64"
../configure --prefix=/usr \--disable-profile \--enable-add-ons \--with-headers=/usr/include \--with-binutils=/opt/rh/${GCC_TOOLSET}/root/usr/bin# 编译并安装
make
make install