#Datawhale AI夏令营#第三期全球AI攻防挑战赛(AIGC技术-图像方向)
本次题目来源于Datawhale AI夏令营第三期全球AI攻防挑战赛图像生成赛道。

首先看一下赛题背景和要求。
1.赛题相关
大赛背景
随着大模型(Deepseek、GPT、LLaMA等)的爆发式应用,AI技术已深度融入金融、医疗、智能终端语音交互场等核心领域,但用户所遭受的深度伪造身份攻击也随之浮出水面。为应对这一全球性挑战,由中国图象图形学学会、蚂蚁集团、云安全联盟CSA大中华区主办,广泛联合学界、机构共同组织发起2025全球AI攻防挑战赛,本次大赛聚焦生活、金融、健康场景下数字身份AI大模型智能交互认证安全,共分为图、视、音三大场景赛道,并以攻防闭环的方式设置赛程突破静态攻防格局,从而成为推动安全技术进化、筑牢可信AI生态的关键力量。
赛道一:图片全要素交互认证-生成赛
在生成式人工智能(GenAI)蓬勃发展的时代,图像生成技术既展现了令人惊叹的创新能力,也为社会诚信体系带来了前所未有的挑战。从金融、广告等新兴领域,到医疗、政府等传统行业,各类业务场景都依赖于用户提交的图片材料进行身份验证。然而,随着不法分子日益熟练地运用PS、AIGC等工具伪造高仿真图片,真实性鉴别已成为制约行业自动化审核发展的关键瓶颈。
为此,我们开设“图片全要素场景攻防”专项赛道,在生成阶段,参赛队伍需按照赛事规范生成高度逼真的模拟图片,挑战现有防伪系统的识别极限。我们期待通过这场攻防对抗,推动数字图片真伪鉴别技术的突破性发展,为构建可信的数字社会基础设施贡献力量。
任务说明
在生成式人工智能(GenAI)蓬勃发展的时代,图像生成技术既展现了令人惊叹的创新能力,也为社会诚信体系带来了前所未有的挑战。从金融、广告等新兴领域,到医疗、政府等传统行业,各类业务场景都依赖于用户提交的图片材料进行身份验证。然而,随着不法分子日益熟练地运用PS、AIGC等工具伪造高仿真图片,真实性鉴别已成为制约行业自动化审核发展的关键瓶颈。
为此,我们开设“图片全要素场景攻防”专项赛道,在生成阶段,参赛队伍需按照赛事规范生成高度逼真的模拟图片,挑战现有防伪系统的识别极限。我们期待通过这场攻防对抗,推动数字图片真伪鉴别技术的突破性发展,为构建可信的数字社会基础设施贡献力量。
比赛任务
本赛题分为四个子任务,包括:AIGC图片生成、自然场景图片编辑、视觉文本编辑和Deepfake。参赛者需要尝试使用不同的模型或优化算法,完成所有子任务。各任务具体定义如下:
- AIGC图片生成:根据给定的文本提示,生成真实且美观的图片。
- 自然场景图片编辑:根据提供的图片和编辑指令,对原图指定区域的内容进行修改。
- 视觉文本编辑:根据提供的图片和编辑指令,对原图中的文字信息进行编辑或替换。
- Deepfake:利用给定的人脸图片,对原图中的人脸进行替换处理。(将target图片中的人脸替换到ori图片中,保持ori中的背景元素)
上述任务允许参赛者灵活选择和调整模型或prompt,或通过优化算法提高任务完成的质量,以充分展示技术能力与创新水平。
数据集介绍
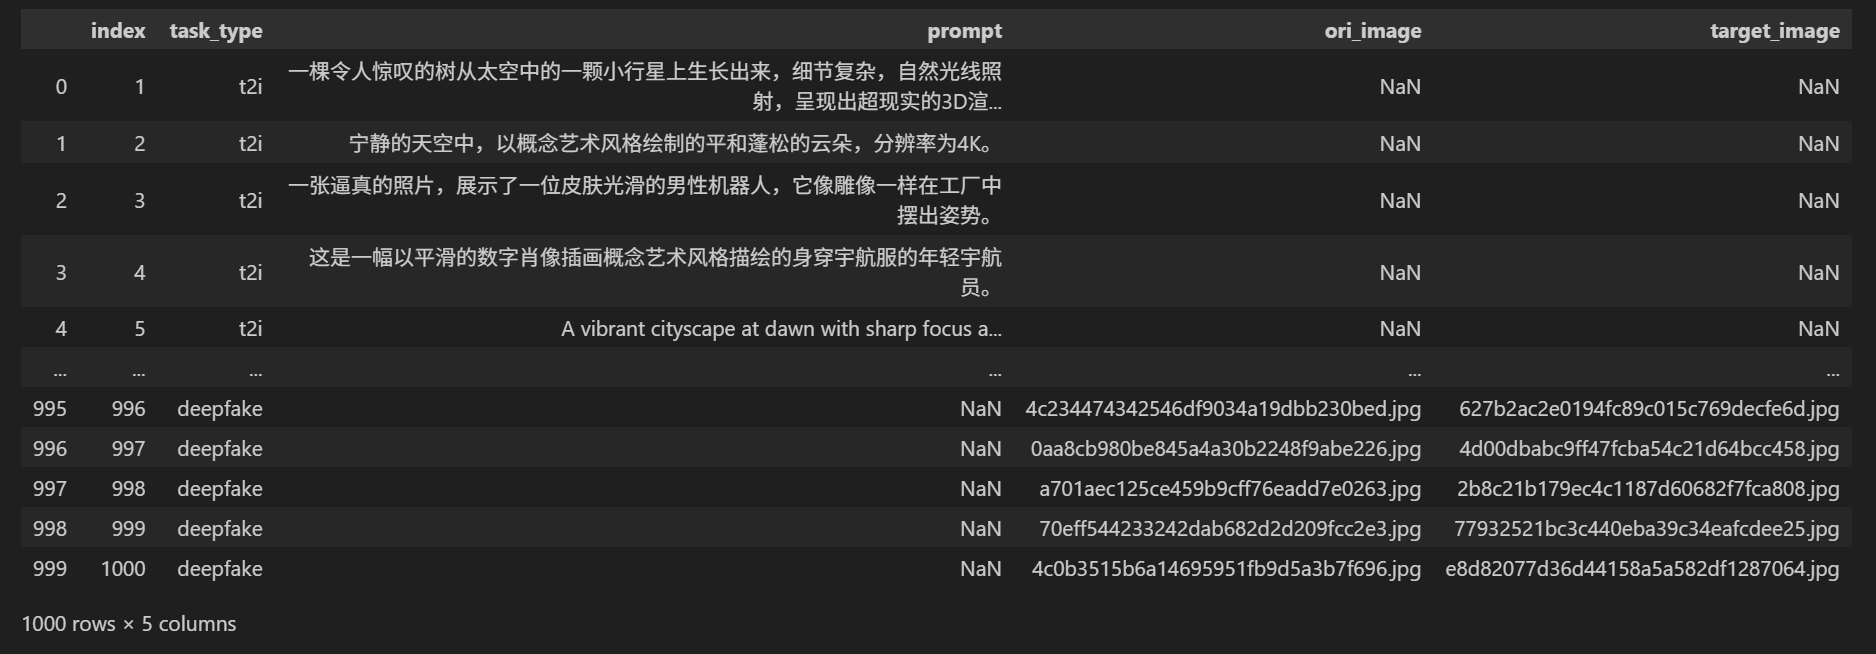
本赛题提供了1000条评测数据,每类任务约250条。评测数据及任务详情记录在 task.csv 文件中,而相关图片保存在 imgs 文件夹内。每张图片均有唯一的标识符(ID),图片名称的格式为 id.jpg。数据集的具体格式如下:
| index | task_type | prompt | ori_image | target_image |
|---|---|---|---|---|
| 1 | t2i(AIGC图片生成) | xxxx | ||
| 2 | tie(自然场景图片编辑) | xxxx | xxxx.jpg | |
| 3 | vttie(视觉文本编辑) | xxxx | xxxx.jpg | |
| 4 | deepfake | xxxx.jpg | xxxx.jpg |
评价指标
本赛题采用 VIEScore 作为评价指标,该指标由两个子分项组成:SC Score 和 PQ Score。其中,SC Score 用于评估生成内容的一致性,而 PQ Score 用于衡量生成内容的质量和真实性。评分范围为 0~10 分,得分越高表示生成效果越优。

其中deepfake任务使用人脸特征余弦相似度替代原始SC Score。

2.Baseline讲解
Datawhale给我们提供了赛事相关的baseline,这个大家可以去Datawhale的官网查看。
这是一个图像生成竞赛,然后共有四个子任务,我们需要针对每个子任务,完成并提交。
具体子任务如下:
- AIGC图片生成:根据给定的文本提示,生成真实且美观的图片。
- 自然场景图片编辑:根据提供的图片和编辑指令,对原图指定区域的内容进行修改。
- 视觉文本编辑:根据提供的图片和编辑指令,对原图中的文字信息进行编辑或替换。
- Deepfake:利用给定的人脸图片,对原图中的人脸进行替换处理。
每个任务我们有具体的Pipeline来处理。
我们先查看一下数据,可以看到数据给的Prompt提示词有中文有英文,那么我们需要模型对中英文的支持都比较好,必要情况下,我们可以通过翻译API将中文统一翻译成英文,通常大模型对英文的指令理解较好。
我们可以利用每天的提交机会看一下,当前子任务的得分情况,这里经过测试,在使用baseline代码的情况下,任务1:2.3172分;任务2:1.4194分;任务3:1.7121分,任务4:0.6998分,这样的总得分是6.1485分,然后看一下具体任务得分情况下,任务4也就是Deepfake换脸,得分较低,上分潜力最大,这一块我们可以多花点时间去调试。
接下来跟着baseline过一遍代码。
首先导入需要使用的库,然后使用Pandas读取数据,顺便打印查看一下数据。
结果如下:
任务1我们选用的是智谱AI开源的CogView4-6B这一款模型,这款模型支持中英文提示词输入,比较友好。参考代码如下:
from diffusers import CogView4Pipeline
import torchpipe = CogView4Pipeline.from_pretrained("/root/autodl-tmp/CogView4-6B", torch_dtype=torch.bfloat16)
pipe.enable_model_cpu_offload()
pipe.vae.enable_slicing()
pipe.vae.enable_tiling()prompt = "A vibrant cherry red sports car sits proudly under the gleaming sun, its polished exterior smooth and flawless, casting a mirror-like reflection. The car features a low, aerodynamic body, angular headlights that gaze forward like predatory eyes, and a set of black, high-gloss racing rims that contrast starkly with the red. A subtle hint of chrome embellishes the grille and exhaust, while the tinted windows suggest a luxurious and private interior. The scene conveys a sense of speed and elegance, the car appearing as if it's about to burst into a sprint along a coastal road, with the ocean's azure waves crashing in the background."
image = pipe(prompt=prompt,guidance_scale=3.5,num_images_per_prompt=1,num_inference_steps=50,width=512,height=512,
).images[0]
任务2和任务3我们选用FLUX.1-Kontext-dev这款模型,这款模型算是当前图生图任务表现最好的模型之一,这里有个Tips,我们需要把中文的prompt翻译成英文,再给到生成大模型,这样效果更好。FLUX.1-Kontext-dev对中文支持不佳。
代码参考:
import torch
from diffusers import FluxKontextPipeline
from diffusers.utils import load_imagepipe = FluxKontextPipeline.from_pretrained("black-forest-labs/FLUX.1-Kontext-dev", torch_dtype=torch.bfloat16)
pipe.to("cuda")input_image = load_image("https://huggingface.co/datasets/huggingface/documentation-images/resolve/main/diffusers/cat.png")image = pipe(image=input_image,prompt="Add a hat to the cat",guidance_scale=2.5
).images[0]
任务4没有开源的模型可以直接调用,这里麻烦一些,我们使用的是Opencv+dliblai处理。
参考代码如下:
# 第四个 task deepfake部分需要
# pip install opencv-python dlib# 需要下载 并解压 https://dlib.net/files/shape_predictor_68_face_landmarks.dat.bz2
# wget https://dlib.net/files/shape_predictor_68_face_landmarks.dat.bz2
# bzip2 -d shape_predictor_68_face_landmarks.dat.bz2
try:import cv2import dlibdetector = dlib.get_frontal_face_detector()predictor = dlib.shape_predictor("./shape_predictor_68_face_landmarks.dat")
except:traceback.print_exc()passdef face_swap_using_dlib(source_img_path: str, aim_img_path: str, save_img_path: str):face = cv2.imread(source_img_path)body = cv2.imread(aim_img_path)face_gray = cv2.cvtColor(face, cv2.COLOR_BGR2GRAY)body_gray = cv2.cvtColor(body, cv2.COLOR_BGR2GRAY)# Create empty matrices in the images' shapesheight, width = face_gray.shapemask = np.zeros((height, width), np.uint8)height, width, channels = body.shaperect = detector(face_gray)[0]# This creates a with 68 pairs of integer values — these values are the (x, y)-coordinates of the facial structures landmarks = predictor(face_gray, rect)landmarks_points = [] def get_landmarks(landmarks, landmarks_points):for n in range(68):x = landmarks.part(n).xy = landmarks.part(n).ylandmarks_points.append((x, y))get_landmarks(landmarks, landmarks_points)points = np.array(landmarks_points, np.int32)convexhull = cv2.convexHull(points) face_cp = face.copy()face_image_1 = cv2.bitwise_and(face, face, mask=mask)rect = cv2.boundingRect(convexhull)subdiv = cv2.Subdiv2D(rect) # Creates an instance of Subdiv2Dsubdiv.insert(landmarks_points) # Insert points into subdivtriangles = subdiv.getTriangleList()triangles = np.array(triangles, dtype=np.int32)indexes_triangles = []face_cp = face.copy()def get_index(arr):index = 0if arr[0]:index = arr[0][0]return indexfor triangle in triangles :# Gets the vertex of the trianglept1 = (triangle[0], triangle[1])pt2 = (triangle[2], triangle[3])pt3 = (triangle[4], triangle[5])# Draws a line for each side of the trianglecv2.line(face_cp, pt1, pt2, (255, 255, 255), 3,  0)cv2.line(face_cp, pt2, pt3, (255, 255, 255), 3,  0)cv2.line(face_cp, pt3, pt1, (255, 255, 255), 3,  0)index_pt1 = np.where((points == pt1).all(axis=1))index_pt1 = get_index(index_pt1)index_pt2 = np.where((points == pt2).all(axis=1))index_pt2 = get_index(index_pt2)index_pt3 = np.where((points == pt3).all(axis=1))index_pt3 = get_index(index_pt3)# Saves coordinates if the triangle exists and has 3 verticesif index_pt1 is not None and index_pt2 is not None and index_pt3 is not None:vertices = [index_pt1, index_pt2, index_pt3]indexes_triangles.append(vertices)# Getting landmarks for the face that will have the first one swapped intorect2 = detector(body_gray)[0]# This creates a with 68 pairs of integer values — these values are the (x, y)-coordinates of the facial structures landmarks_2 = predictor(body_gray, rect2)landmarks_points2 = []# Uses the function declared previously to get a list of the landmark coordinatesget_landmarks(landmarks_2, landmarks_points2)# Generates a convex hull for the second personpoints2 = np.array(landmarks_points2, np.int32)convexhull2 = cv2.convexHull(points2)body_cp = body.copy()lines_space_new_face = np.zeros((height, width, channels), np.uint8)body_new_face = np.zeros((height, width, channels), np.uint8)height, width = face_gray.shapelines_space_mask = np.zeros((height, width), np.uint8)for triangle in indexes_triangles:# Coordinates of the first person's delaunay trianglespt1 = landmarks_points[triangle[0]]pt2 = landmarks_points[triangle[1]]pt3 = landmarks_points[triangle[2]]# Gets the delaunay triangles(x, y, widht, height) = cv2.boundingRect(np.array([pt1, pt2, pt3], np.int32))cropped_triangle = face[y: y+height, x: x+widht]cropped_mask = np.zeros((height, widht), np.uint8)# Fills triangle to generate the maskpoints = np.array([[pt1[0]-x, pt1[1]-y], [pt2[0]-x, pt2[1]-y], [pt3[0]-x, pt3[1]-y]], np.int32)cv2.fillConvexPoly(cropped_mask, points, 255)# Draws lines for the trianglescv2.line(lines_space_mask, pt1, pt2, 255)cv2.line(lines_space_mask, pt2, pt3, 255)cv2.line(lines_space_mask, pt1, pt3, 255)lines_space = cv2.bitwise_and(face, face, mask=lines_space_mask)# Calculates the delaunay triangles of the second person's face# Coordinates of the first person's delaunay trianglespt1 = landmarks_points2[triangle[0]]pt2 = landmarks_points2[triangle[1]]pt3 = landmarks_points2[triangle[2]]# Gets the delaunay triangles(x, y, widht, height) = cv2.boundingRect(np.array([pt1, pt2, pt3], np.int32))cropped_mask2 = np.zeros((height,widht), np.uint8)# Fills triangle to generate the maskpoints2 = np.array([[pt1[0]-x, pt1[1]-y], [pt2[0]-x, pt2[1]-y], [pt3[0]-x, pt3[1]-y]], np.int32)cv2.fillConvexPoly(cropped_mask2, points2, 255)# Deforms the triangles to fit the subject's face : https://docs.opencv.org/3.4/d4/d61/tutorial_warp_affine.htmlpoints =  np.float32(points)points2 = np.float32(points2)M = cv2.getAffineTransform(points, points2)  # Warps the content of the first triangle to fit in the second onedist_triangle = cv2.warpAffine(cropped_triangle, M, (widht, height))dist_triangle = cv2.bitwise_and(dist_triangle, dist_triangle, mask=cropped_mask2)# Joins all the distorted triangles to make the face mask to fit in the second person's featuresbody_new_face_rect_area = body_new_face[y: y+height, x: x+widht]body_new_face_rect_area_gray = cv2.cvtColor(body_new_face_rect_area, cv2.COLOR_BGR2GRAY)# Creates a maskmasked_triangle = cv2.threshold(body_new_face_rect_area_gray, 1, 255, cv2.THRESH_BINARY_INV)dist_triangle = cv2.bitwise_and(dist_triangle, dist_triangle, mask=masked_triangle[1])# Adds the piece to the face maskbody_new_face_rect_area = cv2.add(body_new_face_rect_area, dist_triangle)body_new_face[y: y+height, x: x+widht] = body_new_face_rect_areabody_face_mask = np.zeros_like(body_gray)body_head_mask = cv2.fillConvexPoly(body_face_mask, convexhull2, 255)body_face_mask = cv2.bitwise_not(body_head_mask)body_maskless = cv2.bitwise_and(body, body, mask=body_face_mask)result = cv2.add(body_maskless, body_new_face)# Gets the center of the face for the body(x, y, widht, height) = cv2.boundingRect(convexhull2)center_face2 = (int((x+x+widht)/2), int((y+y+height)/2))seamlessclone = cv2.seamlessClone(result, body, body_head_mask, center_face2, cv2.NORMAL_CLONE)    cv2.imwrite(save_img_path, seamlessclone)
最后打包提交,这样baseline就完成了,跑完全部数据,应该可以得到6.1485分左右,这就是baseline,接下来就是在此基础上提分啦!
3.一些上分参考
因为用的是开源模型,所以其实模型层面可选项不多,无非就是找到一个SOTA模型,最新开源的QWEN-IMAGE模型可以试一下。
然后扩散模型,这里面还是有一些参数可以调的,比如包括生成步骤(50),提示遵循系数(3.5)等。
最重要的应该就是Prompt工程了,我们可以尝试从多个角度来生成Prompt,正向提示词,负向提示词等。
最后就是子任务4:Deepfake,这块的提分潜力最大,相对的难度也最大。