Ansible自动化运维工具详解
前言:
在当今快速发展的IT运维领域,自动化已成为提升效率、减少人为错误的关键。Ansible作为一款开源的自动化运维工具,凭借其简单易用、功能强大、无代理架构等优势,成为众多企业和DevOps团队的首选。
Ansible基于SSH协议实现远程管理,无需在被控端安装额外代理,仅需通过YAML格式的Playbook即可完成复杂的配置管理、应用部署和任务编排。无论是服务器初始化、批量命令执行,还是持续交付流程的自动化,Ansible都能提供高效、可靠的解决方案。
本文将从Ansible的核心概念、架构设计、执行模式到实际应用场景,全面解析其工作原理和最佳实践,帮助读者快速掌握Ansible的自动化运维能力。
目录
一、Ansible 简介
什么是 Ansible?
Ansible 核心优势
二、Ansible 架构解析
核心组件
三、Ansible 执行模式
1. Ad-Hoc 模式(点对点)
2. Playbook 模式(剧本)
四、Ansible 执行流程
五.Ansible配置解析
ansible的安装方式
ansible的程序结构(yum安装为例)
ansible的配置文件查找顺序
ansible的配置文件
ansible的主机清单
六.Ansible常用命令
ansible命令集解释
ansible-doc命令
ansible命令
ansible配置公私钥
七.部署ansible管理集群
实验环境
实验步骤
八.Ansible常用模块
主机连通性测试
command模块
shell模块
copy模块
file模块
fetch模块
cron模块
yum模块
service模块
user模块
group模块
script模块
setup模块
总结
一、Ansible 简介
什么是 Ansible?
Ansible 是一款基于 Python 开发的自动化运维工具,它集成了多种运维工具的优点,能够实现:
- 批量系统配置
- 批量程序部署
- 批量运行命令等功能
核心特点:
- 基于 Paramiko 开发,采用模块化设计
- 无需在被控端安装客户端(基于 SSH 协议通信)
- 已被红帽官方收购,是当前最受欢迎的自动化运维工具
https://docs.ansible.com/ansible/latest/_images/ansible_architecture.pngAnsible 核心优势
- 部署简单:只需在主控端部署,被控端无需额外安装
- SSH 协议:默认使用 SSH 进行管理,安全可靠
- 模块丰富:提供大量运维操作模块,覆盖日常需求
- 扩展性强:支持 API 和自定义模块(Python 扩展)
- Playbooks:通过 YAML 格式的"剧本"实现复杂配置管理
- 轻量级:无需客户端代理,更新只需在主控端操作
- 可视化界面:提供功能强大的 AWX 平台(Web 管理界面)
二、Ansible 架构解析
核心组件
| 组件 | 功能描述 |
|---|---|
| Ansible Core | 核心引擎 |
| Inventory | 主机清单管理(IP、端口、认证信息等) |
| Playbooks | YAML 格式的任务编排文件 |
| Core Modules | 内置核心功能模块 |
| Custom Modules | 用户自定义扩展模块 |
| Connection Plugins | 主机连接插件(SSH 等) |
三、Ansible 执行模式
1. Ad-Hoc 模式(点对点)
- 特点:执行单条命令,快速完成简单任务
- 示例:
ansible webservers -m ping
2. Playbook 模式(剧本)
- 特点:YAML 格式的任务编排,实现复杂自动化
- 优势:
- 任务可复用
- 支持条件判断和流程控制
- 可版本控制
四、Ansible 执行流程
- 加载配置:读取
/etc/ansible/ansible.cfg - 解析主机清单:获取目标主机/组信息
- 加载模块:如 command、shell 等
- 生成临时脚本:转换为 Python 脚本并传输到目标主机
- 执行准备:在目标主机
~/.ansible/tmp/生成临时文件 - 执行任务:添加执行权限并运行
- 返回结果:收集执行输出
- 清理现场:删除临时文件
五.Ansible配置解析
ansible的安装方式
-
ansible安装常用两种方式,yum安装和pip程序安装。
使用pip(python的包管理模块)安装
-
首先,我们需要安装python-pip包,安装完成之后,则直接使用pip命令来安装我们的包,具体操作过程如下:
yum install python-pippip install ansible使用yum安装
-
yum安装是我们比较熟悉的安装方式。我们需要先安装一个epel-release包,然后再安装ansible即可。
yum install epel-release -yyum install ansible -yansible的程序结构(yum安装为例)
-
配置文件目录:/etc/ansible/
-
执行文件目录:/usr/bin/
-
Lib库依赖目录:/usr/lib/pyhtonX.X/site-packages/ansible/
-
Help文档目录:/usr/share/doc/ansible-X.X.X/
-
Man文档目录:/usr/share/man/man1/
ansible的配置文件查找顺序
-
ansible与我们其他的服务在这一点上又很大的不同,这里的配置文件查找是从多个地方找的,顺序如下:
1.检查环境变量 ANSIBLE_CONFIG 指向的路径文件(export ANSIBLE_CONFIG=/etc/ansible/ansible.cfg);
2. ~/.ansible.cfg,检查当前目录下的ansible.cfg配置文件;
3./etc/ansible.cfg检查etc目录的配置文件。
ansible的配置文件
-
ansible的配置文件路径是/etc/ansible/ansible.cfg,ansible许多参数,下面我们列出一些常见的参数:
inventory = /etc/ansible/hoste #这个参数表示资源清单inventory文件的位置library = /usr/share/ansible #指向存放ansible模块的目录,支持多个目录方式,只要用冒号(:)隔开就行。fbrks = 5 #并发连接数,默认为5sudo_user = root #设置默认执行命令的用户 ,2.14版本中是:become_user=rootremote_port = 22 #指定连接被管理节点的端口,默认为22端口,为安全考虑,建议修改host_key_checking = False #设置是否检查SSH主机的密钥,值为True/False,关闭后第一次连接不会提示配置实例timeout = 60 #设置SSH连接的超时时间,单位为秒log_path = /var/log/ansible.cfg #指定一个存储ansible日志的文件(默认不记录日志)ansible的主机清单
-
在配置文件中,我们提到了资源清单,这个清单就是主机清单,里面保存的是一些ansible需要连接管理的主机列表。
-
如下是ansible主机清单的定义方式:
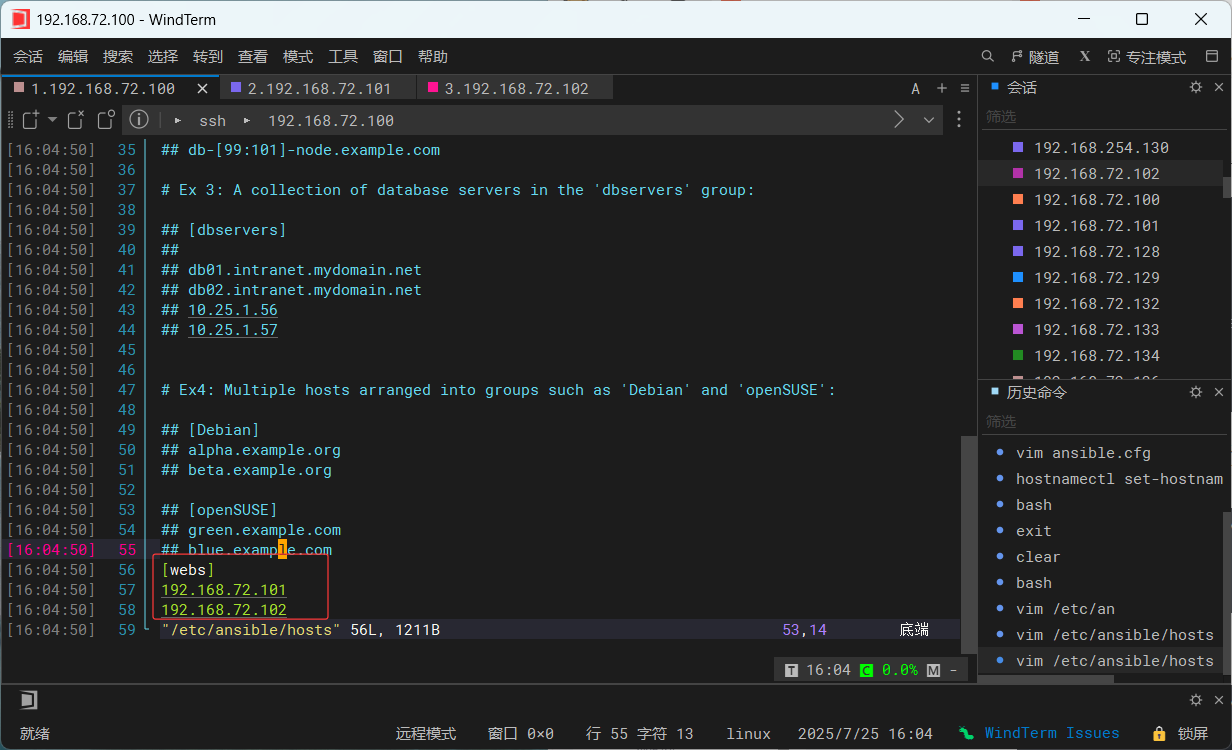
1.直接指明主机地址或者主机名:#green.example.com##bule.example.com## 192.168.72.101# 192.168.72.1022.定义一个主机组(组名)把地址或者主机名加进去[mysql_test]192.168.72.101192.168.72.102192.168.72.103-
需要注意的是,这里的组成员可以使用通配符来匹配,这样对于一些标准化管理就比较方便。我们可以根据实际情况来配置我们的主机列表,具体的操作如下:
[root@ansible ansible]# vim /etc/ansible/hosts [webs]192.168.72.101192.168.72.102六.Ansible常用命令
[root@ansible ansible]# ls /usr/bin/| grep ansible
ansible
ansible-community
ansible-config
ansible-connection
ansible-console
ansible-doc
ansible-galaxy
ansible-inventory
ansible-playbook
ansible-pull
ansible-vault
ansible命令集解释
-
/usr/bin/ansible,Ansible AD-Hoc临时命令执行工具,常用于临时命令的执行
-
/usr/bin/ansible-doc,Ansible模块功能查看工具(document)
-
/usr/bin/ansible-galaxy,下载上传优秀的代码或者Roles模块的官网平台,基于网络的
-
/usr/bin/ansible-playbook,Ansible定制自动化的任务集编排工具
-
/usr/bin/ansible-pull,Ansible远程执行命令的工具,拉取配置而非推送配置(使用较少,海量机器时使用,对运维架构能力要求高)
-
/usr/bin/ansible-vault,Ansible文件加密工具
-
/usr/bin/ansible-console,Ansible基于Linux Consoble界面可与用户交互的命令执行工具
-
ansible-community:
-
含义:
-
“ansible-community” 严格来说不是一个命令。Ansible 是一个自动化工具,Ansible 社区(Ansible-community)是围绕 Ansible 项目的一个开源社区。这个社区主要负责维护和开发 Ansible 相关的内容,包括模块、插件、角色等。社区成员通过贡献代码、提交问题、参与讨论等方式来改进 Ansible 生态。
-
-
用法:
-
作为用户,你可以在社区网站(Ansible Galaxy)上查找其他人共享的 Ansible 角色。例如,如果你要部署一个 Web 服务器,你可以搜索像 “nginx-ansible-role” 这样的角色。下载并使用这些角色可以极大地简化你的 Ansible 配置过程。
-
你也可以参与社区讨论,在社区论坛或者 Ansible 官方的 GitHub 仓库(https://github.com/ansible/ansible)中提交问题或者功能请求。如果你是开发者,还可以贡献自己编写的 Ansible 模块或角色,帮助完善 Ansible 的功能。
-
-
-
ansible-config:-
含义:
-
ansible-config命令用于查看和管理 Ansible 的配置。Ansible 的配置文件控制着 Ansible 的行为,例如它会指定 Inventory 文件(用于定义主机列表和主机组)的位置、连接类型(SSH 等)、模块搜索路径等诸多设置。
-
-
用法:
-
查看配置选项:
-
运行
ansible-config view可以查看 Ansible 的当前配置。它会显示配置文件中的所有设置,包括默认设置和用户自定义设置。例如,它会显示inventory选项的值,该值指向 Ansible 用于确定受管主机的文件或脚本路径。
-
-
列出配置文件搜索路径:
-
使用
ansible-config list命令可以列出 Ansible 在启动时查找配置文件的路径顺序。Ansible 会按照一定的顺序查找配置文件,通常会先查找当前目录下的ansible.cfg,然后是用户主目录下的~/.ansible.cfg,最后是系统默认的配置文件路径(如/etc/ansible/ansible.cfg)。这有助于你了解 Ansible 从哪里读取配置信息。
-
-
检查配置文件中的特定选项:
-
可以使用
ansible-config dump-- only-changed命令来只显示用户修改过的配置选项。这在你有一个复杂的 Ansible 配置环境,并且只想查看与默认设置不同的部分时非常有用。例如,如果你在ansible.cfg文件中修改了remote_user选项,运行此命令就会只显示remote_user相关的配置内容。
-
-
-
-
ansible-inventory:
-
含义
-
ansible-inventory是 Ansible 的一个重要组件,用于管理 Ansible 的主机清单。主机清单定义了 Ansible 将要管理的目标主机,包括主机的 IP 地址、主机名、所属的组等信息。它就像是 Ansible 的 “目标地图”,告诉 Ansible 需要在哪些主机上执行任务。
-
-
用法
-
查看主机清单内容
-
基本的查看命令是
ansible-inventory --list这个命令会以 JSON 格式(默认)输出主机清单中的所有信息。例如,你可以看到主机组的构成,每个主机组中有哪些主机,以及主机的一些变量(如果定义了的话)。假设你有一个简单的主机清单文件,内容如下:
-
当你运行ansible-inventory --list时,它会输出类似这样的内容(为了简洁,省略了部分细节):
{"_meta": {"hostvars": {}},"all": {"children": ["ungrouped","webs"]},"webs": {"hosts": ["192.168.72.101","192.168.72.102"]}
}
-
-
以特定格式输出主机清单
-
除了 JSON 格式,你还可以使用
--yaml选项以 YAML 格式输出,即
ansible-inventory --list --yamlYAML 格式对于人类阅读可能更友好一些。继续以上面的主机清单为例,YAML 格式输出可能如下:
all:children:ungrouped: {}webs:hosts:192.168.72.101: {}192.168.72.102: {}
-
-
检查主机是否在清单中
-
可以使用
ansible-inventory --host <hostname>命令来检查特定主机是否在主机清单中,并查看该主机的相关变量。例如,ansible-inventory --host web1.example.com会输出该主机所属的组以及其变量(如果有)。如果主机不在清单中,会显示相应的提示信息。
-
-
使用动态主机清单脚本
-
Ansible 也支持动态主机清单。你可以编写一个脚本来动态生成主机清单内容,例如从一个数据库或者云服务提供商的 API 获取主机信息。假设你有一个名为
dynamic_inventory.py的动态主机清单脚本,你可以通过ansible-inventory-- inventory <path_to_script>来使用它。这样,每次 Ansible 运行任务时,都会先执行这个脚本获取最新的主机清单信息。
-
-
较为常用的是/usr/bin/ansible和/usr/bin/ansible-playbook
ansible-doc命令
-
ansible-doc命令常用于获取模板块信息及其适用帮助,一般用法如下:
ansible-doc -l ##获取全部模块信息ansible-doc -s MOD_NAME #获取指定模块的使用帮助-
ansible-doc的全部用法:
[root@localhost ~]# ansible-docusage: ansible-doc [-h] [--version] [-v] [-M MODULE_PATH]...optional arguments:--metadata-dump **For internal testing only** Dump json metadata forall plugins.--playbook-dir BASEDIRSince this tool does not use playbooks, use this as asubstitute playbook directory.This sets the relativepath for many features including roles/ group_vars/etc.--version show program's version number, config file location,configured module search path, module location,executable location and exit-F, --list_files Show plugin names and their source files withoutsummaries (implies --list)##-M,指定模块的路径-M MODULE_PATH, --module-path MODULE_PATHprepend colon-separated path(s) to module library (default=~/.ansible/plugins/modules:/usr/share/ansible/plugins/modules)##-h,显示命令参数API文档-h, --help show this help message and exit##输出为json格式-j, --json Change output into json format.##-l,列出可用模块-l, --list List available plugins##-s,显示剧本指定模块的用法-s, --snippet Show playbook snippet for specified plugin(s)ansible命令
-
ansible命令的具体格式如下
ansible <host-pattern> <-f forks> [-m module_name] [-a args]-
如下
#使用ansible -h来查看帮助-a,MODULE_ARGS #模块的参数,如果执行默认COMMAND的模块,即是命令参数,如:“date”,"pwd"。-k,--ask-pass #ask for SSH password。登录密码,提示输入SSH密码而不是假设基于密钥的验证--ask-pass #ask for SSH。su切换密码-K,--ask-sudo-pass #ask for sudo password。提示密码使用sudo,sudo表示提权操作--ask-vault-pass #ask for vault password。 假设我们设定了加密的密码,则用该选项进行访问-B SECONDS #后台超时时间-C #模拟运行环境并且进行预运行,可以进行查错测试-c CONNECTION #连接类型使用-f FORKS #并行任务数,默认为5-i INVENTORY #指定主机清单的路径,默认为/etc/ansible/hosts--list-hosts #查看有哪些主机组-m MODULE_NAME #执行模块的名字,默认使用command模块,所以如果只执行单一命令可以不用 -m 参数-o #压缩输出,尝试讲所有结果在一行输出,一般针对收集工具使用-S #用su命令-R SU_USER #指定su的用户,默认为root用户-s #用sudo的命令-U SUDO_USERSUDO #指定sudo到哪个用户,默认为root用户-T TIMEOUT #指定ssh默认超时时间,默认为10s,也可以在配置文件中修改-u REMOTE_USER #远程用户,默认为root用户-v #查看详细信息,同时支持 -vvv,-vvvv可以查看更加详细的信息ansible配置公私钥
-
上面已经提到ansible是基于ssh协议实现管理主机的,所以ansible配置公私钥的方式与ssh协议的方式相同,具体操作步骤如下:
 1.生产私钥
###
[root@ansible ~]# ssh-keygen
Generating public/private rsa key pair.
Enter file in which to save the key (/root/.ssh/id_rsa):
Enter passphrase (empty for no passphrase):
Enter same passphrase again:
Your identification has been saved in /root/.ssh/id_rsa
Your public key has been saved in /root/.ssh/id_rsa.pub
The key fingerprint is:
SHA256:X0JevTlcSCMuCxK3N2twfdrAHBXrczxq4jK7G991WCk root@ansible
The key's randomart image is:
+---[RSA 3072]----+
|      . .   o.=. |
|       o . = = + |
|      . + * B = .|
|       . B * B =.|
|        S * oEOo+|
|         o o  o*.|
|         ... o...|
|         o+ + . .|
|         +*o .   |
+----[SHA256]-----+2.向被管理主机分发私钥
###
[root@ansible ~]# ssh-copy-id 192.168.72.101
/usr/bin/ssh-copy-id: INFO: Source of key(s) to be installed: "/root/.ssh/id_rsa.pub"
The authenticity of host '192.168.72.101 (192.168.72.101)' can't be established.
ED25519 key fingerprint is SHA256:T18Ri2Kqfht/W/As6DBvSPOqvDBUhgWq5aORE9E4CPQ.
This key is not known by any other names
Are you sure you want to continue connecting (yes/no/[fingerprint])? yes
/usr/bin/ssh-copy-id: INFO: attempting to log in with the new key(s), to filter out any that are already installed
/usr/bin/ssh-copy-id: INFO: 1 key(s) remain to be installed -- if you are prompted now it is to install the new keys
root@192.168.72.101's password: Number of key(s) added: 1Now try logging into the machine, with:   "ssh '192.168.72.101'"
and check to make sure that only the key(s) you wanted were added.###
[root@ansible ~]# ssh-copy-id 192.168.72.102
/usr/bin/ssh-copy-id: INFO: Source of key(s) to be installed: "/root/.ssh/id_rsa.pub"
The authenticity of host '192.168.72.102 (192.168.72.102)' can't be established.
ED25519 key fingerprint is SHA256:T18Ri2Kqfht/W/As6DBvSPOqvDBUhgWq5aORE9E4CPQ.
This host key is known by the following other names/addresses:~/.ssh/known_hosts:1: 192.168.72.101
Are you sure you want to continue connecting (yes/no/[fingerprint])? yes
/usr/bin/ssh-copy-id: INFO: attempting to log in with the new key(s), to filter out any that are already installed
/usr/bin/ssh-copy-id: INFO: 1 key(s) remain to be installed -- if you are prompted now it is to install the new keys
root@192.168.72.102's password: Number of key(s) added: 1Now try logging into the machine, with:   "ssh '192.168.72.102'"
and check to make sure that only the key(s) you wanted were added.
七.部署ansible管理集群
实验环境
| 主机名 | IP地址 | 安装包 |
| ansible | 192.168.72.100 | epel-release、ansible |
| node1 | 192.168.72.101 | - |
| node2 | 192.168.72.102 | - |
实验步骤
-
安装ansible
[root@localhost ~]# hostnamectl set-hostname ansible[root@localhost ~]# su[root@ansible ~]# yum install epel-release -y[root@ansible ~]# yum install ansible -y-
添加主机清单
[root@ansible ~]# cd /etc/ansible/[root@ansible ansible]# lsansible.cfg hosts roles[root@ansible ansible]# vi hosts [web] ##添加到最后一行192.168.115.109192.168.115.110-
配置公私钥
[root@ansible ~]# ssh-keygenGenerating public/private rsa key pair.Enter file in which to save the key (/root/.ssh/id_rsa): Created directory '/root/.ssh'.Enter passphrase (empty for no passphrase): Enter same passphrase again: Your identification has been saved in /root/.ssh/id_rsa.Your public key has been saved in /root/.ssh/id_rsa.pub.The key fingerprint is:SHA256:LPYTI56Y4SDp+SC6GkYrMoXCx1PhftoIvs3AM6iwtc4 root@localhost.localdomainThe key's randomart image is:+---[RSA 2048]----+| . || . . || o ||.o. o . ||=oo=..+.S ||+oBoo*== o ||BB.*+oo.o ||O*o.B . ||BoEo o |+----[SHA256]-----+[root@ansible ~]# ssh-copy-id root@192.168.115.109/usr/bin/ssh-copy-id: INFO: Source of key(s) to be installed: "/root/.ssh/id_rsa.pub"The authenticity of host '192.168.115.109 (192.168.115.109)' can't be established.ECDSA key fingerprint is SHA256:nryK+/NCYC3BMKWWs5x2gbYTOXHh1XQfrA1hIak57bQ.ECDSA key fingerprint is MD5:b4:f5:03:a7:f0:2c:48:5e:c8:26:b0:eb:c2:c3:37:45.Are you sure you want to continue connecting (yes/no)? yes/usr/bin/ssh-copy-id: INFO: attempting to log in with the new key(s), to filter out any that are already installed/usr/bin/ssh-copy-id: INFO: 1 key(s) remain to be installed -- if you are prompted now it is to install the new keysroot@192.168.115.109's password: Number of key(s) added: 1Now try logging into the machine, with: "ssh 'root@192.168.115.109'"and check to make sure that only the key(s) you wanted were added.[root@ansible ~]# ssh-copy-id root@192.168.115.110/usr/bin/ssh-copy-id: INFO: Source of key(s) to be installed: "/root/.ssh/id_rsa.pub"The authenticity of host '192.168.115.110 (192.168.115.110)' can't be established.ECDSA key fingerprint is SHA256:Nc4WQ6E4MwaQD/67ALzZ36hjNRigxQSUiDa2ZP5ZT+o.ECDSA key fingerprint is MD5:f7:33:08:60:92:d5:99:2c:9e:fe:47:5a:63:c8:e5:a8.Are you sure you want to continue connecting (yes/no)? yes/usr/bin/ssh-copy-id: INFO: attempting to log in with the new key(s), to filter out any that are already installed/usr/bin/ssh-copy-id: INFO: 1 key(s) remain to be installed -- if you are prompted now it is to install the new keysroot@192.168.115.110's password: Number of key(s) added: 1Now try logging into the machine, with: "ssh 'root@192.168.115.110'"and check to make sure that only the key(s) you wanted were added.全程是只需要,在ansible上面操作就行!!!
八.Ansible常用模块
主机连通性测试
-
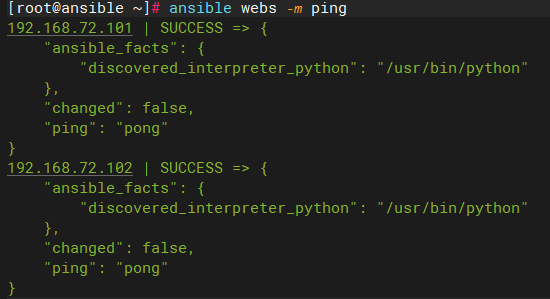
使用下列命令对主机清单中的资源进行连通性测试,出现下列信息说明主机处于连通状态
 #ansible 主机清单组名 -m(指定模块名字)[root@ansible ~]# ansible webs -m ping
192.168.72.101 | SUCCESS => {"ansible_facts": {"discovered_interpreter_python": "/usr/bin/python"},"changed": false,"ping": "pong"
}
192.168.72.102 | SUCCESS => {"ansible_facts": {"discovered_interpreter_python": "/usr/bin/python"},"changed": false,"ping": "pong"
}
command模块
-
command模块可以直接在远程主机上执行命令,并且结果返回打印出来,举例如下:
 ##-m 指定执行模块##-a 指定命令执行
[root@ansible ~]# ansible webs -m command -a 'date'
192.168.72.101 | CHANGED | rc=0 >>
2025年 07月 25日 星期五 16:24:39 CST
192.168.72.102 | CHANGED | rc=0 >>
2025年 07月 25日 星期五 16:24:39 CST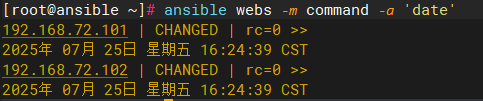
-
命令模块接受命令名称,后面是空格分隔的列表参数。给定的命令将在所有选定的节点上执行,它不会通过shell进行处理,比如$HOME和操作如“<”,">","| ", " ; " ," & " (需要使用 shell模块实现这些功能)。注意,command模块不支持 | 管道命令。
-
下面是command模块常用的几个命令:
-
chdir:在执行命令之前,先切换到该目录
-
execurable:切换shell来执行命令,需要使用命令的绝对路径
-
free_form:要执行的Linux指令,一般使用Ansible的-a参数代替
-
creates:一个文件名,当这个文件存在,则该命令不执行,可以用来做判断
-
removes:一个文件名,这个文件不存在,则该命令不执行
-
-
以下是这些命令的效果
 ##使用chdir切换到/etc/init.d目录
[root@ansible ~]# ansible webs -m command -a 'chdir=/etc/init.d/ ls'
192.168.72.102 | CHANGED | rc=0 >>
functions
netconsole
network
README
192.168.72.101 | CHANGED | rc=0 >>
functions
netconsole
network
README##使用removes,如果/demo/1.txt存在,就执行cat /demo/1.txt[root@ansible ~]# ansible web -m command -a 'removes=/demo/1.txt cat /demo/1.txt'192.168.115.109 | CHANGED | rc=0 >>123456192.168.115.110 | CHANGED | rc=0 >>hello##使用creates命令,如果/demo/1.txt存在,就不执行cat /demo/1.txt[root@ansible ~]# ansible web -m command -a 'creates=/demo/1.txt cat /demo/1.txt'192.168.115.109 | SUCCESS | rc=0 >>skipped, since /demo/1.txt exists192.168.115.110 | SUCCESS | rc=0 >>skipped, since /demo/1.txt exists
shell模块
-
shell模块可以在远程主机上调用shell解释器运行命令,支持shell的各种功能,例如管道等
-
只要是shell命令都可以在通过这个模块在远程主机里面运行
[root@ansible ~]# ansible webs -m shell -a 'cat /etc/passwd | grep root'
192.168.72.101 | CHANGED | rc=0 >>
root:x:0:0:root:/root:/bin/bash
operator:x:11:0:operator:/root:/sbin/nologin
192.168.72.102 | CHANGED | rc=0 >>
root:x:0:0:root:/root:/bin/bash
operator:x:11:0:operator:/root:/sbin/nologin
由于command不支持 管道符,所以它只会支持cat /etc/passwd命令
copy模块
-
这个模块用于将文件复制到远程主机上,同时支持给定的内容生成文件和修改权限等
-
copy模块的相关选项如下:
-
src:被复制到远程主机的本地文件。可以是绝对路径,也可以是相对路径。如果路径是一个目录,则会递归复制,用法类似于“rsync”。
-
content:用于替换“src”,可以直接指定文件的值。
-
dest:必选项,将源文件复制到远程主机的绝对路径。
-
backup:当文件内容发生改变之后,在覆盖之前,把源文件备份,备份文件包含时间信息
-
directory_mode:递归设定目录的权限,默认为系统默认权限。
-
force:当目标主机包含该文件,但是内容不同时,设定为“yes”,表示强制覆盖;设定为“no”表示目标主机的目标位置不存在该文件才复制。默认为“yes”
-
others:所有的file模块中的选项可以在这里使用
-
mode:设置文件权限
-
-
实例如下:复制文件
 ##将本机上的/etc/ansible目录下的hosts文件,复制到两台主机上的/opt目录下
[root@ansible ansible]# ansible webs -m copy -a "src=./hosts dest=/opt"
192.168.72.101 | CHANGED => {"ansible_facts": {"discovered_interpreter_python": "/usr/bin/python"},"changed": true,"checksum": "4cd2146ce8c119e39362825b9dbf09e092213a8f","dest": "/opt/hosts","gid": 0,"group": "root","md5sum": "d4a4ede90a944e5b86a87e5e7da9e845","mode": "0644","owner": "root","size": 1211,"src": "/root/.ansible/tmp/ansible-tmp-1753432979.8689926-12025-118902778952059/source","state": "file","uid": 0
}
192.168.72.102 | CHANGED => {"ansible_facts": {"discovered_interpreter_python": "/usr/bin/python"},"changed": true,"checksum": "4cd2146ce8c119e39362825b9dbf09e092213a8f","dest": "/opt/hosts","gid": 0,"group": "root","md5sum": "d4a4ede90a944e5b86a87e5e7da9e845","mode": "0644","owner": "root","size": 1211,"src": "/root/.ansible/tmp/ansible-tmp-1753432979.8810377-12026-141223786284775/source","state": "file","uid": 0
}###查看是否复制成功
[root@ansible ansible]# ansible webs -m shell -a "ls /opt"
192.168.72.101 | CHANGED | rc=0 >>
hosts
192.168.72.102 | CHANGED | rc=0 >>
hosts-
给定内容生成文件,并且制定权限
##生成内容为“are you ok?”名为leijun的文件,并且设置权限的777[root@ansible ansible]# ansible webs -m copy -a 'content="are you ok?" dest=/opt/leijun mode=777'
192.168.72.101 | CHANGED => {"ansible_facts": {"discovered_interpreter_python": "/usr/bin/python"},"changed": true,"checksum": "268b5f3043df32453de96b4ada31359fd272cdf1","dest": "/opt/leijun","gid": 0,"group": "root","md5sum": "9a631734b0ff69c17ddc29ad6630e5ca","mode": "0777","owner": "root","size": 11,"src": "/root/.ansible/tmp/ansible-tmp-1753433609.619664-13628-257632708634470/source","state": "file","uid": 0
}
192.168.72.102 | CHANGED => {"ansible_facts": {"discovered_interpreter_python": "/usr/bin/python"},"changed": true,"checksum": "268b5f3043df32453de96b4ada31359fd272cdf1","dest": "/opt/leijun","gid": 0,"group": "root","md5sum": "9a631734b0ff69c17ddc29ad6630e5ca","mode": "0777","owner": "root","size": 11,"src": "/root/.ansible/tmp/ansible-tmp-1753433609.6336586-13629-204185309391610/source","state": "file","uid": 0
}
##验证是否文件创建
[root@ansible ansible]# ansible webs -m shell -a "ls -l /opt"
192.168.72.102 | CHANGED | rc=0 >>
总用量 8
-rwxrwxrwx 1 z    z    1211 7月  25 16:43 hosts
-rwxrwxrwx 1 root root   11 7月  25 16:53 leijun
192.168.72.101 | CHANGED | rc=0 >>
总用量 8
-rwxrwxrwx 1 z    z    1211 7月  25 16:43 hosts
-rwxrwxrwx 1 root root   11 7月  25 16:53 leijun##我们在两台主机上查看文件以及权限
[root@ansible ansible]# ansible webs -m shell -a "ls -l /opt"
192.168.72.101 | CHANGED | rc=0 >>
总用量 4
-rw-r--r-- 1 root root 1211 7月  25 16:43 hosts
192.168.72.102 | CHANGED | rc=0 >>
总用量 4
-rw-r--r-- 1 root root 1211 7月  25 16:43 hosts##修改权限644 ——> 777
[root@ansible ansible]# ansible webs -m copy -a "src=./hosts dest=/opt mode=0777"
192.168.72.101 | CHANGED => {"ansible_facts": {"discovered_interpreter_python": "/usr/bin/python"},"changed": true,"checksum": "4cd2146ce8c119e39362825b9dbf09e092213a8f","dest": "/opt/hosts","gid": 0,"group": "root","mode": "0777","owner": "root","path": "/opt/hosts","size": 1211,"state": "file","uid": 0
}
192.168.72.102 | CHANGED => {"ansible_facts": {"discovered_interpreter_python": "/usr/bin/python"},"changed": true,"checksum": "4cd2146ce8c119e39362825b9dbf09e092213a8f","dest": "/opt/hosts","gid": 0,"group": "root","mode": "0777","owner": "root","path": "/opt/hosts","size": 1211,"state": "file","uid": 0
}##验证文件权限是否修改
[root@ansible ansible]# ansible webs -m shell -a "ls -l /opt"
192.168.72.101 | CHANGED | rc=0 >>
总用量 4
-rwxrwxrwx 1 root root 1211 7月  25 16:43 hosts
192.168.72.102 | CHANGED | rc=0 >>
总用量 4
-rwxrwxrwx 1 root root 1211 7月  25 16:43 hosts##修改文件属主
[root@ansible ansible]# ansible webs -m copy -a "src=./hosts dest=/opt mode=0777 owner=z"
192.168.72.102 | CHANGED => {"ansible_facts": {"discovered_interpreter_python": "/usr/bin/python"},"changed": true,"checksum": "4cd2146ce8c119e39362825b9dbf09e092213a8f","dest": "/opt/hosts","gid": 0,"group": "root","mode": "0777","owner": "z","path": "/opt/hosts","size": 1211,"state": "file","uid": 1000
}
192.168.72.101 | CHANGED => {"ansible_facts": {"discovered_interpreter_python": "/usr/bin/python"},"changed": true,"checksum": "4cd2146ce8c119e39362825b9dbf09e092213a8f","dest": "/opt/hosts","gid": 0,"group": "root","mode": "0777","owner": "z","path": "/opt/hosts","size": 1211,"state": "file","uid": 1000
}##验证文件属主是否修改
[root@ansible ansible]# ansible webs -m shell -a "ls -l /opt"
192.168.72.101 | CHANGED | rc=0 >>
总用量 4
-rwxrwxrwx 1 z root 1211 7月  25 16:43 hosts
192.168.72.102 | CHANGED | rc=0 >>
总用量 4
-rwxrwxrwx 1 z root 1211 7月  25 16:43 hosts##修改文件属组
[root@ansible ansible]# ansible webs -m copy -a "src=./hosts dest=/opt mode=0777 owner=z group=z"
192.168.72.101 | CHANGED => {"ansible_facts": {"discovered_interpreter_python": "/usr/bin/python"},"changed": true,"checksum": "4cd2146ce8c119e39362825b9dbf09e092213a8f","dest": "/opt/hosts","gid": 1000,"group": "z","mode": "0777","owner": "z","path": "/opt/hosts","size": 1211,"state": "file","uid": 1000
}
192.168.72.102 | CHANGED => {"ansible_facts": {"discovered_interpreter_python": "/usr/bin/python"},"changed": true,"checksum": "4cd2146ce8c119e39362825b9dbf09e092213a8f","dest": "/opt/hosts","gid": 1000,"group": "z","mode": "0777","owner": "z","path": "/opt/hosts","size": 1211,"state": "file","uid": 1000
}##验证文件属组是否修改
[root@ansible ansible]# ansible webs -m shell -a "ls -l /opt"
192.168.72.102 | CHANGED | rc=0 >>
总用量 4
-rwxrwxrwx 1 z z 1211 7月  25 16:43 hosts
192.168.72.101 | CHANGED | rc=0 >>
总用量 4
-rwxrwxrwx 1 z z 1211 7月 25 16:43 hosts-
备份源文件,并且覆盖源文件
 ##创建新的内容覆盖原文件,并且备份
[root@ansible ansible]# ansible webs -m copy -a 'content="I AM FINE!!" backup=yes dest=/opt/leijun mode=777'
192.168.72.102 | CHANGED => {"ansible_facts": {"discovered_interpreter_python": "/usr/bin/python"},"backup_file": "/opt/leijun.15147.2025-07-25@16:55:36~","changed": true,"checksum": "fc01c3f0eb6a707879d64649b22b31f710ebede5","dest": "/opt/leijun","gid": 0,"group": "root","md5sum": "83e50cab85cd9c3c97653bba92bd4f3c","mode": "0777","owner": "root","size": 11,"src": "/root/.ansible/tmp/ansible-tmp-1753433736.486632-13963-189436342271394/source","state": "file","uid": 0
}
192.168.72.101 | CHANGED => {"ansible_facts": {"discovered_interpreter_python": "/usr/bin/python"},"backup_file": "/opt/leijun.15250.2025-07-25@16:55:36~","changed": true,"checksum": "fc01c3f0eb6a707879d64649b22b31f710ebede5","dest": "/opt/leijun","gid": 0,"group": "root","md5sum": "83e50cab85cd9c3c97653bba92bd4f3c","mode": "0777","owner": "root","size": 11,"src": "/root/.ansible/tmp/ansible-tmp-1753433736.4863994-13962-136724016922843/source","state": "file","uid": 0
}###查看被控主机的文件状态
[root@ansible ansible]# ansible webs -m shell -a "ls -l /opt"
192.168.72.102 | CHANGED | rc=0 >>
总用量 12
-rwxrwxrwx 1 z    z    1211 7月  25 16:43 hosts
-rwxrwxrwx 1 root root   11 7月  25 16:55 leijun
-rwxrwxrwx 1 root root   11 7月  25 16:53 leijun.15147.2025-07-25@16:55:36~
192.168.72.101 | CHANGED | rc=0 >>
总用量 12
-rwxrwxrwx 1 z    z    1211 7月  25 16:43 hosts
-rwxrwxrwx 1 root root   11 7月  25 16:55 leijun
-rwxrwxrwx 1 root root   11 7月  25 16:53 leijun.15250.2025-07-25@16:55:36~
file模块
-
file模块主要用于设置文件的属性,比如创建文件、创建连接文件、删除文件等,如下为常见的命令:
-
force:需要两种情况下强制创建软连接,一种是源文件不存在,但是之后会建立的情况下;另外一种是目标软链接已存在,需要取消之前的软链接,然后创建新的,有两个选项:yes|no。
-
path:指定创建路径
-
-
group:定义文件/目录的属组。后面可以加上mode:定义文件/目录的权限。
-
owner:定义文件/目录的属主,后面必须加上path:定义文件/目录的路径。
-
recurse:递归设置文件的属性,只对目录有效,后面跟上src:被链接的源文件路径,只应用于state=link的情况
-
dest:被链接到的路径,只应用于state=link的情况
-
mode:指定权限。
-
state:状态,有如下选项:
-
directory:如果目录不存在,就创建目录
-
file:即使文件不存在,也不会被创建;已经存在的文件可以修改文件的属性。
-
link:创建软链接
-
hard:创建硬链接
-
touch:如果文件不存在,则会创建一个新的文件,如果文件或者目录已经存在,则更新其最后修改时间
-
absent:删除目录、文件或者取消链接文件
-
-
创建目录,实例如下:
[root@ansible ansible]# ansible webs -m file -a 'path=/opt/app state=directory'
192.168.72.102 | CHANGED => {"ansible_facts": {"discovered_interpreter_python": "/usr/bin/python"},"changed": true,"gid": 0,"group": "root","mode": "0755","owner": "root","path": "/opt/app","size": 6,"state": "directory","uid": 0
}
192.168.72.101 | CHANGED => {"ansible_facts": {"discovered_interpreter_python": "/usr/bin/python"},"changed": true,"gid": 0,"group": "root","mode": "0755","owner": "root","path": "/opt/app","size": 6,"state": "directory","uid": 0
}###验证文件是否创建
[root@ansible ansible]# ansible webs -m shell -a "ls -l /opt"
192.168.72.102 | CHANGED | rc=0 >>
总用量 12
drwxr-xr-x 2 root root    6 7月  25 16:57 app
-rwxrwxrwx 1 z    z    1211 7月  25 16:43 hosts
-rwxrwxrwx 1 root root   11 7月  25 16:55 leijun
-rwxrwxrwx 1 root root   11 7月  25 16:53 leijun.15147.2025-07-25@16:55:36~
192.168.72.101 | CHANGED | rc=0 >>
总用量 12
drwxr-xr-x 2 root root    6 7月  25 16:57 app
-rwxrwxrwx 1 z    z    1211 7月  25 16:43 hosts
-rwxrwxrwx 1 root root   11 7月  25 16:55 leijun
-rwxrwxrwx 1 root root 11 7月 25 16:53 leijun.15250.2025-07-25@16:55:36~-
创建链接文件,实例如下:
[root@ansible ansible]# ansible webs -m file -a 'path=/opt/abc src=/opt/app state=link'
192.168.72.101 | CHANGED => {"ansible_facts": {"discovered_interpreter_python": "/usr/bin/python"},"changed": true,"dest": "/opt/abc","gid": 0,"group": "root","mode": "0777","owner": "root","size": 8,"src": "/opt/app","state": "link","uid": 0
}
192.168.72.102 | CHANGED => {"ansible_facts": {"discovered_interpreter_python": "/usr/bin/python"},"changed": true,"dest": "/opt/abc","gid": 0,"group": "root","mode": "0777","owner": "root","size": 8,"src": "/opt/app","state": "link","uid": 0
}###验证链接文件是否创建
[root@ansible ansible]# ansible webs -m shell -a "ls -l /opt"
192.168.72.101 | CHANGED | rc=0 >>
总用量 12
lrwxrwxrwx 1 root root    8 7月  25 16:58 abc -> /opt/app
drwxr-xr-x 2 root root    6 7月  25 16:57 app
-rwxrwxrwx 1 z    z    1211 7月  25 16:43 hosts
-rwxrwxrwx 1 root root   11 7月  25 16:55 leijun
-rwxrwxrwx 1 root root   11 7月  25 16:53 leijun.15250.2025-07-25@16:55:36~
192.168.72.102 | CHANGED | rc=0 >>
总用量 12
lrwxrwxrwx 1 root root    8 7月  25 16:58 abc -> /opt/app
drwxr-xr-x 2 root root    6 7月  25 16:57 app
-rwxrwxrwx 1 z    z    1211 7月  25 16:43 hosts
-rwxrwxrwx 1 root root   11 7月  25 16:55 leijun
-rwxrwxrwx 1 root root 11 7月 25 16:53 leijun.15147.2025-07-25@16:55:36~[root@ansible ~]# -
删除文件如下所示:
[root@ansible ansible]# ansible webs -m file -a 'path=/opt/abc state=absent'
192.168.72.101 | CHANGED => {"ansible_facts": {"discovered_interpreter_python": "/usr/bin/python"},"changed": true,"path": "/opt/abc","state": "absent"
}
192.168.72.102 | CHANGED => {"ansible_facts": {"discovered_interpreter_python": "/usr/bin/python"},"changed": true,"path": "/opt/abc","state": "absent"
}###验证是否删除成功
[root@ansible ansible]# ansible webs -m shell -a "ls -l /opt"
192.168.72.101 | CHANGED | rc=0 >>
总用量 12
drwxr-xr-x 2 root root    6 7月  25 16:57 app
-rwxrwxrwx 1 z    z    1211 7月  25 16:43 hosts
-rwxrwxrwx 1 root root   11 7月  25 16:55 leijun
-rwxrwxrwx 1 root root   11 7月  25 16:53 leijun.15250.2025-07-25@16:55:36~
192.168.72.102 | CHANGED | rc=0 >>
总用量 12
drwxr-xr-x 2 root root    6 7月  25 16:57 app
-rwxrwxrwx 1 z    z    1211 7月  25 16:43 hosts
-rwxrwxrwx 1 root root   11 7月  25 16:55 leijun
-rwxrwxrwx 1 root root   11 7月  25 16:53 leijun.15147.2025-07-25@16:55:36~
fetch模块
-
fetch模块用于从远程某个主机获取(复制)文件到本地来
-
dest:用来存储文件的目录。
-
src:在远程拉取的文件,并且是一个file,不能是目录
-
-
具体实例如下:
[root@ansible ansible]# ansible webs -m fetch -a 'src=/opt/leijun dest=/mnt'
192.168.72.101 | CHANGED => {"changed": true,"checksum": "fc01c3f0eb6a707879d64649b22b31f710ebede5","dest": "/mnt/192.168.72.101/opt/leijun","md5sum": "83e50cab85cd9c3c97653bba92bd4f3c","remote_checksum": "fc01c3f0eb6a707879d64649b22b31f710ebede5","remote_md5sum": null
}
192.168.72.102 | CHANGED => {"changed": true,"checksum": "fc01c3f0eb6a707879d64649b22b31f710ebede5","dest": "/mnt/192.168.72.102/opt/leijun","md5sum": "83e50cab85cd9c3c97653bba92bd4f3c","remote_checksum": "fc01c3f0eb6a707879d64649b22b31f710ebede5","remote_md5sum": null
}###验证拉取文件完整性
[root@ansible ansible]# ls /mnt/
192.168.72.101  192.168.72.102 [root@ansible ansible]# ls /mnt/192.168.72.101/
opt
[root@ansible ansible]# ls /mnt/192.168.72.101/opt/
leijun
cron模块
-
cron模块用于管理crontab计划性任务的,它的语法和crontab中的语法一致
-
day=:日应该运行的工作( 1-31, *, */2, ) -
hour=:小时 ( 0-23, *, */2, ) -
minute=:分钟( 0-59, *, */2, ) -
month=:月( 1-12, *, /2, ) -
weekday=: 周 ( 0-6 for Sunday-Saturday,, ) -
job=:指明运行的命令是什么 -
name=:定时任务描述 -
reboot:任务在重启时运行,不建议使用,建议使用special_time -
special_time:特殊的时间范围,参数:reboot(重启时),annually(每年),monthly(每月),weekly(每周),daily(每天),hourly(每小时) -
state:指定状态-
present表示添加定时任务,也是默认设置,
-
absent表示删除定时任务
-
-
user:以哪个用户的身份执行
-
-
添加计划性任务如下,实例如下:
[root@ansible sbin]# ansible webs -m cron -a 'name="ifconfig every 5 min" minute=*/5 job="/sbin/ifconfig"'
192.168.72.101 | CHANGED => {"ansible_facts": {"discovered_interpreter_python": "/usr/bin/python"},"changed": true,"envs": [],"jobs": ["ifconfig every 5 min"]
}
192.168.72.102 | CHANGED => {"ansible_facts": {"discovered_interpreter_python": "/usr/bin/python"},"changed": true,"envs": [],"jobs": ["ifconfig every 5 min"]
}##验证任务是否添加
[root@ansible sbin]# ansible webs -m shell -a 'crontab -l'
192.168.72.102 | CHANGED | rc=0 >>
#Ansible: ifconfig every 5 min
*/5 * * * * /sbin/ifconfig
192.168.72.101 | CHANGED | rc=0 >>
#Ansible: ifconfig every 5 min
*/5 * * * * /sbin/ifconfig-
删除计划性任务,比如我们计划任务添加错误,则可以执行以下命令删除计划任务
##首先查看一下,已有的计划性任务
[root@ansible sbin]# ansible webs -m shell -a 'crontab -l'
192.168.72.102 | CHANGED | rc=0 >>
#Ansible: ifconfig every 5 min
*/5 * * * * /sbin/ifconfig
192.168.72.101 | CHANGED | rc=0 >>
#Ansible: ifconfig every 5 min
*/5 * * * * /sbin/ifconfig##准备删除计划性任务
[root@ansible sbin]# ansible webs -m cron -a 'name="ifconfig every 5 min" minute=*/5 job="/sbin/ifconfig" state=absent'
192.168.72.101 | CHANGED => {"ansible_facts": {"discovered_interpreter_python": "/usr/bin/python"},"changed": true,"envs": [],"jobs": []
}
192.168.72.102 | CHANGED => {"ansible_facts": {"discovered_interpreter_python": "/usr/bin/python"},"changed": true,"envs": [],"jobs": []
}[root@ansible sbin]# ansible webs -m shell -a 'crontab -l'
192.168.72.101 | CHANGED | rc=0 >>192.168.72.102 | CHANGED | rc=0 >>
yum模块
-
yum模块主要用于软件的安装,它的选项如下
-
name= :所安装的软件包的名称
-
-
state= :
-
present--》安装
-
latest--》安装最新的
-
absent--》卸载软件
-
-
update_cache :强制更新yum的缓存
-
conf_file :指定远程yum安装时所依赖的配置文件(安装本地已有的包)。
-
disable_pgp_check :是否禁止GPG checking,只用于present 或者 latest。
-
disablerepo :临时禁止使用yum库。只用于安装或者更新时。
-
enablerepo :临时使用的yum库。只用于安装或者更新时。
-
如下演示安装 tree软件包
[root@ansible sbin]# ansible webs -m yum -a 'name=tree state=present'
192.168.72.102 | CHANGED => {"ansible_facts": {"discovered_interpreter_python": "/usr/bin/python"},"changed": true,"changes": {"installed": ["tree"]},"msg": "","rc": 0,"results": ["Loaded plugins: fastestmirror, priorities\nLoading mirror speeds from cached hostfile\n * base: mirrors.aliyun.com\n * epel: ftp-stud.hs-esslingen.de\n * extras: mirrors.aliyun.com\n * updates: mirrors.aliyun.com\nResolving Dependencies\n--> Running transaction check\n---> Package tree.x86_64 0:1.6.0-10.el7 will be installed\n--> Finished Dependency Resolution\n\nDependencies Resolved\n\n================================================================================\n Package        Arch             Version                   Repository      Size\n================================================================================\nInstalling:\n tree           x86_64           1.6.0-10.el7              base            46 k\n\nTransaction Summary\n================================================================================\nInstall  1 Package\n\nTotal download size: 46 k\nInstalled size: 87 k\nDownloading packages:\nRunning transaction check\nRunning transaction test\nTransaction test succeeded\nRunning transaction\n  Installing : tree-1.6.0-10.el7.x86_64                                     1/1 \n  Verifying  : tree-1.6.0-10.el7.x86_64                                     1/1 \n\nInstalled:\n  tree.x86_64 0:1.6.0-10.el7                                                    \n\nComplete!\n"]
}
192.168.72.101 | CHANGED => {"ansible_facts": {"discovered_interpreter_python": "/usr/bin/python"},"changed": true,"changes": {"installed": ["tree"]},"msg": "","rc": 0,"results": ["Loaded plugins: fastestmirror, priorities\nLoading mirror speeds from cached hostfile\n * base: mirrors.aliyun.com\n * epel: ftp-stud.hs-esslingen.de\n * extras: mirrors.aliyun.com\n * updates: mirrors.aliyun.com\nResolving Dependencies\n--> Running transaction check\n---> Package tree.x86_64 0:1.6.0-10.el7 will be installed\n--> Finished Dependency Resolution\n\nDependencies Resolved\n\n================================================================================\n Package        Arch             Version                   Repository      Size\n================================================================================\nInstalling:\n tree           x86_64           1.6.0-10.el7              base            46 k\n\nTransaction Summary\n================================================================================\nInstall  1 Package\n\nTotal download size: 46 k\nInstalled size: 87 k\nDownloading packages:\nRunning transaction check\nRunning transaction test\nTransaction test succeeded\nRunning transaction\n  Installing : tree-1.6.0-10.el7.x86_64                                     1/1 \n  Verifying  : tree-1.6.0-10.el7.x86_64                                     1/1 \n\nInstalled:\n  tree.x86_64 0:1.6.0-10.el7                                                    \n\nComplete!\n"]
}###验证tree是否安装完成
[root@ansible sbin]# ansible webs -m shell -a 'rpm -q tree'
192.168.72.102 | CHANGED | rc=0 >>
tree-1.6.0-10.el7.x86_64
192.168.72.101 | CHANGED | rc=0 >>
tree-1.6.0-10.el7.x86_64[root@ansible ~]#
service模块
-
service模块用于服务程序的管理,它的主要选项如下:
-
arguments:命令行提供额外的参数
-
-
enabled:设置开机自启;true | false
-
name:服务名称
-
runlevel:开机启动的级别,一般不用指定。
-
sleep:在重启服务的过程中,是否等待。如在服务关闭以后等待2秒在启动。(定义在剧本当中)
-
state:有四种状态分别为
-
started(启动服务)
-
stopped(停止服务)
-
restarted(重启服务)
-
reloaded(重载服务)
-
-
开启httpd服务并且设置开启自启
 ##httpd服务必须自行安装httpd软件包
[root@ansible ~]# ansible webs -m yum -a 'name=httpd state=present'[root@ansible ~]# ansible webs -m shell -a 'netstat -natp | grep 80'
192.168.72.102 | CHANGED | rc=0 >>
tcp        0      0 127.0.0.1:25            0.0.0.0:*               LISTEN      1180/master
tcp        0      0 192.168.72.102:42476    140.249.111.33:80       TIME_WAIT   -
tcp        0      0 192.168.72.102:33184    140.249.111.29:80       TIME_WAIT   -
tcp        0      0 192.168.72.102:50056    42.202.158.249:80       TIME_WAIT   -
tcp6       0      0 ::1:25                  :::*                    LISTEN      1180/master
192.168.72.101 | CHANGED | rc=0 >>
tcp        0      0 192.168.72.101:60180    42.202.158.249:80       TIME_WAIT   -
tcp        0      0 192.168.72.101:50014    140.249.111.29:80       TIME_WAIT   -
tcp 0 0 192.168.72.101:39220 140.249.111.30:80 TIME_WAIT - -
通过service模块关闭httpd服务
[root@ansible ~]# ansible webs -m shell -a 'netstat -natp | grep 80'
192.168.72.102 | CHANGED | rc=0 >>
tcp        0      0 127.0.0.1:25            0.0.0.0:*               LISTEN      1180/master
tcp        0      0 192.168.72.102:42476    140.249.111.33:80       TIME_WAIT   -
tcp        0      0 192.168.72.102:33184    140.249.111.29:80       TIME_WAIT   -
tcp        0      0 192.168.72.102:50056    42.202.158.249:80       TIME_WAIT   -
tcp6       0      0 ::1:25                  :::*                    LISTEN      1180/master
192.168.72.101 | CHANGED | rc=0 >>
tcp        0      0 192.168.72.101:60180    42.202.158.249:80       TIME_WAIT   -
tcp        0      0 192.168.72.101:50014    140.249.111.29:80       TIME_WAIT   -
tcp        0      0 192.168.72.101:39220    140.249.111.30:80       TIME_WAIT   -  ###停止httpd服务
[root@ansible ~]# ansible webs -m service -a 'name=httpd state=stopped'192.168.72.101 | CHANGED => {"ansible_facts": {"discovered_interpreter_python": "/usr/bin/python"}, "changed": true, "name": "httpd", "state": "stopped", "status": {...}}192.168.72.102 | CHANGED => {"ansible_facts": {"discovered_interpreter_python": "/usr/bin/python"}, "changed": true, "name": "httpd", "state": "stopped", "status": {...}}[root@ansible ~]# ansible webs -m shell -a 'netstat -natp | grep 80'
192.168.72.102 | FAILED | rc=1 >>
non-zero return code
192.168.72.101 | FAILED | rc=1 >>
non-zero return code
user模块
-
user模块主要用来管理用户账号,它的主要选项如下所示:
-
comment :用户的描述信息
-
-
createhome:是否创建家目录
-
force:在使用state=absent时,行为于userdel --force一致
-
group:指定基本组
-
groups:指定附加组
-
home:指定用户家目录
-
move_home:如果设置为home=时,试图将用户主目录移动到指定的目录
-
name:指定用户名
-
non_unique:该选项允许改变非唯一的用户ID值
-
password:指定用户密码,使用密文密码
-
remove:在使用state=absent时,行为是与userdel --remove一致
-
shell:指定默认的shell
-
state:设置账号状态,不指定为默认创建,指定值为absent表示删除
-
system:当创建一个用户,设置这个用户是系统用户。这个设置不能更改现有的用户
-
uid:指定用户的uid
-
添加用户并且指定用户的uid和密码
[root@localhost ~]# openssl passwd -1 "123"
$1$1OQXvXuE$PmfZvR8ZgrP.KG28.a5hI1[root@ansible ~]# ansible webs -m user -a "name=zhangs password=$1$1OQXvXuE$PmfZvR8ZgrP.KG28.a5hI1"
192.168.72.102 | CHANGED => {"ansible_facts": {"discovered_interpreter_python": "/usr/bin/python"},"changed": true,"comment": "","create_home": true,"group": 1001,"home": "/home/zhangs","name": "zhangs","password": "NOT_LOGGING_PASSWORD","shell": "/bin/bash","state": "present","system": false,"uid": 1001
}
192.168.72.101 | CHANGED => {"ansible_facts": {"discovered_interpreter_python": "/usr/bin/python"},"changed": true,"comment": "","create_home": true,"group": 1001,"home": "/home/zhangs","name": "zhangs","password": "NOT_LOGGING_PASSWORD","shell": "/bin/bash","state": "present","system": false,"uid": 1001
}
192.168.72.103 | CHANGED => {"ansible_facts": {"discovered_interpreter_python": "/usr/bin/python"},"changed": true,"comment": "","create_home": true,"group": 1001,"home": "/home/zhangs","name": "zhangs","password": "NOT_LOGGING_PASSWORD","shell": "/bin/bash","state": "present","system": false,"uid": 1001
}###验证用户和密码是否创建完成
[root@ansible ~]# ansible webs -m shell -a "tail -1 /etc/shadow"
192.168.72.103 | CHANGED | rc=0 >>
zhangs:OQXvXuE.KG28.a5hI1:20294:0:99999:7:::
192.168.72.101 | CHANGED | rc=0 >>
zhangs:OQXvXuE.KG28.a5hI1:20294:0:99999:7:::
192.168.72.102 | CHANGED | rc=0 >>
zhangs:OQXvXuE.KG28.a5hI1:20294:0:99999:7:::-
删除用户
[root@ansible ~]# ansible webs -m user -a 'name=zhangs state=absent'
192.168.72.103 | CHANGED => {"ansible_facts": {"discovered_interpreter_python": "/usr/bin/python"},"changed": true,"force": false,"name": "zhangs","remove": false,"state": "absent"
}
192.168.72.101 | CHANGED => {"ansible_facts": {"discovered_interpreter_python": "/usr/bin/python"},"changed": true,"force": false,"name": "zhangs","remove": false,"state": "absent"
}
192.168.72.102 | CHANGED => {"ansible_facts": {"discovered_interpreter_python": "/usr/bin/python"},"changed": true,"force": false,"name": "zhangs","remove": false,"state": "absent"
}###验证zhangs用户是否删除
[root@ansible ~]# ansible webs -m shell -a 'cat /etc/passwd | grep zhangs'
192.168.72.102 | FAILED | rc=1 >>
non-zero return code
192.168.72.103 | FAILED | rc=1 >>
non-zero return code
192.168.72.101 | FAILED | rc=1 >>
non-zero return code
group模块
-
group模块主要用于添加或者删除组,常用选项如下所示:
-
gid= 设置组的GID号
-
-
name= 指定组的名称
-
state= 指定组的状态,默认为创建,设置值为absent为删除
-
system= 设置值为yes,表示创建为系统组
-
实例命令如下
 #创建组
[root@ansible ~]# ansible webs -m group -a 'name=lisi gid=33333'
192.168.72.102 | CHANGED => {"ansible_facts": {"discovered_interpreter_python": "/usr/bin/python"},"changed": true,"gid": 33333,"name": "lisi","state": "present","system": false
}
192.168.72.101 | CHANGED => {"ansible_facts": {"discovered_interpreter_python": "/usr/bin/python"},"changed": true,"gid": 33333,"name": "lisi","state": "present","system": false
}
192.168.72.103 | CHANGED => {"ansible_facts": {"discovered_interpreter_python": "/usr/bin/python"},"changed": true,"gid": 33333,"name": "lisi","state": "present","system": false
}#查看已经创建的组
[root@ansible ~]# ansible webs -m shell -a 'cat /etc/group | grep 33333'
192.168.72.103 | CHANGED | rc=0 >>
lisi:x:33333:
192.168.72.102 | CHANGED | rc=0 >>
lisi:x:33333:
192.168.72.101 | CHANGED | rc=0 >>
lisi:x:33333:##删除组
[root@ansible ~]# ansible webs -m group -a 'name=lisi state=absent'
192.168.72.101 | CHANGED => {"ansible_facts": {"discovered_interpreter_python": "/usr/bin/python"},"changed": true,"name": "lisi","state": "absent"
}
192.168.72.102 | CHANGED => {"ansible_facts": {"discovered_interpreter_python": "/usr/bin/python"},"changed": true,"name": "lisi","state": "absent"
}
192.168.72.103 | CHANGED => {"ansible_facts": {"discovered_interpreter_python": "/usr/bin/python"},"changed": true,"name": "lisi","state": "absent"
}##查看组是否删除
[root@ansible ~]# ansible webs -m shell -a 'cat /etc/group | grep 33333'
192.168.72.101 | FAILED | rc=1 >>
non-zero return code
192.168.72.102 | FAILED | rc=1 >>
non-zero return code
192.168.72.103 | FAILED | rc=1 >>
non-zero return code
script模块
-
script模块用于将本机的脚本在被管理端的机器上运行。该模块直接指定脚本的路径即可
-
现在本机写一个脚本文件
[root@ansible ~]# vim demo.sh
[root@ansible ~]# cat demo.sh
#/bin/bash
df -hT
[root@ansible ~]# chmod +x demo.sh
-
运行这个脚本于被管理端
[root@ansible ~]# ansible webs -m script -a '/root/demo.sh'
192.168.72.101 | CHANGED => {"changed": true,"rc": 0,"stderr": "Shared connection to 192.168.72.101 closed.\r\n","stderr_lines": ["Shared connection to 192.168.72.101 closed."],"stdout": "文件系统                类型      容量  已用  可用 已用% 挂载点\r\ndevtmpfs                devtmpfs  979M     0  979M    0% /dev\r\ntmpfs                   tmpfs     991M     0  991M    0% /dev/shm\r\ntmpfs                   tmpfs     991M  9.6M  981M    1% /run\r\ntmpfs                   tmpfs     991M     0  991M    0% /sys/fs/cgroup\r\n/dev/mapper/centos-root xfs        50G  2.5G   48G    5% /\r\n/dev/sda1               xfs      1014M  138M  877M   14% /boot\r\n/dev/mapper/centos-home xfs       147G   33M  147G    1% /home\r\ntmpfs                   tmpfs     199M     0  199M    0% /run/user/0\r\n","stdout_lines": ["文件系统                类型      容量  已用  可用 已用% 挂载点","devtmpfs                devtmpfs  979M     0  979M    0% /dev","tmpfs                   tmpfs     991M     0  991M    0% /dev/shm","tmpfs                   tmpfs     991M  9.6M  981M    1% /run","tmpfs                   tmpfs     991M     0  991M    0% /sys/fs/cgroup","/dev/mapper/centos-root xfs        50G  2.5G   48G    5% /","/dev/sda1               xfs      1014M  138M  877M   14% /boot","/dev/mapper/centos-home xfs       147G   33M  147G    1% /home","tmpfs                   tmpfs     199M     0  199M    0% /run/user/0"]
}
192.168.72.102 | CHANGED => {"changed": true,"rc": 0,"stderr": "Shared connection to 192.168.72.102 closed.\r\n","stderr_lines": ["Shared connection to 192.168.72.102 closed."],"stdout": "文件系统                类型      容量  已用  可用 已用% 挂载点\r\ndevtmpfs                devtmpfs  979M     0  979M    0% /dev\r\ntmpfs                   tmpfs     991M     0  991M    0% /dev/shm\r\ntmpfs                   tmpfs     991M  9.6M  981M    1% /run\r\ntmpfs                   tmpfs     991M     0  991M    0% /sys/fs/cgroup\r\n/dev/mapper/centos-root xfs        50G  2.5G   48G    5% /\r\n/dev/sda1               xfs      1014M  138M  877M   14% /boot\r\n/dev/mapper/centos-home xfs       147G   33M  147G    1% /home\r\ntmpfs                   tmpfs     199M     0  199M    0% /run/user/0\r\n","stdout_lines": ["文件系统                类型      容量  已用  可用 已用% 挂载点","devtmpfs                devtmpfs  979M     0  979M    0% /dev","tmpfs                   tmpfs     991M     0  991M    0% /dev/shm","tmpfs                   tmpfs     991M  9.6M  981M    1% /run","tmpfs                   tmpfs     991M     0  991M    0% /sys/fs/cgroup","/dev/mapper/centos-root xfs        50G  2.5G   48G    5% /","/dev/sda1               xfs      1014M  138M  877M   14% /boot","/dev/mapper/centos-home xfs       147G   33M  147G    1% /home","tmpfs                   tmpfs     199M     0  199M    0% /run/user/0"]
}
192.168.72.103 | CHANGED => {"changed": true,"rc": 0,"stderr": "Shared connection to 192.168.72.103 closed.\r\n","stderr_lines": ["Shared connection to 192.168.72.103 closed."],"stdout": "文件系统                类型      容量  已用  可用 已用% 挂载点\r\ndevtmpfs                devtmpfs  979M     0  979M    0% /dev\r\ntmpfs                   tmpfs     991M     0  991M    0% /dev/shm\r\ntmpfs                   tmpfs     991M  9.6M  981M    1% /run\r\ntmpfs                   tmpfs     991M     0  991M    0% /sys/fs/cgroup\r\n/dev/mapper/centos-root xfs        50G  2.5G   48G    5% /\r\n/dev/sda1               xfs      1014M  138M  877M   14% /boot\r\n/dev/mapper/centos-home xfs       147G   33M  147G    1% /home\r\ntmpfs                   tmpfs     199M     0  199M    0% /run/user/0\r\n","stdout_lines": ["文件系统                类型      容量  已用  可用 已用% 挂载点","devtmpfs                devtmpfs  979M     0  979M    0% /dev","tmpfs                   tmpfs     991M     0  991M    0% /dev/shm","tmpfs                   tmpfs     991M  9.6M  981M    1% /run","tmpfs                   tmpfs     991M     0  991M    0% /sys/fs/cgroup","/dev/mapper/centos-root xfs        50G  2.5G   48G    5% /","/dev/sda1               xfs      1014M  138M  877M   14% /boot","/dev/mapper/centos-home xfs       147G   33M  147G    1% /home","tmpfs                   tmpfs     199M     0  199M    0% /run/user/0"]
}
setup模块
-
setup模块主要用于收集信息,是通过调用facts组件来实现的,facts组件时Ansible用于采集被管理机器设备信息的一个功能。我们可以使用setup模块查看机器的所有facts信息,可以使用filter来查看指定信息。整个facts信息被包装在一个JSON格式的数据文件中,ansible_facts是最上层的值。
-
facts就是变量,内建变量。每个主机的各种信息,cpu个数,内存的大小等。会存在facts中的某个变量中,调用后返回很多对应主机的信息,在后面的操作中可以根据不同的信息来做不同的操作。比如redhat系列用yum安装,而debian系列用apt安装软件
-
查看信息实例,查看被管理主机的内存
[root@ansible ~]# ansible webs -m setup -a 'filter="*mem*"'
192.168.72.102 | SUCCESS => {"ansible_facts": {"ansible_memfree_mb": 1397,"ansible_memory_mb": {"nocache": {"free": 1734,"used": 246},"real": {"free": 1397,"total": 1980,"used": 583},"swap": {"cached": 0,"free": 2047,"total": 2047,"used": 0}},"ansible_memtotal_mb": 1980,"discovered_interpreter_python": "/usr/bin/python"},"changed": false
}
192.168.72.101 | SUCCESS => {"ansible_facts": {"ansible_memfree_mb": 1402,"ansible_memory_mb": {"nocache": {"free": 1740,"used": 240},"real": {"free": 1402,"total": 1980,"used": 578},"swap": {"cached": 0,"free": 2047,"total": 2047,"used": 0}},"ansible_memtotal_mb": 1980,"discovered_interpreter_python": "/usr/bin/python"},"changed": false
}
192.168.72.103 | SUCCESS => {"ansible_facts": {"ansible_memfree_mb": 1668,"ansible_memory_mb": {"nocache": {"free": 1769,"used": 211},"real": {"free": 1668,"total": 1980,"used": 312},"swap": {"cached": 0,"free": 2047,"total": 2047,"used": 0}},"ansible_memtotal_mb": 1980,"discovered_interpreter_python": "/usr/bin/python"},"changed": false
}-
setup模块还有一个很好的功能就是保存我们筛选出来的信息到我们的主机上,同时,文件名是被管理主机的IP地址,方便检测那台主机出现问题。
 [root@ansible ~]# ansible webs -m setup -a 'filter="*mem*"' --tree /tmp/facts
192.168.72.101 | SUCCESS => {"ansible_facts": {"ansible_memfree_mb": 1400,"ansible_memory_mb": {"nocache": {"free": 1740,"used": 240},"real": {"free": 1400,"total": 1980,"used": 580},"swap": {"cached": 0,"free": 2047,"total": 2047,"used": 0}},"ansible_memtotal_mb": 1980,"discovered_interpreter_python": "/usr/bin/python"},"changed": false
}
192.168.72.102 | SUCCESS => {"ansible_facts": {"ansible_memfree_mb": 1394,"ansible_memory_mb": {"nocache": {"free": 1733,"used": 247},"real": {"free": 1394,"total": 1980,"used": 586},"swap": {"cached": 0,"free": 2047,"total": 2047,"used": 0}},"ansible_memtotal_mb": 1980,"discovered_interpreter_python": "/usr/bin/python"},"changed": false
}
192.168.72.103 | SUCCESS => {"ansible_facts": {"ansible_memfree_mb": 1665,"ansible_memory_mb": {"nocache": {"free": 1768,"used": 212},"real": {"free": 1665,"total": 1980,"used": 315},"swap": {"cached": 0,"free": 2047,"total": 2047,"used": 0}},"ansible_memtotal_mb": 1980,"discovered_interpreter_python": "/usr/bin/python"},"changed": false
}
[root@ansible ~]# ls /tmp/facts/
192.168.72.101  192.168.72.102  192.168.72.103##查看到收集到的信息
[root@ansible ~]# cat /tmp/facts/192.168.72.101
{"ansible_facts": {"ansible_memfree_mb": 1400, "ansible_memory_mb": {"nocache": {"free": 1740, "used": 240}, "real": {"free": 1400, "total": 1980, "used": 580}, "swap": {"cached": 0, "free": 2047, "total": 2047, "used": 0}}, "ansible_memtotal_mb": 1980, "discovered_interpreter_python": "/usr/bin/python"}, "changed": false}
总结:
Ansible以其简洁的架构、强大的模块化功能和灵活的Playbook编排能力,成为自动化运维领域的重要工具。它不仅降低了运维复杂度,还提高了任务执行的可靠性和可重复性。
通过本文的学习,我们了解到:
Ansible的核心优势:无代理、基于SSH、模块化设计,易于扩展。
两种执行模式:Ad-Hoc(快速单命令执行)和Playbook(复杂任务编排)。
高效的工作流程:从Inventory管理到任务执行,Ansible提供完整的自动化方案。
最佳实践:合理配置SSH、使用Roles组织代码、结合Vault保护敏感数据。
无论是中小规模的基础设施管理,还是大规模的云环境自动化,Ansible都能提供稳定、高效的解决方案。掌握Ansible,意味着掌握更智能、更高效的运维方式,让IT管理变得更简单、更可控。