Vue接口平台学习十一——业务流测试
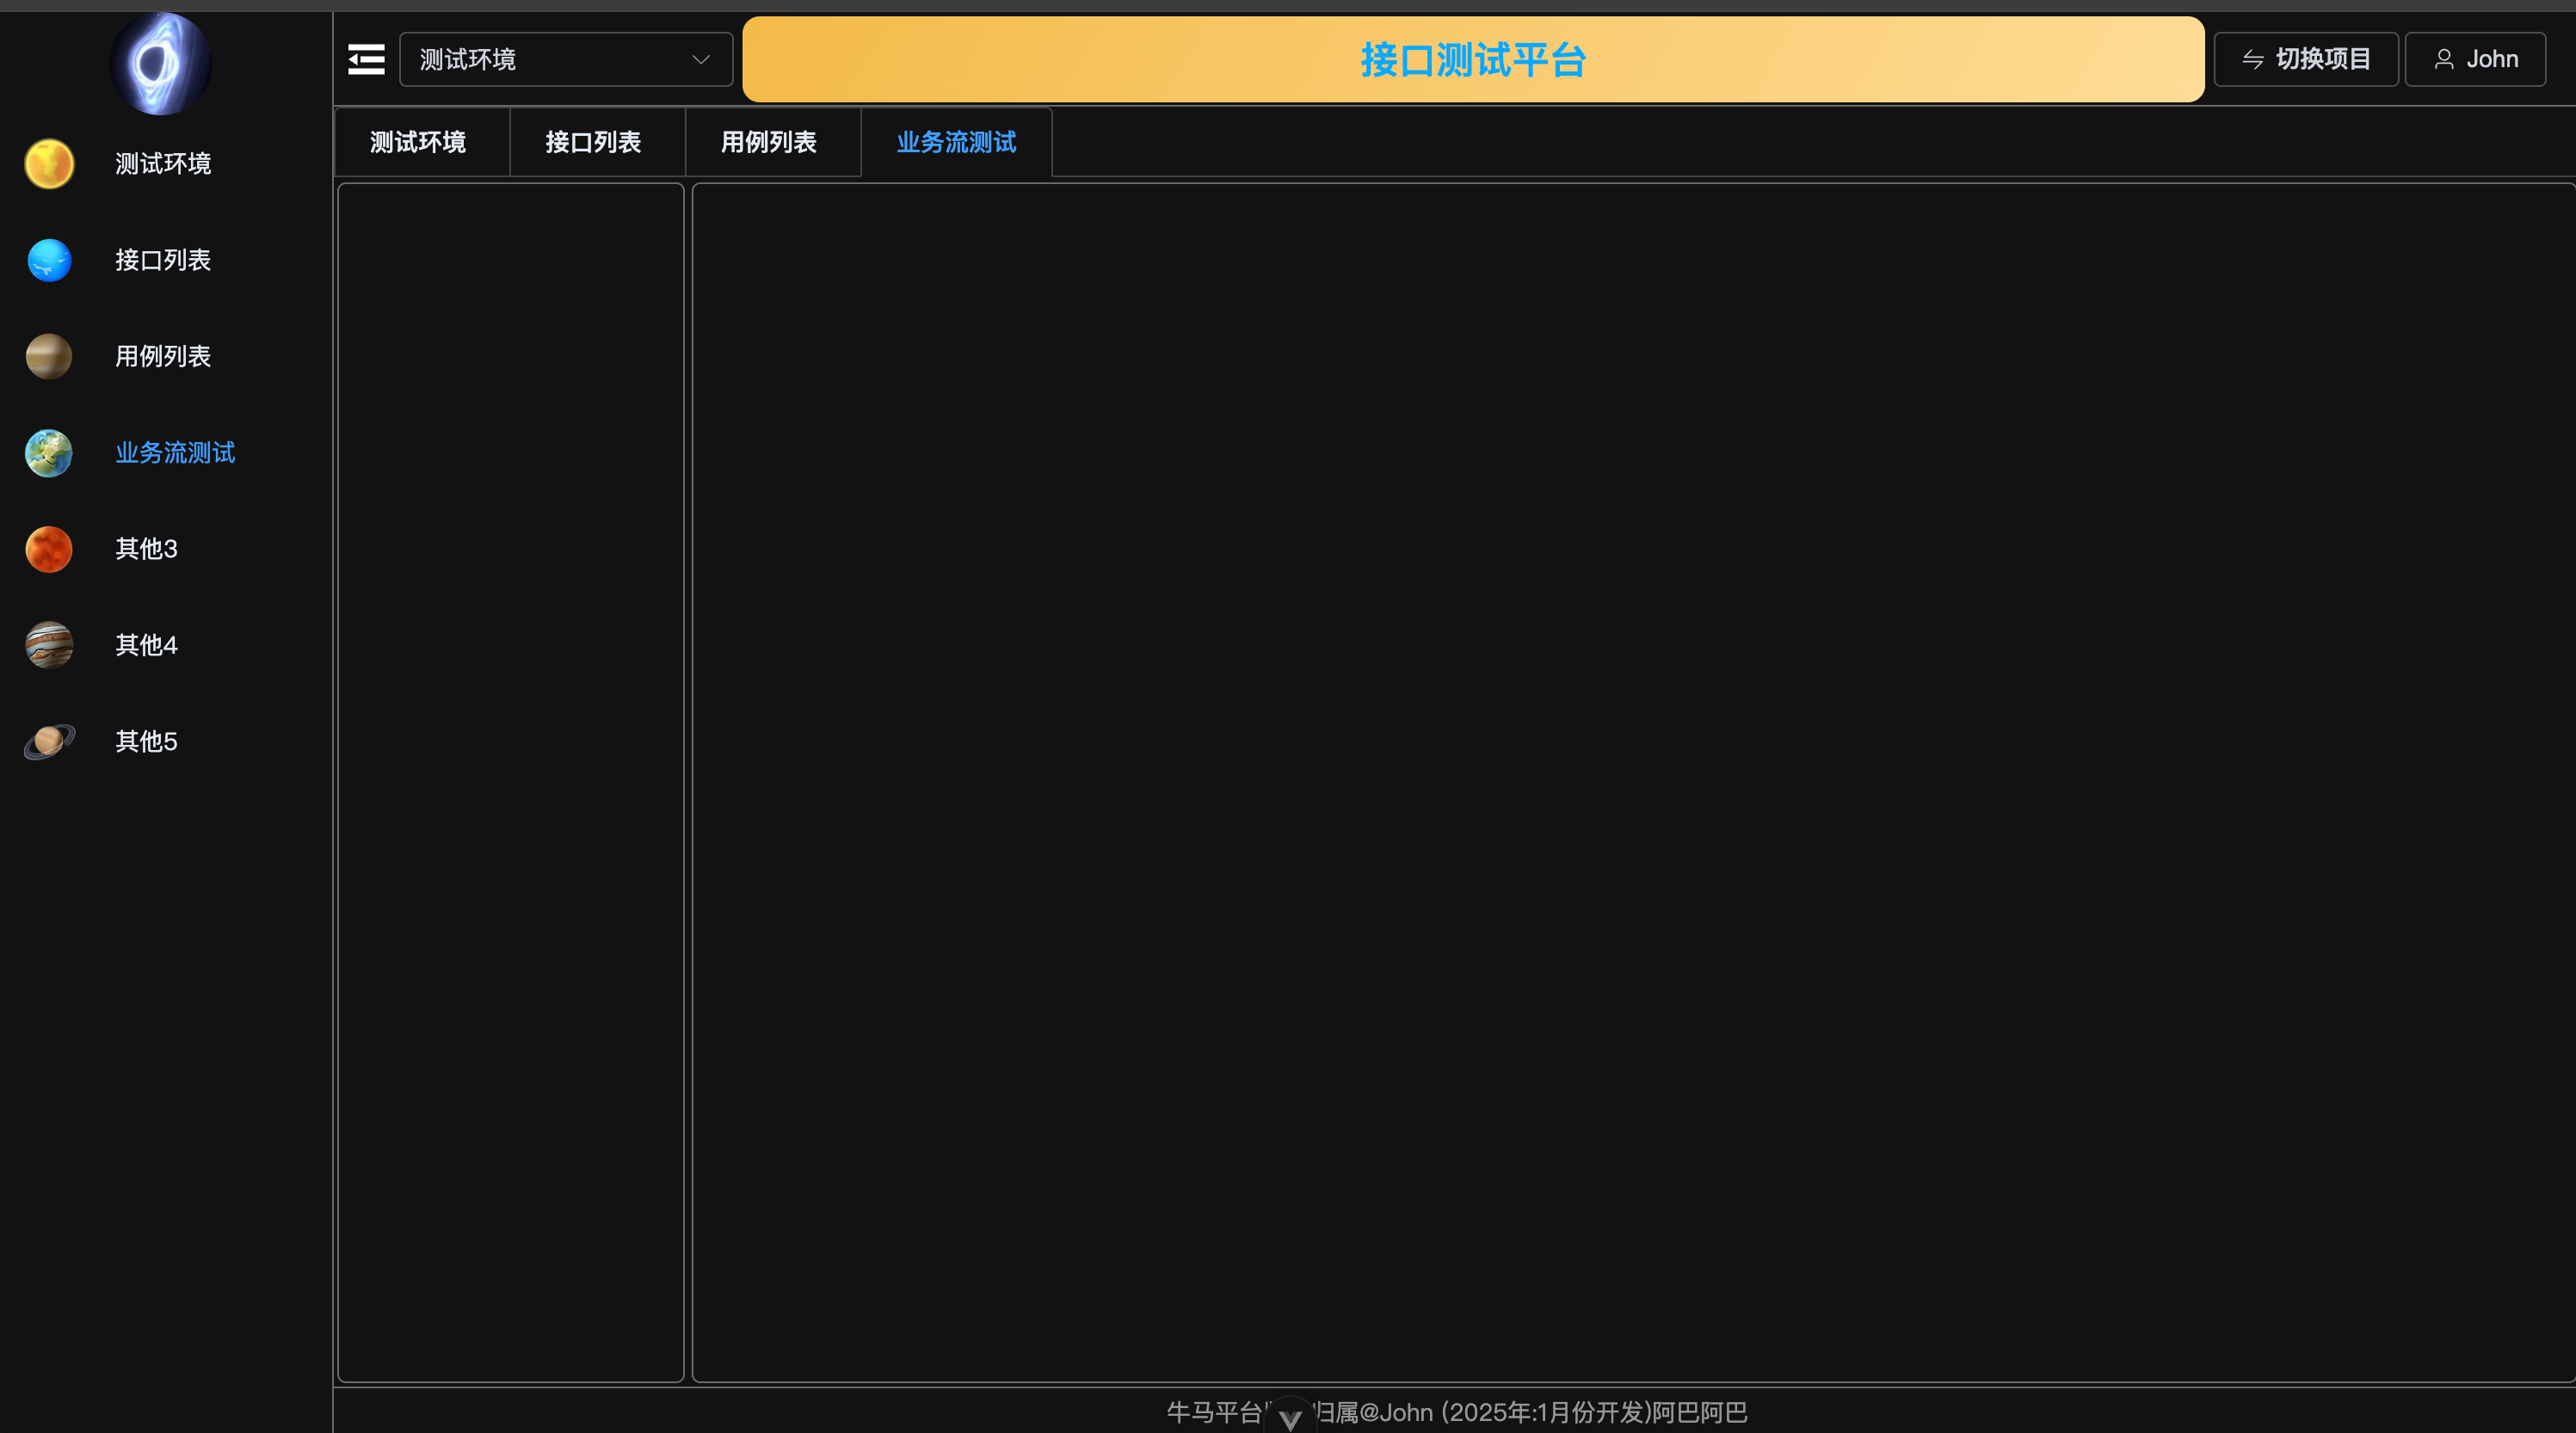
效果图及简单说明
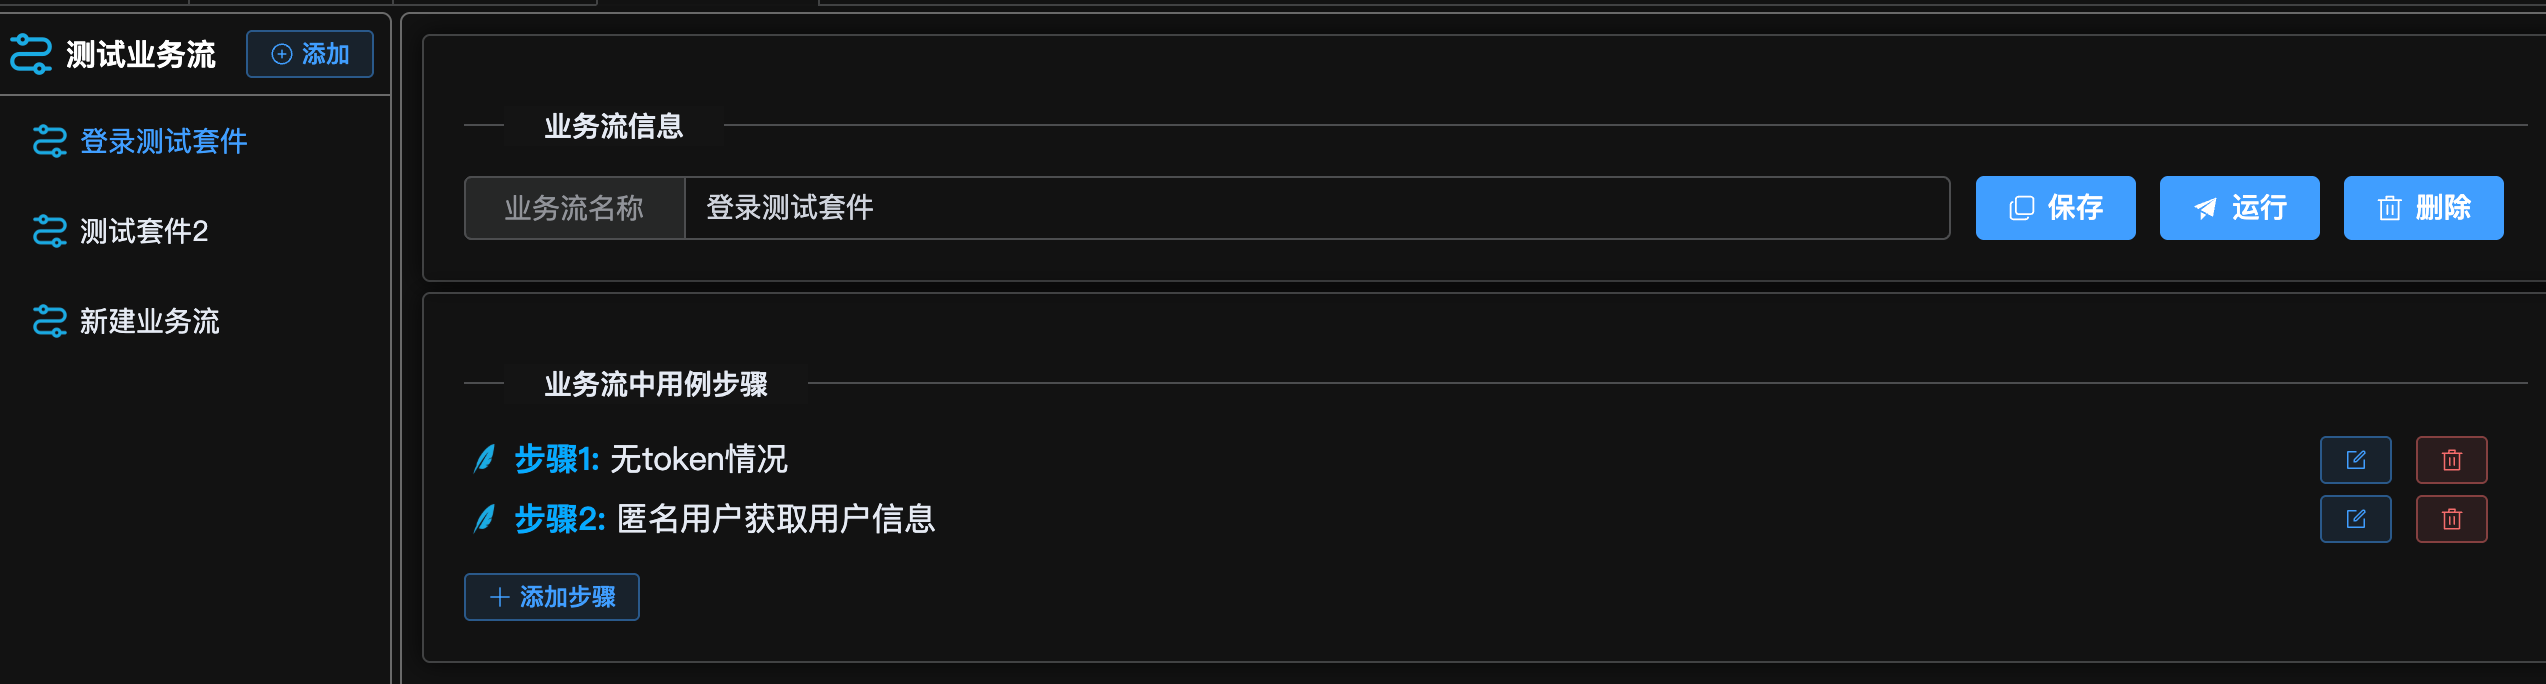
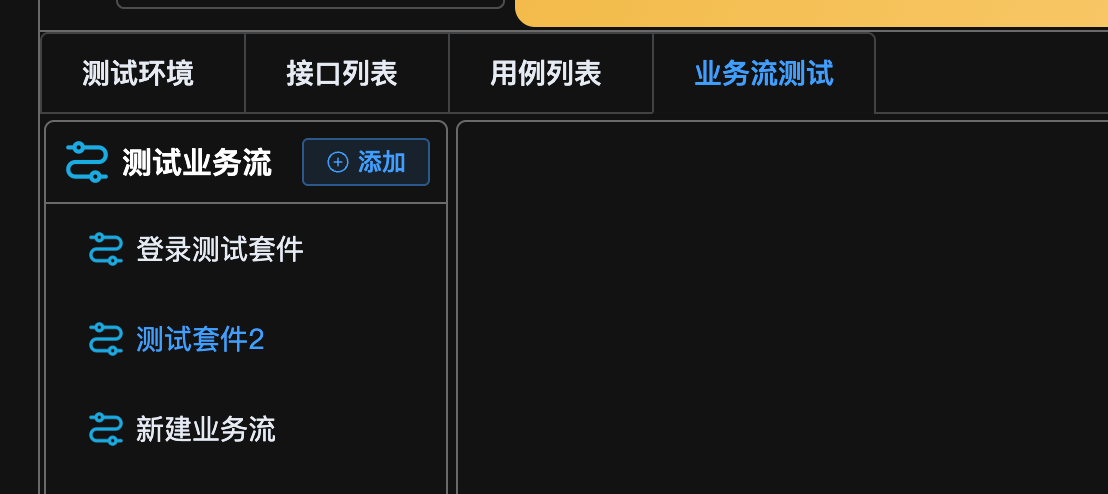
与之前的用例列表相似布局,也分左右,左边用于显示测试流程的名称,右边用于显示流程相关信息。
左侧点击添加,直接增加一个新的业务流。
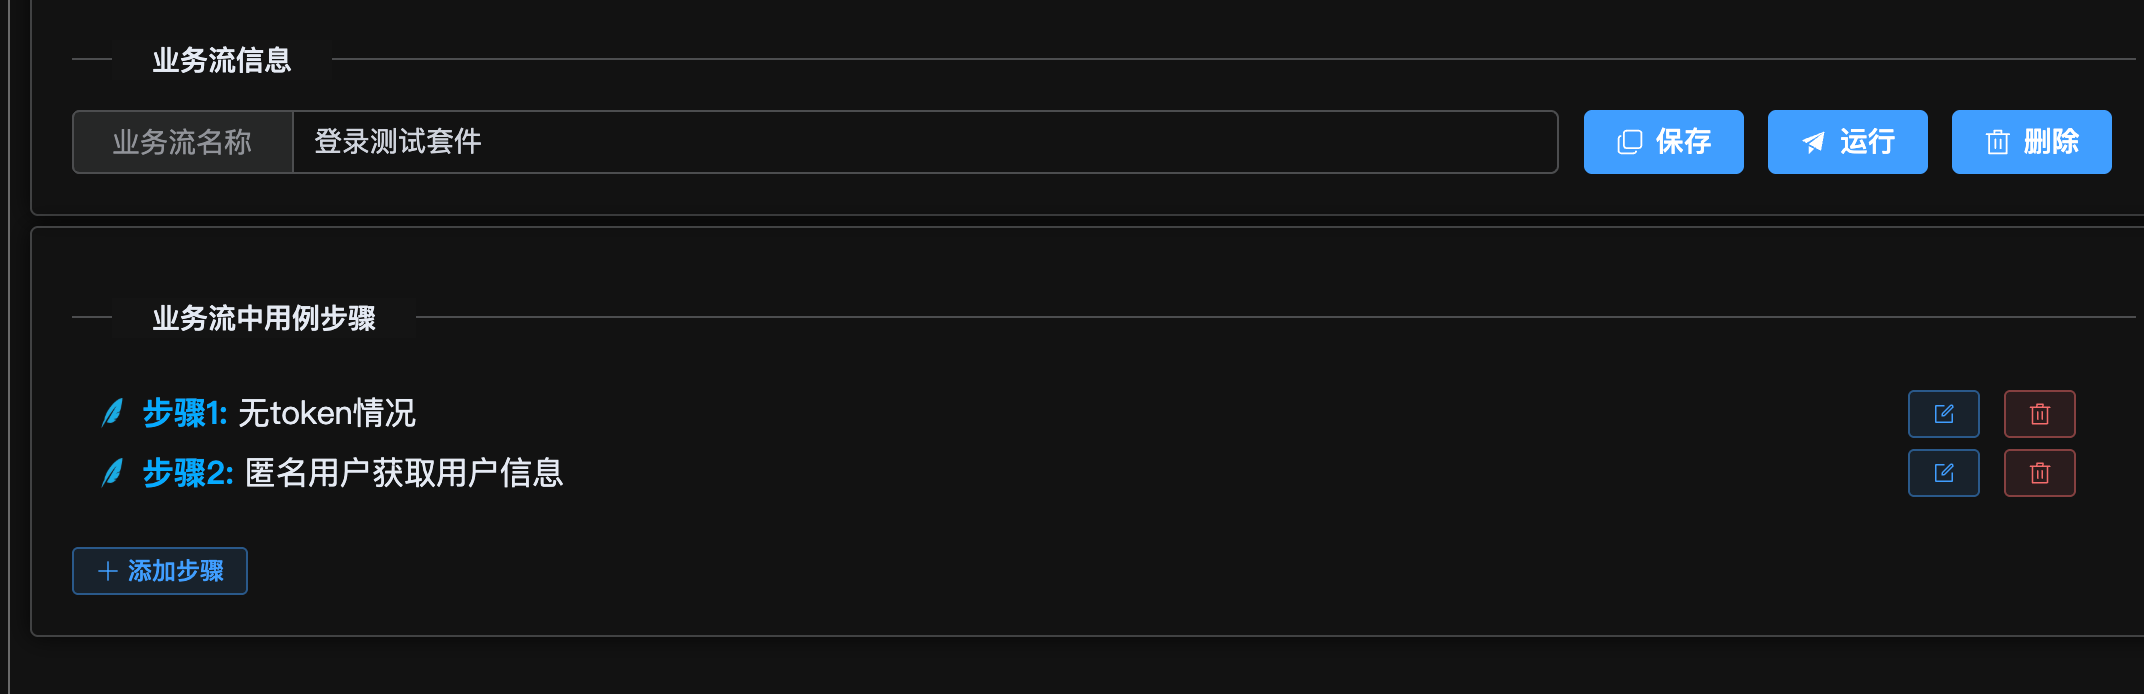
右侧是点击的业务流详情,展示名称,名称的编辑保存,业务流的运行。
右侧下方是业务流中的用例详情,可以添加,编辑和删除。还可以拖拽进行排序
内容实现
前置准备
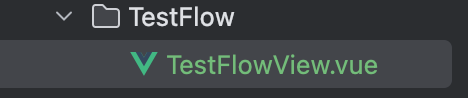
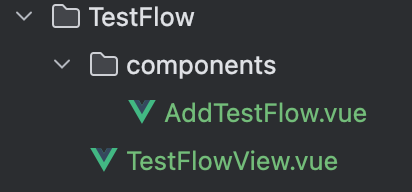
- 新建文件,
新建一个TestFlow文件夹用户存放相关代码,一个View主体文件
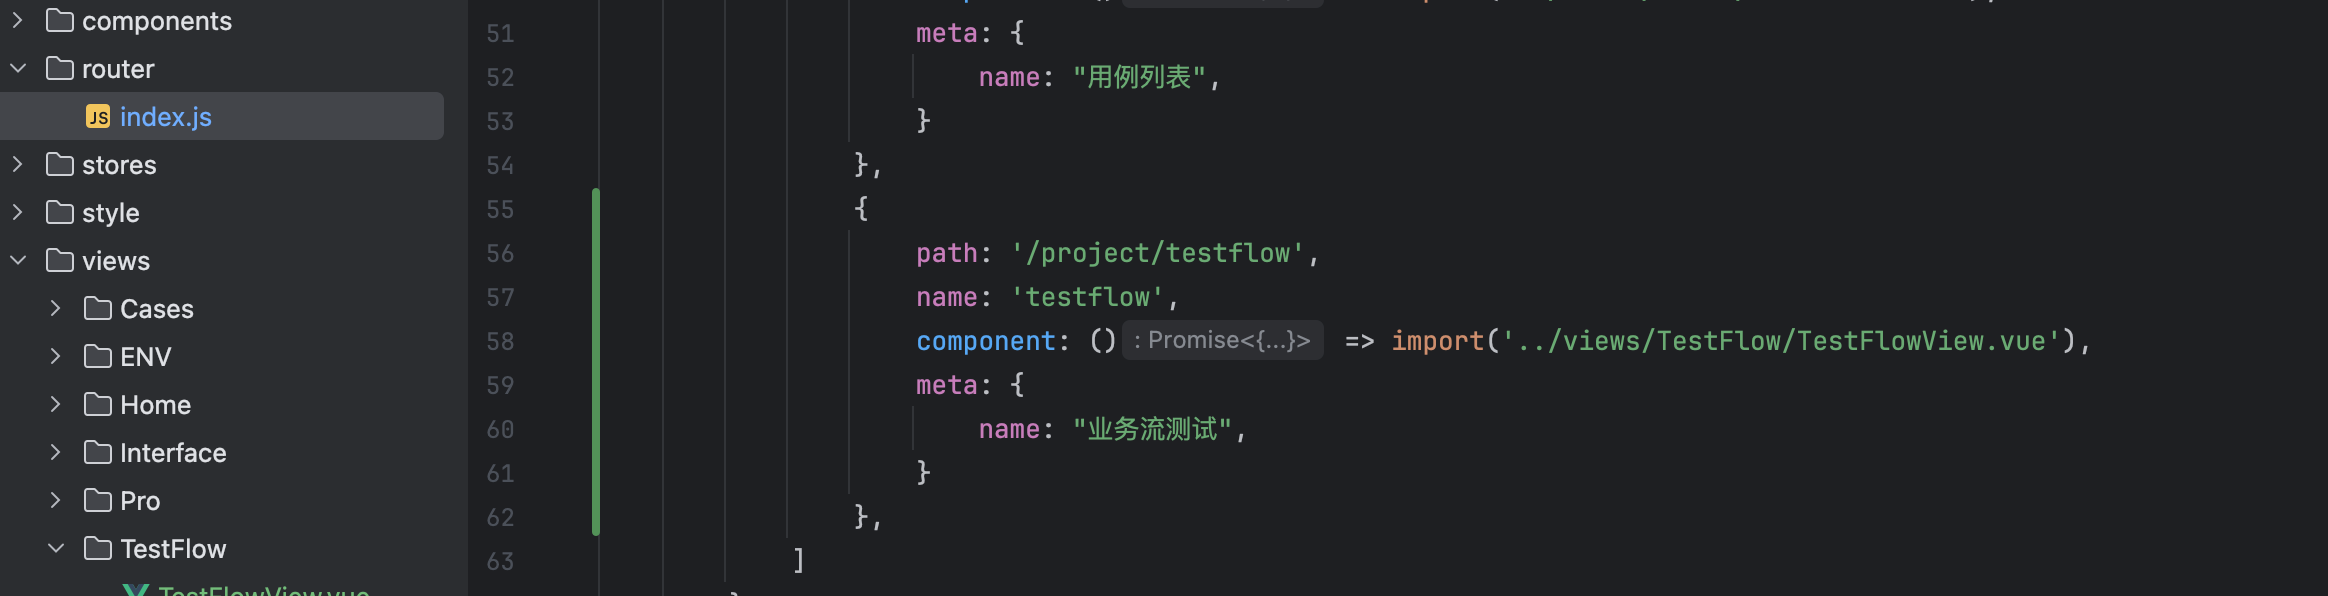
- 设置路由
在router的index文件里,配置路径和组件
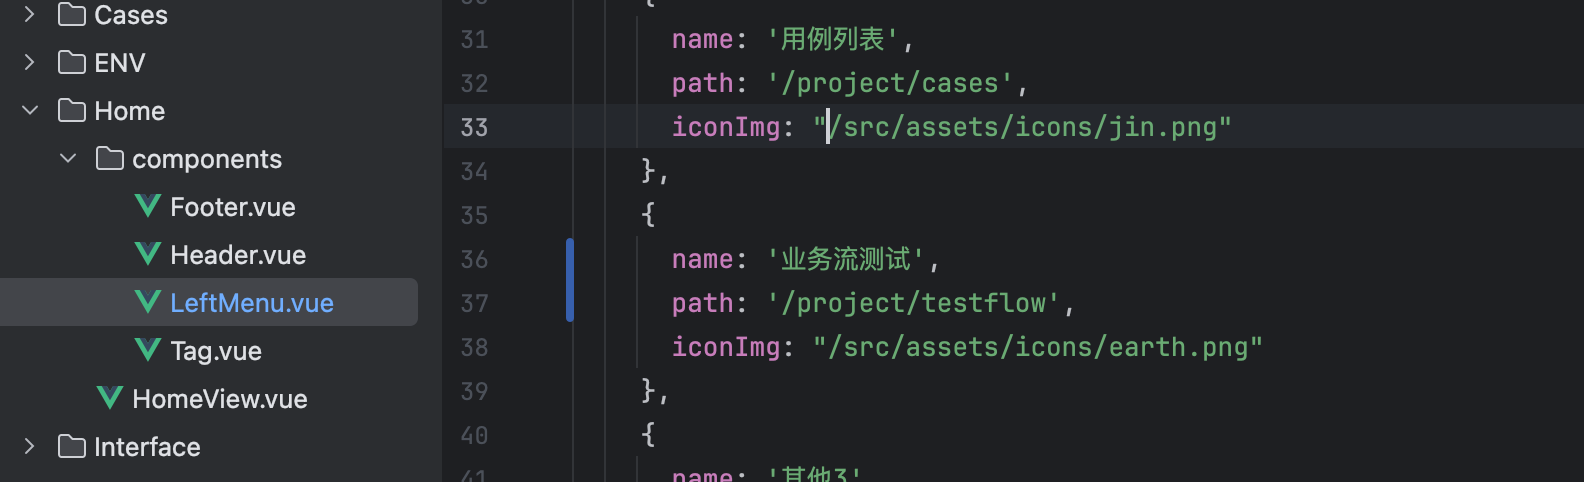
- 修改Home页面的菜单内容
将路径,名称修改为对应内容
最好前置准备,就可以开始页面内容编码了。
整体左右布局
<div class="main_box"><div class="left_box card"><div class="title_box"></div></div><div class="right_box card"></div></div>.main_box{height: calc(100% - 42px);display: flex;.left_box{width: 200px;}.right_box{flex: 1;padding: 10px;}}
左侧元素及功能
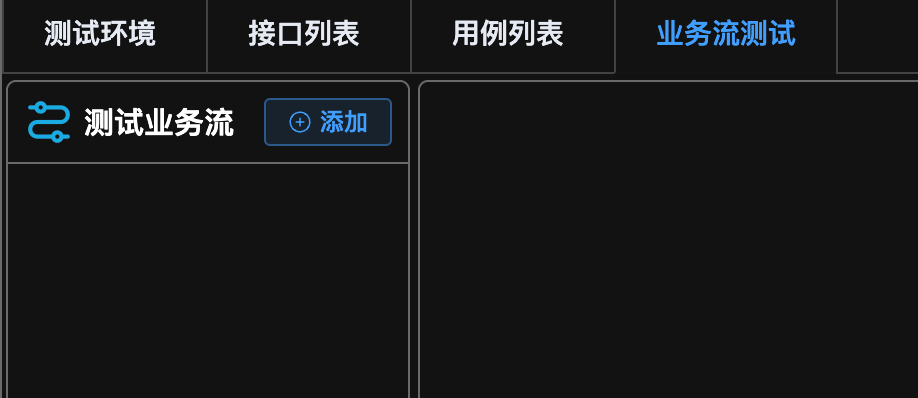
title展示
图标 + 名称 + 添加按钮
<div class="title_box"><img src="@/assets/icons/liucheng.png" width="25" alt=""><div class="name">测试业务流</div><el-button type="primary" plain @click="clickAddFlow" size="small" icon="CirclePlus">添加</el-button>
</div>
.left_box{width: 200px;.title_box{display: flex;height: 40px;//padding: 0 3px;align-items: center;justify-content: center;border-bottom: solid 1px #6a6a6a;.name{font-weight: bold;font-size: 15px;margin: 0 15px 0 5px;}}}
循环数据展示
api封装
- 在api/module创建测试业务流的接口封装FlowApi.js
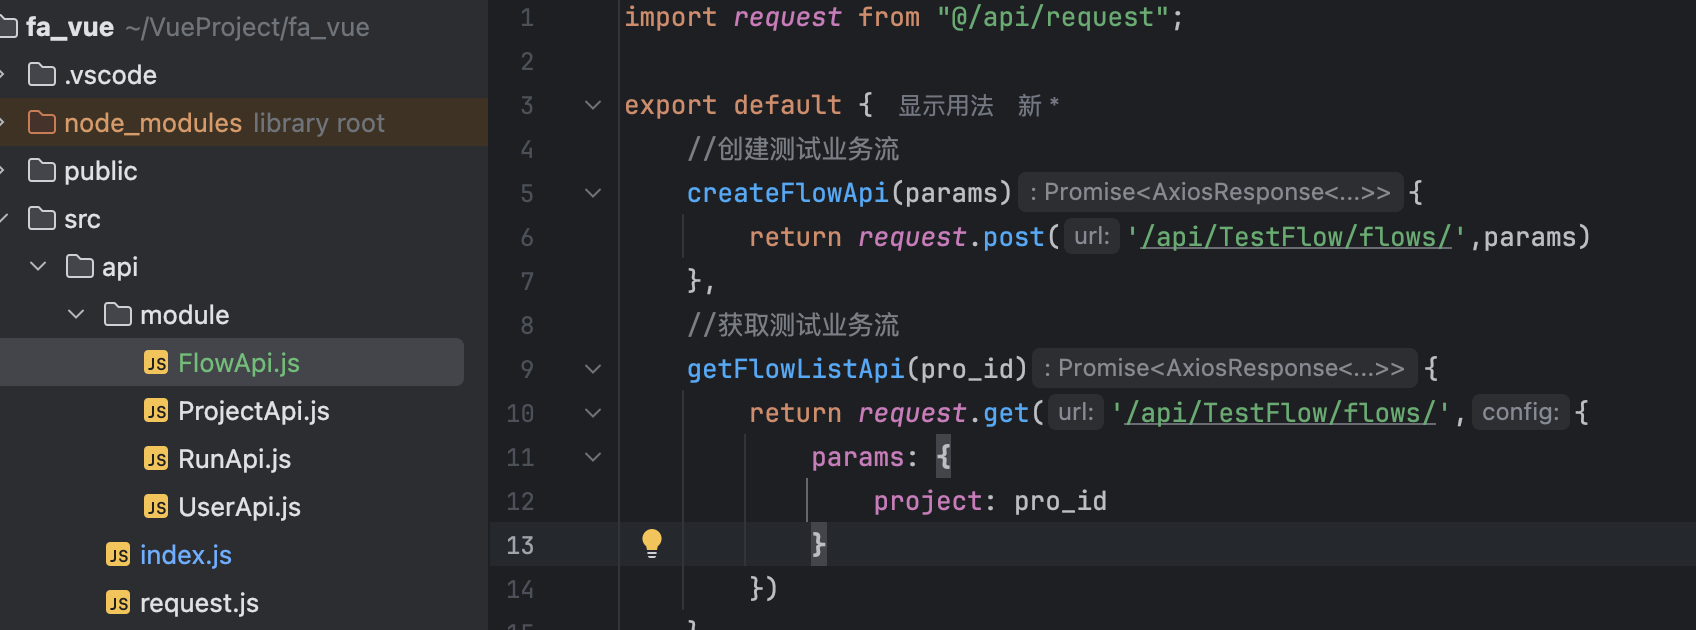
import request from "@/api/request";
export default {//创建测试业务流createFlowApi(params){return request.post('/api/TestFlow/flows/',params)},//获取测试业务流getFlowListApi(pro_id){return request.get('/api/TestFlow/flows/',{params: {project: pro_id}})},
}
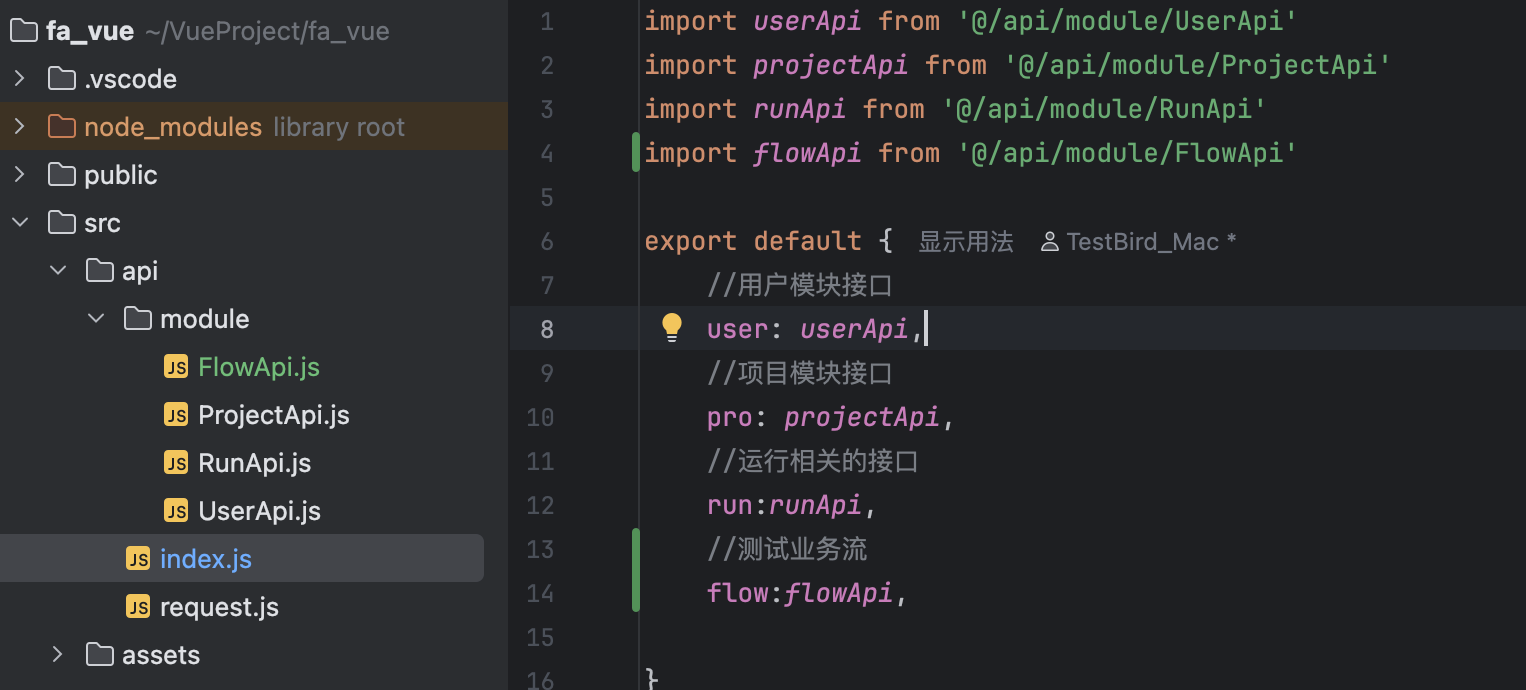
- 在index里增加映射
获取业务流数据
import {ProjectStore} from '@/stores/module/ProStore'
import http from '@/api/index'
import {ElNotification} from "element-plus";
import {onMounted, ref} from "vue";const pStore = ProjectStore()onMounted(()=>{getFlowList()
})let activeFlow = ref({id: "",name: "",
})const flowList = ref([])//获取测试业务流
async function getFlowList() {const response = await http.flow.getFlowListApi(pStore.pro.id)if (response.status === 200) {flowList.value = response.data}// console.log(response.data)
}
使用onMounted,当组件挂载完成后,会立即调用 getFlowList() 方法来获取测试业务流列表数据。用于进入页面,加在完成,就填充数据。
<el-menu :default-active="activeFlow.id+''"><el-menu-item @click="selectFlow(item)" :index="item.id.toString()" v-for="item in flowList"key="item.id"><img src="@/assets/icons/liucheng.png" width="20" alt=""><span style="margin-left: 5px">{{ item.name }}</span></el-menu-item>
</el-menu>
.el-menu{border: none;.el-menu-item{height: 45px;line-height: 45px;}}
通过v-for循环遍历flowList数据,获取每一个测试业务流数据,用于展示。
创建新的业务流
后端实现逻辑,创建只需要传名字和项目id,具体内容,可以创建成功后再编辑,名字可以固定为 “新建业务流”
// 创建测试业务流
async function clickAddFlow() {let params = {name: '新建业务流',project: pStore.pro.id}const response = await http.flow.createFlowApi(params)if (response.status === 201) {ElNotification({title: '业务流创建成功',type: 'success',})await getFlowList()}
}
右侧元素及功能
顶部名称展示
<!--右侧顶部--><el-card style="background: none;"><el-divider content-position="left">业务流信息</el-divider><div class="name_edit"><el-input v-model="activeFlow.name" placeholder="请输入业务流名称"><template #prepend>业务流名称</template></el-input><div class="btns"><el-button type="primary" @click="" icon="CopyDocument">保存</el-button><el-button type="primary" @click="" icon="Promotion">运行</el-button><el-button type="primary" @click="" icon="Delete">删除</el-button></div></div></el-card>
.right_box {flex: 1;padding: 10px;.name_edit{display: flex;.btns{width: 400px;text-align: center;}}}

数据绑定,在选中业务流时,将选择的值赋值给激活的业务楼,用于显示名称
//选中业务流
function selectFlow(item) {activeFlow.value = item
}
删除业务流
一个确认弹窗,确认后调删除接口,删除成功,重新获取业务流数据刷新页面显示。
//删除业务流
async function deleteFlow() {ElMessageBox.confirm('删除操作不可恢复,请确认是否要删除该业务流?','警告', {type: 'warning',confirmButtonText: '确认',cancelButtonText: '取消'}).then(async () => {const response = await http.flow.deleteFlowApi(activeFlow.value.id)if (response.status === 204) {ElNotification({title: '删除成功',type: 'success'})// 刷新页面数据await getFlowList()}})
}
修改业务流
排序,用例什么的都是单独的,这里修改更多是指修改一下业务流的名字。
给保存按钮绑定事件saveFlow,再写事件函数就行了。
// 保存业务流
async function saveFlow() {// console.log({...activeFlow.value})const response = await http.flow.updateFlowApi(activeFlow.value.id, {...activeFlow.value})if (response.status === 200) {ElNotification({title: '保存成功',type: 'success'})}
}
下方展示业务流包含的用例
获取业务流中所有用例展示
由于需要排序,选择使用拖拽组件来实现。介绍及使用链接放在下面了
拖拽组件使用
<!--右侧下方--><el-card style="background: none;margin-top: 5px;"><el-divider content-position="left">业务流中用例步骤</el-divider><draggable v-model="flowCaseList" item-key="id"chosen-class="dragging"class="item-list"ghost-class="ghost"><template #item="{ element }"><div class="drag-item"><div style="display: flex; align-items: center;"><img src="@/assets/icons/case.png" width="20" style="margin-right: 5px;" alt=""><span style="color: #00aaff;font-weight: bold;margin-right: 5px;">步骤{{ element.sort }}: </span><span>{{ element.icase.title }}</span></div><div style="margin-left: auto;margin-right: 20px"><el-button type="primary" plain @click="" size="small" icon="Edit"></el-button><el-button type="danger" plain @click="" size="small" icon="Delete"></el-button></div></div></template></draggable><el-button type="primary" plain @click="" size="small" icon="Plus" style="margin-top: 10px;">添加步骤</el-button></el-card>
// 业务流中用例数据
const flowCaseList = ref([])
......
//选中业务流
function selectFlow(item) {activeFlow.value = itemgetFlowCase()
}//获取业务流中的测试用例
async function getFlowCase() {const response = await http.flow.getFlowCaseListApi(activeFlow.value.id)if (response.status === 200) {flowCaseList.value = response.data}
}
.right_box {flex: 1;padding: 10px;.name_edit {display: flex;.btns {width: 400px;text-align: center;}}.dragging {background-color: #cccccc;border: 2px solid #F3BA48;border-radius: 5px;z-index: 1000; /* 提升拖拽元素的层级 */}.drag-item {margin-bottom: 5px;cursor: move;text-align: center;display: flex;align-items: center;}.item-list {padding: 10px;border-radius: 4px;}.ghost {background-color: #cccccc;border: 2px dashed #00acc1;border-radius: 5px;}}
获取数据,以及展示功能实现了。下面需要实添加,编辑用例,拖拽修改用例执行顺序,以及删除的功能。
向业务流添加用例
点击添加步骤,弹出所有用例弹窗,然后选择用例添加。
这里使用抽屉组件从侧边弹出,里面的内容额外新建一个组件来展示。
新建AddTestFlow.vue文件来写展示用例的那块内容。
<el-drawer v-model="addStepDlg" size="20%" style="padding: 0"><AddTestFlow :cases="flowCaseList" :flow="activeFlow" @refreshCase="getFlowCase(activeFlow.id)"></AddTestFlow></el-drawer>....
引用
import AddTestFlow from "@/views/TestFlow/components/AddTestFlow.vue";
这里传递了3块内容,是后面需要用到的。一个是选择的业务流(在新页面中接口请求需要用到id),一个是业务流中的用例数据(新页面中需要获取现有用例数量,添加时来确定排序),还有传递了一个方法,用来刷新业务流中的用例(新页面中添加成功,重新请求数据展示)。
<!-- AddTestFlow.vue -->
<template><el-tabs :stretch="true"><el-tab-pane label="项目接口"><el-scrollbar height="calc(100vh - 200px)"><el-tree ref="tree1" :data="interfaces1" show-checkbox node-key="id" :props="{children:'cases'}"highlight-current><template #default="{ node, data }"><div class="custom-tree-node"><div v-if="data.name" class="case_line"><img src="@/assets/icons/icon-api-a.png" :height="20" alt=""><b style="color: #00aaff;margin-left: 5px">{{ data.name }}</b></div><div v-if="data.title" class="case_line"><img src="@/assets/icons/case.png" alt="" :height="20"><span :title="data.title" class="truncate-text">{{ data.title }}</span></div></div></template></el-tree></el-scrollbar></el-tab-pane><el-tab-pane label="第三方接口">...<!-- 与第三方接口一样 --></el-tab-pane></el-tabs><div class="add-btns"><el-tooltip class="item" effect="dark" content="将选择的用例加入到业务流中" placement="top-start"><el-button type="primary" size="small" plain @click="addToFlow">确认添加</el-button></el-tooltip></div>
</template>
<script setup>
import {ProjectStore} from '@/stores/module/ProStore'
import {storeToRefs} from 'pinia'
import http from '@/api/index';
import {ref} from "vue";
import {ElNotification} from "element-plus";const proStore = ProjectStore()
const proStoreRef = storeToRefs(proStore)
const interfaces1 = proStoreRef.interfaces1
const interfaces2 = proStoreRef.interfaces2const tree1 = ref({})
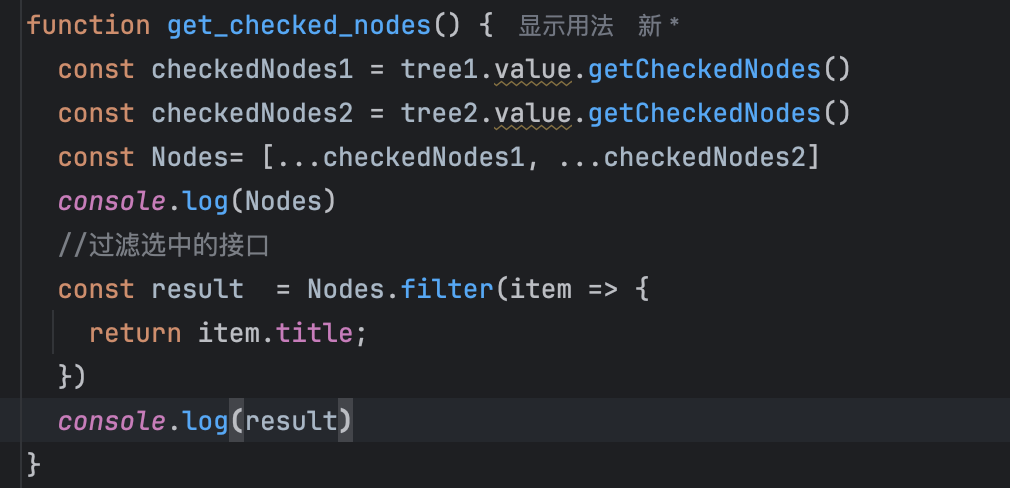
const tree2 = ref({})function get_checked_nodes() {const checkedNodes1 = tree1.value.getCheckedNodes()const checkedNodes2 = tree2.value.getCheckedNodes()const Nodes = [...checkedNodes1, ...checkedNodes2]// console.log(Nodes)//过滤选中的接口const result = Nodes.filter(item => {return item.title;})return result
}const props = defineProps(['cases', 'flow'])
const emit = defineEmits(['refreshCase'])async function addToFlow() {const checkedCase = get_checked_nodes();let orders = props.cases.length;for (let i = 0; i < checkedCase.length; i++) {const item = checkedCase[i];orders += 1;const data = {icase: item.id,scene: props.flow.id,sort: orders}const response = await http.flow.addFlowCaseApi(data)if (response.status === 201) {ElNotification({type: 'success',title: '添加成功',message: `用例-${item.title} 添加成功`,duration:2000})emit('refreshCase')}else{ElNotification({type: 'error',title: '添加失败',message: `用例-${item.title} 添加失败`,duration:2000})}}
}
</script>
<style scoped lang="scss">
.case_line {display: flex;align-items: center;
}.truncate-text {display: inline-block;max-width: 80%; /* 根据实际情况调整最大宽度 */white-space: nowrap;overflow: hidden;text-overflow: ellipsis;
}
</style>
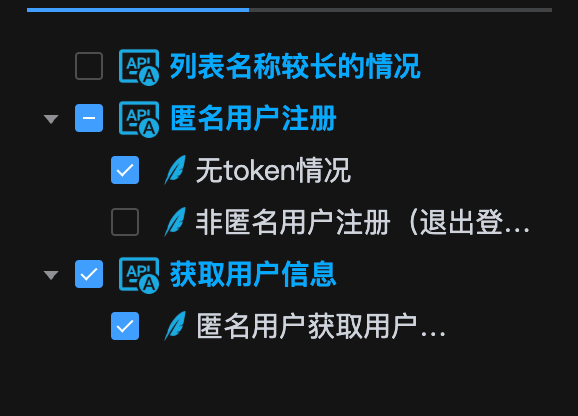
简单说明下代码。使用el-tabs显示选择项目接口和三方接口,stretch="true"可以撑开占满整个宽度

里面内容使用el-tree来展示
el-tree文档
需要展示的interface的格式如下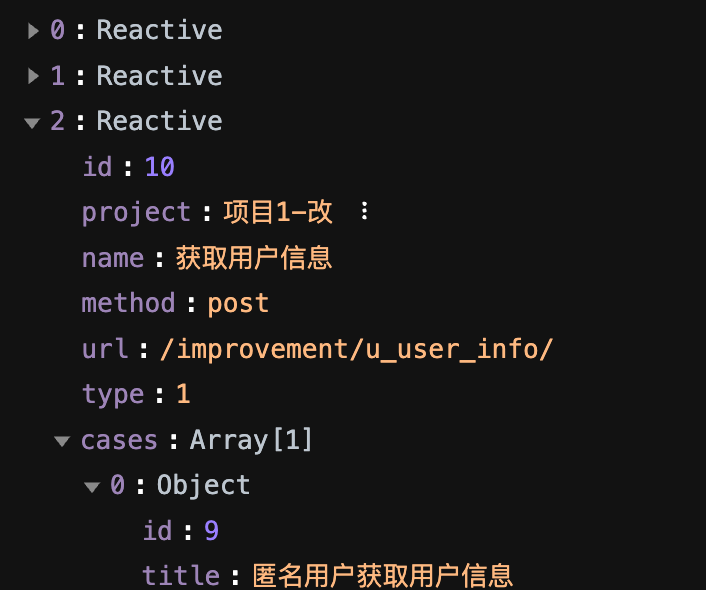
所以将tree props的children参数设置成了cases。
然后就是勾选用例,添加到业务流。
特殊情况:当一个接口下只有一个用例时,选择了该用例,这个接口也被勾选上了,所以需要进行排除。
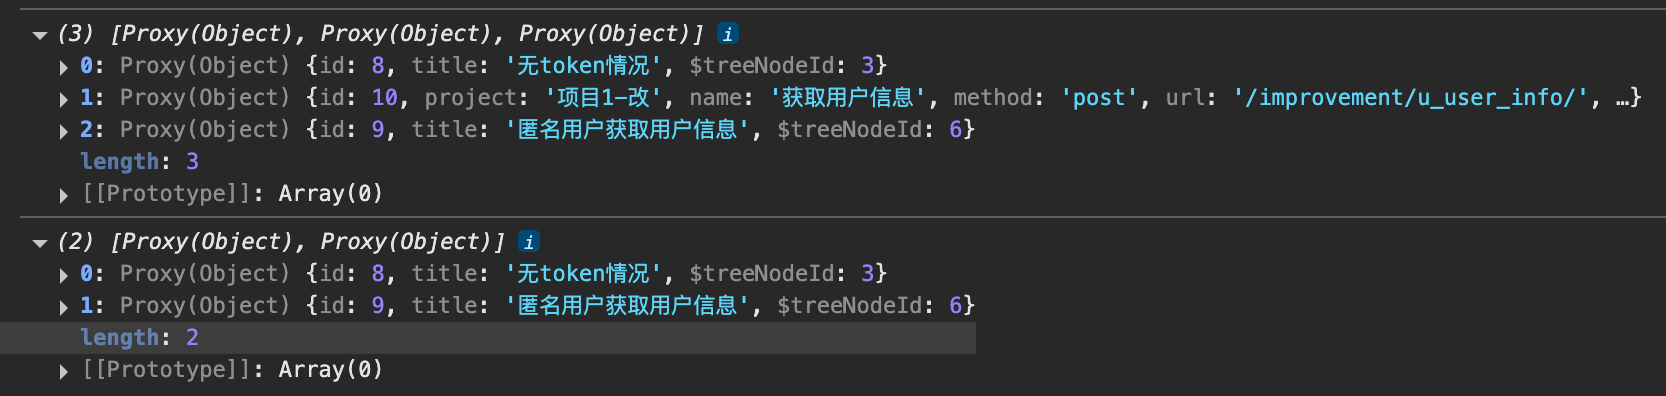
然后就将过滤后的数据循环传给向业务流添加用例的接口进行添加。用例的顺序就用到了组件传递orders = props.cases.length; 业务流的id也是props.flow.id,然后添加成功,就刷新一下业务流的用例,也用到了组件传递过来的方法emit('refreshCase')。到这,添加用例就成功了。
从业务流中删除用例
回到TestFlowView.vue中,对删除按钮进行事件绑定,然后传id,调用接口就行。
<el-button type="danger" plain @click="deleteFlowCase(element.id)" size="small" icon="Delete"></el-button>
// 删除业务流中的测试用例
async function deleteFlowCase(id) {const response = await http.flow.deleteFlowCaseApi(id)if (response.status === 204) {ElNotification({title: '删除成功',type: 'success'})await getFlowCase()}
}
编辑业务流中的用例
复用之前的测试用例组件,没有什么新东西。
<!-- 编辑测试用例的弹窗--><el-drawer v-model="editStepDlg" size="40%" style="padding: 0"><CaseEditor :case_id="editCaseid"></CaseEditor></el-drawer>
// 编辑测试用例
const editCaseid = ref(null)
const editStepDlg = ref(false)async function clickEditCase(case_id) {// console.log(case_id)editCaseid.value = case_ideditStepDlg.value = true
}
然后给编辑用例按钮绑定事件
<el-button type="primary" plain @click="clickEditCase(element.icase.id)" size="small" icon="Edit"></el-button>
编辑业务流中用例执行顺序
这块内容比较复杂。在这之前,先做个小优化。
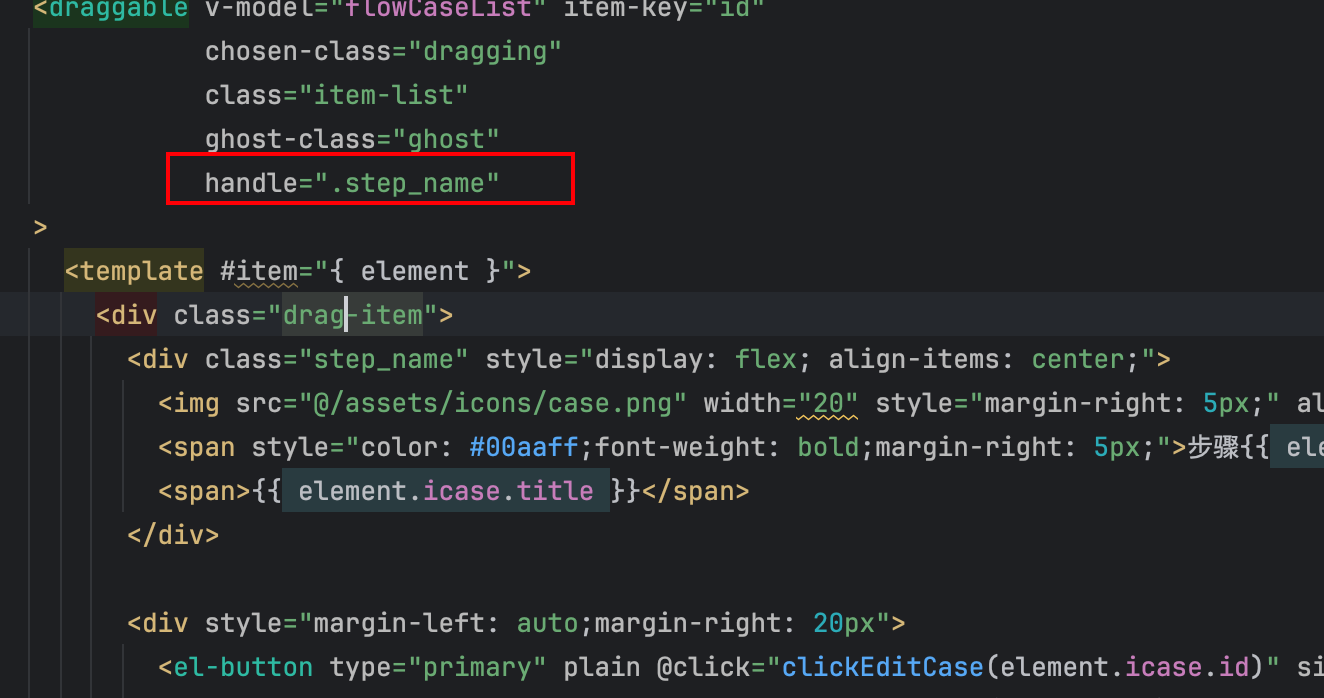
修改一下拖拽生效区域,使得只有在用例名那里才能拖拽。避免每次点击编辑/删除 按钮时都出发拖拽功能
调整排序触发的操作,可以使用拖拽组件的sort方法

- 绑定sort函数
<draggable v-model="flowCaseList" item-key="id"chosen-class="dragging"class="item-list"ghost-class="ghost"handle=".step_name"@sort="updateSort">
- 定义函数
async function updateSort() {}
- 调整顺序后需要获取最新的顺序,按照接口需要的
list[{id,sort}]格式请求接口
const newflowCaseList = flowCaseList.value.map((item, index) => {return {...item, sort: index + 1};});//console.log(newflowCaseList)const updatedList = newflowCaseList.map((item) => ({id: item.id,sort: item.sort}));//console.log(updatedList)//得到数据如下//[{"id": 21,"sort": 1},{"id": 20,"sort": 2},{"id": 19,"sort": 3}]
这就得到了最新的用例顺序了。然后发起请求
- 请求更改顺序的接口
const response = await http.flow.updateFlowCaseOrderApi(updatedList)if (response.status === 200) {ElNotification({title: '排序更新成功',type: 'success',duration: 2000})await getFlowCase()}
完整功能:
async function updateSort() {const newflowCaseList = flowCaseList.value.map((item, index) => {return {...item, sort: index + 1};});console.log(newflowCaseList)const updatedList = newflowCaseList.map((item) => ({id: item.id,sort: item.sort}));console.log(updatedList)const response = await http.flow.updateFlowCaseOrderApi(updatedList)if (response.status === 200) {ElNotification({title: '排序更新成功',type: 'success',duration: 2000})await getFlowCase()}
}
到此排序功能也就完成了。
运行测试业务流
代码及简单说明
<!-- 显示运行结果的组件--><el-drawer v-model="resultDlg" title="运行结果" size="40%"><RunFlowResult :results="runResult"></RunFlowResult></el-drawer>
同样,使用抽屉组件弹窗展示结果。里面内容创建新的组件来展示。
const runResult = ref([])
const resultDlg = ref(false)// 运行业务流
async function runFlow() {const loadingInstance = ElLoading.service({fullscreen: true, text: '正在运行中...'})if (pStore.env) {const params = {env: pStore.env,scene: activeFlow.value.id}console.log(params)const response = await http.run.runFlowApi(params)if (response.status === 200) {ElNotification({title: '业务流运行完成',type: 'success',duration: 2000})runResult.value = response.dataresultDlg.value = true}}else{ElMessage.error('请选择执行的测试环境')}loadingInstance.close()
}
简单说明:点击运行后,先loading提示,禁止其他操作。然后判断选择了测试环境,再调用接口。否则提示选择环境。调用成功后,将组件弹出。并把结果传给RunFlowResult这个组件。
<!--RunFlowResult.vue-->
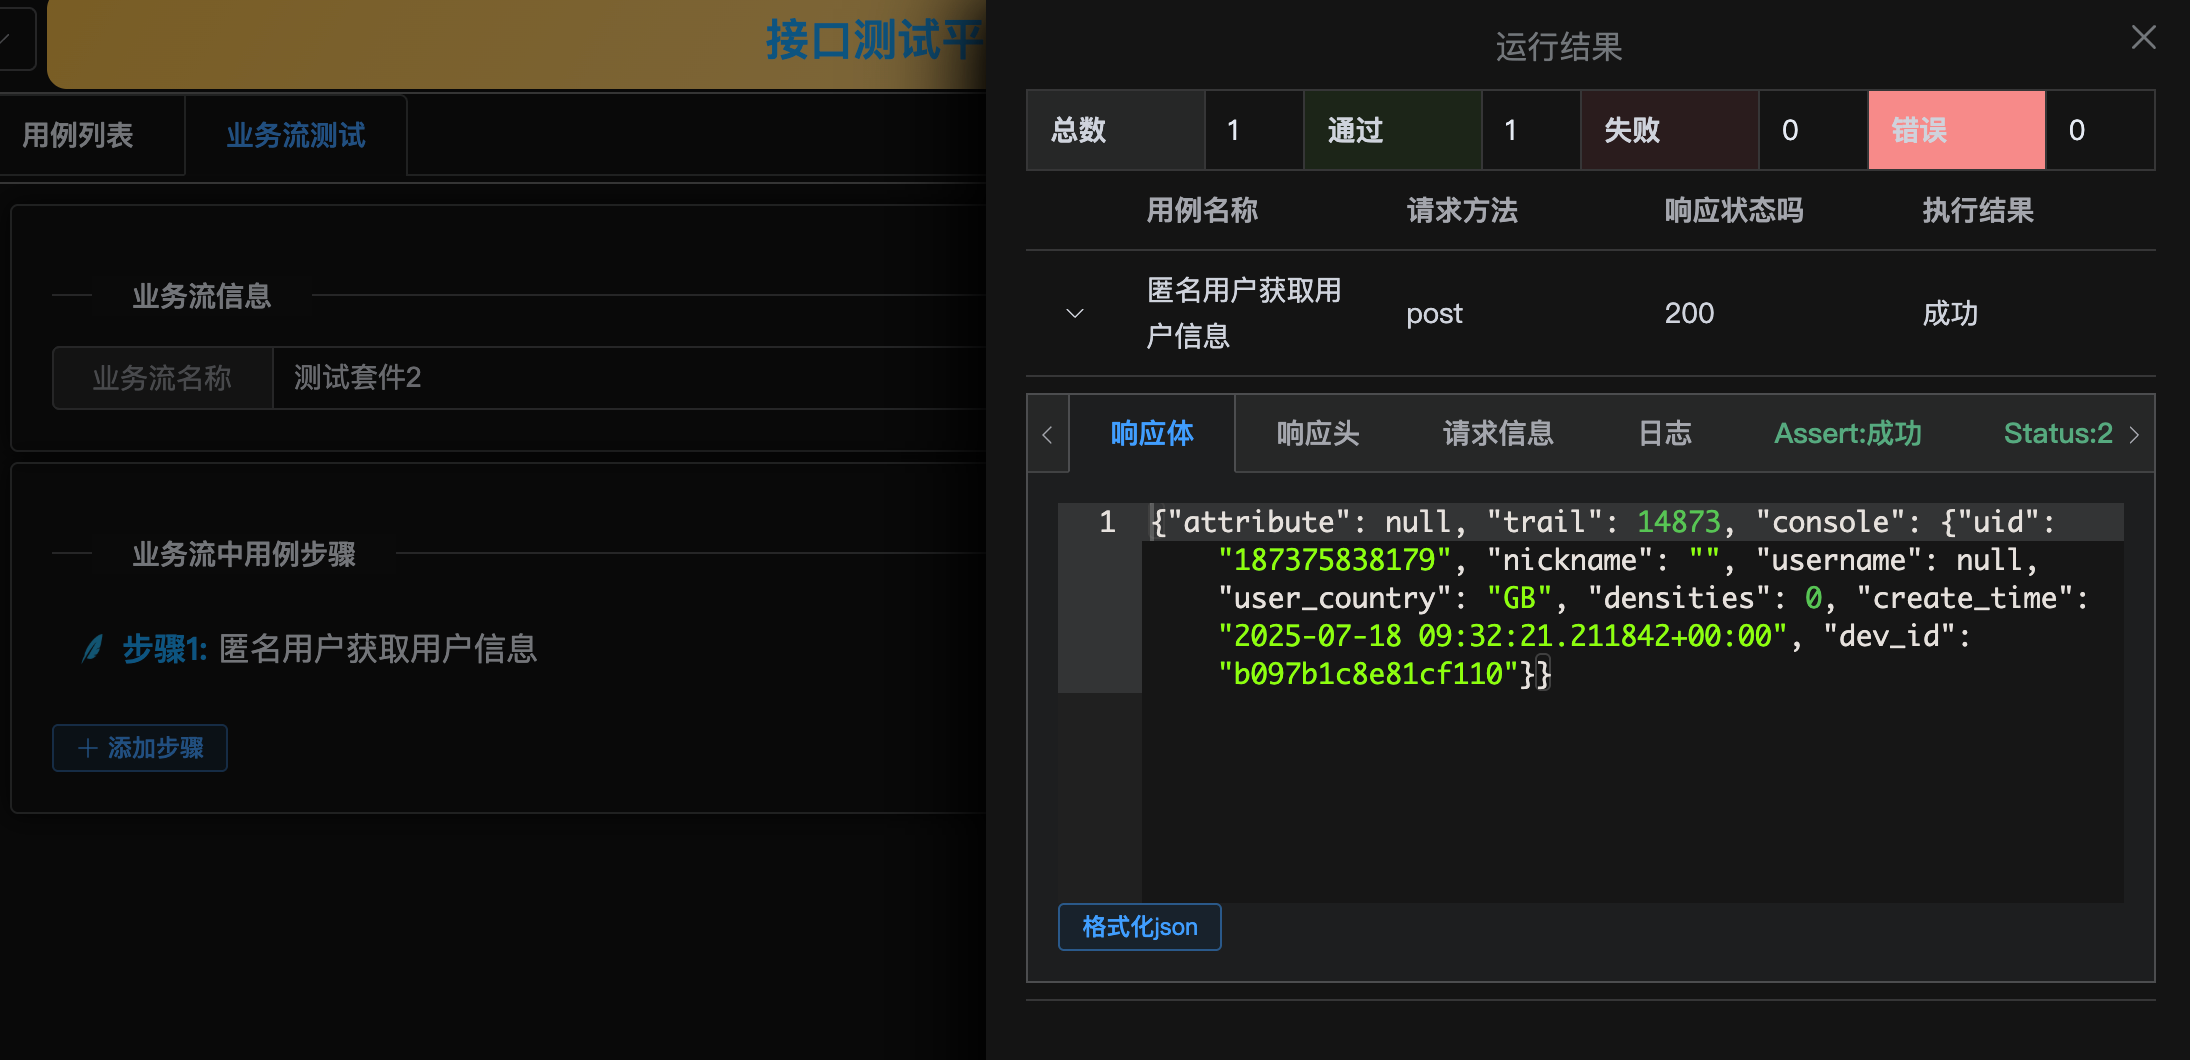
<template><el-descriptions border :column="4"><el-descriptions-item label="总数">{{ props.results.all }}</el-descriptions-item><el-descriptions-item label="通过" label-class-name="success">{{ props.results.success }}</el-descriptions-item><el-descriptions-item label="失败" label-class-name="fail">{{ props.results.fail }}</el-descriptions-item><el-descriptions-item label="错误" label-class-name="error">{{ props.results.error }}</el-descriptions-item></el-descriptions><el-table :data="props.results.cases" style="width: 100%"><el-table-column type="expand"><template #default="props"><Result :result='props.row'></Result></template></el-table-column><el-table-column label="用例名称" prop="name"></el-table-column><el-table-column label="请求方法" prop="method"></el-table-column><el-table-column label="响应状态吗" prop="status_code"></el-table-column><el-table-column label="执行结果" prop="status"></el-table-column></el-table></template><script setup>
import {defineProps} from 'vue'
import Result from "@/components/Result.vue";const props = defineProps({results: {}
})console.log(props.results)</script><style scoped lang="scss">
:deep(.success) {background: var(--el-color-success-light-9) !important;
}
:deep(.fail) {background: var(--el-color-danger-light-9) !important;
}
:deep(.error) {background: var(--el-color-error-dark-2) !important;
}
</style>
这个组件对之前的 Result 做了二次封装。增加了一些内容,与之前单用例不同的是,业务流含有多个用例。所以使用table依次传入
<!-- 测试用例运行的结果 --><el-drawer v-model="isShowDrawer" size="50%"><template #header><b>运行结果</b></template><template #default><Result :result='responseData'></Result></template></el-drawer>
<el-table :data="props.results.cases" style="width: 100%"><el-table-column type="expand"><template #default="props"><Result :result='props.row'></Result></template></el-table-column><el-table-column label="用例名称" prop="name"></el-table-column><el-table-column label="请求方法" prop="method"></el-table-column><el-table-column label="响应状态吗" prop="status_code"></el-table-column><el-table-column label="执行结果" prop="status"></el-table-column></el-table>运行结果截图
总结
到此,比较复杂的业务流前端逻辑终于完了///
主要在于用例添加及排序这块。
拖拽组件使用