Linux操作系统网络服务模块一DHCP服务概述
前言:
在Linux网络服务体系架构中,DHCP(Dynamic Host Configuration Protocol) 作为核心服务之一,承担着局域网内主机网络参数动态分配的关键任务。其设计初衷是解决传统手动配置IP地址的效率瓶颈与错误风险——通过C/S(客户端/服务器)模型实现IP地址、子网掩码、网关及DNS等配置的自动化分发。随着网络规模扩大与终端设备激增,DHCP的集中化管理能力显著提升了IP资源的利用效率,同时避免了地址冲突,成为企业网络、云环境及家庭局域网不可或缺的基础服务。本模块将系统剖析DHCP在Linux环境中的工作原理、配置实践及故障排查策略,为构建高效可靠的网络运维体系奠定基础。
目录
一、 概述
DHCP协议
DHCP的优势
DHCP的分配方式
应用场景
注意
工作流程
何时更新租约
当客户端重启后
客户端类型
二、DCHP安装与配置
部署
基础环境
安装DHCP软件包
配置
三、企业级实战
实战拓扑:
实战要求
手动配置实验
实验拓扑结构:
1.虚拟机配置
2.初始化部署
3.安装DHCP服务
4.配置DHCP服务:
5. 路由器配置
6.实战验证
四、常见故障
总结
一、 概述
DHCP协议
Dynamic Host Configuration Protocol ,动态主机配置协议
作用:动态的进行IP地址分配
服务端的监听端口 67/udp
客户端监听端口 68/udp
网络架构 C/S:client/server
DHCP的优势
-
提高配置效率
-
减少配置错误
DHCP的分配方式
-
手动分配:固定不变,工程师进行地址绑定
-
自动分配:但是不进行地址回收
-
动态分配:进行地址回收
应用场景
-
更加准确的配置网络参数的情况下
-
网络环境较大时
注意
同一个网络环境下不允许存在多个DHCP服务器
工作流程
1、当客户端配置为自动获得IP地址时,客户端发送discover广播包(发现),用来寻找网络中的DHCP服务器
2、假如网络存在DHCP服务器,此时服务器给出回应,向客户端发送Offer广播包(邀约),携带了IP地址的信息,询问客户端是否使用该IP地址
3、假如客户端使用上述IP地址,向服务端发送Request广播包(请求),并将请求信息写入到该包内。
4、服务端向客户端发送Ack广播包(确认),并确定IP地址的租约期。
何时更新租约
当租约期达到50%时
当客户端重启后
客户端直接发送Request包:
A、IP地址空闲 服务端直接回应Ack
B、IP地址被占用 服务端回应noAck 客户端需要将上述“工作流程”完整执行一遍
客户端类型
Linux DHCP服务器不存在,没有IP
Windows DHCP不存在,会启用备用IP地址 169.254.0.0/16 ~ 168.254.255.255/16
二、DCHP安装与配置
部署
基础环境
配置yum源
关闭防火墙及SElinux
[root@dhcpserver ~]# systemctl stop firewalld && systemctl disable firewalld查看SElinux状态
[root@dhcpserver ~]# getenforce###设置宽容模式[root@dhcpserver ~]# setenforce 0###关闭SElinux,重启才能生效[root@dhcpserver ~]# vim /etc/selinux/configSELINUX=enforcing 改为 SELINUX=disabled配置静态IP
###关闭网络图形化工具[root@dhcpserver ~]# systemctl stop NetworkManager ; systemctl disable NetworkManager[root@dhcpserver ~]# cd /etc/sysconfig/network-scripts/[root@dhcpserver ~]# cp ifcfg-ens33 ifcfg-ens34[root@dhcpserver ~]# cat ifcfg-ens34TYPE=EthernetBOOTPROTO=staticNAME=ens34DEVICE=ens34ONBOOT=yesIPADDR=192.168.100.254PREFIX=24[root@dhcpserver ~]# systemctl restart network安装DHCP软件包
[root@localhost ~]# yum install -y dhcp-server配置
配置文件存储路径 /etc/dhcp
默认配置文件副本路径 /usr/share/doc/dhcp-4.2.5/
数据文件存储路径 /var/lib/dhcpd
核心配置文件 /etc/dhcp/dhcpd.conf
[root@dhcpserver ~]# cp /usr/share/doc/dhcp-4.2.5/dhcpd.conf.example /etc/dhcp/[root@dhcpserver ~]# cd /etc/dhcp/[root@dhcpserver ~]# cp dhcpd.conf.example dhcpd.conf[root@dhcpserver ~]# cat dhcpd.conf# dhcpd.conf## Sample configuration file for ISC dhcpd## option definitions common to all supported networks...option domain-name "example.org"; ##指定DNS服务器域名option domain-name-servers ns1.example.org, ns2.example.org; ##指定DNS服务器域名default-lease-time 600; ##默认租约。单位smax-lease-time 7200; ##最大租约时间,单位s# Use this to enble / disable dynamic dns updates globally.#ddns-update-style none;# If this DHCP server is the official DHCP server for the local# network, the authoritative directive should be uncommented.#authoritative;# Use this to send dhcp log messages to a different log file (you also# have to hack syslog.conf to complete the redirection).log-facility local7; ##日志输出通道,交给syslog服务管理# No service will be given on this subnet, but declaring it helps the # DHCP server to understand the network topology.#######每一个subnet都是一个分配地址段的定义######################subnet 10.152.187.0 netmask 255.255.255.0 {}# This is a very basic subnet declaration.subnet 10.254.239.0 netmask 255.255.255.224 {range 10.254.239.10 10.254.239.20;option routers rtr-239-0-1.example.org, rtr-239-0-2.example.org;}# This declaration allows BOOTP clients to get dynamic addresses,# which we don't really recommend.subnet 10.254.239.32 netmask 255.255.255.224 {range dynamic-bootp 10.254.239.40 10.254.239.60;option broadcast-address 10.254.239.31;option routers rtr-239-32-1.example.org;}# A slightly different configuration for an internal subnet.subnet 10.5.5.0 netmask 255.255.255.224 {range 10.5.5.26 10.5.5.30; ##定义分配地址段的地址范围option domain-name-servers ns1.internal.example.org;option domain-name "internal.example.org";option routers 10.5.5.1; ###定义分配的网关地址option broadcast-address 10.5.5.31; ###定义地址段的广播地址default-lease-time 600;max-lease-time 7200;}# Hosts which require special configuration options can be listed in# host statements. If no address is specified, the address will be# allocated dynamically (if possible), but the host-specific information# will still come from the host declaration.######每一个host都是进行地址绑定的配置项###############host passacaglia {hardware ethernet 0:0:c0:5d:bd:95;filename "vmunix.passacaglia";server-name "toccata.fugue.com";}# Fixed IP addresses can also be specified for hosts. These addresses# should not also be listed as being available for dynamic assignment.# Hosts for which fixed IP addresses have been specified can boot using# BOOTP or DHCP. Hosts for which no fixed address is specified can only# be booted with DHCP, unless there is an address range on the subnet# to which a BOOTP client is connected which has the dynamic-bootp flag# set.host fantasia {hardware ethernet 08:00:07:26:c0:a5; ###固定分配地址的主机的MAC地址fixed-address fantasia.fugue.com; ###需要进行分配的IP地址}# You can declare a class of clients and then do address allocation# based on that. The example below shows a case where all clients# in a certain class get addresses on the 10.17.224/24 subnet, and all# other clients get addresses on the 10.0.29/24 subnet.class "foo" {match if substring (option vendor-class-identifier, 0, 4) = "SUNW";}shared-network 224-29 {subnet 10.17.224.0 netmask 255.255.255.0 {option routers rtr-224.example.org;}subnet 10.0.29.0 netmask 255.255.255.0 {option routers rtr-29.example.org;}pool {allow members of "foo";range 10.17.224.10 10.17.224.250;}pool {deny members of "foo";range 10.0.29.10 10.0.29.230;}}三、企业级实战
实战拓扑:

实战要求
1. DHCP服务器能够为两个网络分别分配IP地址。
2. 内部客户机设置为固定获得某一个IP地址。
手动配置实验
实验拓扑结构:
| 设备 | 网络接口 | 网络 | IP地址 |
|---|---|---|---|
| DHCP服务器 | ens160 | VMnet1 | 192.168.1.1 |
| 路由器内部接口 | ens160 | VMnet1 | 192.168.1.254 |
| 路由器外部接口 | ens224 | VMnet2 | 192.168.2.254 |
| 内部客户机 | ens160 | VMnet1 | 固定:192.168.1.100 |
| 外部客户机 | ens160 | VMnet2 | DHCP自动获取:192.168.2.X |
1.虚拟机配置
(1)网络适配器连接设置
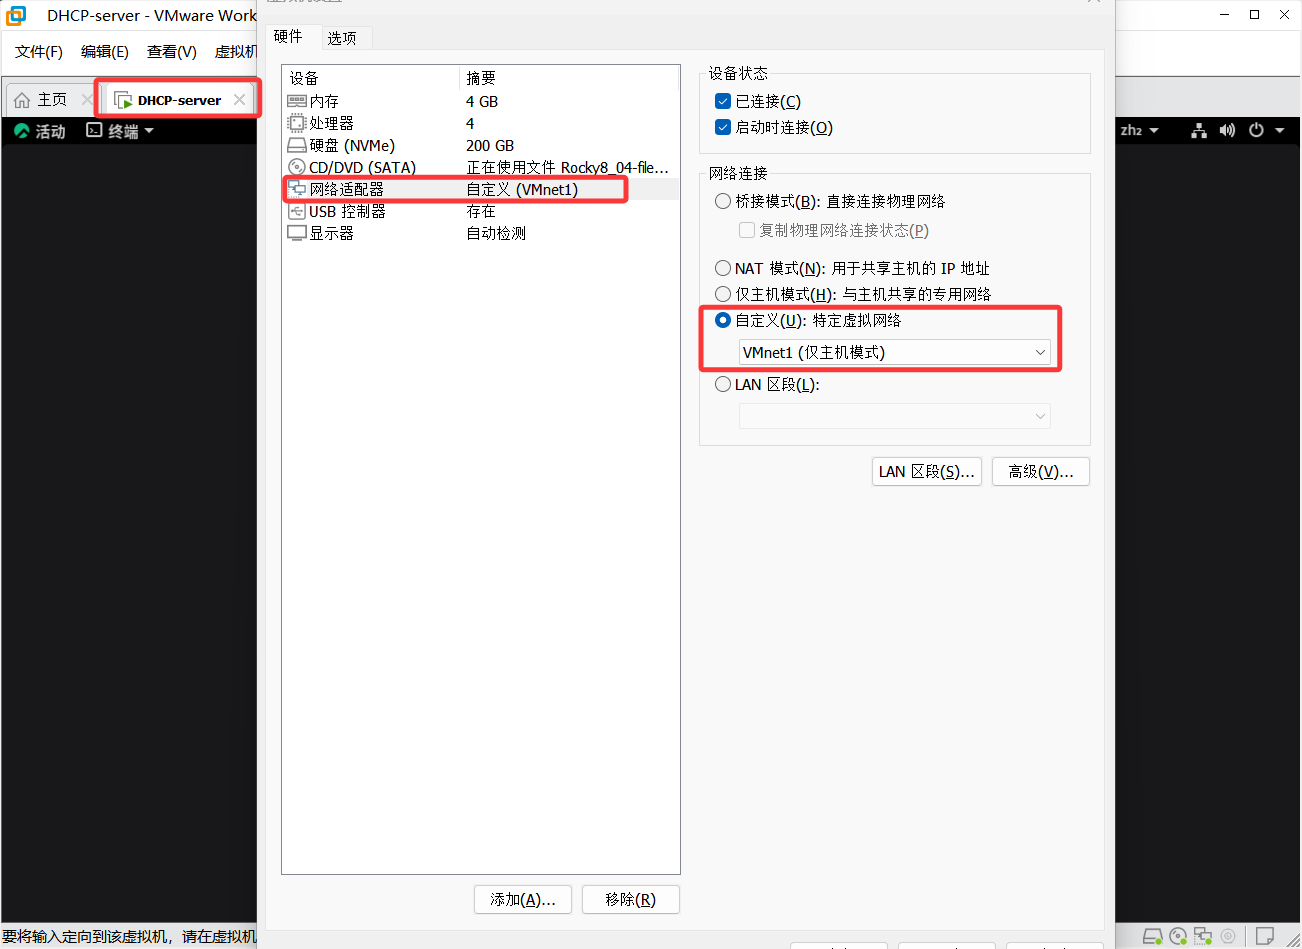
①DHCP服务器连接内部网络VMnet1
②内部客户机连接内部网络VMnet1

③路由器内部接口连接内部网络VMnet1,外部接口连接外部网络VMnet2

 ④外部客户机连接外部网络VMnet2

2.初始化部署
(1)关闭防火墙及SElinux
[root@DHCP-server ~]# systemctl disable --now firewalld(2)查看SElinux状态
[root@DHCP-server ~]# getenforce###设置宽容模式[root@DHCP-server ~]# setenforce 0###关闭SElinux,重启才能生效[root@DHCP-server ~]# vim /etc/selinux/configSELINUX=enforcing 改为 SELINUX=disabled(3)DHCP服务器配置静态IP (ens160)
[root@DHCP-server ~]# cat /etc/sysconfig/network-scripts/ifcfg-ens160
TYPE=Ethernet
BOOTPROTO=static
NAME=ens160
DEVICE=ens160
ONBOOT=yes
IPADDR=192.168.1.1
PREFIX=24
(4)重启网络
[root@DHCP-server ~]# systemctl restart NetworkManager
3.安装DHCP服务
[root@DHCP-server ~]# yum install -y dhcp-server4.配置DHCP服务:
将默认配置文件副本拷贝到当前配置文件的存储路径并修改配置文件
[root@DHCP-server dhcp]# cp /usr/share/doc/dhcp-server/dhcpd.conf.example ./
[root@DHCP-server dhcp]# ls
dhclient.d  dhcpd6.conf  dhcpd.conf  dhcpd.conf.example
[root@DHCP-server dhcp]# cp dhcpd.conf.example dhcpd.conf
cp:是否覆盖'dhcpd.conf'? y
[root@DHCP-server dhcp]# ls
dhclient.d  dhcpd6.conf  dhcpd.conf  dhcpd.conf.example
[root@DHCP-server dhcp]# vim dhcpd.conf
(1)编辑配置文件并注释掉没有用的地址段


(2)协议名也进行注释(没用) 并配置分配地址段和地址绑定
[root@PC1 ~]# ip link show ens160 | awk '/ether/{print $2}'
00:0c:29:f7:04:38    #获取内部客户机 MAC 地址
①配置内部客户机subnet,host声明中添加内部客户机 MAC 地址00:0c:29:f7:04:38,以及绑定固定分配的IP地址192.168.1.100

②配置外部客户机subnet

③启动服务
[root@DHCP-server dhcp]# systemctl enable --now dhcpd
Created symlink /etc/systemd/system/multi-user.target.wants/dhcpd.service → /usr/lib/systemd/system/dhcpd.service.[root@DHCP-server dhcp]# systemctl status dhcpd
● dhcpd.service - DHCPv4 Server DaemonLoaded: loaded (/usr/lib/systemd/system/dhcpd.service; enabled; vendor prese>Active: active (running) since Tue 2025-06-17 13:46:46 CST; 16s agoDocs: man:dhcpd(8)man:dhcpd.conf(5)Main PID: 10515 (dhcpd)Status: "Dispatching packets..."Tasks: 1 (limit: 22875)Memory: 5.4MCGroup: /system.slice/dhcpd.service└─10515 /usr/sbin/dhcpd -f -cf /etc/dhcp/dhcpd.conf -user dhcpd -gro>[root@DHCP-server dhcp]# netstat -antptu | grep dhcpd    #查看监听
udp        0      0 0.0.0.0:67              0.0.0.0:*                           10515/dhcpd
5. 路由器配置
(1)配置内部接口和外部接口的网卡IP
[root@router ~]# cat /etc/sysconfig/network-scripts/ifcfg-ens160
TYPE=Ethernet
PROXY_METHOD=none
BROWSER_ONLY=no
BOOTPROTO=static
DEFROUTE=yes
IPV4_FAILURE_FATAL=no
IPV6INIT=yes
IPV6_AUTOCONF=yes
IPV6_DEFROUTE=yes
IPV6_FAILURE_FATAL=no
IPV6_ADDR_GEN_MODE=eui64
NAME=ens160
UUID=171713aa-bd74-4320-9ec1-6e7872ac63a4
DEVICE=ens160
ONBOOT=yes
IPADDR=192.168.1.254
PREFIX=24
[root@router ~]# cat /etc/sysconfig/network-scripts/ifcfg-ens224
TYPE=Ethernet
PROXY_METHOD=none
BROWSER_ONLY=no
BOOTPROTO=static
DEFROUTE=yes
IPV4_FAILURE_FATAL=no
IPV6INIT=yes
IPV6_AUTOCONF=yes
IPV6_DEFROUTE=yes
IPV6_FAILURE_FATAL=no
IPV6_ADDR_GEN_MODE=default
NAME=ens224
UUID=b280db6b-2c16-4d93-8464-2892adaa0985
DEVICE=ens224
ONBOOT=yes
IPADDR=192.168.2.254
PREFIX=24
(2)开启路由转发功能并DHCP测试网络连通性
[root@router network-scripts]# echo "net.ipv4.ip_forward = 1" >> /etc/sysctl.conf
[root@router network-scripts]# sysctl -p
net.ipv4.ip_forward = 1[root@DHCP-server ~]# ping 192.168.1.254
PING 192.168.1.254 (192.168.1.254) 56(84) bytes of data.
64 bytes from 192.168.1.254: icmp_seq=1 ttl=64 time=0.230 ms
64 bytes from 192.168.1.254: icmp_seq=2 ttl=64 time=0.257 ms[root@DHCP-server ~]# ping 192.168.2.254
PING 192.168.2.254 (192.168.2.254) 56(84) bytes of data.
64 bytes from 192.168.2.254: icmp_seq=1 ttl=64 time=0.358 ms
64 bytes from 192.168.2.254: icmp_seq=2 ttl=64 time=0.283 ms
(3)安装dhcrelay命令
[root@router mnt]# yum install -y dhcp-relay(4)使用dhcrelay命令进行DHCP广播的中继转发
[root@router mnt]# dhcrelay 192.168.1.1     #DHCP服务器IP
Dropped all unnecessary capabilities.
Internet Systems Consortium DHCP Relay Agent 4.3.6
Copyright 2004-2017 Internet Systems Consortium.
All rights reserved.
For info, please visit https://www.isc.org/software/dhcp/
Listening on LPF/ens256/00:0c:29:59:5c:5e
Sending on   LPF/ens256/00:0c:29:59:5c:5e
Listening on LPF/virbr0/52:54:00:ef:f1:eb
Sending on   LPF/virbr0/52:54:00:ef:f1:eb
Listening on LPF/ens224/00:0c:29:59:5c:54
Sending on   LPF/ens224/00:0c:29:59:5c:54
Listening on LPF/ens160/00:0c:29:59:5c:4a
Sending on   LPF/ens160/00:0c:29:59:5c:4a
Sending on   Socket/fallback
(5)重启DHCP服务器
[root@DHCP-server ~]# systemctl restart dhcpd
(6)设置DHCP服务器的网关并验证网关
[root@DHCP-server ~]# cat /etc/sysconfig//network-scripts/ifcfg-ens160
TYPE=Ethernet
BOOTPROTO=static
NAME=ens160
DEVICE=ens160
ONBOOT=yes
IPADDR=192.168.1.1
PREFIX=24
GATEWAY=192.168.1.254
[root@DHCP-server ~]# route -n
Kernel IP routing table
Destination     Gateway         Genmask         Flags Metric Ref    Use Iface
0.0.0.0         192.168.1.254   0.0.0.0         UG    100    0        0 ens160
192.168.1.0     0.0.0.0         255.255.255.0   U     100    0        0 ens160
192.168.122.0   0.0.0.0         255.255.255.0   U     0      0        0 virbr0
6.实战验证
(1)内部客户机验证DHCP服务器是否为其分配的固定IP地址192.168.1.100以及验证网关
[root@PC1 ~]# systemctl restart NetworkManager[root@PC1 ~]# ifconfig ens160
ens160: flags=4163<UP,BROADCAST,RUNNING,MULTICAST> mtu 1500inet 192.168.1.100 netmask 255.255.255.0 broadcast 192.168.1.255inet6 fe80::20c:29ff:fef7:438 prefixlen 64 scopeid 0x20<link>ether 00:0c:29:f7:04:38 txqueuelen 1000 (Ethernet)RX packets 358 bytes 46196 (45.1 KiB)RX errors 0 dropped 0 overruns 0 frame 0TX packets 184 bytes 19475 (19.0 KiB)TX errors 0 dropped 0 overruns 0 carrier 0 collisions 0[root@PC1 ~]# route -n
Kernel IP routing table
Destination Gateway Genmask Flags Metric Ref Use Iface
0.0.0.0 192.168.1.254 0.0.0.0 UG 100 0 0 ens160
192.168.1.0 0.0.0.0 255.255.255.0 U 100 0 0 ens160
192.168.122.0 0.0.0.0 255.255.255.0 U 0 0 0 virbr0[root@PC1 ~]# cat /etc/resolv.conf
# Generated by NetworkManager #NetworkManager 动态管理
search example.org
nameserver 192.168.1.1 #DHCP 分配的 DNS[root@PC1 ~]# ping 192.168.2.2 #ping外部客户机IP地址跨网络通信测试
PING 192.168.2.2 (192.168.2.2) 56(84) bytes of data.
64 bytes from 192.168.2.2: icmp_seq=1 ttl=63 time=0.639 ms
64 bytes from 192.168.2.2: icmp_seq=2 ttl=63 time=0.489 ms[root@PC1 ~]# ping 192.168.1.1 #测试网络连通性
PING 192.168.1.1 (192.168.1.1) 56(84) bytes of data.
64 bytes from 192.168.1.1: icmp_seq=1 ttl=64 time=0.286 ms
64 bytes from 192.168.1.1: icmp_seq=2 ttl=64 time=0.272 ms(2) 外网客户机验证DHCP服务器是否为其分配以192.168.2.X随机的IP地址以及验证网关
[root@PC2 ~]# systemctl restart NetworkManager[root@PC2 ~]# ifconfig ens160
ens160: flags=4163<UP,BROADCAST,RUNNING,MULTICAST> mtu 1500inet 192.168.2.2 netmask 255.255.255.0 broadcast 192.168.2.255inet6 fe80::20c:29ff:fe84:3dad prefixlen 64 scopeid 0x20<link>ether 00:0c:29:84:3d:ad txqueuelen 1000 (Ethernet)RX packets 70 bytes 10136 (9.8 KiB)RX errors 0 dropped 0 overruns 0 frame 0TX packets 457 bytes 75142 (73.3 KiB)TX errors 0 dropped 0 overruns 0 carrier 0 collisions 0[root@PC2 ~]# route -n
Kernel IP routing table
Destination Gateway Genmask Flags Metric Ref Use Iface
0.0.0.0 192.168.2.254 0.0.0.0 UG 100 0 0 ens160
192.168.2.0 0.0.0.0 255.255.255.0 U 100 0 0 ens160
192.168.122.0 0.0.0.0 255.255.255.0 U 0 0 0 virbr0[root@PC2 ~]# cat /etc/resolv.conf
# Generated by NetworkManager #NetworkManager 动态管理
search example.org
nameserver 192.168.1.1 #DHCP 分配的 DNS[root@PC2 ~]# ping 192.168.1.100 #ping内部客户机IP地址跨网络通信测试
PING 192.168.1.100 (192.168.1.100) 56(84) bytes of data.
64 bytes from 192.168.1.100: icmp_seq=1 ttl=63 time=0.540 ms
64 bytes from 192.168.1.100: icmp_seq=2 ttl=63 time=0.502 ms[root@PC2 ~]# ping 192.168.1.1 #测试网络连通性
PING 192.168.1.1 (192.168.1.1) 56(84) bytes of data.
64 bytes from 192.168.1.1: icmp_seq=1 ttl=63 time=0.475 ms
64 bytes from 192.168.1.1: icmp_seq=2 ttl=63 time=0.771 ms四、常见故障
1. 服务启动异常,排查配置文件,特别注意修改的位置!!!
2. 地址参数分配异常,排查网络连接情况,再排查subnet字段!!!
总结:
DHCP服务在Linux网络管理中体现了自动化、高可用与灵活性的核心价值
1.动态分配机制:通过四步租约(DORA:Discover-Offer-Request-Acknowledgement)实现IP地址的按需分配与回收,支持动态、自动和手动三种分配模式,适应不同场景需求。
2.租约生命周期管理:租约更新策略(50%和87.5%时间点主动续约)确保地址可持续使用,结合租期参数(default-lease-time、max-lease-time)优化资源循环效率。
3.集中化配置管理:通过/etc/dhcp/dhcpd.conf文件定义作用域(subnet)、地址池(range)、保留地址(host声明)及全局选项(如DNS、网关),大幅降低运维复杂度。
4.跨网段支持:借助DHCP中继(dhcrelay)转发广播请求,实现单服务器多子网覆盖,扩展服务边界。