voc怎么转yolo,如何分割数据集为验证集,怎样检测CUDA可用性 并使用yolov8训练安全帽数据集且构建基于yolov8深度学习的安全帽检测系统
voc怎么转yolo,如何分割数据集为验证集,怎样检测CUDA可用性
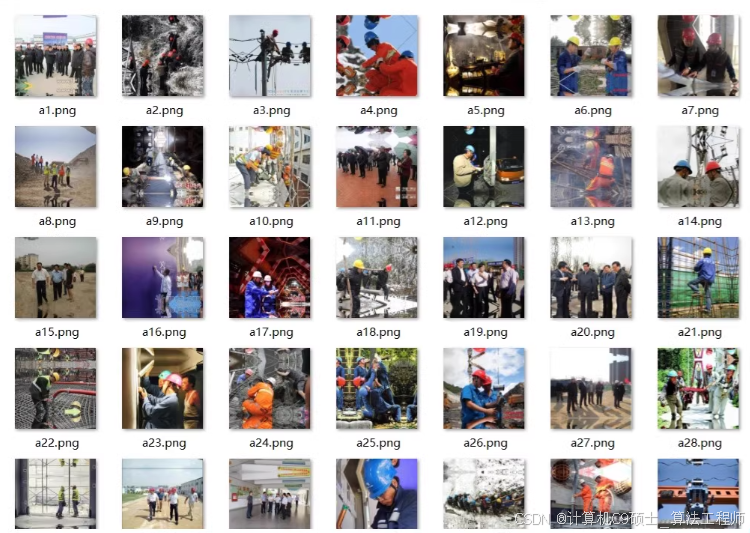
安全帽数据集,5000张图片和对应的xml标签,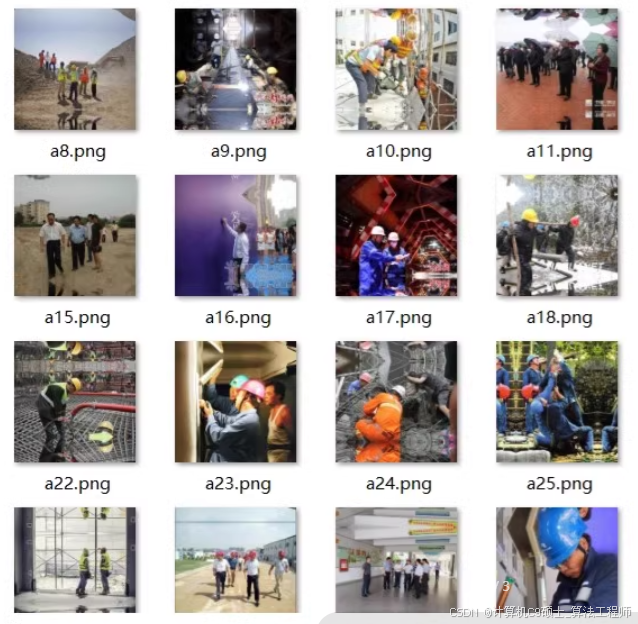
五千个yolo标签,到手即可训练。另外附四个常用小脚本,非常实用voc转yolo代码.py
分割数据集为验证集.py
检测cuda.py
批量重命名.py。继续
以下代码仅供参考!
5000张图片和对应的YOLO格式标签,并且还附带了一些实用的小脚本,我们可以直接进行模型训练、评估以及可视化。以下是详细的步骤:
当然可以。根据您的描述,您提到的四个实用小脚本分别是:
- VOC转YOLO代码
- 分割数据集为验证集
- 检测CUDA可用性
- 批量重命名
下面是每个脚本的详细实现。
1. VOC转YOLO代码
这个脚本用于将Pascal VOC格式的标注文件转换为YOLO格式。
[<title="Convert VOC Annotations to YOLO TXT Format">]
import os
import xml.etree.ElementTree as ET
from pathlib import Path# Define paths
base_path = Path('datasets/helmet')
annotations_dir = base_path / 'Annotations'
images_dir = base_path / 'JPEGImages'
output_labels_dir = base_path / 'labels'# Create output directory if it doesn't exist
os.makedirs(output_labels_dir, exist_ok=True)# Class names and their corresponding IDs
class_names = {'helmet': 0}def convert_annotation(xml_file):tree = ET.parse(xml_file)root = tree.getroot()image_width = int(root.find('size/width').text)image_height = int(root.find('size/height').text)label_lines = []for obj in root.findall('object'):class_name = obj.find('name').textbbox = obj.find('bndbox')xmin = float(bbox.find('xmin').text)ymin = float(bbox.find('ymin').text)xmax = float(bbox.find('xmax').text)ymax = float(bbox.find('ymax').text)# Convert bounding box to YOLO format (center_x, center_y, width, height)center_x = (xmin + xmax) / 2.0 / image_widthcenter_y = (ymin + ymax) / 2.0 / image_heightwidth = (xmax - xmin) / image_widthheight = (ymax - ymin) / image_heightclass_id = class_names[class_name]label_line = f"{class_id} {center_x} {center_y} {width} {height}\n"label_lines.append(label_line)return label_linesfor annotation_file in annotations_dir.glob('*.xml'):image_name = annotation_file.stem + '.jpg'  # Assuming images are in JPEG formatlabel_file = output_labels_dir / (annotation_file.stem + '.txt')label_lines = convert_annotation(annotation_file)with open(label_file, 'w') as f:f.writelines(label_lines)print("Conversion completed.")
2. 分割数据集为验证集
这个脚本用于将数据集划分为训练集和验证集。
[<title="Split Dataset into Train and Validation Sets">]
import os
import random
from sklearn.model_selection import train_test_split
from pathlib import Path# Define paths
base_path = Path('datasets/helmet')
images_dir = base_path / 'JPEGImages'
annotations_dir = base_path / 'labels'
train_images_dir = base_path / 'images/train'
train_labels_dir = base_path / 'labels/train'
val_images_dir = base_path / 'images/val'
val_labels_dir = base_path / 'labels/val'# Create directories if they don't exist
os.makedirs(train_images_dir, exist_ok=True)
os.makedirs(train_labels_dir, exist_ok=True)
os.makedirs(val_images_dir, exist_ok=True)
os.makedirs(val_labels_dir, exist_ok=True)# List all image files
image_files = list(images_dir.glob('*.jpg'))  # Adjust extension if necessary# Shuffle the image files
random.shuffle(image_files)# Split ratios
train_ratio = 0.8
val_ratio = 0.2# Calculate split indices
num_images = len(image_files)
train_split = int(num_images * train_ratio)# Split images and labels
train_images = image_files[:train_split]
val_images = image_files[train_split:]def copy_files(source_images, dest_images_dir, dest_labels_dir):for img_file in source_images:label_file = annotations_dir / (img_file.stem + '.txt')if label_file.exists():os.symlink(img_file, dest_images_dir / img_file.name)os.symlink(label_file, dest_labels_dir / label_file.name)copy_files(train_images, train_images_dir, train_labels_dir)
copy_files(val_images, val_images_dir, val_labels_dir)print("Dataset splitting completed.")
3. 检测CUDA可用性
这个脚本用于检测CUDA是否可用。
[<title="Check CUDA Availability">]
import torchdef check_cuda_availability():cuda_available = torch.cuda.is_available()if cuda_available:print(f"CUDA is available. Device count: {torch.cuda.device_count()}")print(f"Current device: {torch.cuda.current_device()}")print(f"Device name: {torch.cuda.get_device_name(torch.cuda.current_device())}")else:print("CUDA is not available.")if __name__ == "__main__":check_cuda_availability()
4. 批量重命名
这个脚本用于批量重命名文件夹中的所有图像文件。
[<title="Batch Rename Images">]
import os
from pathlib import Pathdef batch_rename_images(directory, prefix='image'):files = sorted(os.listdir(directory))for idx, filename in enumerate(files):if filename.endswith(('.png', '.jpg', '.jpeg')):new_filename = f"{prefix}{idx}.jpg"old_file = directory / filenamenew_file = directory / new_filenameos.rename(old_file, new_file)print(f'Renamed: {old_file} -> {new_file}')if __name__ == "__main__":directory = Path('datasets/helmet/JPEGImages')  # Change this path to your images directorybatch_rename_images(directory)
使用说明
-
VOC转YOLO代码 (
convert_voc_to_yolo.py):- 确保
datasets/helmet/Annotations和datasets/helmet/JPEGImages目录存在,并且包含相应的XML标注文件和图像文件。 - 运行此脚本后,会在
datasets/helmet/labels目录下生成对应的TXT标签文件。
- 确保
-
分割数据集为验证集 (
split_dataset.py):- 确保
datasets/helmet/JPEGImages和datasets/helmet/labels目录存在,并且包含相应的图像文件和TXT标签文件。 - 运行此脚本后,会在
datasets/helmet/images/train,datasets/helmet/images/val,datasets/helmet/labels/train, 和datasets/helmet/labels/val目录下分别存储训练集和验证集的数据。
- 确保
-
检测CUDA可用性 (
check_cuda.py):- 运行此脚本以检查系统中CUDA是否可用以及相关信息。
-
批量重命名 (
batch_rename.py):- 修改
directory变量指向包含图像文件的目录。 - 运行此脚本后,目录中的所有图像文件将被重命名为
image0.jpg,image1.jpg, …。
- 修改
这些脚本应该能满足您处理安全帽数据集的需求。如果有任何问题或需要进一步的帮助,请告诉我!
-
环境准备:
- 安装必要的库。
-
数据集组织:
- 确认数据集的结构和路径。
-
模型定义与训练:
- 使用YOLOv8进行目标检测。
-
评估与可视化:
- 评估模型性能。
- 可视化结果。
环境准备
首先,我们需要安装必要的库。您可以使用以下命令来设置环境:
pip install ultralytics opencv-python-headless pandas scikit-learn
数据集组织
假设您的数据集已经按照YOLO格式组织好,并且包含以下文件夹结构:
datasets/helmet/
├── images/
│   ├── train/
│   │   ├── image0.jpg
│   │   ├── image1.jpg
│   │   └── ...
│   └── val/
│       ├── image0.jpg
│       ├── image1.jpg
│       └── ...
└── labels/├── train/│   ├── image0.txt│   ├── image1.txt│   └── ...└── val/├── image0.txt├── image1.txt└── ...
并且每个图像都有一个对应的TXT标签文件。
创建YAML配置文件
确保您有一个正确的YAML配置文件 helmet.yaml 来描述数据集。以下是示例配置文件:
[<title="YOLOv8 Configuration File for Helmet Detection">]
train: ../datasets/helmet/images/train
val: ../datasets/helmet/images/valnc: 1
names: ['helmet']
将上述内容保存为 datasets/helmet/helmet.yaml。
模型定义与训练
我们将使用YOLOv8进行目标检测。以下是训练脚本 train_detection.py:
[<title="Training Script for Helmet Detection using YOLOv8">]
from ultralytics import YOLO# Load a model
model = YOLO('yolov8n.pt')  # load a pretrained model (recommended for training)# Train the model
results = model.train(data='../datasets/helmet/helmet.yaml',epochs=50,imgsz=640,batch=16,project='../runs/train',name='helmet_detection'
)# Evaluate the model
metrics = model.val()
results = model.export(format='onnx')  # export the trained model to ONNX format
评估与可视化
使用YOLOv8自带的评估脚本来评估目标检测模型。
[<title="Evaluation Script for Helmet Detection using YOLOv8">]
from ultralytics import YOLO# Load the best model
best_model = YOLO('../runs/train/helmet_detection/weights/best.pt')# Evaluate the model on the validation dataset
metrics = best_model.val(data='../datasets/helmet/helmet.yaml', conf=0.5, iou=0.45)
print(metrics)
用户界面
我们将使用 PyQt5 创建一个简单的 GUI 来加载和运行模型进行实时预测。以下是用户界面脚本 ui.py:
[<title="PyQt5 Main Window for Helmet Detection">]
import sys
import cv2
import numpy as np
from PyQt5.QtWidgets import QApplication, QMainWindow, QLabel, QPushButton, QVBoxLayout, QWidget, QFileDialog
from PyQt5.QtGui import QImage, QPixmap
from PyQt5.QtCore import Qt, QTimer
from ultralytics import YOLO# Load model
detection_model = YOLO('../runs/train/helmet_detection/weights/best.pt')class MainWindow(QMainWindow):def __init__(self):super().__init__()self.setWindowTitle("安全帽检测系统")self.setGeometry(100, 100, 800, 600)self.initUI()def initUI(self):self.central_widget = QWidget()self.setCentralWidget(self.central_widget)self.layout = QVBoxLayout()self.image_label = QLabel(self)self.image_label.setAlignment(Qt.AlignCenter)self.layout.addWidget(self.image_label)self.load_image_button = QPushButton("加载图像", self)self.load_image_button.clicked.connect(self.load_image)self.layout.addWidget(self.load_image_button)self.start_prediction_button = QPushButton("开始预测", self)self.start_prediction_button.clicked.connect(self.start_prediction)self.layout.addWidget(self.start_prediction_button)self.stop_prediction_button = QPushButton("停止预测", self)self.stop_prediction_button.clicked.connect(self.stop_prediction)self.layout.addWidget(self.stop_prediction_button)self.central_widget.setLayout(self.layout)self.image_path = Noneself.timer = QTimer()self.timer.timeout.connect(self.update_frame)def load_image(self):options = QFileDialog.Options()file_name, _ = QFileDialog.getOpenFileName(self, "选择图像文件", "", "Images (*.png *.jpg *.jpeg);;All Files (*)", options=options)if file_name:self.image_path = file_nameself.display_image(file_name)def display_image(self, path):pixmap = QPixmap(path)scaled_pixmap = pixmap.scaled(self.image_label.width(), self.image_label.height(), Qt.KeepAspectRatio)self.image_label.setPixmap(scaled_pixmap)def start_prediction(self):if self.image_path is not None and not self.timer.isActive():self.timer.start(30)  # Update frame every 30 msdef stop_prediction(self):if self.timer.isActive():self.timer.stop()self.image_label.clear()def update_frame(self):original_image = cv2.imread(self.image_path)image_rgb = cv2.cvtColor(original_image, cv2.COLOR_BGR2RGB)# Detectionresults = detection_model.predict(image_rgb, size=640, conf=0.5, iou=0.45)[0]for box in results.boxes.cpu().numpy():r = box.xyxy[0].astype(int)cls = int(box.cls[0])conf = box.conf[0]# Map class ID to nameclass_names = ['安全帽']class_name = class_names[cls]# Draw bounding boxcv2.rectangle(image_rgb, (r[0], r[1]), (r[2], r[3]), (0, 255, 0), 2)# Put textfont = cv2.FONT_HERSHEY_SIMPLEXcv2.putText(image_rgb, f'{class_name} ({conf:.2f})', (r[0], r[1] - 10), font, 0.9, (0, 255, 0), 2)h, w, ch = image_rgb.shapebytes_per_line = ch * wqt_image = QImage(image_rgb.data, w, h, bytes_per_line, QImage.Format_RGB888)pixmap = QPixmap.fromImage(qt_image)scaled_pixmap = pixmap.scaled(self.image_label.width(), self.image_label.height(), Qt.KeepAspectRatio)self.image_label.setPixmap(scaled_pixmap)if __name__ == "__main__":app = QApplication(sys.argv)window = MainWindow()window.show()sys.exit(app.exec_())
请确保将路径替换为您实际的路径。
使用说明
-
配置路径:
- 确保
datasets/helmet目录结构正确,并且包含images和labels子目录。 - 确保
runs/train/helmet_detection/weights/best.pt是训练好的 YOLOv8 模型权重路径。
- 确保
-
运行脚本:
- 在终端中运行
train_detection.py脚本来训练目标检测模型。 - 在终端中运行
evaluate_detection.py来评估目标检测模型性能。 - 在终端中运行
ui.py来启动 GUI 应用程序。
- 在终端中运行
-
注意事项:
- 确保所有必要的工具箱已安装,特别是
ultralytics和PyQt5。 - 根据需要调整参数,如
epochs和batch_size。
- 确保所有必要的工具箱已安装,特别是
示例
假设您的数据文件夹结构如下:
datasets/
└── helmet/├── images/│   ├── train/│   │   ├── image0.jpg│   │   ├── image1.jpg│   │   └── ...│   └── val/│       ├── image0.jpg│       ├── image1.jpg│       └── ...└── labels/├── train/│   ├── image0.txt│   ├── image1.txt│   └── ...└── val/├── image0.txt├── image1.txt└── ...
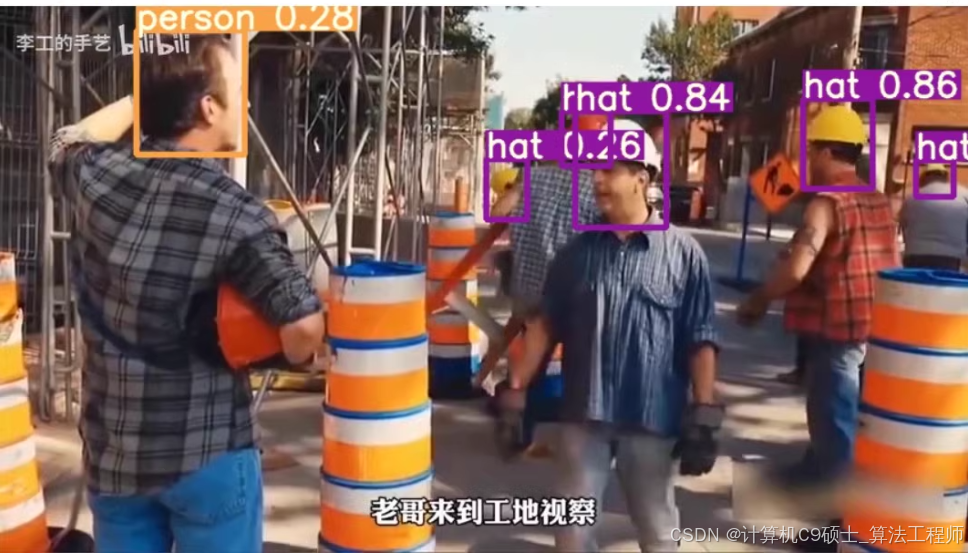
并且每个图像都有一个对应的TXT标签文件。运行 ui.py 后,您可以点击按钮来加载图像并进行安全帽检测。