nginx-整合modsecurity做waf
下面以 CentOS 7、Nginx 1.16.1(Yum 安装版)为例,完整演示如何安装 ModSecurity 3(libmodsecurity + nginx connector)并以动态模块方式加载到 Nginx。
包地址
规则地址:Release v4.14.0 · coreruleset/coreruleset · GitHub
包地址:GitHub - owasp-modsecurity/ModSecurity: ModSecurity is an open source, cross platform web application firewall (WAF) engine for Apache, IIS and Nginx. It has a robust event-based programming language which provides protection from a range of attacks against web applications and allows for HTTP traffic monitoring, logging and real-time analysis.ModSecurity is an open source, cross platform web application firewall (WAF) engine for Apache, IIS and Nginx. It has a robust event-based programming language which provides protection from a range of attacks against web applications and allows for HTTP traffic monitoring, logging and real-time analysis. - owasp-modsecurity/ModSecurity![]() https://github.com/owasp-modsecurity/ModSecurity
https://github.com/owasp-modsecurity/ModSecurity
NGINX地址:https://github.com/owasp-modsecurity/ModSecurity-nginx
一、安装编译依赖
sudo yum groupinstall -y "Development Tools"
sudo yum install -y \pcre-devel \yajl-devel \curl-devel \zlib-devel \openssl-devel \wget \git \libtool \autoconf \automake
二、编译并安装 libmodsecurity (ModSecurity 3)
-
克隆源码
cd /usr/local/src git clone --depth 1 -b v3/master https://github.com/SpiderLabs/ModSecurity cd ModSecurity -
生成构建脚本
git submodule init git submodule update ./build.sh ./configure -
编译并安装
make
sudo make install
默认会把库安装到
/usr/local/modsecurity,并在/usr/local/lib放libmodsecurity.so。
三、下载 ModSecurity-nginx Connector
cd /usr/local/src
git clone --depth 1 https://github.com/SpiderLabs/ModSecurity-nginx.git
四、下载 Nginx 1.16.1 源码并解压(本机已经yum安装了NGINX)
cd /usr/local/src
wget http://nginx.org/download/nginx-1.16.1.tar.gz
tar zxvf nginx-1.16.1.tar.gz
五、编译 nginx 动态模块
-
进入源码目录:
cd nginx-1.16.1 -
提取当前编译参数(可从
nginx -V手动拷贝,这里假设你已经记录):# 下面示例仅为定位,实际请替换成你自己的 configure args CONFIG_ARGS="\--prefix=/etc/nginx \--sbin-path=/usr/sbin/nginx \--modules-path=/usr/lib64/nginx/modules \--conf-path=/etc/nginx/nginx.conf \--with-compat \--with-http_ssl_module \--with-http_stub_status_module \--with-http_v2_module \--with-threads \--with-stream \--with-stream_realip_module \--with-http_realip_module \--with-file-aio \--with-http_slice_module \--with-http_gzip_static_module \--with-http_auth_request_module \--with-http_sub_module \--with-mail \--with-mail_ssl_module \--with-stream_ssl_module \--with-stream_ssl_preread_module \--with-http_addition_module \--with-http_auth_request_module \--with-http_dav_module \--with-http_flv_module \--with-http_gunzip_module \--with-http_mp4_module \--with-http_random_index_module \--with-http_secure_link_module \--with-stream \--with-cc-opt='-O2 -g -pipe -Wall' \--with-ld-opt='-Wl,-z,relro -Wl,-z,now -pie'" -
配置编译,指定 ModSecurity-nginx 目录作为动态模块:
./configure $CONFIG_ARGS \--add-dynamic-module=/usr/local/src/ModSecurity-nginx -
仅编译模块
make编译完成后,模块文件在
objs/ngx_http_modsecurity_module.so。 -
安装模块
sudo cp objs/ngx_http_modsecurity_module.so /usr/lib64/nginx/modules/cp  objs/nginx  /usr/sbin/nginx###检查yum安装NGINX是否已经编译了动态包
nginx -V
nginx version: nginx/1.16.1
built by gcc 8.3.1 20190311 (Red Hat 8.3.1-3) (GCC)
built with OpenSSL 1.0.2k-fips  26 Jan 2017
TLS SNI support enabled
configure arguments: --prefix=/etc/nginx --sbin-path=/usr/sbin/nginx --modules-path=/usr/lib64/nginx/modules --conf-path=/etc/nginx/nginx.conf --error-log-path=/var/log/nginx/error.log --http-log-path=/var/log/nginx/access.log --pid-path=/var/run/nginx.pid --lock-path=/var/run/nginx.lock --http-client-body-temp-path=/var/cache/nginx/client_temp --http-proxy-temp-path=/var/cache/nginx/proxy_temp --http-fastcgi-temp-path=/var/cache/nginx/fastcgi_temp --http-uwsgi-temp-path=/var/cache/nginx/uwsgi_temp --http-scgi-temp-path=/var/cache/nginx/scgi_temp --user=nginx --group=nginx --with-compat --with-file-aio --with-threads --with-http_addition_module --with-http_auth_request_module --with-http_dav_module --with-http_flv_module --with-http_gunzip_module --with-http_gzip_static_module --with-http_mp4_module --with-http_random_index_module --with-http_realip_module --with-http_secure_link_module --with-http_slice_module --with-http_ssl_module --with-http_stub_status_module --with-http_sub_module --with-http_v2_module --with-mail --with-mail_ssl_module --with-stream --with-stream_realip_module --with-stream_ssl_module --with-stream_ssl_preread_module --with-cc-opt='-O2 -g -pipe -Wall -Wp,-D_FORTIFY_SOURCE=2 -fexceptions -fstack-protector-strong --param=ssp-buffer-size=4 -grecord-gcc-switches -m64 -mtune=generic -fPIC' --with-ld-opt='-Wl,-z,relro -Wl,-z,now -pie' --add-dynamic-module=/usr/local/src/ModSecurity-nginx
六、加载 ModSecurity 模块并配置
-
在
/etc/nginx/nginx.conf顶部(worker_processes之前)加入:load_module modules/ngx_http_modsecurity_module.so; -
在
http {}块里添加:modsecurity on; modsecurity_rules_file /etc/nginx/modsec/main.conf; -
创建 ModSecurity 主配置
/etc/nginx/modsec/main.conf,可先复制示例:sudo mkdir -p /etc/nginx/modsec sudo cp /usr/local/src/ModSecurity/modsecurity.conf-recommended /etc/nginx/modsec/modsecurity.conf sudo cp /usr/local/src/ModSecurity/unicode.mapping /etc/nginx/modsec/ -
在
main.conf(或一个单独的 rules 文件)里,打开检测并加载你需要的规则,例如:Include /etc/nginx/modsec/modsecurity.conf# /etc/nginx/modsec/main.conf# 2. 为每个 IP 初始化持久化集合 (Phase 1) SecAction \"id:1000001,\phase:1,\nolog,\pass,\initcol:ip=%{REMOTE_ADDR}"# 3. 对已封禁 IP 立即拒绝连接 (Phase 1) SecRule IP:cc_block "@eq 1" \"id:1000002,\phase:1,\log,\msg:'CC drop: %{REMOTE_ADDR} in block period',\deny,\status:444"# 4. 只对目标 URI 计数 (Phase 2) SecRule REQUEST_URI "@streq /w/ww" \"id:1000003,\phase:2,\nolog,\pass,\setvar:ip.cc_counter=+1,\expirevar:ip.cc_counter=60"# 5. 超出阈值则封禁并拒绝本次请求 (Phase 2) SecRule IP:cc_counter "@gt 30" \"id:1000004,\phase:2,\log,\msg:'CC threshold exceeded for %{REMOTE_ADDR}',\setvar:ip.cc_block=1,\expirevar:ip.cc_block=600,\deny,\status:444"
5.将防火墙配置文件加载到nginx中
#打开配置:
vim /etc/nginx/modsec/modsecurity.conf
注释:#SecRuleEngine DetectionOnly
添加:SecRuleEngine On注释:#SecAuditLogParts ABIJDEFHZ
添加:SecAuditLogParts ABCDEFHZ
七、启动并验证
sudo nginx -t
sudo systemctl enable --now nginx
-
检查模块加载:
nginx -V 2>&1 | grep modsecurity -
模拟 CC 攻击,查看第 31 次后连接被直接丢弃且不返回响应。
-
for i in {1..40}; do curl -s -o /dev/null -w "%{http_code}\n" http://ip/w/ww; done
检查日志/var/log/modsec_audit.log:
ModSecurity: Access denied with code 444 (phase 1). Matched "Operator `Eq' with parameter
这样就防御成功。
八、消除NGINX日志记录和加载默认规则
看着NGINX的日志还是记录444,这样看着不舒服
http {# … 你原有的 modsecurity 配置 …# 1. 把 444 的响应标记为不写日志map $status $loggable {default 1;444     0;}# 2. 把 access_log 加上 if 条件access_log  /var/log/nginx/access.log  main  if=$loggable;# 后面不变server {listen 8080;location = /w/ww/ {# 不需要再 if($modsec_forbidden),# 只要返回 444,就不记录日志,ModSecurity 已经 drop 了proxy_pass http://backend;}# 其它 location …}
}
使用默认规则拦截:
wget https://github.com/coreruleset/coreruleset/archive/refs/tags/v4.14.0.zip
unzip v4.14.0.zip
cd coreruleset-4.14.0/
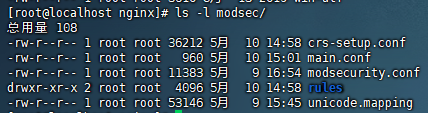
cp crs-setup.conf.example /etc/nginx/modsec/
cp -r rules/ /etc/nginx/modsec/
cd /etc/nginx/modsec/
mv crs-setup.conf.example crs-setup.conf
vim main.conf
加入:Include /etc/nginx/modsec/crs-setup.conf
Include /etc/nginx/modsec/rules/*.conf
重启NGINX就可以使用默认规则拦截
最终配置/etc/nginx:
####cat nginx.conf user  nginx;
load_module modules/ngx_http_modsecurity_module.so;
worker_processes  1;error_log  /var/log/nginx/error.log warn;
pid        /var/run/nginx.pid;events {worker_connections  1024;
}http {include       /etc/nginx/mime.types;default_type  application/octet-stream;log_format  main  '$remote_addr - $remote_user [$time_local] "$request" ''$status $body_bytes_sent "$http_referer" ''"$http_user_agent" "$http_x_forwarded_for"';access_log  /var/log/nginx/access.log  main;modsecurity on;modsecurity_rules_file /etc/nginx/modsec/main.conf;map $status $loggable {default 1;444     0;}sendfile        on;#tcp_nopush     on;keepalive_timeout  65;#gzip  on;include /etc/nginx/conf.d/*.conf;
}######cat modsec/main.conf
Include /etc/nginx/modsec/modsecurity.conf
Include /etc/nginx/modsec/crs-setup.conf
Include /etc/nginx/modsec/rules/*.conf# 1. 为每个 IP 初始化持久化集合 (Phase 1)
SecAction \"id:1000001,\phase:1,\nolog,\pass,\initcol:ip=%{REMOTE_ADDR},\initcol:global=global"# 2. 对已封禁 IP 立即拒绝连接 (Phase 1)
SecRule IP:cc_block "@eq 1" \"id:1000002,\phase:1,\log,\msg:'CC drop: %{REMOTE_ADDR} in block period',\deny,\status:444"# 3. 只对目标 URI 计数 (Phase 2)
SecRule REQUEST_URI "@streq /w/ww" \"id:1000003,\phase:2,\nolog,\pass,\setvar:ip.cc_counter=+1,\expirevar:ip.cc_counter=60"# 4. 超出阈值则封禁并拒绝本次请求 (Phase 2)
SecRule IP:cc_counter "@gt 30" \"id:1000004,\phase:2,\log,\msg:'CC threshold exceeded for %{REMOTE_ADDR}',\setvar:ip.cc_block=1,\expirevar:ip.cc_block=600,\deny,\status:444"