一.导入案例代码
application.yml
server:port: 8888
spring:datasource:druid:driver-class-name: com.mysql.cj.jdbc.Driverurl: jdbc:mysql://localhost:3306/spring_cache_demo?serverTimezone=Asia/Shanghai&useUnicode=true&characterEncoding=utf-8&zeroDateTimeBehavior=convertToNull&useSSL=false&allowPublicKeyRetrieval=trueusername: rootpassword:redis:host: localhostport: 6379password: 123456database: 1
logging:level:com:itheima:mapper: debugservice: infocontroller: info
pom.xml
<?xml version="1.0" encoding="UTF-8"?>
<project xmlns="http://maven.apache.org/POM/4.0.0"xmlns:xsi="http://www.w3.org/2001/XMLSchema-instance"xsi:schemaLocation="http://maven.apache.org/POM/4.0.0 http://maven.apache.org/xsd/maven-4.0.0.xsd"><modelVersion>4.0.0</modelVersion><parent><groupId>org.springframework.boot</groupId><artifactId>spring-boot-starter-parent</artifactId><version>2.7.3</version><relativePath/></parent><groupId>com.itheima</groupId><artifactId>springcache-demo</artifactId><version>1.0-SNAPSHOT</version><properties><maven.compiler.source>11</maven.compiler.source><maven.compiler.target>11</maven.compiler.target></properties><dependencies><dependency><groupId>org.springframework.boot</groupId><artifactId>spring-boot-starter-web</artifactId><scope>compile</scope></dependency><dependency><groupId>org.projectlombok</groupId><artifactId>lombok</artifactId><version>1.18.20</version></dependency><dependency><groupId>com.alibaba</groupId><artifactId>fastjson</artifactId><version>1.2.76</version></dependency><dependency><groupId>commons-lang</groupId><artifactId>commons-lang</artifactId><version>2.6</version></dependency><dependency><groupId>org.springframework.boot</groupId><artifactId>spring-boot-starter-cache</artifactId></dependency><dependency><groupId>org.springframework.boot</groupId><artifactId>spring-boot-starter-data-redis</artifactId></dependency><dependency><groupId>mysql</groupId><artifactId>mysql-connector-java</artifactId><scope>runtime</scope></dependency><dependency><groupId>org.mybatis.spring.boot</groupId><artifactId>mybatis-spring-boot-starter</artifactId><version>2.2.0</version></dependency><dependency><groupId>com.alibaba</groupId><artifactId>druid-spring-boot-starter</artifactId><version>1.2.1</version></dependency><dependency><groupId>com.github.xiaoymin</groupId><artifactId>knife4j-spring-boot-starter</artifactId><version>3.0.2</version></dependency><dependency><groupId>org.springframework.boot</groupId><artifactId>spring-boot-starter-test</artifactId></dependency></dependencies><build><plugins><plugin><groupId>org.springframework.boot</groupId><artifactId>spring-boot-maven-plugin</artifactId><version>2.7.3</version></plugin></plugins></build>
</project>
二.注解的使用
1.@EnableCaching注解
启动类:
package com.itheima;import lombok.extern.slf4j.Slf4j;
import org.springframework.boot.SpringApplication;
import org.springframework.boot.autoconfigure.SpringBootApplication;
import org.springframework.cache.annotation.EnableCaching;@Slf4j
@SpringBootApplication
@EnableCaching  // 开启缓存,通常加在启动类上
public class CacheDemoApplication {public static void main(String[] args) {SpringApplication.run(CacheDemoApplication.class,args);log.info("项目启动成功...");}
}
UserController.java
package com.itheima.controller;import com.itheima.entity.User;
import com.itheima.mapper.UserMapper;
import lombok.extern.slf4j.Slf4j;
import org.springframework.beans.factory.annotation.Autowired;
import org.springframework.cache.annotation.CachePut;
import org.springframework.web.bind.annotation.*;@RestController
@RequestMapping("/user")
@Slf4j
public class UserController {@Autowiredprivate UserMapper userMapper;@PostMapping// 在要缓存的方法上加上@CachePut注解// key中的内容为spring表达式@CachePut(cacheNames = "userCache", key = "#user.id")   // cacheNames表示缓存名称,在redis中会形成userCache::的形式,再加上key构成redis中的最终的key。此处是使用形参名+user.id动态生成key,以保证redis中的key都不同
//    @CachePut(cacheNames = "userCache", key = "#result.id")  // 这里使用result表示返回值user的id
//    @CachePut(cacheNames = "userCache", key = "#p0.id")
//    @CachePut(cacheNames = "userCache", key = "#a0.id")
//    @CachePut(cacheNames = "userCache", key = "#root.args[0].id")     后三种都表示取形参列表中的第一个参数(0号参数)的id属性作为keypublic User save(@RequestBody User user){userMapper.insert(user);return user;}@DeleteMappingpublic void deleteById(Long id){userMapper.deleteById(id);}@DeleteMapping("/delAll")public void deleteAll(){userMapper.deleteAll();}@GetMappingpublic User getById(Long id){User user = userMapper.getById(id);return user;}}
我们要使用缓存,那么就要现在启动类上加上开启缓存注解@EnableCaching。接着我们在要进行缓存的方法上加上注解。
2.@CachePut注解
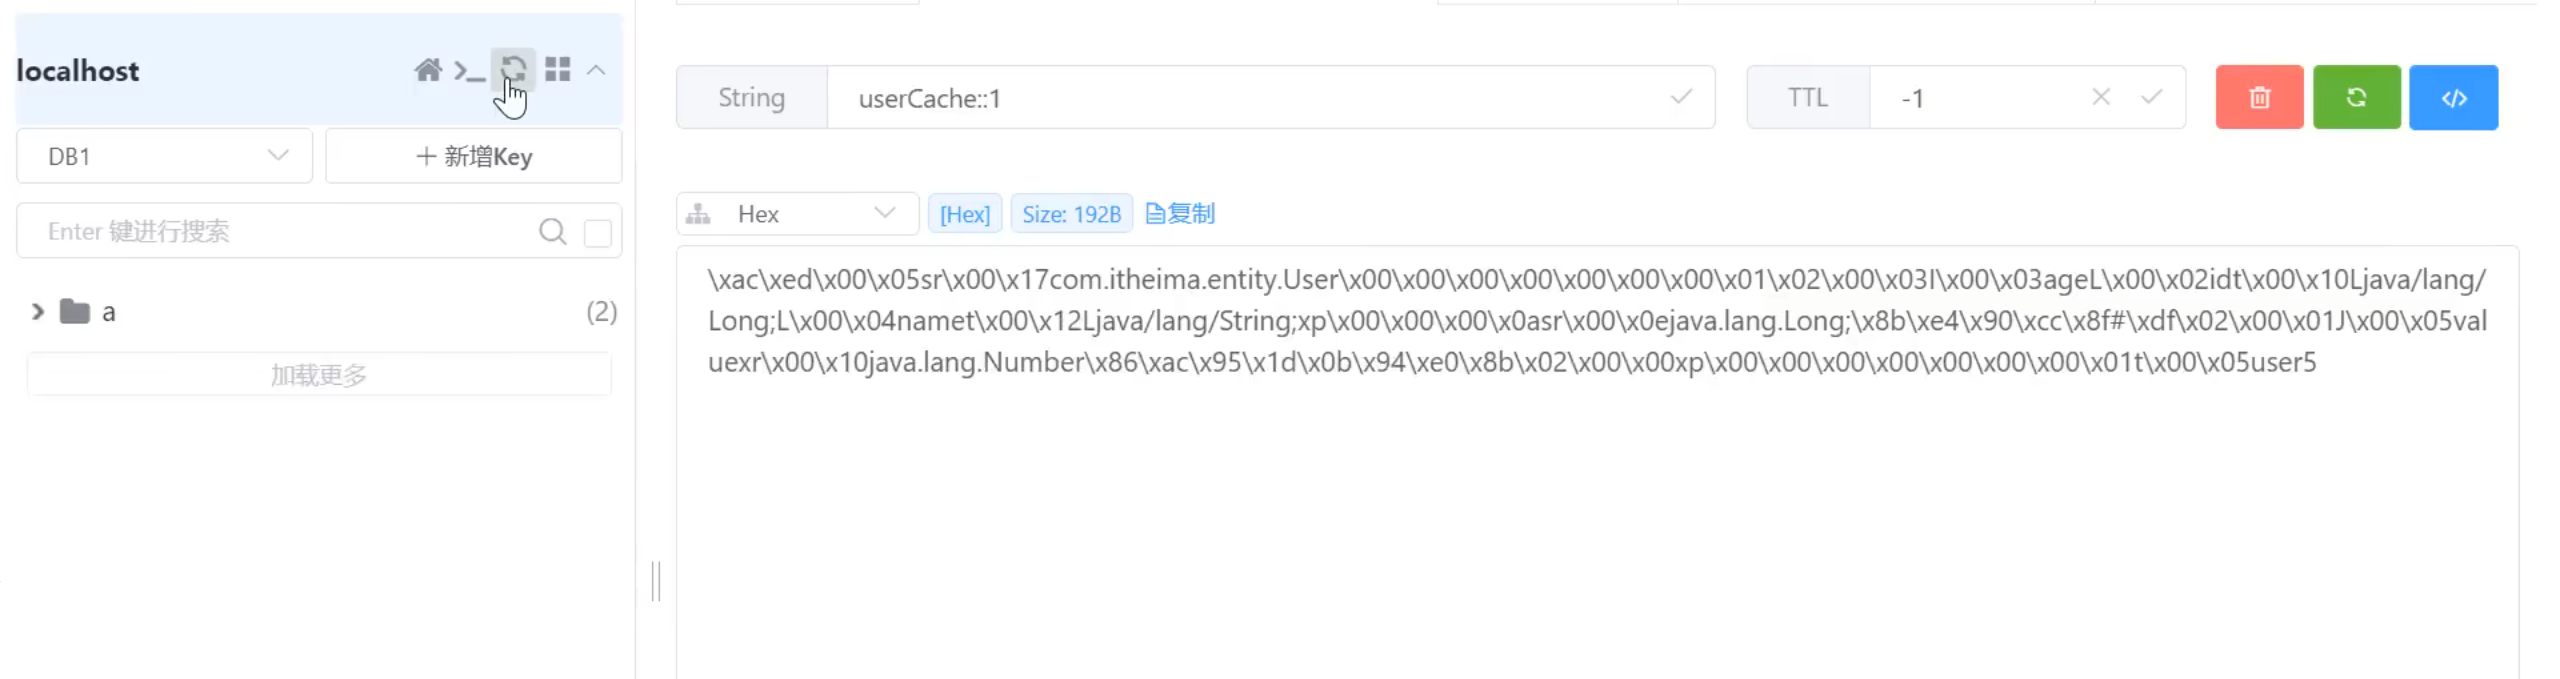
首先我们要将新增的数据添加到sql数据库和redis数据库当中。因此我们在save方法上加上@CachePut注解,并指定缓存名称为userCache,使用spring表达式来指定key。缓存名称cacheNames和key共同组成redis中完整的key。其组合方式为cacheNames:: + key。spring表达式要使用#开头:
1.@CachePut(cacheNames = "userCache", key = "#user.id")
使用形参的id属性作为key。
2.@CachePut(cacheNames = "userCache", key = "#result.id")
使用返回值的id属性作为key。
3.@CachePut(cacheNames = "userCache", key = "#p0.id")
4.@CachePut(cacheNames = "userCache", key = "#a0.id")
5.@CachePut(cacheNames = "userCache", key = "#root.args[0].id")
p0,a0,root.args[0]都表示形参列表中的第一个形参。

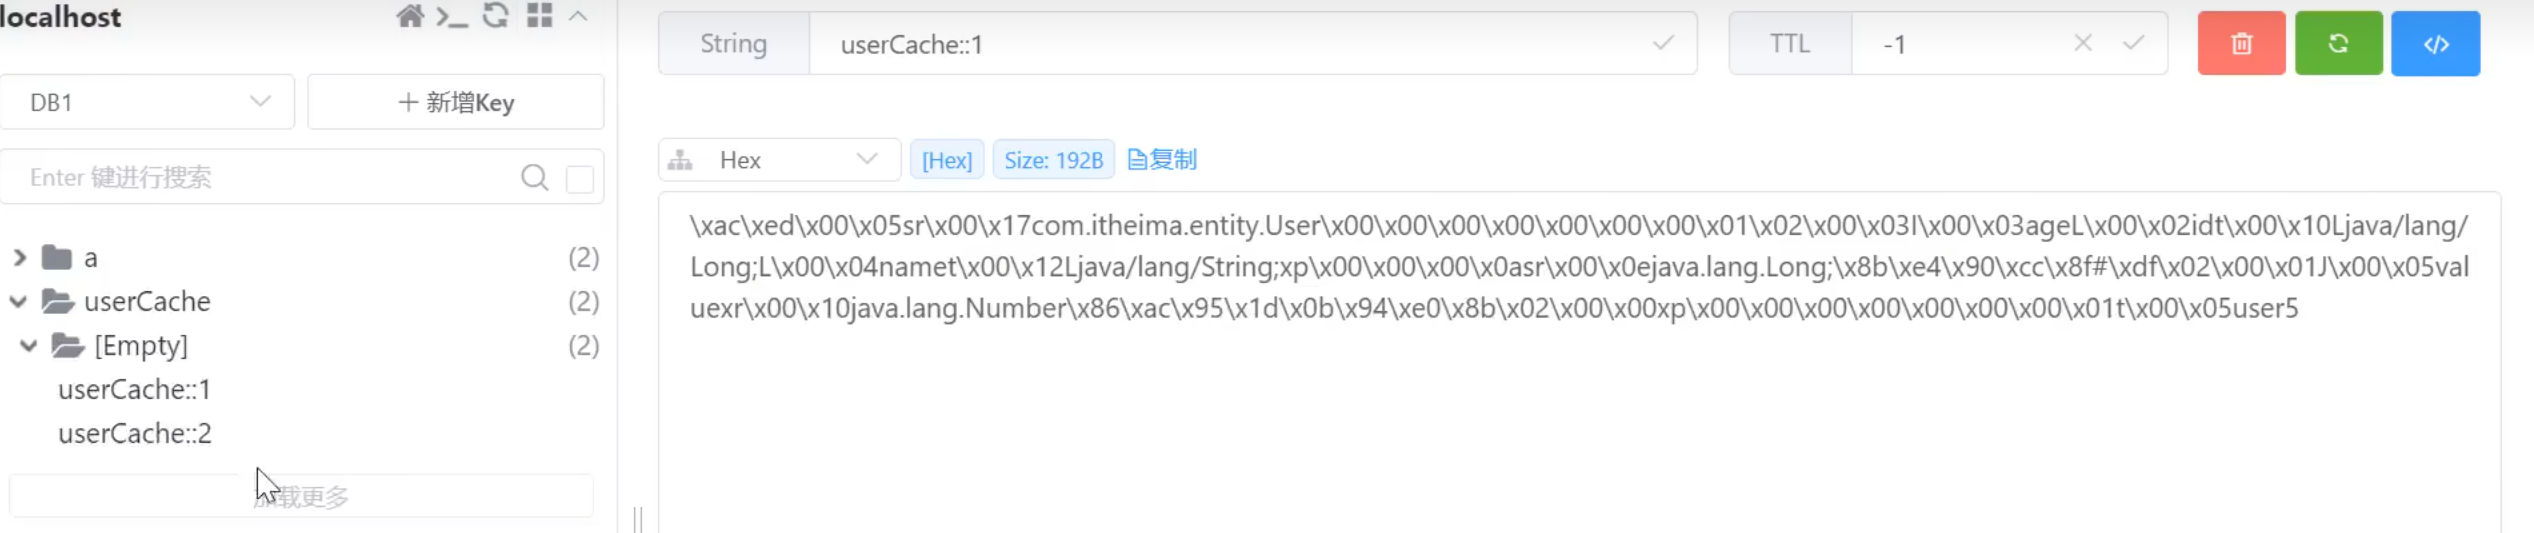
代码运行完毕后,已成功将测试数据缓存到sql数据库和redis数据库当中。
3.@Cacheable注解
在getById上加上@Cacheable注解,这样会先查询redis,没有的话再查询sql。
package com.itheima.controller;import com.itheima.entity.User;
import com.itheima.mapper.UserMapper;
import lombok.extern.slf4j.Slf4j;
import org.springframework.beans.factory.annotation.Autowired;
import org.springframework.cache.annotation.CachePut;
import org.springframework.cache.annotation.Cacheable;
import org.springframework.web.bind.annotation.*;@RestController
@RequestMapping("/user")
@Slf4j
public class UserController {@Autowiredprivate UserMapper userMapper;@PostMapping// 在要缓存的方法上加上@CachePut注解// key中的内容为spring表达式@CachePut(cacheNames = "userCache", key = "#user.id")   // cacheNames表示缓存名称,在redis中会形成userCache::的形式,再加上key构成redis中的最终的key。此处是使用形参名+user.id动态生成key,以保证redis中的key都不同
//    @CachePut(cacheNames = "userCache", key = "#result.id")  // 这里使用result表示返回值user的id
//    @CachePut(cacheNames = "userCache", key = "#p0.id")
//    @CachePut(cacheNames = "userCache", key = "#a0.id")
//    @CachePut(cacheNames = "userCache", key = "#root.args[0].id")     后三种都表示取形参列表中的第一个参数(0号参数)的id属性作为keypublic User save(@RequestBody User user){userMapper.insert(user);return user;}@DeleteMappingpublic void deleteById(Long id){userMapper.deleteById(id);}@DeleteMapping("/delAll")public void deleteAll(){userMapper.deleteAll();}@Cacheable(cacheNames = "userCache", key = "#id")   // 判断redis中是否有数据,有的话直接返回缓存数据,没有再查数据库@GetMappingpublic User getById(Long id){User user = userMapper.getById(id);return user;}}
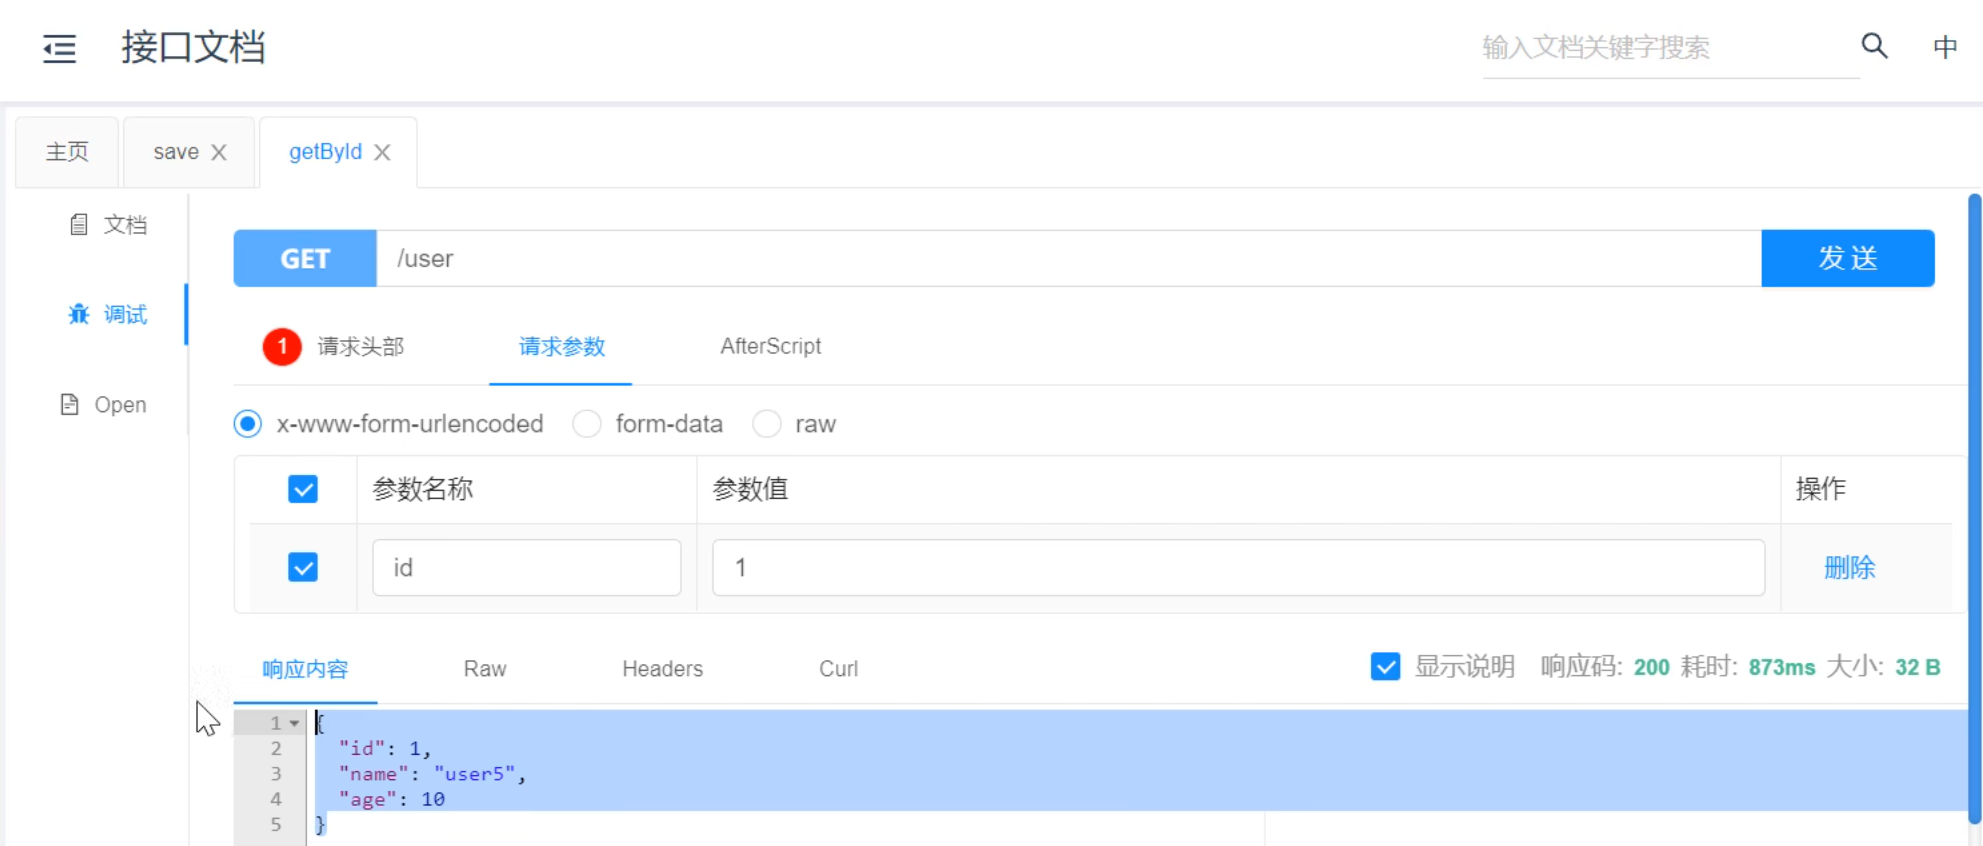
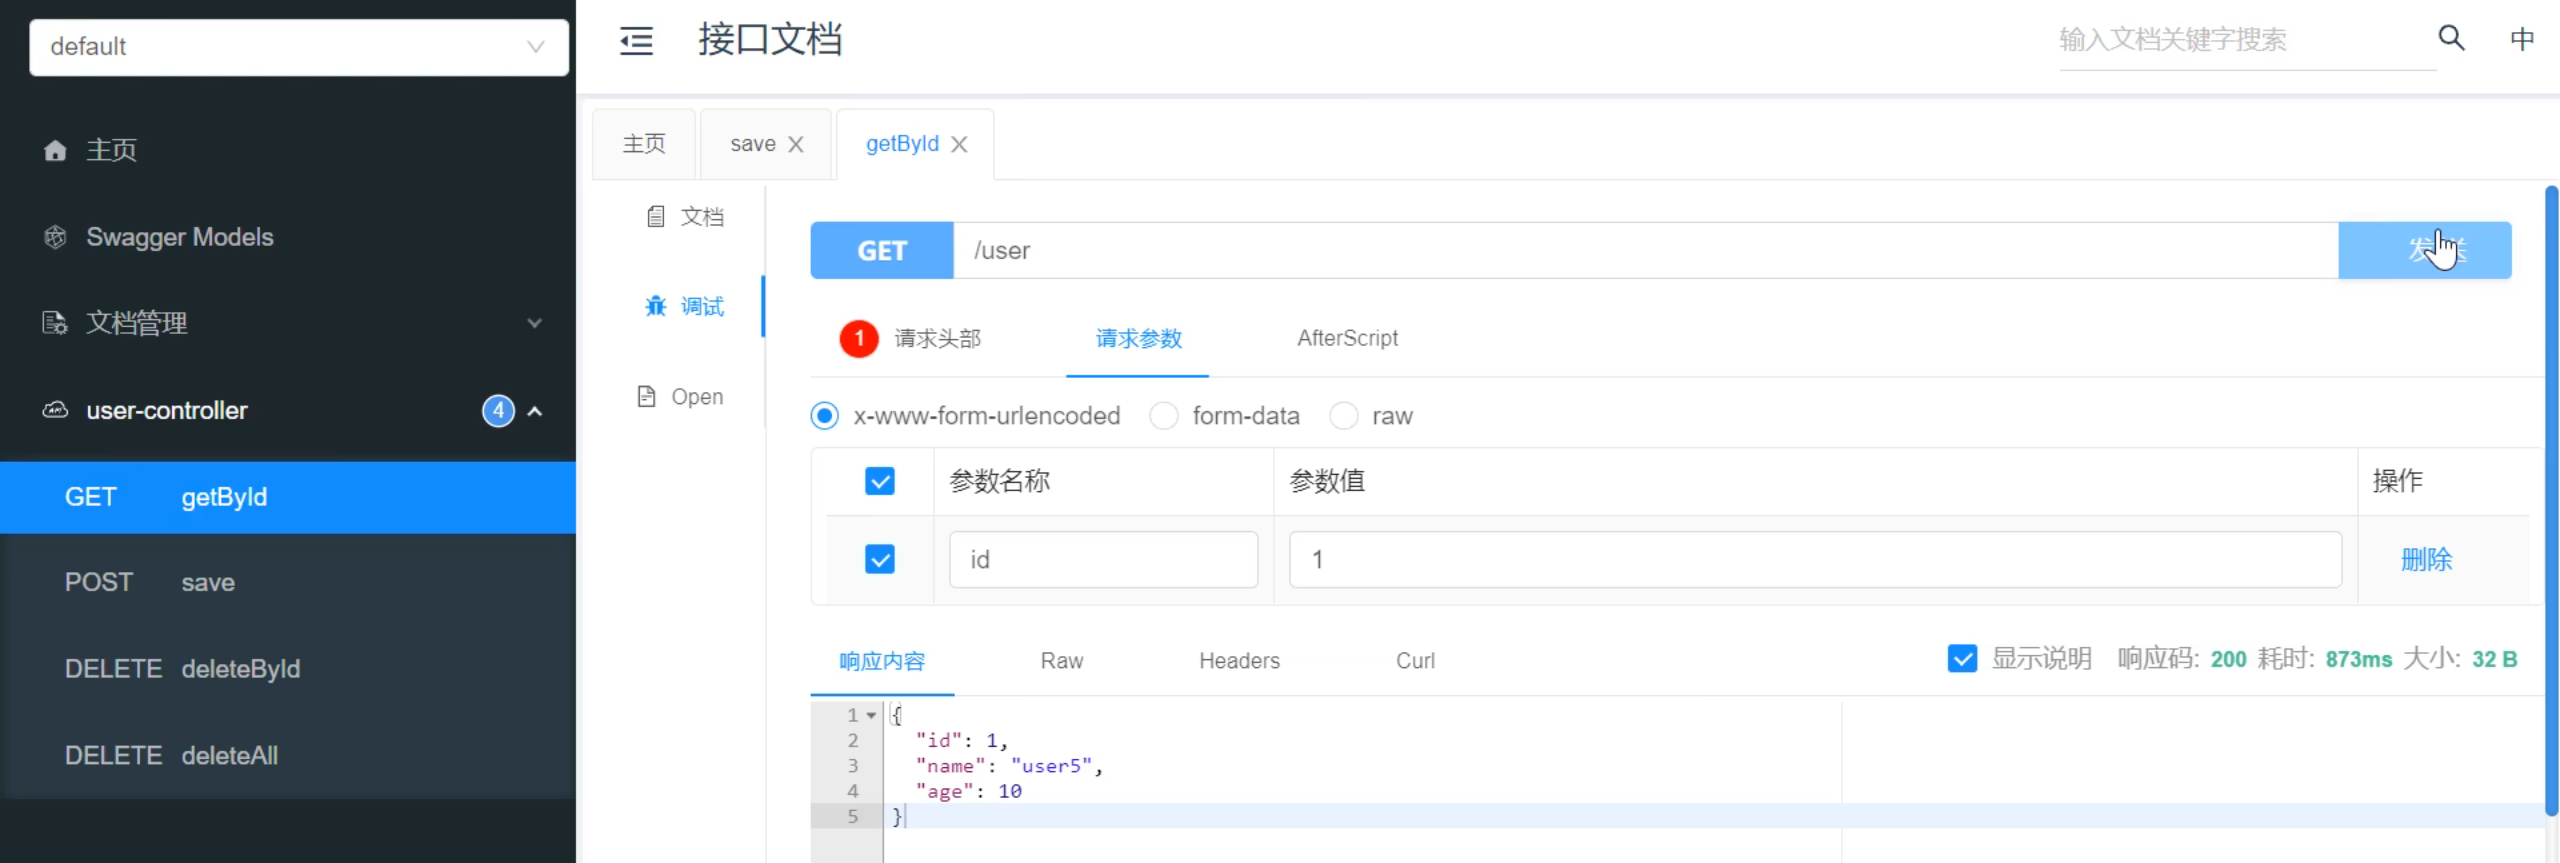
查询到数据,但是没有调用getById方法,是因为redis中确实有该数据。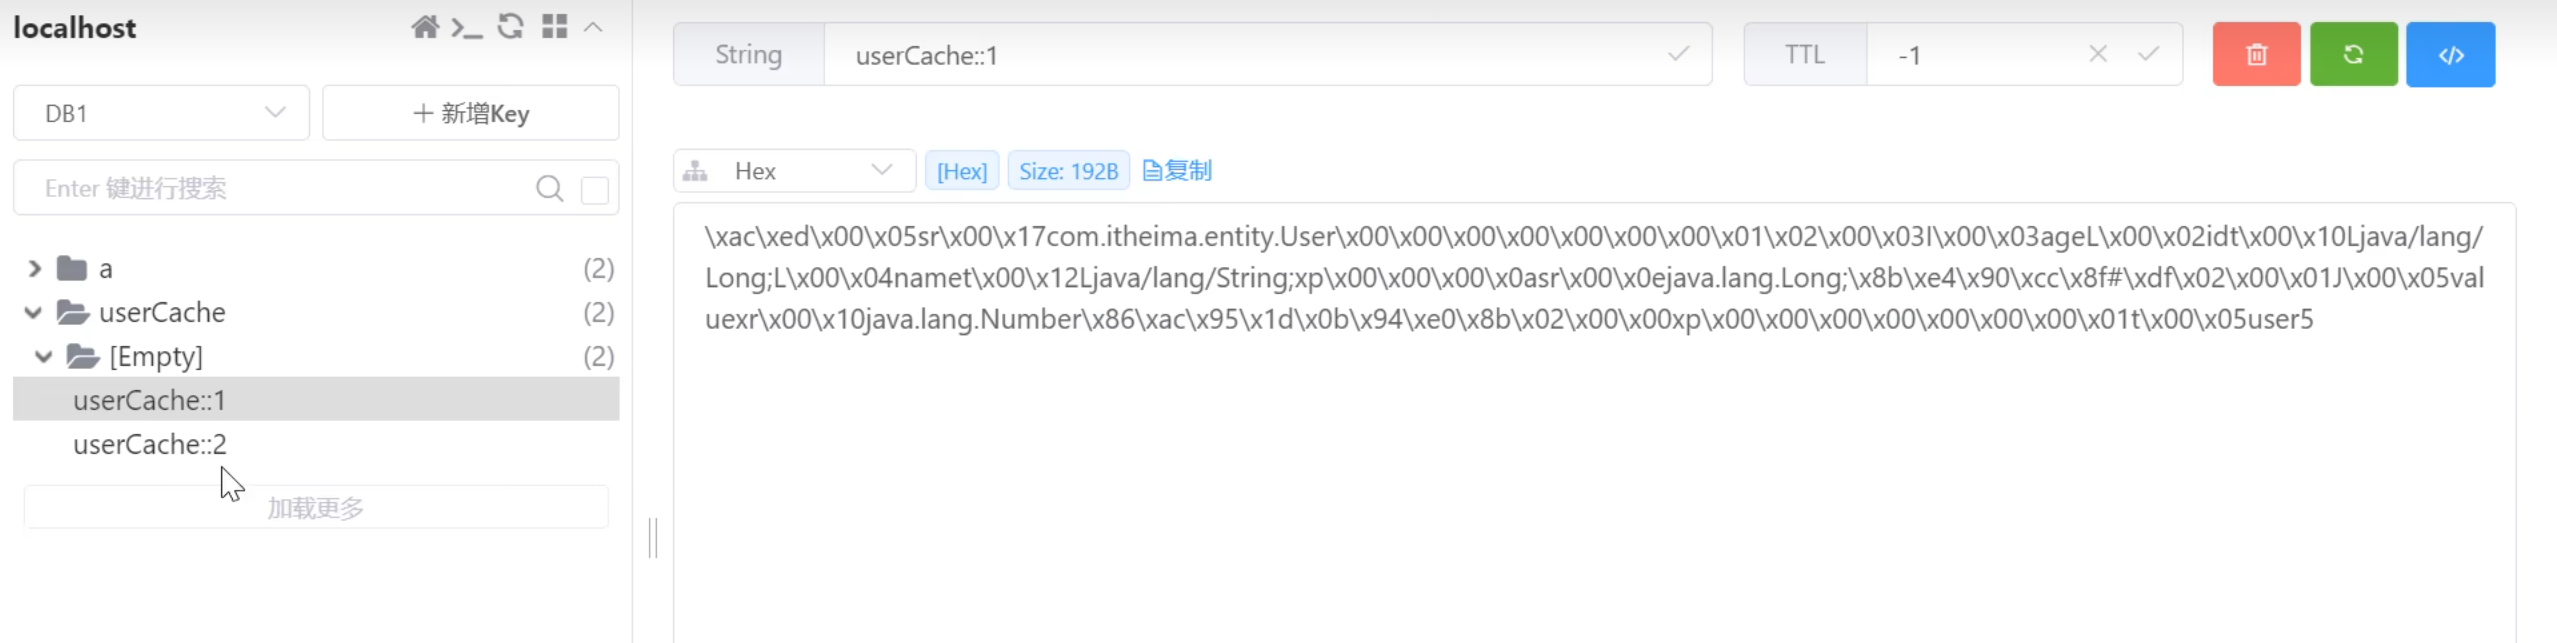 我们将其删除再查:
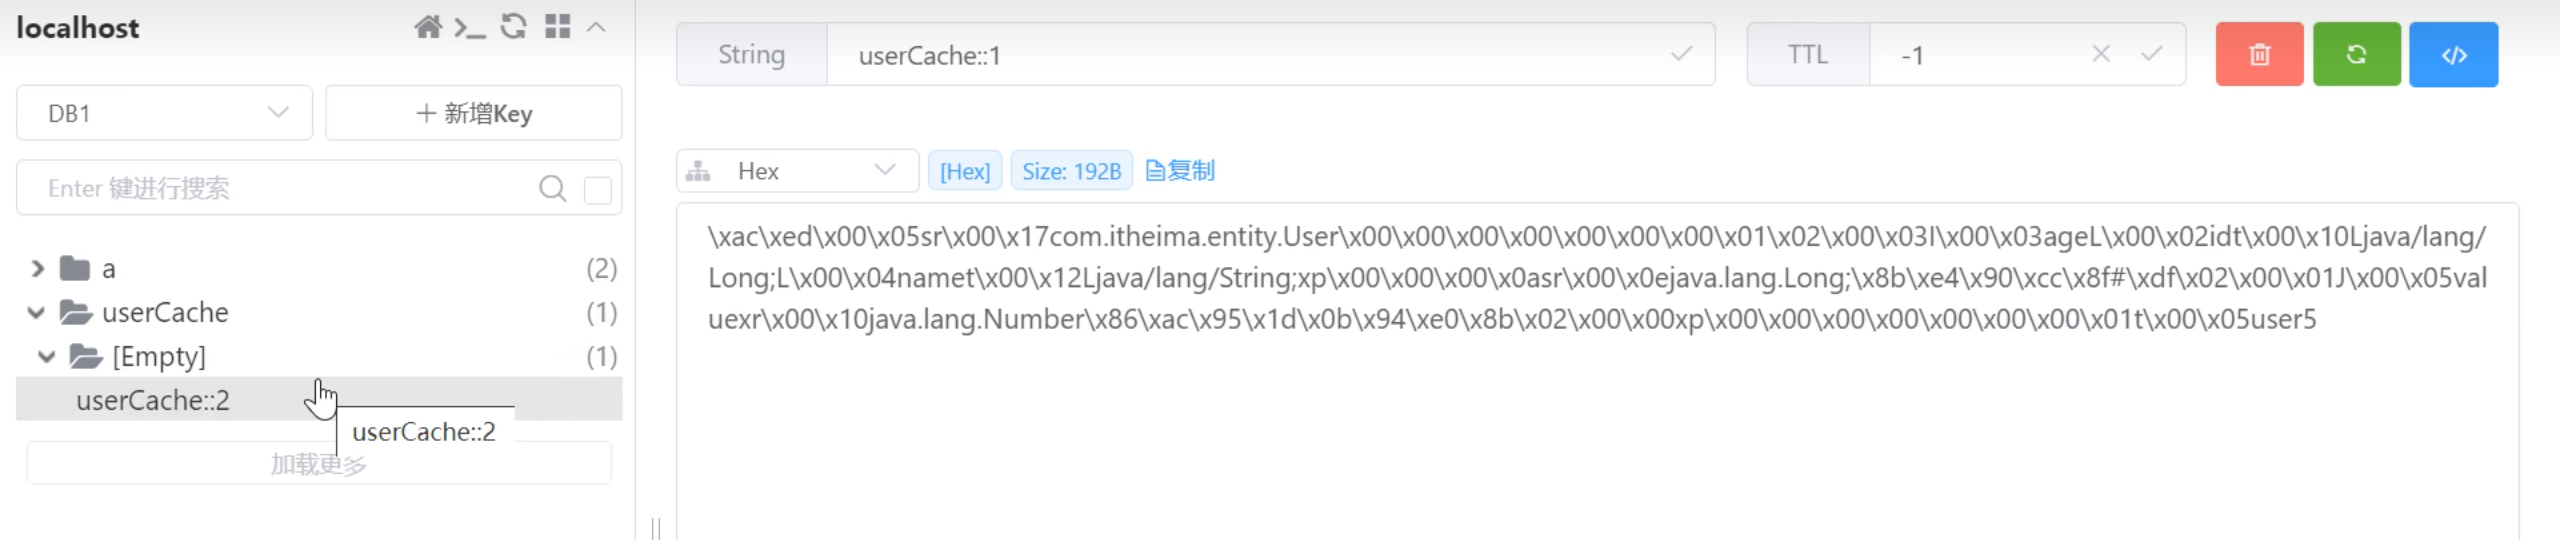
这时就会执行该方法,因为在redis中没有查询到对应的数据。
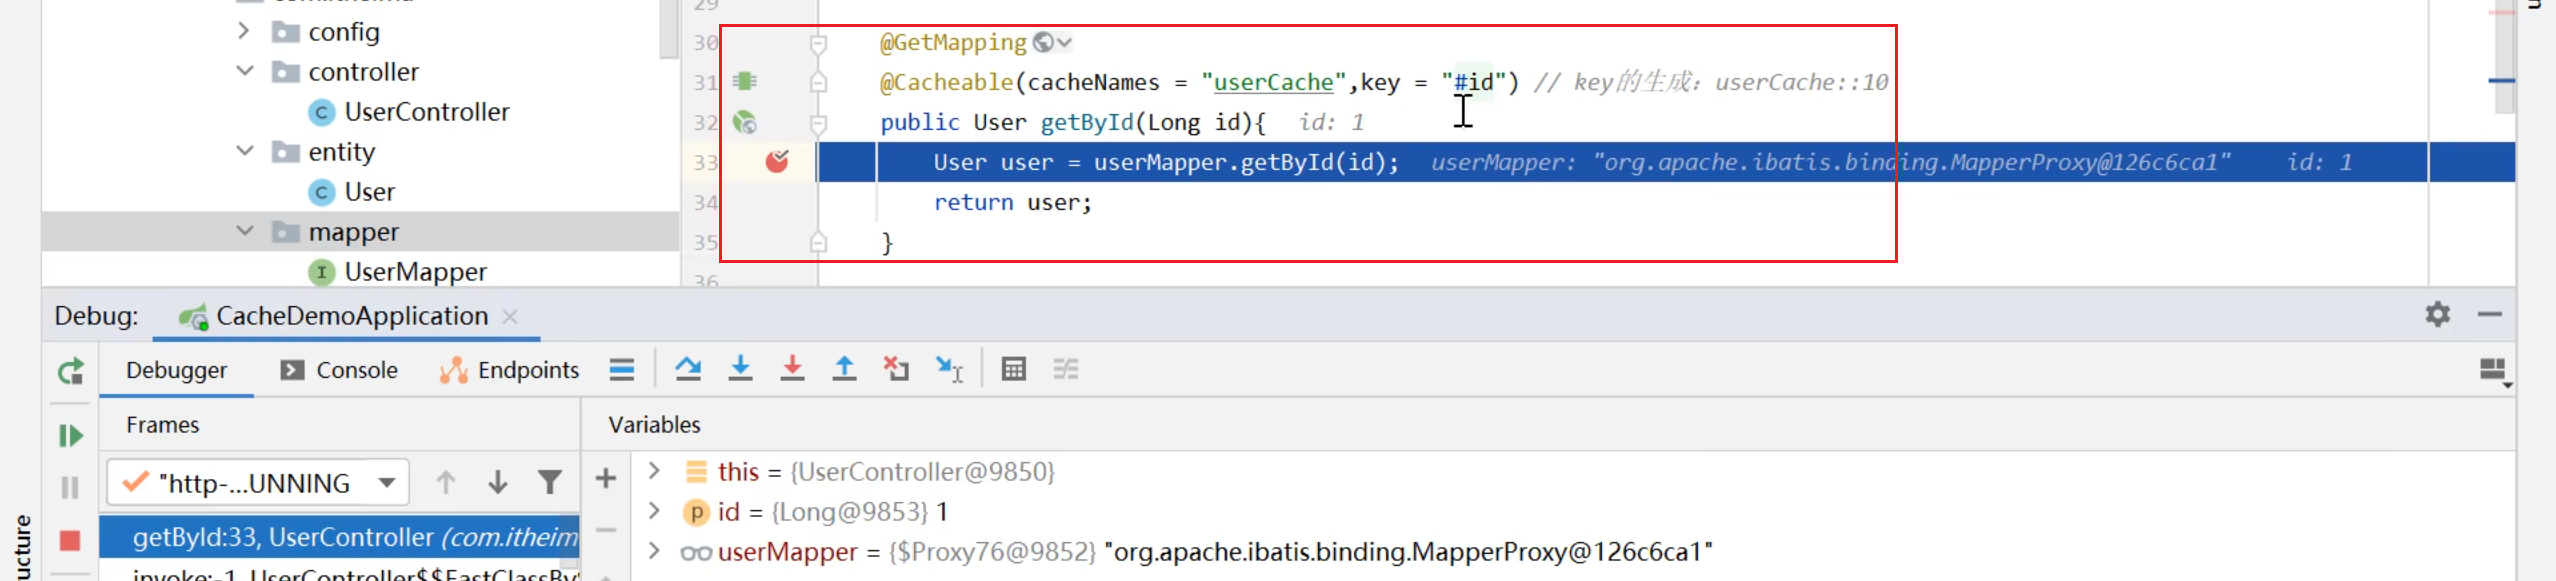
控制台会使用sql进行查询。
 之后会将该数据放入redis缓存。
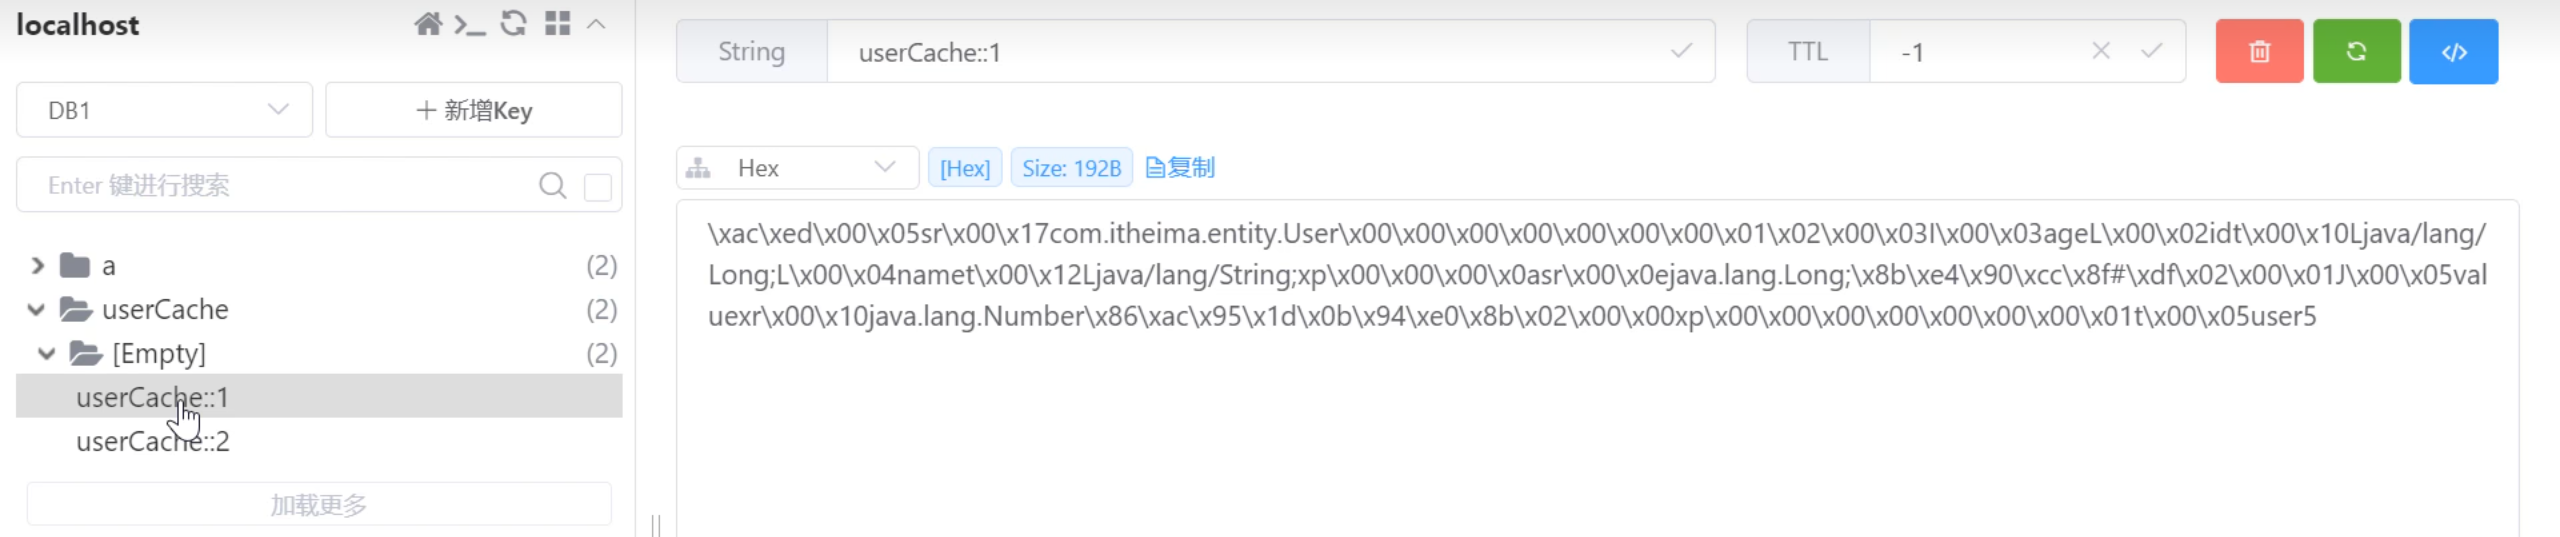
再次查询就会直接查出来而不用执行getById方法查询数据库。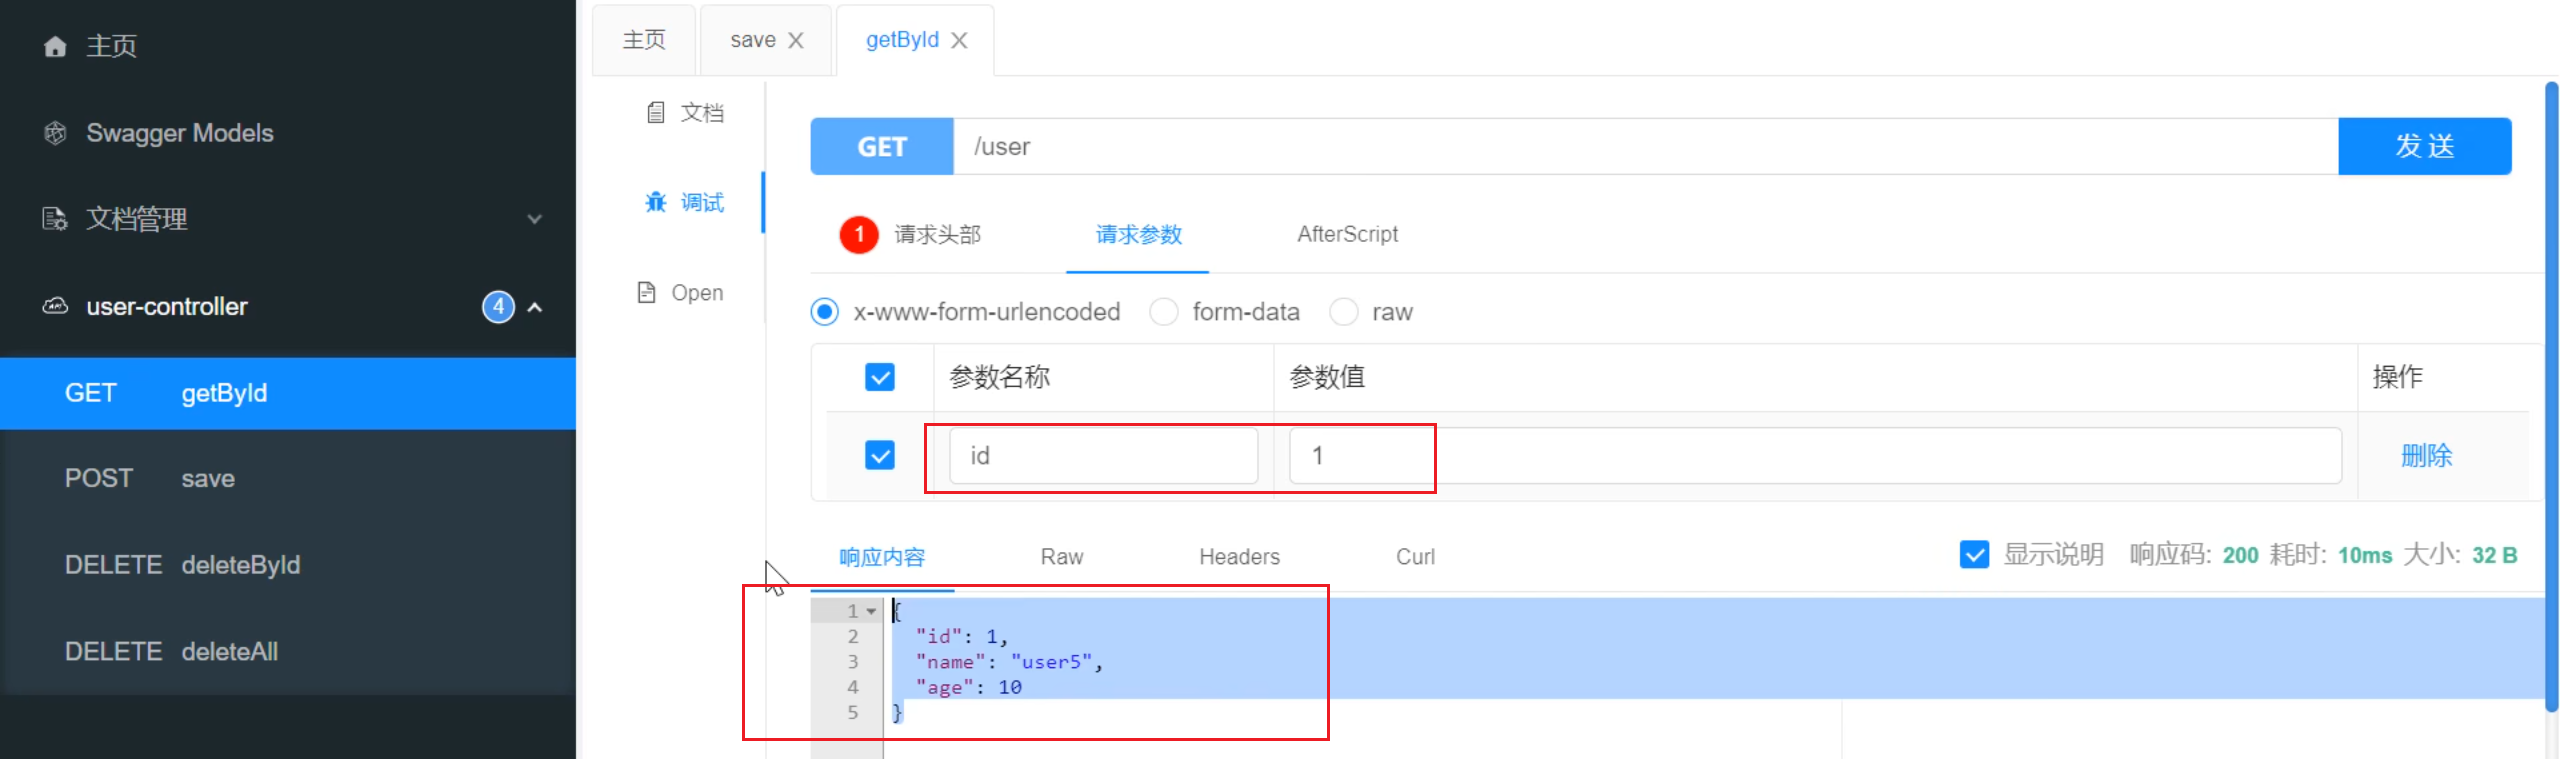
4.@CacheEvict注解
我们使用@CacheEvict注解来删除redis数据库中的缓存数据。当sql数据库中的数据被删除后,redis当中相对应的数据也应该被删除。
package com.itheima.controller;import com.itheima.entity.User;
import com.itheima.mapper.UserMapper;
import lombok.extern.slf4j.Slf4j;
import org.springframework.beans.factory.annotation.Autowired;
import org.springframework.cache.annotation.CacheEvict;
import org.springframework.cache.annotation.CachePut;
import org.springframework.cache.annotation.Cacheable;
import org.springframework.web.bind.annotation.*;@RestController
@RequestMapping("/user")
@Slf4j
public class UserController {@Autowiredprivate UserMapper userMapper;@PostMapping// 在要缓存的方法上加上@CachePut注解// key中的内容为spring表达式@CachePut(cacheNames = "userCache", key = "#user.id")   // cacheNames表示缓存名称,在redis中会形成userCache::的形式,再加上key构成redis中的最终的key。此处是使用形参名+user.id动态生成key,以保证redis中的key都不同
//    @CachePut(cacheNames = "userCache", key = "#result.id")  // 这里使用result表示返回值user的id
//    @CachePut(cacheNames = "userCache", key = "#p0.id")
//    @CachePut(cacheNames = "userCache", key = "#a0.id")
//    @CachePut(cacheNames = "userCache", key = "#root.args[0].id")     后三种都表示取形参列表中的第一个参数(0号参数)的id属性作为keypublic User save(@RequestBody User user){userMapper.insert(user);return user;}@CacheEvict(cacheNames = "userCache", key = "#id")  // 删除指定的userCache::id键值对@DeleteMappingpublic void deleteById(Long id){userMapper.deleteById(id);}@CacheEvict(cacheNames = "userCache", allEntries = true)    // 删除全部userCache键值对@DeleteMapping("/delAll")public void deleteAll(){userMapper.deleteAll();}@Cacheable(cacheNames = "userCache", key = "#id")   // 判断redis中是否有数据,有的话直接返回缓存数据,没有再查数据库@GetMappingpublic User getById(Long id){User user = userMapper.getById(id);return user;}}
@CacheEvict注解首先也应该定义cacheNames,用来指定要删除的key,接着在key中书写spring表达式来删除对应的键值对。这个注解在根据id删除对应的数据这个方法中进行使用。
其中@CacheEvict注解中也可以使用allEntries这个属性,这个属性用于删除所有cacheName中的键值对。当allEntries=true时,删除所有的符合cacheName的键值对。这个注解在deleteAll这个方法中进行使用。
接下来我们进行测试:
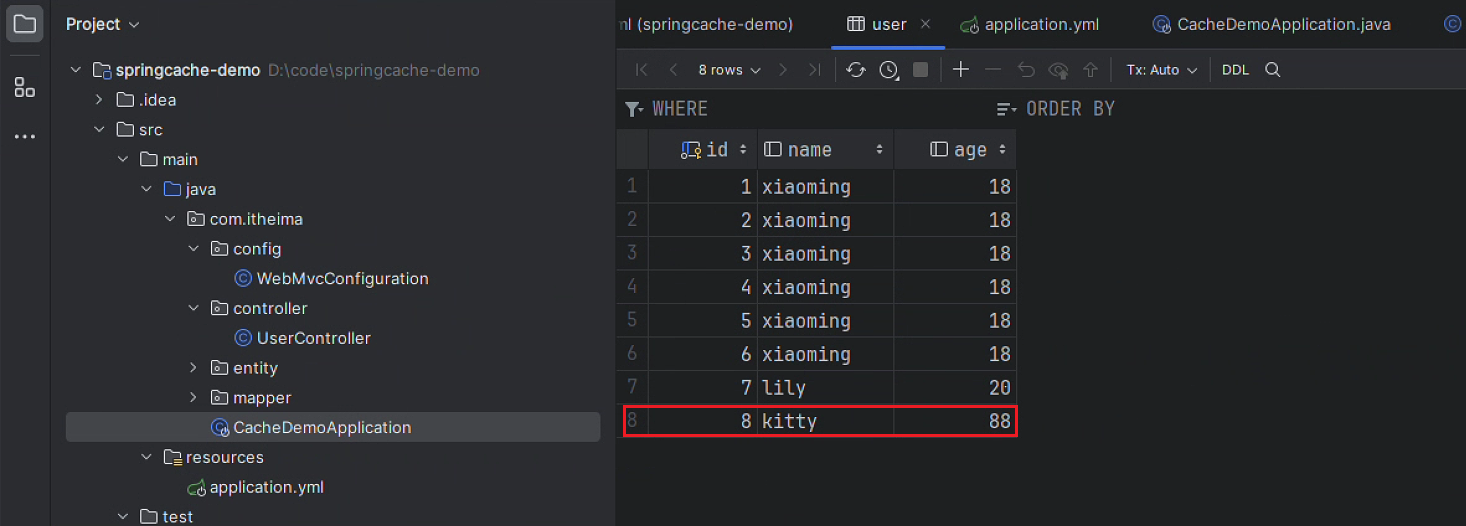
数据库中两条数据。
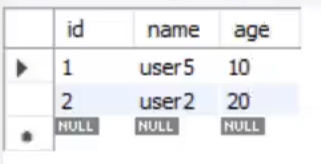
我们删除id=1的,
数据库中的数据已经被清理了。
 刷新后发现缓存数据还在,那是因为只有等方法执行完后才会清理redis中的缓存数据。
我们将方法执行完,发现redis中的数据已经被删了。

现在我们往数据库中插入多条数allEntries=true据。接着进行批量删除,执行deleteAll方法。我们使用allEntries=true进行批量删除。这样userCache下面所有的键值对都会被删除掉。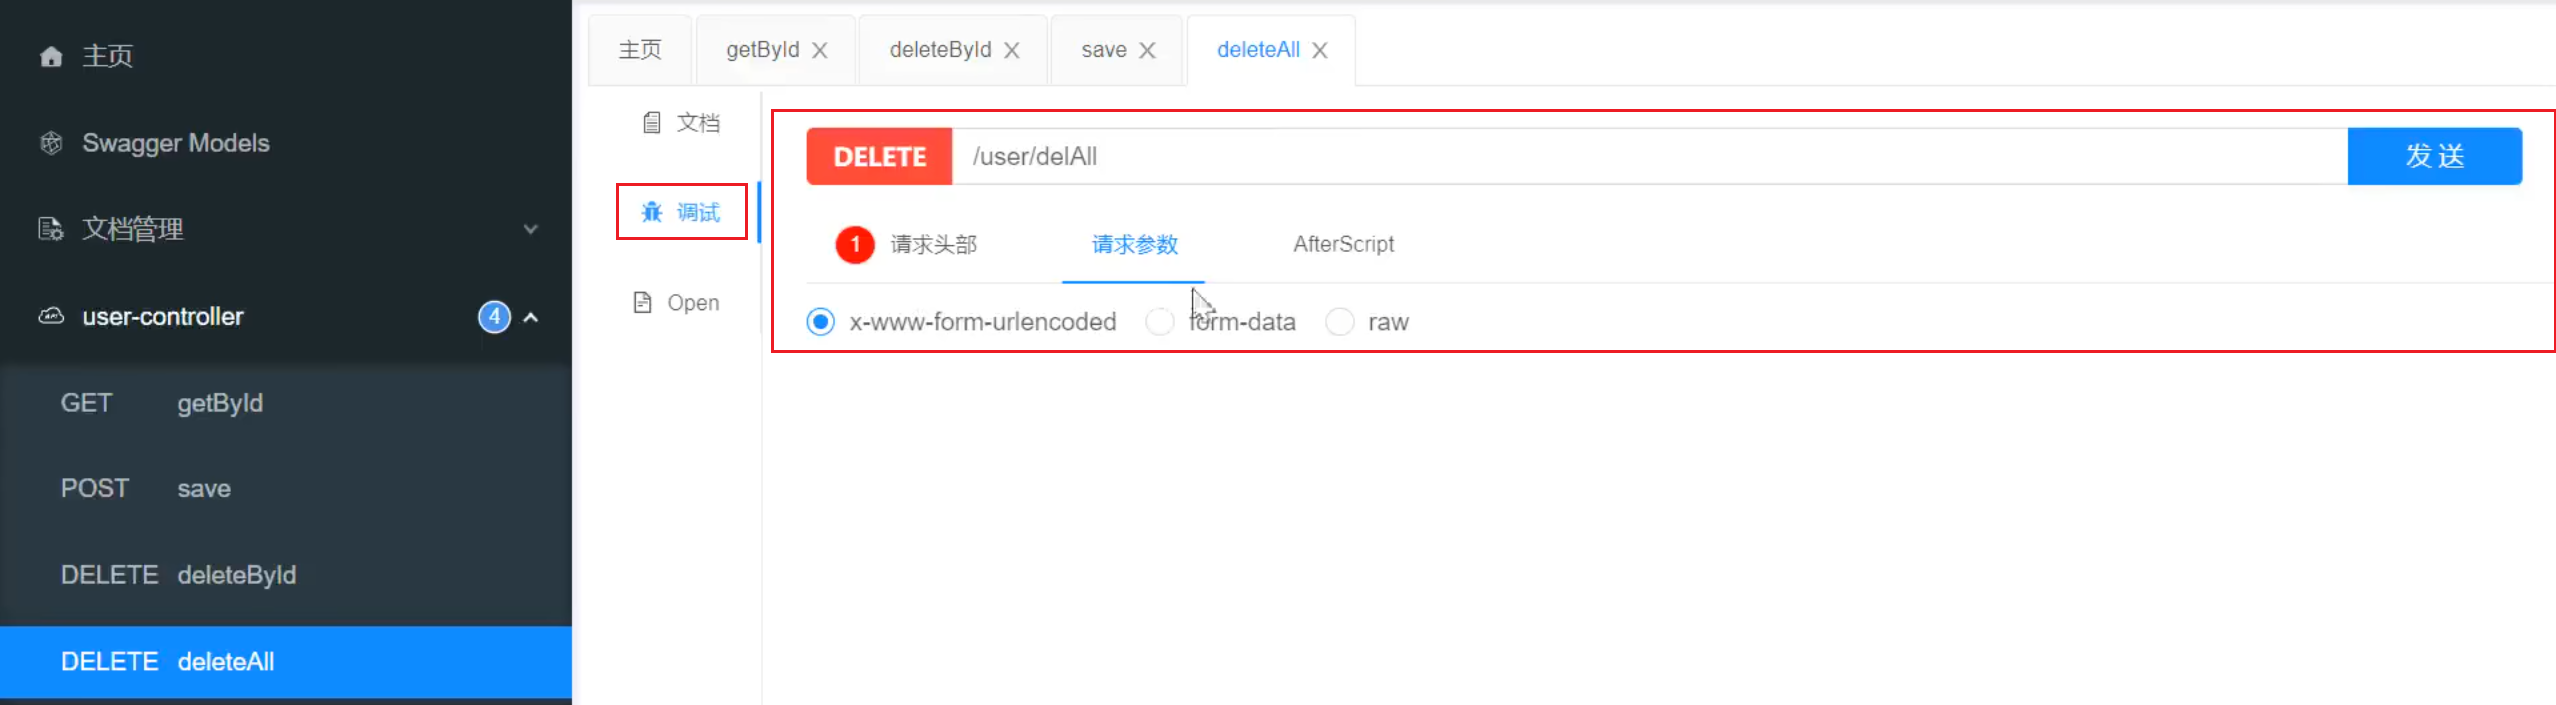
用户数据没有了,缓存数据也没有了。