【Scrapy】简单项目实战--爬取dangdang图书信息
目录
一、基本步骤
1、新建项目 :新建一个新的爬虫项目
2、明确目标 (items.py):明确你想要抓取的目标
3、制作爬虫 (spiders/xxspider.py):制作爬虫开始爬取网页
4、存储内容 (pipelines.py):设计管道存储爬取内容
5、运行爬虫
二、实战:爬取当当图书
接下来介绍一个简单的项目,完成一遍 Scrapy 抓取流程。
一、基本步骤
1、新建项目 :新建一个新的爬虫项目
1 创建一个scrapy项目
scrapy startproject mySpider(文件夹名称)
2、明确目标 (items.py):明确你想要抓取的目标
选择你需要爬取的内容,例如作者名字、小说名、封面图片等
在items.py文件中定义
3、制作爬虫 (spiders/xxspider.py):制作爬虫开始爬取网页
 生成一个爬虫
scrapy genspider  爬虫文件的名字 要爬的网页
eg:[不需要加https]
https://www.baidu.com/ --> baidu.com
https://www.douban.com/  --> douban.com
scrapy genspider baidu www.baidu.com
EG 爬虫文件解释:
import scrapy
class BaiduSpider(scrapy.Spider):# 爬虫的名字 一般运行爬虫的时候 使用的值name = 'baidu'# 允许访问的域名allowed_domains = ['www.baidu.com']# 起始的url地址  指的是第一次要访问的域名# start_urls   是在allowed_domains的前面添加一个http://#              是在allowed_domains的后面添加一个/# 如果以html结尾 就不用加/ 否则网站进不去  报错start_urls = ['http://www.baidu.com/']# 是执行了start_urls之后  执行的方法# 方法中的response  就是返回的那个对象# 相当于 response = urllib.request.urlopen()#       response = requests.get()def parse(self, response):pass
4、 配置中间件(middlewares.py防反爬)
# middlewares.py 添加随机请求头和代理
import random
from fake_useragent import UserAgentclass CustomMiddleware:def process_request(self, request, spider):# 随机UA(伪装不同浏览器)request.headers['User-Agent'] = UserAgent().random# 使用代理IP(示例用阿布云代理)request.meta['proxy'] = "http://http-dyn.abuyun.com:9020"request.headers['Proxy-Authorization'] = basic_auth_header('H01234567890123D', '0123456789012345')
【本项目没有防反爬机制,不用管这个文件】
4、存储内容 (pipelines.py):设计管道存储爬取内容
如果想使用管道的话 那么就必须在settings中开启管道
ITEM_PIPELINES = {# 管道可以有很多个 那么管道是有优先级 优先级的范围是1到1000 值越小优先级越高'scrapy_dangdang.pipelines.ScrapyDangdangPipeline': 300,
}# 将在settings.py中这段话取消注释,则打开了通道。
然后去pippelines.py中设计管道:
class ScrapyDangdangPipeline:def open_spider(self,spider):self.fp = open('book.json','w',encoding='utf-8')# item就是yield后面的对象def process_item(self, item, spider): self.fp.write(str(item))return itemdef close_spider(self,spider):self.fp.close()
5、运行爬虫
在cmd中输入:scrapy crawl 爬虫的名字eg:scrapy crawl baidu
二、实战:爬取当当图书
创建项目
上一节我们已经创建好了文件夹
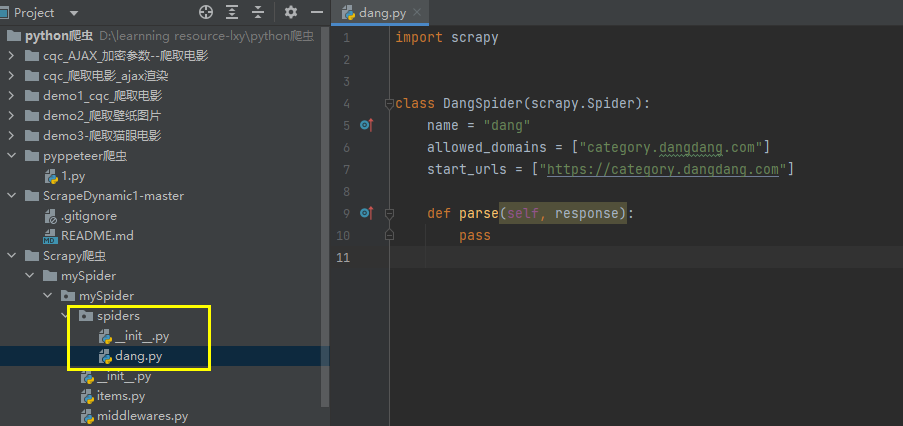
创建好文件夹之后,通过cd mySprider进入到文件夹内部,创建通过scrapy genspider 爬虫程序了,这里创建爬虫文件,scrapy genspider dang category.dangdang.com

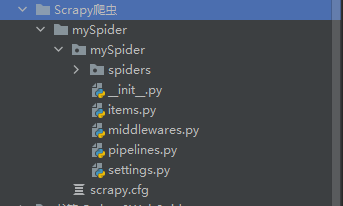
爬虫文件已经创建完成,通过mySprider,spiders目录下看到创建好的db文件。
明确目标 (items.py):明确你想要抓取的目标
-
确定需要下载的数据,去items.py文件中添加。这里我们准备存储图片、名字和价格
# Define here the models for your scraped items
#
# See documentation in:
# https://docs.scrapy.org/en/latest/topics/items.htmlimport scrapyclass MyspiderItem(scrapy.Item):# define the fields for your item here like:# name = scrapy.Field()src = scrapy.Field()# 名字name = scrapy.Field()# 价格price = scrapy.Field()pass
去爬虫文件中去爬取我们需要的内容了(这里是在dang.py文件中)
import scrapy
from ..items import MyspiderItemclass DangSpider(scrapy.Spider):# 爬虫的名字 一般运行爬虫的时候 使用的值name = 'dang'# 允许访问的域名# 如果是多页下载的话 那么必须要调整的是allowed_domains的范围 一般情况下只写域名allowed_domains = ['category.dangdang.com']# 起始的url地址  指的是第一次要访问的域名# start_urls   是在allowed_domains的前面添加一个http://#              是在allowed_domains的后面添加一个/# 如果以html结尾 就不用加/start_urls = ['http://category.dangdang.com/cp01.01.02.00.00.00.html']base_url = 'http://category.dangdang.com/pg'page = 1# 是执行了start_urls之后  执行的方法# 方法中的response  就是返回的那个对象# 相当于 response = urllib.request.urlopen()#       response = requests.get()def parse(self, response):# pipelines     下载数据# items         定义数据结构的# src = //ul[@id="component_59"]/li//img/@src# alt = //ul[@id="component_59"]/li//img/@alt# price = //ul[@id="component_59"]/li//p[@class="price"]/span[1]/text()# 所有的seletor的对象 都可以再次调用xpath方法li_list = response.xpath('//ul[@id="component_59"]/li')for li in li_list:#  第一张图片和其他的图片的标签是属性是不一样的#  第一张图片src是可以使用的 其他图片的地址data-originalsrc = li.xpath('.//img/@data-original').extract_first()if src:src = srcelse:src = li.xpath('.//img/@src').extract_first()name = li.xpath('.//img/@alt').extract_first()price = li.xpath('.//p[@class="price"]/span[1]/text()').extract_first()book = MyspiderItem(src=src,name=name,price=price)# 获取一个book就交给pipelinesyield book# 每一页爬取的业务逻辑都是一样的# 所以我们只需要将执行的那个页的请求再次调用parse方法就可以了if self.page < 100:self.page = self.page + 1url = self.base_url + str(self.page) + '-cp01.01.02.00.00.00.html'# 怎么去调用parse方法# scrapy.Request就是scrpay的get方法# url就是请求地址# callback是你要执行的那个函数 注意不需要加圆括号yield scrapy.Request(url=url,callback=self.parse)
通过解析拿到数据之后,我们就可以去通道中添加保存的方法了(pippelines.py)
去settings.py在打开通道和添加通道,完成之后进行下一步
ITEM_PIPELINES = {# 管道可以有很多个 那么管道是有优先级 优先级的范围是1到1000 值越小优先级越高'mySpider.pipelines.ScrapyDangdangPipeline': 300,'mySpider.pipelines.DangDangDownloadPiepline': 301,
}
注意
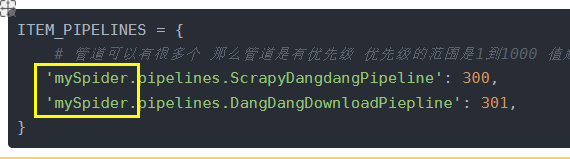
黄色框起来的是你的文件名,自行修改!
- 通道打开后,在pippelines.py完成下列操作
import os
# 如果想使用管道的话 那么就必须在settings中开启管道
class ScrapyDangdangPipeline:def open_spider(self,spider):self.fp = open('book.json','w',encoding='utf-8')# item就是yield后面的book对象def process_item(self, item, spider):# 一下这种模式不推荐 因为每传递一个对象 那么就打开一次文件对文件的操作过于频繁# # write方法必须要写一个字符串 而不能是其他的对象# # w模式 会每一个对象都打开一次文件 覆盖之前的内容# with open('book.json','a',encoding='utf-8') as fp:#     fp.write(str(item))self.fp.write(str(item))return itemdef close_spider(self,spider):self.fp.close()# 多条管道开启# 定义管道类# 在settings中开启管道# 'scrapy_dangdang.pipelines.DangDangDownloadPiepline': 301,
import urllib.requestclass DangDangDownloadPiepline:def process_item(self,item,spider):url = 'http:' + item.get('src')if not os.path.exists('./books/'):os.mkdir('./books/')filename = './books/' + item.get('name') + '.jpg'urllib.request.urlretrieve(url=url,filename=filename)return item
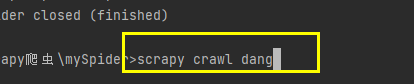
- 最后在cmd中输入:scrapy crawl dang
- 完成之后就开始下载了,全部完成之后你就会看到多了book.json文件和books文件夹在自己的项目中。里面有数据,则表示项目成功了。
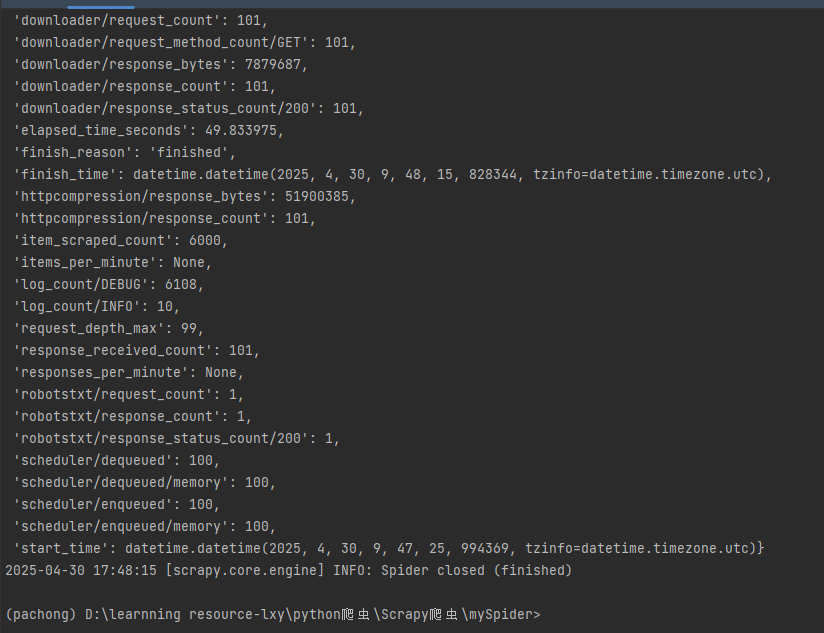
运行结果

三、总结
一定要记得!!在setting开启管道设置 ,设置的时候注意路径名称,在这卡了半天
✅ spiders/ 里的爬虫逻辑(怎么抓,主要抓取数据的文件)
✅ pipelines.py 里的存储逻辑,处理抓到的数据(怎么存,定义文件存储方式等等)
✅ settings.py 里的配置参数(怎么调优)总的来说,简单一点的爬虫用scrapy实现时需要先创建好项目-->明确要爬取的目标--->分析页面,看看数据存在什么标签中,写爬取的py文件--->看看是否有反爬机制--->在管道文件中添加对数据的处理方式。