Knife4j 接口文档添加登录验证流程分析
Knife4j 接口文档添加登录验证流程是非常必要的,否则接口文档一旦暴露到外面是很危险的,今天我们详细分析一下。在1.9.6的版本时,作者把swagger-bootstrap-ui项目重命名为Knife4j,今天分析2.0.6版本。
1、pom.xml文件引入
<parent><groupId>org.springframework.boot</groupId><artifactId>spring-boot-starter-parent</artifactId><version>2.3.4.RELEASE</version><relativePath /> </parent><dependency><groupId>com.github.xiaoymin</groupId><artifactId>knife4j-spring-boot-starter</artifactId><version>2.0.6</version></dependency><dependency><groupId>org.springframework.boot</groupId><artifactId>spring-boot-starter-web</artifactId></dependency><dependency><groupId>com.google.guava</groupId><artifactId>guava</artifactId><version>20.0</version><scope>compile</scope></dependency>
详解:只需要引入knife4j-spring-boot-starter即可,它会把其它的依赖都加载进来,如要Swagger的核心包也会加载进来,我们看下他的依赖包如下:
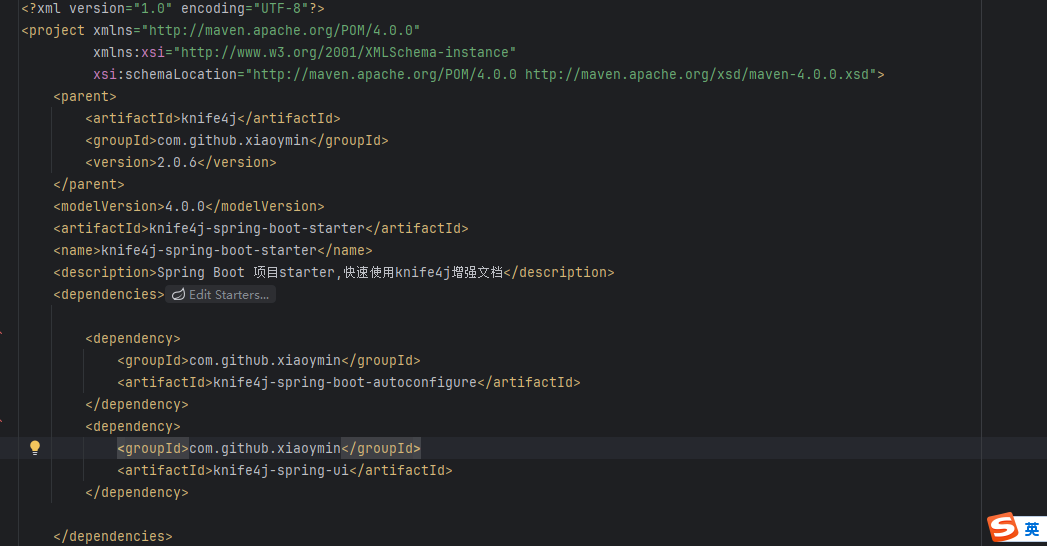
等等可以看到需要的均包含里面。
2、配置文件
pro格式
# Swagger 基础认证配置
knife4j.basic.username=admin
knife4j.basic.password=admin# 开启认证 true:开启 。 false:关闭
knife4j.basic.enable=false# 生产环境配置 # 默认 false,放开所有Swagger相关资源 true:屏蔽相关资源
knife4j.production=true# 全局开关 # 是否开启swagger true:开启 。 false:关闭
knife4j.enable=false
yml格式
#配置swagger配置
knife4j:basic:username: adminpassword: adminenable: true #开启认证 true:开启 。 false:关闭production: false #默认是 false 放开所有Swagger相关资源。 true:屏蔽相关资源enable: true #是否开启swagger true:开启 。 false:关闭
3、代码中核心配置类
1)无项目名称
import com.github.xiaoymin.knife4j.spring.annotations.EnableKnife4j;
import org.springframework.context.annotation.Configuration;
import springfox.documentation.builders.ApiInfoBuilder;
import springfox.documentation.builders.RequestHandlerSelectors;
import springfox.documentation.swagger2.annotations.EnableSwagger2WebMvc;
import springfox.documentation.service.ApiInfo;
import org.springframework.context.annotation.Bean;
import springfox.documentation.spring.web.plugins.Docket;
import springfox.documentation.spi.DocumentationType;
import springfox.documentation.builders.PathSelectors;
import org.springframework.boot.autoconfigure.condition.ConditionalOnExpression;@Configuration
@EnableSwagger2WebMvc
@EnableKnife4j
@ConditionalOnExpression("${knife4j.enable}")  //开启访问接口文档的权限  **knife4j.enable是在yml配置文件中配置为true
public class SwaggerConfiguration {@Beanpublic Docket createRestApi() {return new Docket(DocumentationType.SWAGGER_2).apiInfo(apiInfo()).select().apis(RequestHandlerSelectors.basePackage("com.demo.service.controller")).paths(PathSelectors.any()).build();}private ApiInfo apiInfo() {return new ApiInfoBuilder().title("Spring Boot中使用Swagger2构建RESTful APIs(带认证)").description("更多Spring Boot相关文章请关注:https://blog.csdn.net/elvishehai").termsOfServiceUrl("https://blog.csdn.net/elvishehai").version("1.0").build();}
}
@EnableSwagger2WebMvc原先是用@EnableSwagger2来做注解的,最新版本直接使用。@EnableSwagger2WebMvc来做注解,暂时可以把他理解为功能就是一样的。
@EnableKnife4j API接口文档的开关。
2)有项目名称
server:servlet:context-path: /order-service配置类
import com.github.xiaoymin.knife4j.spring.annotations.EnableKnife4j;
import io.swagger.annotations.ApiOperation;
import org.springframework.beans.factory.annotation.Value;
import org.springframework.boot.autoconfigure.condition.ConditionalOnExpression;
import org.springframework.context.annotation.Bean;
import org.springframework.context.annotation.Configuration;
import org.springframework.web.servlet.config.annotation.ResourceHandlerRegistry;
import org.springframework.web.servlet.config.annotation.WebMvcConfigurer;
import springfox.documentation.builders.ApiInfoBuilder;
import springfox.documentation.builders.PathSelectors;
import springfox.documentation.builders.RequestHandlerSelectors;
import springfox.documentation.service.ApiInfo;
import springfox.documentation.service.ApiKey;
import springfox.documentation.spi.DocumentationType;
import springfox.documentation.spring.web.plugins.Docket;
import springfox.documentation.swagger2.annotations.EnableSwagger2WebMvc;import java.util.List;import static com.google.common.collect.Lists.newArrayList;@Configuration
@EnableSwagger2WebMvc
@EnableKnife4j
@ConditionalOnExpression("${knife4j.enable}")  //开启访问接口文档的权限  **knife4j.enable是在yml配置文件中配置为true
public class SwaggerConfiguration implements WebMvcConfigurer {@Beanpublic Docket createRestApi() {return new Docket(DocumentationType.SWAGGER_2).apiInfo(apiInfo()).select()//.apis(RequestHandlerSelectors.basePackage("com.demo.service.controller")).apis(RequestHandlerSelectors.withMethodAnnotation(ApiOperation.class)).paths(PathSelectors.any()).build().securitySchemes(security());// 关键修改:添加项目路径前缀映射// .pathMapping(contextPath);}@Overridepublic void addResourceHandlers(ResourceHandlerRegistry registry) {registry.addResourceHandler("doc.html").addResourceLocations("classpath:/META-INF/resources/");registry.addResourceHandler("swagger-ui.html").addResourceLocations("classpath:/META-INF/resources/");//试试swaggerregistry.addResourceHandler("/webjars/**").addResourceLocations("classpath:/META-INF/resources/webjars/");registry.addResourceHandler("/result/**").addResourceLocations("classpath:/static/result/");}private ApiInfo apiInfo() {return new ApiInfoBuilder().title("Spring Boot中使用Swagger2构建RESTful APIs(带认证)").description("更多Spring Boot相关文章请关注:https://blog.csdn.net/elvishehai").termsOfServiceUrl("https://blog.csdn.net/elvishehai").version("1.0").build();}private List<ApiKey> security() {return newArrayList(new ApiKey("token", "token", "header"));}
}
原理:继承 WebMvcConfigurer 接口能解决 NoHandlerFoundException 的原因在于:它允许开发者直接干预 Spring MVC 的默认配置,补充缺失的静态资源映射规则。
1)默认静态资源映射的局限性
Spring Boot 默认仅映射 /static、/public 等目录下的静态资源。但 Knife4j 的 doc.html 等文件位于 META-INF/resources 下,需手动添加资源路径映射规则。
2)WebMvcConfigurer 的作用
实现 WebMvcConfigurer 接口后,通过重写 addResourceHandlers 方法,显式声明自定义资源路径,覆盖框架默认行为。例如
@Override
public void addResourceHandlers(ResourceHandlerRegistry registry) {registry.addResourceHandler("/order-service/doc.html").addResourceLocations("classpath:/META-INF/resources/doc.html");
}
3)路径匹配修正
若未显式配置带项目前缀的路径(如 /order-service/doc.html),框架会按默认路径(如/doc.html)查找资源。手动映射后,资源路径与请求路径完全匹配,避免NoHandlerFoundException。
4、启动后访问
http://localhost:8080/order-service/doc.html 弹出
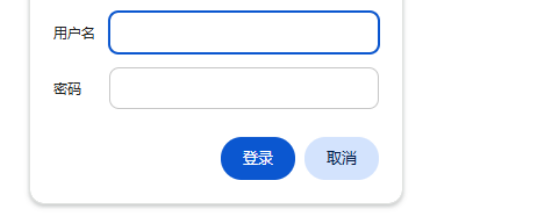
或者
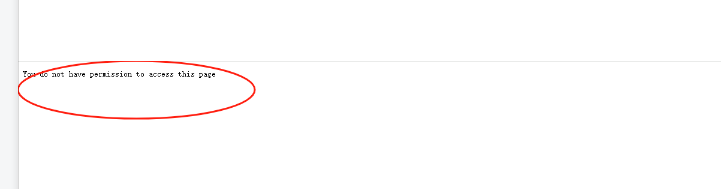
具体弹出什么根据配置文件的信息确定。
5、参考网上大牛文档
参考文献
文档地址传播
说明文档: https://doc.xiaominfo.com
效果(旧版):http://swagger-bootstrap-ui.xiaominfo.com/doc.html
效果(2.X版):http://knife4j.xiaominfo.com/doc.html
Gitee:https://gitee.com/xiaoym/knife4j
GitHub:https://github.com/xiaoymin/swagger-bootstrap-ui
示例:https://gitee.com/xiaoym/swagger-bootstrap-ui-demo
到此,Knife4j 接口文档添加登录验证流程分析,下期更精彩敬请期待!