JavaScript高级进阶(五)
操作节点属性
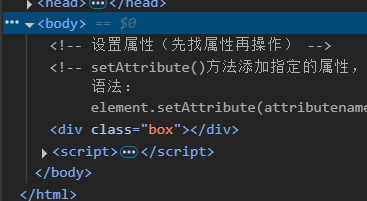
设置属性(先找属性再操作)
setAttribute()方法添加指定的属性,并为其赋指定的值
语法:
element.setAttribute(attributename/属性名,attributevalue/属性值)
例:
<style>
.box{
width: 200px;
height: 200px;
background-color: skyblue;
}
</style>
<body>
<div></div>
</body>
<script>
var div_ =document.querySelector("div");//找到元素
// 方法1
div_.setAttribute('class','box')//给元素添加了一个类名
</script>
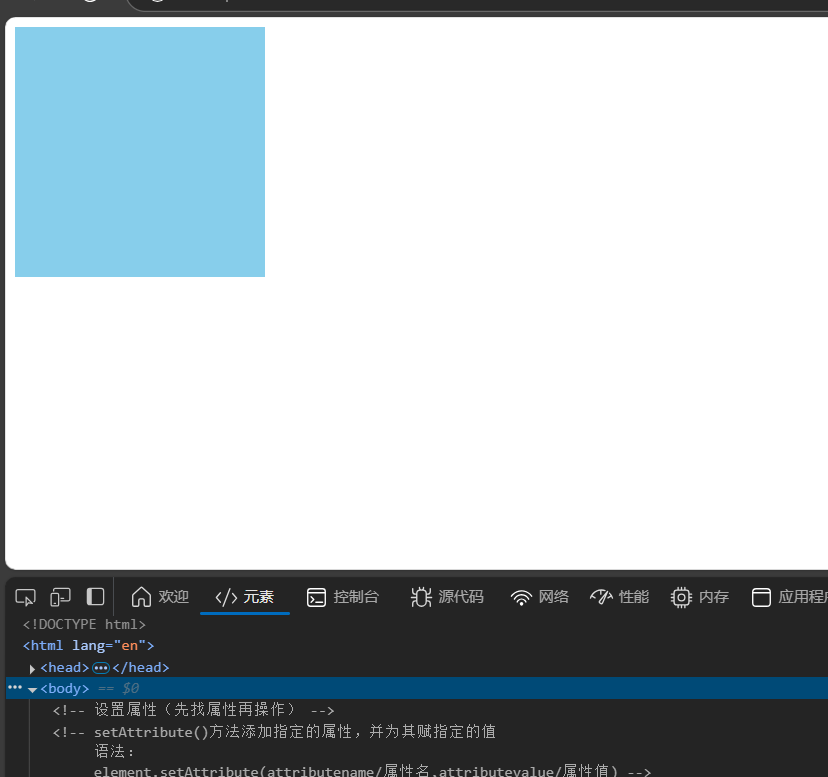
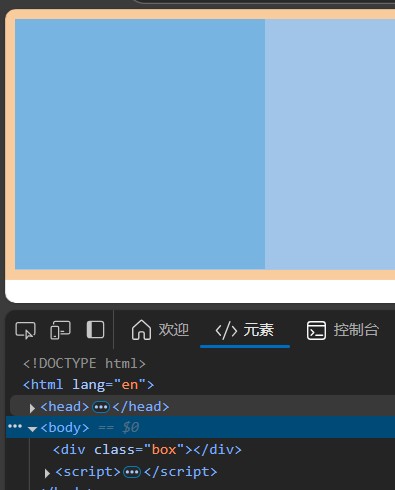
就一个简单的div,背景样式加了个天蓝色,可是我们在body标签内部是没有添加什么属性的,它没有这个样式对应的class属性,如何使这个样式生效?
在js中我们首先找到这个元素,再使用setAttribute方法给它添加了一个值为box的class属性
在后台我们也看到这个属性值加上去了,对应上面的样式也生效了。
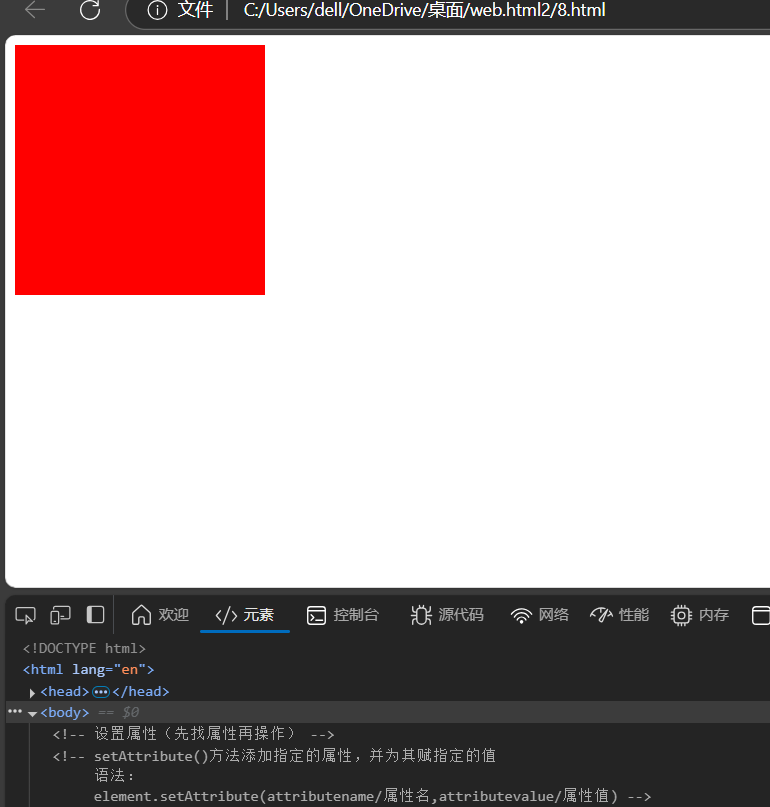
div_.style.backgroundColor='red'
在js中我们再次对样式进行操作,发现变红了。
有人说,这我可太清楚了,因为代码从上到下执行!
真的是这样吗?
div_.style.backgroundColor = 'red'; // 先设为红色
div_.setAttribute('class', 'box'); // 再添加类名(skyblue 会覆盖红色)
我们交换js中这两行代码,结果发现
还是红色,没有被覆盖!
我们先回顾一下CSS优先级规则:
内联样式(style 属性) > ID 选择器 > 类/属性/伪类选择器 > 标签选择器。
如果优先级相同,后定义的样式会覆盖前面的样式。
JavaScript 操作的是内联样式:
div_.style.backgroundColor = 'red' 是通过 JS 直接操作元素的 style 属性(内联样式),它的优先级天然高于外部或 <style> 标签中的 CSS 规则(比如 .box 的样式)
所以CSS优先级才是根本原因!
不过这里有一个误区:内联样式一旦设置,除非手动清除或覆盖,否则类样式无法覆盖它。(
!important 可以打破这个规则,如:
.box {
background-color: skyblue !important; /* 强制覆盖内联样式 */
}
)
回到我们之前写的那个例子,还有第二种添加属性的方法:
<style>
.box{
width: 200px;
height: 200px;
background-color: skyblue;
}
</style>
<body>
<div></div>
</body>
<script>
var div_ =document.querySelector("div");//找到元素
//方法2
div_.className="box"
</script>
box属性值一样老老实实被添加好了,这种方法作为替代方案,看场景来用,某些常用属性(如 id、class、href)可以直接通过 DOM 对象的属性赋值:
element.id = "newId";
element.className = "active"; // 注意:class 是保留字,需用 className
像img也可以用这两种方法添加src属性:
<body>
< img alt="">
</body>
<script>
var img_ =document.querySelector("img");//找到元素
//方法1 img_.setAttribute('src','./images/11573144197-1_b_1724033544.jpg')
//方法2
img_.src="./images/11573144197-1_b_1724033544.jpg"
</script>
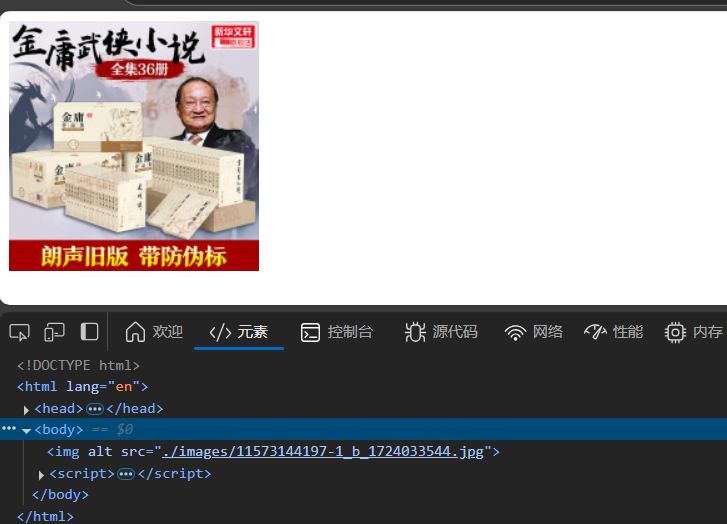
src属性都很完美的添加上去了,这就是设置节点属性这部分。
获取属性
<!-- 获取属性 -->
getAttribute()返回指定属性名的属性值。
语法:
element.getAttribute(attributename);//attributename(必须):需要获得属性值的属性名称。
就用我们前面写的img的例子:
<body>
< img alt="">
</body>
<script>
var img_ =document.querySelector("img");
img_.src="./images/11573144197-1_b_1724033544.jpg"
</script>
src属性已经设置上了,我们就用getAttribute获取这个属性:
var src_=img_.getAttribute('src')
console.log(src_);
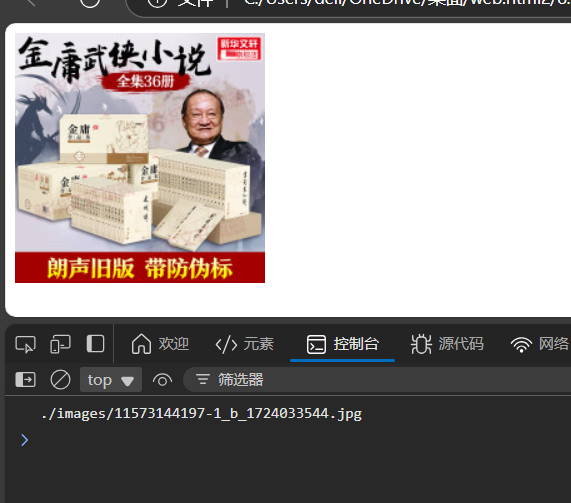
这里也可以直接:var src_=img_.src,都可以拿到完整的路径。
删除属性
removeAttribute()方法删除指定的属性
语法:element.removeAttribute(attributename)//attributename:要删除的属性名称
秉承复用性原则,还是使用我们前面写的img例子:
<body>
< img alt="">
</body>
<script>
var img_ =document.querySelector("img");
img_.src="./images/11573144197-1_b_1724033544.jpg"
</script>
src属性已经设置好了,使用removeAttribute将其删除。
img_.removeAttribute('src')
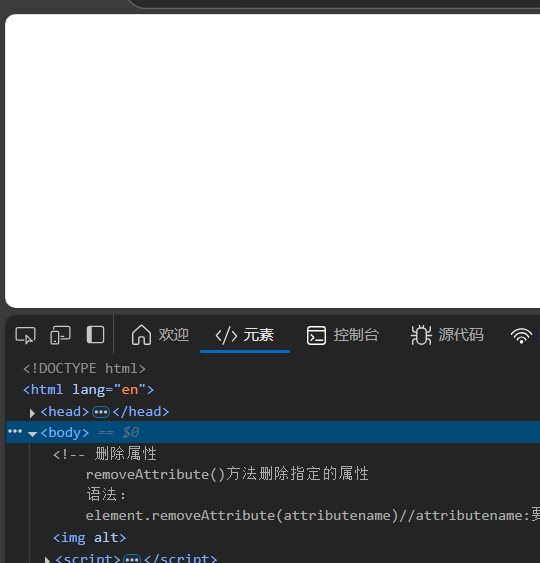
删除属性连带属性值一起都删除了,如果:
<body>
< img alt="">
</body>
<script>
var img_ =document.querySelector("img");
img_.src="./images/11573144197-1_b_1724033544.jpg"
// img_.removeAttribute('src')
var body_=document.getElementsByTagName('body')[0]
body_.removeChild(img_);
</script>
这样就是直接将img节点删除了。
body中已经什么都没有了,总结想操作属性节点,首先要找到这个节点在进行对应操作。
除了上面这些重要的,还有一些补充:
标准属性操作方法
①element.hasAttribute(name)
作用:检查元素是否具有指定的属性。
返回值:true(存在)或 false(不存在)。
例如:
const div = document.querySelector("div");
console.log(div.hasAttribute("class")); // true 或 false
②element.toggleAttribute(name [, force])
作用:切换属性的存在状态(存在则移除,不存在则添加),
name:属性名。
force(可选):布尔值,true 表示强制添加,false 表示强制移除。
data-* 自定义属性(推荐)
html:
<div id="user" data-id="123" data-role="admin"></div>
js:
const user = document.querySelector("#user");
// 获取
console.log(user.dataset.id); // "123"
console.log(user.dataset.role); // "admin"
// 设置(直接覆盖或添加)
user.dataset.role = "guest"; // 修改 data-role
user.dataset.status = "active"; // 新增 data-status
// 删除
delete user.dataset.role; // 移除 data-role
操作 class(推荐 classList)
const div = document.querySelector("div");
// 添加类
div.classList.add("active");
// 移除类
div.classList.remove("box");
// 切换类
div.classList.toggle("hidden");
// 检查是否包含类
console.log(div.classList.contains("active")); // true/false
还有一些操作布尔属性什么的就不提了,用到的比较少,好了,这就是操作节点属性这一部分。