Vue3+Vite+TypeScript+Element Plus开发-14.路由守卫
系列文档目录
Vue3+Vite+TypeScript安装
Element Plus安装与配置
主页设计与router配置
静态菜单设计
Pinia引入
Header响应式菜单缩展
Mockjs引用与Axios封装
登录设计
登录成功跳转主页
多用户动态加载菜单
Pinia持久化
动态路由 -动态增加路由
动态路由-动态删除路由
路由守卫
文章目录
目录
系列文档目录
文章目录
前言
路由守卫
1.案例
2.增加404页面
3.官方说明
4.路由调整
5.测试效果
后续
参考文献
前言
在上一章节中,我们详细介绍了动态路由的删除方法。本章节将重点讨论404页面的创建以及如何通过路由守卫实现无路由跳转逻辑。
路由守卫
1.案例
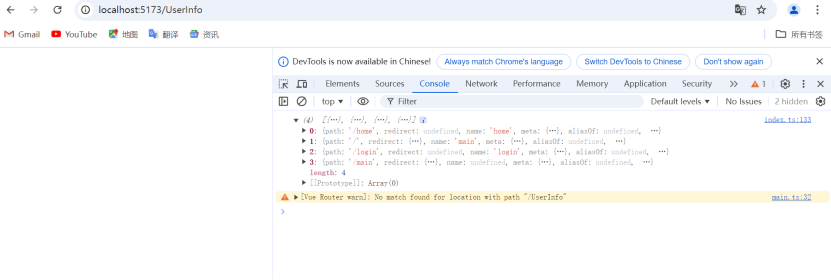
在早期模拟数据阶段,有意未为个人资料设置路径,导致动态路由中缺少个人资料的相关路由。因此,当在菜单中选择“个人资料”时,界面上没有显示任何信息。同时在调试过程中出现了警告信息: [Vue Router warn]: No match found for location with path "/Userinfo" ,因此需要增加路由守卫。
2.增加404页面
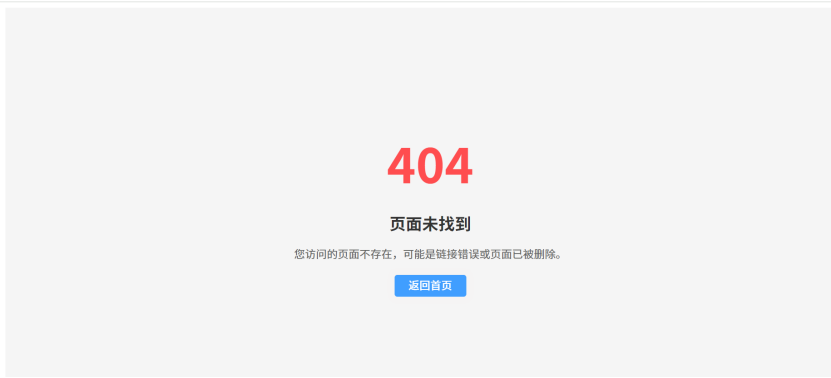
在 src/views 目录下新增了一个 404.vue 文件,该文件用于定义404错误页面。当用户尝试访问不存在的路由时,系统将自动重定向到此404页面。
<template>
    <div class="error-page">
      <div class="error-content">
        <h1 class="error-title">404</h1>
        <h2 class="error-subtitle">页面未找到</h2>
        <p class="error-description">您访问的页面不存在,可能是链接错误或页面已被删除。</p>
        <el-button
          type="primary"
          @click="goBack"
          class="error-button"
          :loading="loading"
          >返回首页</el-button
        >
      </div>
    </div>
  </template>

  <script setup>
  import { useRouter } from "vue-router";
  import { ref } from "vue";

  const router = useRouter();
  const loading = ref(false);

  const goBack = () => {
    loading.value = true;
    setTimeout(() => {
      router.push("/");
      loading.value = false;
    }, 1000);
  };
  </script>

  <style scoped>
  .error-page {
    display: flex;
    flex-direction: column;
    align-items: center;
    justify-content: center;
    height: 100vh;
    background-color: #f5f5f5;
  }

  .error-content {
    text-align: center;
    animation: fadeIn 1s ease-in-out;
  }

  .error-title {
    font-size: 72px;
    color: #ff4d4f;
    margin-bottom: 20px;
    animation: bounceIn 1s ease-in-out;
  }

  .error-subtitle {
    font-size: 24px;
    color: #333;
    margin-bottom: 10px;
  }

  .error-description {
    font-size: 16px;
    color: #666;
    margin-bottom: 20px;
  }

  .error-button {
    font-size: 16px;
    padding: 10px 20px;
    animation: pulse 1s infinite;
  }

  @keyframes fadeIn {
    from {
      opacity: 0;
    }
    to {
      opacity: 1;
    }
  }

  @keyframes bounceIn {
    0% {
      transform: scale(0);
      opacity: 0;
    }
    50% {
      transform: scale(1.2);
      opacity: 0.5;
    }
    100% {
      transform: scale(1);
      opacity: 1;
    }
  }

  @keyframes pulse {
    0% {
      transform: scale(1);
      box-shadow: 0 0 0 0 rgba(255, 77, 79, 0.7);
    }
    70% {
      transform: scale(1);
      box-shadow: 0 0 10px 10px rgba(255, 77, 79, 0);
    }
    100% {
      transform: scale(1);
      box-shadow: 0 0 0 0 rgba(255, 77, 79, 0);
    }
  }
  </style>
3.官方说明
具体请参考下面文档
导航守卫 | Vue Router
4.路由调整
路由守卫主要有全局前置守卫和通配符路由两种实现方式。为了在后期更好地加强权限管理和路由控制,本项目采用全局前置守卫模式。
方法1:全局前置守卫
import { createRouter, createWebHistory, RouteRecordRaw } from 'vue-router';
import Main from '@/views/Main.vue'; //
import Home from '@/views/Home.vue';
import Login from '@/views/Login.vue';
// import 404 from '@/views/404.vue';
import NotFound from "@/views/404.vue"; // 导入 404 页面组件

// 定义路由配置
const routes: RouteRecordRaw[] = [
  {
    path: '/',
    name: 'main',
    component: Main,
    redirect: { name: 'login' }, // 默认重定向到 login 子路由
     children: [
      {
        path: 'home',
        name: 'home',
        component: Home,
      }
    ],

  },
  {
    path: '/login',
    name: 'login',
    component: Login,
  },
  {
    path: '/main', // 如果确实需要 /main 路径
    redirect: { name: 'home' }, // 仅保留重定向规则
  },

  // 其他路由配置...
  {
    //path: "/:pathMatch(.*)*", // 通配符路由
    path: '/404', // 定义一个显式的 404 页面路由
    name: "404",
    component: NotFound,
  },
];

// 创建路由器
const router = createRouter({
  history: createWebHistory(),
  routes, // 使用已定义的路由配置
});


// 全局前置守卫
router.beforeEach((to, from, next) => {
  if (to.matched.length === 0) {
    next({ name: "404" }); // 如果没有匹配的路由,跳转到 404 页面
  } else {
    next();
  }
});

export default router;
方案2:通配符路由
import { createRouter, createWebHistory, RouteRecordRaw } from 'vue-router';
import Main from '@/views/Main.vue'; //
import Home from '@/views/Home.vue';
import Login from '@/views/Login.vue';
// import 404 from '@/views/404.vue';
import NotFound from "@/views/404.vue"; // 导入 404 页面组件

// 定义路由配置
const routes: RouteRecordRaw[] = [
  {
    path: '/',
    name: 'main',
    component: Main,
    redirect: { name: 'login' }, // 默认重定向到 login 子路由
     children: [
      {
        path: 'home',
        name: 'home',
        component: Home,
      }
    ],

  },
  {
    path: '/login',
    name: 'login',
    component: Login,
  },
  {
    path: '/main', // 如果确实需要 /main 路径
    redirect: { name: 'home' }, // 仅保留重定向规则
  },

  // 其他路由配置...
  {
    path: "/:pathMatch(.*)*", // 通配符路由
    name: "404",
    component: NotFound,
  },
];

// 创建路由器
const router = createRouter({
  history: createWebHistory(),
  routes, // 使用已定义的路由配置
});


export default router;
5.测试效果
使用 user 账号登录后,点击“个人资料”菜单,将会显示如下效果:
后续
在本章节中,我们将专注于讨论当路由不存在时如何跳转至404页面。接下来的章节,我们将重点讲解Pinia的持久化优化,以及在未登录状态下通过路由守卫跳转到登录页面的实现。
参考文献
导航守卫 | Vue RouterVue.js 的官方路由![]() https://router.vuejs.org/zh/guide/advanced/navigation-guards.html
https://router.vuejs.org/zh/guide/advanced/navigation-guards.html