关于依赖注入框架VContainer DIIOC 的学习记录
文章目录
- 前言
- 一、VContainer核心概念
- 1.DI(Dependency Injection(依赖注入))
- 2.scope(域,作用域)
- 二、练习例子
- 1.Hello,World!
- 步骤一,编写一个底类。HelloWorldService
- 步骤二,编写使用低类的类。GamePresenter
- 步骤三,编写对应的LitetimeScope,GameLifetimeScope。用来注册C#类依赖
- 2.补充,控制反转 (IoC)
- 3.构造函数注入
- 4.方法注入(其他的和上边一样)
- 5.字段、属性注入
- 6.C#complex 类型注册
- 7.接口注册
- 8.多接口注册
- 9.自动注册所有已实现的接口
- 10.注册所有已实现的接口和具体类型
- 11.注册生命周期Maker接口
- 11.注册实例
- 12.将实例注册为接口
- 13.注册泛型
前言
稍微记录一下VContainer依赖注入框架的学习过程。这个框架主要是解决代码的依赖问题,假设有个类A和一个类B,类B需要使用到类A作为依赖,这个时候就会有很强的依赖性,当类A改变代码逻辑的时候,会影响到类B,不符合代码原则,所以要进行依赖倒置原则,这个时候我们一般需要准备一个接口A来抽象一下类B需要用到的功能,这样当类A修改的时候不会影响到类B。这里主要是学习经过框架来进行依赖并且进一步提升自己的代码质量
github:https://github.com/hadashiA/VContainer
文章地址:https://vcontainer.hadashikick.jp/getting-started/hello-world
一、VContainer核心概念
1.DI(Dependency Injection(依赖注入))
DI(依赖注入)是 OOP 中的一种通用技术,旨在从代码中删除无关的依赖项。 它为您的对象图带来了可测试性、可维护性、可扩展性或任何类型的可交换性。
在所有的编程范式中,基本设计是弱模块耦合和强模块内聚。 如您所知,OOP(面向对象编程)通过对象来实现。
1.Objects 隐藏了其职责 (封装) 的详细信息。
2.对象将 其职责范围之外的工作转移到其他对象。
实际上,从根本上这样做是有问题的。 如果在类代码中编写委托对象,则意味着源代码级别的紧密耦合。 从类中排除无关依赖项的唯一方法是从外部传入它。
因此,如果你的类从外部接收依赖项,它将需要来自外部的帮助。 DI 是一种技术,它有助于一个地方完全在外部解决依赖关系。
延伸阅读:
曼宁 |.NET 中的依赖关系注入
适用于 Unity 的轻量级 IoC 容器 - Seba 的实验室
2.scope(域,作用域)
scope,域,作用域,可以认为是VContainer当中的一个空间范围,在这个范围内的依赖注入是独立的。一般我们会为场景的预制体设置单独的scope,离开这个scope后对应的DI即不在生成。
每一个scope都有**生命周期(LifeTime)**加入这个scope是通过场景或者预制体创建出来的话,那么这个scope的生命周期会在场景或者预制体销毁之后结束,除此之外还有一个RootScope,就是最核心的scope,通常RootScope是注入到单例上面的。
二、练习例子
1.Hello,World!
在场景中,使用LifetimeScope脚本挂载节点的方式来作为容器并且控制范围。
所以所有LifetimeScope子类来进行注册C#代码的依赖项,在启动场景的时候,Lifetime会自动构建Container并且反派到自己的PlayerLoopSystem。
步骤一,编写一个底类。HelloWorldService
 public class HelloWorldService
    {
        public void Hello()
        {
            DLogger.Log("Hello World");
        }
    }
步骤二,编写使用低类的类。GamePresenter
public class GamePresenter : ITickable
    {
        readonly HelloWorldService helloWorldService;

        public GamePresenter(HelloWorldService helloWorldService)
        {
            this.helloWorldService = helloWorldService;
        }

        public void Tick()
        {
            helloWorldService.Hello();
        }
    }
这里基础ITickable接口,这个接口对应Unity程序中的Uodate,继承实现Marker接口接会自动将这个类型注入到对应GameTimeScope的PlayerLoopSystem里面。
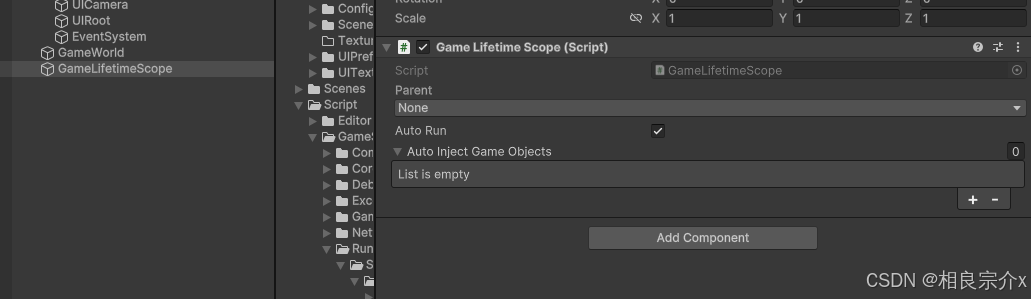
步骤三,编写对应的LitetimeScope,GameLifetimeScope。用来注册C#类依赖
public class GameLifetimeScope : LifetimeScope
{
    protected override void Configure(IContainerBuilder builder)
    {
        builder.Register<HelloWorldService>(Lifetime.Singleton);
        builder.RegisterEntryPoint<GamePresenter>();
    }
}
这里通过重写LifeimeScope的Configure方法来进行C#依赖项。HelloWorldService是作为单例进行注册。
RegisterEntryPoint() 是用于注册与 Unity 的 PlayerLoop 事件相关的接口的别名。
类似于 Register(Lifetime.Singleton)。作为()
在不依赖 MonoBehaviour 的情况下注册生命周期事件有助于领域逻辑和表示的解耦!
由于LiteTimeScope自身依赖Mono,所以创建节点挂载脚本的方式来进行控制。
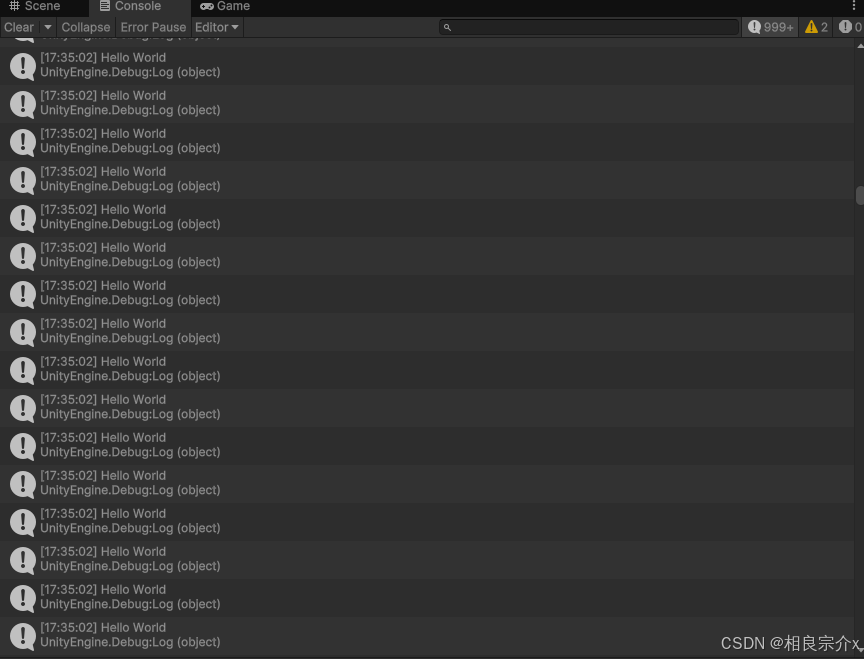
启动脚本后打印如下:
2.补充,控制反转 (IoC)
IoC (Inversion of Control):将具有控制流责任的对象作为入口点。在简单和传统的编程中,入口点是负责中断用户输入的地方。
创建一个HelloUI脚本用于保存对应的脚本对象。
public class HelloUI : MonoBehaviour
{
    #region 自动生成
    public Text m_textStart;
    public Button m_btnHello;
    public void Start()
    {
        RefRoot refRoot = GetComponent<RefRoot>();
        m_textStart = refRoot.GetText(0);
        m_btnHello = refRoot.GetButton(1);
    }
    #endregion
}
在正常的 Unity 编程中,您可以在 HelloUI 中嵌入逻辑调用,但如果使用的是 DI,则可以将 HelloUI 和任何控制流分开。
namespace MyGame
{
     public class GamePresenter : IStartable
     {
         readonly HelloWorldService helloWorldService;
         readonly HelloScreen helloScreen;

         public GamePresenter(
             HelloWorldService helloWorldService,
             HelloScreen helloScreen)
         {
             this.helloWorldService = helloWorldService;
             this.helloScreen = helloScreen;
         }

        void IStartable.Start()
        {
            helloScreen.m_btnHello.onClick.AddListener(() => helloWorldService.Hello());
        }
     }
}
通过这样做,我们成功地分离了域逻辑 / 控制流 / 视图组件。
GamePresenter 的演示者:仅负责 Control Flow。
HelloWorldService 中:只对可以随时随地调用的功能负责
HelloUI:仅负责 View。
在 VContainer 中,您需要注册依赖的 MonoBehaviour。不要忘记注册 HelloUI。
3.构造函数注入
构造函数里,只需要写一个需要依赖注入的函数,成员变量里就可以随时获得对象。如下例子ClassB构造函数的参数是ClassA,我们的classA变量就可以随时使用
class ClassB : IStartable,ITickable
{
    readonly ClassA a;
    public ClassB(ClassA a)
    {
        Debug.Log("ClassA构造函数注入");
        this.a = a;
    }

    public void Start()
    {
        a.Start();
    }

    public void Tick()
    {
        a.Update();
    }
}
class ClassA
{
    public ClassA()
    {
        Debug.Log("ClassA构造");
    }

    public void Start()
    {
        Debug.Log("Start");
    }
    public void Update()
    {
        Debug.Log("Update");
    }
}
public class GameLifetimeScope : LifetimeScope
{
    //public UIView helloScreen;

    protected override void Configure(IContainerBuilder builder)
    {

        builder.RegisterEntryPoint<ClassB>();
        builder.Register<ClassA>(Lifetime.Singleton);
    }
}
4.方法注入(其他的和上边一样)
class ClassB : IStartable,ITickable
{
    private ClassA a;

    [Inject]
    public void GetClassA(ClassA a)
    {
        Debug.Log("方法注入");
        this.a = a;
    }

    public void Start()
    {
        a.Start();
    }

    public void Tick()
    {
        a.Update();
    }
}
5.字段、属性注入
class ClassB : IStartable,ITickable
{
    [Inject]
    private ClassA a;

    public void Start()
    {
        a.Start();
    }

    public void Tick()
    {
        a.Update();
    }
}
6.C#complex 类型注册
class ServiceA : IServiceA, IInputPort, IDisposable { /* ... */ }
注册具体类型如下
builder.Register<ServiceA>(Lifetime.Singleton);
它可以像这样解析:
class ClassA
{
    public ClassA(ServiceA serviceA) { /* ... */ }
}
7.接口注册
builder.Register<IServiceA, ServiceA>();
它可以像这样解析:
class ClassA
{
    public ClassA(IServiceA serviceA) { /* ... */ }
}
8.多接口注册
builder.Register<ServiceA>(Lifetime.Singleton)
    .As<IServiceA, IInputPort>();
它可以像这样解析:
class ClassA
{
    public ClassA(IServiceA serviceA) { /* ... */ }
}

class ClassB
{
    public ClassB(IInputPort inputPort) { /* ... */ }
}
9.自动注册所有已实现的接口
builder.Register<ServiceA>(Lifetime.Singleton)
    .AsImplementedInterfaces();
它可以像这样解析:
class ClassA
{
    public ClassA(IServiceA serviceA) { /* ... */ }
}

class ClassB
{
    public ClassB(IInputPort inputPort) { /* ... */ }
}
10.注册所有已实现的接口和具体类型
builder.Register<ServiceA>(Lifetime.Singleton)
    .AsImplementedInterfaces()
    .AsSelf();
它可以像这样解析:
class ClassA
{
    public ClassA(IServiceA serviceA) { /* ... */ }
}

class ClassB
{
    public ClassB(IInputPort inputPort) { /* ... */ }
}

class ClassC
{
    public ClassC(ServiceA serviceA) { /* ... */ }
}
11.注册生命周期Maker接口
class GameController : IStartable, ITickable, IDisposable { /* ... */ }
builder.RegisterEntryPoint<GameController>();

关键的区别在于它是否在 PlayerLoopSystem 中运行。Register<GameController>(Lifetime.Singleton).AsImplementedInterfaces()
如果要自定义入口点的异常处理,可以使用以下内容注册回调。

```c
builder.RegisterEntryPointExceptionHandler(ex =>
{
    UnityEngine.Debug.LogException(ex);
    // Additional process ...
});
如果您有多个 EntryPoints,则可以选择使用以下声明作为分组。
builder.UseEntryPoints(entryPoints =>
{
   entryPoints.Add<ScopedEntryPointA>();
   entryPoints.Add<ScopedEntryPointB>();
   entryPoints.Add<ScopedEntryPointC>().AsSelf();
   entryPoints.OnException(ex => ...)
});
这与以下相同:
builder.RegisterEntryPoint<ScopedEntryPointA>();
builder.RegisterEntryPoint<ScopedEntryPointB>();
builder.RegisterEntryPoint<ScopedEntryPointC>().AsSelf();
builder.RegisterEntryPointExceptionHandler(ex => ...);
11.注册实例
// ...
var obj = new ServiceA();
// ...

builder.RegisterInstance(obj);
RegisterIntance总是有一个生命周期,所以它没有参数。
它可以像这样解析:
class ClassA
{
    public ClassA(ServiceA serviceA) { /* ... */ }
}
向 RegisterInstance 注册的实例不由容器管理。
Dispose 不会自动执行。
方法注入不会自动执行
如果您希望容器管理创建的实例,请考虑改用以下内容
register(_ => 实例, …)
RegisterComponent(…)
12.将实例注册为接口
builder.RegisterInstance<IInputPort>(serviceA);

builder.RegisterInstance(serviceA)
    .As<IServiceA, IInputPort>();

builder.RegisterInstance(serviceA)
    .AsImplementedInterfaces();
寄存器特定于类型的参数
如果类型不是唯一的,但您有要在启动时注入的依赖项,则可以使用以下内容:
builder.Register<SomeService>(Lifetime.Singleton)
    .WithParameter<string>("http://example.com");
或者,您可以使用键命名 paramter。
builder.Register<SomeService>(Lifetime.Singleton)
    .WithParameter("url", "http://example.com");
它可以像这样解析:
class SomeService
{
    public SomeService(string url) { /* ... */ }
}
此 Register 仅在注入 时起作用。SomeService
class OtherClass
{
    // ! Error
    public OtherClass(string hogehoge) { /* ... */ }
}
13.注册泛型
class GenericType<T>
{
    // ...
}
builder.Register(typeof(GenericType<>), Lifetime.Singleton);
它可以像这样解析:
class SomeService
{
    public SomeService(GenericType<int> closedGenericType) { /* ... */ }
}