海南公司注册网站永嘉网站制作系统
目录
一、路由的使用
二、声明式导航
2.1 声明式导航
2.2 声明式导航路由传参
2.2.1.字符串写法
2.2.2.对象写法
2.2.3 query 传参和 param 传参总结
2.3 命名路由
2.4 可选操作符
2.5 props 参数
三、编程式导航
3.1 replace 和 push 跳转方法
3.2 back、forword、go 方法
四、声明式导航与编程式导航小结
五、扩展
5.1 重定向
5.2 404
5.3 多级路由
5.4 路由模式配置
5.6 SPA 的理解
六、缓存组件
6.1 语法
6.2 属性
6.3 两个生命周期钩子
七、路由守卫
7.1 全局路由守卫
7.2 独享路由守卫
7.3 组件内路由守卫
一、路由的使用
1. 下载 VueRouter 到当前项目,如果是vue2项目需要指定路由版本,因为现在脚手架默认下载vue3的版本。
vue2 的 VueRouter 版本为 3.x , vuex 的版本为 3.x ;
vue3 的 VueRouter 版本为 4.x , vuex 的版本为 4.x ;
npm i vue-router@3.6.52. 在 main.js 中引入 VueRouter
import VueRouter from 'vue-router'3. 注册
Vue.use(VueRouter)4. 创建路由对象
const router = new VueRouter()5. 在main.js 入口文件注入到 vue 实例中
new Vue({render: h => h(App),router:router
}).$mount('#app')
6. 引入路由组件,并注册
单独一个 router.js 文件存放路由信息

在 router/index.js 引入 router.js

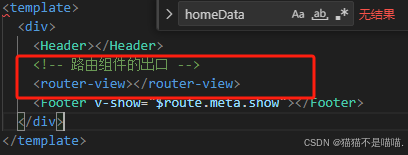
7. 在 App.vue 中配置路由出口(配对成功路由显示的位置)
二、声明式导航
2.1 声明式导航
vue-router 提供了一个全局组件 router-link,类似 a 标签的作用
<router-link to="跳转路径">购物车</router-link>- 能跳转,配置 to 属性指定路径(必须) ,本质还是 a 标签 ,to 无需 #
- 能高亮,默认就会提供高亮类名,可以直接设置高亮样式(router-link-exact-active 和 router-link-active)
- router-link-exact-active: 精确匹配,只能匹配一层,如 to="/user"
- router-link-exact-active: 模糊匹配,可以匹配多层,如 to="/user/a" to="/user/b"
我们可以在创建路由对象时自定义上面两个类名
const router = new VueRouter({routes: routes,linkActiveClass: "自定义名1",linkExactActiveClass: "自定义名2"
})
2.2 声明式导航路由传参
2.2.1.字符串写法
1. 携带 query 参数
<router-link :to="/home/message/detail?id=666&title=你好">跳转</router-link>获取参数:
$route.query.参数名
如: $route.query.id $route.query.title
注意: 在 template 中可以直接用上述方法接收参数,如果在 script 的 vue 实例对象中,还需要加 this
2. 携带 param 参数
链接位置,路径后面直接带传递的值, 如 666 你好
<router-link :to="路径/666/你好">跳转</router-link>路由配置时需要使用冒号(:)占位符,如 :id 和 :title
const router = new VueRouter({routes: [...,path:'detail/:id/:title', //使用占位符声明接收params参数]})获取参数:
$route.params.占位参数名
如:$route.params.id $route.params.title
注意: 在 template 中可以直接用上述方法接收参数,如果在 script 的 vue 实例对象中,还需要加 this
2.2.2.对象写法
1. 携带 query 参数:
<router-link :to="{path:'/home/message/detail',query:{id:666,title:'你好'}
}">跳转</router-link>
路由配置
new VueRouter({routes:[{path:'/home',component:Home,children:[{path:'news',component:News},{path:'message',component:Message,children:[{path:'detail',component:Detail}]}]}]
})
获取数据
$route.query.参数名
如: $route.query.id $route.query.title
2. 携带 param 参数:
携带 param 参数时, 对象写法跳转不能使用path,一定要用name配置项。但是 query 可以写 path
<router-link :to="{name:'xiangqing',params:{id: 666,title: '你好'}">{{m.title}}
</router-link>
路由配置
const router = new VueRouter({routes: [...,{ name: 'xiangqing'path:'detail/:id/:title'}, //使用占位符声明接收params参数]})获取参数
$route.params.参数名
如:$route.params.id $route.params.title
2.2.3 query 传参和 param 传参总结
query 传参
跳转:to="/path?参数名=值&参数名2=值"
获取:$route.query.参数名
param 传参
配置动态路由:path: "/path/:参数名"
跳转:to="/path/参数值"
获取:$route.params.参数名
注意:1. 动态路由也可以传多个参数,但一般只传一个。
2. 使用param 对象写法传参,跳转路由要使用 name 属性,不能使用 path 属性。
3. 需要在路由配置中设置占位参数
2.3 命名路由
给路由添加一个 name 属性,在路由跳转时便可根据 name 名称来路由跳转。但是在 <router-link>标签的 to 要写成对象的形式。这里我给子路由都添加 name 属性
const router = new VueRouter({routes:[{path:'/about',component:About,},{path:'/home',component:Home,children:[ //通过children配置子级路由{name: 'xingwen'path:'news', //此处一定不要写:/newscomponent:News},{name: 'xiaoxi'path:'message', //此处一定不要写:/messagecomponent:Message}]}]
})
简化跳转
<!--简化前,需要写完整的路径 -->
<router-link to="/home/news">跳转</router-link><!--简化后,直接通过名字跳转 -->
<router-link :to="{name:'xingwen'}">跳转</router-link><!--简化写法配合传递参数 -->
<router-link :to="{name:'xingwen',query:{id:666,title:'你好'}}"
>跳转</router-link>
2.4 可选操作符
/路径/:keywords表示 必须要传参数。如果不传参数也希望匹配,可以加个可选符 "?"
如:
const router = new VueRouter({routes: [...{ path: '/路径/:keywords?', component: Search }]
})
2.5 props 参数
new VueRouter({routes:[{path:'/home',component:Home,children:[{path:'news',component:News},{path:'message',component:Message,children:[{name:'xiangqing',path:'detail/:id/:title',component:Detail,//props的第一种写法,值为对象,该对象中的所有key-value都会以props的形式传给Detail组件。// props:{a:1,b:'hello'}//props的第二种写法,值为布尔值,若布尔值为真,就会把该路由组件收到的所有params参数,以props的形式传给Detail组件。// props:true//props的第三种写法,值为函数props($route){return {id:$route.params.id,title:$route.params.title,}}}]}]}]
})
detail.vue 组件,接收 props 参数
<template><ul><li>消息编号:{{id}}</li><li>消息标题:{{title}}</li></ul>
</template><script>export default {name:'Detail',props:['id','title']}
</script>
三、编程式导航
3.1 replace 和 push 跳转方法
在跳转标签 <router-link> 标签上添加 replace 属性
<template><div><h2>Home组件内容</h2><div><ul class="nav nav-tabs"><li><router-link replace class="list-group-item" active-class="active" to="/home/news">News</router-link></li><li><router-link replace class="list-group-item" active-class="active" to="/home/message">Message</router-link></li></ul><router-view></router-view></div></div>
</template><script>export default {name:'Home'}
</script>
1. 浏览器历史记录有两种方式,分别是 push 和 replace , 其中 push 是追加历史记录, replace 是替换当前记录。路由跳转默认是 push 方式。
2. 开启 replace 模式,只需要在 <router-link> 标签添加 replace 属性
3.2 back、forword、go 方法
<template><div class="col-xs-offset-2 col-xs-8"><div class="page-header"><h2>Vue Router Demo</h2><button @click="back">后退</button><button @click="forward">前进</button><button @click="test">测试一下go</button><button @click="test1">测试一下go</button><button @click="test2">测试一下go</button></div></div>
</template><script>export default {name:'Banner',methods:{back(){this.$router.back()   // 后退},forward(){this.$router.forward()  // 前进},test(){this.$router.go()  // 可前进可后退},test1(){this.$router.go(2)  // 前进2次},test2(){this.$router.go(-1)  // 后退1次}},}
</script>
四、声明式导航与编程式导航小结
声明式导航(通过router-link组件实现,包括to属性及传参方法)和编程式导航(利用$router.push或$router.replace函数)。声明式导航适用于静态或预定义的路由切换,而编程式导航在动态生成或复杂跳转场景下更为灵活。当数据量大时,为避免内存消耗和卡顿,推荐使用编程式导航。
五、扩展
5.1 重定向
默认 url 地址端口后面只带一个\ , 如果没有匹配成功,就会出现空白页
解决: 为 \ 设置一个路由,如果匹配的是 \ , 就重定向到首页
{ path: 匹配路径, redirect: 重定向到的路径 },
比如:
{ path:'/' ,redirect:'/index' }
5.2 404
如果找不到该页面,就显示为 404页面,在使用路由基础模板时,需要把匹配 404 的路由放在最后面。
import NotFind from '@/views/NotFind'const router = new VueRouter({routes: [...{ path: '*', component: NotFind } //最后一个]
})
5.3 多级路由
在一级路由里面添加 children 属性,它是一个数组。children 中的配置项 跟一级路由中的配置项一样
const router = new VueRouter({routes:[{path:'/about',component:About,},{path:'/home',component:Home,children:[ //通过children配置子级路由{path:'news', //此处一定不要写:/newscomponent:News},{path:'message', //此处一定不要写:/messagecomponent:Message}]}]
})
跳转(要写完整路径),如 <router-link to="/home/message">信息</router-link>
5.4 路由模式配置
vue 导航栏模式有两种,分别是 hash 模式(vue 默认该模式)和 history 模式。
hash 模式带 # , 如 localhost:8080/#employee
history 模式不带 #, 如 localhost:8080/employee
切换 vue 路由模式
const router = new VueRouter({mode:'histroy', //默认是hashroutes:[]
})区别:
1. hash 模式不会把 # 后面的路径传递给服务器,而 history 模式会把 url 上的所有地址都传递给服务器
2. history 模式刷新后会出现 404 问题,需要依靠后端解决,hash 模式没有
5.6 SPA 的理解
1. 单页 Web 应用(single page web application,SPA)
2. 整个应用只有一个完整的页面
3. 点击新页面中的导航链接不会刷页面,只会做页面的局部更新
4. 数据需要通过ajax请求获取
六、缓存组件
从首页列表点到详情页,又点返回,数据重新加载了 → 希望回到原来的位置
keep-alive 是 Vue 的内置组件,当它包裹动态组件时,会缓存不活动的组件实例,而不是销毁它们
6.1 语法
在 router-view 路由出口标签上再包裹一个 keep-alvie 标签
<template><div class="h5-wrapper"><keep-alive><router-view></router-view></keep-alive></div>
</template>
6.2 属性
1. include : 组件名数组,只有匹配的组件会被缓存
2. exclude : 组件名数组,任何匹配的组件都不会被缓存
3. max : 最多可以缓存多少组件实例
<template><div class="h5-wrapper"><keep-alive :include="['LayoutPage']">  //include中写想要缓存的组件名,不写表示全部缓存<router-view></router-view></keep-alive></div>
</template>
//Layout.vue//...
export default {name: "LayoutPage", //如果没有配置name,则会找文件名作为组件名
}6.3 两个生命周期钩子
keep-alive的使用会触发两个生命周期函数。组件缓存后就不会执行组件的created, mounted, destroyed 等钩子了。所以其提供了actived 和deactived钩子,帮我们实现业务需求
activated 当组件被激活(使用)的时候触发 → 进入这个页面的时候触发
deactivated 当组件不被使用的时候触发 → 离开这个页面的时候触发
七、路由守卫
7.1 全局路由守卫
//该文件专门用于创建整个应用的路由器
import VueRouter from "vue-router";
//引入组件
import Home from '../pages/Home'
import About from '../pages/About'
import News from '../pages/News'
import Message from '../pages/Message'
import Detail from '../pages/Detail'//创建一个路由器
const router = new VueRouter({routes:[{name:'guanyv',path:'/about',component:About,meta:{title:'关于'}},{name:'zhuye',path:'/home',component:Home,meta:{title:'主页'},children:[{name:'xinwen',path:'news',component:News,meta:{isAuth:true,title:'新闻'}},{name:'xiaoxi',path:'message',component:Message,meta:{isAuth:true,title:'消息'},children:[{name:'xiangqing',path:'detail',component:Detail,meta:{isAuth:true,title:'详情'},props($route){return {id:$route.query.id,title:$route.query.title,}}}]}]}]
})//全局前置路由守卫————初始化的时候、每次路由切换之前被调用
router.beforeEach((to,from,next) => {console.log('前置路由守卫',to,from)if(to.meta.isAuth){if(localStorage.getItem('school')==='atguigu'){next()}else{alert('学校名不对,无权限查看!')}}else{next()}
})//全局后置路由守卫————初始化的时候被调用、每次路由切换之后被调用
router.afterEach((to,from)=>{console.log('后置路由守卫',to,from)document.title = to.meta.title || '硅谷系统'
})//导出路由器
export default router
7.2 独享路由守卫
//该文件专门用于创建整个应用的路由器
import VueRouter from "vue-router";
//引入组件
import Home from '../pages/Home'
import About from '../pages/About'
import News from '../pages/News'
import Message from '../pages/Message'
import Detail from '../pages/Detail'//创建一个路由器
const router = new VueRouter({routes:[{name:'guanyv',path:'/about',component:About,meta:{title:'关于'}},{name:'zhuye',path:'/home',component:Home,meta:{title:'主页'},children:[{name:'xinwen',path:'news',component:News,meta:{title:'新闻'},//独享守卫,特定路由切换之后被调用beforeEnter(to,from,next){console.log('独享路由守卫',to,from)if(localStorage.getItem('school') === 'atguigu'){next()}else{alert('暂无权限查看')}}},{name:'xiaoxi',path:'message',component:Message,meta:{title:'消息'},children:[{name:'xiangqing',path:'detail',component:Detail,meta:{title:'详情'},props($route){return {id:$route.query.id,title:$route.query.title,}}}]}]}]
})//全局后置路由守卫————初始化的时候被调用、每次路由切换之后被调用
router.afterEach((to,from)=>{console.log('后置路由守卫',to,from)document.title = to.meta.title || '硅谷系统'
})//导出路由器
export default router
7.3 组件内路由守卫
<template><h2>我是About组件的内容</h2>
</template><script>export default {name:'About',//通过路由规则,离开该组件时被调用beforeRouteEnter (to, from, next) {console.log('About--beforeRouteEnter',to,from)if(localStorage.getItem('school')==='atguigu'){next()}else{alert('学校名不对,无权限查看!')}},//通过路由规则,离开该组件时被调用beforeRouteLeave (to, from, next) {console.log('About--beforeRouteLeave',to,from)next()}}
</script>