网站开发用原生自己的网站如何让百度收录
本专栏内容均可在Github:notes_04 找到
完整项目使用技术栈: Nextjs15 + MySQL + Redis + Auth + Prisma + i18n + strapi + Docker + vercel
一、本节目标
本篇我们来实现右侧笔记CURD部分。
一、效果
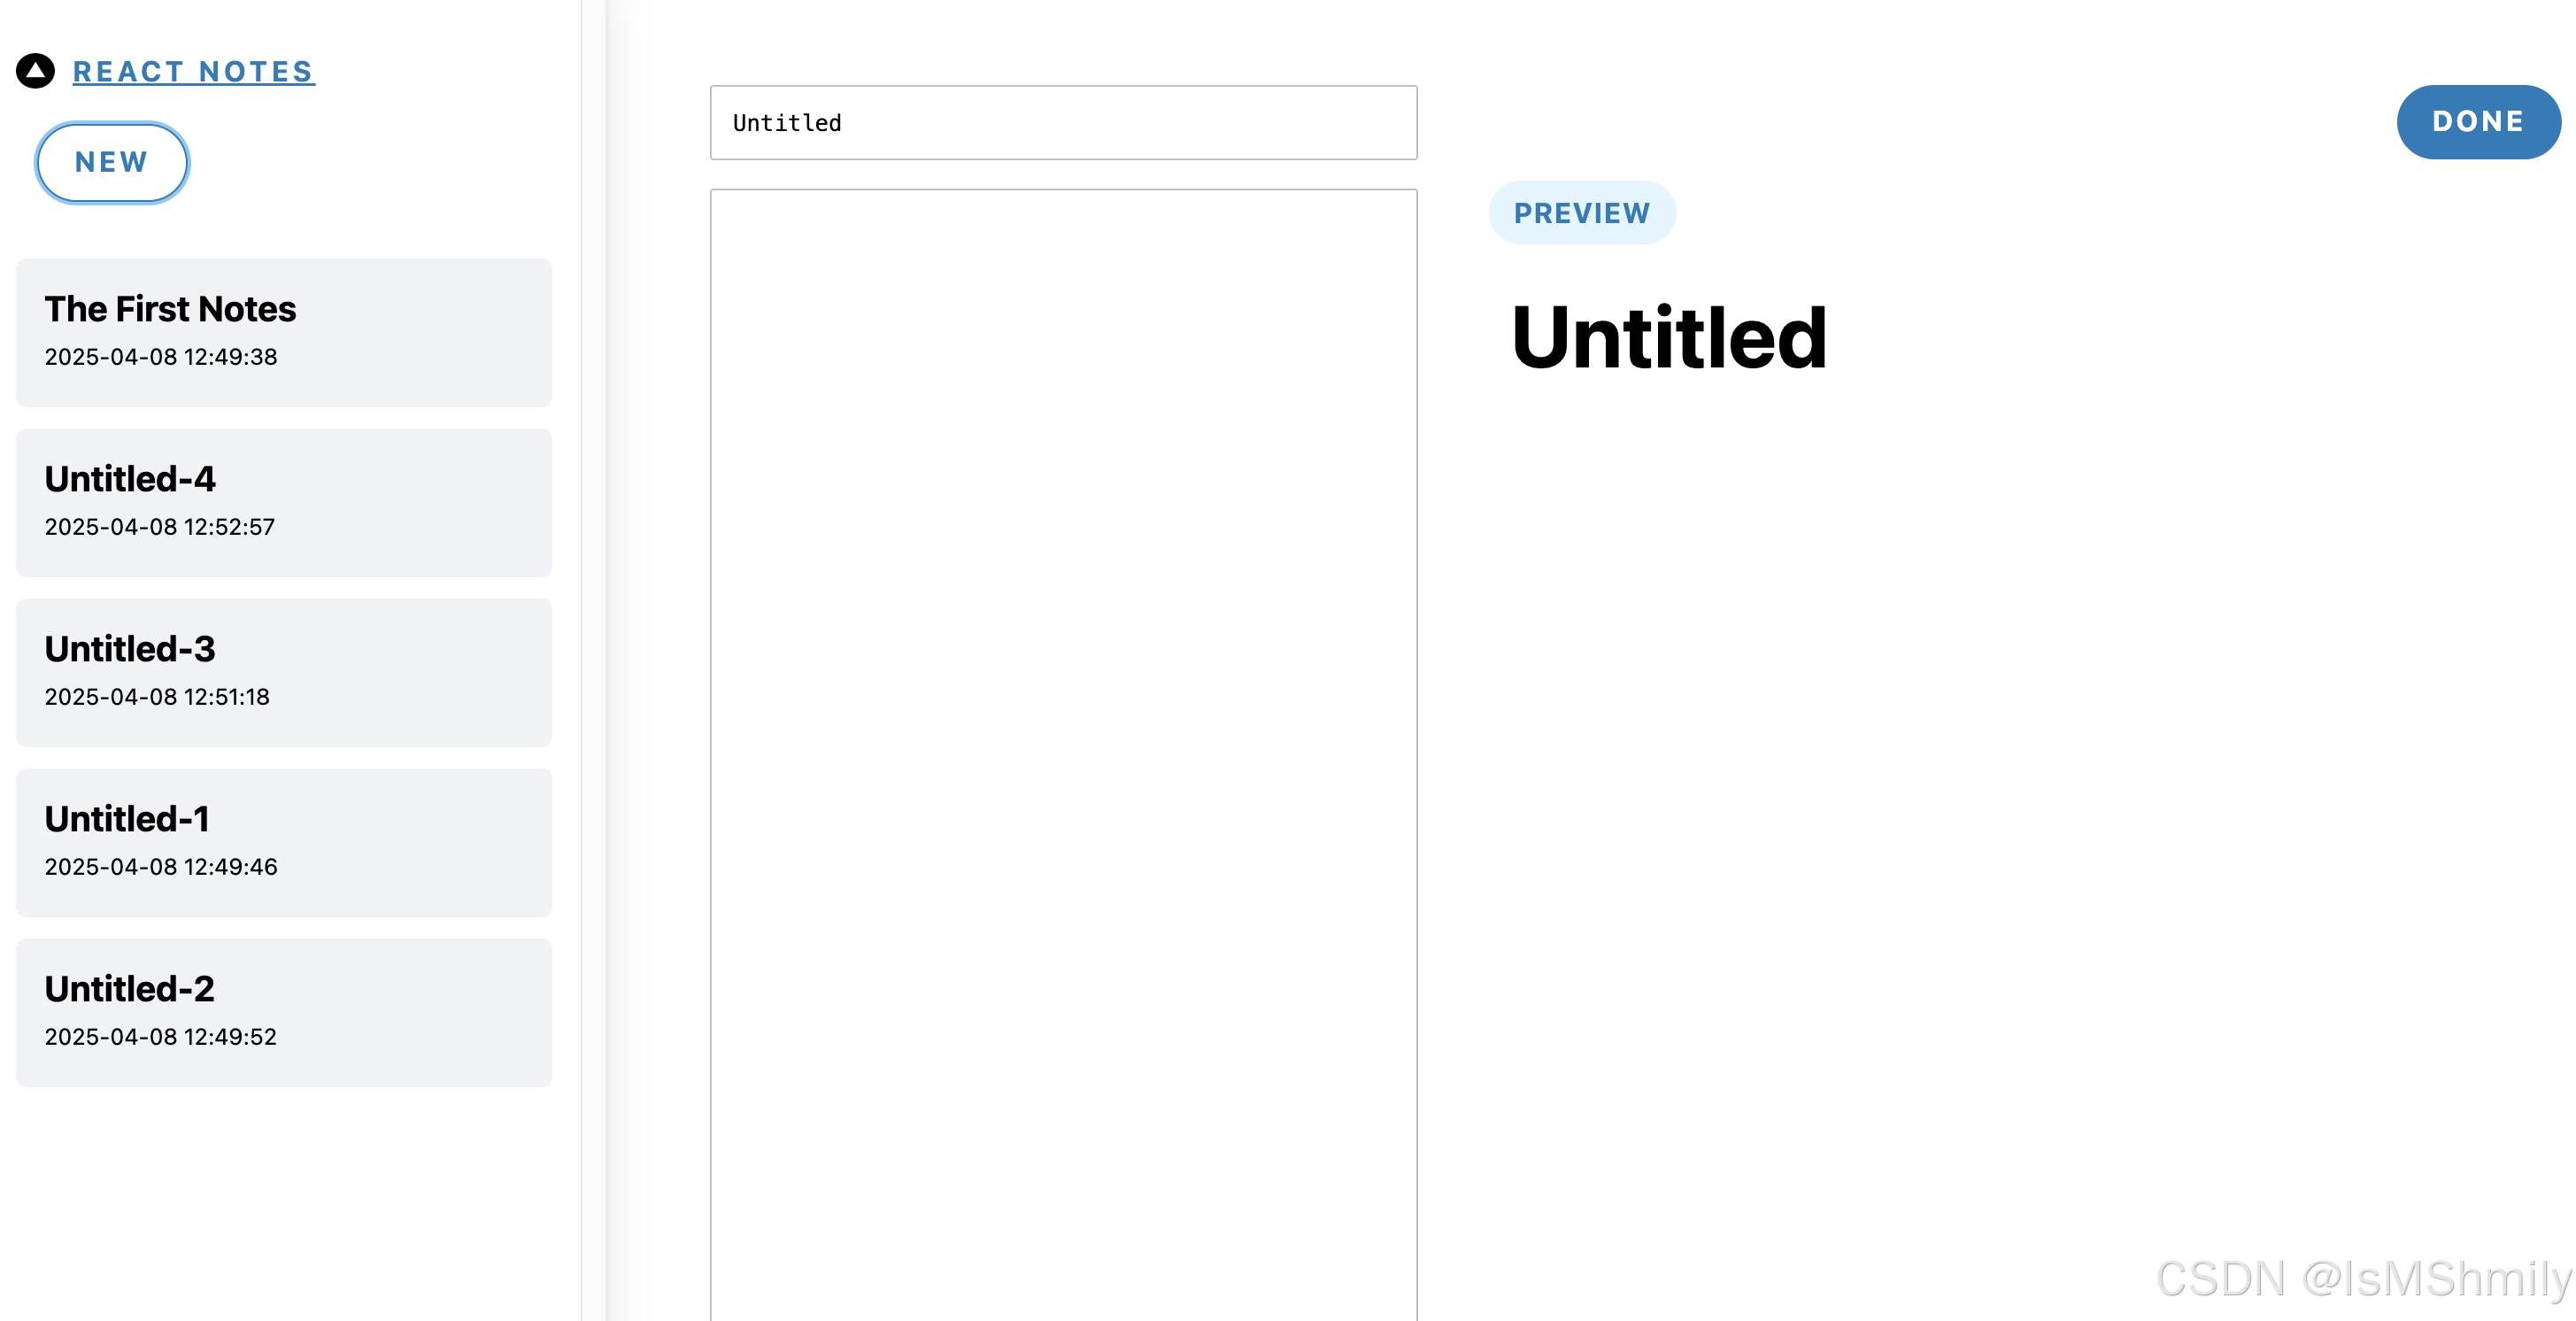
当点击 New 按钮的时候进入编辑界面:
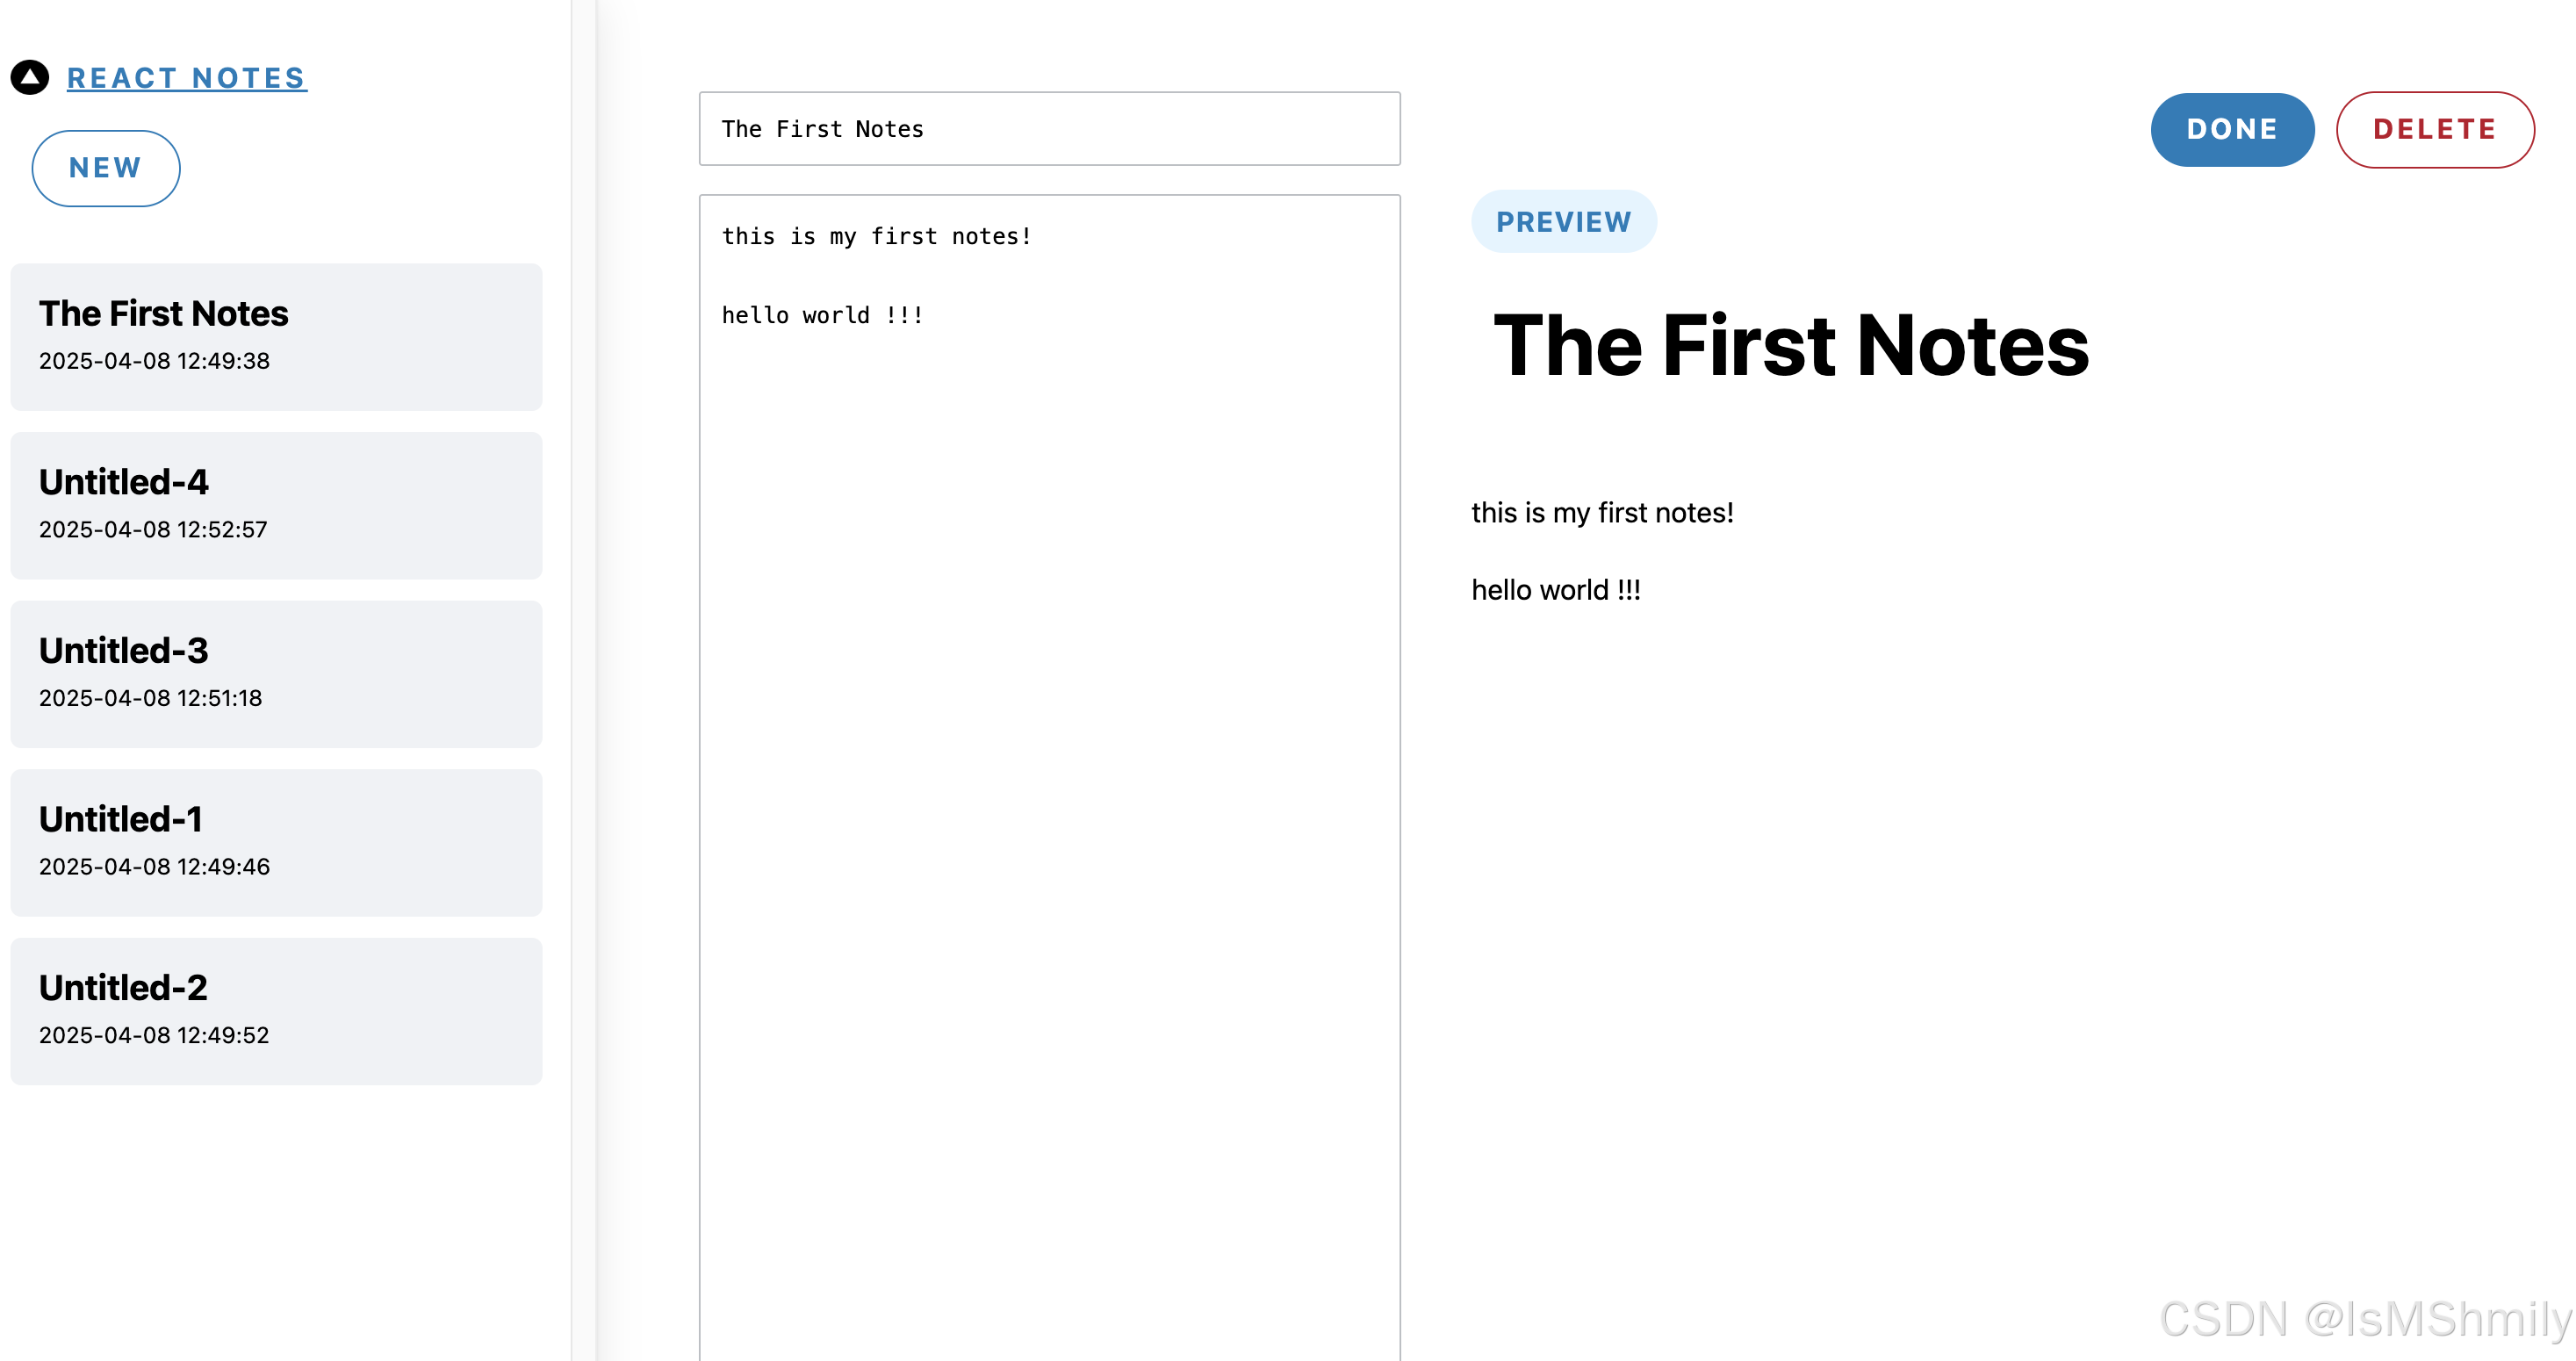
当点击具体笔记的 Edit 按钮的时候进入该笔记的编辑页面:
二、笔记预览
回忆下之前的路由设计,当点击 New 的时候,导航至 /note/edit 路由,当点击 Edit 的时候,导航至 /note/edit/xxxx 路由。
新增 app/note/edit/page.tsx
import NoteEditor from "../../components/NoteEditor";export default async function EditPage() {return <NoteEditor noteId={""} initialTitle="Untitled" initialBody="" />;
}
新增 app/note/edit/loading.tsx
export default function EditSkeleton() {return (<divclassName="note-editor skeleton-container"role="progressbar"aria-busy="true"><div className="note-editor-form"><div className="skeleton v-stack" style={{ height: "3rem" }} /><div className="skeleton v-stack" style={{ height: "100%" }} /></div><div className="note-editor-preview"><div className="note-editor-menu"><divclassName="skeleton skeleton--button"style={{ width: "8em", height: "2.5em" }}/><divclassName="skeleton skeleton--button"style={{ width: "8em", height: "2.5em", marginInline: "12px 0" }}/></div><divclassName="note-title skeleton"style={{ height: "3rem", width: "65%", marginInline: "12px 1em" }}/><div className="note-preview"><div className="skeleton v-stack" style={{ height: "1.5em" }} /><div className="skeleton v-stack" style={{ height: "1.5em" }} /><div className="skeleton v-stack" style={{ height: "1.5em" }} /><div className="skeleton v-stack" style={{ height: "1.5em" }} /><div className="skeleton v-stack" style={{ height: "1.5em" }} /></div></div></div>);
}
你可能会问,同级的 page.js 又没有数据请求,添加 loading.js 有什么用?
同级的 page.js 确实没有请求,但 loading.js 会将 page.js 和其 children 都包裹在 <Suspense> 中,所以 app/note/edit/[id]/page.tsx 中的请求也会触发该 loading.js。
app/note/edit/[id]/page.tsx 代码如下:
import NoteEditor from "../../../components/NoteEditor";
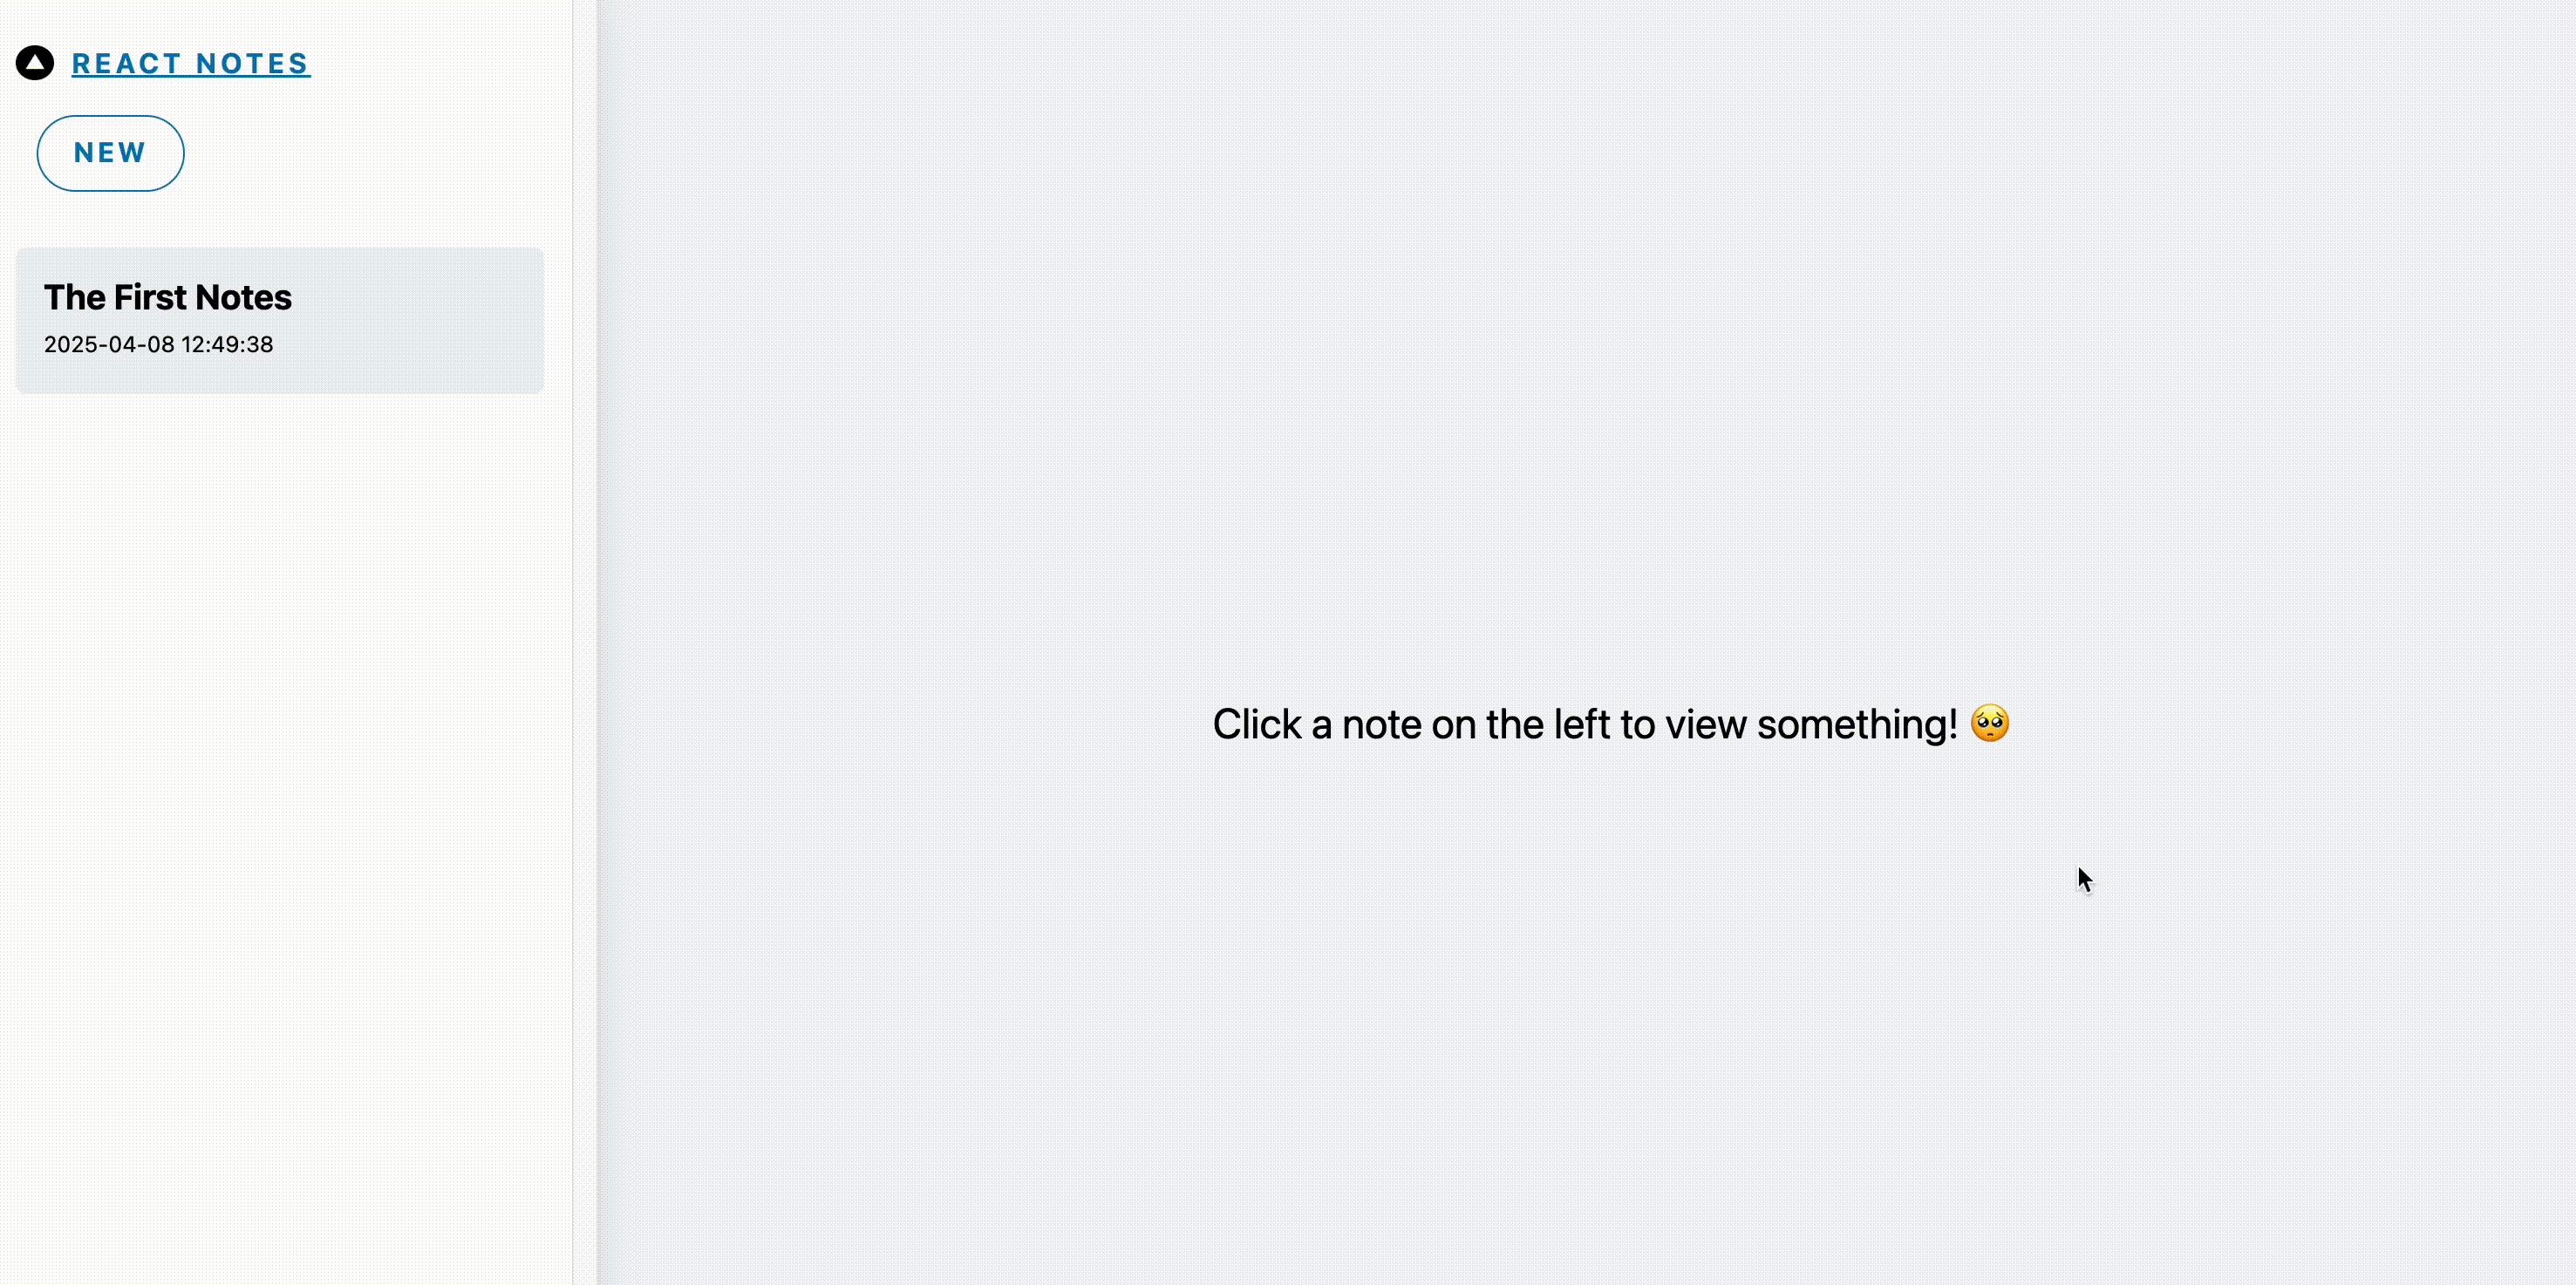
import { getNote } from "@/lib/redis";export default async function EditPage({ params }: { params: { id: string } }) {const noteId = params.id;const note = await getNote(noteId);// 让效果更明显const sleep = (ms: number) => new Promise((r) => setTimeout(r, ms));await sleep(500);if (note === null) {return (<div className="note--empty-state"><span className="note-text--empty-state">Click a note on the left to view something! 🥺</span></div>);}return (<NoteEditornoteId={noteId}initialTitle={note.title}initialBody={note.content}/>);
}
我们抽离了一个 <NoteEditor> 组件用于实现编辑功能,app/components/NoteEditor.tsx 代码如下:
"use client";import { useState } from "react";
import NotePreview from "@/components/NotePreview";
import { useFormStatus } from "react-dom";export default function NoteEditor({ noteId, initialTitle, initialBody }) {const { pending } = useFormStatus();const [title, setTitle] = useState(initialTitle);const [body, setBody] = useState(initialBody);const isDraft = !noteId;return (<div className="note-editor"><form className="note-editor-form" autoComplete="off"><label className="offscreen" htmlFor="note-title-input">Enter a title for your note</label><inputid="note-title-input"type="text"value={title}onChange={(e) => {setTitle(e.target.value);}}/><label className="offscreen" htmlFor="note-body-input">Enter the body for your note</label><textareavalue={body}id="note-body-input"onChange={(e) => setBody(e.target.value)}/></form><div className="note-editor-preview"><form className="note-editor-menu" role="menubar"><buttonclassName="note-editor-done"disabled={pending}type="submit"role="menuitem"><imgsrc="/checkmark.svg"width="14px"height="10px"alt=""role="presentation"/>Done</button>{!isDraft && (<buttonclassName="note-editor-delete"disabled={pending}role="menuitem"><imgsrc="/cross.svg"width="10px"height="10px"alt=""role="presentation"/>Delete</button>)}</form><div className="label label--preview" role="status">Preview</div><h1 className="note-title">{title}</h1><NotePreview>{body}</NotePreview></div></div>);
}
因为需要控制输入框的状态,所以 <NoteEditor> 使用了客户端组件,我们在 <NotePreview> 中引用了 <NotePreview>组件,用于实现编辑时的实时预览功能。
三、笔记新增、更新、删除
当点击 Done 的时候,导航至对应的笔记预览页面 /note/xxxx。当点击 Delete 的时候,导航至首页。
正常开发笔记的增加、更新和删除功能,为了实现前后端交互,可能要写多个接口来实现,比如当点击删除的时候,调用删除接口,接口返回成功,前端跳转至首页。但既然我们都用了 Next.js 15 了,没必要这么麻烦,Server Actions 直接搞定,省的一个个写接口了。
修改 app/components/NoteEditor.tsx
"use client";import { useState } from "react";
import NotePreview from "./NotePreview";
import { useFormStatus } from "react-dom";
import { deleteNote, saveNote } from "../actions";
export default function NoteEditor({noteId,initialTitle,initialBody,
}: {noteId: string;initialTitle: string;initialBody: string;
}) {const { pending } = useFormStatus();const [title, setTitle] = useState(initialTitle);const [body, setBody] = useState(initialBody);const isDraft = !noteId;return (<div className="note-editor"><form className="note-editor-form" autoComplete="off"><label className="offscreen" htmlFor="note-title-input">Enter a title for your note</label><inputid="note-title-input"type="text"value={title}onChange={(e) => {setTitle(e.target.value);}}/><label className="offscreen" htmlFor="note-body-input">Enter the body for your note</label><textareavalue={body}id="note-body-input"onChange={(e) => setBody(e.target.value)}/></form><div className="note-editor-preview"><form className="note-editor-menu" role="menubar"><buttonclassName="note-editor-done"disabled={pending}type="submit"formAction={() => saveNote(noteId, title, body)}role="menuitem">Done</button>{!isDraft && (<buttonclassName="note-editor-delete"disabled={pending}formAction={() => deleteNote(noteId)}role="menuitem">Delete</button>)}</form><div className="label label--preview" role="status">Preview</div><h1 className="note-title">{title}</h1><NotePreview>{body}</NotePreview></div></div>);
}
新增:app/actions.tsx
"use server";import { redirect } from "next/navigation";
import { addNote, updateNote, delNote } from "@/lib/redis";export async function saveNote(noteId: string, title: string, body: string) {const data = JSON.stringify({title,content: body,updateTime: new Date(),});if (noteId) {updateNote(noteId, data);redirect(`/note/${noteId}`);} else {const res = await addNote(data);redirect(`/note/${res}`);}
}export async function deleteNote(noteId: string) {delNote(noteId);redirect("/");
}
至此 新增和删除可以正常运行了: