桂林百度网站建设辽宁城乡建设厅网站
目录
前提准备:
cache1,2:
客户端cache-api(一定得是LAMP环境)
memcache实现主主复制以及高可用(基于以上完成)
cache1,2:
memcache+keepalived(基于以上完成)
cache1,2:
前提准备:
1. 准备三台centos7,其中一台为cache1:192.168.180.110,一台为cache2:192.168.180.120和一台客户端(LAMP环境):192.168.180.150
2. 分别修改主机名称
hostnamectl set-hostname cache1 && bashhostnamectl set-hostname cache2 && bashhostnamectl set-hostname cache-api && bash3. 关闭所有防火墙
systemctl stop firewalld
setenforce 0
主要步骤开始!!!
cache1,2:
1. 安装libevent
#解压
tar zxf libevent-2.1.8-stable.tar.gz -C /usr/src/
cd /usr/src/libevent-2.1.8-stable/#安装组件
yum install -y gcc gcc-c++#编译安装
./configure --prefix=/usr/local/libevent && make && make install
2. 安装memcached
cd
#解压
tar zxf memcached-1.5.1.tar.gz -C /usr/src/
cd /usr/src/memcached-1.5.1/#编译安装
./configure --prefix=/usr/local/memcached --with-libevent=/usr/local/libevent && make && make install
3. 设置memcached服务脚本
vim /usr/local/memcached/memcached_service.sh#!/bin/bash
CMD="/usr/local/memcached/bin/memcached"
start() {$CMD -d -m 128 -u root
}
stop() {killall memcached;
}
ACTION=$1case $ACTION in'start')start;;'stop')stop;;'restart')stopsleep 2start;;*)echo 'Usage:{start|stop|restart}'esac#退出,设置权限,打开
chmod 755 /usr/local/memcached/memcached_service.sh
/usr/local/memcached/memcached_service.sh start
netstat -antp | grep memcache

客户端cache-api(一定得是LAMP环境)
1. 安装Libmemcached
#解压
tar zxf libmemcached-1.0.18.tar.gz
cd libmemcached-1.0.18#安装组件
yum install -y gcc gcc-c++#编译安装
./configure --prefix=/usr/local/libmemcached --with-memcached=/usr/local/memcached && make && make install
2. 安装memcached扩展
tar zxf memcached-2.2.0.tgz
cd memcached-2.2.0
/usr/local/php5/bin/phpizecp -r /usr/local/php5/include/php/ext/ ././configure --enable-memcached --with-php-config=/usr/local/php5/bin/php-config --with-libmemcached-dir=/usr/local/libmemcached --disable-memcached-sasl && make && make test && make install

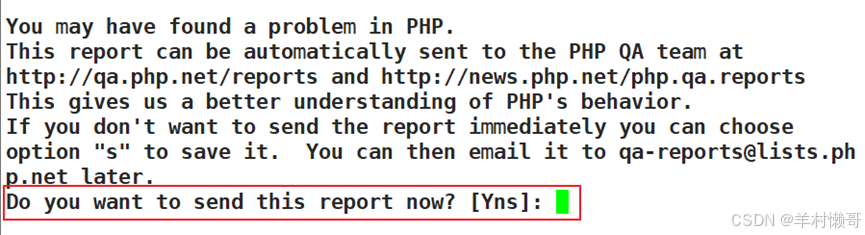
在这一步时,输入n
获得共享地址
Installing shared extensions: /usr/local/php5/lib/php/extensions/no-debug-zts-20121212/3. 配置php添加memcached组件
cd /usr/local/php5/vim php.ini#输入刚刚获得的共享地址
extension_dir = "/usr/local/php5/lib/php/extensions/no-debug-zts-20121212/"
extension=memcached.so

4. 访问并查看是否添加成功
vim /usr/local/httpd/htdocs/index.php
<?php
phpinfo();
?>#重启httpd
systemctl restart httpd
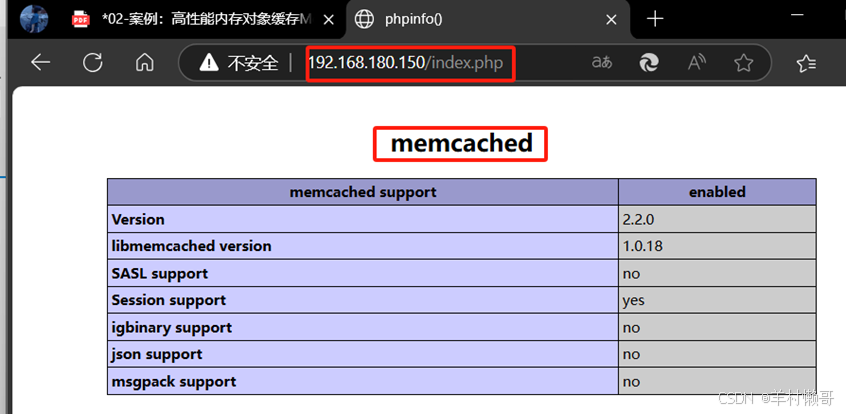
🚨有些时候可能访问不到这个页面,但是在本地访问却可以访问到
curl 127.0.0.1/index.php | grep memcached
🚨可以看到是有内容的,有内容就可以直接进行下一步
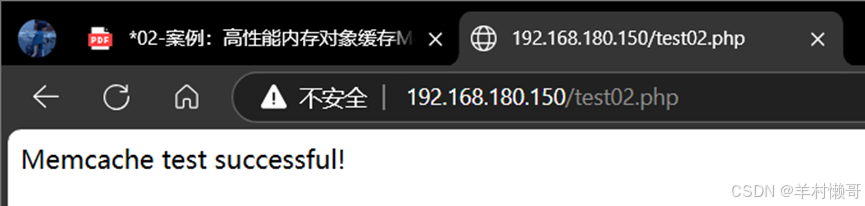
5. 测试memcached-api功能
vim /usr/local/httpd/htdocs/test02.php
<?php
$memcache = new Memcached();
$memcache->addServer('192.168.180.110', 11211);
$memcache->set('key', 'Memcache test successful!', 0, 60);
$result = $memcache->get('key');
unset($memcache);
echo $result;
?>#重启httpd,可以多重启几次
systemctl restart httpd
🚨当访问这个的时候,可能也会访问不到,多重启几次httpd就可以了,上面的模块index.php也可以访问到了
6. 浏览器访问,看到这句话就说明已经被memcache记录了
192.168.180.150/test02.php
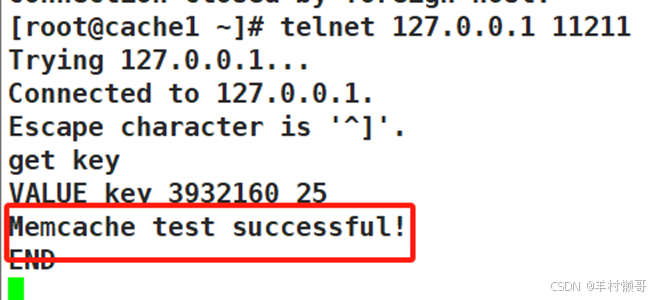
7. 在cache1上安装telnet,并远程登录
yum install -y telnettelnet 127.0.0.1 11211
输入:get key
memcache实现主主复制以及高可用(基于以上完成)
cache1,2:
1. 删除cache1,2上的memcache1.5.1版本
rm -rf /usr/src/memcached-1.5.1/
rm -rf memcached-1.5.1.tar.gz
2. 重新下载支持复制功能的memcache
yum install -y psmisc#关闭memcache
/usr/local/memcached/memcached_service.sh stop
netstat -nultp | grep memcached#解压
tar zxf memcached-1.2.8-repcached-2.2.tar.gz
cd memcached-1.2.8-repcached-2.2#编译
./configure --prefix=/usr/local/memcached_replication --enable-replication --with-libevent=/usr/local/libevent

3. 修改配置文件
vim memcached.c#将原先的删除,替换成新的
#ifndef IOV_MAX
# define IOV_MAX 1024
#endif#再进行安装
make && make install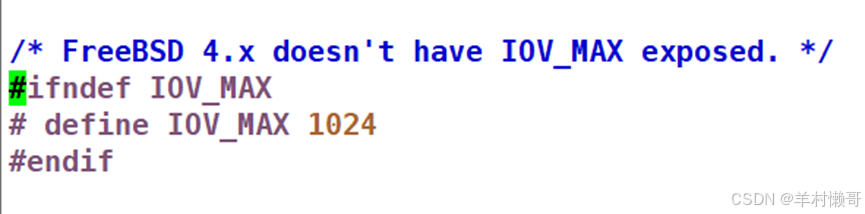
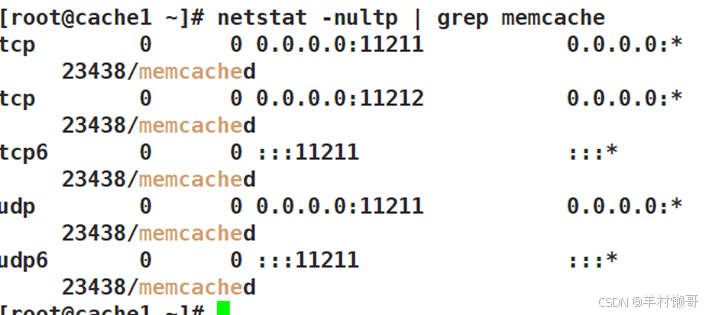
4. 启动memcache服务
ln -s /usr/local/libevent/lib/libevent-2.1.so.6 /usr/lib64/cache1:/usr/local/memcached_replication/bin/memcached -d -u root -m 128 -x 192.168.180.120cache2:/usr/local/memcached_replication/bin/memcached -d -u root -m 128 -x 192.168.180.110netstat -nultp | grep memcache
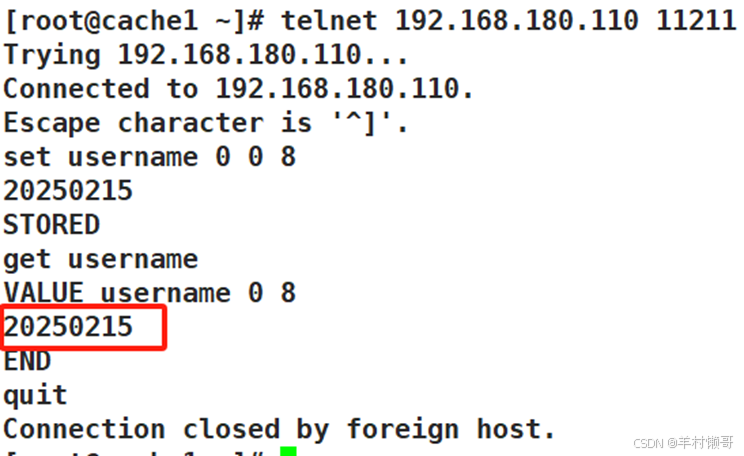
5. 在cache1远程登录并插入数值
telnet 192.168.180.110 11211set username 0 0 8
20250215
get username
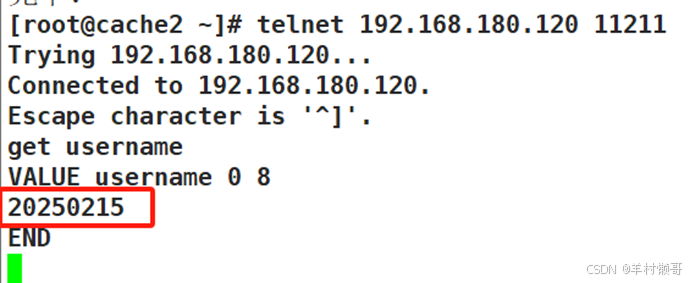
6. 在cache2上安装telnet并登录查看cache1插入的数值
yum install -y telnet
telnet 192.168.180.120 11211
get username
memcache+keepalived(基于以上完成)
cache1,2:
1. 均安装keepalived
yum install -y keepalived#cache1修改主配置文件,将原先内容删除
vim /etc/keepalived/keepalived.conf
! Configuration File for keepalived
global_defs {router_id route
}
vrrp_instance VI_1 {state MASTER    //主备都为主interface ens33    //网卡类型virtual_router_id 51priority 100    //优先级advert_int 1nopreempt    //不主动抢占资源,只在Master或者高优先级服务器上设置authentication {auth_type PASSauth_pass 1111}virtual_ipaddress {192.168.180.200    //定义虚拟VIP地址}
}
virtual_server 192.168.180.200 11211    //VIP故障检测
delay_loop 6
lb_algo rr
lb_kind NAT
persistence_timeout 20
protocol TCP
sorry_server 192.168.180.120 11211    //对端IP,也就是cache2
real_server 192.168.180.110 11211 {    //本机IP
weight 3
notify_down /root/memcached.sh    //当 memcached 宕机,停止keepalived服务
TCP_CHECK {
connect_timeout 3
nb_get_retry 3
delay_before_retry 3
connect_port 11211
}
}
}#编写完成退出,将这一份文件复制到cache2上
scp /etc/keepalived/keepalived.conf 192.168.180.120:/etc/keepalived/echo "/usr/bin/systemctl stop keepalived" > /root/memcached.sh
chmod +x memcached.sh
#在cache2上,修改配置文件的一些内容
vim /etc/keepalived/keepalived.conf! Configuration File for keepalived
global_defs {router_id route
}
vrrp_instance VI_1 {state MASTERinterface ens33virtual_router_id 51priority 99    //优先级修改advert_int 1nopreempt(删除)    //将这一个删除authentication {auth_type PASSauth_pass 1111}virtual_ipaddress {192.168.180.200}
}
virtual_server 192.168.180.200 11211
delay_loop 6
lb_algo rr
lb_kind NAT
persistence_timeout 20
protocol TCP
sorry_server 192.168.180.110 11211    //对端IP
real_server 192.168.180.120 11211 {    //本机IP
weight 3
notify_down /root/memcached.sh
TCP_CHECK {
connect_timeout 3
nb_get_retry 3
delay_before_retry 3
connect_port 11211
}
}
}echo "/usr/bin/systemctl stop keepalived" > /root/memcached.sh
chmod +x memcached.sh
2. 均开启
systemctl start keepalived3. 查看VIP是否生成
ip address show dev ens33 | grep 192.168.180.200
4. 验证高可用性
#关闭seten 0#cache1杀掉memcache:
killall memcached在cache2上查看,VIP已转移到cache2上
