网站建设客服北京网络营销外包公司哪家好
《老友记》上线 3D 版了?
允许用户旋转镜头,且从近景切换到全景观看故事?
今年出炉的 3D 方向 AI 项目 SitCom3D,能够自动补齐《老友记》原剧中的三维拍摄空间,用户可以选择主视图、侧视图等不同角度欣赏剧集。镜头的主导权在观众手中,仿佛亲临拍摄片场。
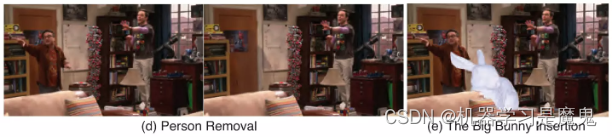
举个栗子,在原剧中只出现了以下两个画面。
看了《老友记》后,AI直接还原出画面的3D场景,构造不同角度下的镜头故事。
这流畅的运镜,仿佛就是新上线的 3D 版老友记,并且你就是导演!
项目介绍:情景喜剧的三维重构
这个项目由 UC 伯克利的 Georgios Pavlakos 等研究人员在 ECCV 2022 “The One Where They Reconstructed 3D Humans and Environments in TV Shows” 论文中提出,旨在借助 AI 完成影视剧集中的3D重建。
3D建模在很多领域都有广泛的应用,然而传统的重建方式耗时巨大,比如在制造业,一个工业级模型需要专业建模师花费数周时间。目前快速获得3D模型的方式有两种,一种是靠仪器扫描获得三维形状数据,例如点云;另一种则是基于深度学习,使用AI建模。后者更直观,且成本更低。想象一下用手机拍几张、甚至一张照片就能获得高精度的3D模型,既可以为元宇宙线上生活提供基础设施,又能在传统工业领域加速研发流程。
提到2D图像转3D模型,绕不开近两年大火的NeRF神经网络。自2020年发表以来众多高校和业界公司基于它研发了各自版本的NeRF:英伟达推出了极速版的instant NeRF;苹果的NeuMan框架等等。

NeRF为2D转3D提供了新的思路,其背后的机制,相关论文解读有很多,这里仅做简述:NeRF通过对数张2D照片的学习,使用神经辐射场的方式建立起像素点位置(x, y, z)和相机参数(θ, φ)对应图像的volume density体积密度和RGB颜色值的关系,训练完成后以此生成新的视角。通过这种方式,NeRF相较传统的3D建模方式能够生成更精细的还原。
回到TV Show的三维重建项目,如下图(fig2)所示,研究人员正是基于NeRF模型,通过分析整个剧集里的三维信息,精确感知和重建3D人体姿势和演员位置,并生成新的不存在剧集里的2D角度图像。

生成3D模型的原理如下图所示,首先从剧集输入中通过SfM(Structure-from-Motion)方法估计出摄像机的位置,并通过NeRF重建出精确的环境3D场景信息。接着根据多镜头和单镜头的情形,进行人体3D重建。最后基于这些信息进行更多的编辑和开发,比如在电视剧中删除一个人,或者插入一只兔子。

这个项目目前已在github上开源。
项目地址:https://github.com/ethanweber/sitcoms3D
论文地址:https://ethanweber.me/sitcoms3D
感兴趣的小伙伴可以直接在矩池云上复现这个项目,具体操作方式如下:
项目复现:用矩池云快速实现三维重构
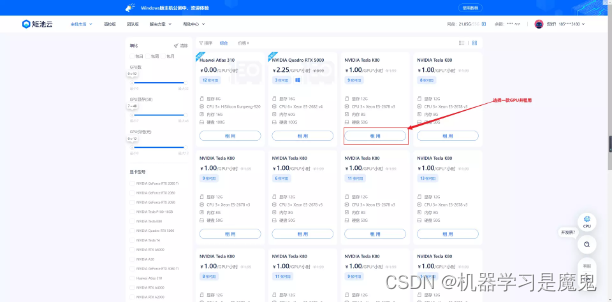
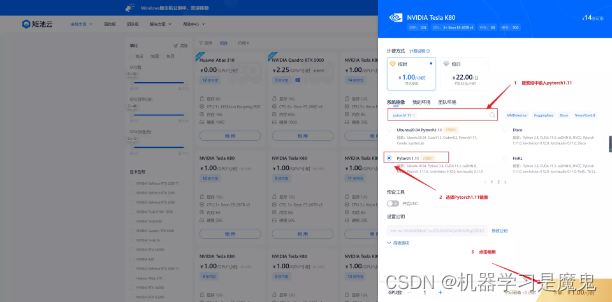
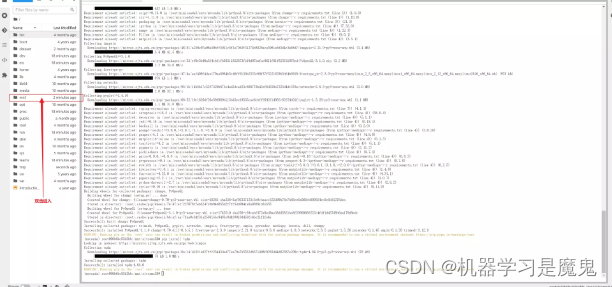
1、打开矩池云官网,进入主机市场,找到合适的机器

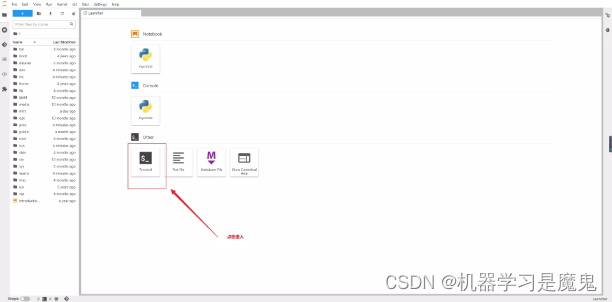
等待机器启动,启动完成界面如下,点击进入 Jupyter Notebook

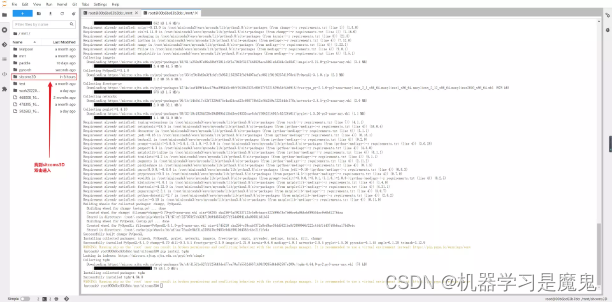
2、进入命令行,进行代码下载与安装
依次输入以下命令
cd /mnt
git clone https://hub.fastgit.xyz/ethanweber/sitcoms3D.git
如果下载慢可以用进入 https://hub.fastgit.xyz/ethanweber/sitcoms3D 手动下载后上传
https://github.com/CMUAbstract/cote.git
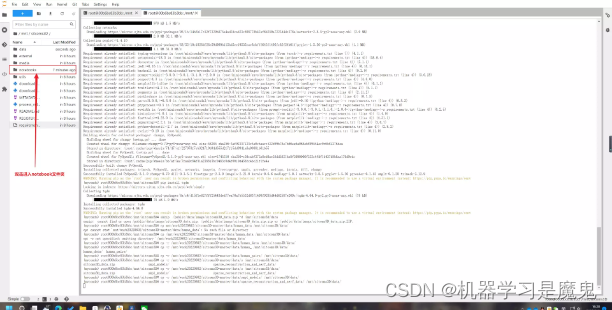
进入文件夹
cd sitcoms3D/
安装依赖
pip install -r requirements.txt
pip install tqdm
解压数据
矩池云已经为大家准备好了 sitcoms3D 数据,大家直接将 /public/data/image/sitcoms3D_data.zip 解压到 sitcoms3D-master 项目文件夹中的 data 下即可
unzip /public/data/videos_and_music/sitcoms3D_data.zip -d /mnt/sitcoms3D/data
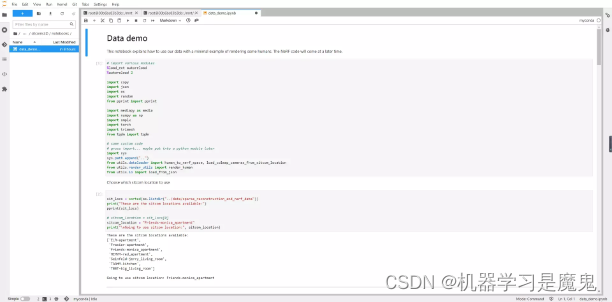
3、进入Jupyter notebook
打开demo,在Jupyter中“Run all cell”即可运行官方的例程。
4、调整版代码
官方 Demo 码有演示性质,直接运行有可能一些变量会受到干扰,因此我们对代码进行了一定的精简,可以根据需要用以下方式进一步进行使用。
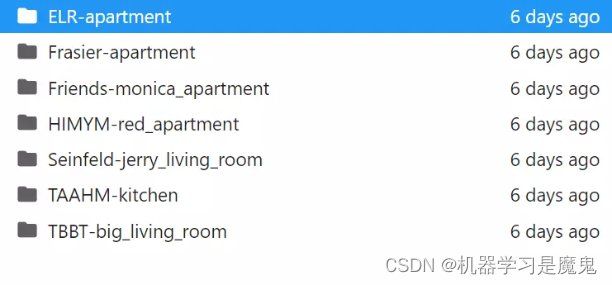
这一模型导入的数据文件有以下七个目录,应该是不同的数据,比如默认的sitcom_location = “Friends-monica_apartment” 表示从老友记里面选取数据
在第2个cell中更改sitcom_location 可以改变数据。
sitcom_location = sit_locs[0]
# sitcom_location = "Friends-monica_apartment"
下一步为是选择图像,原文中使用了romdom随机选择一个图像,我们可以加一行代码来指定自己的图像。
# choose a random image to work with
image_name = random.choice(list(nerf_image_name_to_info.keys()))
image_name = "ELR_S09E01_00007186.jpg"
print("Showing camera information for image:", image_name)
pprint(nerf_image_name_to_info[image_name])
更改后的代码如下:在不指定图像的情况下,每次run all cell 即可随机抽取图像。
# import various modules
%load_ext autoreload
%autoreload 2
import copy
import json
import os
import random
from pprint import pprintimport mediapy as media
import numpy as np
import smplx
import torch
import trimesh
from tqdm import tqdm
# some custom code
# gross import... maybe put into a python module later
import sys
sys.path.append("..")
from utils.dataloader import human_to_nerf_space, load_colmap_cameras_from_sitcom_location
from utils.render_utils import render_human
from utils.io import load_from_json
这一段定位了数据的路径并抽取出图像
sit_locs = sorted(os.listdir("../data/sparse_reconstruction_and_nerf_data"))
print(sit_locs)sitcom_location = sit_locs[3]
print("load.....",sitcom_location)cameras = load_from_json(f"../data/sparse_reconstruction_and_nerf_data/{sitcom_location}/cameras.json")nerf_image_name_to_info = {}
for dict_ in cameras["frames"]:nerf_image_name_to_info[dict_["image_name"]] = {"intrinsics": np.array(dict_["intrinsics"]),"camtoworld": np.array(dict_["camtoworld"]),}image_name = random.choice(list(nerf_image_name_to_info.keys()))
print("image name: ", image_name)basedir = f"../data/sparse_reconstruction_and_nerf_data/{sitcom_location}"
colmap_image_name_to_info = load_colmap_cameras_from_sitcom_location(basedir)point_cloud_transform = np.array(cameras["point_cloud_transform"])
scale_factor = np.array(cameras["scale_factor"])
# colmap_rescale = float(smpl_data["colmap_rescale"])
根据抽取的图像读取其中的人物数据
# the set of image names that we used for nerf
# these images are included in the sparse_reconstruction_and_nerf_data/ folder
nerf_image_names = set(nerf_image_name_to_info.keys())# the set of image names that we have smpl parameters for
# this is wherever our method "calibrated multi-shot" was run
human_pairs = load_from_json(f"../data/human_pairs/{sitcom_location}.json")
image_name_to_shot_change_image_name = {}
calibrated_multishot_image_names = set()
for image_name_a, human_idx_a, image_name_b, human_idx_b in human_pairs:calibrated_multishot_image_names.add(image_name_a)calibrated_multishot_image_names.add(image_name_b)image_name_to_shot_change_image_name[image_name_a] = image_name_bimage_name_to_shot_change_image_name[image_name_b] = image_name_aimage_names = nerf_image_names.intersection(calibrated_multishot_image_names)
print("Found {} images that are used for nerf and contain smpl parameters".format(len(image_names)))# choose a random image name to work with and visualize
# image_name = random.choice(list(image_names))
# image_name = "Friends_S08E20_00001431.jpg"# read data for the image and a human...
human_data = load_from_json(f"../data/human_data/{sitcom_location}.json")image_human_data = human_data[image_name]
print("going to visualize image {} with {} humans".format(image_name, len(image_human_data)))
显示读取的图片
image = media.read_image(f"../data/sparse_reconstruction_and_nerf_data/{sitcom_location}/images/{image_name}")
media.show_image(image, height=200)
导入SMPL模型
model_folder = "../data/smpl_models"
model_type = "smpl"
gender = "neutral"body_model = smplx.create(model_folder,model_type=model_type,gender=gender)
用于将人物数据加载到模型,提取出mesh的函数
def get_human_obj_mesh(image_name: str, human_idx: int):if "smpl" not in human_data[image_name][human_idx]:print(f"smpl values don't exist for {image_name} and human_idx {human_idx}")return Nonesmpl_data = human_data[image_name][human_idx]["smpl"]print(smpl_data.keys())camera_translation = torch.tensor(smpl_data["camera_translation"])[None]betas = torch.tensor(smpl_data["betas"])[None]global_orient = torch.tensor(smpl_data["global_orient"])[None]body_pose = torch.tensor(smpl_data["body_pose"])[None]colmap_rescale = float(smpl_data["colmap_rescale"])output = body_model(betas=betas,global_orient=global_orient,body_pose=body_pose,return_verts=True)vertices = output.vertices + camera_translationpose_colmap = torch.from_numpy(colmap_image_name_to_info[image_name]["camtoworld"]).float()pose_colmap[:3,3] *= colmap_rescale# homogeneous coordinatesvertices = torch.cat([vertices, torch.ones_like(vertices[..., 0:1])], dim=-1)vertices = vertices @ pose_colmap.Tvertices = vertices[...,:3]out_mesh = trimesh.Trimesh(vertices[0].detach().numpy(), body_model.faces, process=False)human_obj_filename = "temp.obj"out_mesh.export(human_obj_filename);# specify the human to renderobj_mesh_original = trimesh.load(human_obj_filename, process=False)obj_mesh = human_to_nerf_space(obj_mesh_original, point_cloud_transform, scale_factor, colmap_rescale)return obj_mesh
应用get_human_obj_mesh函数,获取图像的mesh数据
human_obj_meshes = []
for human_idx in range(len(image_human_data)):print("human_idx", human_idx)obj_mesh = get_human_obj_mesh(image_name, human_idx)if obj_mesh:human_obj_meshes.append(obj_mesh)
现实提取出模型的结果
def show_humans(human_obj_meshes, pose, K, image_name):image = media.read_image(f"../data/sparse_reconstruction_and_nerf_data/{sitcom_location}/images/{image_name}")color_h, depth_h, alpha_h = render_human(human_obj_meshes, pose, K)media.show_image(image, height=200, title="Image we use for camera pose and intrinsics")media.show_image(color_h, height=200, title="Image of humans rendered from this camera")composited = (color_h * alpha_h[...,None] + image * (1 - alpha_h[...,None])).astype("uint8")media.show_image(composited, height=200, title="Composited image")pose = nerf_image_name_to_info[image_name]["camtoworld"]
K = nerf_image_name_to_info[image_name]["intrinsics"]
show_humans(human_obj_meshes, pose, K, image_name) # image_name to read the background image
模型的局限性
当然,Sitcoms 也受到训练模型的的一些局限性,在我们运行的案例中,有相对成功的结果,也有相对混乱的结果。
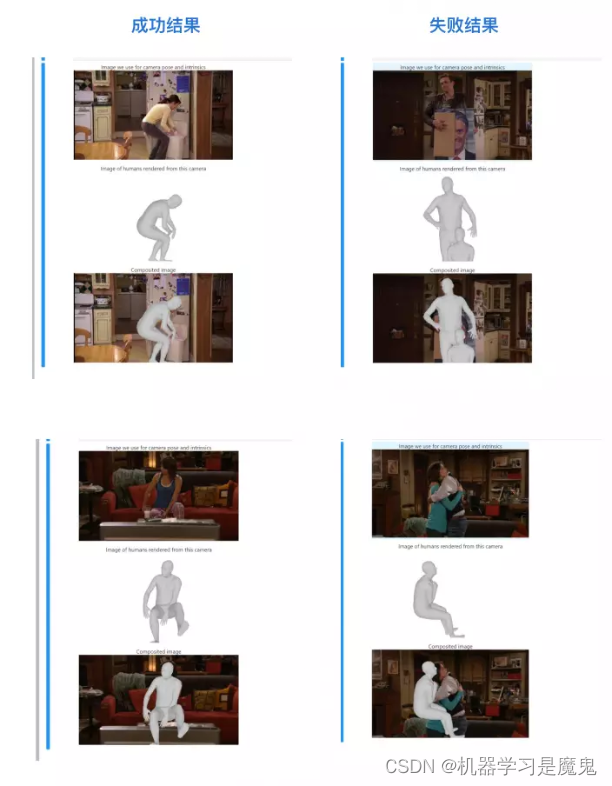
相对失败的图片可以完整地提取出三维信息,但有可能图片仅能显示出画面的一部分人,甚至会将一些物体误判为人物,Sitcom 仍存在一些鲁棒性的问题。
参考资料
论文地址:https://arxiv.org/abs/2207.14279
GitHub地址:https://github.com/ethanweber/sitcoms3D
项目主页:https://ethanweber.me/sitcoms3D/