SpringBoot(8)——Springboot数据层开发

系列文章
1、SpringBoot(1)——创建SpringBoot项目的方式_基于注解方式开发aspectj springboot下载-CSDN博客
2、SpringBoot(2)——SpringBoot入门:微服务-CSDN博客
3、SpringBoot(3)——SpringBoot入门程序及解析-CSDN博客
4、SpringBoot(4)——SpringBoot自动配置原理-CSDN博客
5、SpringBoot(5)——SpringBoot配置文件-CSDN博客
6、SpringBoot(6)——Springboot整合springmvc-CSDN博客
7、SpringBoot(7)——Springboot整合thymeleaf_thymeleaf springboot 样例源码-CSDN博客
目录
编辑
1.Springboot数据层开发
1.1数据源自动管理
1.2配置druid数据源
1.3 springboot整合jdbcTemplate
1.4 Springboot整合mybatis注解版
1.5 Springboot整合mybatis配置文件
1.Springboot数据层开发
1.1数据源自动管理
<!--引入druid的依赖-->
<dependency>
    <groupId>com.alibaba</groupId>
    <artifactId>druid</artifactId>
    <version>1.2.23</version>
</dependency>
<dependency>
    <groupId>log4j</groupId>
    <artifactId>log4j</artifactId>
    <version>1.2.17</version>
</dependency>
让我们使用yml方式配置,创建application.yml
spring:
  datasource:
    username: root
    password: root
    url: jdbc:mysql://localhost:3306/boot_demo
    driver-class-name: com.mysql.cj.jdbc.Driver
    type: com.zaxxer.hikari.HikariDataSource
在默认情况下, 数据库连接可以使用DataSource池进行自动配置
DataSource 池是一个存放数据库连接对象的 “池子”。在应用程序运行时,它会预先创建一定数量的数据库连接,并将这些连接存储在池中
- 如果Hikari可用, Springboot将使用它。
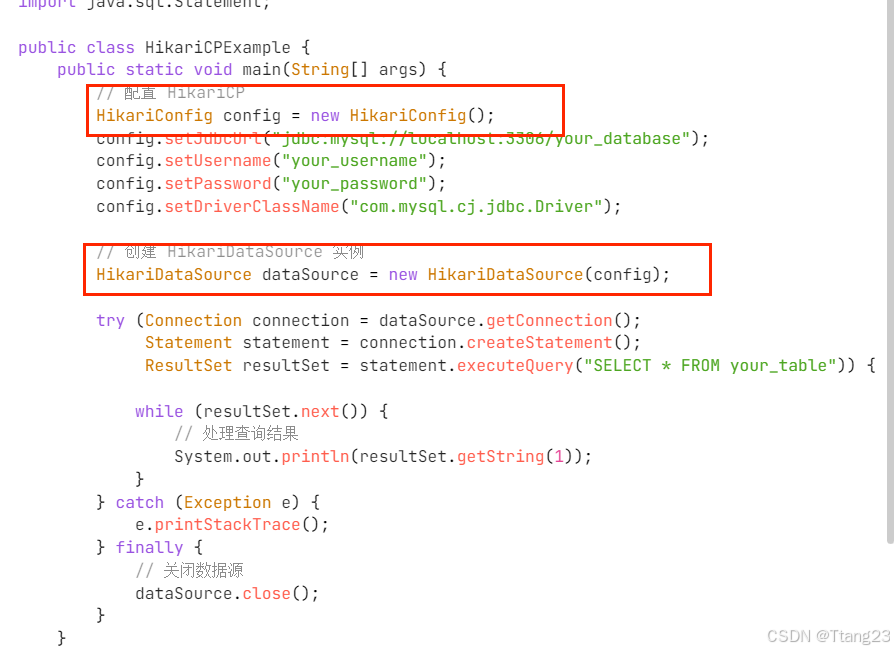
HikariCP 是一个高性能的 JDBC 连接池,专为 Java 应用程序设计,旨在提供快速、可靠且轻量级的数据库连接管理解决方案
- 如果Commons DBCP2 可用, 我们将使用它。
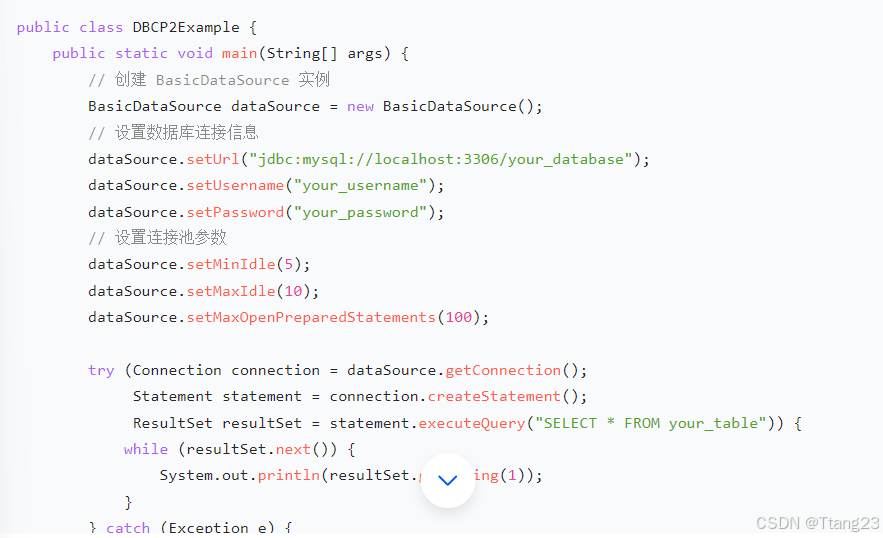
Commons DBCP2 通过连接池技术,预先创建一定数量的数据库连接并存储在池中,当应用程序需要数据库连接时,直接从连接池中获取,使用完毕后将连接归还给连接池,供其他操作复用,以此减少创建和销毁连接的开销,提升应用程序的性能和响应速度。
spring:
  datasource:
    username: root
    password: root
    url: jdbc:mysql://localhost:3306/boot_demo
    driver-class-name: com.mysql.jdbc.Driver
    type: com.zaxxer.hikari.HikariDataSource
    # type: org.apache.commons.dbcp2.BasicDataSource
1.2配置druid数据源
引入druid的依赖
<!--引入druid的依赖-->
<dependency>
    <groupId>com.alibaba</groupId>
    <artifactId>druid</artifactId>
    <version>1.2.23</version>
</dependency>
<dependency>
    <groupId>log4j</groupId>
    <artifactId>log4j</artifactId>
    <version>1.2.17</version>
</dependency>修改spring.datasource.type=com.alibaba.druid.pool.DruidDataSource
在application.yaml中加入
spring:
  datasource:
    username: root
    password: root
    url: jdbc:mysql://localhost:3306/boot_demo
    driver-class-name: com.mysql.cj.jdbc.Driver
    type: com.alibaba.druid.pool.DruidDataSource
    initialSize: 5
    minIdle: 5
    maxActive: 20
    maxWait: 60000
    timeBetweenEvictionRunsMillis: 60000
    minEvictableIdleTimeMillis: 300000
    validationQuery: SELECT 1 FROM DUAL
    testWhileIdle: true
    testOnBorrow: false
    testOnReturn: false
    poolPreparedStatements: true
    filters: stat,wall,log4j
    maxPoolPreparedStatementPerConnectionSize: 20
    useGlobalDataSourceStat: true
    connectionProperties: druid.stat.mergeSql=true;druid.stat.slowSqlMillis=500
!! com.mysql.jdbc.Driver这个驱动类在 MySQL 8.x 及更高版本中已经被弃用,新的驱动类是 com.mysql.cj.jdbc.Driver。
创建数据源注册类
这一是一种注册数据源的方式,比在yml文件内配置更灵活。
import com.alibaba.druid.pool.DruidDataSource;
import com.alibaba.druid.support.http.StatViewServlet;
import com.alibaba.druid.support.http.WebStatFilter;
import org.springframework.boot.context.properties.ConfigurationProperties;
import org.springframework.boot.web.servlet.FilterRegistrationBean;
import org.springframework.boot.web.servlet.ServletRegistrationBean;
import org.springframework.context.annotation.Bean;
import org.springframework.context.annotation.Configuration;
import org.springframework.jdbc.core.JdbcTemplate;


import javax.sql.DataSource;
import java.util.Arrays;
import java.util.HashMap;
import java.util.Map;

@Configuration
public class DruidConfig {

    @ConfigurationProperties(prefix = "spring.datasource")

    @Bean
    public DataSource dataSource(){
        return new DruidDataSource();
    }

}
配置文件(yml)、配置类、注解的优先级
注解的优先级最高,接着是配置类,最后是配置文件
配置Druid运行期监控
在 Spring Boot 接入 JDBC 时配置 Druid 运行期监控,
- 可用于性能监控与优化,如分析 SQL 执行性能、监控连接池性能以合理调整参数;
- 能监测系统运行状态,实时查看数据库连接状态、了解应用对数据库的操作频率;
- 还可辅助问题排查与定位,快速找出性能瓶颈,分析异常请求原因,从而提升系统整体性能,及时处理连接问题,修复程序漏洞。
package com.qcby.config;
import com.alibaba.druid.pool.DruidDataSource;
import com.alibaba.druid.support.http.StatViewServlet;
import com.alibaba.druid.support.http.WebStatFilter;
import org.springframework.boot.context.properties.ConfigurationProperties;
import org.springframework.boot.web.servlet.FilterRegistrationBean;
import org.springframework.boot.web.servlet.ServletRegistrationBean;
import org.springframework.context.annotation.Bean;
import org.springframework.context.annotation.Configuration;
import org.springframework.jdbc.core.JdbcTemplate;
import javax.sql.DataSource;
import java.util.Arrays;
import java.util.HashMap;
import java.util.Map;
@Configuration
public class DruidConfig {
@ConfigurationProperties(prefix = "spring.datasource")
@Bean
public DataSource dataSource(){
return new DruidDataSource();
}
@Bean
public ServletRegistrationBean statViewServlet(){
ServletRegistrationBean bean = new ServletRegistrationBean(new StatViewServlet(),
"/druid/*");
Map<String,String> initParams = new HashMap<>();
initParams.put("loginUsername","root");
initParams.put("loginPassword","root");
initParams.put("allow","");//默认就是允许所有访问
initParams.put("deny","192.168.15.21");
bean.setInitParameters(initParams);
return bean;
}
//2、配置一个web监控的filter
@Bean
public FilterRegistrationBean webStatFilter(){
FilterRegistrationBean bean;
bean = new FilterRegistrationBean();
bean.setFilter(new WebStatFilter());
Map<String,String> initParams = new HashMap<>();
initParams.put("exclusions","*.js,*.css,/druid/*");
bean.setInitParameters(initParams);
bean.setUrlPatterns(Arrays.asList("/*"));
return bean;
}
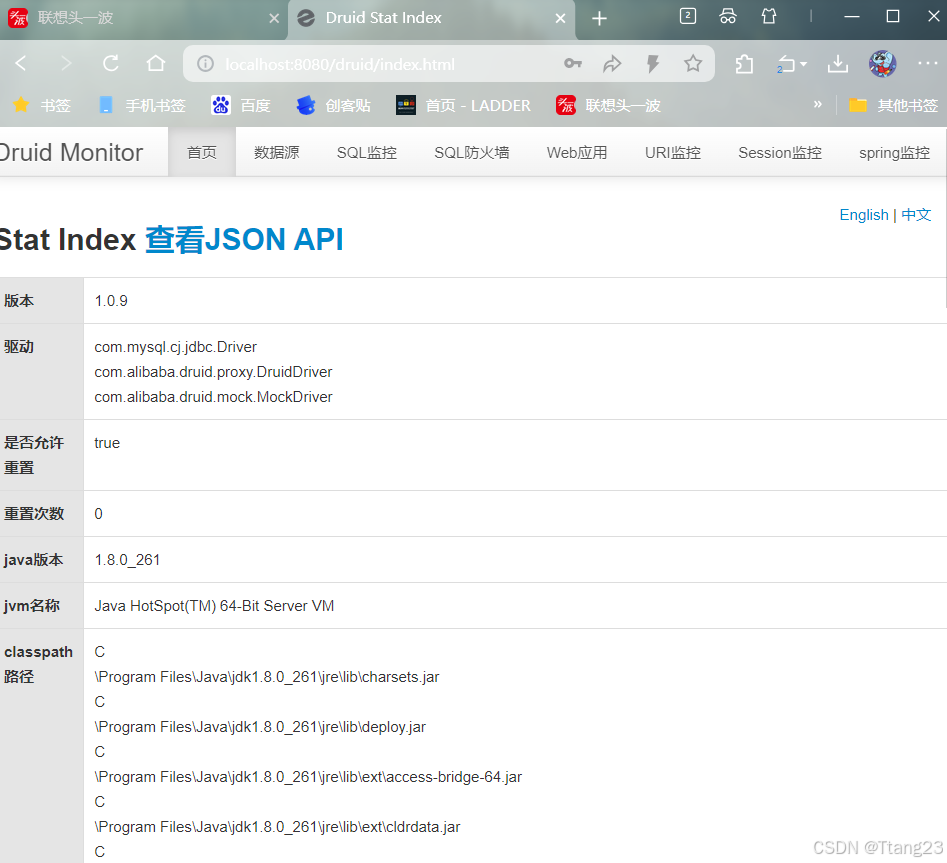
}监控数据库操作,通过网址:http://localhost:8080/drui查看
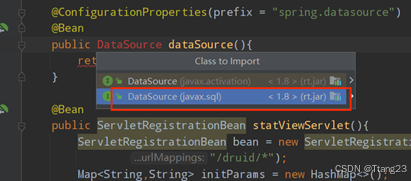
注意!这个依赖不要导错
打开监控页面http://localhost:8080/druid
1.3 springboot整合jdbcTemplate
JdbcTemplate 是 Spring 框架提供的一个用于简化 JDBC(Java Database Connectivity)操作的工具类。它位于 org.springframework.jdbc.core 包下
JdbcTemplate 基于 JDBC 连接池来管理数据库连接。它会从连接池中获取一个数据库连接,然后使用该连接创建 Statement 或 PreparedStatement 对象,执行开发者提供的 SQL 语句。在执行过程中,JdbcTemplate 会自动处理结果集的映射,将查询结果转换为 Java 对象或集合。最后,它会将连接归还给连接池,同时处理可能出现的异常。
1.3.1 在数据源建表
SET FOREIGN_KEY_CHECKS=0;

-- ----------------------------
-- Table structure for tx_user
-- ----------------------------
DROP TABLE IF EXISTS `tx_user`;
CREATE TABLE `tx_user` (
  `username` varchar(10) DEFAULT NULL,
  `userId` int(10) NOT NULL,
  `password` varchar(10) DEFAULT NULL,
  PRIMARY KEY (`userId`)
) ENGINE=InnoDB DEFAULT CHARSET=utf8;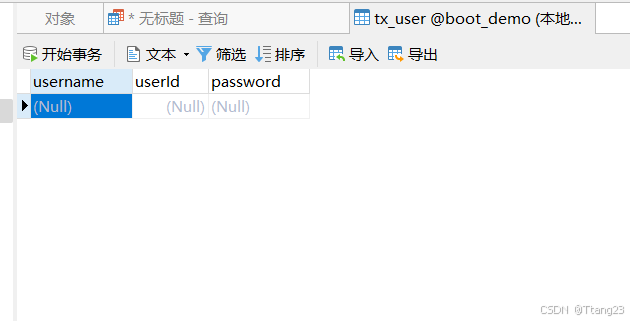
创建Controller
package com.qcby.controller;
import org.springframework.beans.factory.annotation.Autowired;
import org.springframework.jdbc.core.JdbcTemplate;
import org.springframework.stereotype.Controller;
import org.springframework.web.bind.annotation.RequestMapping;
import org.springframework.web.bind.annotation.ResponseBody;
import java.util.List;
import java.util.Map;
@Controller
public class TestController {
@Autowired
public JdbcTemplate jdbcTemplate;
@ResponseBody
@RequestMapping("/query")
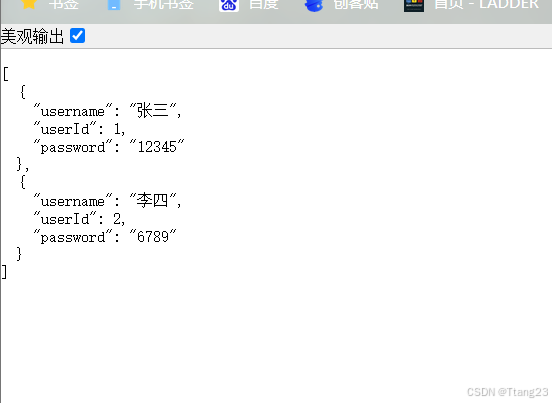
public List<Map<String, Object>> query(){
List<Map<String, Object>> maps = jdbcTemplate.queryForList("SELECT * FROM tx_user");
return maps;
}
}启动 springboot访问
原理:
Springboot中提供了JdbcTemplateAutoConfiguration的自动配置
org.springframework.boot.autoconfigure.jdbc.JdbcTemplateAutoConfiguration,\
JdbcTemplateAutoConfiguration源码:

1.4 Springboot整合mybatis注解版
<dependency>
    <groupId>org.mybatis.spring.boot</groupId>
    <artifactId>mybatis-spring-boot-starter</artifactId>
    <version>2.3.1</version>
</dependency>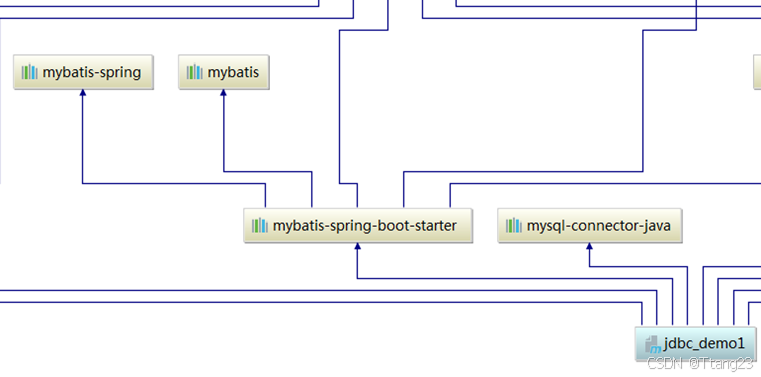
步骤:
1)、配置数据源相关属性(见上一节Druid)
2)、给数据库建表
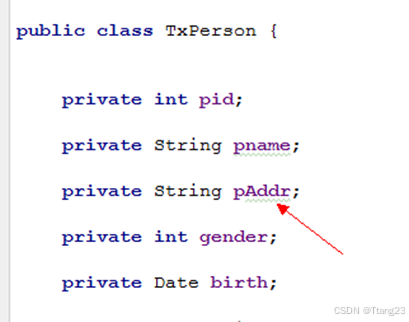
3)、创建JavaBean
package com.qcby.Person;
import java.util.Date;
public class TxPerson {
    private int pid;
    private String pName;
    private String addr;
    private String gender;
    private Date birth;
    public int getPid() {
        return pid;
    }
    public void setPid(int pid) {
        this.pid = pid;
    }
    public String getpName() {
        return pName;
    }
    public void setpName(String pName) {
        this.pName = pName;
    }
    public String getAddr() {
        return addr;
    }
    public void setAddr(String addr) {
        this.addr = addr;
    }
    public String getGender() {
        return gender;
    }
    public void setGender(String gender) {
        this.gender = gender;
    }
    public Date getBirth() {
        return birth;
    }
    public void setBirth(Date birth) {
        this.birth = birth;
    }
    @Override
    public String toString() {
        return "TxPerson{" +
                "pid=" + pid +
                ", pName='" + pName + '\'' +
                ", addr='" + addr + '\'' +
                ", gender='" + gender + '\'' +
                ", birth=" + birth +
                '}';
    }
}
4)创建Mapper
import com.qcby.Person.TxPerson;
import org.apache.ibatis.annotations.*;
import java.util.List;

public interface TxPersonMapper {
    @Select("select * from tx_person")
    public List<TxPerson> getPersons();

    @Select("select * from tx_person t where t.pid = #{id}")
    public TxPerson getPersonById(int id);

    @Options(useGeneratedKeys =true, keyProperty = "pid")
    @Insert("insert into tx_person(pid, pname, addr,gender, birth)" +
            " values(#{pid}, #{pname}, #{addr},#{gender}, #{birth})")
    public void insert(TxPerson person);

    @Delete("delete from tx_person where pid = #{id}")
    public void update(int id);
}- 可单独使用:可以只使用 Mapper 接口,通过注解定义所有 SQL 语句;也可以只使用 Mapper.xml 文件,在 XML 文件里定义所有 SQL 语句。
- 可混合使用:在同一个项目中,也能同时使用 Mapper 接口和 Mapper.xml 文件。MyBatis 会自动处理这两种方式定义的 SQL 映射。不过要注意,同一个 Mapper 接口方法不能同时在注解和 XML 文件里定义,避免冲突。
单元测试
package com.qcby;
import com.qcby.Person.TxPerson;
import com.qcby.mapper.TxPersonMapper;
import org.junit.jupiter.api.extension.ExtendWith;
import org.springframework.beans.factory.annotation.Autowired;
import org.springframework.boot.test.context.SpringBootTest;
import org.springframework.context.ApplicationContext;
import org.junit.jupiter.api.Test;
import org.springframework.test.context.junit.jupiter.SpringExtension;
import javax.sql.DataSource;
import java.sql.SQLException;
@ExtendWith(SpringExtension.class)
@SpringBootTest
public class MyTest {
@Autowired
public TxPersonMapper txPersonMapper;
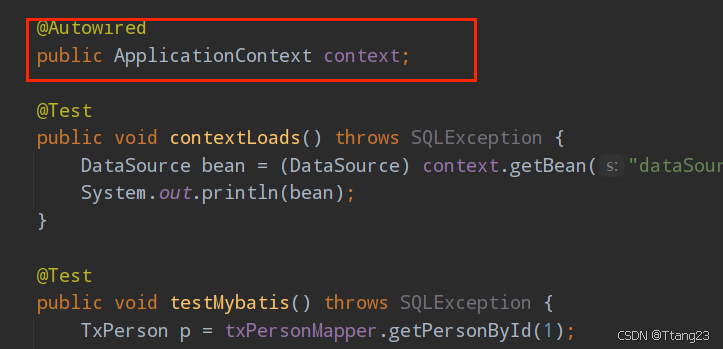
@Autowired
public ApplicationContext context;
@Test
public void contextLoads() throws SQLException {
DataSource bean = (DataSource) context.getBean("dataSource");
System.out.println(bean);
}
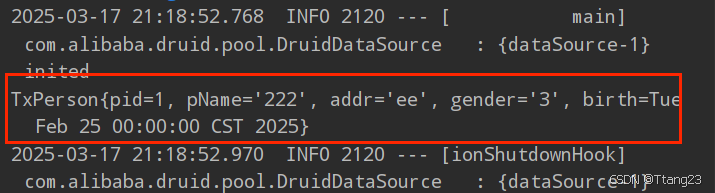
@Test
public void testMybatis() throws SQLException {
TxPerson p = txPersonMapper.getPersonById(1);
System.out.println(p);
}
}遇到问题:
这个context识别不了
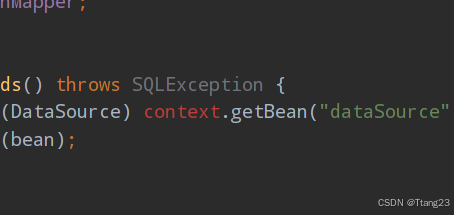
解决:导入的一般是这个application的
解决驼峰模式和数据库中下划线不能映射的问题。

配置MybatisConfig(这个和druidconfig均可以配置到主启动类里)
package com.qcby.config;

import org.apache.ibatis.annotations.Mapper;
import org.mybatis.spring.annotation.MapperScan;
import org.mybatis.spring.boot.autoconfigure.ConfigurationCustomizer;
import org.springframework.context.annotation.Bean;
import org.springframework.context.annotation.Configuration;


//@MapperScan("com.qcby.mapper")
@Configuration
public class MybatisConfig {

    @Bean
    public ConfigurationCustomizer getCustomizer(){
        return new ConfigurationCustomizer() {
            @Override
            public void customize(org.apache.ibatis.session.Configuration configuration) {
                configuration.setMapUnderscoreToCamelCase(true);
            }
        };
    }
}
查询结果
我们同样可以在mybatis的接口上不加@Mapper注解
通过扫描器注解来扫描

1.5 Springboot整合mybatis配置文件
这也是一种SpringBoot实现MyBatis整合的一种方式。注意,不要和上面那种纯注解的形式共用一个mapper
创建sqlMapConfig.xml配置文件
创建映射文件PersonMapper.xml
<?xml version="1.0" encoding="UTF-8" ?>
<!DOCTYPE mapper PUBLIC "-//mybatis.org//DTD Mapper 3.0//EN"
        "http://mybatis.org/dtd/mybatis-3-mapper.dtd">

<mapper namespace="cn.tx.mapper.TxPersonMapper">
    <select id="getPersons" resultType="TxPerson">
        select * from tx_person
    </select>
</mapper>
在application.yaml中配置mybatis的信息
mybatis:
  config-location: classpath:sqlMapConfig.xml
  mapper-locations: classpath:mapper/*.xml
  type-aliases-package: cn.tx.springboot.jdbc_demo1