【VUE】day06 动态组件 插槽 自定义指令 ESlint
【VUE】day06 动态组件 & 插槽 & 自定义指令
- 1. 动态组件
- 1.1 通过不同的按钮展示不同的组件
- 1.1.1回顾`@click`
- 1.2 keep-alive的使用
- 1.3 keep-alive对应的生命周期函数
- 1.3.1 keep-alive的include属性
- 1.3.2 exclude
- 1.4 组件注册名称和组件声明时name的区别
- 1.4.1 组件声明时name
- 2. 插槽
- 2.1 `<slot>`
- 2.2 v-slot指令 具名插槽
- 2.3 v-slot指令 作用域插槽
- 3. 自定义指令
- 3.1 私有自定义指令的基础用法
- 3.2 全局自定义指令的基础用法
- 4. ESlint与VSCode
- 4.1 ESlint
- 4.1.1 创建项目的时候带上ESlint
- 4.2 VSCode配置
- 5. axios
- 6. 若依中的axios使用
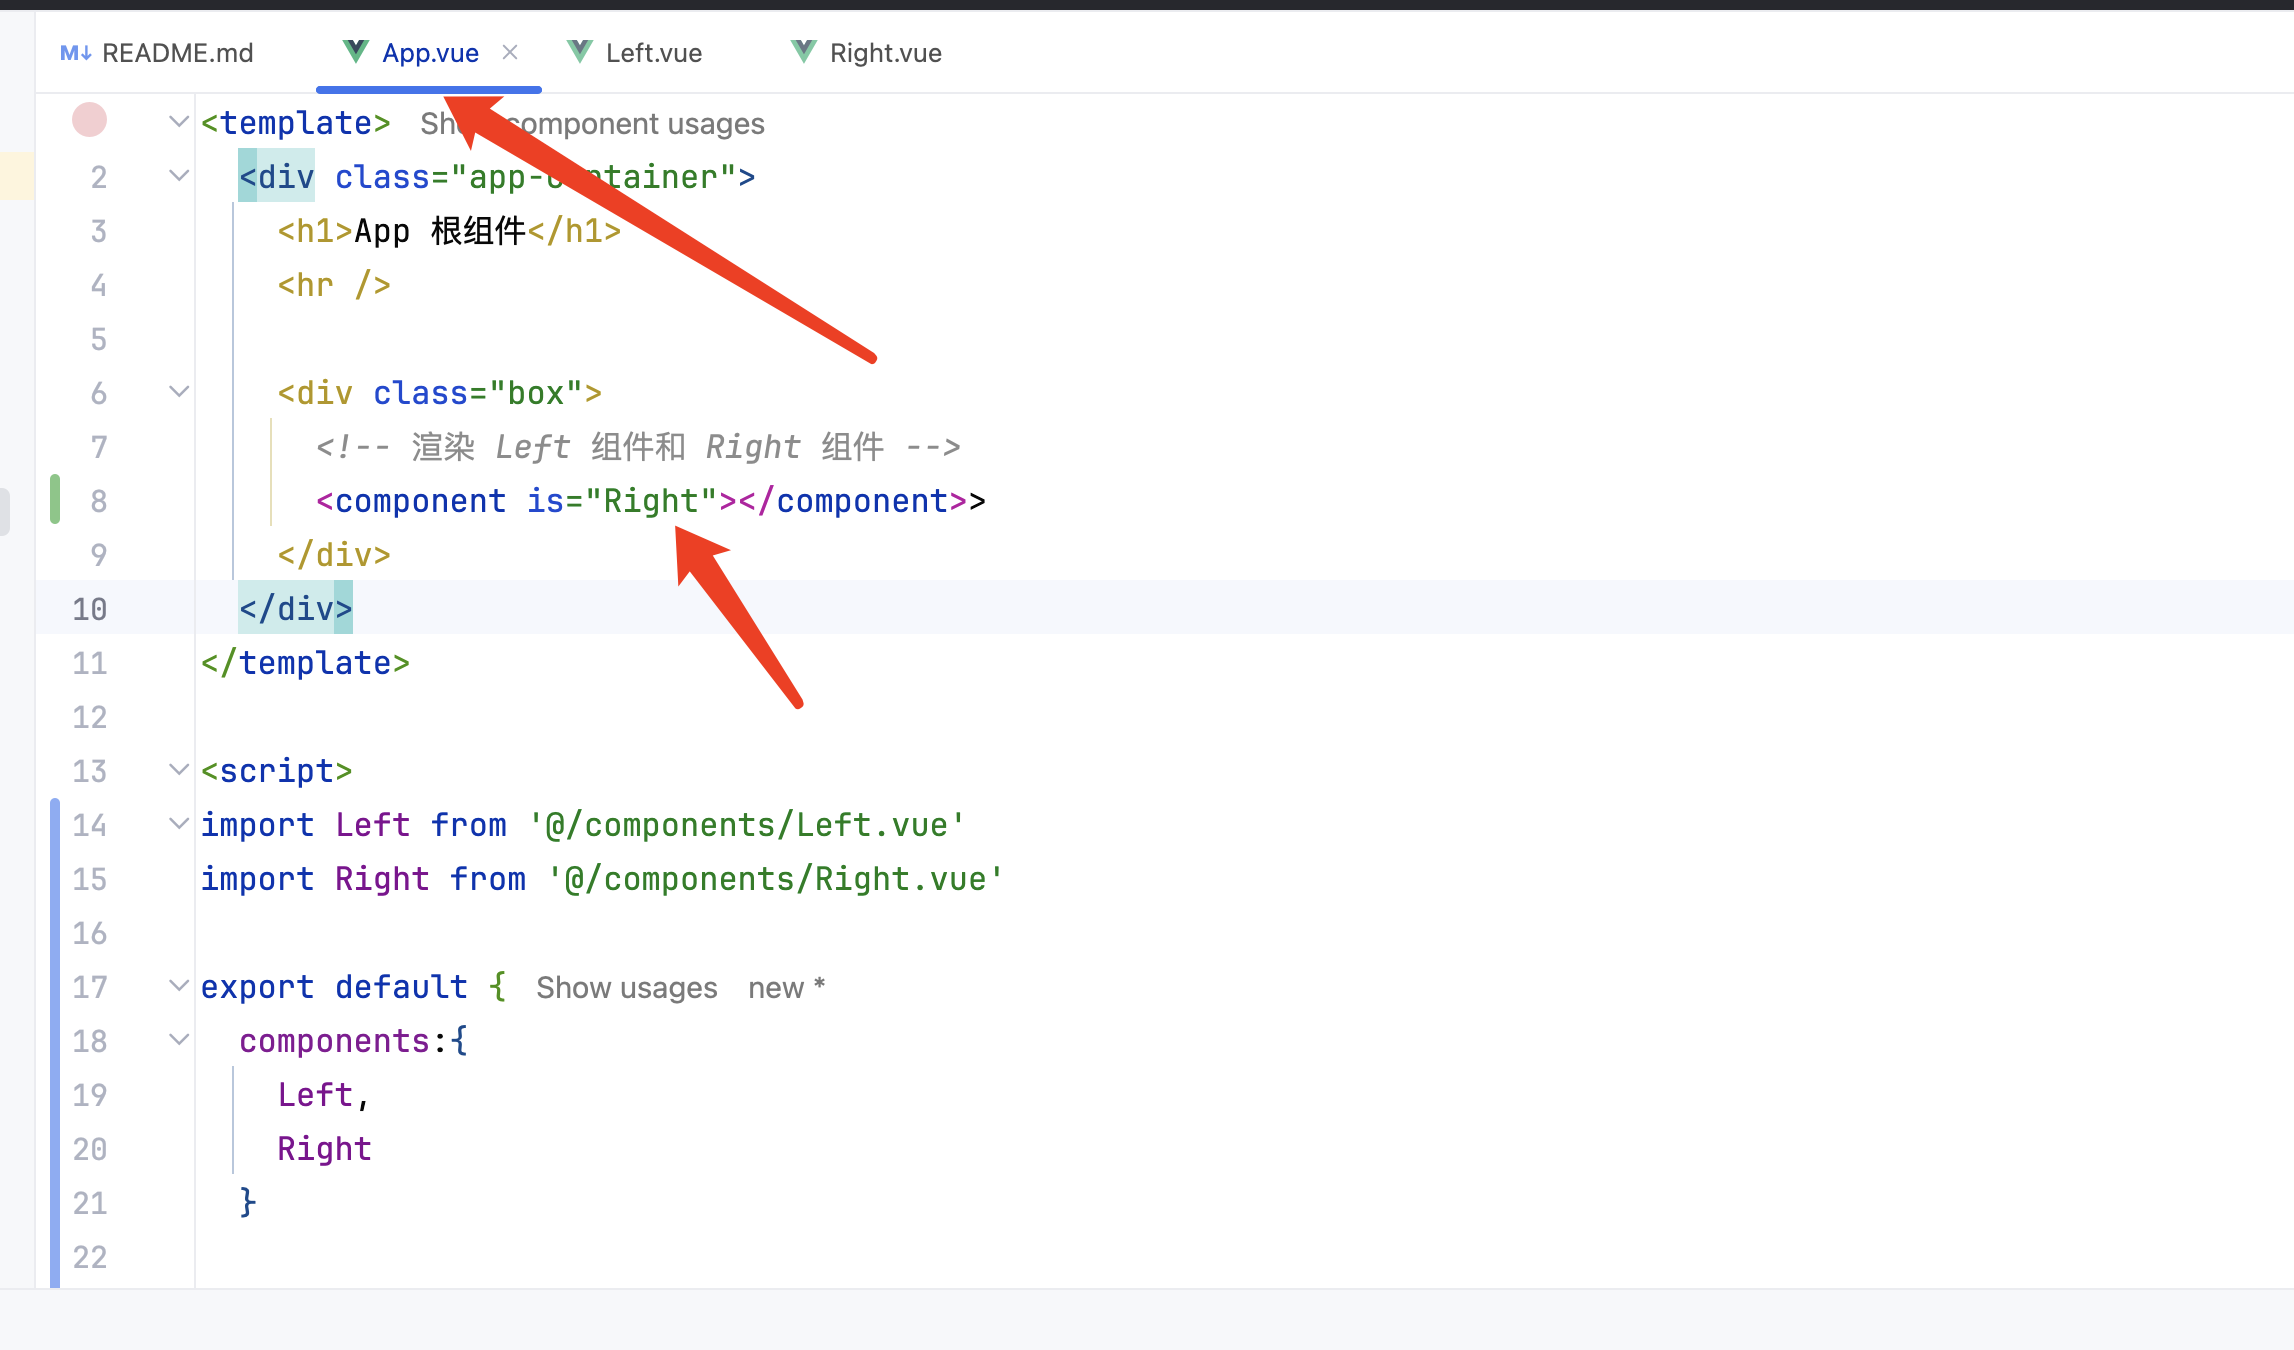
1. 动态组件
动态组件指的是动态切换组件的显示与隐藏。
vue提供了一个内置的<component>组件,专门用来实现动态组件的渲染。
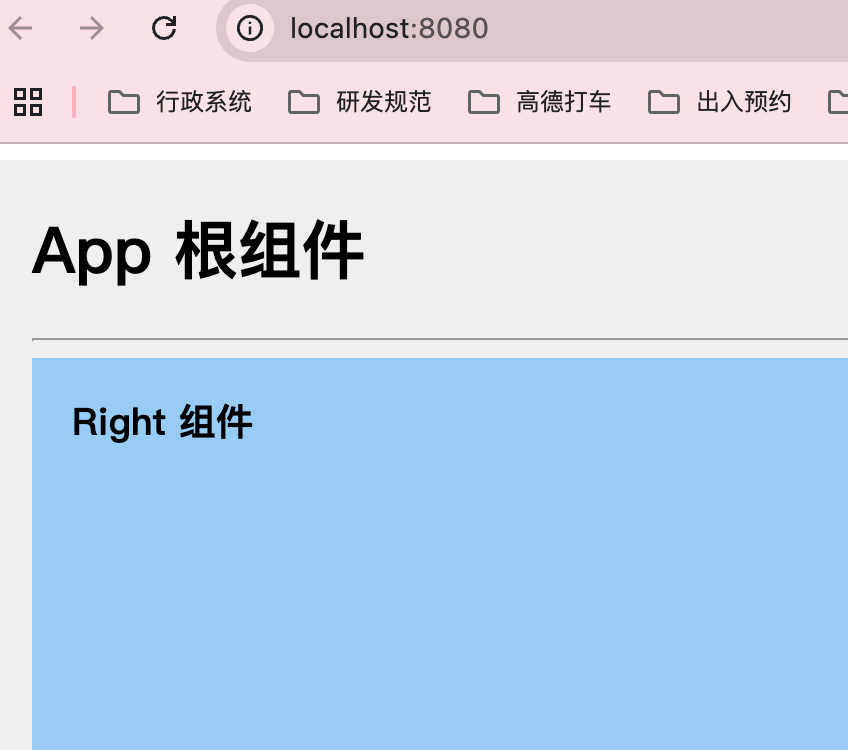
当is='Right'则Right组件会显示出来。
1.1 通过不同的按钮展示不同的组件
<template>
  <div class="app-container">
    <h1>App 根组件</h1>
    <hr/>

    <!-- 通过按钮点击选择显示的组件    -->
    <button @click="comName ='Left'">展示Left</button>
    <button @click="comName = 'Right'">展示Right</button>
    <div class="box">
      <!-- 渲染 Left 组件和 Right 组件 -->
      <!-- component标签是vue内置的,作用:组件的占位符 -->
      <component :is="comName"></component>
    </div>
  </div>
</template>

<script>
import Left from '@/components/Left.vue'
import Right from '@/components/Right.vue'

export default {
  components: {
    Left,
    Right
  },
  data() {
    return {
      comName: 'Right'
    }
  }

}
</script>

<style lang="less">
.app-container {
  padding: 1px 20px 20px;
  background-color: #efefef;
}

.box {
  display: flex;
}
</style>
1.1.1回顾@click
@click 是 v-on:click 指令的简写,用于监听 click 事件。当用户点击按钮时,click 事件被触发,并执行等号后指定的表达式或方法。
<button @click="comName = 'Left'">展示Left</button>
@click:绑定点击事件(等同于v-on:click)。- comName = ‘Left’:当按钮被点击时,comName 变量的值被设置为
'Left'。
1.2 keep-alive的使用
<keep-alive> 是 Vue.js 中的一个内置组件,用于缓存动态组件或组件的状态,以避免重复渲染和销毁,从而提升性能。它通常用于在组件切换时保留组件的状态或避免重新渲染。
是 Vue.js 中的一个内置组件,用于缓存动态组件或组件的状态,以避免重复渲染和销毁,从而提升性能。它通常用于在组件切换时保留组件的状态或避免重新渲染。
主要功能
- 缓存组件: 会缓存包裹的组件实例,而不是销毁它们。当组件再次被激活时,会直接从缓存中恢复,而不是重新创建。
- 保留状态:被缓存的组件会保留其状态(如数据、DOM 状态等),避免重新初始化。
- 生命周期钩子:被缓存的组件会触发特定的生命周期钩子,如 activated 和 deactivated,而不是 mounted 和 destroyed。
基本用法:
<template>
  <div>
    <button @click="toggleComponent">切换组件</button>
    <keep-alive>
      <component :is="currentComponent"></component>
    </keep-alive>
  </div>
</template>

<script>
export default {
  data() {
    return {
      currentComponent: 'ComponentA'
    };
  },
  methods: {
    toggleComponent() {
      this.currentComponent = this.currentComponent === 'ComponentA' ? 'ComponentB' : 'ComponentA';
    }
  }
};
</script>
==================================================================================
在1.1上面代码的基础上,我添加了下面的功能:left组件增加一个按钮每次可以+1
<template>
  <div class="left-container">
    <h3>Left 组件 -- {{ count }}</h3>
    <button @click="count = count + 1">+1</button>
  </div>
</template>

<script>
export default {
  data() {
    return {
      count: 0
    }
  }
}
</script>

<style lang="less">
.left-container {
  padding: 0 20px 20px;
  background-color: orange;
  min-height: 250px;
  flex: 1;
}
</style>
但是上面的存在问题,当我展示Rght的时候并再切换回Left的时候,原来的count值就变成了默认值。
解决办法:
 <keep-alive>
        <component :is="comName"></component>
 </keep-alive>
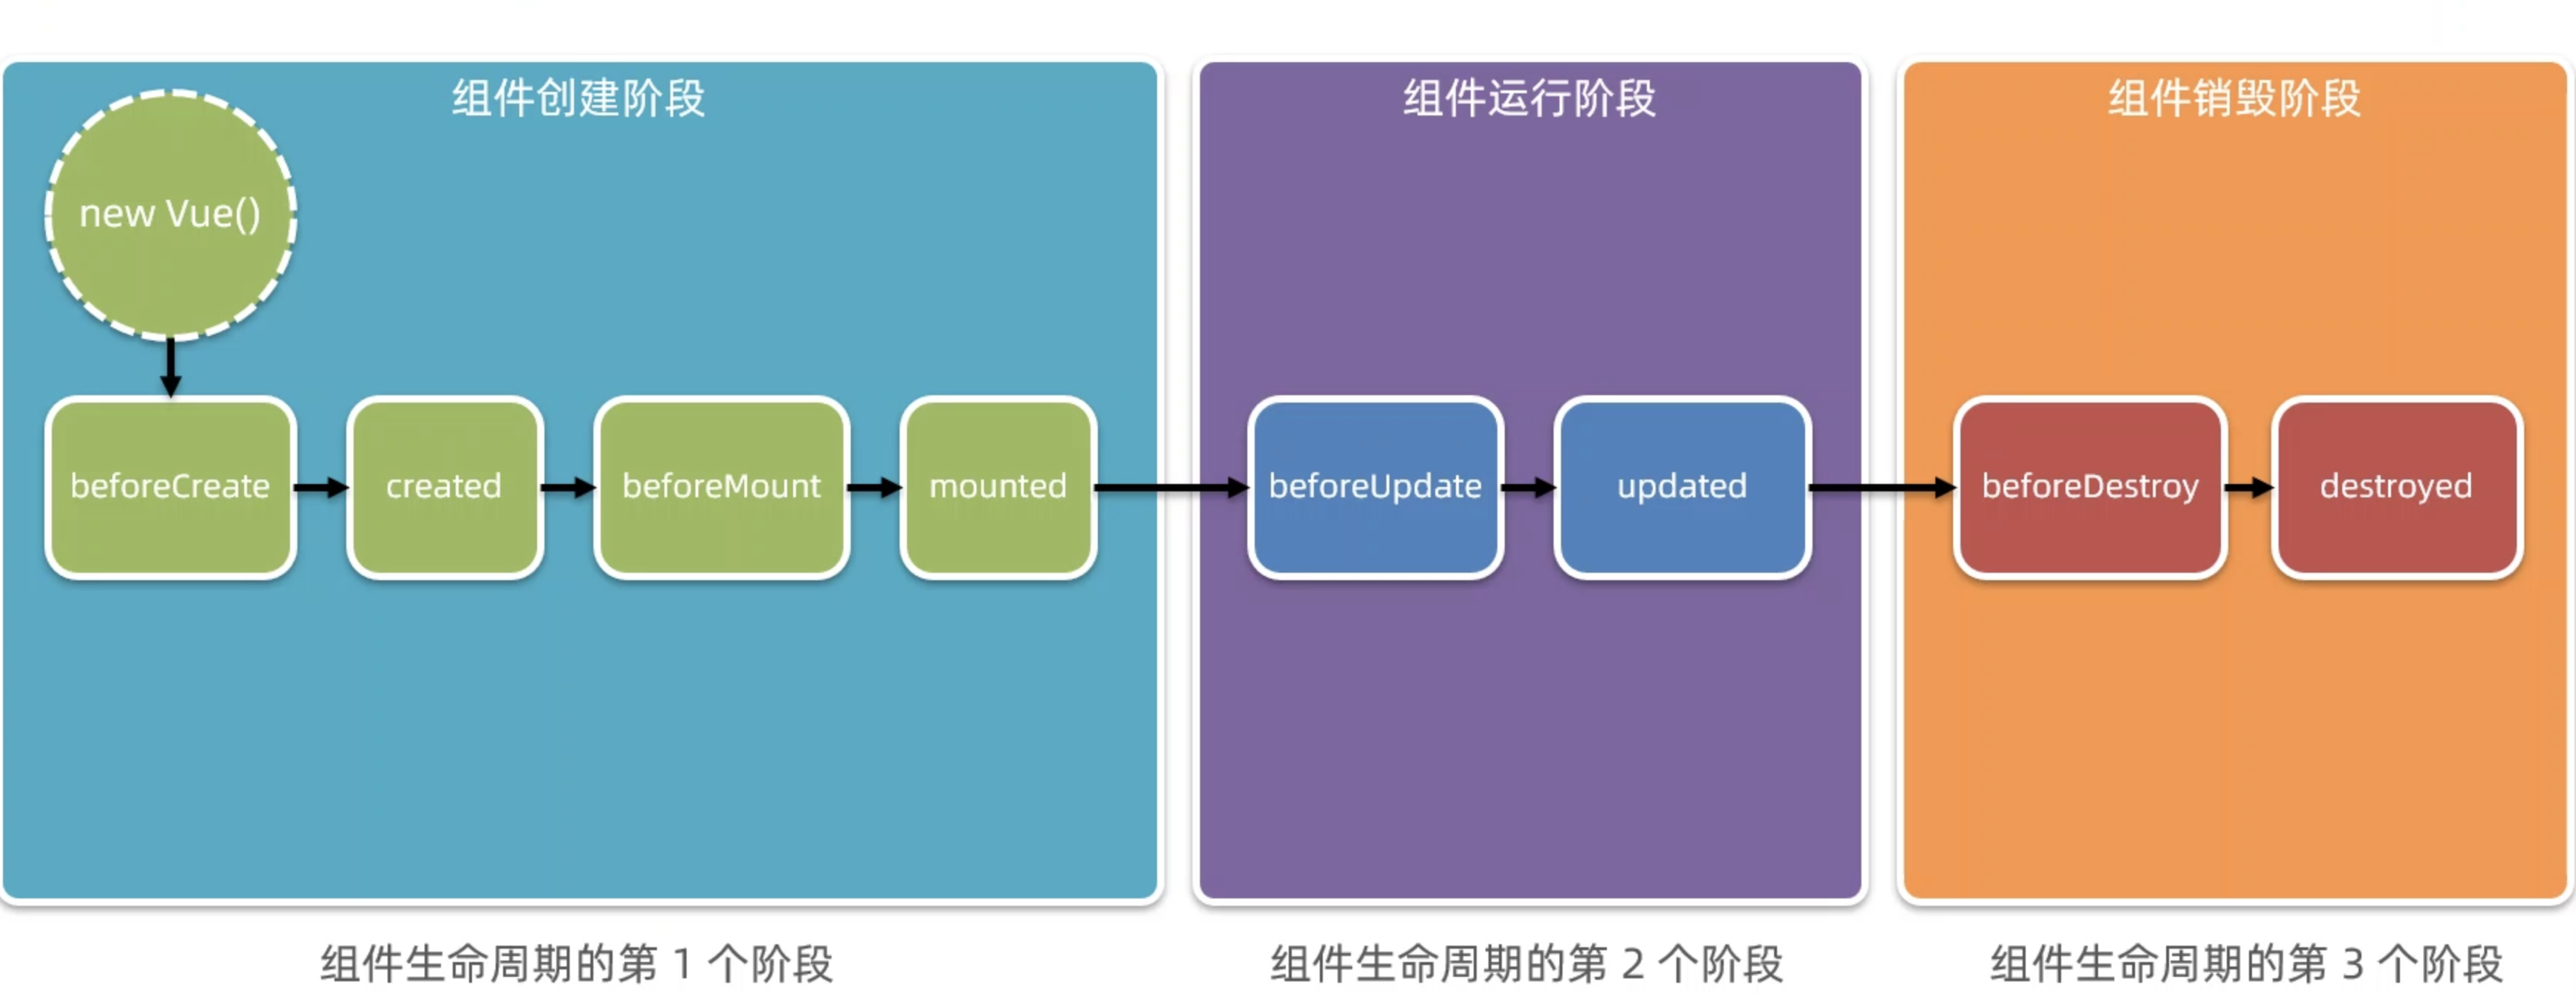
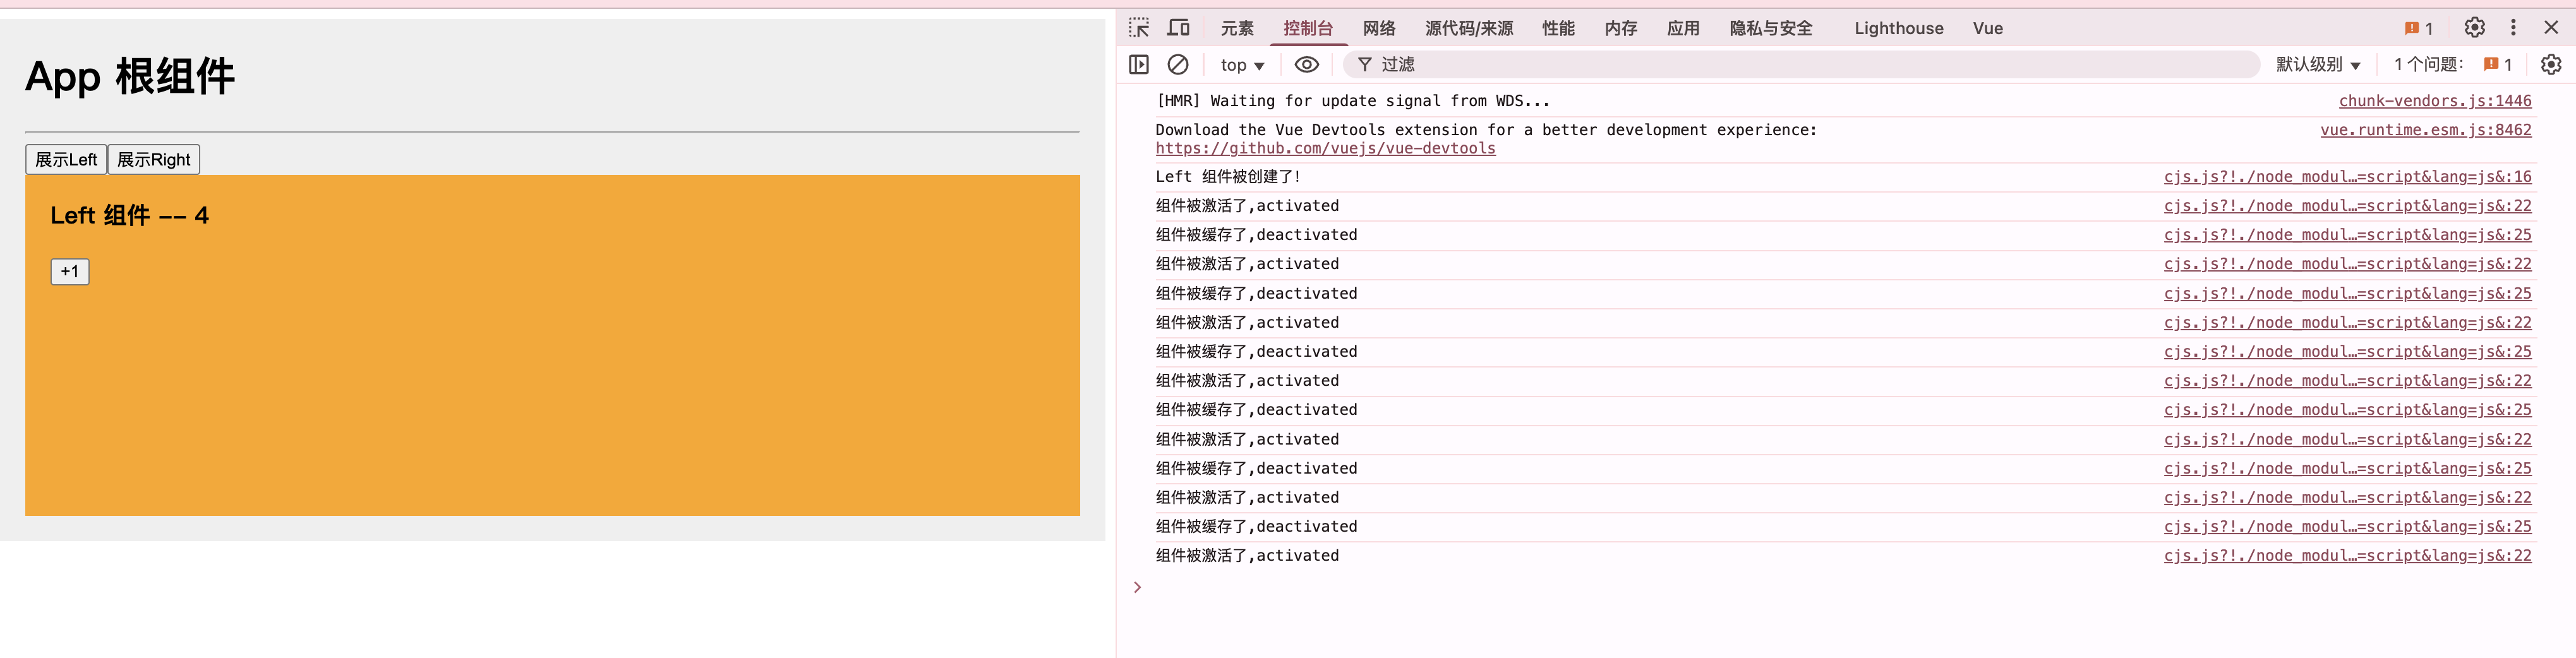
1.3 keep-alive对应的生命周期函数
当组件被缓存时,会自动触发组件的deactivated生命周期函数
当组件被激活时,会自动触发组件的activated生命周期函数
<template>
<div class="left-container">
<h3>Left 组件 -- {{ count }}</h3>
<button @click="count = count + 1">+1</button>
</div>
</template>
<script>
export default {
data() {
return {
count: 0
}
},
created() {
console.log('Left 组件被创建了!')
},
destroyed() {
console.log('Left 组件被销毁了!')
},
activated() {
console.log('组件被激活了,activated')
},
deactivated() {
console.log('组件被缓存了,deactivated')
}
}
</script>
<style lang="less">
.left-container {
padding: 0 20px 20px;
background-color: orange;
min-height: 250px;
flex: 1;
}
</style>
=========================app.vue============================
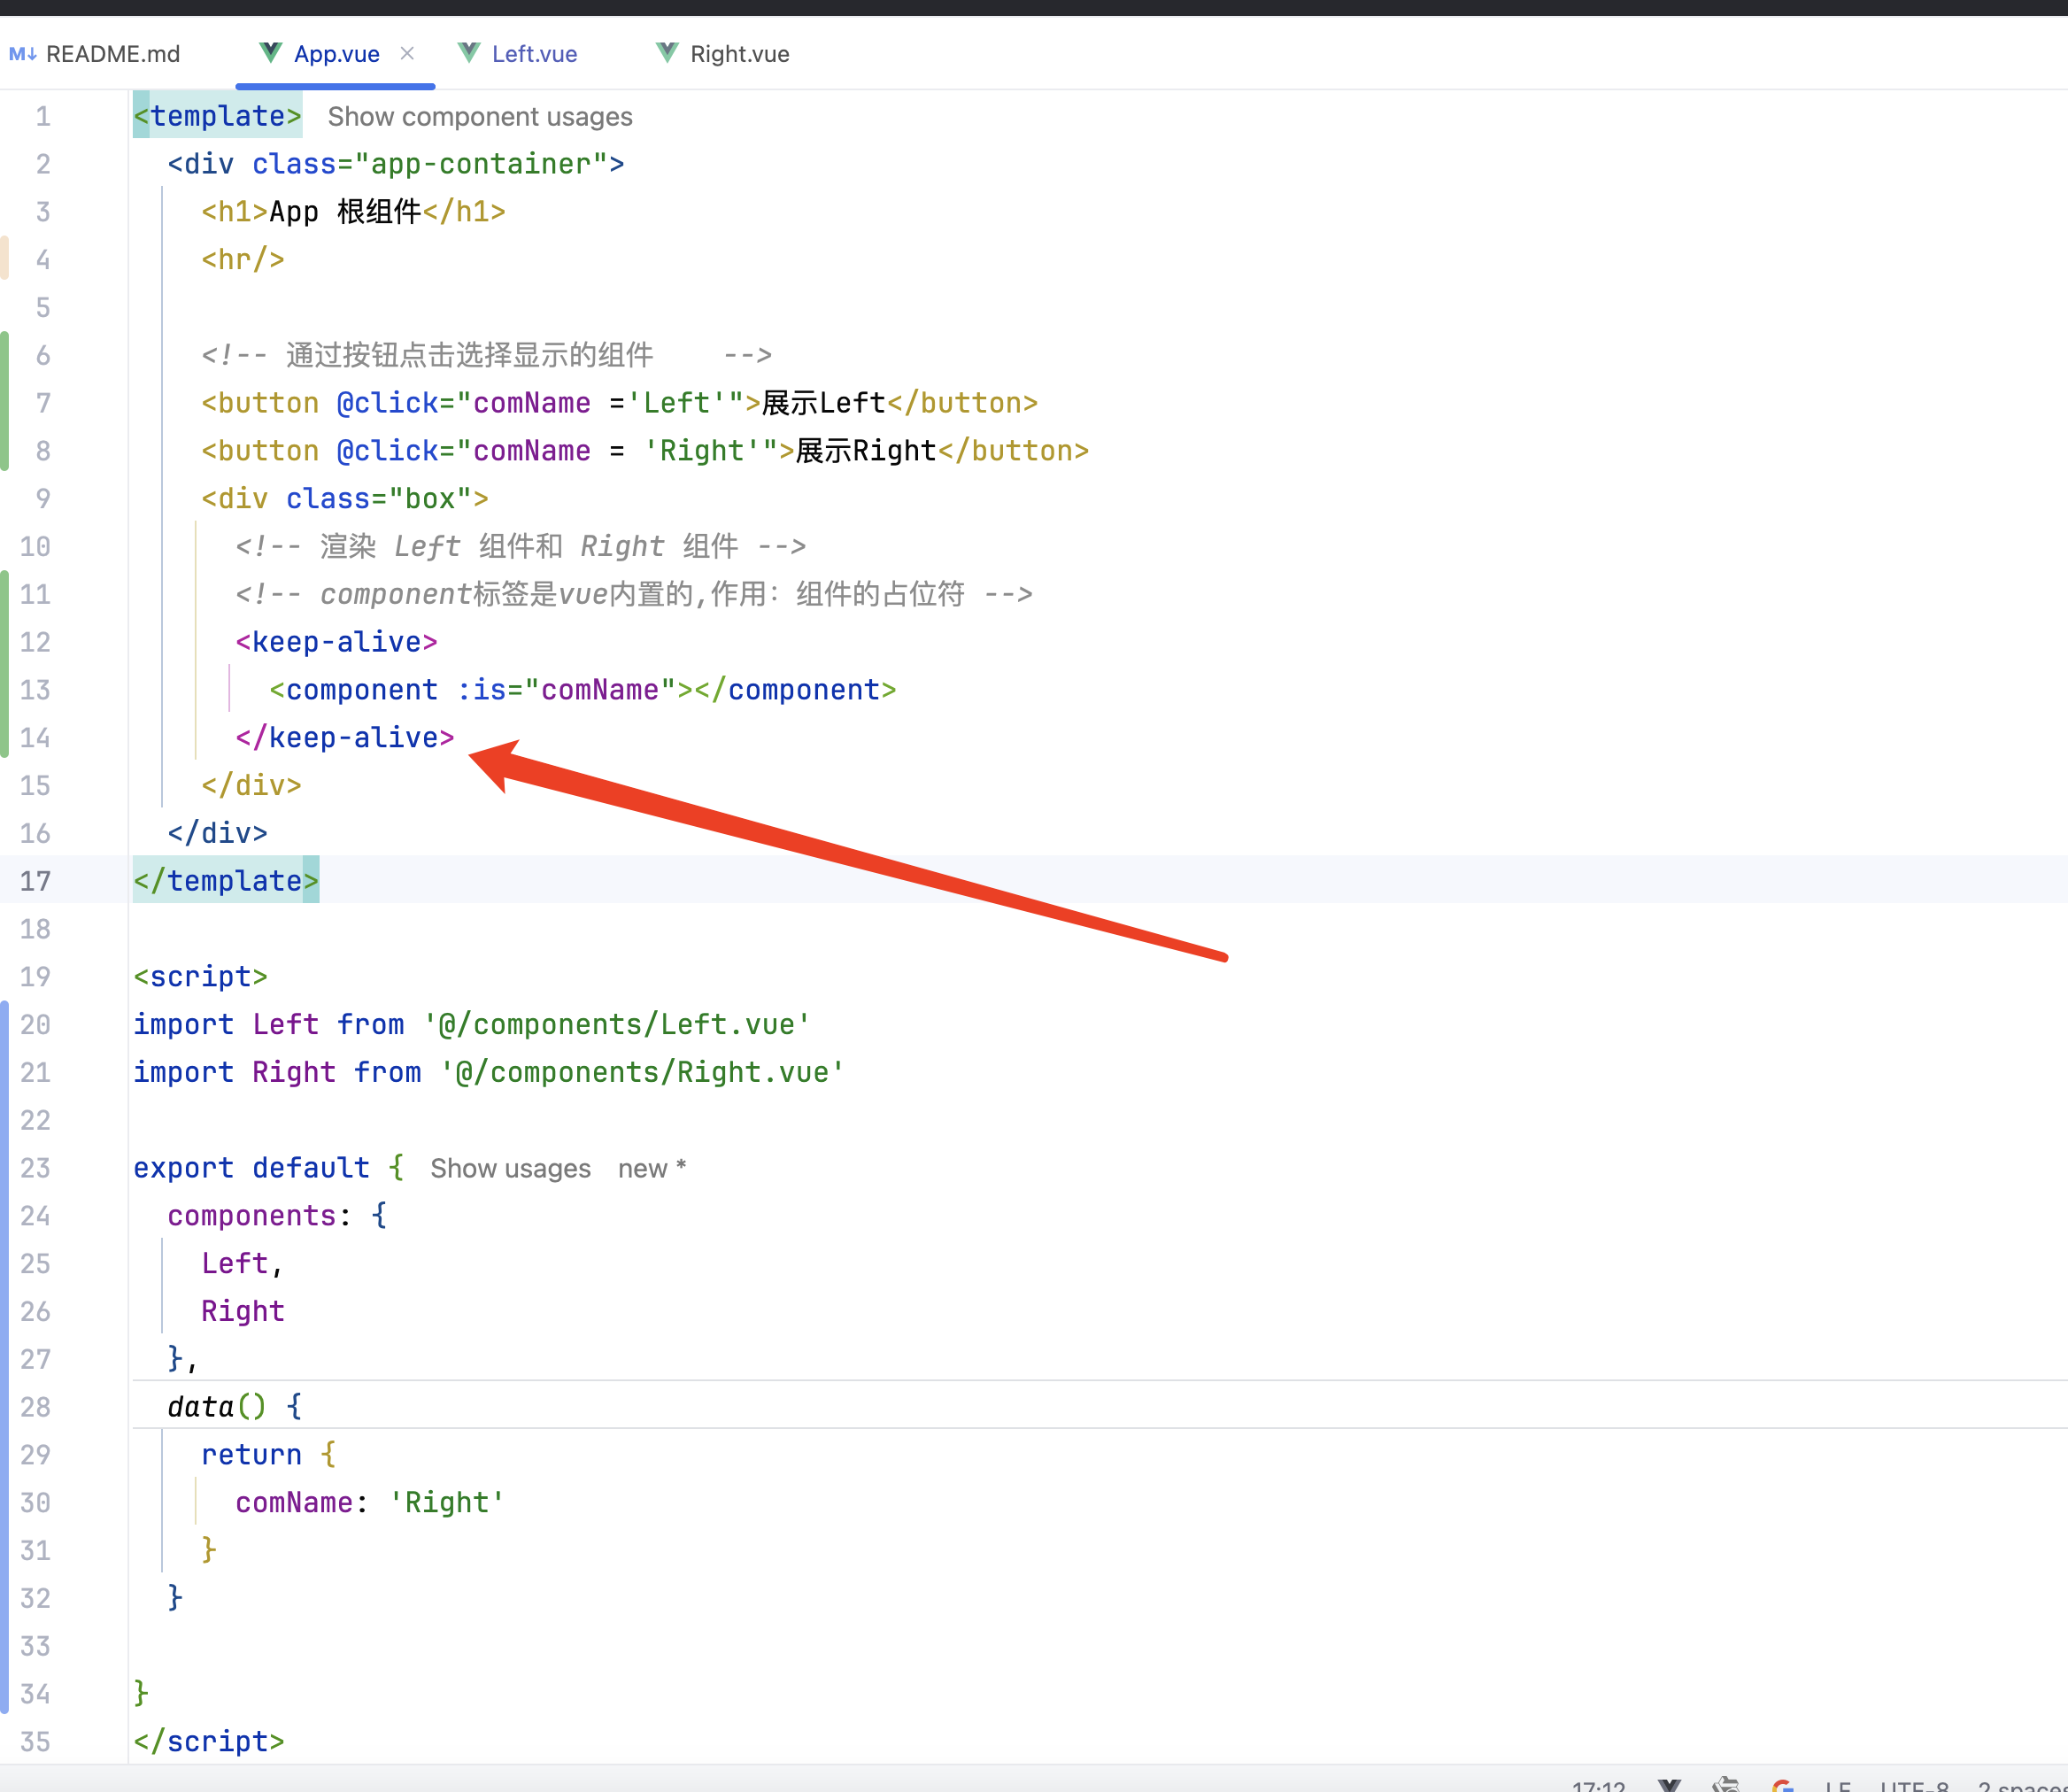
<div class="box">
<!-- 渲染 Left 组件和 Right 组件 -->
<!-- component标签是vue内置的,作用:组件的占位符 -->
<keep-alive include="Left">
<component :is="comName"></component>
</keep-alive>
</div>
</div>
1.3.1 keep-alive的include属性
include属性用来指定:只有名称匹配的组件会被缓存。多个组件之间使用英文的逗号分隔

1.3.2 exclude
排除哪个不被缓存
<template>
  <div class="app-container">
    <h1>App 根组件</h1>
    <hr/>

    <!-- 通过按钮点击选择显示的组件    -->
    <button @click="comName ='Left'">展示Left</button>
    <button @click="comName = 'Right'">展示Right</button>
    <div class="box">
      <!-- 渲染 Left 组件和 Right 组件 -->
      <!-- component标签是vue内置的,作用:组件的占位符 -->
      <keep-alive exclude="Right">
        <component :is="comName"></component>
      </keep-alive>
    </div>
  </div>
</template>

<script>
import Left from '@/components/Left.vue'
import Right from '@/components/Right.vue'

export default {
  components: {
    Left,
    Right
  },
  data() {
    return {
      comName: 'Right'
    }
  }

}
</script>

<style lang="less">
.app-container {
  padding: 1px 20px 20px;
  background-color: #efefef;
}

.box {
  display: flex;
}
</style>
1.4 组件注册名称和组件声明时name的区别
1.4.1 组件声明时name
<template>
  <div class="right-container">
    <h3>Right 组件</h3>
  </div>
</template>

<script>
export default {
  // 当提供了name属性之后,组件的名称就是name属性的值
  name: 'MyRight'
}
</script>

<style lang="less">
.right-container {
  padding: 0 20px 20px;
  background-color: lightskyblue;
  min-height: 250px;
  flex: 1;
}
</style>
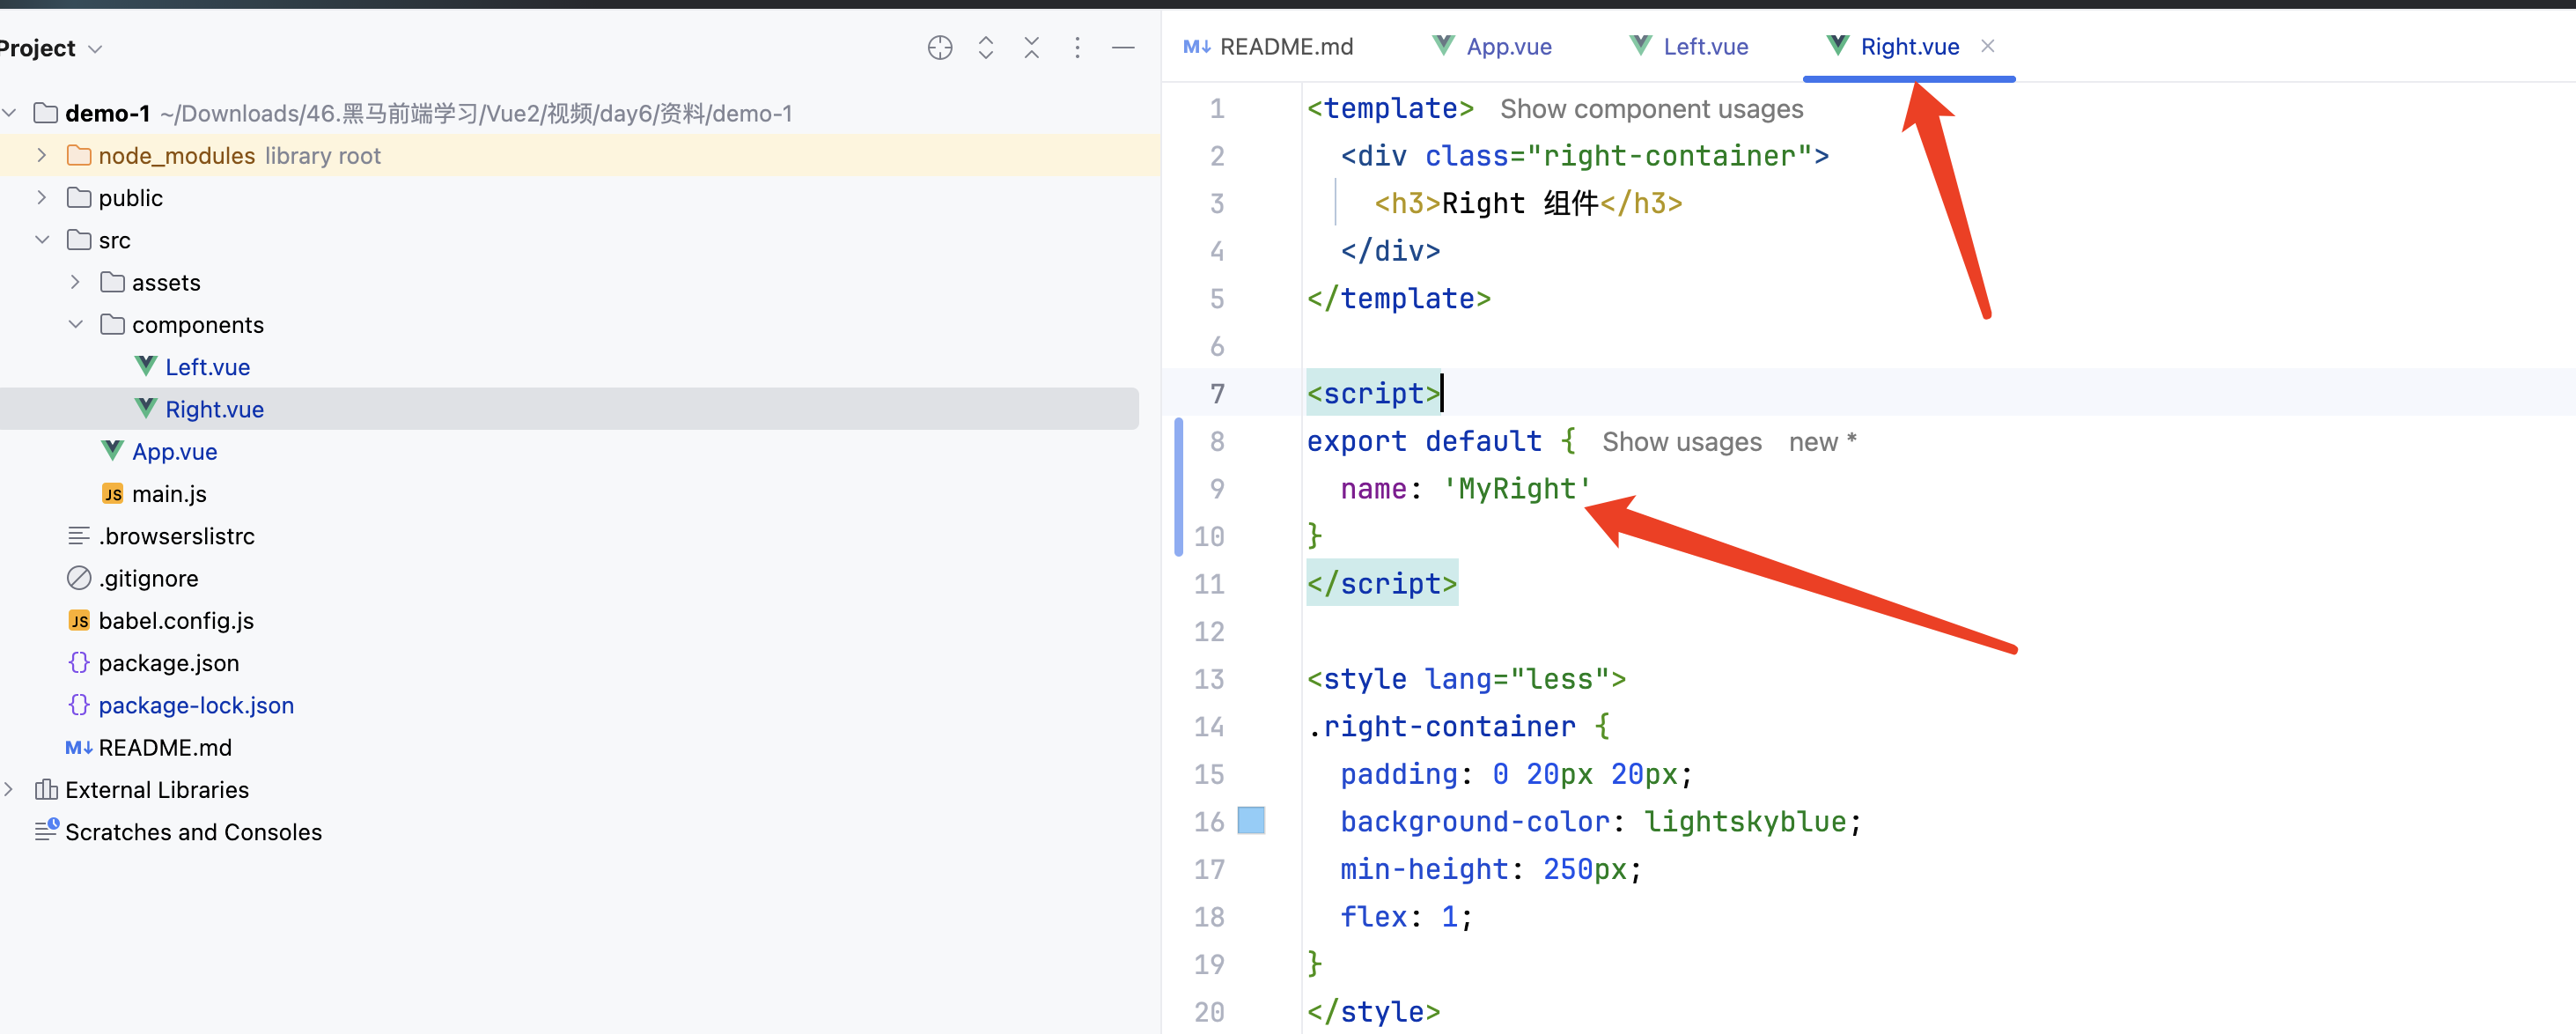
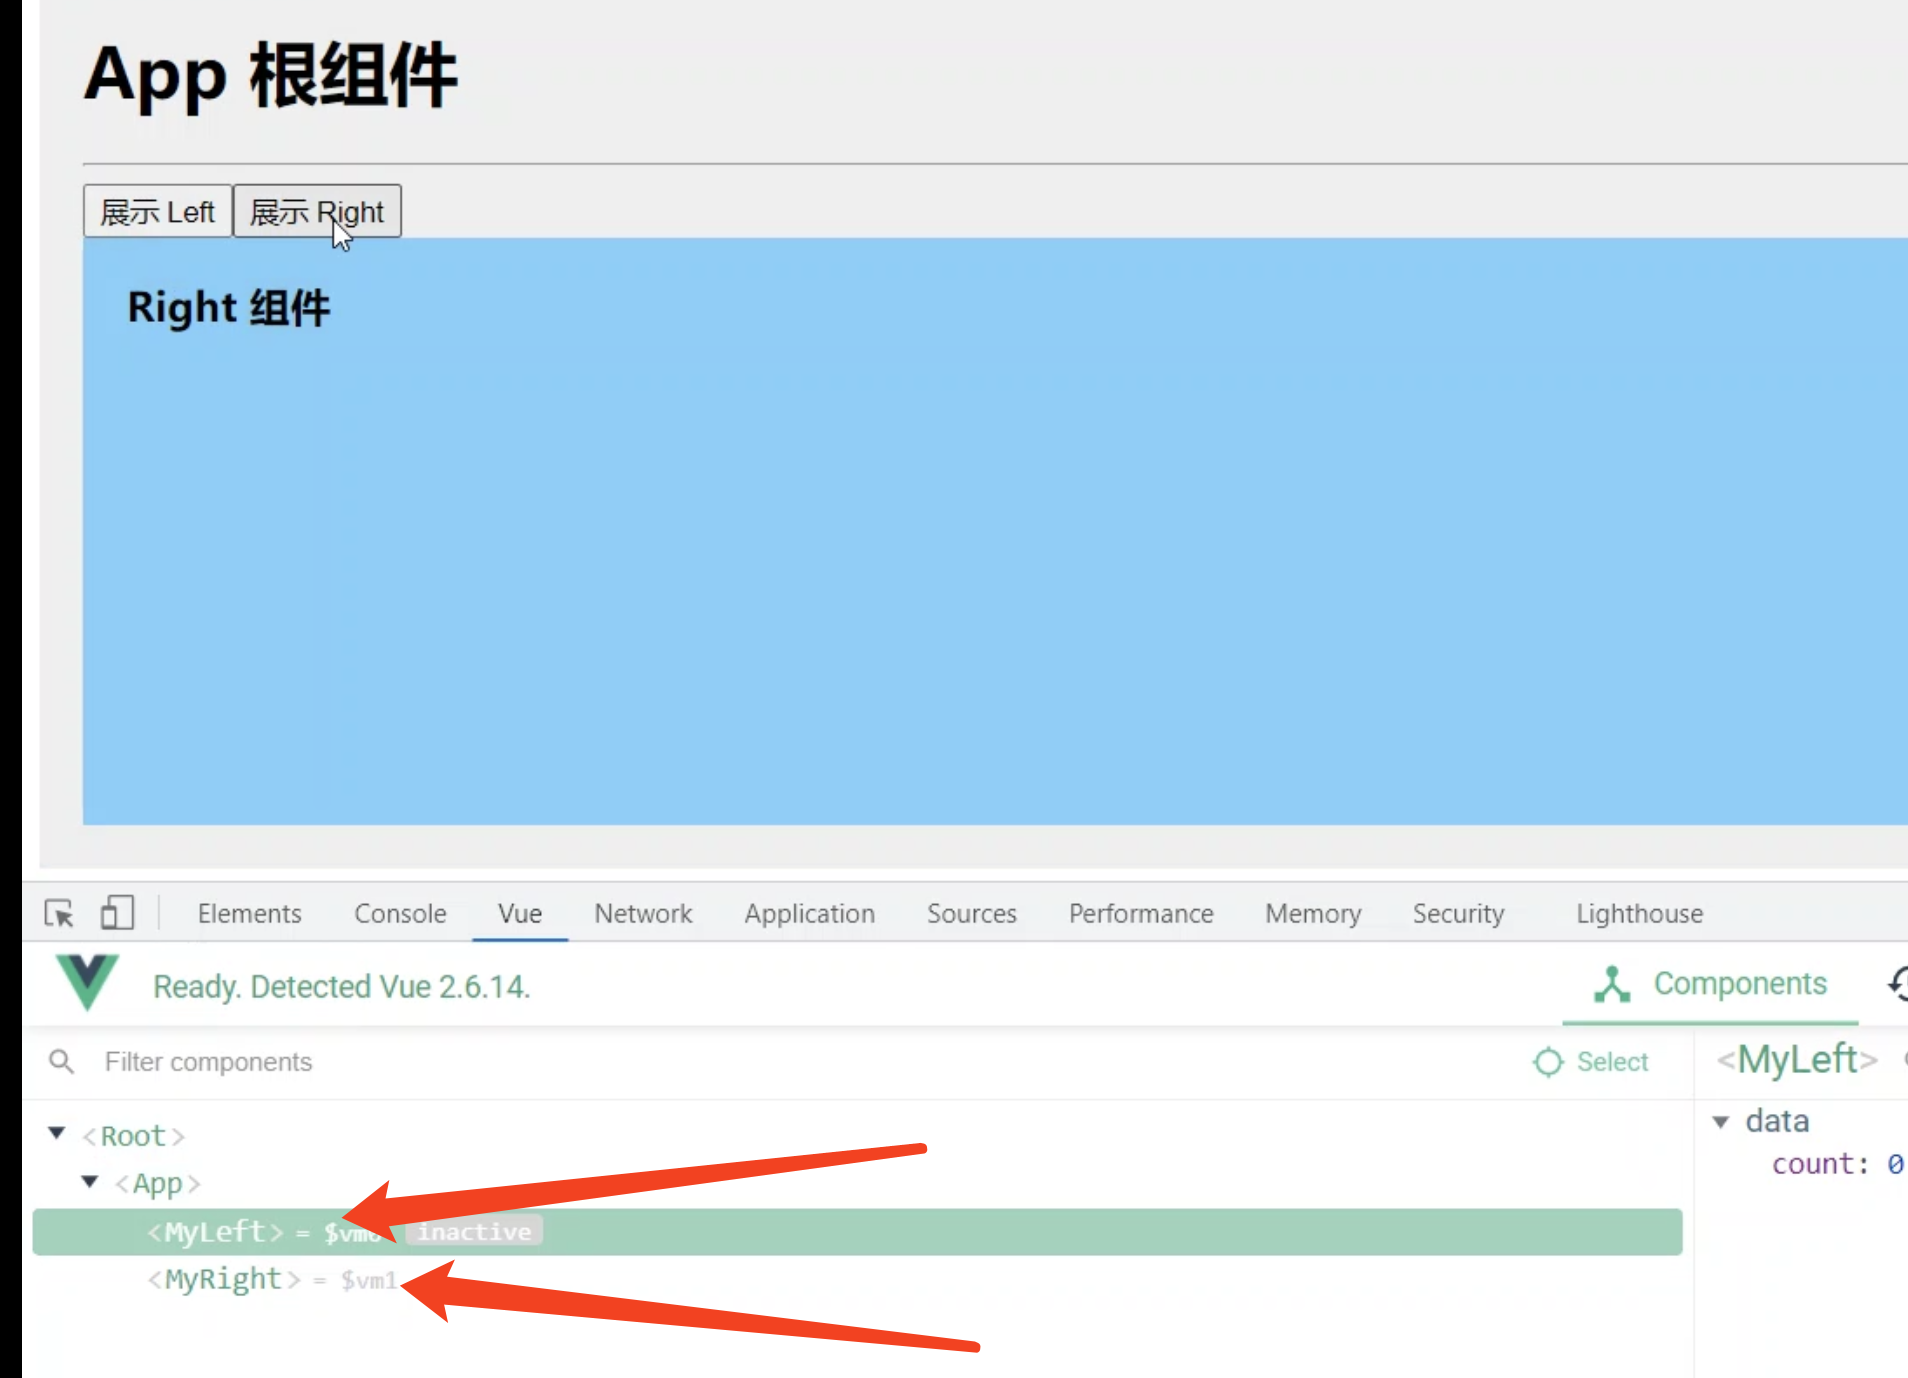
如果我们自己进行了如下的name声明,exclude="Right"就会失效。
建议组件都要如下操作,export default name
export default {
  // 当提供了name属性之后,组件的名称就是name属性的值
  name: 'MyRight'
}

export default {
  // 当提供了name属性之后,组件的名称就是name属性的值
  name: 'MyLeft'
}
2. 插槽
插槽(Slot)是Vue为组件的封装者提供的能力。 允许开发者在封装组件时,把不确定的、希望由用户指定的部分定义为插槽。
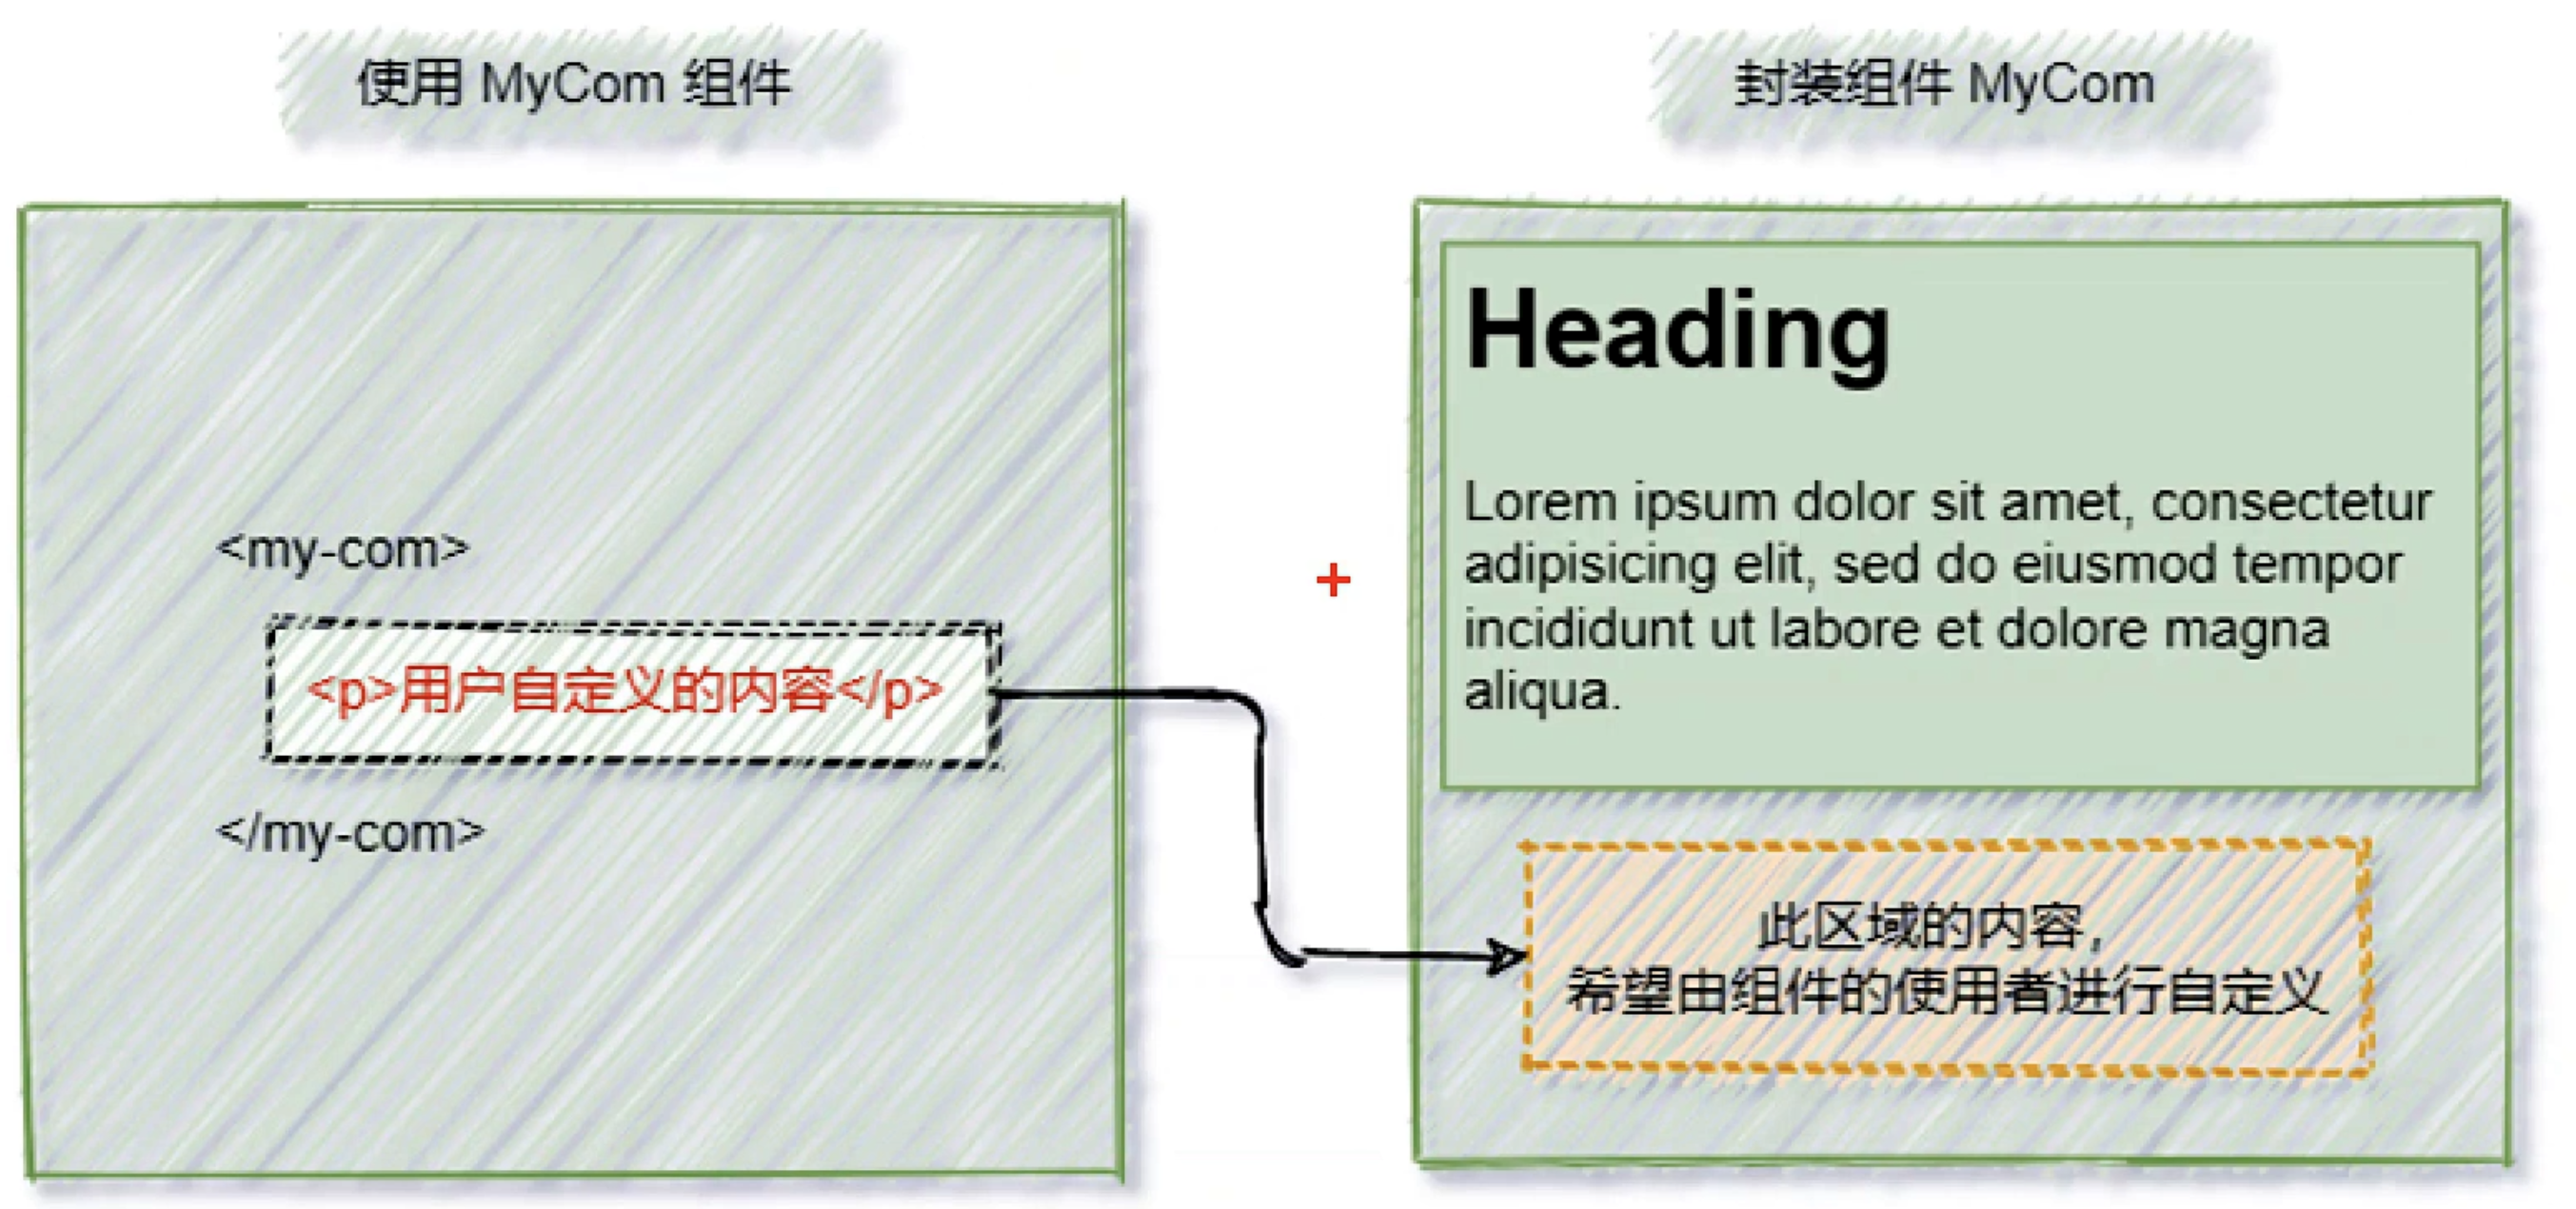
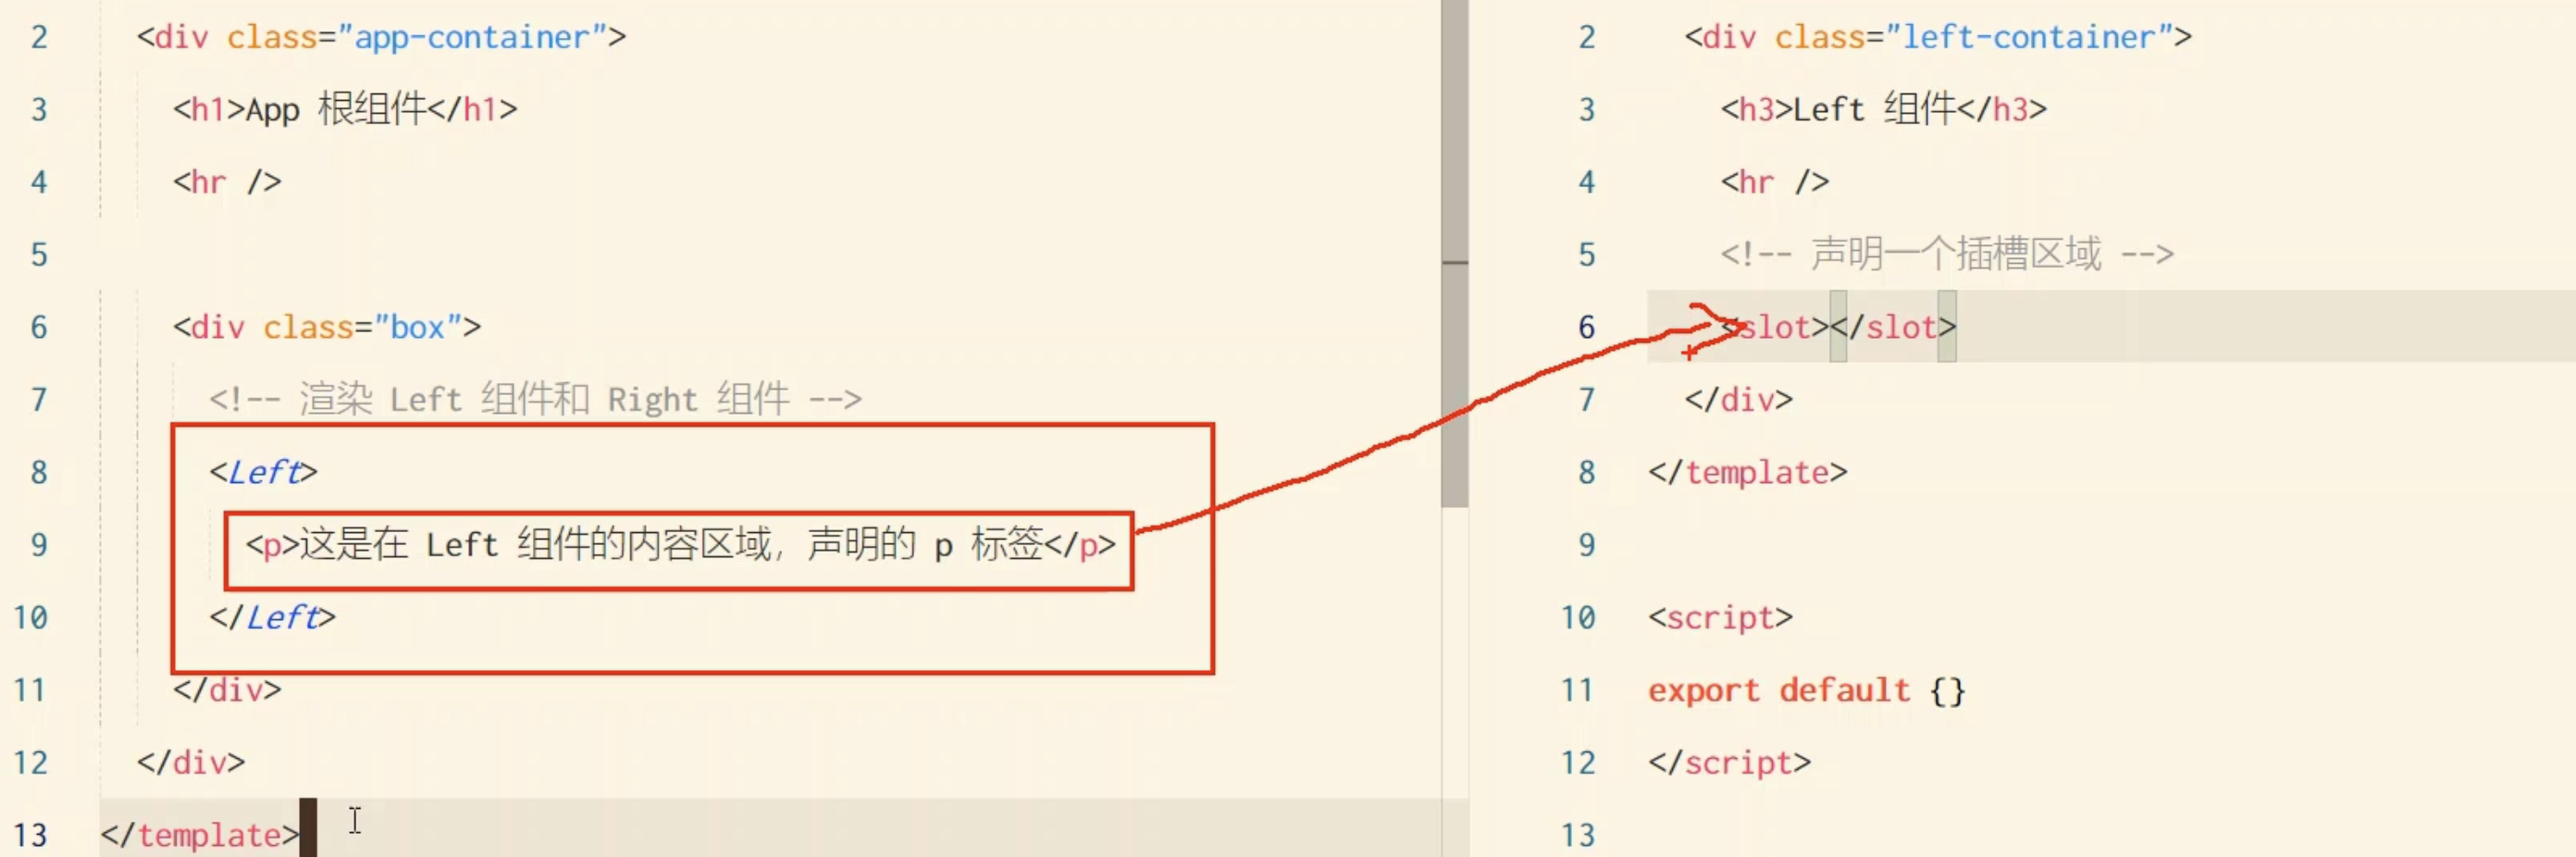
2.1 <slot>
<slot>是 Vue.js 中用于实现内容分发的机制,它允许父组件向子组件传递模板内容,从而增强组件的灵活性和复用性。通过插槽,父组件可以将自定义内容插入到子组件的特定位置,而子组件则负责渲染这些内容。
基本用法
- 默认插槽
默认插槽是最简单的插槽形式。子组件通过<slot>标签定义插槽的位置,父组件传递的内容会替换<slot>标签。
子组件

<template>
  <div class="child">
    <h3>子组件标题</h3>
    <slot>默认内容</slot>
  </div>
</template>
父组件

<template>
  <div class="parent">
    <ChildComponent>
      <p>这是父组件传递的内容</p>
    </ChildComponent>
  </div>
</template>

<script>
import ChildComponent from './ChildComponent.vue';

export default {
  components: {
    ChildComponent
  }
};
</script>
渲染结果
<div class="child">
  <h3>子组件标题</h3>
  <p>这是父组件传递的内容</p>
</div>
举例子
2.2 v-slot指令 具名插槽
具名插槽允许子组件定义多个插槽,并通过 name 属性区分。父组件可以通过 v-slot 指令将内容插入到指定的插槽中。
子组件

<template>
  <div class="child">
    <header>
      <slot name="header">默认头部</slot>
    </header>
    <main>
      <slot>默认内容</slot>
    </main>
    <footer>
      <slot name="footer">默认尾部</slot>
    </footer>
  </div>
</template>
父组件

<template>
  <div class="parent">
    <ChildComponent>
      <template v-slot:header>
        <h1>自定义头部</h1>
      </template>
      <p>这是父组件传递的内容</p>
      <template v-slot:footer>
        <p>自定义尾部</p>
      </template>
    </ChildComponent>
  </div>
</template>

<script>
import ChildComponent from './ChildComponent.vue';

export default {
  components: {
    ChildComponent
  }
};
</script>
渲染结果:
<div class="child">
<header>
<h1>自定义头部</h1>
</header>
<main>
<p>这是父组件传递的内容</p>
</main>
<footer>
<p>自定义尾部</p>
</footer>
</div>
2.3 v-slot指令 作用域插槽
作用域插槽允许子组件将数据传递给父组件,父组件可以根据这些数据自定义插槽内容的渲染方式。
子组件 (ChildComponent.vue):

<template>
  <div class="child">
    <slot :user="user"></slot>
  </div>
</template>

<script>
export default {
  data() {
    return {
      user: {
        name: 'Alice',
        age: 25
      }
    };
  }
};
</script>
父组件

<template>
  <div class="parent">
    <ChildComponent v-slot="{ user }">
      <p>姓名: {{ user.name }}</p>
      <p>年龄: {{ user.age }}</p>
    </ChildComponent>
  </div>
</template>

<script>
import ChildComponent from './ChildComponent.vue';

export default {
  components: {
    ChildComponent
  }
};
</script>
渲染结果

<div class="child">
  <p>姓名: Alice</p>
  <p>年龄: 25</p>
</div>
3. 自定义指令
vue中的自定义指令分为两类,分别是:
- 私有自定义指令
- 全局自定义指令
3.1 私有自定义指令的基础用法
私有自定义指令(Private Custom Directives)是 Vue.js 中用于封装和复用特定 DOM 操作逻辑的一种机制。与全局自定义指令不同,私有自定义指令仅在单个组件中有效,适合用于特定组件的特殊需求。
1.基本语法
在 Vue 组件中,可以通过directives选项定义私有自定义指令。每个指令可以包含以下钩子函数:
bind:指令第一次绑定到元素时调用。
inserted:被绑定元素插入父节点时调用。
update:所在组件的 VNode 更新时调用。
componentUpdated:所在组件的 VNode 及其子 VNode 全部更新后调用。
unbind:指令与元素解绑时调用。
2. 示例:实现一个聚焦指令
以下是一个简单的私有自定义指令,用于在元素插入 DOM 后自动聚焦。
<template>
  <div>
    <input v-focus placeholder="自动聚焦的输入框" />
  </div>
</template>

<script>
export default {
  directives: {
    focus: {
      // 指令的定义
      inserted(el) {
        el.focus(); // 元素插入 DOM 后自动聚焦
      }
    }
  }
};
</script>
3. 示例:实现一个颜色切换指令
以下是一个自定义指令,用于根据绑定的值动态改变元素的背景颜色。
<template>
<div>
<p v-color="color">这段文字的背景颜色会动态改变。</p>
<button @click="changeColor">切换颜色</button>
</div>
</template>
<script>
export default {
data() {
return {
color: 'yellow'
};
},
methods: {
changeColor() {
this.color = this.color === 'yellow' ? 'lightblue' : 'yellow';
}
},
directives: {
color: {
bind(el, binding) {
el.style.backgroundColor = binding.value; // 初始设置背景颜色
},
update(el, binding) {
el.style.backgroundColor = binding.value; // 值更新时改变背景颜色
}
}
}
};
</script>
===================================
在这段代码中,el 是 Vue.js 自定义指令中的一个参数,代表指令绑定的 DOM 元素。
它是 Vue.js 自定义指令钩子函数(如 bind、update 等)的第一个参数,用于直接操作 DOM。
4. 示例:实现一个权限控制指令
以下是一个自定义指令,用于根据用户的权限控制元素的显示与隐藏。
<template>
  <div>
    <button v-permission="'admin'">只有管理员可见的按钮</button>
  </div>
</template>

<script>
export default {
  directives: {
    permission: {
      inserted(el, binding) {
        const userRole = 'user'; // 假设当前用户角色是 'user'
        if (binding.value !== userRole) {
          el.style.display = 'none'; // 如果权限不匹配,隐藏元素
        }
      }
    }
  }
};
</script>
5. 钩子函数的参数
每个钩子函数接收以下参数:
el:指令绑定的 DOM 元素。
binding:一个对象,包含以下属性:
- name:指令名(不包含 v- 前缀)。
- value:指令的绑定值(例如 v-my-directive=“value” 中的 value)。
- oldValue:指令绑定的前一个值(仅在 update 和 componentUpdated 中可用)。
- expression:绑定值的字符串形式(例如 v-my-directive=“1 + 1” 中的 “1 + 1”)。
- arg:指令的参数(例如 v-my-directive:arg 中的 arg)。
- modifiers:包含修饰符的对象(例如 v-my-directive.modifier 中的 { modifier: true })。
vnode:Vue 编译生成的虚拟节点。
oldVnode:上一个虚拟节点(仅在 update 和 componentUpdated 中可用)。
6. 私有自定义指令 vs 全局自定义指令
私有自定义指令:仅在当前组件中有效,适合用于特定组件的特殊需求。
全局自定义指令:在整个应用中都有效,适合用于通用的 DOM 操作逻辑。
全局自定义指令的定义方式:
Vue.directive('focus', {
  inserted(el) {
    el.focus();
  }
});
7. 总结
私有自定义指令是 Vue.js 中用于封装和复用 DOM 操作逻辑的强大工具。通过 directives 选项,你可以在组件中定义特定功能的指令,例如自动聚焦、动态样式、权限控制等。私有自定义指令的使用场景包括:
特定组件的 DOM 操作。
封装复杂的交互逻辑。
实现权限控制或条件渲染。
通过合理使用私有自定义指令,可以提高代码的复用性和可维护性。
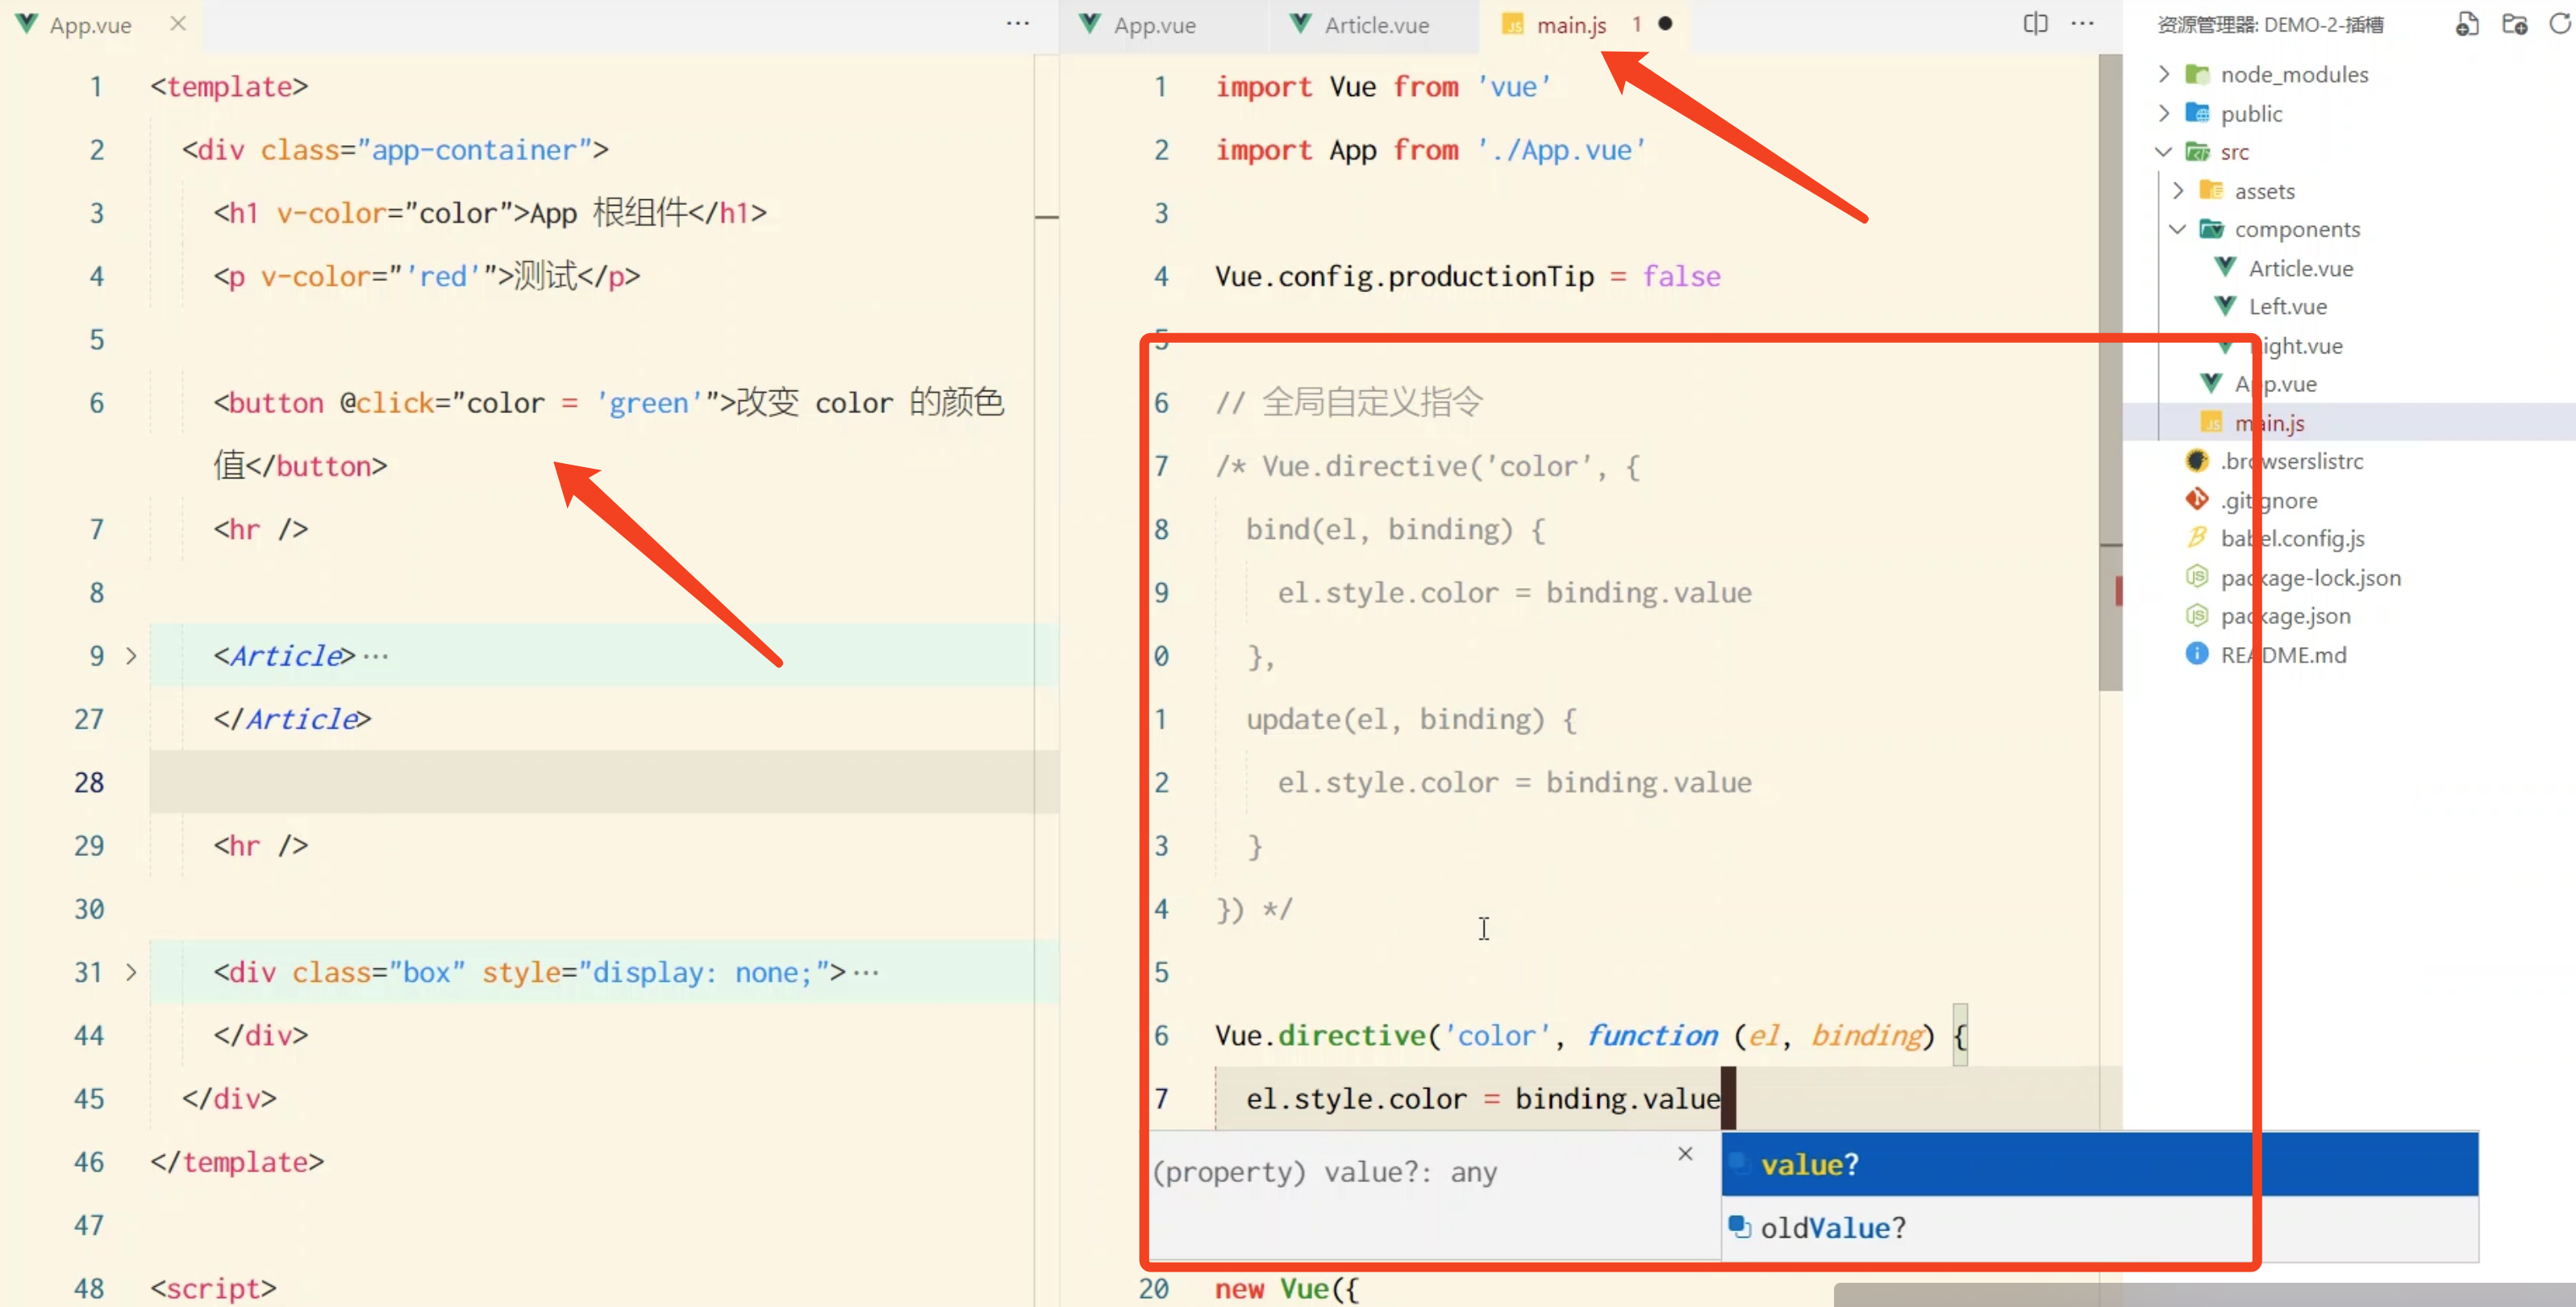
3.2 全局自定义指令的基础用法
1.定义全局自定义指令
Vue.directive('指令名', {
  // 钩子函数
  bind(el, binding, vnode) {
    // 指令第一次绑定到元素时调用
  },
  inserted(el, binding, vnode) {
    // 元素插入 DOM 时调用
  },
  update(el, binding, vnode, oldVnode) {
    // 组件更新时调用
  },
  componentUpdated(el, binding, vnode, oldVnode) {
    // 组件及其子组件更新后调用
  },
  unbind(el, binding, vnode) {
    // 指令与元素解绑时调用
  }
});
2.钩子函数参数
每个钩子函数接收以下参数:
el:指令绑定的 DOM 元素。
binding:一个对象,包含以下属性:
name:指令名(不包含 v- 前缀)。
value:指令的绑定值(例如 v-my-directive=“value” 中的 value)。
oldValue:指令绑定的前一个值(仅在 update 和 componentUpdated 中可用)。
expression:绑定值的字符串形式(例如 v-my-directive=“1 + 1” 中的 “1 + 1”)。
arg:指令的参数(例如 v-my-directive:arg 中的 arg)。
modifiers:包含修饰符的对象(例如 v-my-directive.modifier 中的 { modifier: true })。
vnode:Vue 编译生成的虚拟节点。
oldVnode:上一个虚拟节点(仅在 update 和 componentUpdated 中可用)。
3.例子1
Vue.directive('focus', {
inserted(el) {
el.focus(); // 元素插入 DOM 后自动聚焦
}
});
使用:
<template>
<input v-focus placeholder="自动聚焦的输入框" />
</template>
4.例子2
Vue.directive('color', {
  bind(el, binding) {
    el.style.backgroundColor = binding.value; // 初始设置背景颜色
  },
  update(el, binding) {
    el.style.backgroundColor = binding.value; // 值更新时改变背景颜色
  }
});
==================================================================
<template>
  <div>
    <p v-color="color">这段文字的背景颜色会动态改变。</p>
    <button @click="changeColor">切换颜色</button>
  </div>
</template>

<script>
export default {
  data() {
    return {
      color: 'yellow'
    };
  },
  methods: {
    changeColor() {
      this.color = this.color === 'yellow' ? 'lightblue' : 'yellow';
    }
  }
};
</script>
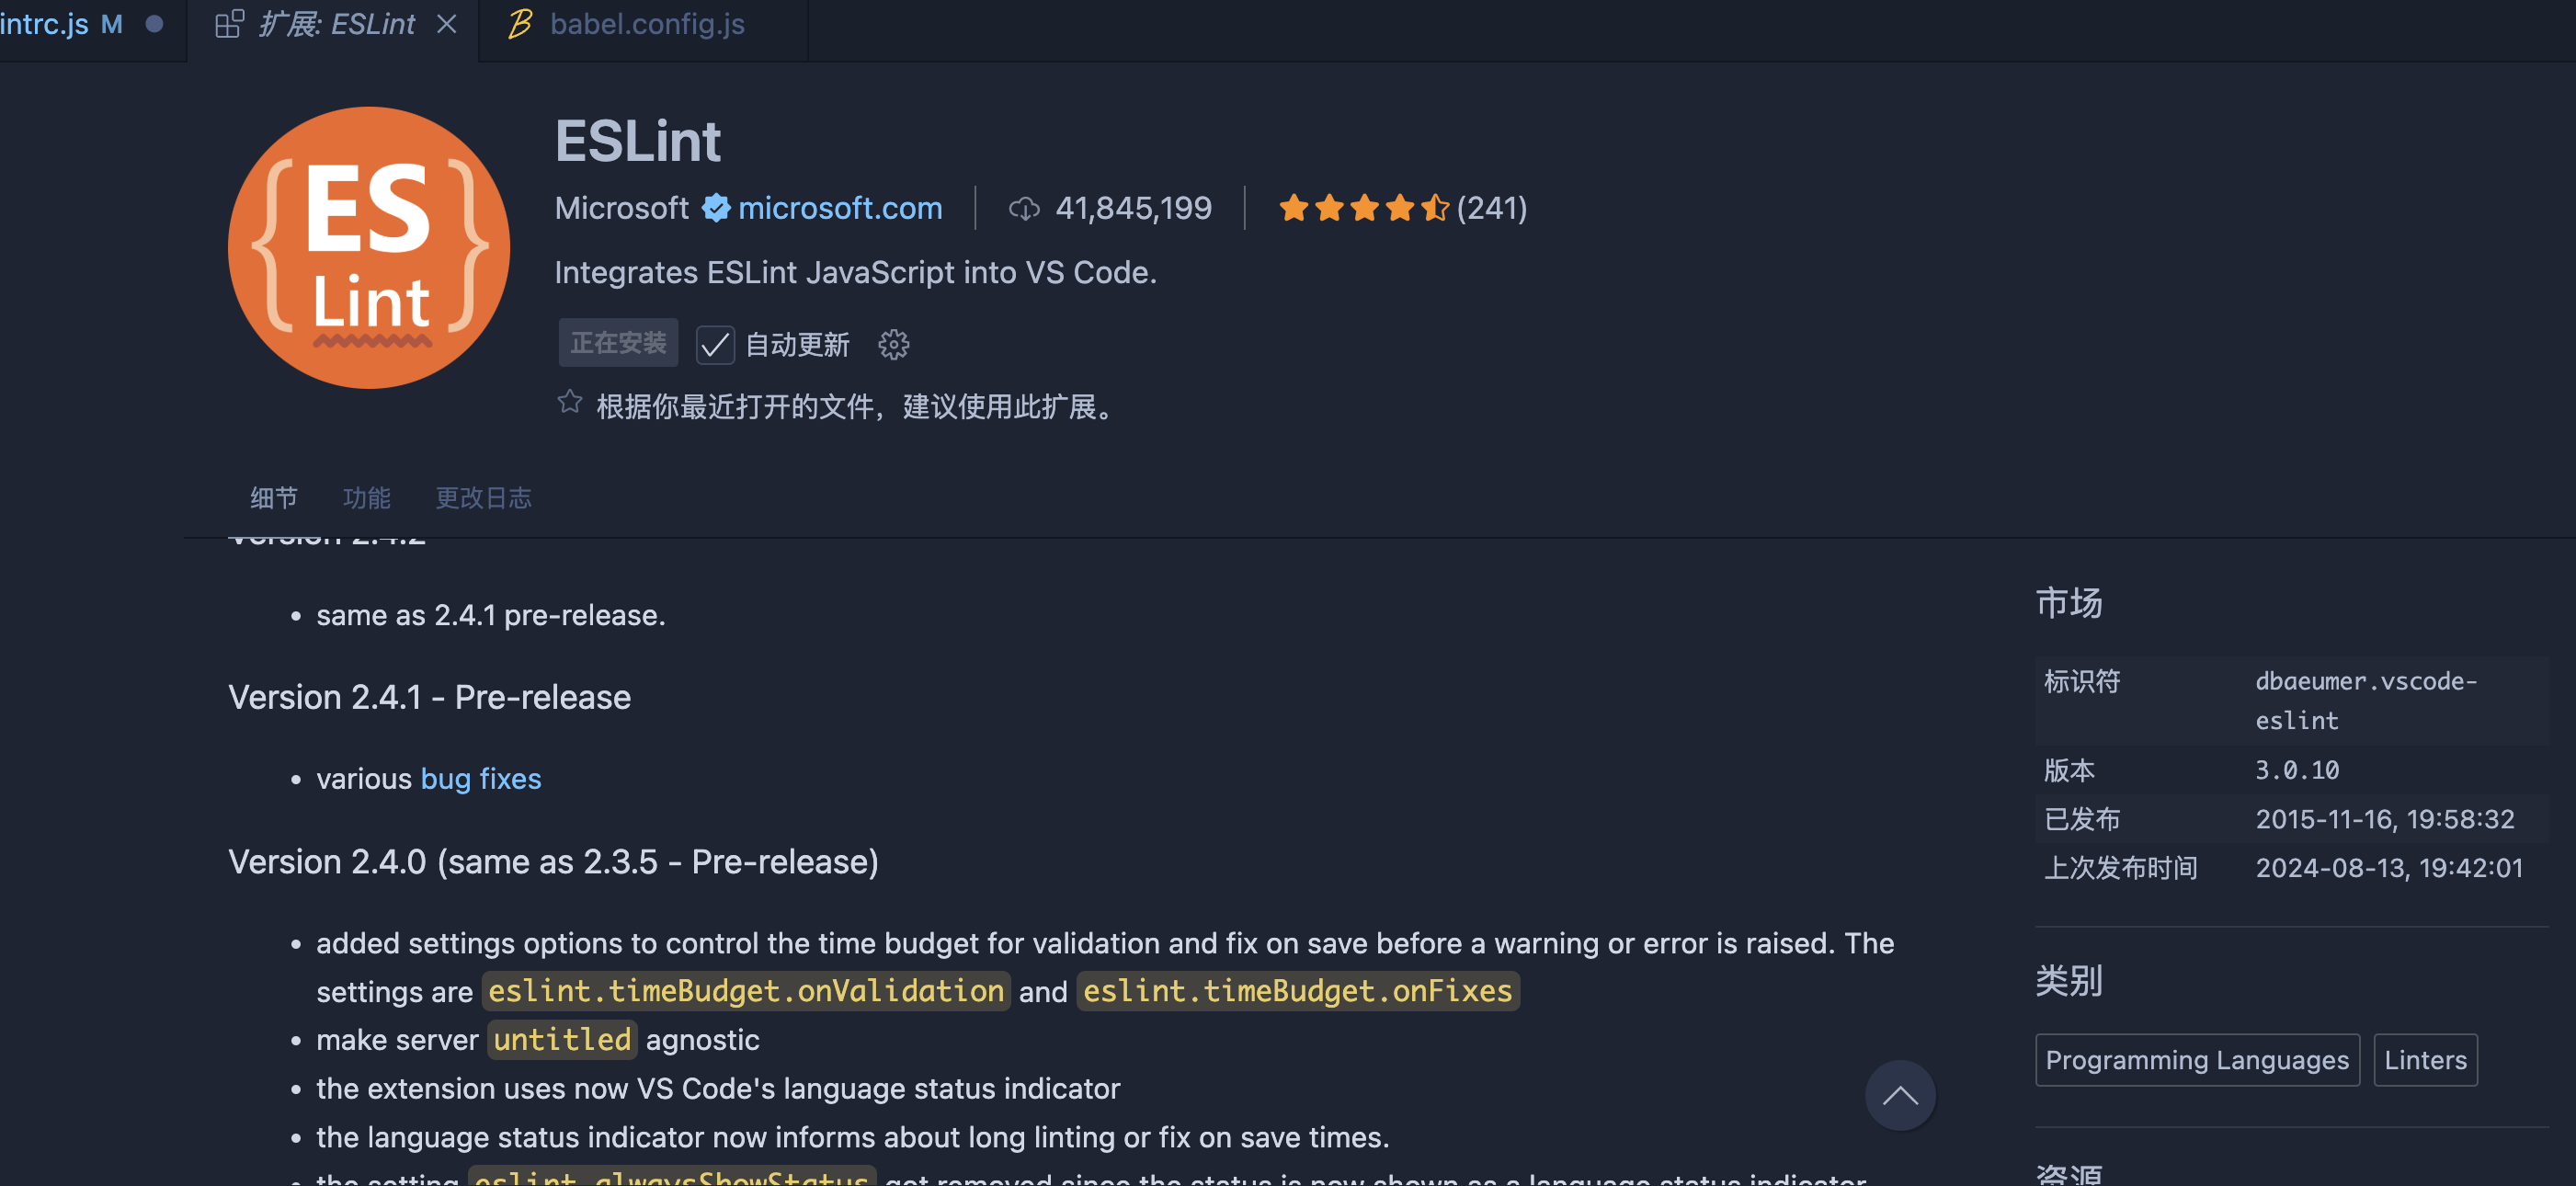
4. ESlint与VSCode
4.1 ESlint
ESLint 是一个用于 JavaScript/TypeScript 代码的静态代码分析工具,主要用于发现代码中的错误、潜在问题以及风格不一致的地方。它可以帮助开发者编写更规范、更高质量的代码,特别适合团队协作开发。
1. 主要功能
- 代码错误检查:发现语法错误、未定义变量、未使用变量等问题。
- 代码风格检查:检查代码是否符合指定的风格规范(如缩进、引号、分号等)。
- 自动修复:自动修复一些简单的代码问题。
- 插件支持:通过插件扩展功能,支持 React、Vue、TypeScript 等框架和语言。
- 自定义规则:可以根据项目需求自定义检查规则。
4.1.1 创建项目的时候带上ESlint

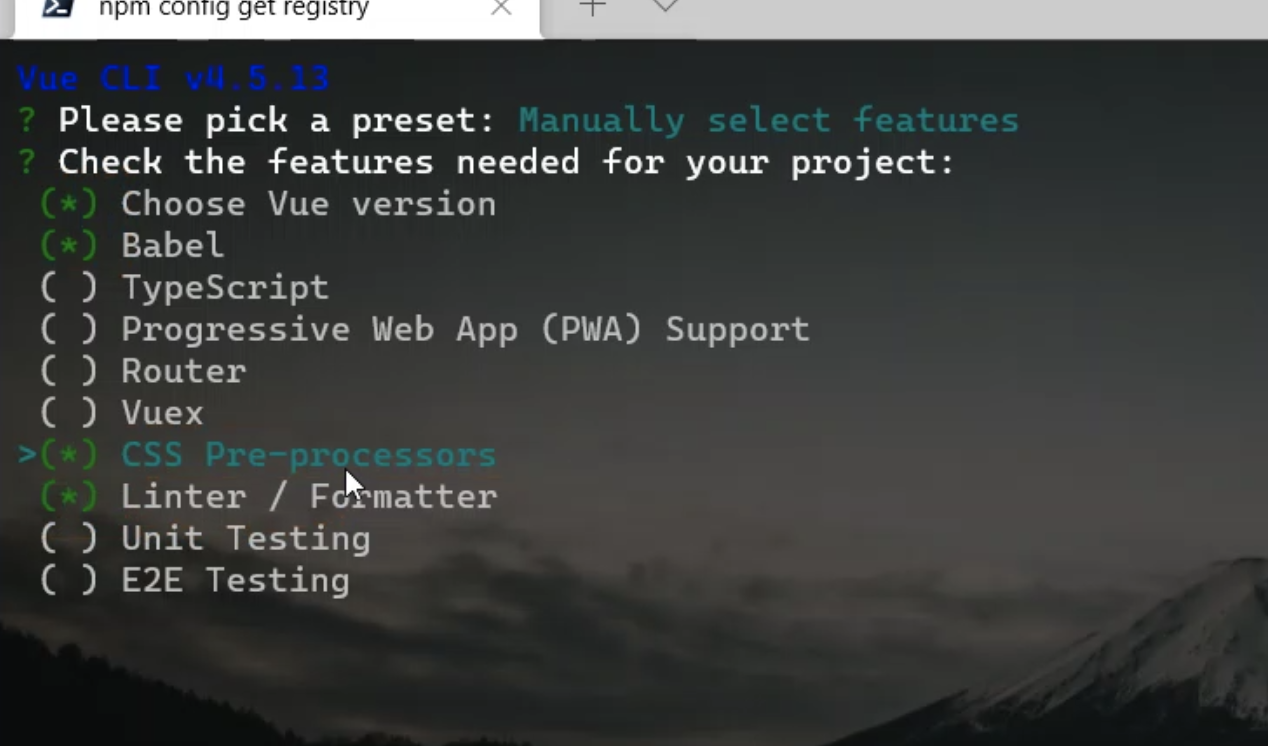

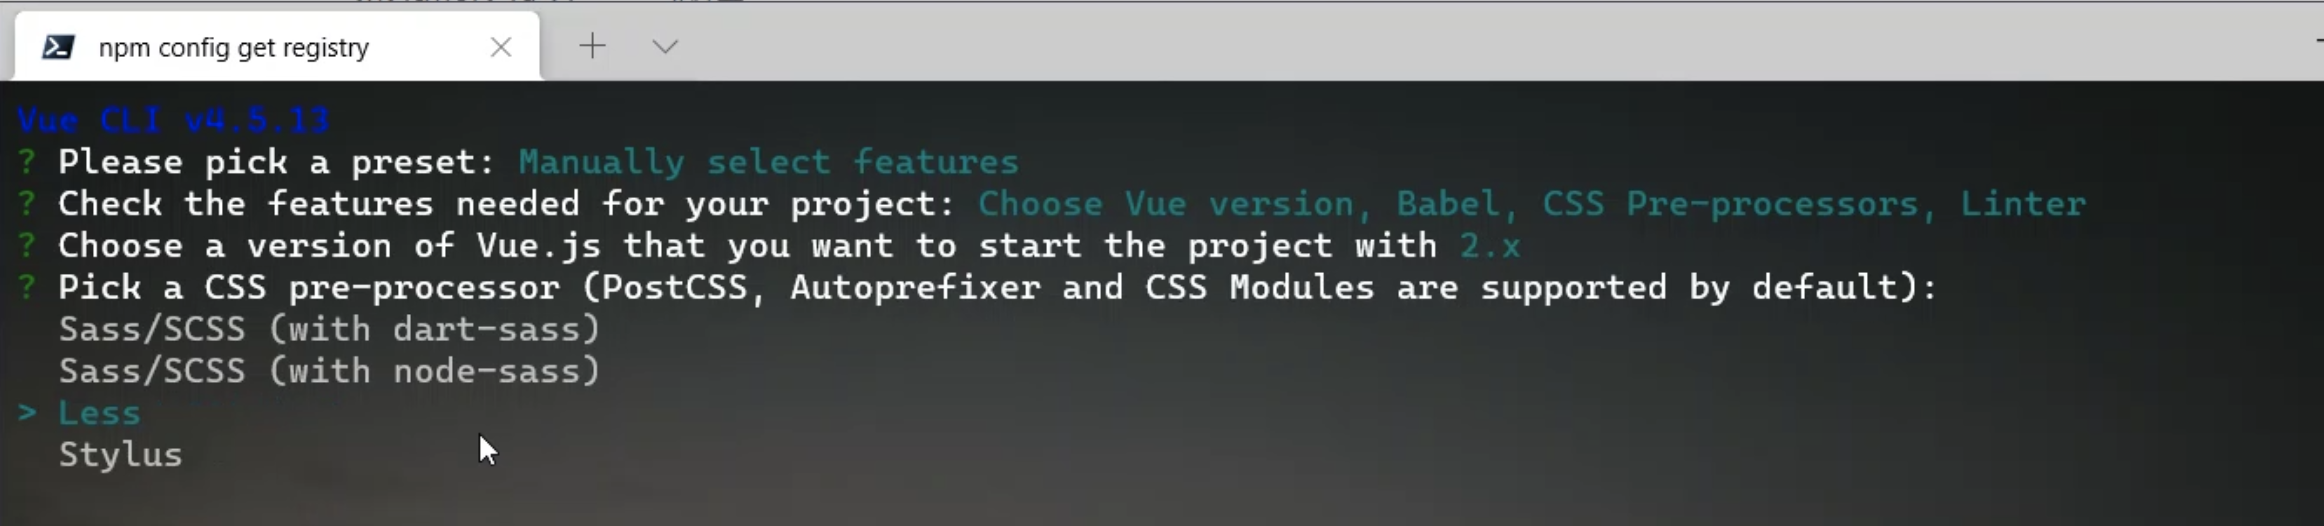
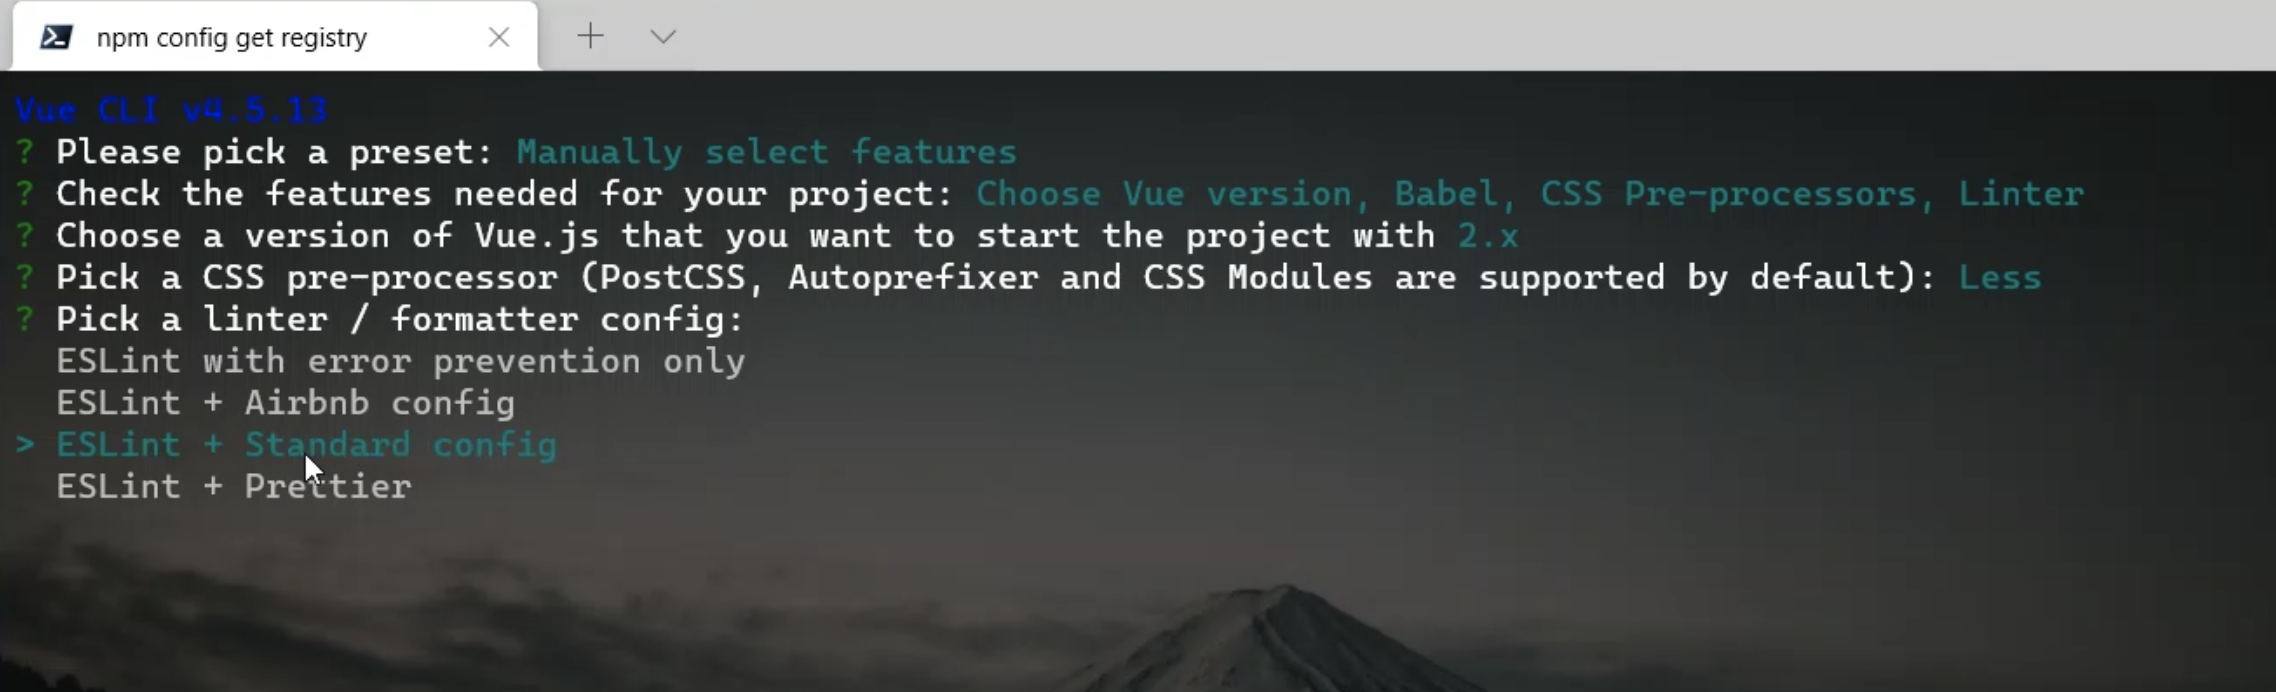
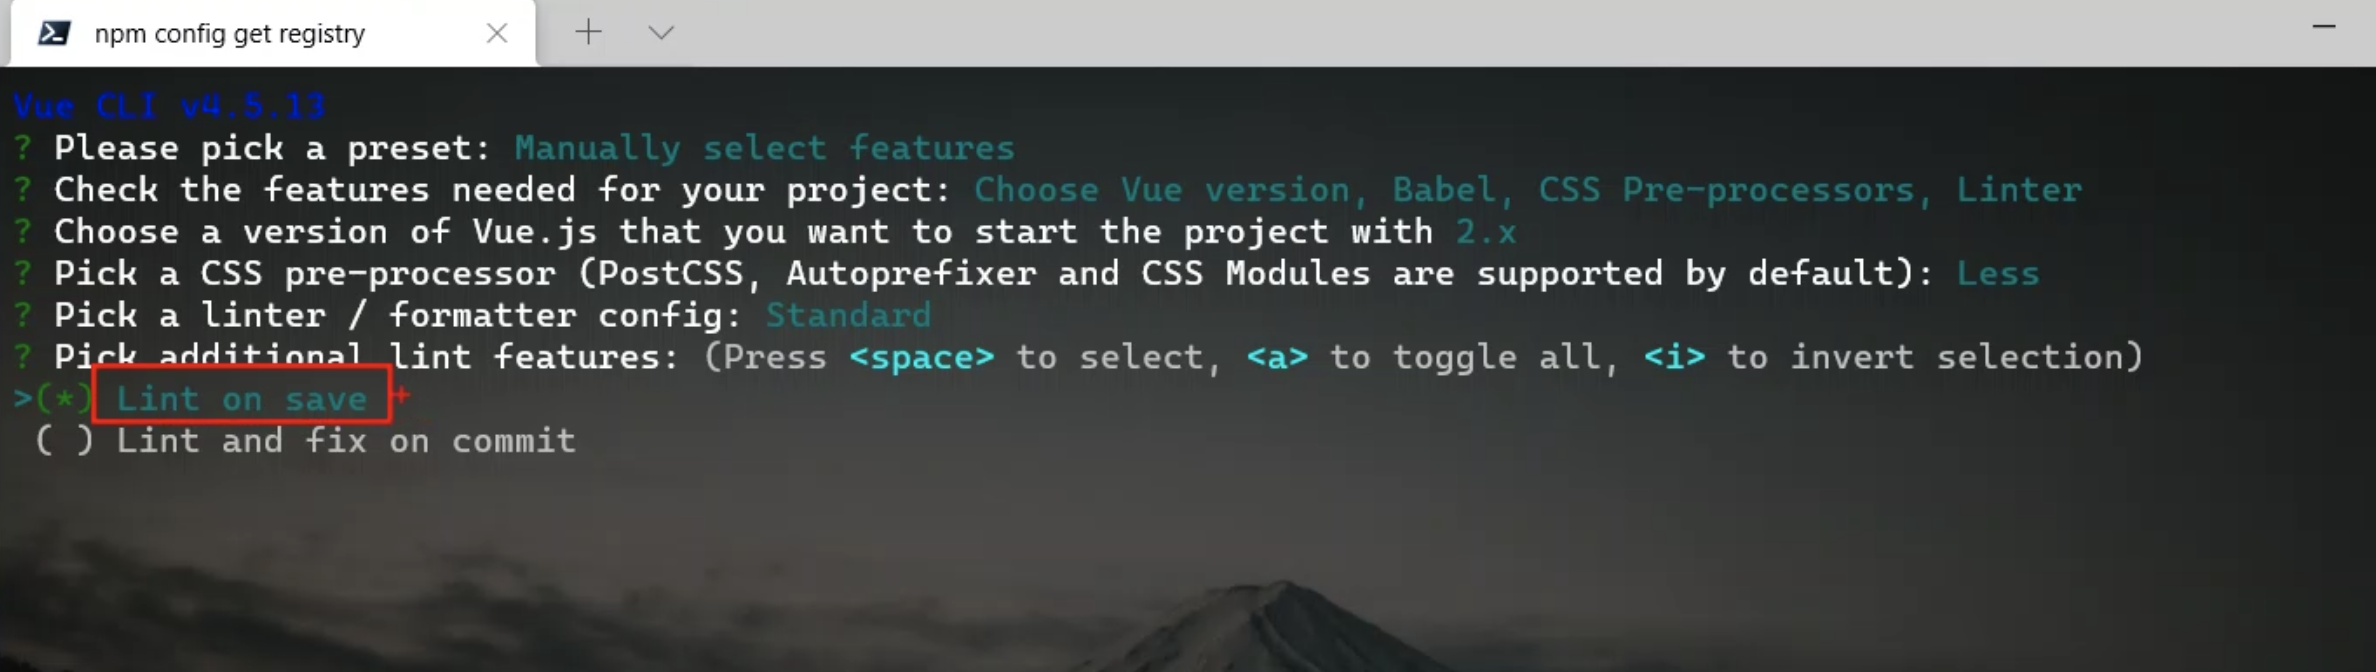
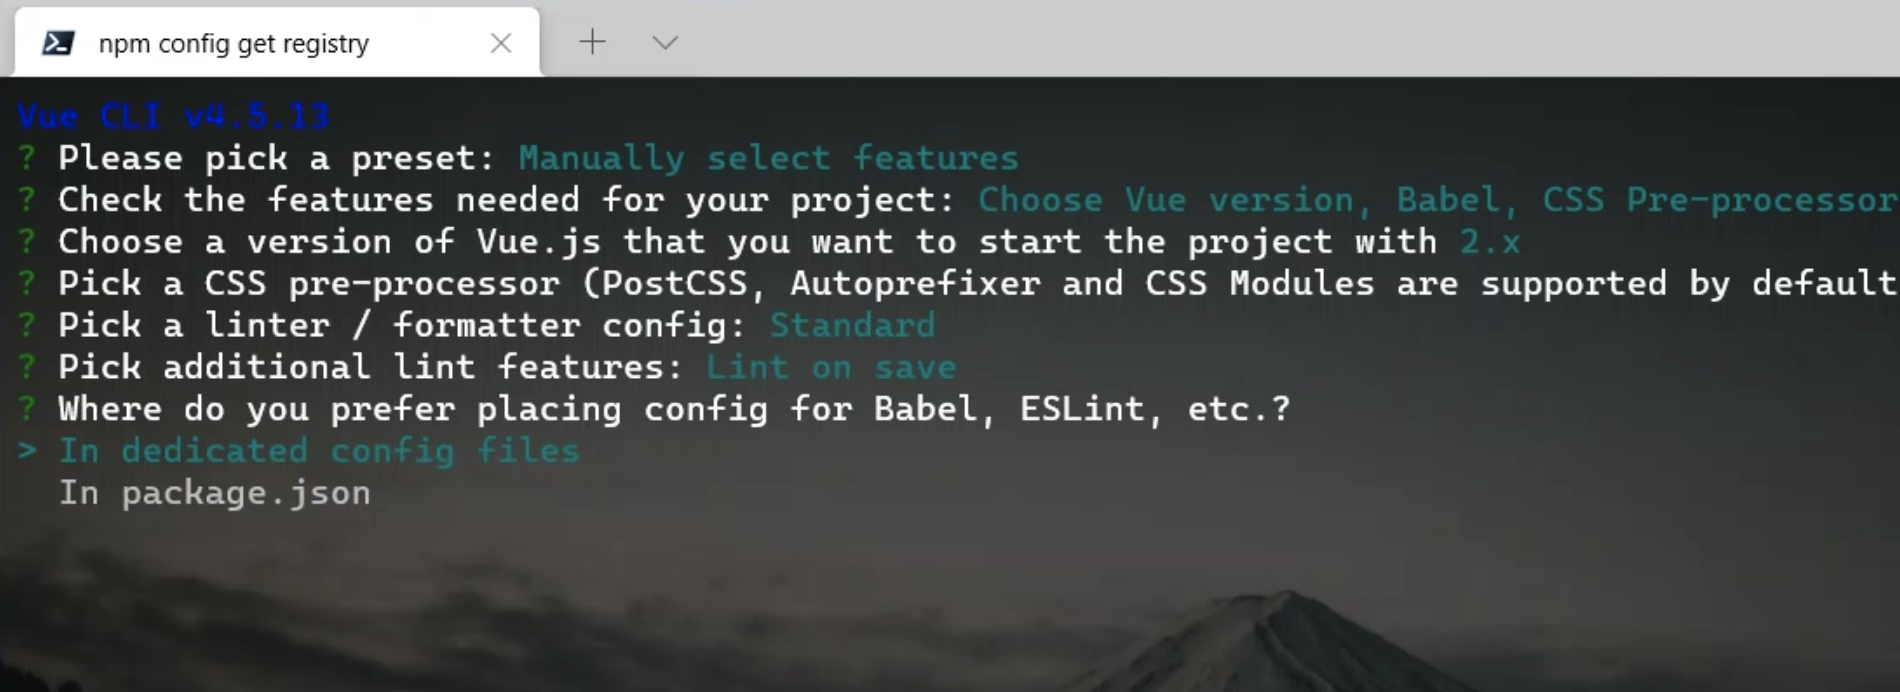
这时会有ESlint相关文件
.eslintrc.js

module.exports = {
  root: true,
  env: {
    node: true
  },
  extends: ['plugin:vue/essential', '@vue/standard'],
  parserOptions: {
    parser: 'babel-eslint'
  },
  rules: {
    // 自定义规则
    'no-console': process.env.NODE_ENV === 'production' ? 'warn' : 'off',
    'no-debugger': process.env.NODE_ENV === 'production' ? 'warn' : 'off',
    // 在方法的形参 () 之前,是否必须有空格
    "space-before-function-paren": ["warn", "never"]
  }
}
这段 ESLint 配置文件的主要作用是:
- 指定运行环境:Node.js。
- 继承规则集:Vue 官方的基本规则和 standard 风格。
- 自定义规则:
- 在生产环境中禁止使用 console 和 debugger。
- 方法形参 () 之前不能有空格。
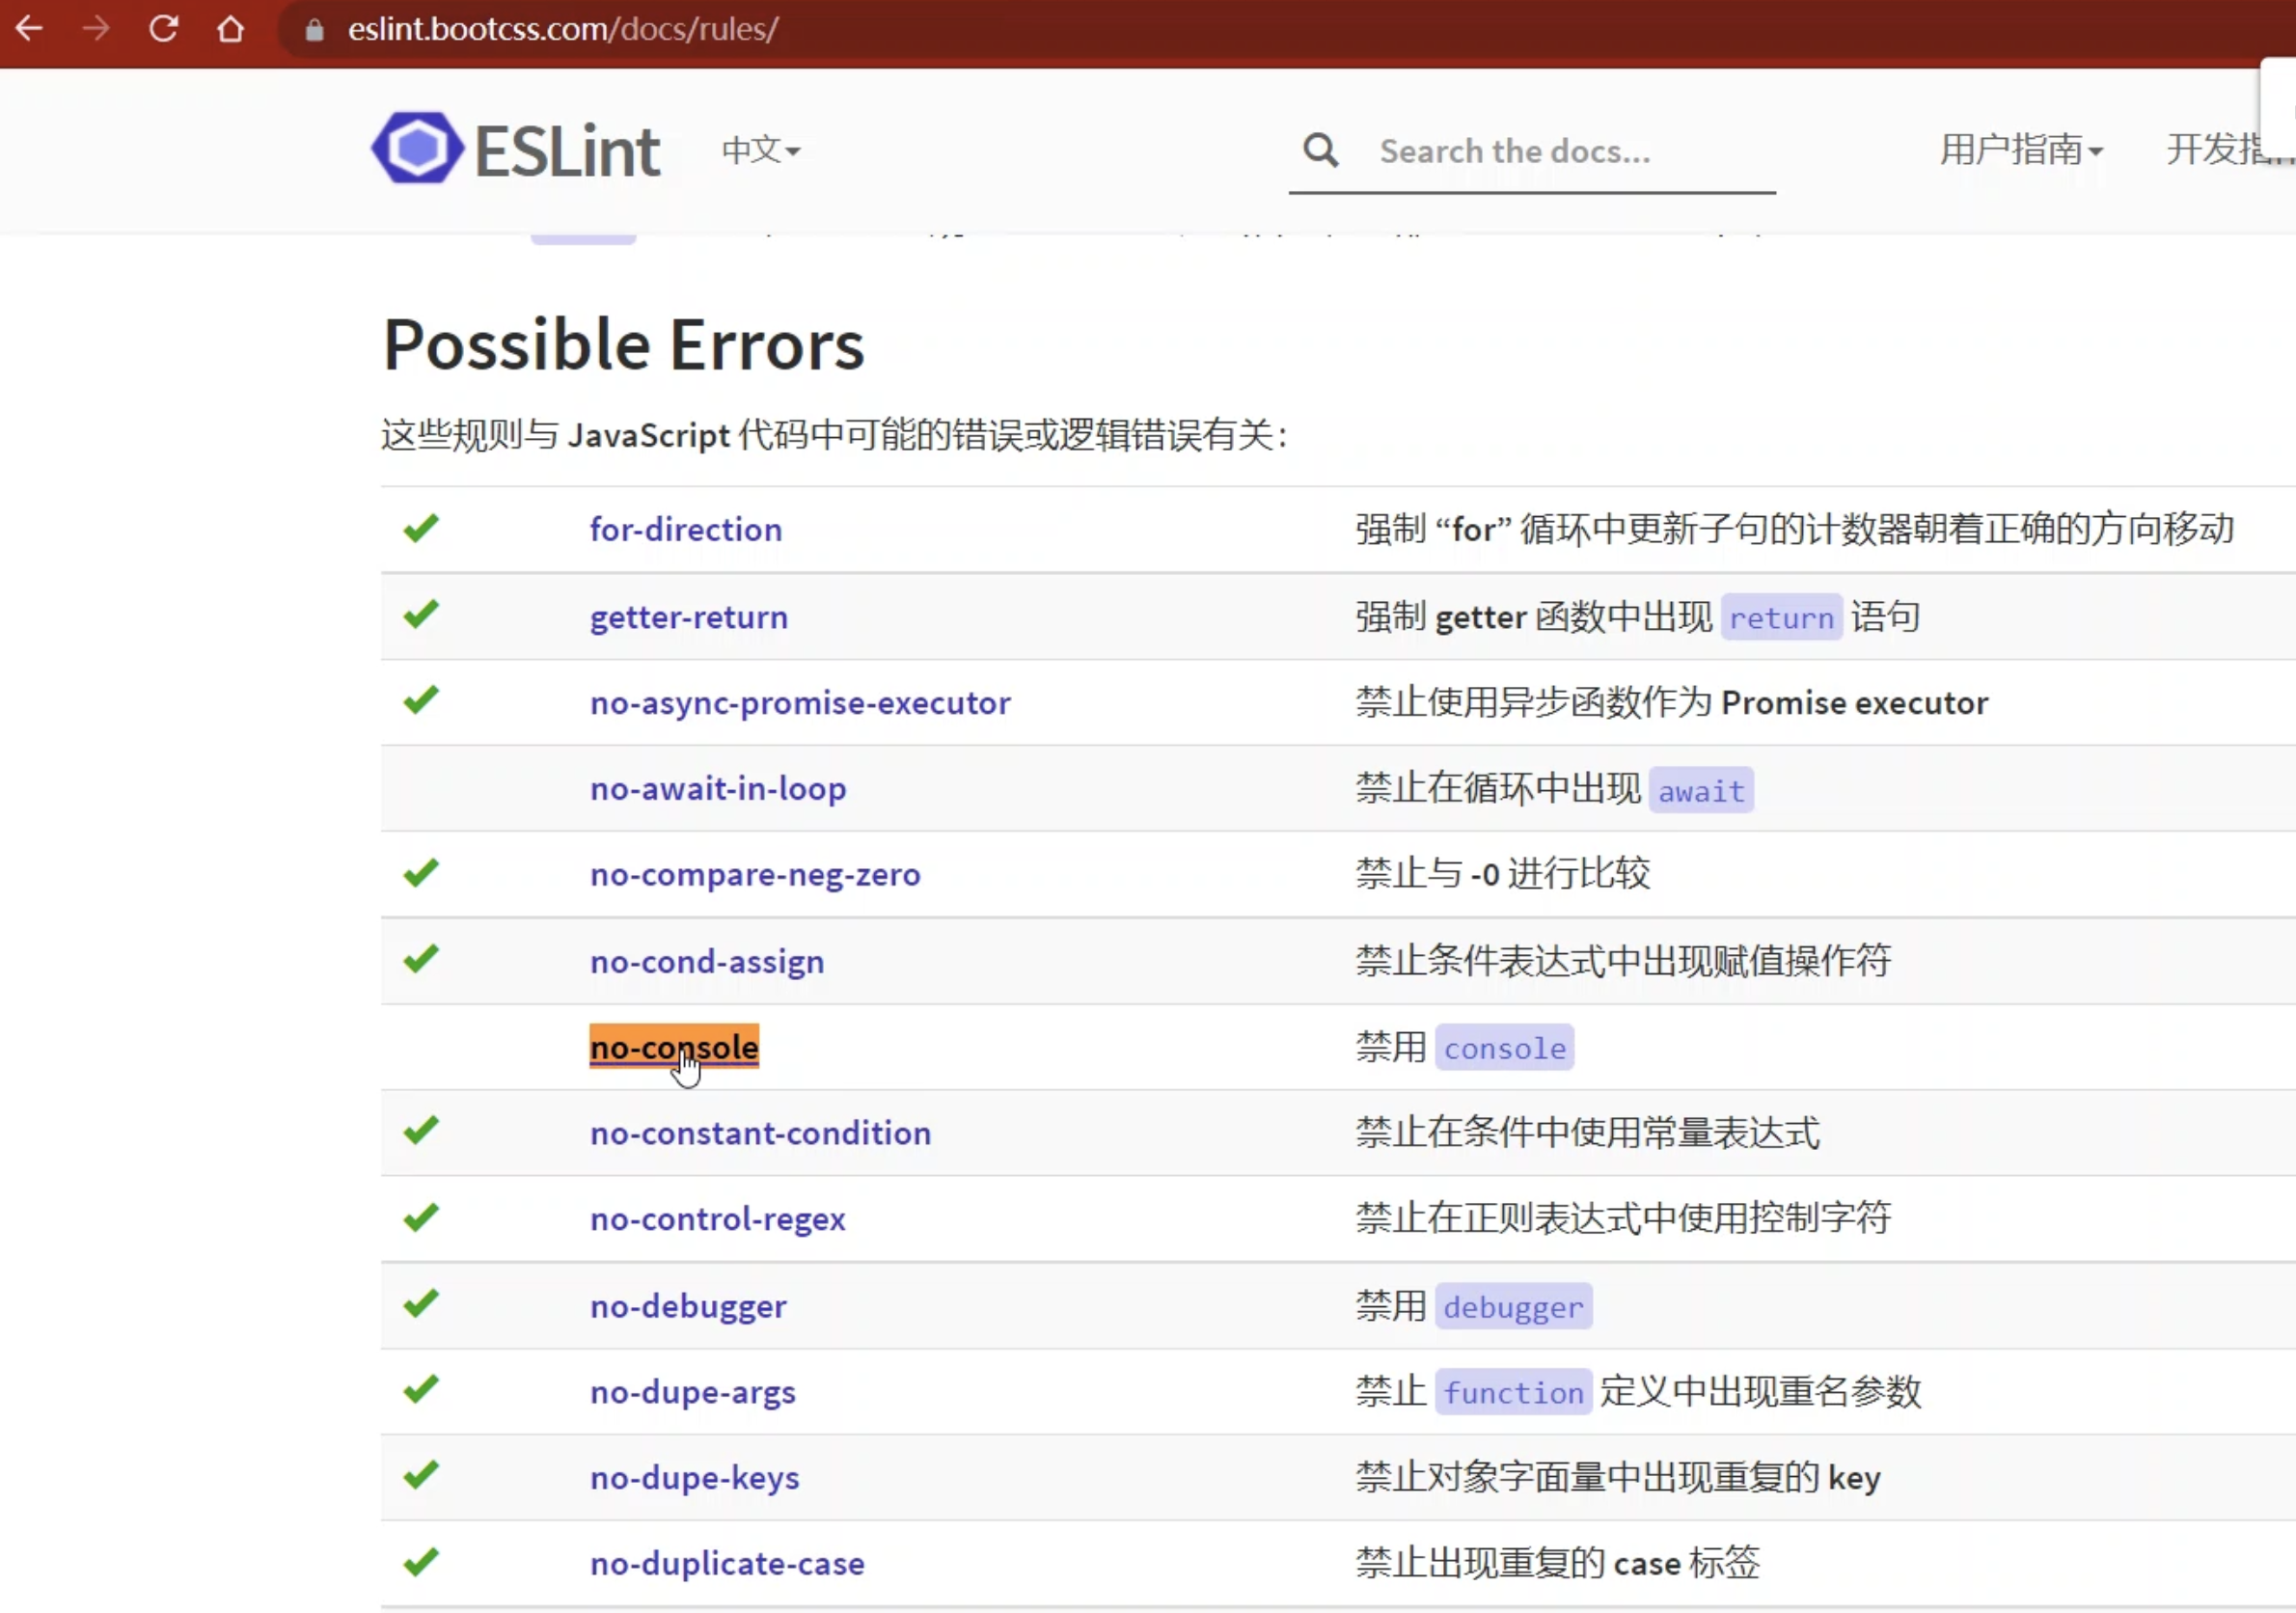
这个规则可以查询下面文档,添加
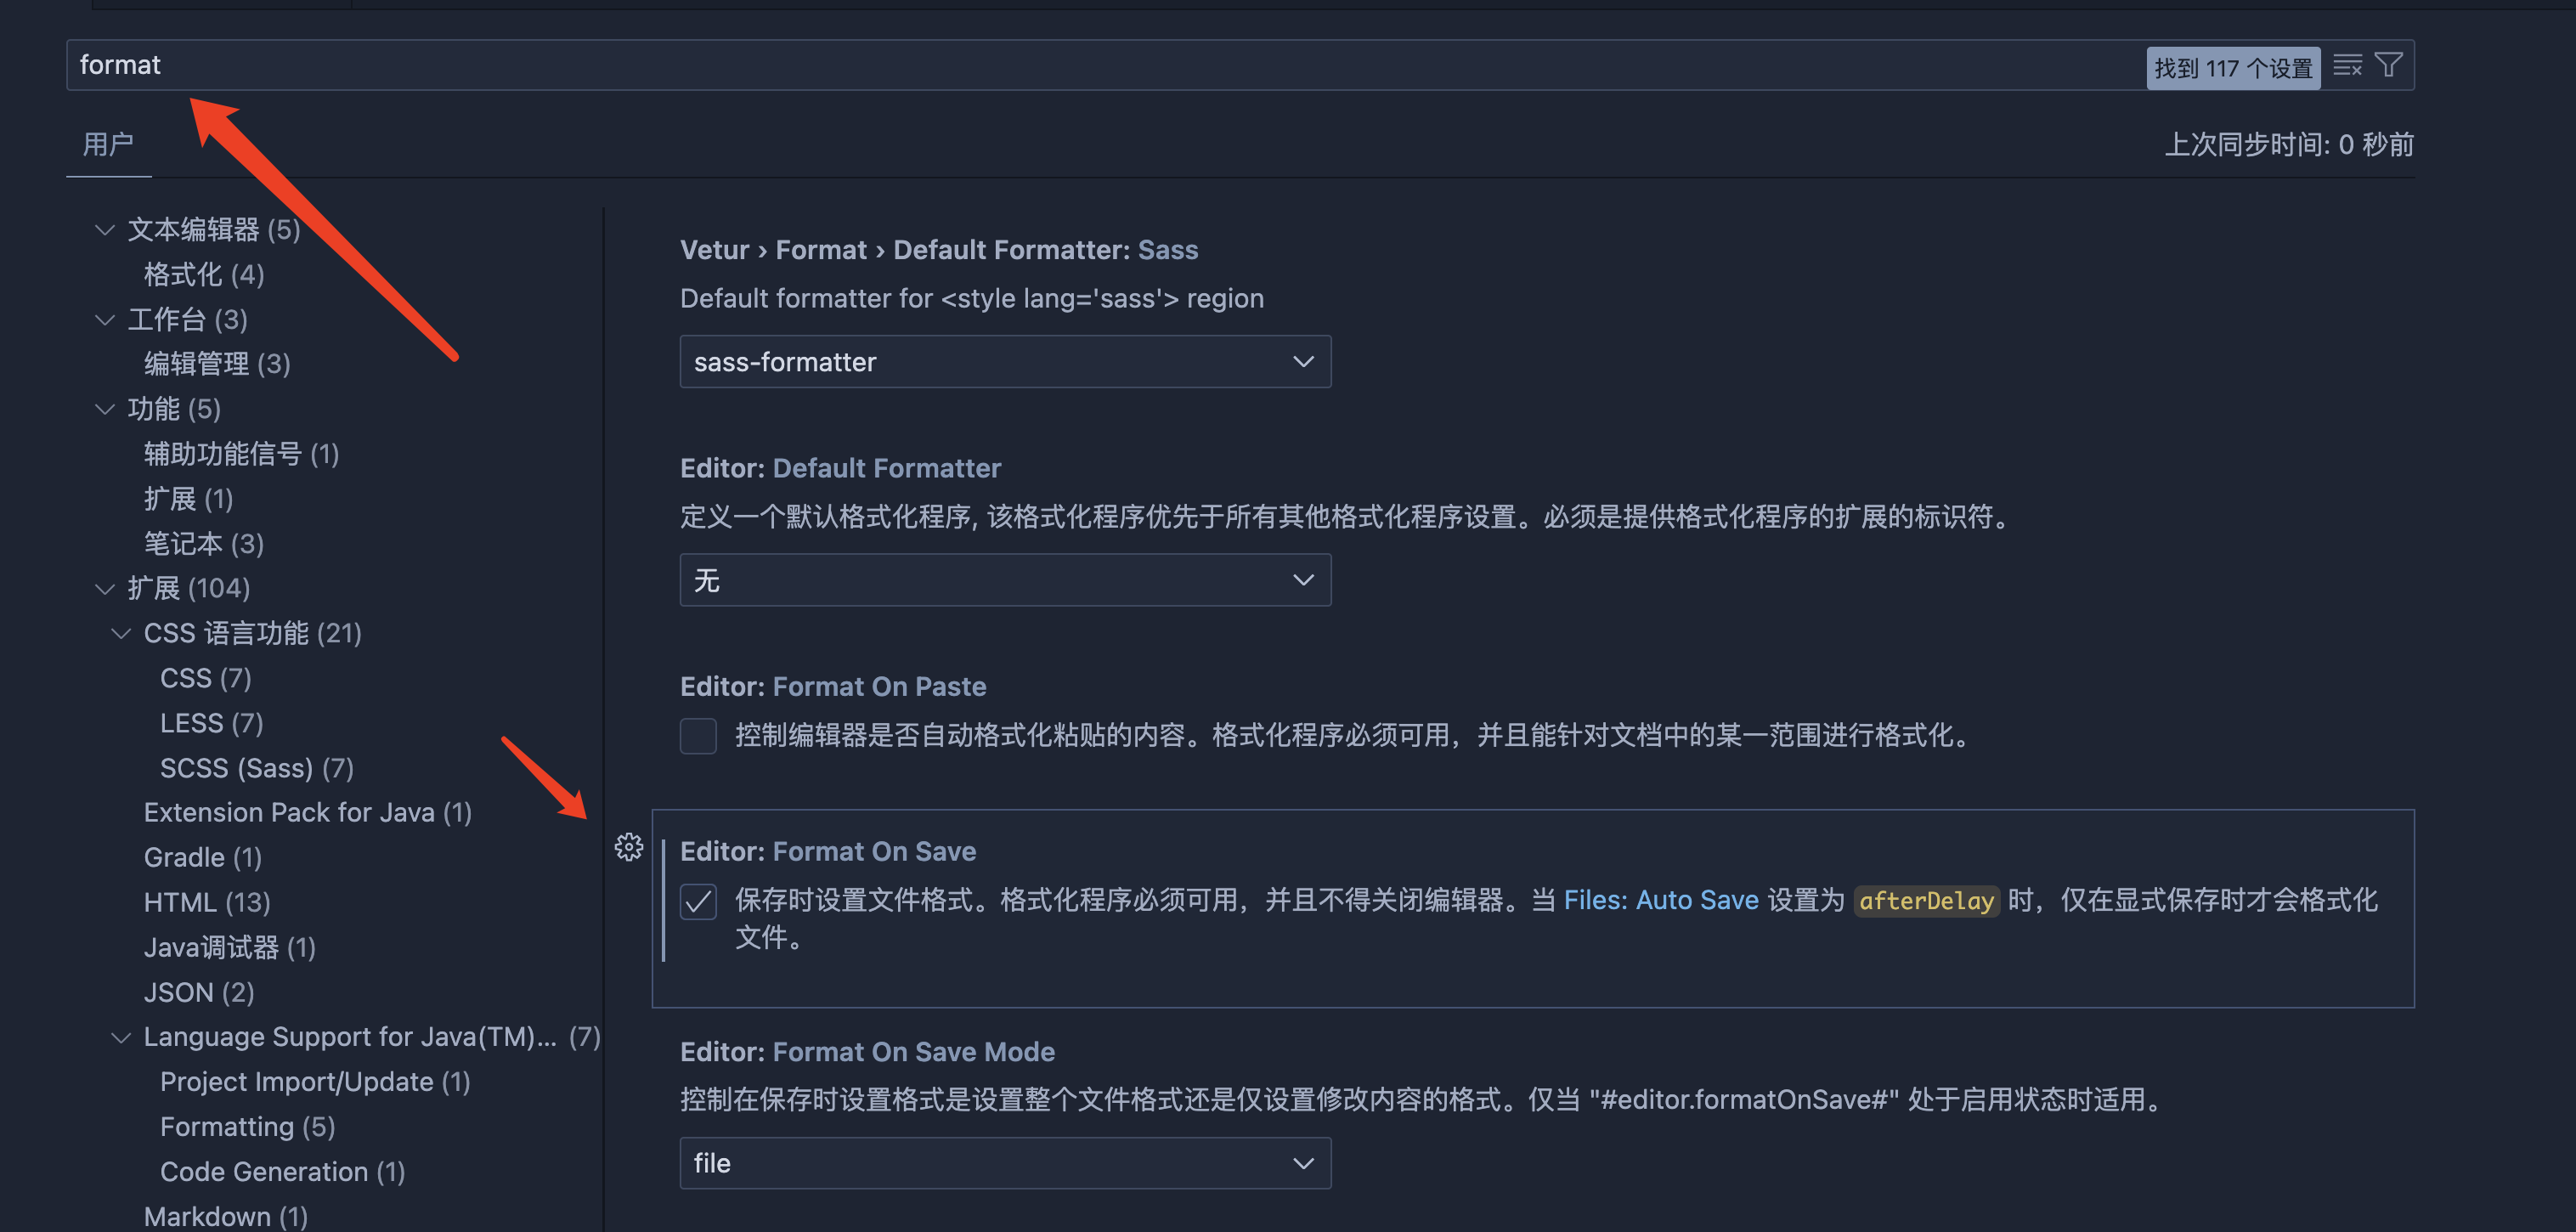
4.2 VSCode配置
vscode tab size
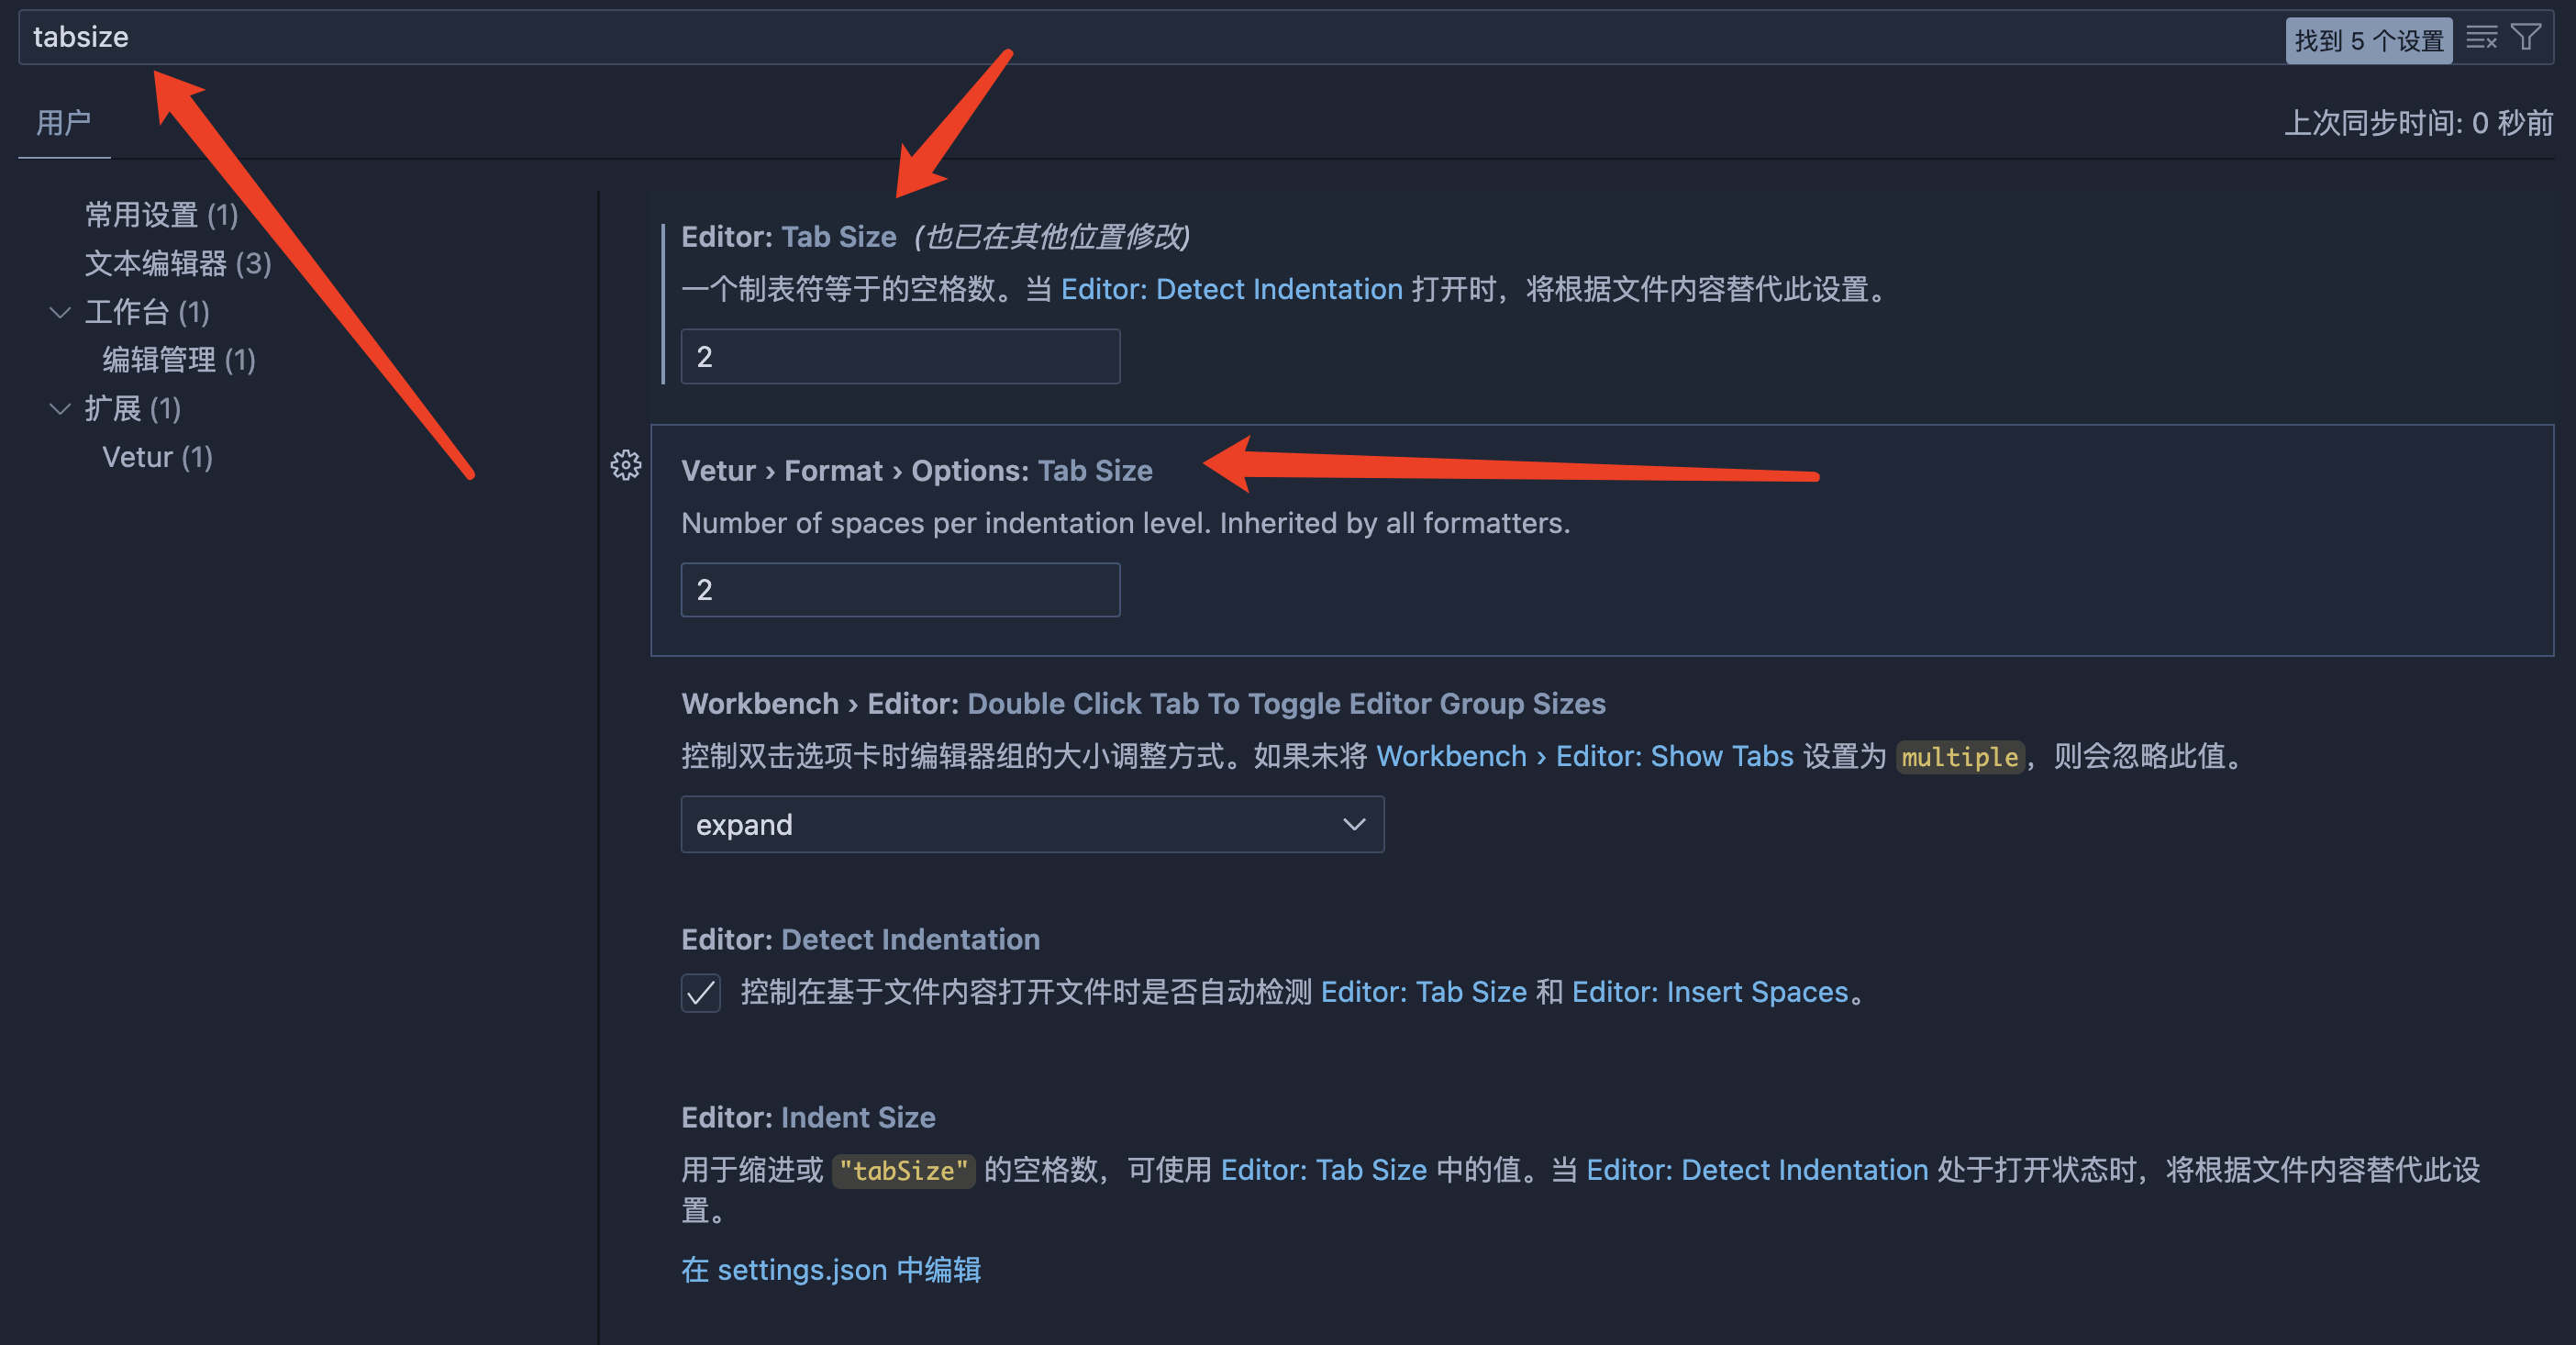
注意 Vetur 是 Visual Studio Code(VS Code)的一个插件,专门用于 Vue.js 开发。它为 Vue 项目提供了丰富的功能支持,包括语法高亮、代码片段、错误检查、格式化、调试等,是 Vue 开发者必备的工具之一。

	// ESlint插件的配置
    "editor.codeActionsOnSave": {
        "source.fixAll": true,
    },
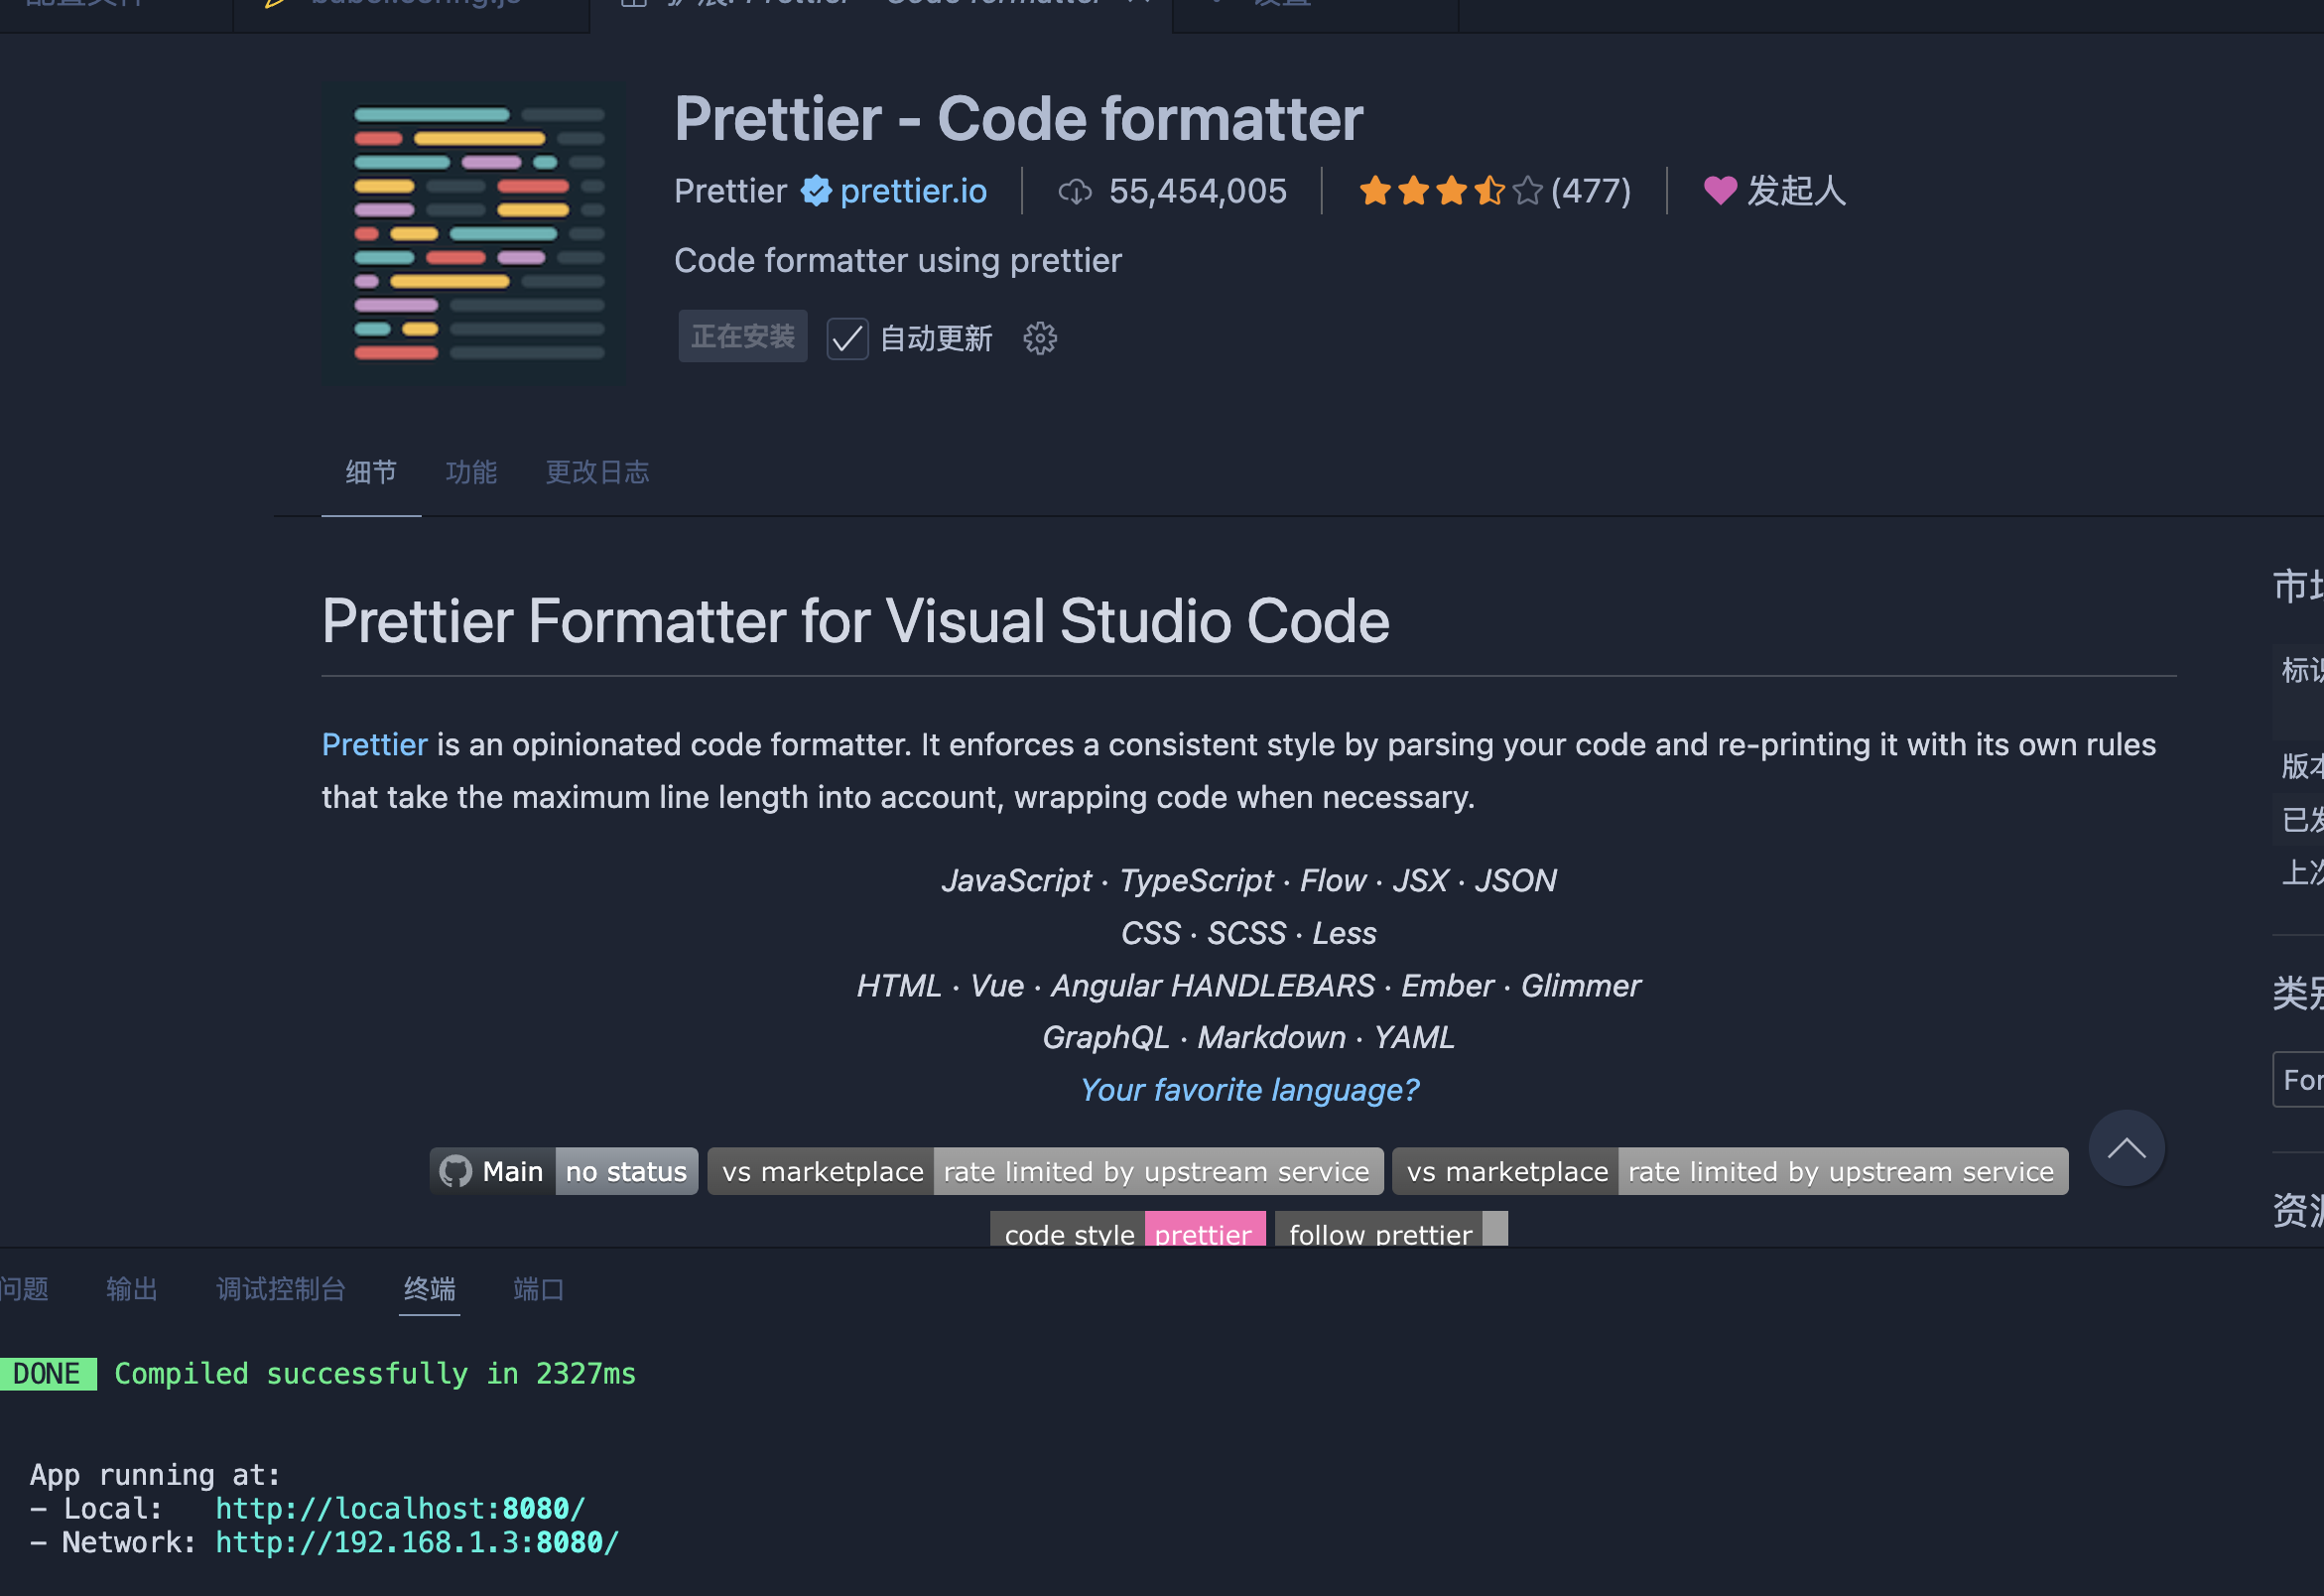
Prettier - Code formatter 是一个用于 代码格式化 的插件,支持多种编程语言(如 JavaScript、TypeScript、CSS、HTML、JSON、Markdown 等)。它通过自动格式化代码,确保代码风格一致,从而提高代码的可读性和可维护性。
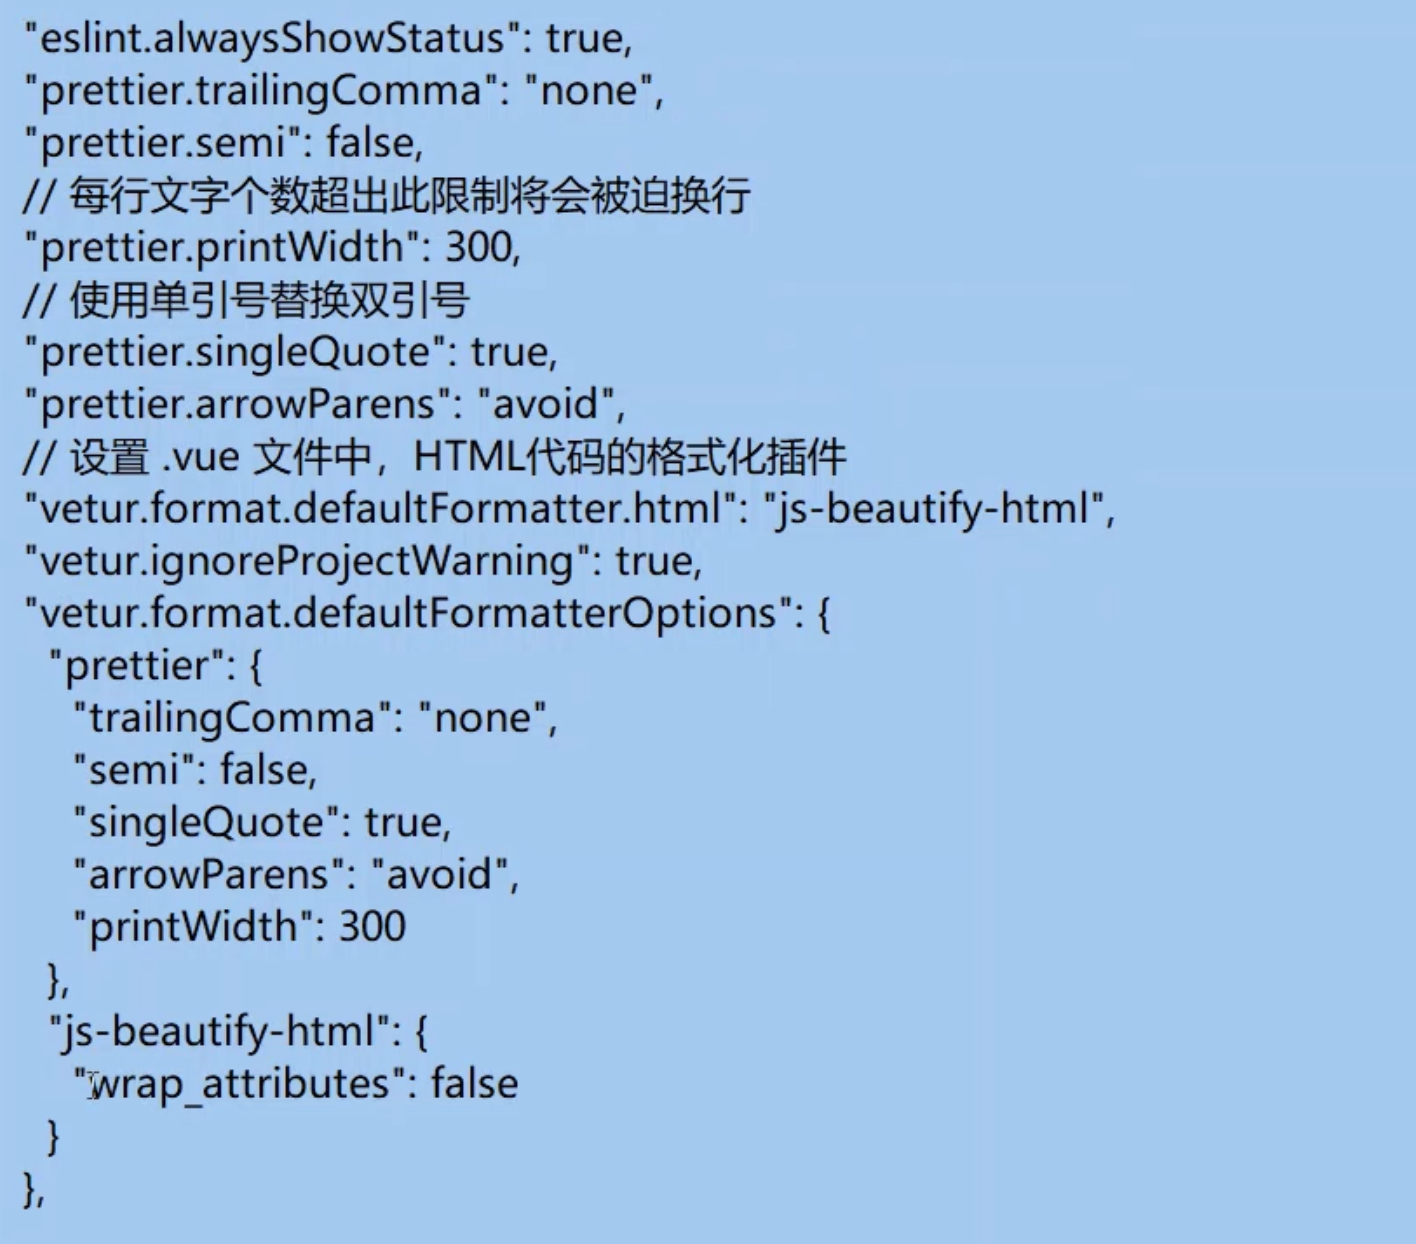
这个是settings.json
{
    // ESlint插件的配置
    "editor.codeActionsOnSave": {
        "source.fixAll": true
    },
    "eslint.alwaysShowStatus": true,
    "prettier.trailingComma": "none",
    "prettier.semi": false,
    "prettier.printWidth": 300,
    "prettier.singleQuote": true,
    "prettier.arrowParens": "avoid",
    "vetur.format.defaultFormatter.html": "js-beautify-html",
    "vetur.ignoreProjectWarning": true,
    "vetur.format.defaultFormatterOptions": {
        "prettier": {
            "trailingComma": "none",
            "semi": false,
            "singleQuote": true,
            "arrowParens": "avoid",
            "printWidth": 300
        },
        "js-beautify-html": {
            "wrap_attributes": false
        }
    },
    "security.workspace.trust.untrustedFiles": "open",
    "workbench.colorTheme": "Bearded Theme Arc",
    "terminal.integrated.defaultProfile.osx": "zsh",
    "terminal.external.osxExec": "/bin/zsh",
    "window.nativeFullScreen": false,
    "terminal.integrated.fontFamily": "monospace",
    "terminal.integrated.shellIntegration.decorationsEnabled": "never",
    "workbench.iconTheme": "catppuccin-perfect-dark",
    "workbench.editorLargeFileConfirmation": 5120,
    "settingsSync.ignoredSettings": [
        "workbench.editorLargeFileConfirmation"
    ],
    "editor.largeFileOptimizations": false,
    "open-in-browser.default": "Chrome",
    "editor.tabSize": 2,
    "editor.formatOnSave": true
}
5. axios
npm i axios -S npm i axios -S 是一个 npm 命令,用于在当前项目中安装 axios 库,并将其添加到 package.json 文件的 dependencies 中。
这样写明显不规范
规范处理方法
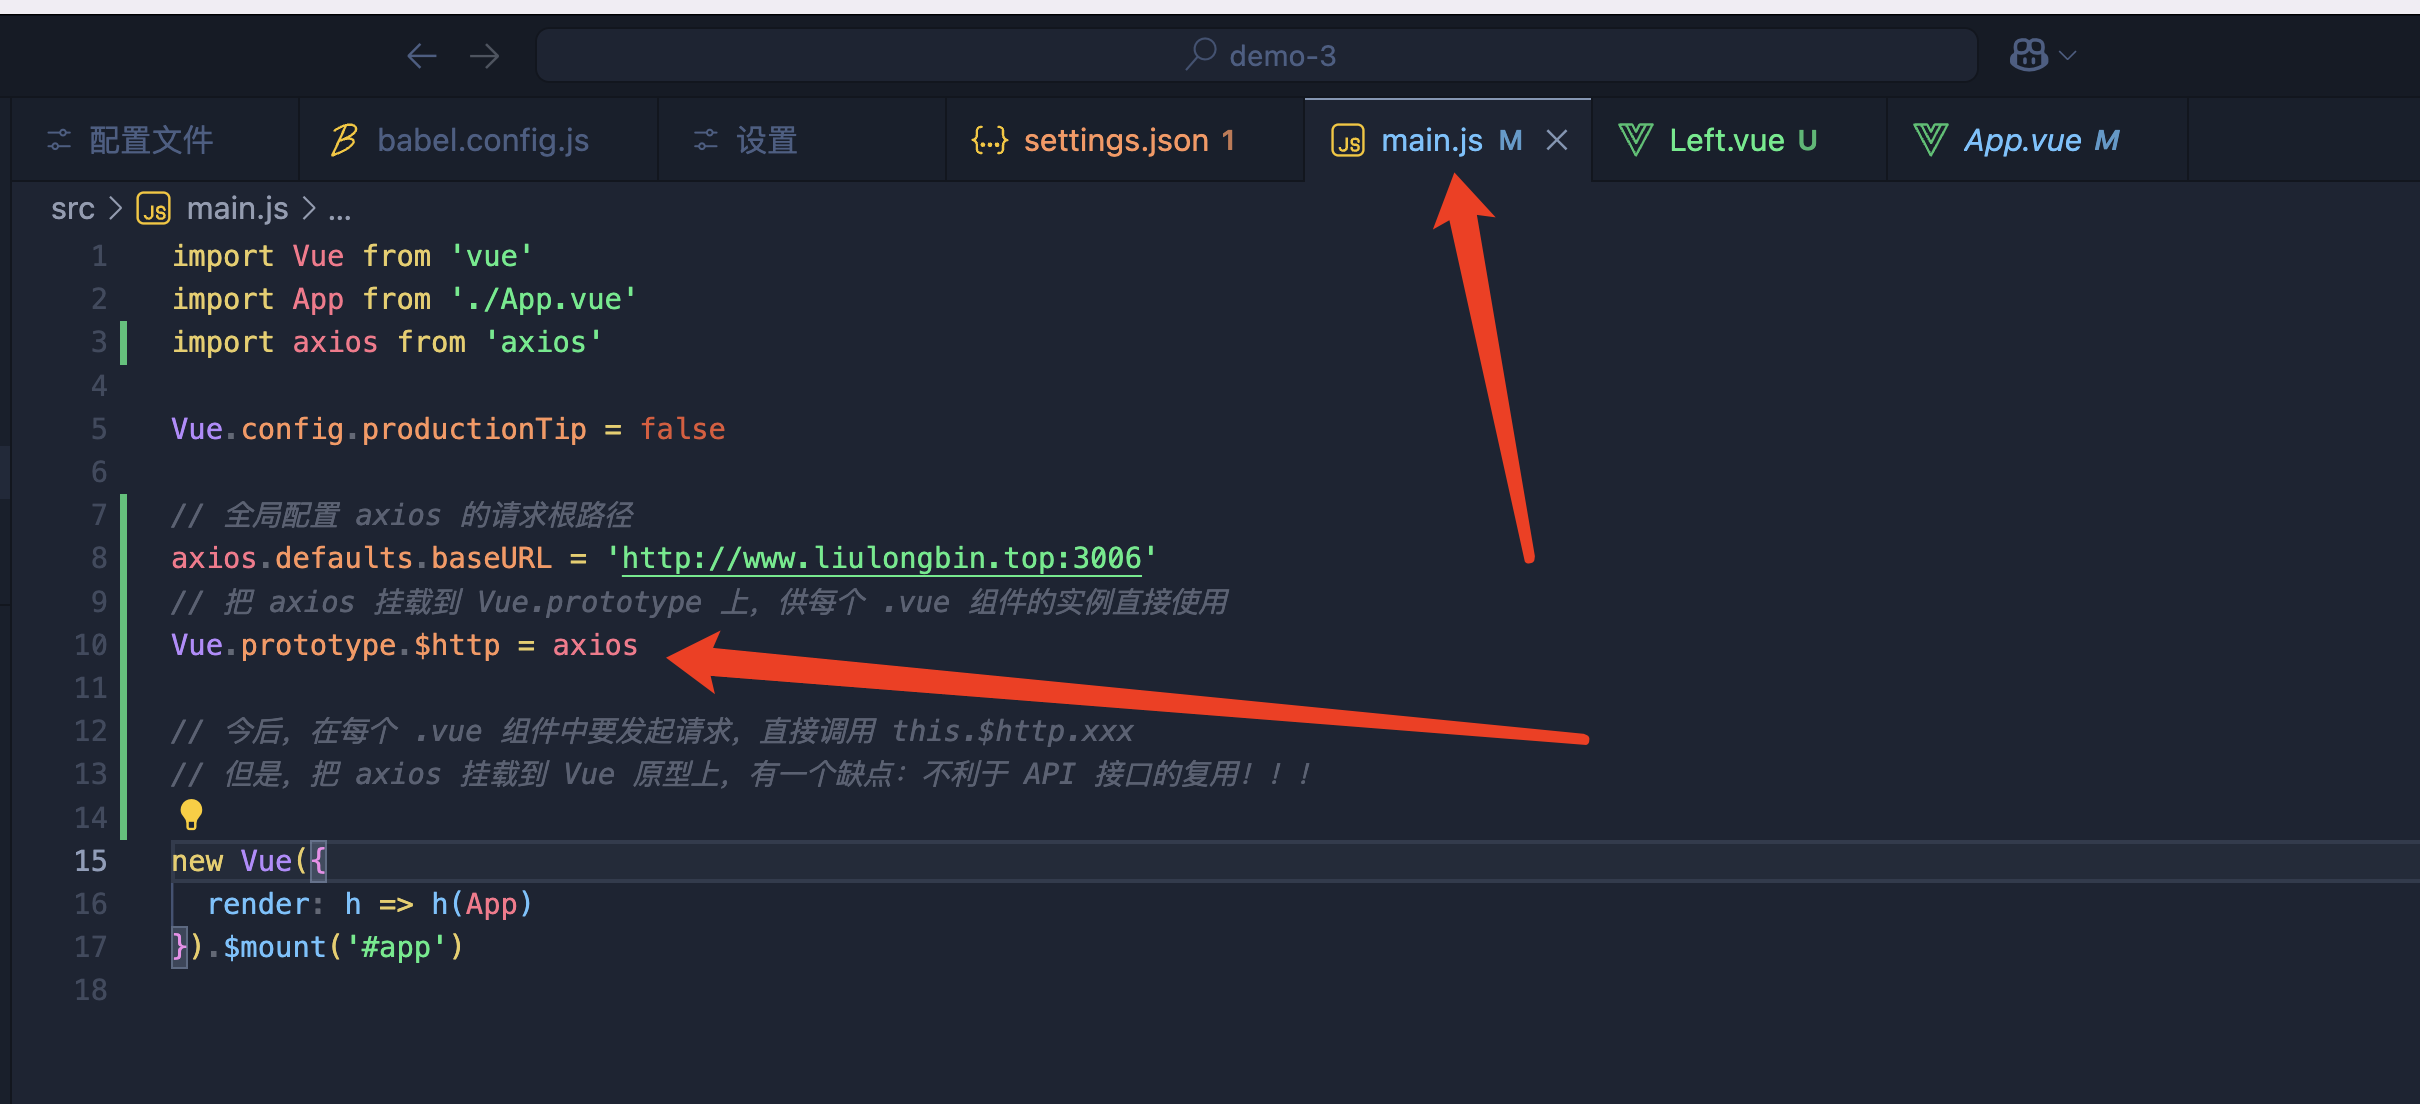
// 全局配置 axios 的请求根路径
axios.defaults.baseURL = 'http://www.liulongbin.top:3006'
// 把 axios 挂载到 Vue.prototype 上,供每个 .vue 组件的实例直接使用
Vue.prototype.$http = axios

<template>
<div class="right-container">
<h3>Right 组件</h3>
<button @click="postInfo">发起 POST 请求</button>
<button @click="btnGetBooks">获取图书列表的数据</button>
</div>
</template>
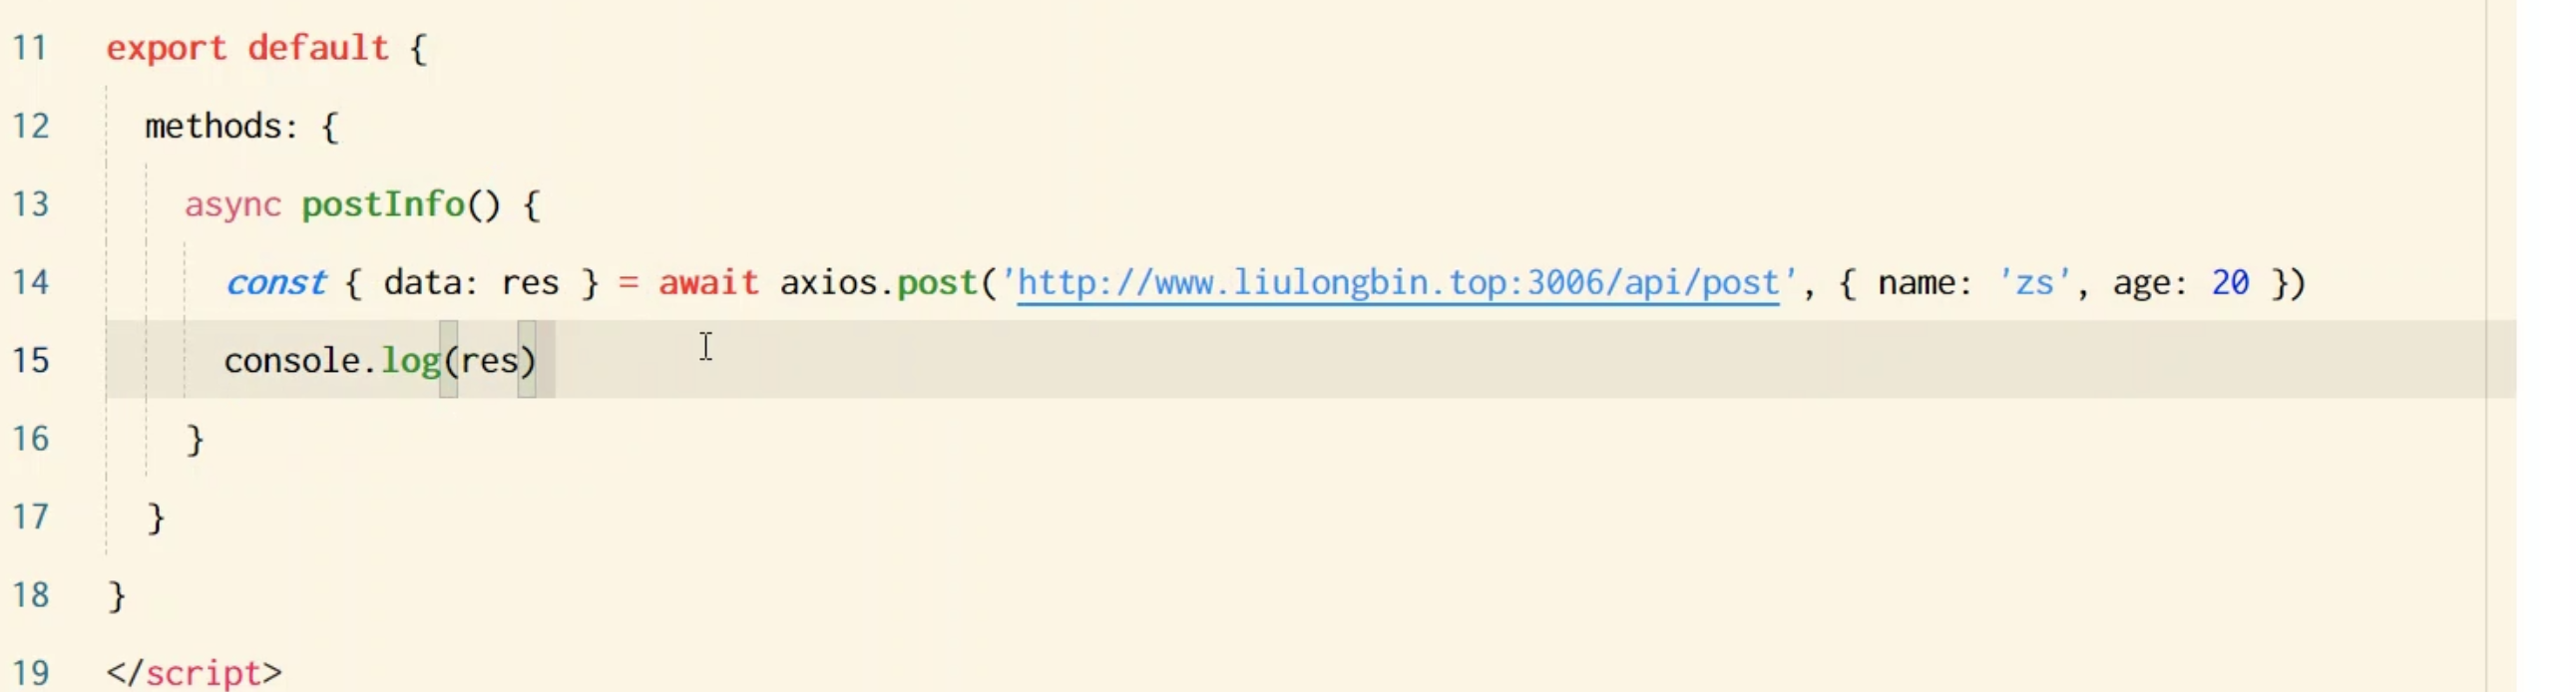
<script>
// import axios from 'axios'
export default {
methods: {
async postInfo() {
const { data: res } = await this.$http.post('/api/post', { name: 'zs', age: 20 })
console.log(res)
},
// 点击按钮,获取图书列表的数据
async btnGetBooks() {
const { data: res } = await this.$http.get('/api/getbooks')
console.log(res)
}
}
}
</script>
<style lang="less" scoped>
.right-container {
background-color: skyblue;
min-height: 200px;
flex: 1;
}
</style>
多个请求的根路径
import axios from 'axios';

// 创建第一个 Axios 实例,配置第一个请求根路径
const api1 = axios.create({
  baseURL: 'http://www.liulongbin.top:3006'
});

// 创建第二个 Axios 实例,配置第二个请求根路径
const api2 = axios.create({
  baseURL: 'https://api.example.com'
});

// 将 Axios 实例挂载到 Vue.prototype 上,供组件使用
Vue.prototype.$http1 = api1;
Vue.prototype.$http2 = api2;
在组件中使用
export default {
  methods: {
    fetchDataFromApi1() {
      this.$http1.get('/api/data')
        .then(response => {
          console.log('Data from API 1:', response.data);
        })
        .catch(error => {
          console.error('Error fetching data from API 1:', error);
        });
    },
    fetchDataFromApi2() {
      this.$http2.get('/api/data')
        .then(response => {
          console.log('Data from API 2:', response.data);
        })
        .catch(error => {
          console.error('Error fetching data from API 2:', error);
        });
    }
  }
};
6. 若依中的axios使用
import axios from 'axios'
import { Notification, MessageBox, Message, Loading } from 'element-ui'
import store from '@/store'
import { getToken } from '@/utils/auth'
import errorCode from '@/utils/errorCode'
import { tansParams, blobValidate } from "@/utils/ruoyi";
import cache from '@/plugins/cache'
import { saveAs } from 'file-saver'

let downloadLoadingInstance;
// 是否显示重新登录
export let isRelogin = { show: false };

axios.defaults.headers['Content-Type'] = 'application/json;charset=utf-8'
// 创建axios实例
const service = axios.create({
  // axios中请求配置有baseURL选项,表示请求URL公共部分
  baseURL: process.env.VUE_APP_BASE_API,
  // 超时
  timeout: 10000
})

// request拦截器
service.interceptors.request.use(config => {
  // 是否需要设置 token
  const isToken = (config.headers || {}).isToken === false
  // 是否需要防止数据重复提交
  const isRepeatSubmit = (config.headers || {}).repeatSubmit === false
  if (getToken() && !isToken) {
    config.headers['Authorization'] = 'Bearer ' + getToken() // 让每个请求携带自定义token 请根据实际情况自行修改
  }
  // get请求映射params参数
  if (config.method === 'get' && config.params) {
    let url = config.url + '?' + tansParams(config.params);
    url = url.slice(0, -1);
    config.params = {};
    config.url = url;
  }
  if (!isRepeatSubmit && (config.method === 'post' || config.method === 'put')) {
    const requestObj = {
      url: config.url,
      data: typeof config.data === 'object' ? JSON.stringify(config.data) : config.data,
      time: new Date().getTime()
    }
    const requestSize = Object.keys(JSON.stringify(requestObj)).length; // 请求数据大小
    const limitSize = 5 * 1024 * 1024; // 限制存放数据5M
    if (requestSize >= limitSize) {
      console.warn(`[${config.url}]: ` + '请求数据大小超出允许的5M限制,无法进行防重复提交验证。')
      return config;
    }
    const sessionObj = cache.session.getJSON('sessionObj')
    if (sessionObj === undefined || sessionObj === null || sessionObj === '') {
      cache.session.setJSON('sessionObj', requestObj)
    } else {
      const s_url = sessionObj.url;                  // 请求地址
      const s_data = sessionObj.data;                // 请求数据
      const s_time = sessionObj.time;                // 请求时间
      const interval = 1000;                         // 间隔时间(ms),小于此时间视为重复提交
      if (s_data === requestObj.data && requestObj.time - s_time < interval && s_url === requestObj.url) {
        const message = '数据正在处理,请勿重复提交';
        console.warn(`[${s_url}]: ` + message)
        return Promise.reject(new Error(message))
      } else {
        cache.session.setJSON('sessionObj', requestObj)
      }
    }
  }
  return config
}, error => {
    console.log(error)
    Promise.reject(error)
})

// 响应拦截器
service.interceptors.response.use(res => {
    // 未设置状态码则默认成功状态
    const code = res.data.code || 200;
    // 获取错误信息
    const msg = errorCode[code] || res.data.msg || errorCode['default']
    // 二进制数据则直接返回
    if (res.request.responseType ===  'blob' || res.request.responseType ===  'arraybuffer') {
      return res.data
    }
    if (code === 401) {
      if (!isRelogin.show) {
        isRelogin.show = true;
        MessageBox.confirm('登录状态已过期,您可以继续留在该页面,或者重新登录', '系统提示', { confirmButtonText: '重新登录', cancelButtonText: '取消', type: 'warning' }).then(() => {
          isRelogin.show = false;
          store.dispatch('LogOut').then(() => {
            location.href = '/index';
          })
      }).catch(() => {
        isRelogin.show = false;
      });
    }
      return Promise.reject('无效的会话,或者会话已过期,请重新登录。')
    } else if (code === 500) {
      Message({ message: msg, type: 'error' })
      return Promise.reject(new Error(msg))
    } else if (code === 601) {
      Message({ message: msg, type: 'warning' })
      return Promise.reject('error')
    } else if (code !== 200) {
      Notification.error({ title: msg })
      return Promise.reject('error')
    } else {
      return res.data
    }
  },
  error => {
    console.log('err' + error)
    let { message } = error;
    if (message == "Network Error") {
      message = "后端接口连接异常";
    } else if (message.includes("timeout")) {
      message = "系统接口请求超时";
    } else if (message.includes("Request failed with status code")) {
      message = "系统接口" + message.substr(message.length - 3) + "异常";
    }
    Message({ message: message, type: 'error', duration: 5 * 1000 })
    return Promise.reject(error)
  }
)

// 通用下载方法
export function download(url, params, filename, config) {
  downloadLoadingInstance = Loading.service({ text: "正在下载数据,请稍候", spinner: "el-icon-loading", background: "rgba(0, 0, 0, 0.7)", })
  return service.post(url, params, {
    transformRequest: [(params) => { return tansParams(params) }],
    headers: { 'Content-Type': 'application/x-www-form-urlencoded' },
    responseType: 'blob',
    ...config
  }).then(async (data) => {
    const isBlob = blobValidate(data);
    if (isBlob) {
      const blob = new Blob([data])
      saveAs(blob, filename)
    } else {
      const resText = await data.text();
      const rspObj = JSON.parse(resText);
      const errMsg = errorCode[rspObj.code] || rspObj.msg || errorCode['default']
      Message.error(errMsg);
    }
    downloadLoadingInstance.close();
  }).catch((r) => {
    console.error(r)
    Message.error('下载文件出现错误,请联系管理员!')
    downloadLoadingInstance.close();
  })
}

export default service