【一】Vue组件开发教程
目录
一、环境
二、为什么要组件开发
三、正式开发
【初步封装】child.vue
【初步封装】App.vue
【父组件向子组件传参数/方法】child.vue
【父组件向子组件传参数/方法】App.vue
【子组件向父组件暴露参数/方法】child.vue
【子组件向父组件暴露参数/方法】App.vue
【子组件向父组件传递参数/方法】child.vue
【子组件向父组件传递参数/方法】App.vue
总结
四、defineProps、defineEmits、defineExpose方法介绍
defineProps、defineEmits
defineExpose
子组件
父组件
一、环境
本文组件开发使用环境如下:
- Vue3
- setup语法糖
二、为什么要组件开发
Vue3的一个很大特性在于“组件”,有了组件,我们可以将原本需要几千几万行的一个前端文件(html、js、css)分成若干个小的部分,根据需要再将小的部分拼装起来,同时体现组件的复用性
三、正式开发
首先在component文件夹下创建一个“child.vue”文件,作为组件,默认的App.vue作为父组件使用child.vue组件
假设我们的子组件需要封装一个<input>输入框,父组件只需充当子组件的容器,假设在这个阶段,我们不需要与子组件进行信息交互。
【初步封装】child.vue
在这里我们封装了一个输入框,该输入框的高度和宽度取决于父组件,并且该输入框的值依赖于组件本身的变量“inputValue”
注意:此时父组件无法获取到子组件的值,因为我们没有设置外部方法和外部参数。
<script setup>
import { ref } from 'vue'
const inputValue = ref('')
</script>

<template>
  <div class="container">
    <div>测试:</div>
    <input type="text" v-model="inputValue" class="input">
  </div>
</template>

<style scoped>

.container {
  width: 100%;
  height: 100%;
}
.input {
    width: 100%;
    height: auto;
    line-height: 100%;
    font-size: 18pxpx;
}
</style>
【初步封装】App.vue
<script setup>
import myInput from './components/child.vue'
</script>
<template>
<div class="container">
<myInput />
</div>
</template>
<style scoped>
.container {
width: 300px;
margin: 20px auto;
}
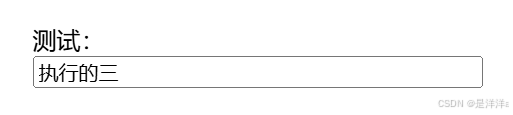
</style>效果:
此时组件可以正常运行,但是此时我们的业务需求增加一条:“可以由父组件传入输入框的标签,即label”
【父组件向子组件传参数/方法】child.vue
子组件使用defineProps预编译宏,该函数可以用来指定父组件传入的参数,并且可以指定传入参数的类型和默认值。
注意:在新版本Vue3中,defineProps不需要导入,在旧版本中仍然需要使用import导入
<script setup>
import { ref } from 'vue'

const props = defineProps({
    labelName:{
        type: String,
        default: '测试'
    }
})

const inputValue = ref('')
</script>

<template>
  <div class="container">
    <div>{{ props.labelName }}</div>
    <input type="text" v-model="inputValue" class="input">
  </div>
</template>

<style scoped>

.container {
  width: 100%;
  height: 100%;
}
.input {
    width: 100%;
    height: auto;
    line-height: 100%;
    font-size: 18px;
}
</style>
【父组件向子组件传参数/方法】App.vue
<script setup>
import { ref } from 'vue'
import myInput from './components/child.vue'
const name = ref('用户名')
</script>

<template>
  <div class="container">
      <myInput
        labelName="用户名"
      />
      <!-- 或者 -->
      <myInput
        :labelName="name"
      />
  </div>
</template>

<style scoped>
.container {
    width: 300px;
    height: auto;
    margin: 20px auto;
}
</style>
效果:
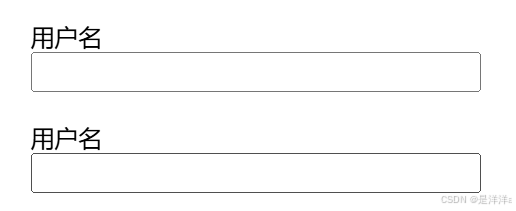
看起来,我们成功向父组件传入了参数,但是此时业务需求再次增加:“父组件创建一个按钮,点击按钮后,输入框会清空”
【子组件向父组件暴露参数/方法】child.vue
这里,我们使用defineExpose方法,暴露组件本身的“inputValue”变量,顾名思义,暴露的变量,父组件可以控制改组件的变量。
<script setup>
import { ref } from 'vue'

const props = defineProps({
    labelName:{
        type: String,
        default: '测试'
    }
})

const inputValue = ref('')

//定义暴露的参数
defineExpose({
    inputValue
})
</script>

<template>
  <div class="container">
    <div>{{ props.labelName }}</div>
    <input type="text" v-model="inputValue" class="input">
  </div>
</template>

<style scoped>

.container {
  width: 100%;
  height: 100%;
}
.input {
    width: 100%;
    height: auto;
    line-height: 100%;
    font-size: 18px;
}
</style>
【子组件向父组件暴露参数/方法】App.vue
父组件给子组件传递一个“ref”,后续使用ref的value方法获取组件暴露的变量
<script setup>
import { ref } from 'vue'
import myInput from './components/child.vue'
const name = ref('用户名')
// 使用ref获取子组件的DOM节点
const input = ref(null)

function clearInput() {
    input.value.inputValue = ''
}
</script>

<template>
  <div class="container">
      <myInput
        labelName="用户名"
        ref="input"
      />
      <button @click="clearInput">清空</button>
  </div>
</template>

<style scoped>
.container {
    width: 300px;
    height: auto;
    margin: 20px auto;
}
</style>
点击后,输入框中的内容成功被清除。
此时,我们又多了一个需求:“输入框中值为子字符串’abcd‘时,向父组件发出信号(执行父组件的方法)”
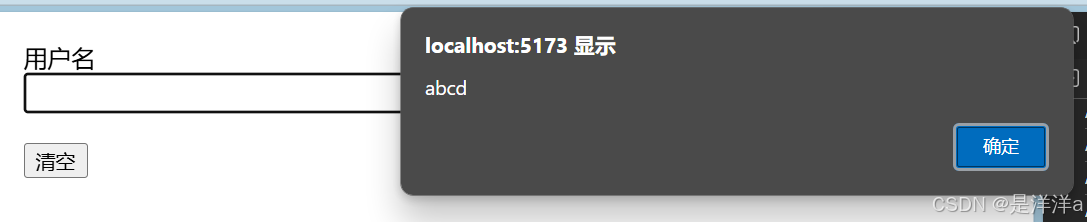
在这里为方便起见,当输入框出现abcd时,父组件接收子组件的值,并且弹窗提醒。
秉持着,父组件尽量不应破坏子组件的原则,检测字符串的任务应交由“子组件child.vue”完成,弹窗提醒交由“父组件App.vue”
弹窗提醒交给父组件是为了保证:当出现abcd时,父组件可以根据场景灵活的选择处理方案。
【子组件向父组件传递参数/方法】child.vue
这里使用defineEmits方法(需要import导入最新版本已不需要导入),用来向主动的向父组件传递参数
<script setup>
import { ref,defineEmits } from 'vue'

// 定义外部参数
const props = defineProps({
    labelName:{
        type: String,
        default: '测试'
    }
})

const inputValue = ref('')

//定义暴露的参数
defineExpose({
    inputValue
})

// 定义事件
const emit = defineEmits(['customInput'])

function watchValue() {
    if (inputValue.value == 'abcd'){
        emit('customInput', inputValue.value);
    }
}
</script>

<template>
  <div class="container">
    <div>{{ props.labelName }}</div>
    <input type="text" v-model="inputValue" class="input" @input="watchValue">
  </div>
</template>

<style scoped>

.container {
  width: 100%;
  height: 100%;
}
.input {
    width: 100%;
    height: auto;
    line-height: 100%;
    font-size: 18px;
}
</style>
【子组件向父组件传递参数/方法】App.vue
<script setup>
import { ref } from 'vue'
import myInput from './components/child.vue'
const name = ref('用户名')
// 使用ref获取子组件的DOM节点
const input = ref(null)

function clearInput() {
    input.value.inputValue = ''
}
function Pop(value){
  console.log(value);
  alert(value);
}
</script>

<template>
  <div class="container">
      <myInput
        labelName="用户名"
        ref="input"
        @customInput="Pop"
      />
      <button @click="clearInput">清空</button>
  </div>
</template>

<style scoped>
.container {
    width: 300px;
    height: auto;
    margin: 20px auto;
}
</style>
效果:
总结
- 子组件主动的向父组件传递消息:使用defineEmits
- 子组件被动的接收父组件传递消息:使用defineExpose
- 子组件初始化的接收父组件传递消息:使用defineProps
四、defineProps、defineEmits、defineExpose方法介绍
defineProps、defineEmits
- defineProps和defineEmits只能在<script setup>中使用,不需要被导入
- defineProps和defineEmits可以对传入值进行类型约束
const props = defineProps({
    test:{
        type: String,
        default: '测试',
        required: true,
        validator:(value) => {
          if (value.length > 5){
            return false
          }
          else {
            return true
          }
        }
    }
})- type:指定prop的类型,例如String、Number、Boolean、Object、Array、Func
- default:指定prop默认值
- required:表明该prop是否为必需项
- validator:自定义验证函数,用于对传入的prop值进行验证,返回true表示验证通过,返回false表示验证失败
响应式Props结构:
在Vue3.5及以上版本中,从defineProps返回值解构出的变量是响应式的。
const { foo } = defineProps(['foo'])// 使用数组形式定义事件
const emit = defineEmits(['messageSent']);
// 或者使用对象形式定义事件并进行参数验证
// const emit = defineEmits({
// messageSent: (payload) => {
// if (typeof payload === 'string') {
// return true;
// } else {
// console.warn('messageSent 事件的参数必须是字符串');
// return false;
// }
// }
// });- 使用对象形式定义事件时,以键值对的形式,对参数进行验证
defineExpose
子组件
<template>
  <div>
    <p>子组件内容</p>
  </div>
</template>

<script setup>
import { ref } from 'vue';

// 定义子组件内部的响应式数据
const innerCount = ref(0);

// 定义子组件内部的方法
const increment = () => {
  innerCount.value++;
};

// 使用 defineExpose 暴露属性和方法
defineExpose({
  innerCount,
  increment
});
</script>

<style scoped>
/* 子组件样式 */
</style>
父组件
<template>
  <div>
    <ChildComponent ref="childRef" />
    <button @click="callChildMethod">调用子组件方法</button>
    <p>子组件的计数: {{ childRef?.innerCount }}</p>
  </div>
</template>

<script setup>
import { ref } from 'vue';
import ChildComponent from './ChildComponent.vue';

// 创建一个 ref 来引用子组件
const childRef = ref(null);

// 调用子组件暴露的方法
const callChildMethod = () => {
  if (childRef.value) {
    childRef.value.increment();
  }
};
</script>

<style scoped>
/* 父组件样式 */
</style>