Linux 安装 Elasticsearch:避坑指南 + 性能调优实战
为什么选择 Elasticsearch?
在开始安装前,我们先简单了解一下为什么 Elasticsearch 成为了当今最流行的搜索引擎之一。
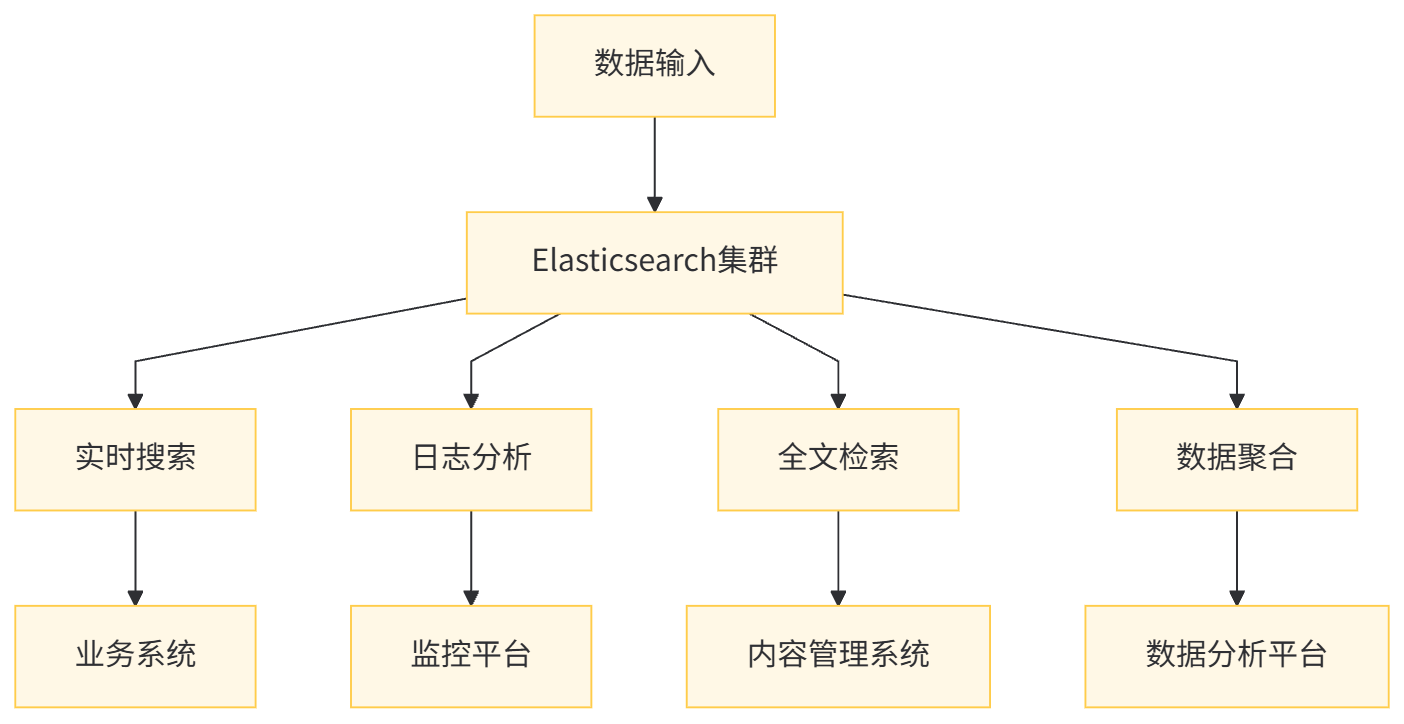
Elasticsearch 是一个基于 Lucene 的分布式、RESTful 风格的搜索和数据分析引擎,具有以下核心优势:
- 实时搜索:毫秒级响应速度
- 分布式架构:易于扩展,可处理 PB 级数据
- 多租户支持:多个索引和类型
- 丰富的查询 DSL:支持复杂查询场景
- 强大的聚合分析:支持复杂数据分析
环境准备与系统要求
在安装 Elasticsearch 之前,我们需要确保系统满足以下要求:
操作系统要求
Elasticsearch 支持多种 Linux 发行版,本文将以 CentOS 8 为例进行讲解,其他发行版的操作类似。
硬件要求
- 最低配置:2 核 CPU,4GB 内存
- 推荐配置:4 核 CPU,8GB 内存(生产环境)
依赖检查
Elasticsearch 需要 Java 环境支持,我们需要安装 Java Development Kit (JDK)。从 Elasticsearch 7.0 开始,官方推荐使用 Java 11。
# 检查是否已安装Java
java -version# 如果未安装,执行以下命令安装OpenJDK 11
sudo dnf install java-11-openjdk-devel -y# 验证安装
java -version
成功安装后,应该看到类似以下输出:
openjdk version "11.0.16" 2022-07-19 LTS
OpenJDK Runtime Environment (Red_Hat-11.0.16.0.8-1.el8_6) (build 11.0.16+8-LTS)
OpenJDK 64-Bit Server VM (Red_Hat-11.0.16.0.8-1.el8_6) (build 11.0.16+8-LTS, mixed mode, sharing)
网络要求
Elasticsearch 默认使用以下端口:
- 9200:HTTP REST API 端口
- 9300:节点间通信端口
确保这些端口在防火墙中开放:
# 开放9200和9300端口
sudo firewall-cmd --zone=public --add-port=9200/tcp --permanent
sudo firewall-cmd --zone=public --add-port=9300/tcp --permanent
sudo firewall-cmd --reload
Elasticsearch 安装步骤
创建专用用户
Elasticsearch 不建议使用 root 用户运行,我们需要创建一个专用用户:
# 创建elasticsearch用户组
sudo groupadd elasticsearch# 创建elasticsearch用户并加入用户组
sudo useradd -m -g elasticsearch elasticsearch# 设置密码(可选)
sudo passwd elasticsearch
下载并安装 Elasticsearch
我们将安装最新的稳定版本 Elasticsearch 8.6.0:
# 切换到临时目录
cd /tmp# 下载Elasticsearch
wget https://artifacts.elastic.co/downloads/elasticsearch/elasticsearch-8.6.0-linux-x86_64.tar.gz# 验证文件完整性(可选但推荐)
wget https://artifacts.elastic.co/downloads/elasticsearch/elasticsearch-8.6.0-linux-x86_64.tar.gz.sha512
shasum -a 512 -c elasticsearch-8.6.0-linux-x86_64.tar.gz.sha512 # 解压文件
tar -xzf elasticsearch-8.6.0-linux-x86_64.tar.gz# 移动到安装目录
sudo mv elasticsearch-8.6.0 /usr/local/elasticsearch# 修改目录权限
sudo chown -R elasticsearch:elasticsearch /usr/local/elasticsearch
系统配置优化
为了让 Elasticsearch 运行更稳定,我们需要调整一些系统参数:
- 增加虚拟内存区域数量
Elasticsearch 需要大量的虚拟内存,我们需要调整 vm.max_map_count 参数:
# 临时设置
sudo sysctl -w vm.max_map_count=262144# 永久设置(重启生效)
echo "vm.max_map_count=262144" | sudo tee -a /etc/sysctl.conf# 验证设置
sysctl vm.max_map_count
- 调整文件描述符限制
Elasticsearch 需要能够打开大量文件描述符:
# 编辑limits.conf文件
sudo vi /etc/security/limits.conf# 在文件末尾添加以下内容
elasticsearch soft nofile 65536
elasticsearch hard nofile 65536
elasticsearch soft nproc 4096
elasticsearch hard nproc 4096
- 调整系统资源限制
# 编辑配置文件
sudo vi /etc/systemd/system.conf# 添加以下内容
DefaultLimitNOFILE=65536
DefaultLimitNPROC=4096
DefaultLimitMEMLOCK=infinity# 重新加载系统配置
sudo systemctl daemon-reexec
配置 Elasticsearch
Elasticsearch 的主要配置文件位于/usr/local/elasticsearch/config/elasticsearch.yml,我们需要根据实际需求进行配置:
# 切换到elasticsearch用户
sudo su - elasticsearch# 编辑配置文件
vi /usr/local/elasticsearch/config/elasticsearch.yml
基本配置示例:
# 集群名称,同一集群中的所有节点必须使用相同的名称
cluster.name: my-elasticsearch-cluster# 节点名称,每个节点应具有唯一的名称
node.name: node-1# 数据存储路径
path.data: /var/lib/elasticsearch# 日志存储路径
path.logs: /var/log/elasticsearch# 绑定的网络接口,0.0.0.0表示所有接口
network.host: 0.0.0.0# HTTP端口
http.port: 9200# 节点间通信端口
transport.port: 9300# 初始主节点
cluster.initial_master_nodes: ["node-1"]# 允许跨域访问(开发环境)
http.cors.enabled: true
http.cors.allow-origin: "*"# 禁用安全特性(开发环境,生产环境请启用并配置)
xpack.security.enabled: false
注意:在生产环境中,强烈建议启用 xpack.security 并进行相应配置,以确保集群安全。
创建数据和日志目录并设置权限:
# 退出elasticsearch用户,回到root
exit# 创建数据和日志目录
sudo mkdir -p /var/lib/elasticsearch /var/log/elasticsearch# 设置权限
sudo chown -R elasticsearch:elasticsearch /var/lib/elasticsearch
sudo chown -R elasticsearch:elasticsearch /var/log/elasticsearch
内存配置
Elasticsearch 对内存使用非常敏感,我们需要合理配置 JVM 参数:
# 切换到elasticsearch用户
sudo su - elasticsearch# 编辑jvm.options文件
vi /usr/local/elasticsearch/config/jvm.options
根据服务器内存大小调整堆内存:
# 设置堆内存大小,通常为物理内存的一半,但不超过31GB
-Xms4g
-Xmx4g
注意:Elasticsearch 的堆内存不宜设置过大,过大的堆内存会导致垃圾回收时间过长,影响性能。同时,32GB 是一个临界点,超过这个值可以考虑使用压缩普通对象指针 (Compressed Oops)。
启动 Elasticsearch
# 切换到elasticsearch用户
sudo su - elasticsearch# 启动Elasticsearch(后台运行)
/usr/local/elasticsearch/bin/elasticsearch -d# 查看日志,确认启动情况
tail -f /var/log/elasticsearch/my-elasticsearch-cluster.log
成功启动后,日志中会出现类似以下内容:
[2023-03-15T10:00:00,000][INFO ][o.e.n.Node ] [node-1] started
验证安装
打开另一个终端,执行以下命令验证 Elasticsearch 是否正常运行:
# 检查集群健康状态
curl http://localhost:9200/_cluster/health?pretty
正常情况下,会返回类似以下结果:
{"cluster_name" : "my-elasticsearch-cluster","status" : "green","timed_out" : false,"number_of_nodes" : 1,"number_of_data_nodes" : 1,"active_primary_shards" : 0,"active_shards" : 0,"relocating_shards" : 0,"initializing_shards" : 0,"unassigned_shards" : 0,"delayed_unassigned_shards" : 0,"number_of_pending_tasks" : 0,"number_of_in_flight_fetch" : 0,"task_max_waiting_in_queue_millis" : 0,"active_shards_percent_as_number" : 100.0
}
其中 "status" 为 "green" 表示集群健康状态良好。
设置为系统服务
为了方便管理,我们可以将 Elasticsearch 设置为系统服务:
# 创建服务文件
sudo vi /etc/systemd/system/elasticsearch.service
添加以下内容:
[Unit]
Description=Elasticsearch
Documentation=https://www.elastic.co
Wants=network-online.target
After=network-online.target[Service]
User=elasticsearch
Group=elasticsearch
Environment="ES_HOME=/usr/local/elasticsearch"
Environment="ES_PATH_CONF=/usr/local/elasticsearch/config"
Environment="PID_DIR=/var/run/elasticsearch"
ExecStart=/usr/local/elasticsearch/bin/elasticsearch
Restart=always
WorkingDirectory=/usr/local/elasticsearch
LimitNOFILE=65536
LimitNPROC=4096
LimitMEMLOCK=infinity[Install]
WantedBy=multi-user.target
创建 PID 目录并设置权限:
sudo mkdir -p /var/run/elasticsearch
sudo chown -R elasticsearch:elasticsearch /var/run/elasticsearch
现在可以使用 systemctl 命令管理 Elasticsearch:
# 重新加载系统服务
sudo systemctl daemon-reload# 启动服务
sudo systemctl start elasticsearch# 停止服务
sudo systemctl stop elasticsearch# 重启服务
sudo systemctl restart elasticsearch# 设置开机自启
sudo systemctl enable elasticsearch# 查看服务状态
sudo systemctl status elasticsearch
配置 Elasticsearch 安全特性
在生产环境中,必须启用 Elasticsearch 的安全特性,包括身份验证、授权、加密通信等。
启用安全特性
编辑 elasticsearch.yml 文件,启用 xpack.security:
sudo su - elasticsearch
vi /usr/local/elasticsearch/config/elasticsearch.yml
修改以下配置:
# 启用安全特性
xpack.security.enabled: true# 启用节点间加密通信
xpack.security.transport.ssl.enabled: true
重启 Elasticsearch:
exit  # 退出elasticsearch用户
sudo systemctl restart elasticsearch
设置内置用户密码
Elasticsearch 提供了几个内置用户,我们需要为这些用户设置密码:
sudo su - elasticsearch
/usr/local/elasticsearch/bin/elasticsearch-setup-passwords interactive
按照提示为每个用户设置密码:
Initiating the setup of passwords for reserved users elastic,apm_system,kibana,kibana_system,logstash_system,beats_system,remote_monitoring_user.
You will be prompted to enter passwords as the process progresses.
Please confirm that you would like to continue [y/N]yEnter password for [elastic]:
Reenter password for [elastic]:
Enter password for [apm_system]:
Reenter password for [apm_system]:
Enter password for [kibana_system]:
Reenter password for [kibana_system]:
Enter password for [logstash_system]:
Reenter password for [logstash_system]:
Enter password for [beats_system]:
Reenter password for [beats_system]:
Enter password for [remote_monitoring_user]:
Reenter password for [remote_monitoring_user]:
Changed password for user [apm_system]
Changed password for user [kibana_system]
Changed password for user [kibana]
Changed password for user [logstash_system]
Changed password for user [beats_system]
Changed password for user [remote_monitoring_user]
Changed password for user [elastic]
现在验证需要密码才能访问:
# 使用用户名密码访问
curl -u elastic:your_password http://localhost:9200/_cluster/health?pretty
配置 Elasticsearch 集群
在生产环境中,通常需要部署 Elasticsearch 集群以提高可用性和性能。下面我们介绍如何配置一个包含 3 个节点的集群。
假设我们有 3 台服务器:
- node1: 192.168.1.101
- node2: 192.168.1.102
- node3: 192.168.1.103
在每个节点上按照前面的步骤安装 Elasticsearch,然后分别配置 elasticsearch.yml 文件。
node1 配置
cluster.name: my-elasticsearch-cluster
node.name: node-1
node.master: true
node.data: true
path.data: /var/lib/elasticsearch
path.logs: /var/log/elasticsearch
network.host: 192.168.1.101
http.port: 9200
transport.port: 9300
discovery.seed_hosts: ["192.168.1.101:9300", "192.168.1.102:9300", "192.168.1.103:9300"]
cluster.initial_master_nodes: ["node-1", "node-2", "node-3"]
xpack.security.enabled: true
xpack.security.transport.ssl.enabled: true
xpack.security.transport.ssl.verification_mode: certificate
xpack.security.transport.ssl.client_authentication: required
xpack.security.transport.ssl.keystore.path: certs/elastic-certificates.p12
xpack.security.transport.ssl.truststore.path: certs/elastic-certificates.p12
node2 配置
cluster.name: my-elasticsearch-cluster
node.name: node-2
node.master: true
node.data: true
path.data: /var/lib/elasticsearch
path.logs: /var/log/elasticsearch
network.host: 192.168.1.102
http.port: 9200
transport.port: 9300
discovery.seed_hosts: ["192.168.1.101:9300", "192.168.1.102:9300", "192.168.1.103:9300"]
cluster.initial_master_nodes: ["node-1", "node-2", "node-3"]
xpack.security.enabled: true
xpack.security.transport.ssl.enabled: true
xpack.security.transport.ssl.verification_mode: certificate
xpack.security.transport.ssl.client_authentication: required
xpack.security.transport.ssl.keystore.path: certs/elastic-certificates.p12
xpack.security.transport.ssl.truststore.path: certs/elastic-certificates.p12
node3 配置
cluster.name: my-elasticsearch-cluster
node.name: node-3
node.master: true
node.data: true
path.data: /var/lib/elasticsearch
path.logs: /var/log/elasticsearch
network.host: 192.168.1.103
http.port: 9200
transport.port: 9300
discovery.seed_hosts: ["192.168.1.101:9300", "192.168.1.102:9300", "192.168.1.103:9300"]
cluster.initial_master_nodes: ["node-1", "node-2", "node-3"]
xpack.security.enabled: true
xpack.security.transport.ssl.enabled: true
xpack.security.transport.ssl.verification_mode: certificate
xpack.security.transport.ssl.client_authentication: required
xpack.security.transport.ssl.keystore.path: certs/elastic-certificates.p12
xpack.security.transport.ssl.truststore.path: certs/elastic-certificates.p12
配置集群 SSL 证书
为了确保节点间通信的安全性,我们需要生成 SSL 证书并在所有节点上使用:
# 在node1上生成证书
sudo su - elasticsearch
cd /usr/local/elasticsearch
bin/elasticsearch-certutil cert -out config/certs/elastic-certificates.p12 -pass ""# 设置证书权限
chmod 644 config/certs/elastic-certificates.p12
将生成的证书复制到其他节点:
# 在node1上执行,将证书复制到node2
scp /usr/local/elasticsearch/config/certs/elastic-certificates.p12 elasticsearch@192.168.1.102:/usr/local/elasticsearch/config/certs/# 将证书复制到node3
scp /usr/local/elasticsearch/config/certs/elastic-certificates.p12 elasticsearch@192.168.1.103:/usr/local/elasticsearch/config/certs/
在 node2 和 node3 上设置证书权限:
sudo su - elasticsearch
chmod 644 /usr/local/elasticsearch/config/certs/elastic-certificates.p12
启动集群
在所有节点上启动 Elasticsearch:
exit  # 退出elasticsearch用户
sudo systemctl start elasticsearch
验证集群状态:
curl -u elastic:your_password http://192.168.1.101:9200/_cluster/health?pretty
健康的集群会返回:
{"cluster_name" : "my-elasticsearch-cluster","status" : "green","timed_out" : false,"number_of_nodes" : 3,"number_of_data_nodes" : 3,"active_primary_shards" : 0,"active_shards" : 0,"relocating_shards" : 0,"initializing_shards" : 0,"unassigned_shards" : 0,"delayed_unassigned_shards" : 0,"number_of_pending_tasks" : 0,"number_of_in_flight_fetch" : 0,"task_max_waiting_in_queue_millis" : 0,"active_shards_percent_as_number" : 100.0
}
查看集群节点信息:
curl -u elastic:your_password http://192.168.1.101:9200/_cat/nodes?v
Elasticsearch 基本操作
创建索引
# 创建一个名为"products"的索引
curl -u elastic:your_password -X PUT "http://localhost:9200/products?pretty" -H 'Content-Type: application/json' -d'
{"settings": {"number_of_shards": 3,"number_of_replicas": 1},"mappings": {"properties": {"name": { "type": "text" },"price": { "type": "double" },"category": { "type": "keyword" },"created_at": { "type": "date" }}}
}
'
添加文档
# 添加文档
curl -u elastic:your_password -X POST "http://localhost:9200/products/_doc/1?pretty" -H 'Content-Type: application/json' -d'
{"name": "iPhone 14","price": 7999.00,"category": "手机","created_at": "2023-03-15T10:00:00Z"
}
'# 批量添加文档
curl -u elastic:your_password -X POST "http://localhost:9200/products/_bulk?pretty" -H 'Content-Type: application/json' -d'
{"index":{"_id":"2"}}
{"name":"Samsung Galaxy S23","price":6999.00,"category":"手机","created_at":"2023-03-15T10:30:00Z"}
{"index":{"_id":"3"}}
{"name":"MacBook Pro 16","price":18999.00,"category":"笔记本电脑","created_at":"2023-03-15T11:00:00Z"}
{"index":{"_id":"4"}}
{"name":"Dell XPS 15","price":12999.00,"category":"笔记本电脑","created_at":"2023-03-15T11:30:00Z"}
'
查询文档
# 查询所有文档
curl -u elastic:your_password -X GET "http://localhost:9200/products/_search?pretty" -H 'Content-Type: application/json' -d'
{"query": {"match_all": {}}
}
'# 按条件查询
curl -u elastic:your_password -X GET "http://localhost:9200/products/_search?pretty" -H 'Content-Type: application/json' -d'
{"query": {"match": {"category": "手机"}}
}
'# 范围查询
curl -u elastic:your_password -X GET "http://localhost:9200/products/_search?pretty" -H 'Content-Type: application/json' -d'
{"query": {"range": {"price": {"gte": 8000,"lte": 20000}}}
}
'
更新文档
# 更新文档
curl -u elastic:your_password -X POST "http://localhost:9200/products/_update/1?pretty" -H 'Content-Type: application/json' -d'
{"doc": {"price": 8499.00}
}
'
删除文档
# 删除文档
curl -u elastic:your_password -X DELETE "http://localhost:9200/products/_doc/1?pretty"# 删除索引
curl -u elastic:your_password -X DELETE "http://localhost:9200/products?pretty"
Elasticsearch 性能调优
JVM 调优
- 堆内存设置
如前所述,堆内存通常设置为物理内存的一半,但不超过 31GB:
-Xms8g
-Xmx8g
- 垃圾回收器选择
对于 Elasticsearch,推荐使用 G1 垃圾回收器:
-XX:+UseG1GC
-XX:MaxGCPauseMillis=50
- 内存锁定
确保 Elasticsearch 能够锁定内存,防止被交换到磁盘:
-Xms8g
-Xmx8g
-XX:+AlwaysPreTouch
-XX:+UseG1GC
-XX:MaxGCPauseMillis=50
-XX:+HeapDumpOnOutOfMemoryError
-XX:HeapDumpPath=/var/log/elasticsearch/heapdump.hprof
并在 elasticsearch.yml 中添加:
bootstrap.memory_lock: true
索引优化
- 合理设置分片和副本
- 分片数量:通常每个分片的大小建议在 20GB 到 50GB 之间
- 副本数量:根据可用性需求设置,生产环境建议至少 1 个副本
# 索引默认设置
index.number_of_shards: 3
index.number_of_replicas: 1
- 索引刷新间隔
对于写入密集型应用,可以适当增加刷新间隔:
index.refresh_interval: 30s
- 字段映射优化
- 对不需要分词的字段使用 keyword 类型
- 合理设置 text 字段的 analyzer
- 禁用不需要的字段的_all 字段
操作系统优化
- 虚拟内存
vm.max_map_count=262144
- 文件系统
推荐使用 ext4 或 xfs 文件系统,并启用 noatime 选项:
/dev/sdX /var/lib/elasticsearch ext4 defaults,noatime 0 2
- 网络优化
# 增加TCP连接队列大小
net.core.somaxconn=65535# 增加文件描述符限制
fs.file-max=1000000
与 Java 应用集成
下面我们演示如何在 Java 应用中集成 Elasticsearch,使用最新的 Elasticsearch Java Client 8.6.0。
Maven 依赖
<dependencies><!-- Elasticsearch Java Client --><dependency><groupId>co.elastic.clients</groupId><artifactId>elasticsearch-java</artifactId><version>8.6.0</version></dependency><dependency><groupId>com.fasterxml.jackson.core</groupId><artifactId>jackson-databind</artifactId><version>2.14.2</version></dependency><!-- 日志 --><dependency><groupId>org.projectlombok</groupId><artifactId>lombok</artifactId><version>1.18.30</version><scope>provided</scope></dependency><!-- Spring Boot --><dependency><groupId>org.springframework.boot</groupId><artifactId>spring-boot-starter</artifactId><version>3.0.4</version></dependency><!-- Swagger3 --><dependency><groupId>org.springdoc</groupId><artifactId>springdoc-openapi-starter-webmvc-ui</artifactId><version>2.1.0</version></dependency>
</dependencies>
Elasticsearch 配置类
import co.elastic.clients.elasticsearch.ElasticsearchClient;
import co.elastic.clients.json.jackson.JacksonJsonpMapper;
import co.elastic.clients.transport.ElasticsearchTransport;
import co.elastic.clients.transport.rest_client.RestClientTransport;
import org.apache.http.HttpHost;
import org.apache.http.auth.AuthScope;
import org.apache.http.auth.UsernamePasswordCredentials;
import org.apache.http.client.CredentialsProvider;
import org.apache.http.impl.client.BasicCredentialsProvider;
import org.elasticsearch.client.RestClient;
import org.springframework.context.annotation.Bean;
import org.springframework.context.annotation.Configuration;
import lombok.extern.slf4j.Slf4j;/*** Elasticsearch配置类* * @author ken*/
@Configuration
@Slf4j
public class ElasticsearchConfig {/*** 创建Elasticsearch客户端* * @return ElasticsearchClient实例*/@Beanpublic ElasticsearchClient elasticsearchClient() {// 创建凭证提供器final CredentialsProvider credentialsProvider = new BasicCredentialsProvider();credentialsProvider.setCredentials(AuthScope.ANY,new UsernamePasswordCredentials("elastic", "your_password"));// 创建REST客户端RestClient restClient = RestClient.builder(new HttpHost("localhost", 9200, "http")).setHttpClientConfigCallback(httpClientBuilder -> httpClientBuilder.setDefaultCredentialsProvider(credentialsProvider)).build();// 创建传输层ElasticsearchTransport transport = new RestClientTransport(restClient, new JacksonJsonpMapper());// 创建API客户端ElasticsearchClient client = new ElasticsearchClient(transport);log.info("Elasticsearch client initialized successfully");return client;}
}
实体类
import co.elastic.clients.elasticsearch._types.mapping.DateProperty;
import co.elastic.clients.elasticsearch._types.mapping.DoubleProperty;
import co.elastic.clients.elasticsearch._types.mapping.KeywordProperty;
import co.elastic.clients.elasticsearch._types.mapping.TextProperty;
import co.elastic.clients.elasticsearch._types.mapping.TypeMapping;
import co.elastic.clients.json.JsonData;
import co.elastic.clients.json.jackson.JacksonJsonpMapper;
import com.fasterxml.jackson.annotation.JsonFormat;
import lombok.Data;
import java.time.LocalDateTime;
import java.util.HashMap;
import java.util.Map;/*** 产品实体类* * @author ken*/
@Data
public class Product {private String id;private String name;private Double price;private String category;@JsonFormat(pattern = "yyyy-MM-dd'T'HH:mm:ss'Z'")private LocalDateTime createdAt;/*** 获取产品索引的映射配置* * @return TypeMapping实例*/public static TypeMapping getMapping() {Map<String, JsonData> properties = new HashMap<>();// 名称字段:text类型,支持分词搜索TextProperty nameProperty = new TextProperty.Builder().build();properties.put("name", JsonData.of(nameProperty, new JacksonJsonpMapper()));// 价格字段:double类型DoubleProperty priceProperty = new DoubleProperty.Builder().build();properties.put("price", JsonData.of(priceProperty, new JacksonJsonpMapper()));// 分类字段:keyword类型,支持精确匹配和聚合KeywordProperty categoryProperty = new KeywordProperty.Builder().build();properties.put("category", JsonData.of(categoryProperty, new JacksonJsonpMapper()));// 创建时间字段:date类型DateProperty createdAtProperty = new DateProperty.Builder().format("yyyy-MM-dd'T'HH:mm:ss'Z'").build();properties.put("createdAt", JsonData.of(createdAtProperty, new JacksonJsonpMapper()));return new TypeMapping.Builder().properties(properties).build();}
}
服务类
import co.elastic.clients.elasticsearch.ElasticsearchClient;
import co.elastic.clients.elasticsearch._types.query_dsl.MatchQuery;
import co.elastic.clients.elasticsearch._types.query_dsl.Query;
import co.elastic.clients.elasticsearch.core.*;
import co.elastic.clients.elasticsearch.core.search.Hit;
import co.elastic.clients.elasticsearch.indices.CreateIndexRequest;
import co.elastic.clients.elasticsearch.indices.CreateIndexResponse;
import co.elastic.clients.elasticsearch.indices.ExistsRequest;
import lombok.RequiredArgsConstructor;
import lombok.extern.slf4j.Slf4j;
import org.springframework.stereotype.Service;
import org.springframework.util.ObjectUtils;
import java.io.IOException;
import java.util.List;
import java.util.stream.Collectors;/*** 产品服务类,提供与Elasticsearch交互的方法* * @author ken*/
@Service
@RequiredArgsConstructor
@Slf4j
public class ProductService {private final ElasticsearchClient elasticsearchClient;private static final String INDEX_NAME = "products";/*** 创建产品索引* * @return 是否创建成功* @throws IOException 当Elasticsearch操作失败时抛出*/public boolean createProductIndex() throws IOException {// 检查索引是否已存在boolean exists = elasticsearchClient.indices().exists(ExistsRequest.of(e -> e.index(INDEX_NAME)));if (exists) {log.info("Index {} already exists", INDEX_NAME);return false;}// 创建索引CreateIndexRequest request = CreateIndexRequest.of(c -> c.index(INDEX_NAME).mappings(Product.getMapping()).settings(s -> s.numberOfShards("3").numberOfReplicas("1")));CreateIndexResponse response = elasticsearchClient.indices().create(request);log.info("Index {} created: {}", INDEX_NAME, response.acknowledged());return response.acknowledged();}/*** 保存产品* * @param product 产品对象* @return 保存的产品ID* @throws IOException 当Elasticsearch操作失败时抛出*/public String saveProduct(Product product) throws IOException {IndexRequest<Product> request;if (ObjectUtils.isEmpty(product.getId())) {// 生成IDrequest = IndexRequest.of(i -> i.index(INDEX_NAME).document(product));} else {// 使用指定IDrequest = IndexRequest.of(i -> i.index(INDEX_NAME).id(product.getId()).document(product));}IndexResponse response = elasticsearchClient.index(request);log.info("Product saved with id: {}", response.id());return response.id();}/*** 根据ID获取产品* * @param id 产品ID* @return 产品对象,若不存在则返回null* @throws IOException 当Elasticsearch操作失败时抛出*/public Product getProductById(String id) throws IOException {GetResponse<Product> response = elasticsearchClient.get(g -> g.index(INDEX_NAME).id(id), Product.class);if (response.found()) {Product product = response.source();product.setId(response.id());return product;} else {log.info("Product with id {} not found", id);return null;}}/*** 搜索产品* * @param keyword 搜索关键词* @return 产品列表* @throws IOException 当Elasticsearch操作失败时抛出*/public List<Product> searchProducts(String keyword) throws IOException {// 创建匹配查询Query query = MatchQuery.of(m -> m.field("name").query(keyword))._toQuery();// 执行搜索SearchResponse<Product> response = elasticsearchClient.search(s -> s.index(INDEX_NAME).query(query), Product.class);// 处理搜索结果List<Hit<Product>> hits = response.hits().hits();return hits.stream().map(hit -> {Product product = hit.source();product.setId(hit.id());return product;}).collect(Collectors.toList());}/*** 删除产品* * @param id 产品ID* @return 是否删除成功* @throws IOException 当Elasticsearch操作失败时抛出*/public boolean deleteProduct(String id) throws IOException {DeleteResponse response = elasticsearchClient.delete(d -> d.index(INDEX_NAME).id(id));log.info("Product with id {} deleted: {}", id, response.result().name());return response.result() == co.elastic.clients.elasticsearch._types.Result.Deleted;}
}
控制器类
import io.swagger.v3.oas.annotations.Operation;
import io.swagger.v3.oas.annotations.Parameter;
import io.swagger.v3.oas.annotations.tags.Tag;
import lombok.RequiredArgsConstructor;
import lombok.extern.slf4j.Slf4j;
import org.springframework.http.HttpStatus;
import org.springframework.http.ResponseEntity;
import org.springframework.util.StringUtils;
import org.springframework.web.bind.annotation.*;
import java.io.IOException;
import java.util.List;/*** 产品控制器,提供REST API接口* * @author ken*/
@RestController
@RequestMapping("/api/products")
@RequiredArgsConstructor
@Slf4j
@Tag(name = "产品管理", description = "产品的CRUD和搜索接口")
public class ProductController {private final ProductService productService;@Operation(summary = "创建产品索引")@PostMapping("/index")public ResponseEntity<Boolean> createIndex() {try {boolean result = productService.createProductIndex();return ResponseEntity.ok(result);} catch (IOException e) {log.error("Failed to create index", e);return ResponseEntity.status(HttpStatus.INTERNAL_SERVER_ERROR).body(false);}}@Operation(summary = "保存产品")@PostMappingpublic ResponseEntity<String> saveProduct(@Parameter(description = "产品对象") @RequestBody Product product) {try {String id = productService.saveProduct(product);return ResponseEntity.ok(id);} catch (IOException e) {log.error("Failed to save product", e);return ResponseEntity.status(HttpStatus.INTERNAL_SERVER_ERROR).body(null);}}@Operation(summary = "根据ID获取产品")@GetMapping("/{id}")public ResponseEntity<Product> getProduct(@Parameter(description = "产品ID") @PathVariable String id) {try {Product product = productService.getProductById(id);if (product != null) {return ResponseEntity.ok(product);} else {return ResponseEntity.notFound().build();}} catch (IOException e) {log.error("Failed to get product", e);return ResponseEntity.status(HttpStatus.INTERNAL_SERVER_ERROR).body(null);}}@Operation(summary = "搜索产品")@GetMapping("/search")public ResponseEntity<List<Product>> searchProducts(@Parameter(description = "搜索关键词") @RequestParam String keyword) {try {StringUtils.hasText(keyword, "搜索关键词不能为空");List<Product> products = productService.searchProducts(keyword);return ResponseEntity.ok(products);} catch (IllegalArgumentException e) {return ResponseEntity.badRequest().body(null);} catch (IOException e) {log.error("Failed to search products", e);return ResponseEntity.status(HttpStatus.INTERNAL_SERVER_ERROR).body(null);}}@Operation(summary = "删除产品")@DeleteMapping("/{id}")public ResponseEntity<Boolean> deleteProduct(@Parameter(description = "产品ID") @PathVariable String id) {try {boolean result = productService.deleteProduct(id);return ResponseEntity.ok(result);} catch (IOException e) {log.error("Failed to delete product", e);return ResponseEntity.status(HttpStatus.INTERNAL_SERVER_ERROR).body(false);}}
}
常见问题与解决方案
1. 启动失败:max virtual memory areas vm.max_map_count [65530] is too low
解决方案:
# 临时设置
sudo sysctl -w vm.max_map_count=262144# 永久设置
echo "vm.max_map_count=262144" | sudo tee -a /etc/sysctl.conf
2. 启动失败:memory locking requested for elasticsearch process but memory is not locked
解决方案:
- 确保 elasticsearch.yml 中配置了:
bootstrap.memory_lock: true
- 确保系统配置中设置了:
LimitMEMLOCK=infinity
- 重启 Elasticsearch 服务
3. 集群节点无法发现彼此
解决方案:
- 检查 discovery.seed_hosts 和 cluster.initial_master_nodes 配置是否正确
- 确保节点间 9300 端口能够通信
- 检查防火墙设置
- 对于启用了安全特性的集群,确保 SSL 证书配置正确
4. 堆内存溢出
解决方案:
- 检查 JVM 堆内存设置是否合理
- 分析堆转储文件,查找内存泄漏
- 优化查询和索引操作,避免一次性加载过多数据
- 考虑增加服务器内存或扩展集群
总结
本文详细介绍了在 Linux 环境下安装和配置 Elasticsearch 的全过程,从单节点部署到集群配置,从基本操作到性能调优,再到与 Java 应用的集成。通过遵循本文的步骤,你应该能够成功部署一个稳定、高效的 Elasticsearch 环境。