Three.js 核心技术:相机(正交 / 透视)、动画与资源加载、音视频播放、事件绑定等解析
Three.js 核心技术:相机(正交 / 透视)、动画与资源加载、音视频播放、事件绑定等解析
- 一、简介
- 二、正交相机使用
- 三、透视相机使用
- 四、动画
- 五、批量加载资源、音视频播放、事件绑定
一、简介
Three.js 是一个基于 WebGL 的 JavaScript 3D 库,它简化了在浏览器中创建和渲染 3D 图形的过程,让开发者无需深入掌握底层 WebGL 细节,就能快速实现高质量的 3D 交互效果。
核心特点
1.封装底层复杂性:WebGL 是浏览器渲染 3D 图形的底层 API,但直接使用 WebGL 需要处理大量图形学细节(如着色器、顶点缓冲、矩阵运算等)。Three.js 封装了这些复杂操作,提供简洁的 API,让开发者专注于 3D 场景逻辑。
2.跨平台兼容性:基于 Web 标准(HTML5 + JavaScript),可在所有支持 WebGL 的浏览器中运行(包括 PC、移动端),无需安装插件,直接通过网页访问。
3.丰富的功能模块,内置了创建 3D 场景所需的核心组件:
- 场景(Scene):3D 世界的容器,所有物体、灯光、相机都需要添加到场景中。
- 相机(Camera):模拟人眼视角,决定场景中哪些部分会被渲染(常用透视相机、正交相机)。
- 渲染器(Renderer):将场景和相机的 “视角” 渲染到 DOM 元素(如 )中。
- 几何体(Geometry):定义 3D 物体的形状(如立方体、球体、自定义模型)。
- 材质(Material):定义物体的外观(颜色、纹理、反光、透明度等)。
- 灯光(Light):照亮场景,影响物体的可见性和材质表现(如环境光、平行光、点光源)。
- 动画系统:支持物体位置、旋转、缩放的动画,以及骨骼动画、变形动画等。
- 交互支持:可通过射线投射(Raycaster)实现鼠标 / 触摸与 3D 物体的交互(如点击、选中)。
4.扩展性强:持加载外部 3D 模型(如 glTF、OBJ、FBX 等格式)、纹理图片、字体等资源,也可与其他库(如 React、Vue、GSAP 动画库)结合使用。
常见应用场景
1.数据可视化:用 3D 图表展示复杂数据(如人口分布、地形模型)。
2.游戏开发:浏览器端 3D 小游戏(如迷宫、解谜、休闲游戏)。
3.虚拟展示:产品 3D 预览(如家具、汽车)、虚拟展厅、博物馆数字化。
4.教育与仿真:3D 模型交互教学(如人体结构、化学分子)、物理仿真实验。
5.创意艺术:交互式 3D 艺术作品、动态视觉效果。
为什么选择 Three.js?
1.低门槛:对新手友好,无需深厚的图形学知识即可入门。
2.活跃社区:开源项目,文档丰富,社区问题解答及时,插件和示例资源多。
3.性能优化:内置多种性能优化方案(如层级渲染、实例化、LOD 细节层次),适合处理复杂场景。
简单来说,Three.js 是 Web 端 3D 开发的 “瑞士军刀”,让开发者能以更低成本在浏览器中实现媲美原生应用的 3D 体验
二、正交相机使用
在 three.js 中,正交相机(OrthographicCamera)是一种采用正交投影方式的相机,其核心特点是物体在渲染结果中显示的大小与物体到相机的距离无关,不会产生近大远小的透视效果,适合用于 2D 渲染、工程制图、UI 界面、等距视图等场景。正交投影中,相机的视锥体是一个长方体(轴对齐的平行六面体),而非透视相机的棱锥体。所有平行的线条在最终渲染中仍然保持平行,物体的尺寸在视图中保持一致,不会因距离相机远近而变化。
1.创建2D场景,原点为容器中心点
<template><div id="container" ref="threeRef"></div>
</template><script setup>
import * as THREE from 'three';
import { ref, onMounted } from 'vue';const threeRef = ref(null);// Vue组件挂载完成后执行的生命周期钩子
onMounted(async () => {// 获取Three.js渲染容器的DOM元素const container = threeRef.value;// 安全检查:确保容器存在,避免空指针错误if (!container) return;// 解构获取容器的实际宽度和高度(包含padding和border)const { offsetWidth: width, offsetHeight: height } = container;// ========== 场景设置 ==========// 创建三维场景,作为所有3D对象(网格、光源、相机等)的容器const scene = new THREE.Scene();// 设置场景背景颜色为白色(十六进制格式)scene.background = new THREE.Color('#ffffff');// ========== 相机设置 ==========const halfWidth = width / 2;const halfHeight = height / 2;// 创建正交投影相机(适合2D/UI元素,无透视变形,物体大小不随距离变化)const camera = new THREE.OrthographicCamera(-halfWidth, // left:左裁剪平面(基于宽高比调整,确保不失真)halfWidth, // right:右裁剪平面(与左边界对称)halfHeight, // top:上裁剪平面(从中心向上)-halfHeight, // bottom:下裁剪平面(从中心向下,与上边界对称)0.1, // near:近裁剪面,距离相机0.1单位内的物体不渲染1000 // far:远裁剪面,距离相机1000单位外的物体不渲染);// 设置相机在三维空间中的位置(X, Y, Z坐标)// Z=100将相机放置在场景前方足够远的位置,确保能看到整个可视区域camera.position.set(0, 0, 100);// 设置相机朝向场景的中心点(原点),确保相机正对场景camera.lookAt(0, 0, 0);// ========== 渲染器设置 ==========// 创建WebGL渲染器实例,用于将3D场景绘制到canvas上const renderer = new THREE.WebGLRenderer({antialias: true, // 开启抗锯齿,使3D模型边缘更平滑alpha: true // 开启透明度通道,允许CSS背景渐变透过canvas显示});// 设置渲染器输出canvas的尺寸,与容器大小一致renderer.setSize(width, height);// 设置设备像素比率,限制最大为2以平衡显示质量与性能renderer.setPixelRatio(Math.min(window.devicePixelRatio, 2));// 将渲染器的canvas元素添加到DOM容器中,开始显示3D内容container.appendChild(renderer.domElement);// ========== 光源设置 ==========// 创建环境光:提供均匀的场景基础照明,无方向性const ambientLight = new THREE.AmbientLight('#ffffff', 0.6); // 颜色白色,强度0.6scene.add(ambientLight);// 创建第一个方向光:模拟主光源,产生阴影和明暗效果const directionalLight1 = new THREE.DirectionalLight('#ffffff', 0.8); // 颜色白色,强度0.8directionalLight1.position.set(10, 10, 5); // 设置光源位置(右上前方)scene.add(directionalLight1);// 创建第二个方向光:作为补充光源,减少阴影区域的黑暗const directionalLight2 = new THREE.DirectionalLight('#ffffff', 0.4); // 颜色白色,强度0.4directionalLight2.position.set(-10, -10, -5); // 设置光源位置(左下后方)scene.add(directionalLight2);renderer.render(scene, camera);
});</script><style lang="scss" scoped>
#container {width: 100%;height: 100%;
}
</style>
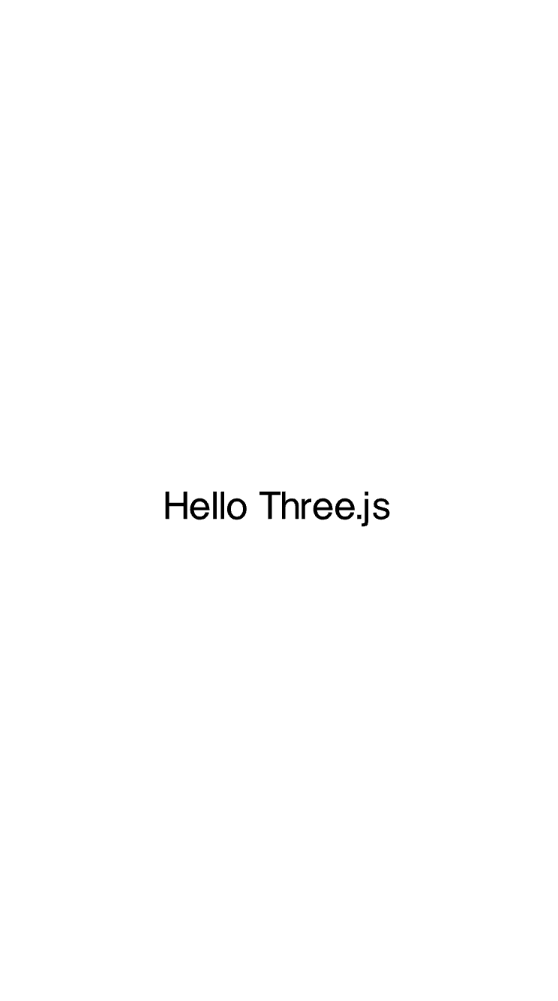
2.绘制文本,绘制文本需用到字体json,字体文件转json:https://gero3.github.io/facetype.js/
<template><div id="container" ref="threeRef"></div>
</template><script setup>
import * as THREE from 'three';
import { ref, onMounted } from 'vue';
import { FontLoader } from 'three/addons/loaders/FontLoader.js';
import { TextGeometry } from 'three/addons/geometries/TextGeometry.js';const threeRef = ref(null);// Vue组件挂载完成后执行的生命周期钩子
onMounted(async () => {// 获取Three.js渲染容器的DOM元素const container = threeRef.value;// 安全检查:确保容器存在,避免空指针错误if (!container) return;// 解构获取容器的实际宽度和高度(包含padding和border)const { offsetWidth: width, offsetHeight: height } = container;// ========== 场景设置 ==========// 创建三维场景,作为所有3D对象(网格、光源、相机等)的容器const scene = new THREE.Scene();// 设置场景背景颜色为白色(十六进制格式)scene.background = new THREE.Color('#ffffff');// ========== 相机设置 ==========const halfWidth = width / 2;const halfHeight = height / 2;// 创建正交投影相机(适合2D/UI元素,无透视变形,物体大小不随距离变化)const camera = new THREE.OrthographicCamera(-halfWidth, // left:左裁剪平面(基于宽高比调整,确保不失真)halfWidth, // right:右裁剪平面(与左边界对称)halfHeight, // top:上裁剪平面(从中心向上)-halfHeight, // bottom:下裁剪平面(从中心向下,与上边界对称)0.1, // near:近裁剪面,距离相机0.1单位内的物体不渲染1000 // far:远裁剪面,距离相机1000单位外的物体不渲染);// 设置相机在三维空间中的位置(X, Y, Z坐标)// Z=100将相机放置在场景前方足够远的位置,确保能看到整个可视区域camera.position.set(0, 0, 100);// 设置相机朝向场景的中心点(原点),确保相机正对场景----------camera.lookAt(0, 0, 0);// ========== 渲染器设置 ==========// 创建WebGL渲染器实例,用于将3D场景绘制到canvas上const renderer = new THREE.WebGLRenderer({antialias: true, // 开启抗锯齿,使3D模型边缘更平滑alpha: true // 开启透明度通道,允许CSS背景渐变透过canvas显示});// 设置渲染器输出canvas的尺寸,与容器大小一致renderer.setSize(width, height);// 设置设备像素比率,限制最大为2以平衡显示质量与性能renderer.setPixelRatio(Math.min(window.devicePixelRatio, 2));// 将渲染器的canvas元素添加到DOM容器中,开始显示3D内容container.appendChild(renderer.domElement);// ========== 光源设置 ==========// 创建环境光:提供均匀的场景基础照明,无方向性const ambientLight = new THREE.AmbientLight('#ffffff', 0.6); // 颜色白色,强度0.6scene.add(ambientLight);// 创建第一个方向光:模拟主光源,产生阴影和明暗效果const directionalLight1 = new THREE.DirectionalLight('#ffffff', 0.8); // 颜色白色,强度0.8directionalLight1.position.set(10, 10, 5); // 设置光源位置(右上前方)scene.add(directionalLight1);// 创建第二个方向光:作为补充光源,减少阴影区域的黑暗const directionalLight2 = new THREE.DirectionalLight('#ffffff', 0.4); // 颜色白色,强度0.4directionalLight2.position.set(-10, -10, -5); // 设置光源位置(左下后方)scene.add(directionalLight2);// ========== 字体和3D文字创建 ==========// 创建字体加载器实例,用于加载外部字体文件const fontLoader = new FontLoader();// 异步加载字体文件(来自Three.js官方示例字体库)fontLoader.load(// 字体文件的URL路径'https://unpkg.com/three@0.160.0/examples/fonts/helvetiker_regular.typeface.json',// 字体加载成功回调函数(font) => {// 创建3D文字几何体 - 将文本字符串转换为三维网格const textGeometry = new TextGeometry('Hello Three.js', {font: font, // 使用的字体对象size: 18, // 字体大小(单位:世界坐标系单位)height: 0.3, // 文字挤出厚度(3D深度,值越大文字越厚)curveSegments: 12, // 曲线分段数(值越高曲线越平滑,但性能开销越大)bevelEnabled: true, // 启用斜面效果,创建立体文字的倾斜边缘bevelThickness: 0.03, // 斜面厚度(边缘倾斜部分的深度)bevelSize: 0.02, // 斜面大小(边缘倾斜部分的宽度)bevelOffset: 0, // 斜面偏移量(控制斜面起始位置)bevelSegments: 5 // 斜面分段数(值越高斜面越平滑)});// ========== 文字居中处理 ==========// 计算几何体的边界框(获取文字的实际尺寸信息)textGeometry.computeBoundingBox();// 解构获取边界框的最小和最大坐标点const { min, max } = textGeometry.boundingBox;// 计算X轴居中偏移量:将文字中心点对齐到场景X轴中心const centerX = -(max.x - min.x) / 2;// 计算Y轴居中偏移量:将文字中心点对齐到场景Y轴中心const centerY = -(max.y - min.y) / 2;// ========== 材质和网格创建 ==========// 创建Phong材质(支持高光反射和复杂光照计算)const textMaterial = new THREE.MeshPhongMaterial({color: '#000000', // 字体颜色specular: '#ffffff', // 高光反射颜色:白色shininess: 100 // 高光强度:0-100,值越大高光点越小越亮});// 创建网格对象:将几何体与材质结合,形成可渲染的3D对象const textMesh = new THREE.Mesh(textGeometry, textMaterial);// 设置文字在场景中的位置(居中到场景原点,Z轴为0即在相机正前方)textMesh.position.set(centerX, centerY, 0);// 将文字网格添加到场景中,使其成为场景的一部分scene.add(textMesh);// ========== 执行渲染 ==========// 使用当前场景和相机进行单次渲染,将3D内容绘制到canvas上renderer.render(scene, camera);},// 加载进度回调函数(可选,此处未定义)- 可用于显示加载进度条undefined,// 加载错误回调函数(可选,此处未定义)- 可用于处理字体加载失败情况undefined);
});</script><style lang="scss" scoped>
#container {width: 100%;height: 100%;
}
</style>
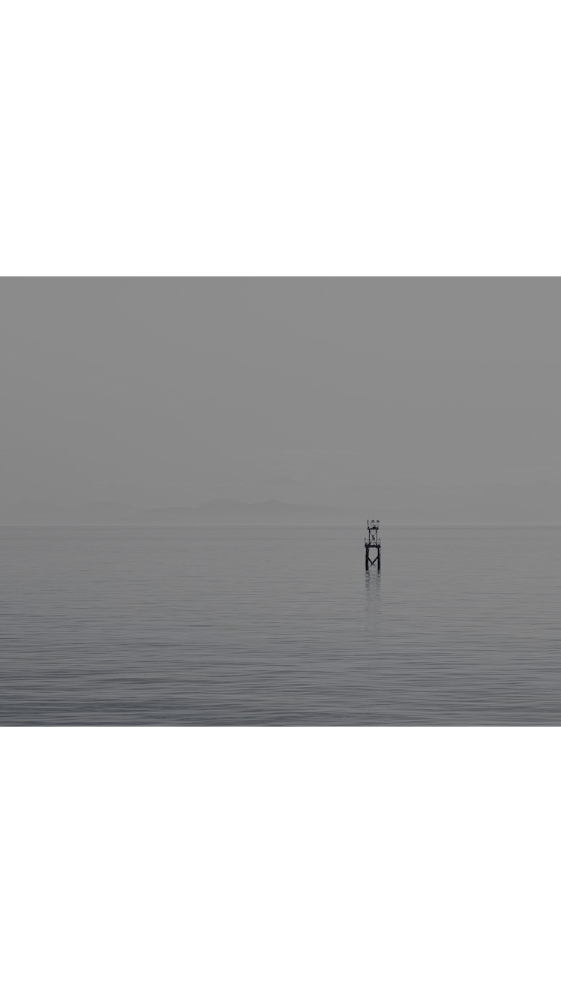
3.绘制图片
<template><div id="container" ref="threeRef"></div>
</template><script setup>
import * as THREE from 'three';
import { ref, onMounted } from 'vue';const threeRef = ref(null);onMounted(async () => {const container = threeRef.value;if (!container) return;const { offsetWidth: width, offsetHeight: height } = container;// 场景设置const scene = new THREE.Scene();scene.background = new THREE.Color('#ffffff');// 相机设置const halfWidth = width / 2;const halfHeight = height / 2;const camera = new THREE.OrthographicCamera(-halfWidth,halfWidth,halfHeight,-halfHeight,0.1,1000);camera.position.set(0, 0, 100);camera.lookAt(0, 0, 0);// 渲染器设置const renderer = new THREE.WebGLRenderer({antialias: true,alpha: true});renderer.setSize(width, height);renderer.setPixelRatio(Math.min(window.devicePixelRatio, 2));container.appendChild(renderer.domElement);// 光源设置const ambientLight = new THREE.AmbientLight('#ffffff', 0.6);scene.add(ambientLight);const directionalLight1 = new THREE.DirectionalLight('#ffffff', 0.8);directionalLight1.position.set(10, 10, 5);scene.add(directionalLight1);const directionalLight2 = new THREE.DirectionalLight('#ffffff', 0.4);directionalLight2.position.set(-10, -10, -5);scene.add(directionalLight2);// 添加图片到场景// 创建纹理加载器const textureLoader = new THREE.TextureLoader();try {const texture = await textureLoader.loadAsync('https://picsum.photos/800/600');// 创建平面几何体(矩形)// 参数:宽度、高度、宽度分段数、高度分段数const planeGeometry = new THREE.PlaneGeometry(400, 300);// 创建材质(使用加载的纹理)const planeMaterial = new THREE.MeshPhongMaterial({map: texture, // 应用纹理specular: '#ffffff', // 高光反射颜色:白色shininess: 100 // 高光强度:0-100,值越大高光点越小越亮});// 创建网格(几何体+材质)const imagePlane = new THREE.Mesh(planeGeometry, planeMaterial);// 设置图片位置(场景中心)imagePlane.position.set(0, 0, 0);// 添加到场景scene.add(imagePlane);renderer.render(scene, camera);} catch (error) {console.error('图片加载失败', error);renderer.render(scene, camera);}});</script><style lang="scss" scoped>
#container {width: 100vw;height: 100vh;
}
</style>
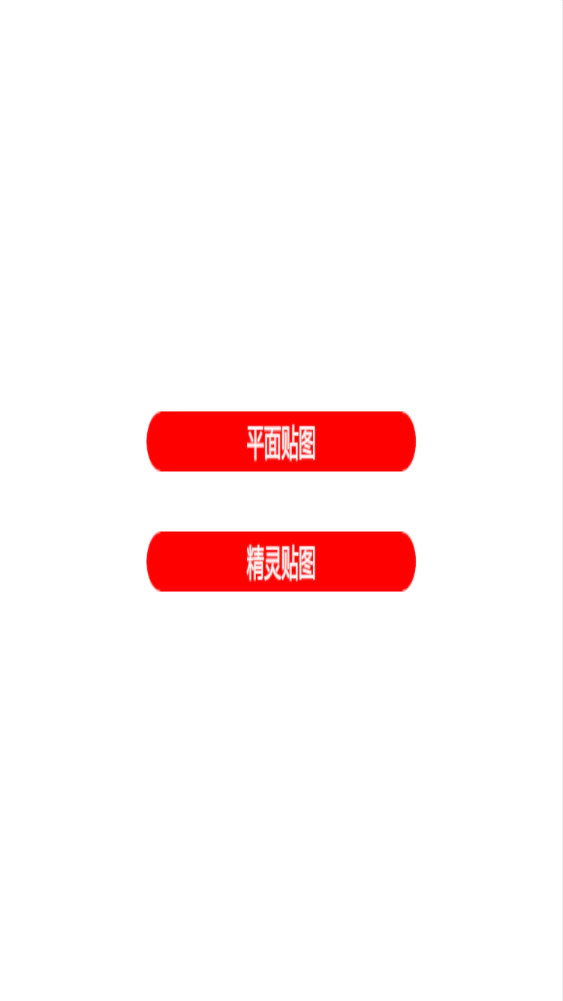
4.绘制canvas贴图,如:绘制文字,canvas贴图又分精灵贴图、平面贴图,精灵贴图始终正对摄像机,平面贴图会随场景旋转改变角度
<template><div id="container" ref="threeRef"></div>
</template><script setup>
import * as THREE from 'three';
import { ref, onMounted } from 'vue';
import html2canvas from 'html2canvas';const threeRef = ref(null);onMounted(async () => {const container = threeRef.value;if (!container) return;const { offsetWidth: width, offsetHeight: height } = container;// 场景设置const scene = new THREE.Scene();scene.background = new THREE.Color('#ffffff');// 正交相机设置 - 适合2D图形展示const halfWidth = width / 2;const halfHeight = height / 2;const camera = new THREE.OrthographicCamera(-halfWidth,halfWidth,halfHeight,-halfHeight,0.1,1000);camera.position.set(0, 0, 100);camera.lookAt(0, 0, 0);// 渲染器设置const renderer = new THREE.WebGLRenderer({antialias: true,alpha: true});renderer.setSize(width, height);renderer.setPixelRatio(Math.min(window.devicePixelRatio, 2));container.appendChild(renderer.domElement);// 光源设置const ambientLight = new THREE.AmbientLight('#ffffff', 0.6);scene.add(ambientLight);const directionalLight1 = new THREE.DirectionalLight('#ffffff', 0.8);directionalLight1.position.set(10, 10, 50);scene.add(directionalLight1);const directionalLight2 = new THREE.DirectionalLight('#ffffff', 0.4);directionalLight2.position.set(-10, -10, 50);scene.add(directionalLight2);const spriteDiv = document.createElement('div');spriteDiv.style.backgroundColor = 'red';spriteDiv.style.borderRadius = '20px';spriteDiv.style.color = '#ffffff';spriteDiv.style.fontSize = '24px';spriteDiv.style.textAlign = 'center';spriteDiv.style.lineHeight = '40px';spriteDiv.textContent = '精灵贴图';document.body.appendChild(spriteDiv);const spriteCanvas = await html2canvas(spriteDiv);const spriteTexture = new THREE.CanvasTexture(spriteCanvas);const spriteMaterial = new THREE.SpriteMaterial({ map: spriteTexture });const sprite = new THREE.Sprite(spriteMaterial);sprite.position.set(0, -40, 1);sprite.scale.set(180, 40, 1);scene.add(sprite);spriteDiv.textContent = '平面贴图';const meshCanvas = await html2canvas(spriteDiv);const meshTexture = new THREE.CanvasTexture(meshCanvas);let material = new THREE.MeshBasicMaterial({map: meshTexture,side: THREE.DoubleSide});let geometry = new THREE.PlaneGeometry();let mesh = new THREE.Mesh(geometry, material);mesh.position.set(0, 40, 1);mesh.scale.set(180, 40, 1);scene.add(mesh);document.body.removeChild(spriteDiv);renderer.render(scene, camera);
});
</script><style lang="scss" scoped>
#container {width: 100vw;height: 100vh;overflow: hidden;
}
</style>
5.绘制dom,将dom添加到场景中,CSS3DRenderer和CSS2DRenderer渲染的本质还是dom,可以直接添加dom事件
<template><div id="container" ref="threeRef"></div>
</template><script setup>
/**CSS2DRenderer特点:渲染2D元素,始终面向相机,不受3D透视影响。元素大小和位置固定,不随摄像机视角变化。性能更轻量,适合大量标签或简单弹窗。交互上类似HUD叠加在场景中,不随场景旋转变化。支持常规CSS,但不能使用3D transform123456。CSS3DRenderer特点:渲染真正的3D对象,具有深度信息。元素大小和位置随摄像机视角变化,可旋转、缩放、透视。性能相对更重,适合复杂UI或网页窗口。交互上完全沉浸式,随场景旋转变化。支持完整CSS,包括3D transform和动画12789**/import * as THREE from 'three';
import { CSS2DRenderer, CSS2DObject } from 'three/addons/renderers/CSS2DRenderer.js';
import { CSS3DRenderer, CSS3DObject } from 'three/addons/renderers/CSS3DRenderer.js';
import { ref, onMounted } from 'vue';const threeRef = ref(null);onMounted(() => {const container = threeRef.value;if (!container) return;const { offsetWidth: width, offsetHeight: height } = container;// 场景设置const scene = new THREE.Scene();scene.background = new THREE.Color('#ffffff');// 正交相机设置const halfWidth = width / 2;const halfHeight = height / 2;const camera = new THREE.OrthographicCamera(-halfWidth,halfWidth,halfHeight,-halfHeight,0.1,1000);camera.position.set(0, 0, 100);camera.lookAt(0, 0, 0);// 基础WebGL渲染器(用于场景背景,可省略)const renderer = new THREE.WebGLRenderer({antialias: true,alpha: true});renderer.setSize(width, height);renderer.setPixelRatio(Math.min(window.devicePixelRatio, 2));container.appendChild(renderer.domElement);// CSS2D渲染器(替代精灵贴图)const css2DRenderer = new CSS2DRenderer();css2DRenderer.setSize(width, height);css2DRenderer.domElement.style.position = 'absolute';css2DRenderer.domElement.style.top = '0';css2DRenderer.domElement.style.pointerEvents = 'none'; // 允许鼠标穿透到WebGL场景container.appendChild(css2DRenderer.domElement);// CSS3D渲染器(替代平面贴图)const css3DRenderer = new CSS3DRenderer();css3DRenderer.setSize(width, height);css3DRenderer.domElement.style.position = 'absolute';css3DRenderer.domElement.style.top = '0';css3DRenderer.domElement.style.pointerEvents = 'none';container.appendChild(css3DRenderer.domElement);// 创建CSS2D元素(替代精灵)sconst css2DElement = document.createElement('div');css2DElement.style.width = '180px';css2DElement.style.height = '40px';css2DElement.style.backgroundColor = 'red';css2DElement.style.borderRadius = '20px';css2DElement.style.color