Chrony服务器实验练习
1.通过自定义时间服务器向指定的客户端主机同步时间,自定义时间服务器主机的时间通过ntp.aliyun.com主机同步时间
实验环境
实验使用两台Linux虚拟机,一台当作服务器主机(192.168.159.132),一台当作客户端主机(192.168.159.134)
服务器主机配置
1.设置主机名为server
[root@localhost ~]# hostnamectl set-hostname server #设置新主机名
[root@localhost ~]# reboot   #重启系统2.保证能接收到客户端的请求
[root@server ~]# systemctl stop firewalld    #关闭防火墙
[root@server ~]# setenforce 0                #关闭selinux3.确认chrony是否安装及启动(默认安装启动)
[root@server ~]# rpm -qa | grep chrony[root@server ~]# ps -aux | grep chronyd
![]()

4.更改配置文件
[root@server ~]# vim /etc/chrony.conf5.修改参数
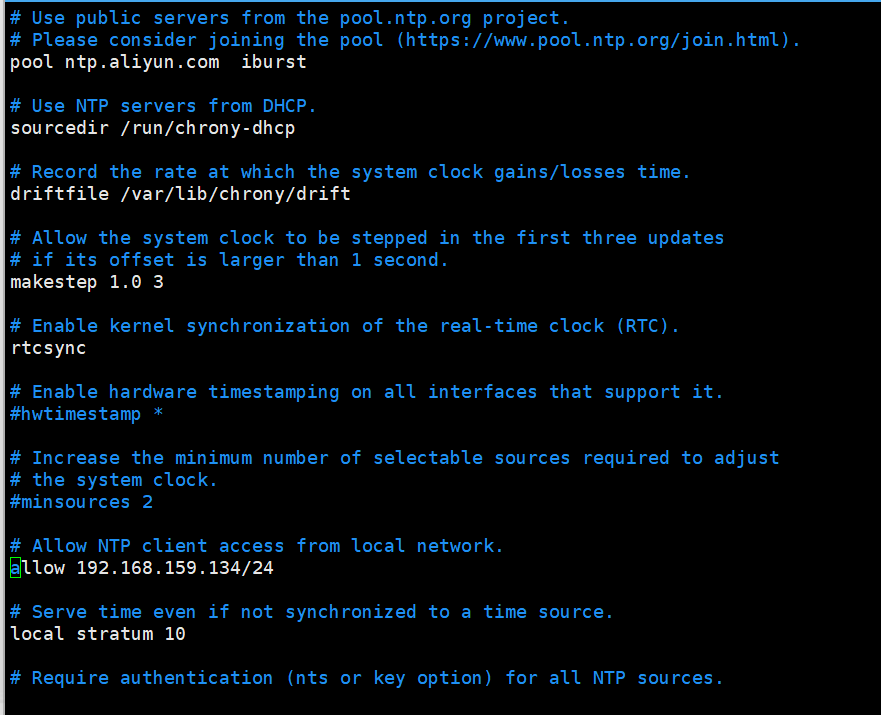
#添加阿里的时间同步服务地址
# Please consider joining the pool (https://www.pool.ntp.org/join.html).
pool ntp.aliyun.com iburst#设置192.168.159.134/24 可以访问本机进行同步
# Allow NTP client access from local network.
allow 192.168.159.134/24#设置当前服务器层级
# Serve time even if not synchronized to a time source.
local stratum 106.重启服务等待客户端连接
[root@server ~]# systemctl restart chronyd
客户端主机配置
1.设置主机名为server
[root@localhost ~]# hostnamectl set-hostname client #设置新主机名
[root@localhost ~]# reboot   #重启系统2.修改配置文件
[root@client ~]# vim /etc/chrony.conf
#设置要连接的时间服务主机192.168.159.132
# Please consider joining the pool (https://www.pool.ntp.org/join.html).
pool 192.168.159.132  iburst3.重启加载配置连接服务器
[root@client ~]# systemctl restart chronyd
测试
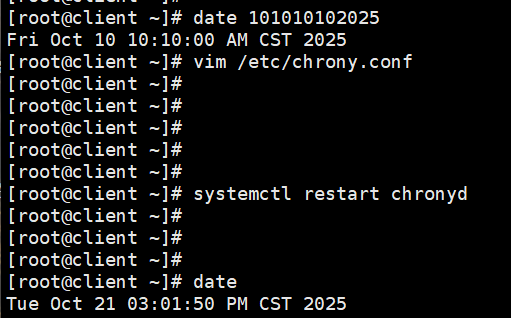
1.客户端主机设置错误时间
[root@client ~]# date 101010102025
Fri Oct 10 10:10:00 AM CST 20252.重启加载配置
[root@client ~]# systemctl restart chronyd3.等待一段时间后查看时间,恢复正确时间
[root@client ~]# date
Tue Oct 21 03:01:50 PM CST 2025