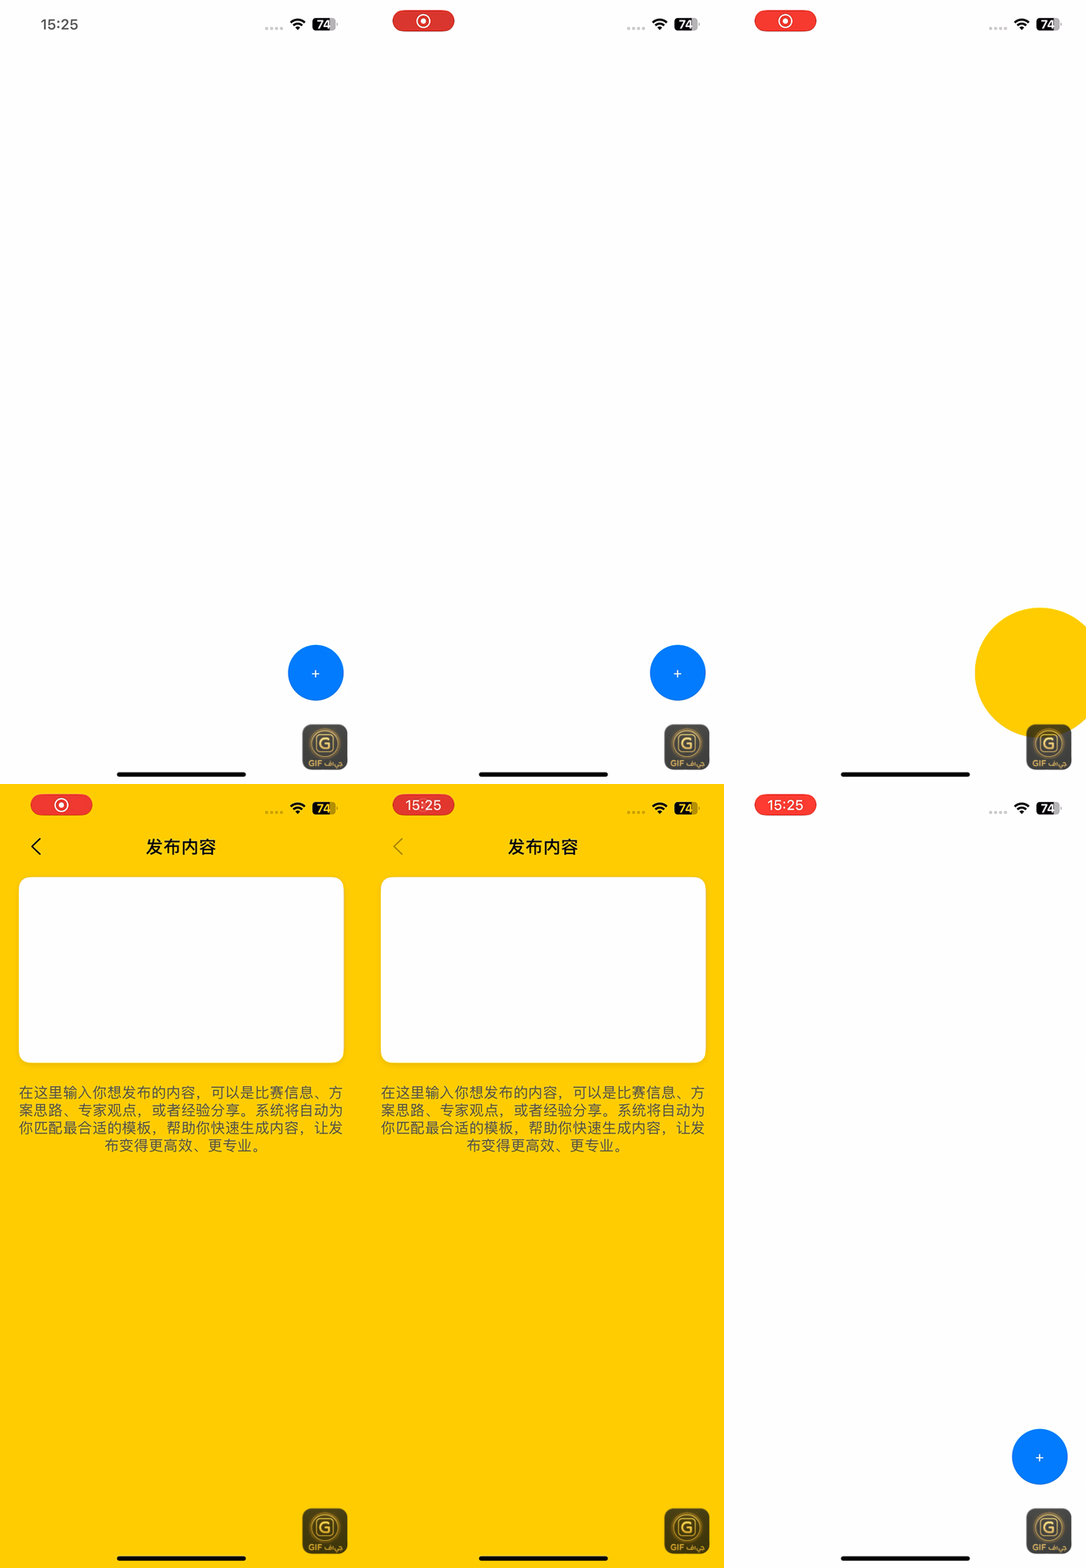
自定义转场动画 - 从悬浮按钮丝滑扩散到发布页面

一. 引言
很多 App 都有一个显眼的悬浮按钮。
比如微博的「+」发布、B 站的「上传」、知乎的「提问」……
它们的共同点是:
当用户点击时,新的页面会以一种“自然生长”的方式展开。
今天我们就实现一个类似的效果:
点击悬浮按钮,页面从按钮中心扩散成全屏的发布界面。整个动效不靠第三方库,完全使用系统的转场机制配合核心动画来完成。
二. 核心思路
我们知道,在 iOS 里每个页面切换,默认动画都是由系统提供的(比如 push 的右滑、present 的上滑)。
但如果想要做自定义动画,比如“从按钮中扩散出来”,那就得使用一个更底层的机制:
UIViewControllerTransitioningDelegate 它允许我们接管页面切换时的动画过程。
整个转场动画的本质是:
- 用户点击按钮
- 系统调用我们的转场代理
- 动画类(Animator)执行自定义动画逻辑
- 动画完成后,系统恢复控制
而我们的自定义动画,就是通过一个圆形遮罩(CAShapeLayer),然后通过动画让圆形遮罩不断扩大,让下一个页面从按钮中心“生长”出来。
三. 实现步骤
整个过程我们还是分成三个部分吧:
- ViewController:一级页面,悬浮按钮会在这个页面显示,点击后进行页面切换。
- PublishAnimator:过渡动画核心,真正的“魔法”发生在这里,负责结果系统的过渡动画。
- PublishViewController:发布页面,点击发布按钮后切换到该页面。
3.1 主页面(ViewController)
主页面要做的事情只有三件:
- 显示悬浮按钮
- 点击按钮时 present 新页面
- 让系统在切换时使用我们自己的动画类
该类的所有代码如下:
class ViewController: UIViewController, UIViewControllerTransitioningDelegate {let floatButton = UIButton(type: .system)override func viewDidLoad() {super.viewDidLoad()view.backgroundColor = .white// 悬浮按钮floatButton.frame = CGRect(x: view.bounds.width - 80, y: view.bounds.height - 150, width: 60, height: 60)floatButton.layer.cornerRadius = 30floatButton.backgroundColor = .systemBluefloatButton.setTitle("+", for: .normal)floatButton.setTitleColor(.white, for: .normal)floatButton.addTarget(self, action: #selector(buttonTapped), for: .touchUpInside)view.addSubview(floatButton)}@objc func buttonTapped() {let publishVC = PublishViewController()publishVC.modalPresentationStyle = .fullScreen// 告诉系统:使用自定义转场动画publishVC.transitioningDelegate = self  present(publishVC, animated: true, completion: nil)}// MARK: - UIViewControllerTransitioningDelegate// 当页面「出现」时调用func animationController(forPresented presented: UIViewController,presenting: UIViewController,source: UIViewController) -> UIViewControllerAnimatedTransitioning? {let animator = PublishAnimator()animator.originFrame = floatButton.frameanimator.isPresenting = truereturn animator}// 当页面「关闭」时调用func animationController(forDismissed dismissed: UIViewController) -> UIViewControllerAnimatedTransitioning? {let animator = PublishAnimator()animator.originFrame = floatButton.frameanimator.isPresenting = falsereturn animator}
}
解释一下这个机制:
- transitioningDelegate 告诉系统:“我要自己控制 present/dismiss 的动画”
- 每当 present 或 dismiss 时,系统会来问我们:“请给我一个 Animator,我该怎么动画?”
- 我们就返回 PublishAnimator 实例,里面写的是什么动画,系统就执行什么。
3.2 动画核心(PublishAnimator)
真正的“魔法”发生在这里。
我们要实现的动画逻辑是:用按钮的 frame 作为圆心,创建一个遮罩圆,从小到大扩散覆盖整个屏幕。
代码如下:
class PublishAnimator: NSObject, UIViewControllerAnimatedTransitioning {let duration: TimeInterval = 0.35var originFrame: CGRect = .zerovar isPresenting = truefunc transitionDuration(using transitionContext: UIViewControllerContextTransitioning?) -> TimeInterval {return duration}func animateTransition(using transitionContext: UIViewControllerContextTransitioning) {guardlet toVC = transitionContext.viewController(forKey: .to),let fromVC = transitionContext.viewController(forKey: .from)else { return }let container = transitionContext.containerViewif isPresenting {// ① 展开动画container.addSubview(toVC.view)// 动画起点:按钮区域的圆let startPath = UIBezierPath(ovalIn: originFrame)// 动画终点:足够覆盖整个屏幕的超大圆let extreme = sqrt(pow(container.bounds.width, 2) + pow(container.bounds.height, 2))let endPath = UIBezierPath(ovalIn: originFrame.insetBy(dx: -extreme, dy: -extreme))// 创建遮罩层let maskLayer = CAShapeLayer()maskLayer.path = endPath.cgPathtoVC.view.layer.mask = maskLayer// 路径动画(从小圆扩展为大圆)let animation = CABasicAnimation(keyPath: "path")animation.fromValue = startPath.cgPathanimation.toValue = endPath.cgPathanimation.duration = durationanimation.timingFunction = CAMediaTimingFunction(name: .easeInEaseOut)animation.delegate = AnimationDelegate {toVC.view.layer.mask = niltransitionContext.completeTransition(true)}maskLayer.add(animation, forKey: "path")} else {// ② 收回动画(反向)container.insertSubview(toVC.view, belowSubview: fromVC.view)let extreme = sqrt(pow(container.bounds.width, 2) + pow(container.bounds.height, 2))let startPath = UIBezierPath(ovalIn: originFrame.insetBy(dx: -extreme, dy: -extreme))let endPath = UIBezierPath(ovalIn: originFrame)let maskLayer = CAShapeLayer()maskLayer.path = endPath.cgPathfromVC.view.layer.mask = maskLayerlet animation = CABasicAnimation(keyPath: "path")animation.fromValue = startPath.cgPathanimation.toValue = endPath.cgPathanimation.duration = durationanimation.timingFunction = CAMediaTimingFunction(name: .easeInEaseOut)animation.delegate = AnimationDelegate {fromVC.view.layer.mask = niltransitionContext.completeTransition(true)}maskLayer.add(animation, forKey: "path")}}
}
动画要点拆解:
主要是通过 UIBezierPath(ovalIn:) 创建一个圆形路径,起点是按钮的 frame,使用CAShapeLayer来当作遮罩(mask)层,让视图按照圆形区域显示,然后通过核心动画 CABasicAnimation(keyPath: "path") 来改变mask的形状(从小圆到大圆)。
最后 transitionContext.completeTransition(true) 通知系统动画结束。
这样我们就实现了一个从按钮中心“扩散开”的动画。收回时,只要反向执行即可。
3.3 发布页面(PublishViewController)
PublishViewController 本身没做动画,它只是普通的页面布局,带有一个返回按钮(dismiss 动画就是上面反向的动画)。
import UIKitclass PublishViewController: UIViewController {override func viewDidLoad() {super.viewDidLoad()view.backgroundColor = .systemYellow// 顶部导航栏let navBarHeight: CGFloat = 80let navBar = UIView(frame: CGRect(x: 0, y: 12.0, width: view.bounds.width, height: navBarHeight))view.addSubview(navBar)// 返回按钮let backButton = UIButton(type: .system)backButton.frame = CGRect(x: 10, y: 40, width: 60, height: 30)backButton.setImage(UIImage(systemName: "chevron.backward"), for: .normal)backButton.tintColor = .blackbackButton.addTarget(self, action: #selector(closeTapped), for: .touchUpInside)navBar.addSubview(backButton)....}
}
四. 结语
整个动画的核心,其实就两步:
- 接管转场过程 —— 通过 UIViewControllerTransitioningDelegate,让系统在 present 和 dismiss 时使用我们自定义的动画控制器。
- 构建圆形扩散动画 —— 使用 CAShapeLayer 作为遮罩,通过 path 动画让圆从按钮中心扩散覆盖全屏,再在返回时反向执行。
实现过程简单清晰,但效果极具空间感。
用户能一眼看出:这是从按钮“进入”的页面,也能从同一点“返回”,交互逻辑自然闭环。
在实际项目中,你可以:
- 把圆形改成矩形、心形、logo形(只要换路径);
- 在扩散时叠加模糊或缩放动画,让动效更有层次;
- 使用弹性曲线(Spring 动画)增强空间张力,让展开更生动。
动画不是为了炫技,而是为了让过渡更「有意义」。它让用户在切换中保持空间感与方向感。
如果你在项目中也有类似的转场需求,
或想探讨不同的动效表现方式,欢迎在评论区或私信交流,一起让 App 的过渡更具“生命力”。
