Kubernetes秘钥与配置管理全解析
一、Secret(秘钥管理)
1.1 概念
Secret 用来保存敏感数据,如:
-
密码
-
Token
-
密钥
Secret 的作用: 将敏感信息与 Pod 分离,方便控制访问并降低泄露风险。
1.2 Secret类型
| 类型 | 说明 |
|---|---|
kubernetes.io/service-account-token | Kubernetes 自动创建,用于访问 APIServer。Pod 默认挂载在 /run/secrets/kubernetes.io/serviceaccount。 |
Opaque | 默认类型,用户自定义密码、密钥等(Base64 编码)。 |
kubernetes.io/dockerconfigjson | 存储私有 Docker Registry 的认证信息。 |
kubernetes.io/tls | 存储 SSL/TLS 证书与私钥。 |
使用前提:Pod 必须引用 Secret 才能使用。
使用方式:
-
作为 Volume 文件 挂载。
-
作为 环境变量。
-
kubelet 拉取镜像时使用认证信息。
应用场景:凭据管理
1.3 创建Secret
1.3.1 命令行创建
echo -n 'zhangsan' > username.txt
echo -n 'abc1234' > password.txtkubectl create secret generic mysecret --from-file=username.txt --from-file=password.txt查看:
kubectl get secrets
kubectl describe secret mysecret
注意:不会展示实际内容以保护数据。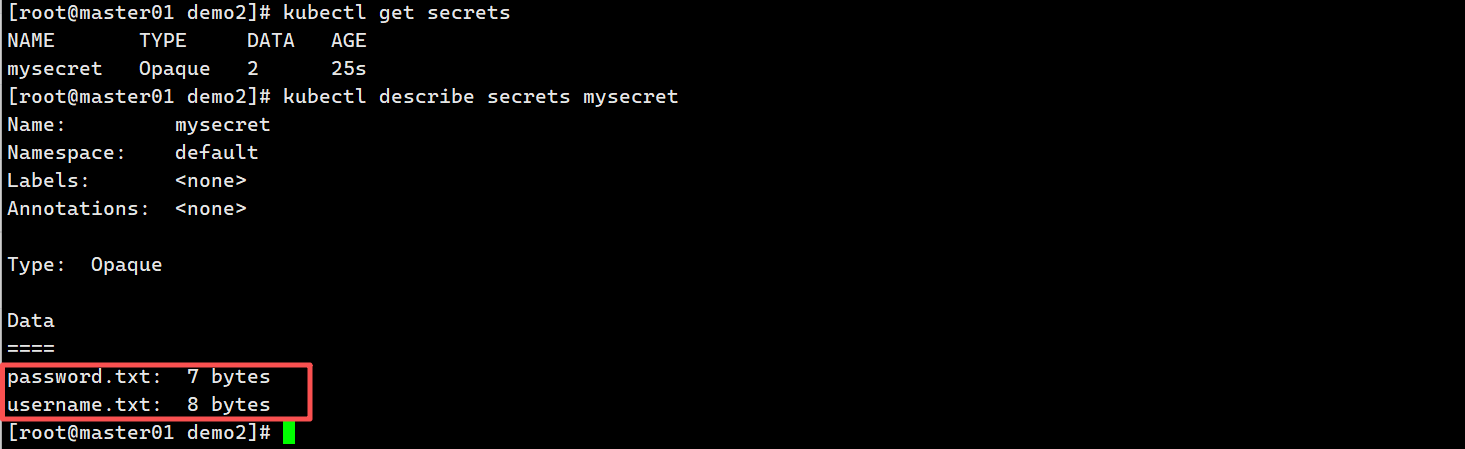
1.3.2 yaml文件创建(Base64编码)
Base64 编码格式:
echo -n zhangsan | base64     # emhhbmdzYW4=
echo -n abc1234 | base64      # YWJjMTIzNA==
---------------------------------------------------------------------
apiVersion: v1
kind: Secret
metadata:name: mysecret1
type: Opaque
data:password: 'YWJjMTIzNA=='username: 'emhhbmdzYW4='创建查看
kubectl apply -f secret.yaml
kubectl get secret mysecret1 -o yaml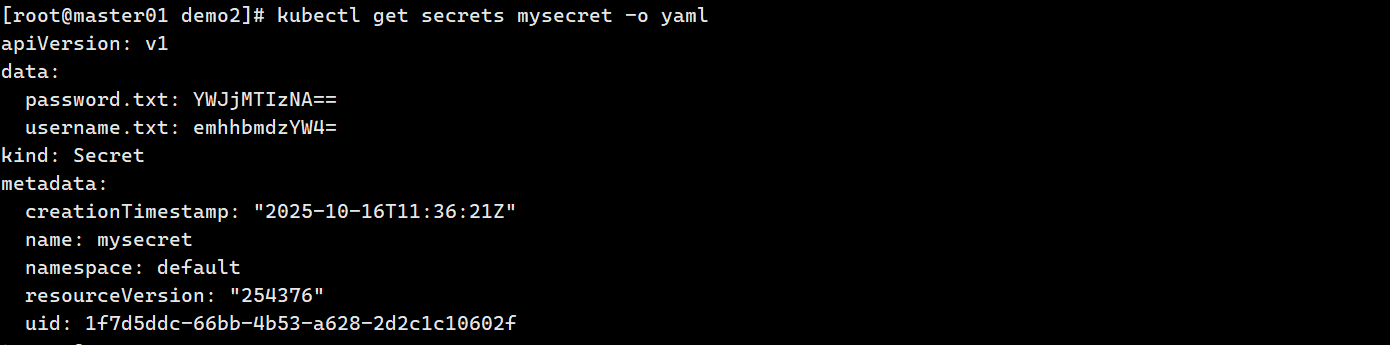
1.4 使用Secret
1.4.1 挂载为文件
#将Secret挂载到Volume中,以Volume的形式挂载到Pod的某个目录下
vim secret-test.yaml
apiVersion: v1
kind: Pod
metadata:name: mypod
spec:containers:- name: nginximage: nginxvolumeMounts:- name: secretsmountPath: "/etc/secrets"readOnly: truevolumes:- name: secretssecret:secretName: mysecret验证:kubectl exec -it mypod -- ls /etc/secrets
1.4.2 导入环境变量
vim secret-test1.yaml
apiVersion: v1
kind: Pod
metadata:name: mypod1
spec:containers:- name: nginximage: nginxenv:- name: TEST_USERvalueFrom:secretKeyRef:name: mysecret1key: username- name: TEST_PASSWORDvalueFrom:secretKeyRef:name: mysecret1key: password验证
kubectl exec -it mypod1 -- printenv | grep TEST
二、ConfigMap(配置管理)
2.1 概念
与 Secret 类似,但存储非敏感配置数据。 ConfigMap 可供应用读取配置文件、命令行参数或环境变量。
应用场景:应用配置管理
2.2 创建ConfigMap
2.2.1 从目录创建
mkdir /opt/configmap/
vim /opt/configmap/game.properties
enemies=aliens
lives=3
enemies.cheat=true
enemies.cheat.level=noGoodRotten
secret.code.passphrase=UUDDLRLRBABAS
secret.code.allowed=true
secret.code.lives=30vim /opt/configmap/ui.properties
color.good=purple
color.bad=yellow
allow.textmode=true
how.nice.to.look=fairlyNicekubectl create configmap game-config --from-file=/opt/configmap/
//--from-file指定在目录下的所有文件都会被用在ConfigMap里面创建一个键值对,键的名字就是文件名,值就是文件的内容查看
kubectl get configmaps
kubectl describe configmaps game-config 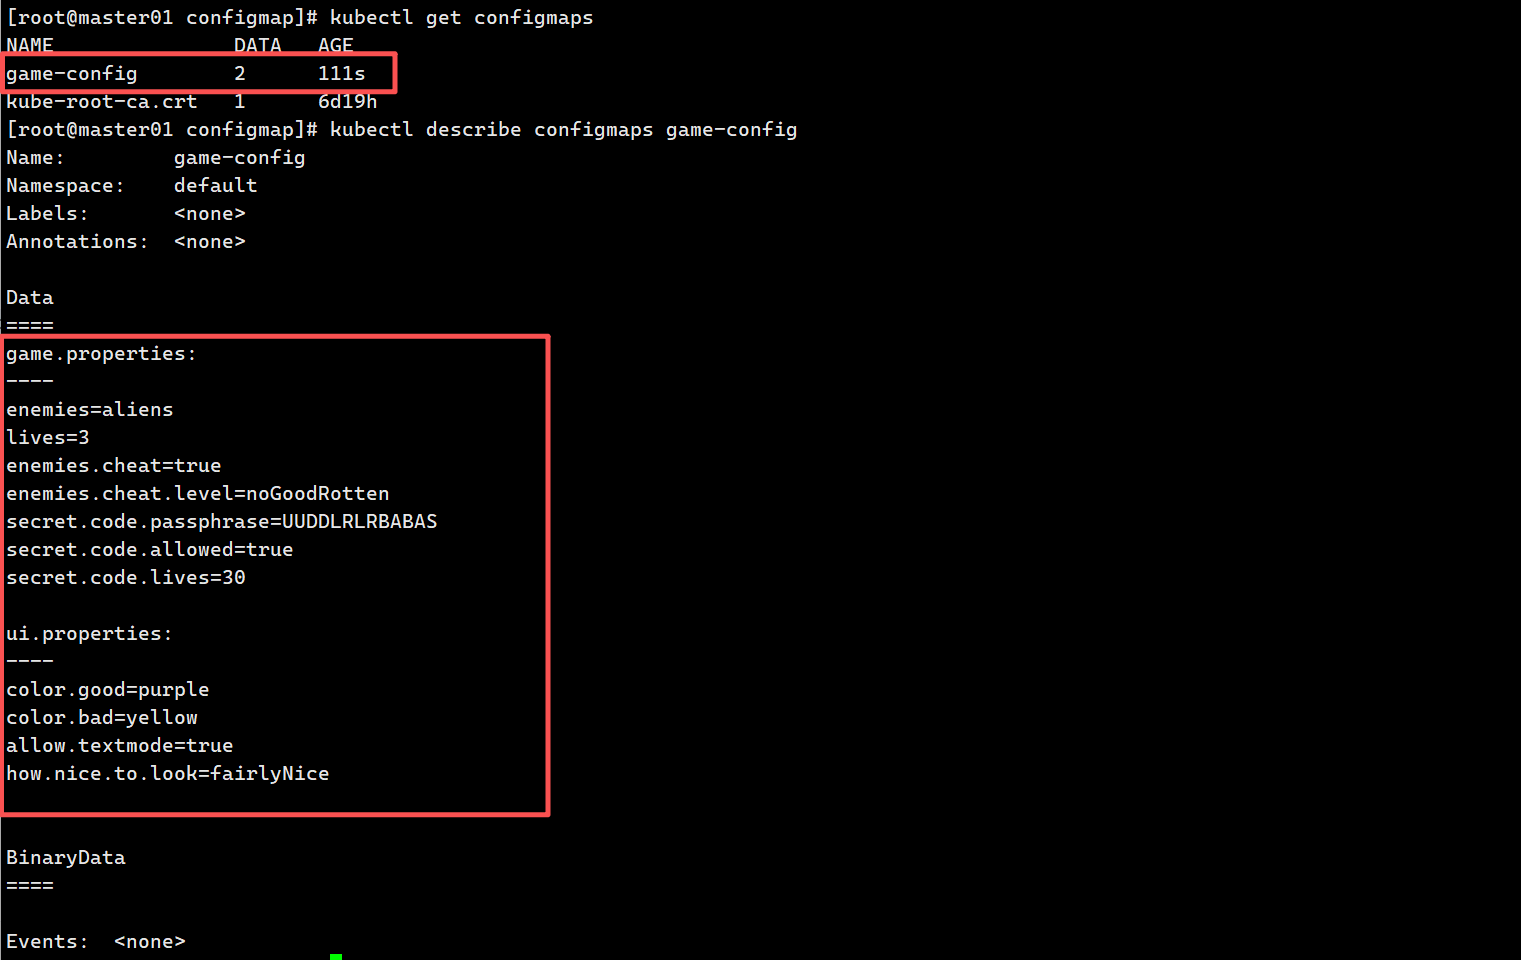
2.2.2 从文件创建
kubectl create configmap game-config-2 \--from-file=/opt/configmap/game.properties \--from-file=/opt/configmap/ui.properties2.2.3 使用字面值
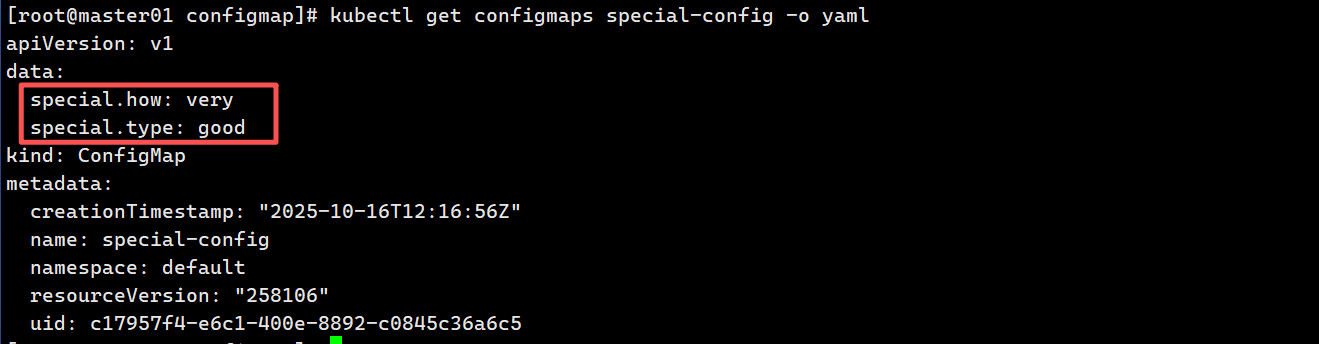
kubectl create configmap special-config \--from-literal=special.how=very \--from-literal=special.type=goodkubectl get configmaps special-config -o yaml#special.how=very,special.type=good为键值对
2.3 Pod中使用ConfigMap
2.3.1 作为环境变量注入
创建configmap
vim env.yaml
apiVersion: v1
kind: ConfigMap
metadata:name: special-confignamespace: default
data:special.how: veryspecial.type: good
---
apiVersion: v1
kind: ConfigMap
metadata:name: env-confignamespace: default
data:log_level: INFOkubectl create -f env.yaml kubectl get cm==============================================================
//Pod的创建
vim test-pod.yaml
apiVersion: v1
kind: Pod
metadata:name: test-pod
spec:containers:- name: busyboximage: busybox:1.28.4command: ["/bin/sh", "-c", "env"]env:                            # 定义环境变量列表- name: SPECIAL_HOW_KEYvalueFrom:configMapKeyRef:name: special-configkey: special.how- name: SPECIAL_TYPE_KEYvalueFrom:configMapKeyRef:name: special-configkey: special.typeenvFrom:                   # 从整个配置资源导入环境变量- configMapRef:name: env-config    #从env-config ConfigMap中批量导入的所有键值对restartPolicy: Never验证:kubectl logs test-pod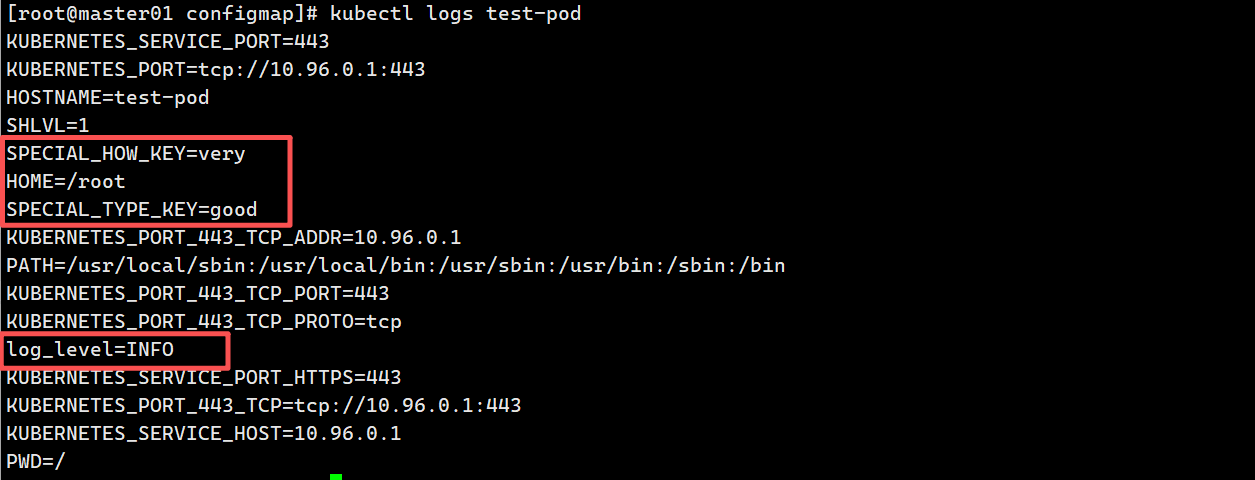
2.3.2 命令行参数使用
vim test-pod2.yaml
apiVersion: v1
kind: Pod
metadata:name: test-pod2
spec:containers:- name: busyboximage: busybox:1.28.4command: - /bin/sh- -c- echo "$(SPECIAL_HOW_KEY) $(SPECIAL_TYPE_KEY)"env:- name: SPECIAL_HOW_KEYvalueFrom:configMapKeyRef:name: special-configkey: special.how- name: SPECIAL_TYPE_KEYvalueFrom:configMapKeyRef:name: special-configkey: special.typeenvFrom:- configMapRef:name: env-configrestartPolicy: Neverkubectl create -f test-pod2.yaml输出:kubectl logs test-pod2
2.3.3 以Volume形式挂载
在数据卷里面使用ConfigMap,就是将文件填入数据卷,在这个文件中,键就是文件名,键值就是文件内容
vim test-pod3.yaml
apiVersion: v1
kind: Pod
metadata:name: test-pod3
spec:containers:- name: busyboximage: busybox:1.28.4command: [ "/bin/sh", "-c", "sleep 36000" ]volumeMounts:- name: config-volumemountPath: /etc/configvolumes:- name: config-volumeconfigMap:name: special-configrestartPolicy: Neverkubectl create -f test-pod3.yaml kubectl exec -it test-pod3 sh

2.3.4 ConfigMap热更新机制
vim test-pod4.yaml
apiVersion: v1
kind: ConfigMap
metadata:name: log-confignamespace: default
data:log_level: INFO
---
apiVersion: apps/v1
kind: Deployment
metadata:name: my-nginx
spec:replicas: 1selector:matchLabels:app: my-nginxtemplate:metadata:labels:app: my-nginxspec:containers:- name: my-nginximage: nginxports:- containerPort: 80volumeMounts:- name: config-volumemountPath: /etc/configvolumes:- name: config-volumeconfigMap:name: log-configkubectl apply -f test-pod.yaml
kubectl exec my-nginx-585847cbc9-x4c6t -- cat /etc/config/log_level
修改:
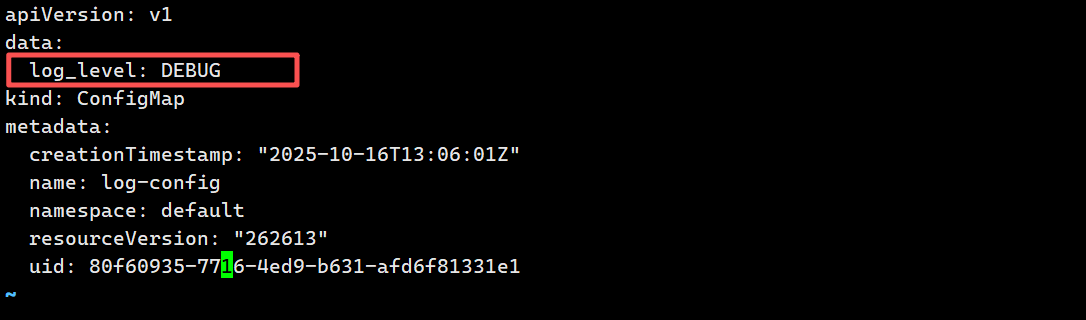
kubectl edit configmap log-configapiVersion: v1
data:log_level: INFO #INFO 修改成 DEBUG
kind: ConfigMap
metadata:creationTimestamp: "2025-10-16T13:06:01Z"name: log-confignamespace: defaultresourceVersion: "262613"uid: 80f60935-7716-4ed9-b631-afd6f81331e1验证
//等大概10秒左右,使用该 ConfigMap 挂载的 Volume 中的数据同步更新
kubectl exec my-nginx-585847cbc9-x4c6t -- cat /etc/config/log_levelVolume 挂载的数据约 10 秒后同步更新。环境变量不会自动更新。

2.3.5 触发滚动更新
更新ConfigMap不会自动触发Pod重启,可手动触发滚动更新。更新 ConfigMap 目前并不会触发相关 Pod 的滚动更新,可以通过在 .spec.template.metadata.annotations 中添加 version/config ,每次通过修改
version/config来触发滚动更新PS:更新 ConfigMap 后:
●使用该 ConfigMap 挂载的 Env 不会同步更新。
●使用该 ConfigMap 挂载的 Volume 中的数据需要一段时间(实测大概10秒)才能同步更新。
三、总结对比表
| 项目 | Secret | ConfigMap |
|---|---|---|
| 存储内容 | 敏感信息(密码、密钥) | 普通配置信息 |
| 数据编码 | Base64 | 纯文本 |
| 使用方式 | Volume、Env、镜像拉取凭证 | Volume、Env、命令参数 |
| 是否自动更新 | Volume 延迟更新,Env 不会 | Volume 延迟更新,Env 不会 |
| 安全性 | 高(需 RBAC 控制) | 普通 |