Java入门级教程23——配置Nginx服务器、轻量级HTTP服务开发、前后端分离实现完整应用系统
目录
1.在 Windows 系统下配置 Nginx 的步骤
1.1 下载 Nginx
1.2 解压 Nginx
1.3 创建文件夹
1.4 存放文件
1.5 修改配置文件
1.6 检查配置文件语法
1.7 启动 Nginx
1.8 验证 Nginx 是否启动成功
2.实现视频、音频播放以及交互
2.1 eclipse端——监听访问请求
2.2 在DevEco Stdio中创建cj项目
2.2.1 文件分布情况
2.2.2 创建components文件夹
2.2.3 创建UserView.cj
2.2.4 在resource-->rawfile下创建demo1.html
2.2.5 修改main_ability.cj文件
3.实现登录页面
3.1 eclipse端——生成验证码
3.1.1 数据库准备
3.1.2 加载依赖
3.1.3 具体实现
3.2 DevEco Stdio端——实现登录跳转页面
3.3.1 创建UserLogin.cj
3.3.2 在resource-->rawfile下创建login.html
3.3.3 修改main_ability.cj文件
1.在 Windows 系统下配置 Nginx 的步骤
1.1 下载 Nginx
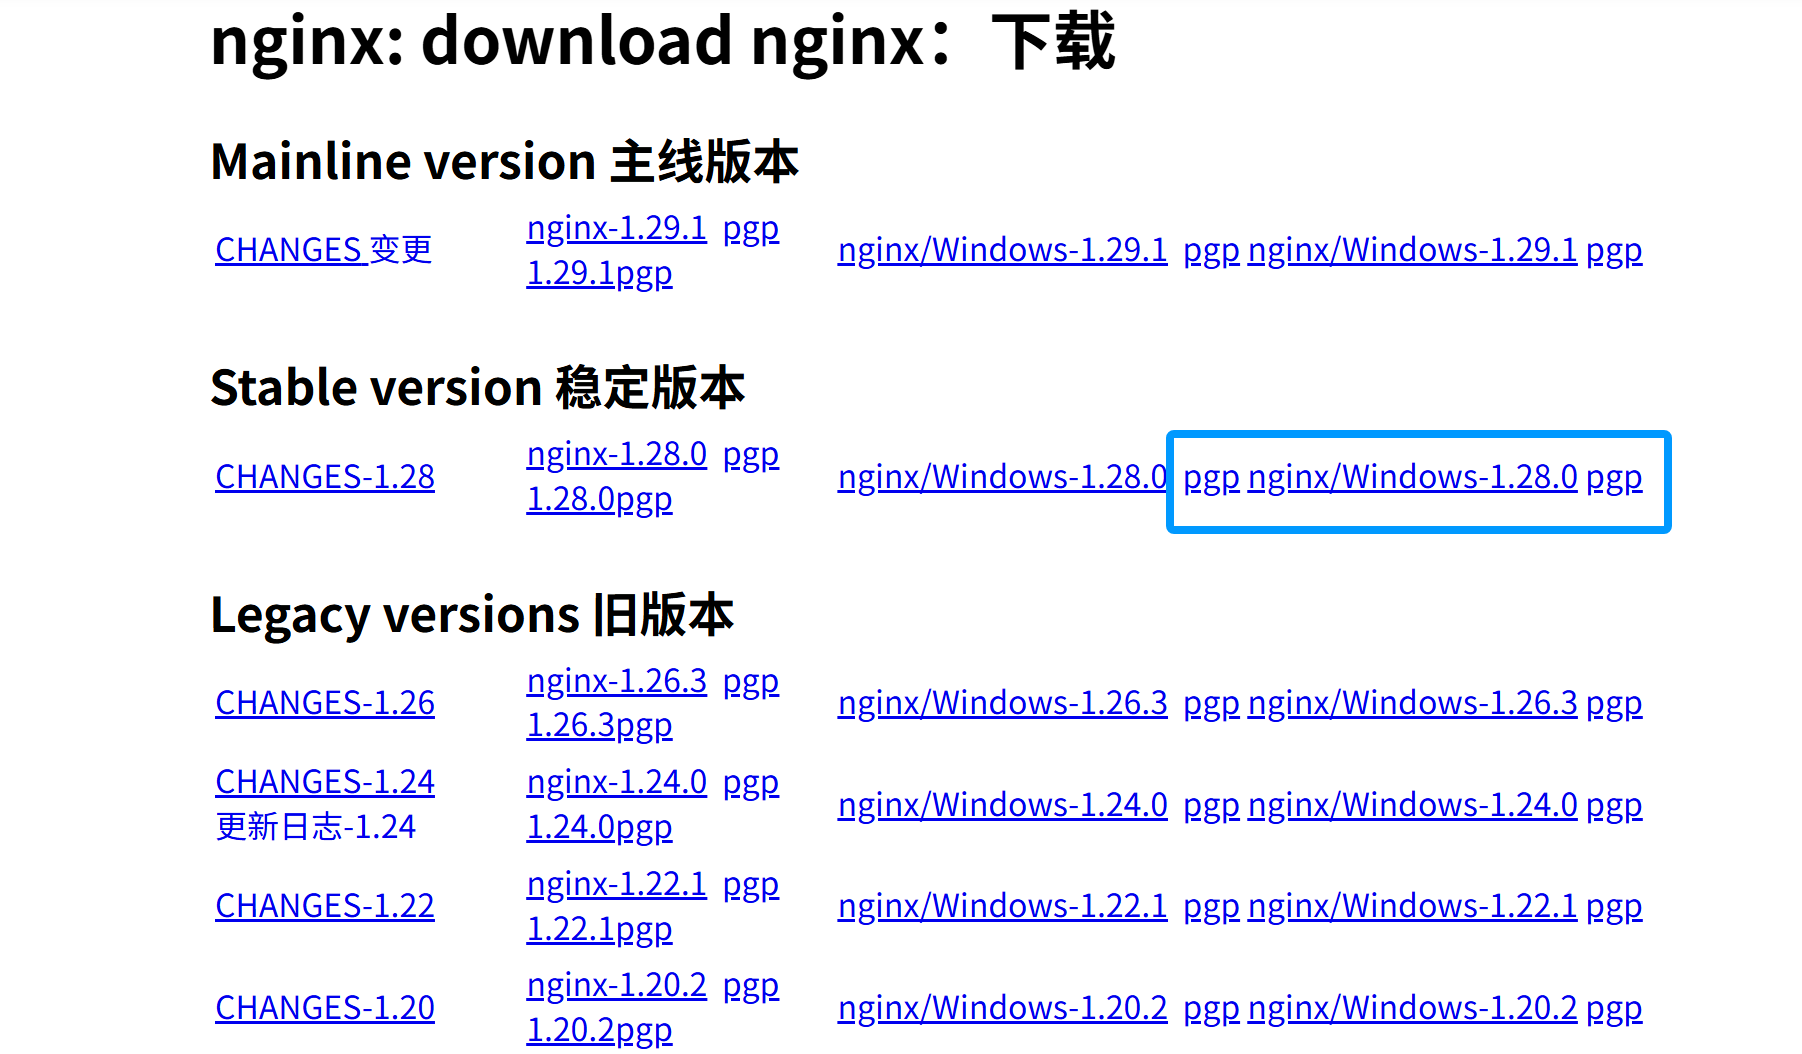
从 Nginx 官网(https://nginx.org/en/download.html)下载 Windows 版的 Nginx 压缩包,推荐下载稳定版。
1.2 解压 Nginx
将下载好的压缩包解压到你希望安装 Nginx 的目录,如D:\nginx-1.28.0。
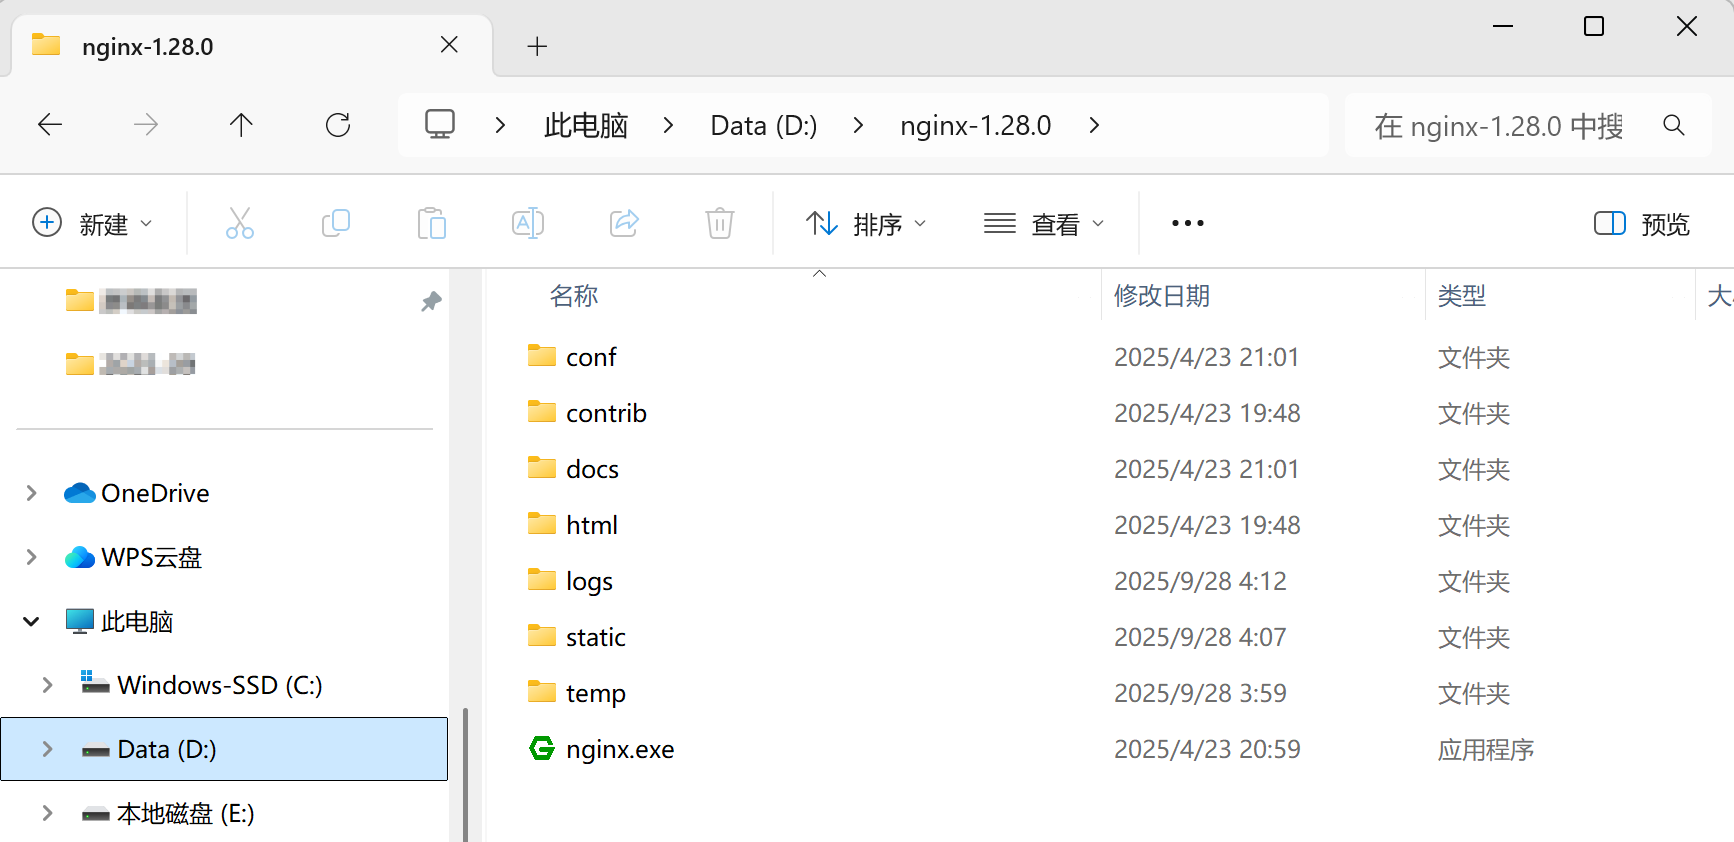
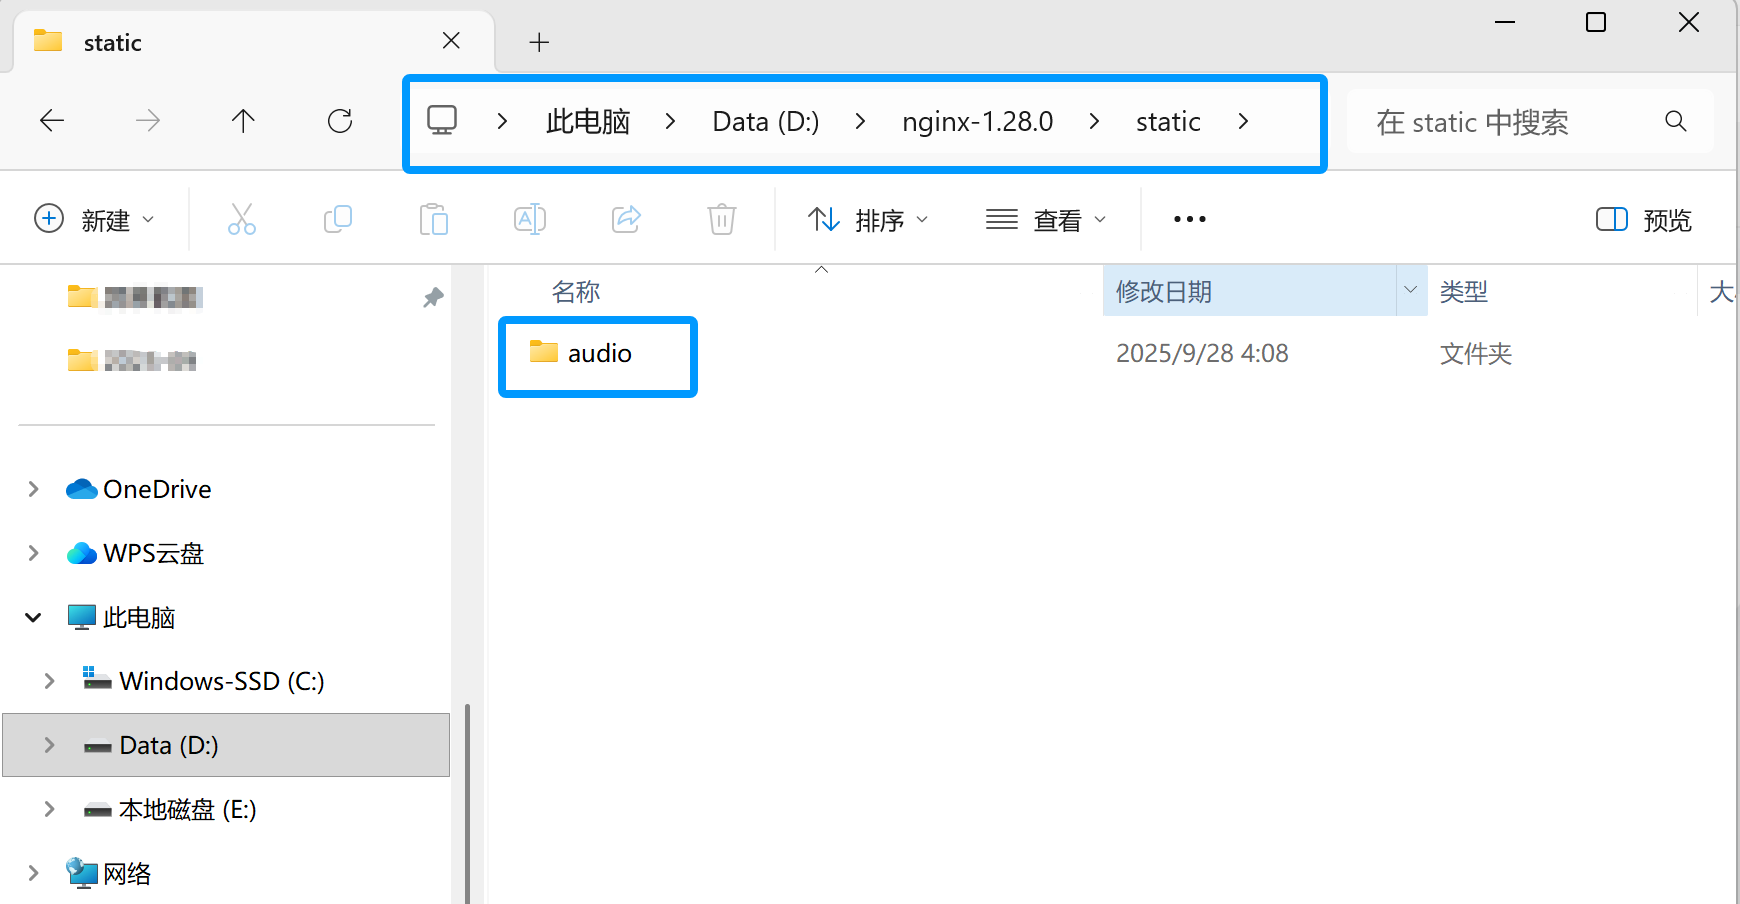
1.3 创建文件夹
在 D:\nginx-1.28.0 目录下创建文件夹 static --> audio
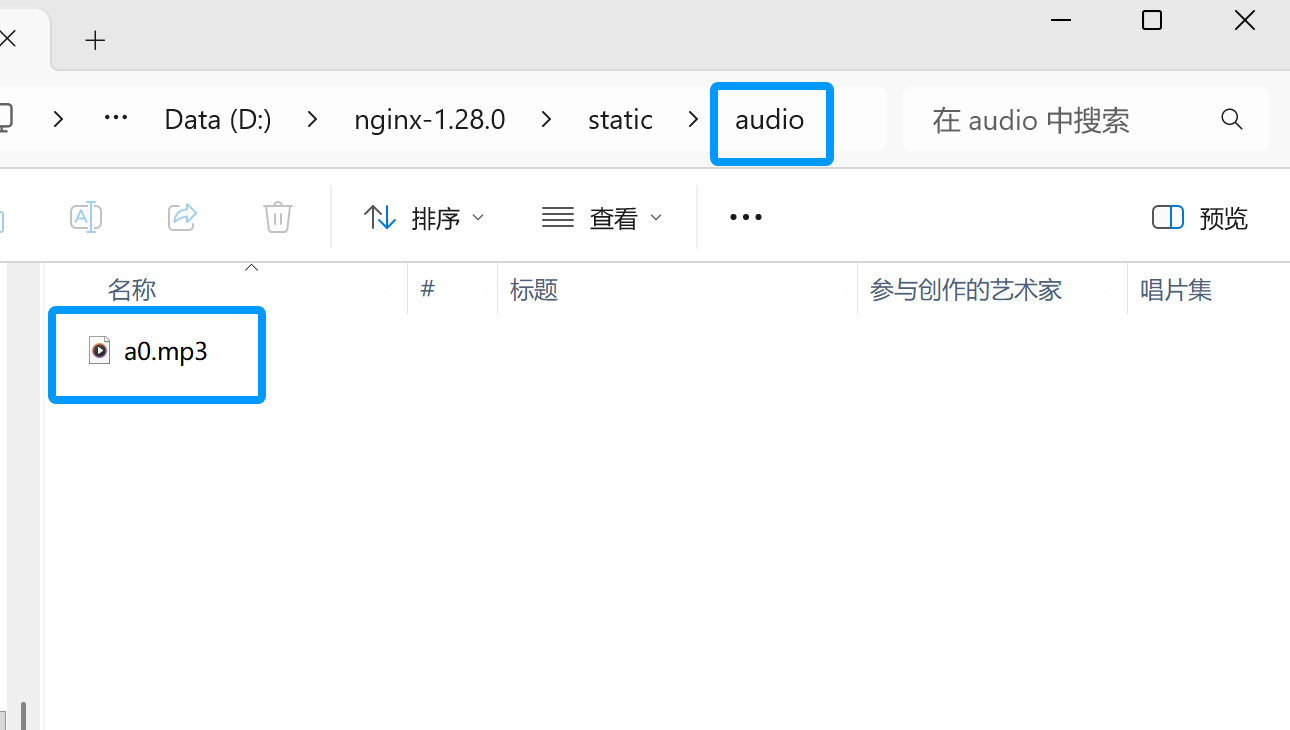
1.4 存放文件
在audio下存放 a0.mp3 和 a0.mp4 文件
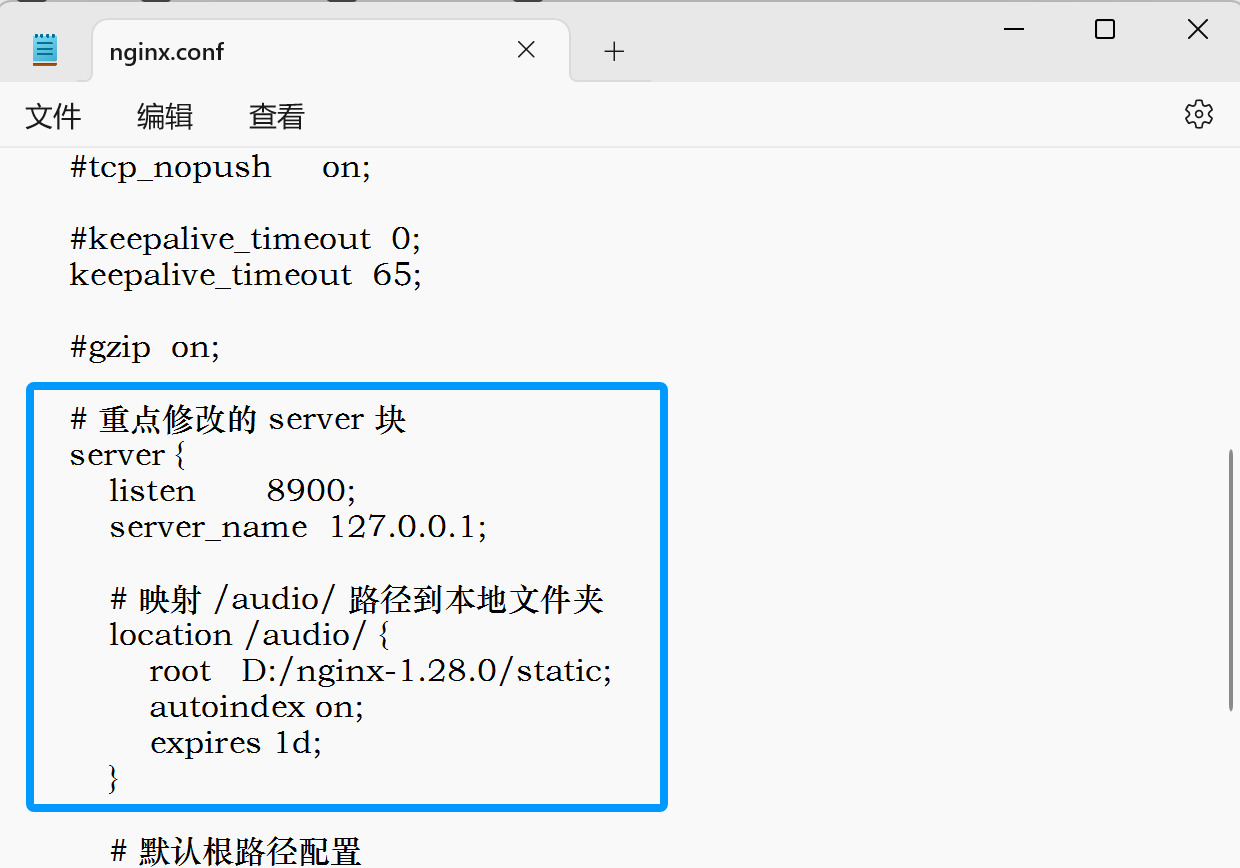
1.5 修改配置文件
Nginx 的配置文件通常位于安装目录下的 conf文件夹中,文件名为 nginx.conf。可以使用任何文本编辑器打开该文件进行配置。
user  nobody;
worker_processes  1;#error_log  logs/error.log;
#error_log  logs/error.log  notice;
#error_log  logs/error.log  info;#pid        logs/nginx.pid;events {worker_connections  1024;
}http {include       mime.types;default_type  application/octet-stream;#log_format  main  '$remote_addr - $remote_user [$time_local] "$request" '#                  '$status $body_bytes_sent "$http_referer" '#                  '"$http_user_agent" "$http_x_forwarded_for"';#access_log  logs/access.log  main;sendfile        on;#tcp_nopush     on;#keepalive_timeout  0;keepalive_timeout  65;#gzip  on;# 重点修改的 server 块server {listen       8900;server_name  127.0.0.1;# 映射 /audio/ 路径到本地文件夹location /audio/ {root   D:/nginx-1.28.0/static;autoindex on;expires 1d;}# 默认根路径配置location / {root   html;index  index.html index.htm;}# 错误页面配置(保留默认)error_page   500 502 503 504  /50x.html;location = /50x.html {root   html;}# 以下 PHP 相关配置保留默认注释即可,无需修改#location ~ \.php$ {#    proxy_pass   http://127.0.0.1;#}#location ~ \.php$ {#    root           html;#    fastcgi_pass   127.0.0.1:9000;#    fastcgi_index  index.php;#    fastcgi_param  SCRIPT_FILENAME  /scripts$fastcgi_script_name;#    include        fastcgi_params;#}#location ~ /\.ht {#    deny  all;#}}# 以下默认注释的 server 块(HTTPS 等)保留不变,无需修改#server {#    listen       8000;#    listen       somename:8080;#    server_name  somename  alias  another.alias;#    location / {#        root   html;#        index  index.html index.htm;#    }#}#server {#    listen       443 ssl;#    server_name  localhost;#    ssl_certificate      cert.pem;#    ssl_certificate_key  cert.key;#    ssl_session_cache    shared:SSL:1m;#    ssl_session_timeout  5m;#    ssl_ciphers  HIGH:!aNULL:!MD5;#    ssl_prefer_server_ciphers  on;#    location / {#        root   html;#        index  index.html index.htm;#    }#}
}
1.6 检查配置文件语法
修改完配置文件后,在命令提示符中输入nginx -t命令来检查配置文件的语法是否正确。如果语法正确,会显示 “nginx: the configuration file D:\nginx-1.28.0/conf/nginx.conf syntax is ok” 等类似信息。
1.7 启动 Nginx
打开命令提示符,切换到 Nginx 的安装目录,例如cd D:\nginx-1.28.0,然后输入start nginx启动 Nginx。

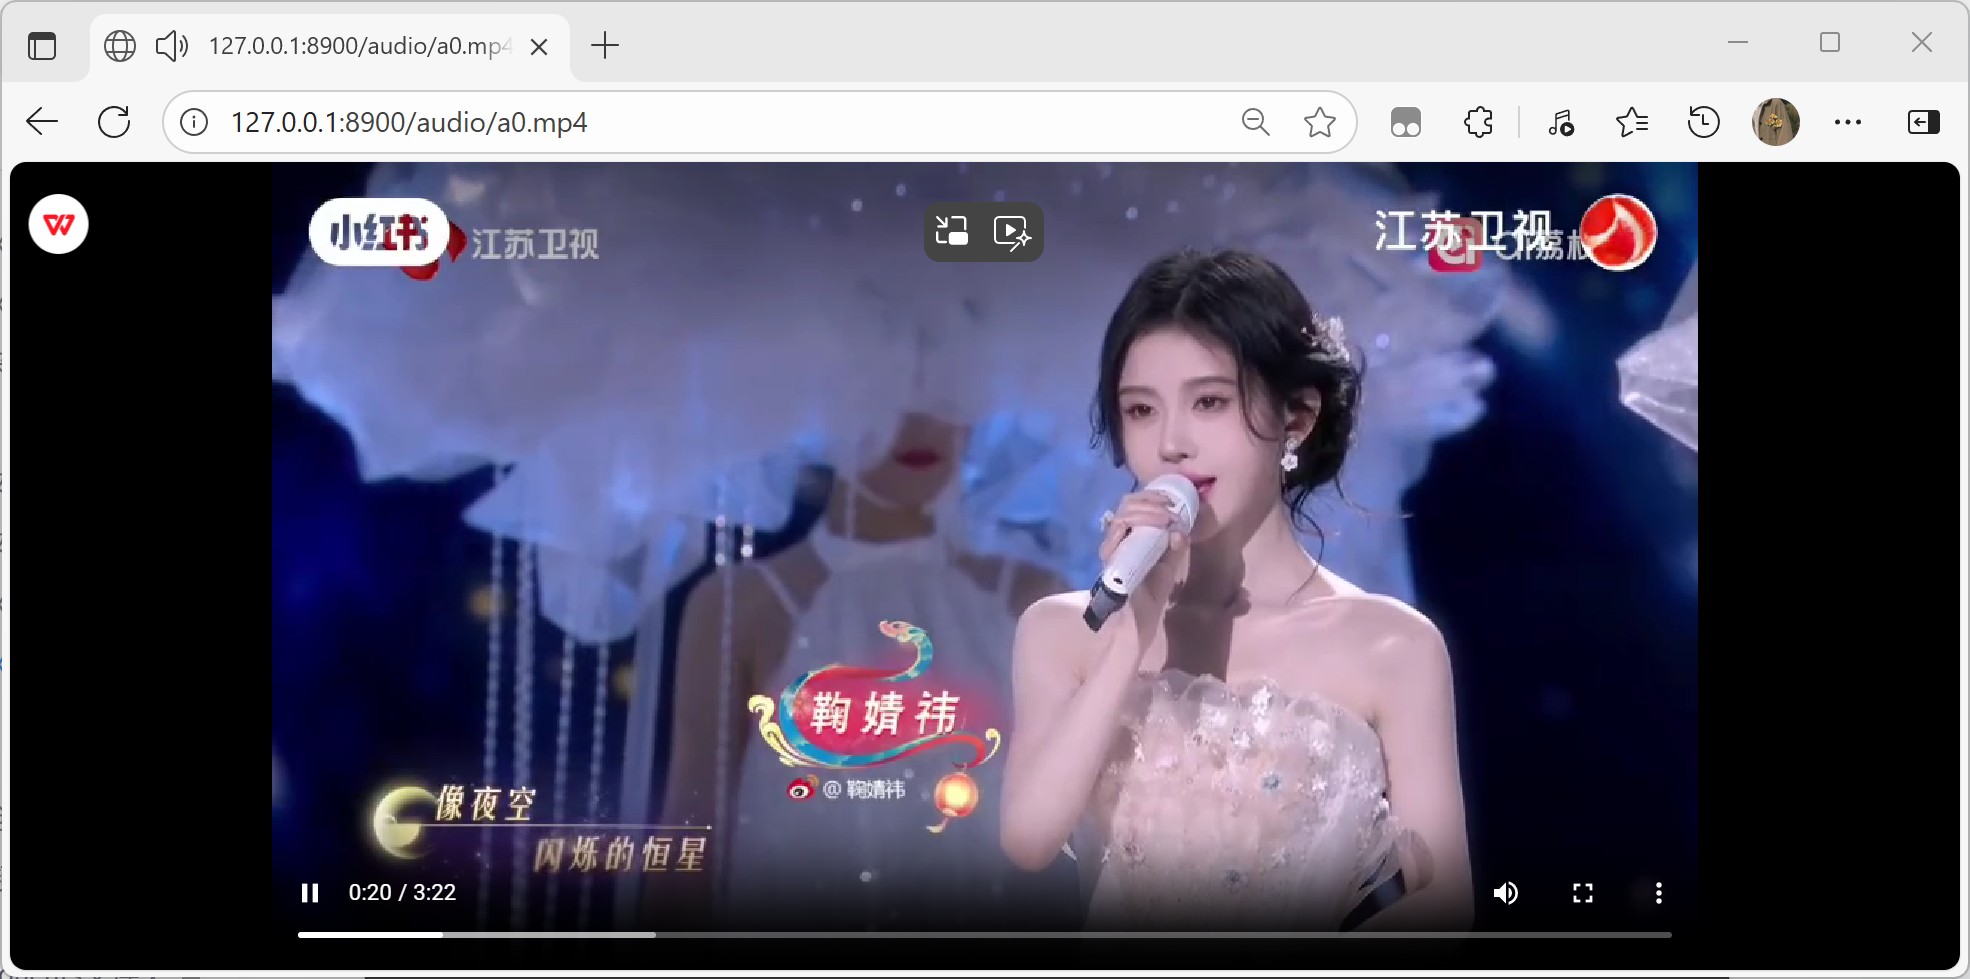
1.8 验证 Nginx 是否启动成功
打开浏览器,在地址栏中输入http://127.0.0.1:8900/audio/a0.mp3,如果浏览器自动下载 a0.mp3 文件,或弹出播放窗口,说明 Nginx 已经启动成功。

2.实现视频、音频播放以及交互
2.1 eclipse端——监听访问请求
使用 Hutool 工具包创建的一个极其轻量级的 HTTP 服务器。它的核心功能是:在本地的 8891 端口启动一个服务,并监听访问 /query 路径的请求,然后返回一句中文欢迎语。
package com.hy.chapter1;import java.nio.charset.Charset;import cn.hutool.http.ContentType;
import cn.hutool.http.HttpUtil;public class Server {public String loadHelloWorld() {return "欢迎使用轻量级的基于HuTool的web数据服务";}public static void main(String[] args) {HttpUtil.createServer(8891).addAction("/query", (request, response) -> {System.out.println("鸿蒙的查询服务接受到了");// 设置字符集不乱码response.setCharset(Charset.forName("UTF-8"));// 设置可以跨域,让不同IP和端口的请求可以访问response.setHeader("Access-Control-Allow-Origin", "*");Server server = new Server();String result = server.loadHelloWorld();response.setCharset(Charset.forName("UTF-8"));response.write(result, ContentType.TEXT_PLAIN.toString());}).start();}}
输出结果:
Hutool Simple Http Server listen on 【0:0:0:0:0:0:0:0:8891】
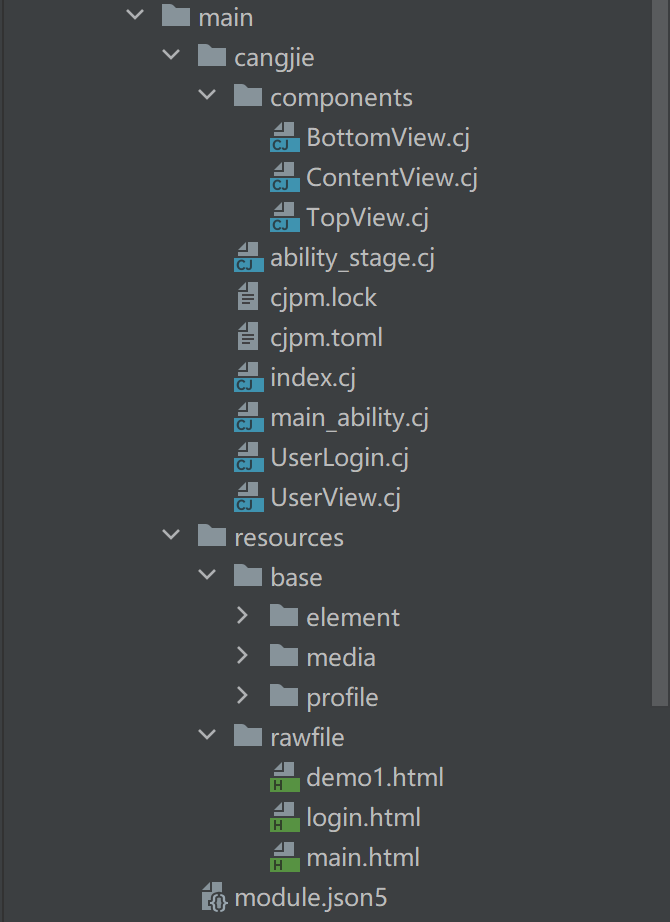
2.2 在DevEco Stdio中创建cj项目
2.2.1 文件分布情况
2.2.2 创建components文件夹
① TopView.cj
package ohos_app_cangjie_entry.componentsimport ohos.base.*
import ohos.component.*
import ohos.state_manage.*
import ohos.state_macro_manage.*
import ohos.resource_manager.*@Component
public class TopView{var imgPath:CJResourcefunc  build(){Row(12){Image(this.imgPath).width(60).height(60).objectFit(ImageFit.Contain)Text("技术展现舞台风采").fontSize(22).fontWeight(FontWeight.Bold)}.width(100.percent).height(12.percent).justifyContent(FlexAlign.Center)}
}
② ContentView.cj
package ohos_app_cangjie_entry.componentsimport ohos.base.*
import ohos.component.*
import ohos.state_manage.*
import ohos.state_macro_manage.*
import ohos.resource_manager.*
import  ohos.webview.*@Component
public class ContentView{let webController = WebviewController()//这个地方没有s,其实是resource协议let  webPath:String = "resource://rawfile/demo1.html"func  build(){Column(){//目前能力还不是很齐全// Web(src: "https://one.jit.edu.cn/", controller: this.webController)Web(src: this.webPath, controller: this.webController)}.width(100.percent).height(80.percent)}
}
③ BottomView.cj
package ohos_app_cangjie_entry.componentsimport ohos.base.*
import ohos.component.*
import ohos.state_manage.*
import ohos.state_macro_manage.*
import ohos.resource_manager.*@Component
public class BottomView{func  build(){Row(){}.width(100.percent).height(8.percent).backgroundColor(0x116655)}
}
2.2.3 创建UserView.cj
package ohos_app_cangjie_entry
import ohos.base.*
import ohos.component.*
import ohos.state_manage.*
import ohos.state_macro_manage.*
import ohos_app_cangjie_entry.components.TopView
import ohos_app_cangjie_entry.components.ContentView
import ohos_app_cangjie_entry.components.BottomView@Entry
@Component
class  UserView{//定义变量  资源文件的变量类型:CJResource//重新引入第三方的图片,仓颉鸿蒙会报错,重新编译一下工程let  imgPath1 :CJResource = @r(app.media.startIcon)//回调函数,构建鸿蒙的UIfunc   build(){Column(){TopView(imgPath:imgPath1)ContentView()BottomView()}.width(100.percent).height(100.percent).backgroundColor(0x289567)}}
2.2.4 在resource-->rawfile下创建demo1.html
<html>
<header><title></title><style type="text/css">#textview{font-size:40px;}</style>
</header>
<body>
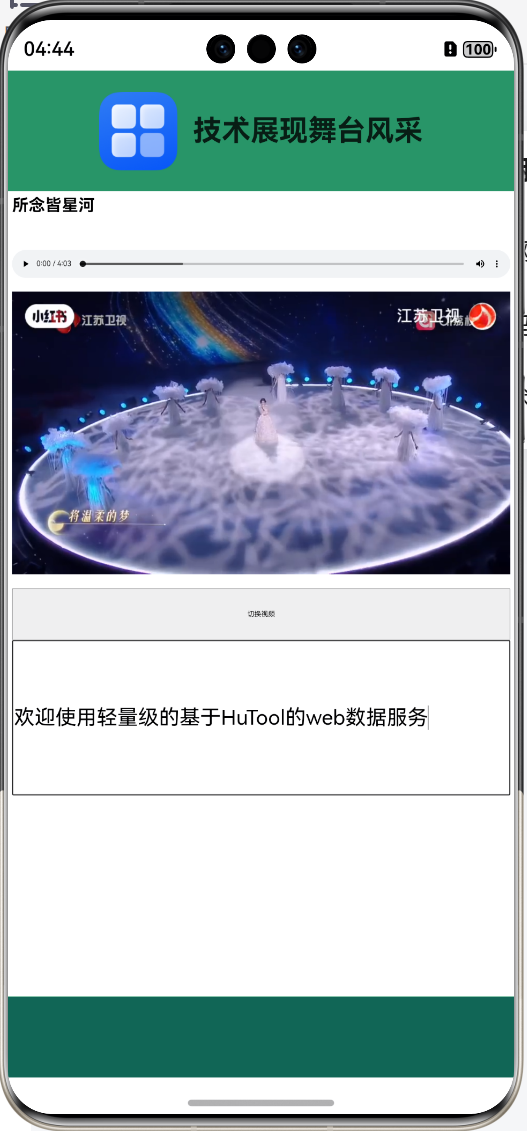
<h1>所念皆星河</h1>
<audio src="http://192.168.1.22:8900/audio/a0.mp3" controls="controls" autoplay="autoplay"style="width:100%;height:100px;"></audio><video id="vd" src="http://192.168.1.22:8900/audio/a0.mp4" controls="controls" autoplay="false"style="width:100%;height:600px;"></video><button style="width:100%;height:100px;" id="changebtn">切换视频</button><input type="text" style="width:100%;height:300px;" id="textview" value="这是文本"></input>
</body>
<script type="text/javascript">let btnObj = document.getElementById("changebtn");let vdObj = document.getElementById("vd");btnObj.onclick=function(){console.log("按钮点击切换");vdObj.src="http://192.168.1.22:8900/audio/a0.mp4";}let textObj = document.getElementById("textview");textObj.onclick=function(){//1.创建原生ajax对象let ajaxObj = new XMLHttpRequest();//2.设置请求方法和链接ajaxObj.open("get", "http://192.168.1.22:8891/query");//3.发送请求ajaxObj.send();//4.回调,得到服务器传送的数据ajaxObj.onreadystatechange = () => {if (ajaxObj.readyState == 4 && ajaxObj.status == 200) {let result = ajaxObj.responseText;console.log('1.服务器端传回的数据为:' + result);//let re1 = eval(result)// console.log('2.服务器端传回的数据为:' + re1);textObj.value = result;}}}</script>
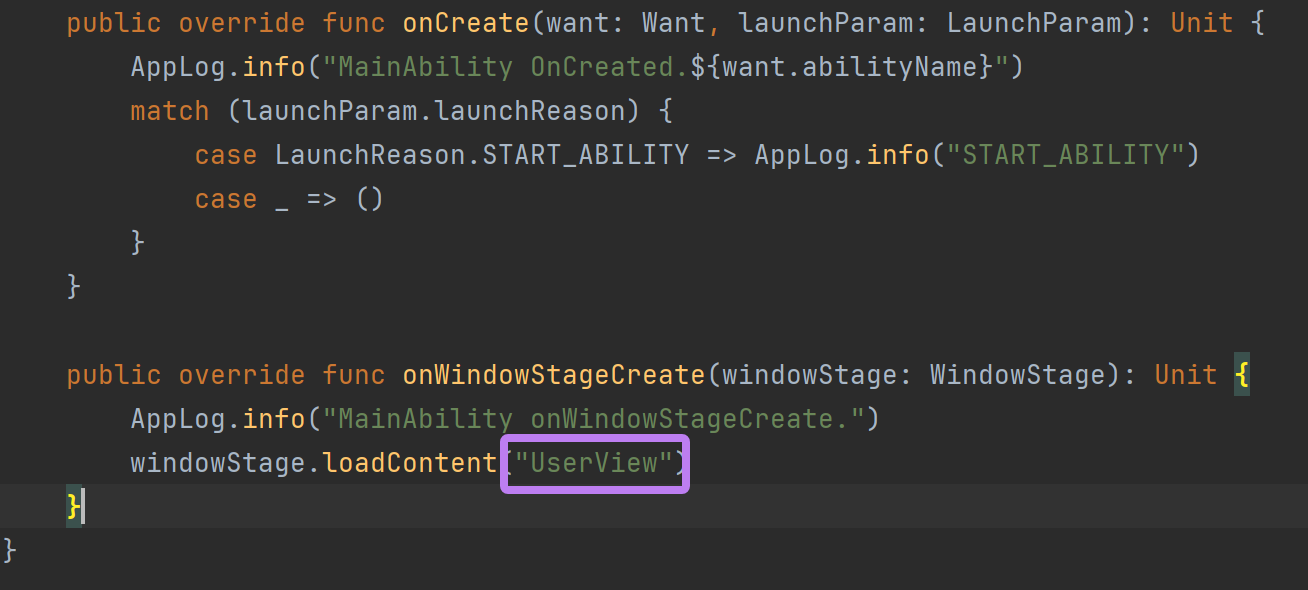
</html>2.2.5 修改main_ability.cj文件
实现效果:
输出结果:
Hutool Simple Http Server listen on 【0:0:0:0:0:0:0:0:8891】
鸿蒙的查询服务接受到了
3.实现登录页面
3.1 eclipse端——生成验证码
3.1.1 数据库准备
CREATE TABLE t_user(uid INT PRIMARY KEY auto_increment,uname VARCHAR(20) NOT NULL,upwd CHAR(11) NOT NULL
)DROP TABLE t_userINSERT INTO t_user(uname,upwd) VALUES('admin1','111111');
INSERT INTO t_user(uname,upwd) VALUES('admin2','222222');
INSERT INTO t_user(uname,upwd) VALUES('admin3','333333');SELECT * FROM t_user
实现效果:

3.1.2 加载依赖
在pom.xml文件中添加并加载依赖
<dependency><groupId>mysql</groupId><artifactId>mysql-connector-java</artifactId><version>8.0.24</version></dependency><dependency><groupId>cn.hutool</groupId><artifactId>hutool-all</artifactId><version>5.8.38</version></dependency><dependency><groupId>com.alibaba</groupId><artifactId>fastjson</artifactId><version>1.2.83</version></dependency><dependency><groupId>dom4j</groupId><artifactId>dom4j</artifactId><version>1.6.1</version></dependency><dependency><groupId>jaxen</groupId><artifactId>jaxen</artifactId><version>1.1.1</version></dependency>3.1.3 具体实现
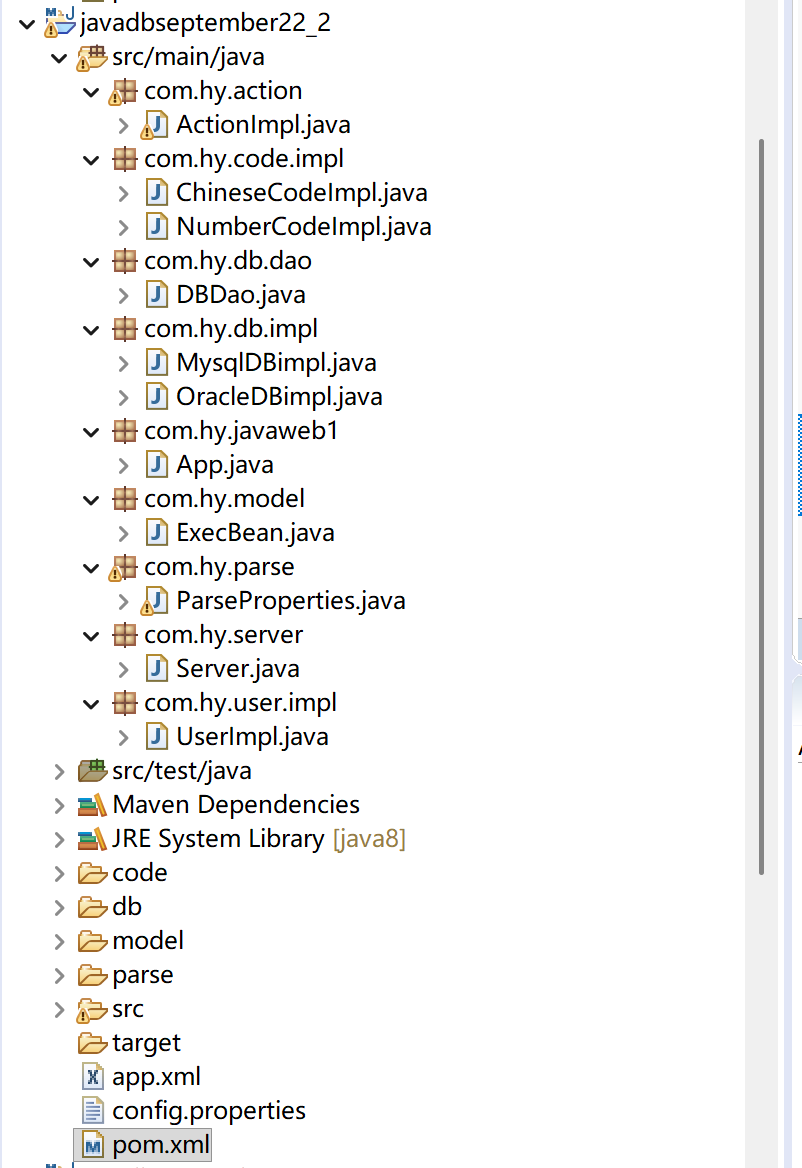
(1) 类在包中的分布情况
(2) 配置文件
- app.xml(若要使用汉字验证码,将NumberCodeImpl替换为ChineseCodeImpl)
<?xml version="1.0" encoding="UTF-8"?>
<apps><action name="/makecode"  class="com.hy.code.impl.NumberCodeImpl"  method="makeCode"></action><action name="/loginparam"  class="com.hy.user.impl.UserImpl"  method="checkLogin"></action>
</apps>- config.properties
port=8500
path=app.xml
(3) 创建包并实现类
① com.hy.action
package com.hy.action;import java.io.IOException;
import java.lang.reflect.InvocationTargetException;
import java.lang.reflect.Method;
import java.nio.charset.Charset;import com.alibaba.fastjson.JSONArray;
import com.hy.model.ExecBean;
import com.hy.parse.ParseProperties;import cn.hutool.http.ContentType;
import cn.hutool.http.server.HttpServerRequest;
import cn.hutool.http.server.HttpServerResponse;
import cn.hutool.http.server.action.Action;
import cn.hutool.json.JSONObject;public class ActionImpl implements Action {public void doAction(HttpServerRequest request, HttpServerResponse response) throws IOException {System.out.println("执行。。。。。。。");String path = request.getPath();System.out.println("请求的路径为:" + path);ExecBean bean = ParseProperties.getTabs().get(path);try {System.out.println(bean.getClassPath());Class targetC = Class.forName(bean.getClassPath());Object targetObj = targetC.newInstance();if (path.contains("login")) {String name = request.getParam("name");String pwd = request.getParam("pwd");System.out.println(name + "," + pwd);Method setNameMethod = targetC.getDeclaredMethod("setName", String.class);Method setPwdMethod = targetC.getDeclaredMethod("setPwd", String.class);setNameMethod.invoke(targetObj, name);setPwdMethod.invoke(targetObj, pwd);}Method m = targetC.getDeclaredMethod(bean.getMethod(), null);String str = (String) m.invoke(targetObj, null);System.out.println("结果为:" + str);response.setCharset(Charset.forName("UTF-8"));response.setHeader("Access-Control-Allow-Origin", "*");JSONObject objData = new JSONObject();System.out.println(path.substring(1));objData.put(path.substring(1), str);response.write(objData.toString(), ContentType.JSON.toString());} catch (ClassNotFoundException e) {e.printStackTrace();} catch (NoSuchMethodException e) {e.printStackTrace();} catch (SecurityException e) {e.printStackTrace();} catch (IllegalAccessException e) {e.printStackTrace();} catch (IllegalArgumentException e) {e.printStackTrace();} catch (InvocationTargetException e) {e.printStackTrace();} catch (InstantiationException e) {e.printStackTrace();}}}
② com.hy.code.impl
- ChineseCodeImpl.java:中文验证码
package com.hy.code.impl;import java.util.Random;public class ChineseCodeImpl {private static final String[] COMMON_CHARACTERS = { "伟", "芳", "强", "丽", "敏", "静", "杰", "慧", "磊", "娜", "超", "玲", "勇","丹", "军", "艳", "涛", "霞", "明", "梅", "峰", "兰", "刚", "萍", "辉", "秀", "波", "桂", "鹏", "菊", "林", "翠", "俊", "青","龙", "荣", "华", "英", "忠", "玉", "凯", "平", "健", "红", "婷", "祥", "瑞", "云", "雪", "飞", "亮", "芬", "宇", "文", "浩","甜", "佳", "博", "思", "萌", "颖", "振", "海", "冰", "晨", "露", "泽", "宁", "雨", "嘉", "瑶", "润", "琴", "帆", "琪", "昕","梦", "阳", "依", "风", "清", "影", "悦", "新", "源", "媛", "薇", "可", "靖", "萱", "卿", "韵", "逸", "柏", "艺", "馨", "羽","菱", "君", "碧", "锦", "菱", "熙", "菱", "念", "悠", "宛", "若", "诗", "珊", "菱", "芷", "菱", "芙", "榆", "菱", "檀", "菱","樱", "菱", "玫", "菱", "荷", "菱", "莲", "柳", "梨", "槐", "桃", "菱", "竹", "菱", "松", "菱", "柏", "菱", "榕", "菱", "枫","柯", "桦", "桐", "梓", "榕", "杞", "檀", "棉", "棕", "楼", "椿" };StringBuilder sb = new StringBuilder();public String makeCode() {System.out.println("中文验证码执行");for (int i = 0; i < 4; i++) {Random r = new Random();int len = r.nextInt(COMMON_CHARACTERS.length);if (!sb.toString().contains(COMMON_CHARACTERS[len])) {sb.append(COMMON_CHARACTERS[len]);} else {i--;continue;}}return sb.toString();}}- NumberCodeImpl.java
package com.hy.code.impl;import java.util.Random;public class NumberCodeImpl {private static final String[] COMMON_NUMBERS = { "0", "1", "2", "3", "4", "5", "6", "7", "8", "9" };StringBuilder sb = new StringBuilder();public String makeCode() {System.out.println("数字验证码执行");for (int i = 0; i < 4; i++) {Random r = new Random();int len = r.nextInt(COMMON_NUMBERS.length);if (!sb.toString().contains(COMMON_NUMBERS[len])) {sb.append(COMMON_NUMBERS[len]);} else {i--;continue;}}return sb.toString();}}
③ com.hy.db.dao
package com.hy.db.dao;import java.sql.Connection;
import java.sql.DriverManager;
import java.sql.PreparedStatement;
import java.sql.ResultSet;
import java.sql.SQLException;public class DBDao {Connection conn;public DBDao() {try {Class.forName("com.mysql.cj.jdbc.Driver");conn = DriverManager.getConnection("jdbc:mysql://127.0.0.1:3306/mysql2025", "root", "Hy61573166!!!");} catch (ClassNotFoundException e) {e.printStackTrace();} catch (SQLException e) {e.printStackTrace();}}public void closeDB() {if (null != conn) {try {conn.close();} catch (SQLException e) {e.printStackTrace();}}}public int checkLogin(String name, String pwd) {String sql = "select  count(uname)  from  t_user  where  uname =?  and  upwd=?";int count = 0;try {PreparedStatement pstmt = this.conn.prepareStatement(sql);pstmt.setString(1, name);pstmt.setString(2, pwd);ResultSet rs = pstmt.executeQuery();while (rs.next()) {count = rs.getInt(1);}} catch (SQLException e) {e.printStackTrace();} finally {this.closeDB();}return count;}}
④ com.hy.db.impl
package com.hy.db.impl;public class MysqlDBimpl {public String query() {System.out.println("查询Mysql数据库");return "Mysql数据";}}
package com.hy.db.impl;public class OracleDBimpl {public String query() {System.out.println("查询oracle数据库");return "oracle数据";}}
⑤ com.hy.javaweb1
package com.hy.javaweb1;import com.hy.server.Server;/*** *  交给用户去选择:满足用户需求* 1. 生成验证码,大的项目,满足不同用户的需求* 2. 数据库不同,mysql,oracle,gaussdb* 3. 分布式策略不同*/
public class App {public static void main(String[] args) {Server server = new Server();server.execAction();}
}
⑥ com.hy.model
package com.hy.model;public class ExecBean {private String classPath;private String method;public String getClassPath() {return classPath;}public void setClassPath(String classPath) {this.classPath = classPath;}public String getMethod() {return method;}public void setMethod(String method) {this.method = method;}}
⑦ com.hy.parse
package com.hy.parse;import java.io.File;
import java.io.FileInputStream;
import java.io.FileNotFoundException;
import java.io.IOException;
import java.util.Hashtable;
import java.util.List;
import java.util.Properties;import org.dom4j.Document;
import org.dom4j.DocumentException;
import org.dom4j.Element;
import org.dom4j.io.SAXReader;import com.hy.model.ExecBean;public class ParseProperties {private static ParseProperties p = null;private Properties properties = null;private static Hashtable<String, ExecBean> tabs = new Hashtable<String, ExecBean>();private ParseProperties() {properties = new Properties();try {FileInputStream fin = new FileInputStream("./config.properties");properties.load(fin);SAXReader saxReader = new SAXReader();Document doc = saxReader.read(new File(properties.getProperty("path")));List<Element> lists = doc.selectNodes("./apps/action");for (Element element : lists) {String classPath = element.attributeValue("class");String method = element.attributeValue("method");ExecBean execBean = new ExecBean();execBean.setClassPath(classPath);execBean.setMethod(method);tabs.put(element.attributeValue("name"), execBean);}} catch (FileNotFoundException e) {e.printStackTrace();} catch (IOException e) {e.printStackTrace();} catch (DocumentException e) {e.printStackTrace();}}public static synchronized ParseProperties getInstance() {if (null == p) {p = new ParseProperties();}return p;}public Properties getProperties() {return properties;}public void setProperties(Properties properties) {this.properties = properties;}public static Hashtable<String, ExecBean> getTabs() {return tabs;}public static void setTabs(Hashtable<String, ExecBean> tabs) {ParseProperties.tabs = tabs;}}
⑧ com.hy.server
package com.hy.server;import com.hy.action.ActionImpl;
import com.hy.parse.ParseProperties;import cn.hutool.http.HttpUtil;
import cn.hutool.http.server.SimpleServer;
import cn.hutool.http.server.action.Action;public class Server {private Action actionImpl = new ActionImpl();private SimpleServer simpleServer;public Server() {String portStr = ParseProperties.getInstance().getProperties().getProperty("port");int port = Integer.parseInt(portStr);simpleServer = HttpUtil.createServer(port);simpleServer.start();System.out.println("自定义框架hutoolweb启动");}public void execAction() {simpleServer.addAction("/", actionImpl);}}
⑨ com.hy.user.impl
package com.hy.user.impl;import com.hy.db.dao.DBDao;public class UserImpl {String name;String pwd;public String checkLogin() {System.out.println(this.getName() + "," + this.getPwd());DBDao dao = new DBDao();if (dao.checkLogin(this.getName(), this.getPwd()) > 0) {return "success";}return "fail";}public String getName() {return name;}public void setName(String name) {this.name = name;}public String getPwd() {return pwd;}public void setPwd(String pwd) {this.pwd = pwd;}}
输出结果:
Hutool Simple Http Server listen on 【0:0:0:0:0:0:0:0:8500】
自定义框架hutoolweb启动
3.2 DevEco Stdio端——实现登录跳转页面
3.3.1 创建UserLogin.cj
package ohos_app_cangjie_entryimport ohos.base.*
import ohos.component.*
import ohos.state_manage.*
import ohos.state_macro_manage.*
import ohos.webview.*@Entry
@Component
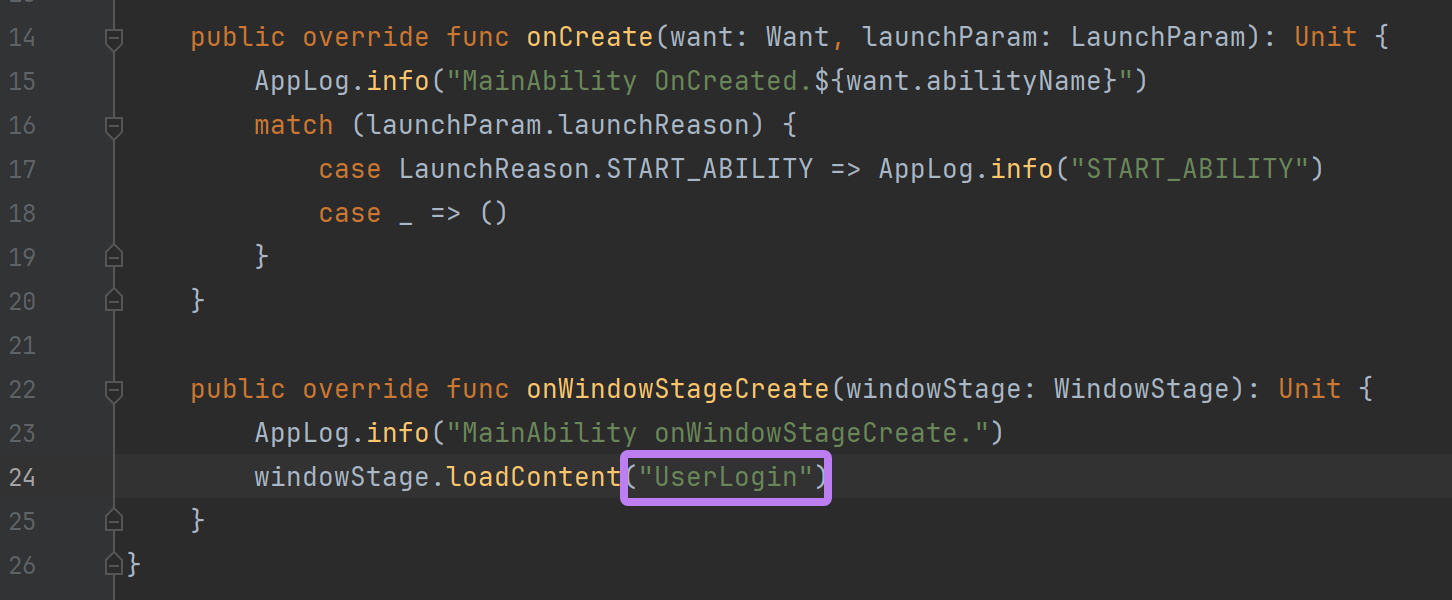
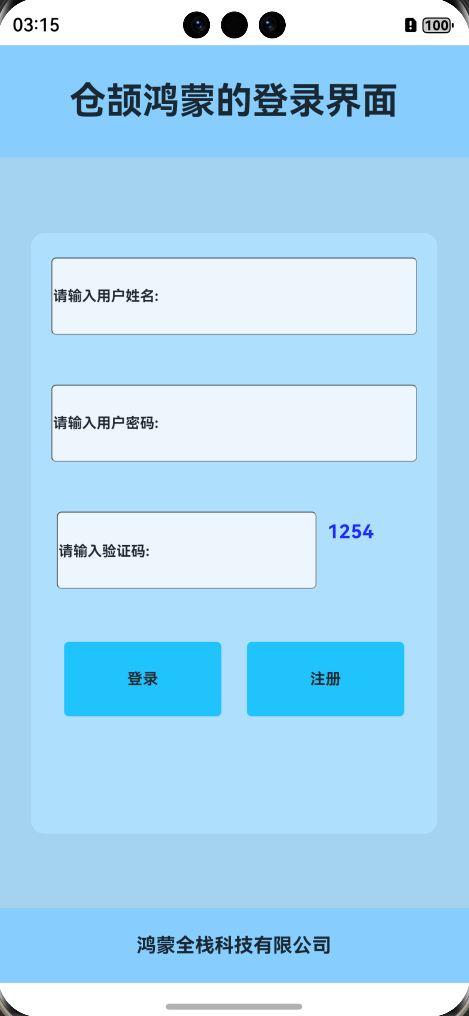
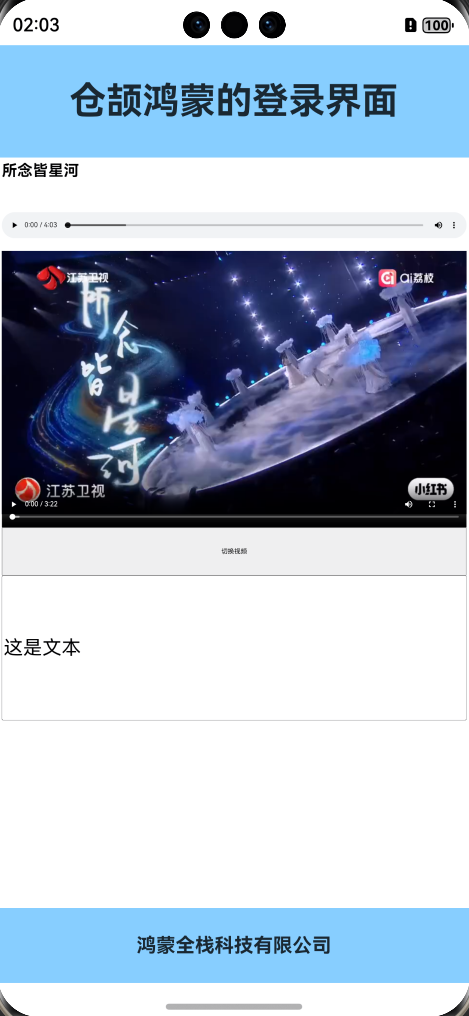
class UserLogin {let webController = WebviewController()//这个地方没有s,其实是resource协议let webPath: String = "resource://rawfile/login.html"func build() {Column() {Row() {Text("仓颉鸿蒙的登录界面").fontSize(30).fontWeight(FontWeight.Bold)}.width(100.percent).height(12.percent).backgroundColor(0x87CEFF).justifyContent(FlexAlign.Center)Web(src: this.webPath, controller: this.webController).width(100.percent).height(80.percent)Row() {Text("鸿蒙全栈科技有限公司").fontSize(16).fontWeight(FontWeight.Bold)}.width(100.percent).height(8.percent).backgroundColor(0x87CEFF) .justifyContent(FlexAlign.Center)}.width(100.percent).height(100.percent)}
}3.3.2 在resource-->rawfile下创建login.html
<!DOCTYPE html>
<html>
<head><meta charset="utf-8"><title></title><style type="text/css">body{margin: 0px;padding: 0px;}.main{width: 100%;height: 100vh;background-color: #A4D3EE;display: flex;justify-content: center;align-items: center;}.loginview{position: relative;width: 86%;height: 80%;background-color: #B0E2FF;z-index: 100;border: 20px;border-radius: 28px;display: flex;flex-direction: column;justify-content: center;align-items: center;opacity:0.8;}.inputview{width: 90%;height: 22%;margin: 3px;display: flex;justify-content: center;align-items: center;}.inputview1{width: 90%;height: 16%;margin: 3px;display: flex;justify-content: center;align-items: center;}.inputview3{width: 90%;height: 22%;margin: 3px;display: flex;justify-content: space-around;align-items: center;}.inputview4{width: 90%;height: 22%;margin: 3px;display: flex;justify-content: space-around;align-items: center;}input::placeholder {color: black;font-size: 30px;}.nameview{width:100%;height:60%;font-size:30px;font-weight:bold;border-radius: 10px;}.pwdview{width:100%;height:60%;font-size:30px;font-weight:bold;border-radius: 10px;}.codeview{width:70%;height:60%;font-size:36px;font-weight:bold;border-radius: 10px;}#spancode{width:23%;height:60%;font-size:40px;color:blue;font-weight:bold;display:block;margin-top: 30px;}button{width:43%;height:60%;background-color:#00BFFF;font-size:32px;font-weight:bold;border:none;margin-top: 8px;border-radius: 10px;}button:hover{background-color:#FF4500;}h1{color:red;}</style>
</head>
<body>
<div class="main"><div class="loginview"><div class="inputview"><input class="nameview" placeholder="请输入用户姓名:" type="text"/></div><div class="inputview"><input class="pwdview" placeholder="请输入用户密码:" type="password"/></div><div class="inputview3"><input class="codeview" placeholder="请输入验证码:" type="text"/><span id="spancode"></span></div><div class="inputview4"><button value="" onclick="checkLogin()">登录</button><button value="">注册</button></div><div class="inputview1"></div></div></div>
</body>
<script type="text/javascript">let  checkCode = "";let  inputCodeObj =   document.getElementsByClassName("codeview")[0];let  inputNameObj =   document.getElementsByClassName("nameview")[0];let  inputPwdObj =   document.getElementsByClassName("pwdview")[0];let  inputView1Obj =   document.getElementsByClassName("inputview1")[0];let  spanObj =  document.getElementById("spancode");function  checkLogin() {let  inputCodeValue  = inputCodeObj.value;console.log("1.服务器端传回的数据为:"+inputCodeValue);//js的 === 值和类型都相等if(inputCodeValue === checkCode) {console.log("核实:对的");let  nameValue  =  inputNameObj.value;let  pwdValue  =  inputPwdObj.value;console.log("核实:"+nameValue+","+pwdValue);//1. 创建原生ajax对象XMLHttpRequestlet ajaxObj = new XMLHttpRequest();//2.设置请求方法和链接ajaxObj.open("get", "http://192.168.1.22:8500/loginparam?name="+nameValue+"&pwd="+pwdValue);//3.发送请求ajaxObj.send();ajaxObj.onreadystatechange = () => {if (ajaxObj.readyState == 4 && ajaxObj.status == 200) {console.log('接受成功');let result = ajaxObj.responseText;let  objdata = JSON.parse(result);let  resultValue = objdata.loginparam;console.log('核实:' +resultValue);if(resultValue == "success") {window.location.href = "demo1.html";}else {inputView1Obj.innerHTML = "<h1>对不起,用户名或密码输入错误<h1>";setTimeout(()=>{createCode();inputView1Obj.innerHTML ="";},2000)}}}}else {console.log("核实:错的");inputView1Obj.innerHTML = "<h1>对不起,验证码输入错误<h1>";setTimeout(()=>{createCode();inputView1Obj.innerHTML ="";},2000)}}function  createCode() {//1. 创建原生ajax对象XMLHttpRequestlet ajaxObj = new XMLHttpRequest();//2.设置请求方法和链接ajaxObj.open("get", "http://192.168.1.22:8500/makecode");//3.发送请求ajaxObj.send();//4.回调,得到服务器传送的数据ajaxObj.onreadystatechange = () => {if (ajaxObj.readyState == 4 && ajaxObj.status == 200) {console.log('接受成功');let result = ajaxObj.responseText;console.log('核实:' + result);console.log('核实:' +typeof result);//spanObj.innerText = result;let  objdata = JSON.parse(result);checkCode = objdata.makecode;console.log('核实:' +checkCode);spanObj.innerText = checkCode ;}}}createCode();
</script>
</html>
3.3.3 修改main_ability.cj文件
实现效果:
运行日志:
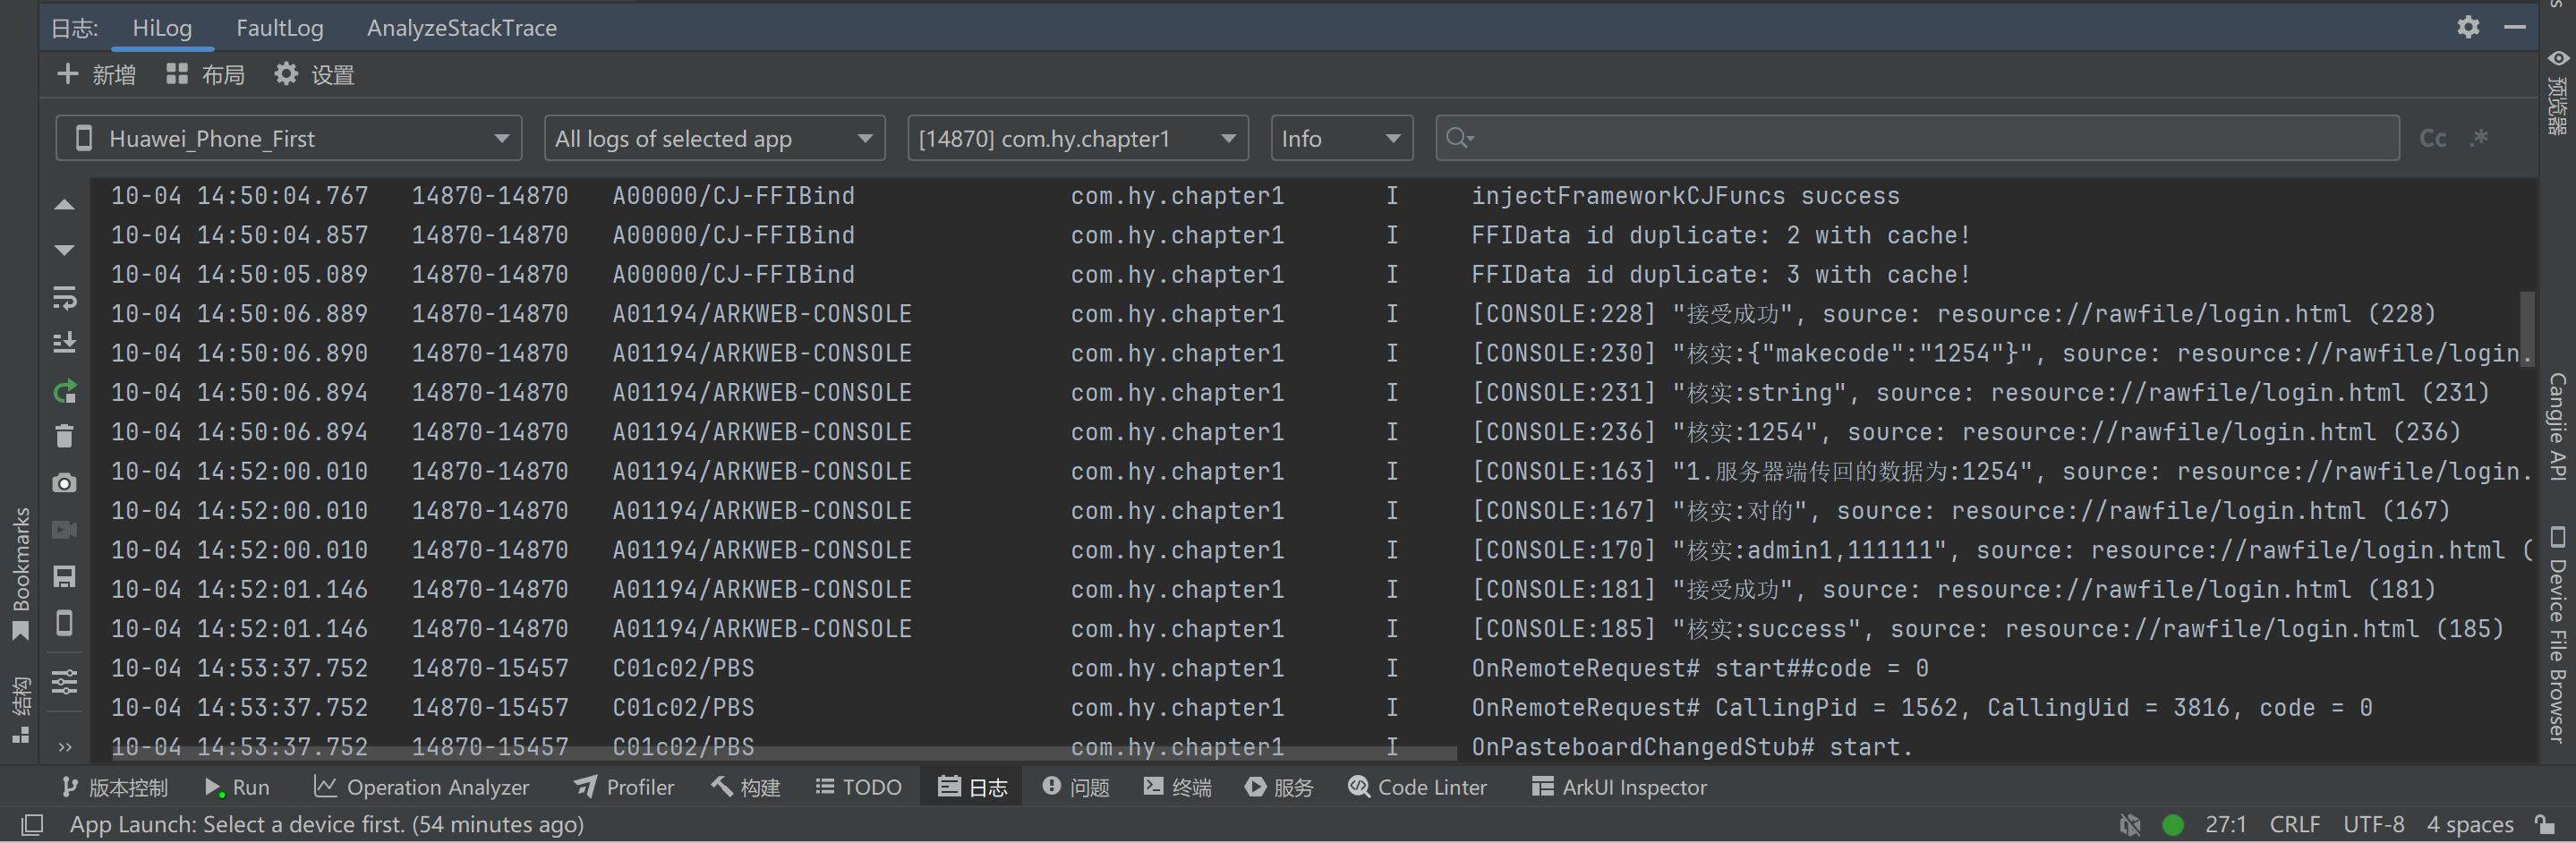
eclipse输出结果:
Hutool Simple Http Server listen on 【0:0:0:0:0:0:0:0:8500】
自定义框架hutoolweb启动
执行。。。。。。。
请求的路径为:/makecode
com.hy.code.impl.NumberCodeImpl
数字验证码执行
结果为:1254
makecode
执行。。。。。。。
请求的路径为:/loginparam
com.hy.user.impl.UserImpl
admin1,111111
admin1,111111
结果为:success
loginparam