【Vue】——Pinia
Vue 3 状态管理:深入理解与使用 Pinia
一、对 Pinia 的理解
Pinia 是 Vue.js 官方团队推荐的新一代状态管理库,可以看作是下一代 Vuex。它汲取了 Vuex 5 核心团队讨论中的许多理念,并提供了一个更简单、更直观、且类型安全的全新 API。

核心特性与优势:
- Vue 2 和 Vue 3 支持:同时支持两个大版本,项目迁移或升级无压力。
- 极简的 API:抛弃了 Vuex 中
Mutations和Actions的区分,所有操作都可以在actions中完成,大大简化了学习成本和代码量。 - 完美的 TypeScript 支持:Pinia 的 API 设计从一开始就考虑了类型推断,无需复杂的包装器即可享受完整的 TypeScript 体验。
- 模块化设计:不再有可嵌套的模块这种复杂的概念,每个 Store 都是独立且自组织的,可以通过导入方式自然组合。
- 无
modules的命名空间:Store 之间可以自由交叉组合,不再需要命名空间前缀。 - DevTools 支持:与 Vue DevTools 完美集成,提供了出色的开发体验,可以追踪状态变化和 actions 调用。
简单来说,如果你觉得 Vuex 过于繁琐和复杂,Pinia 提供了一个更现代化、更清爽的替代方案。
二、准备一个效果
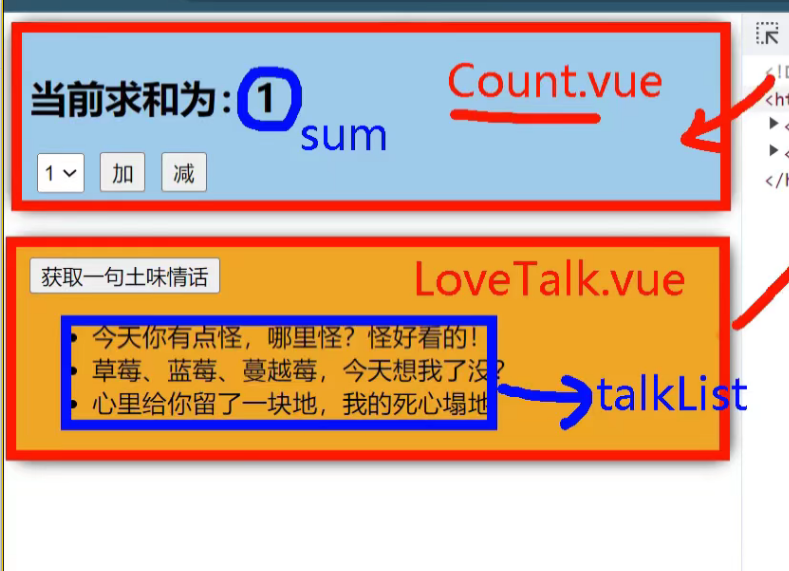
我们将构建一个简单的计数器应用来演示 Pinia 的各个功能。这个应用包含:
显示主计数器的值。
一个 +1 按钮。
一个 -1 按钮。
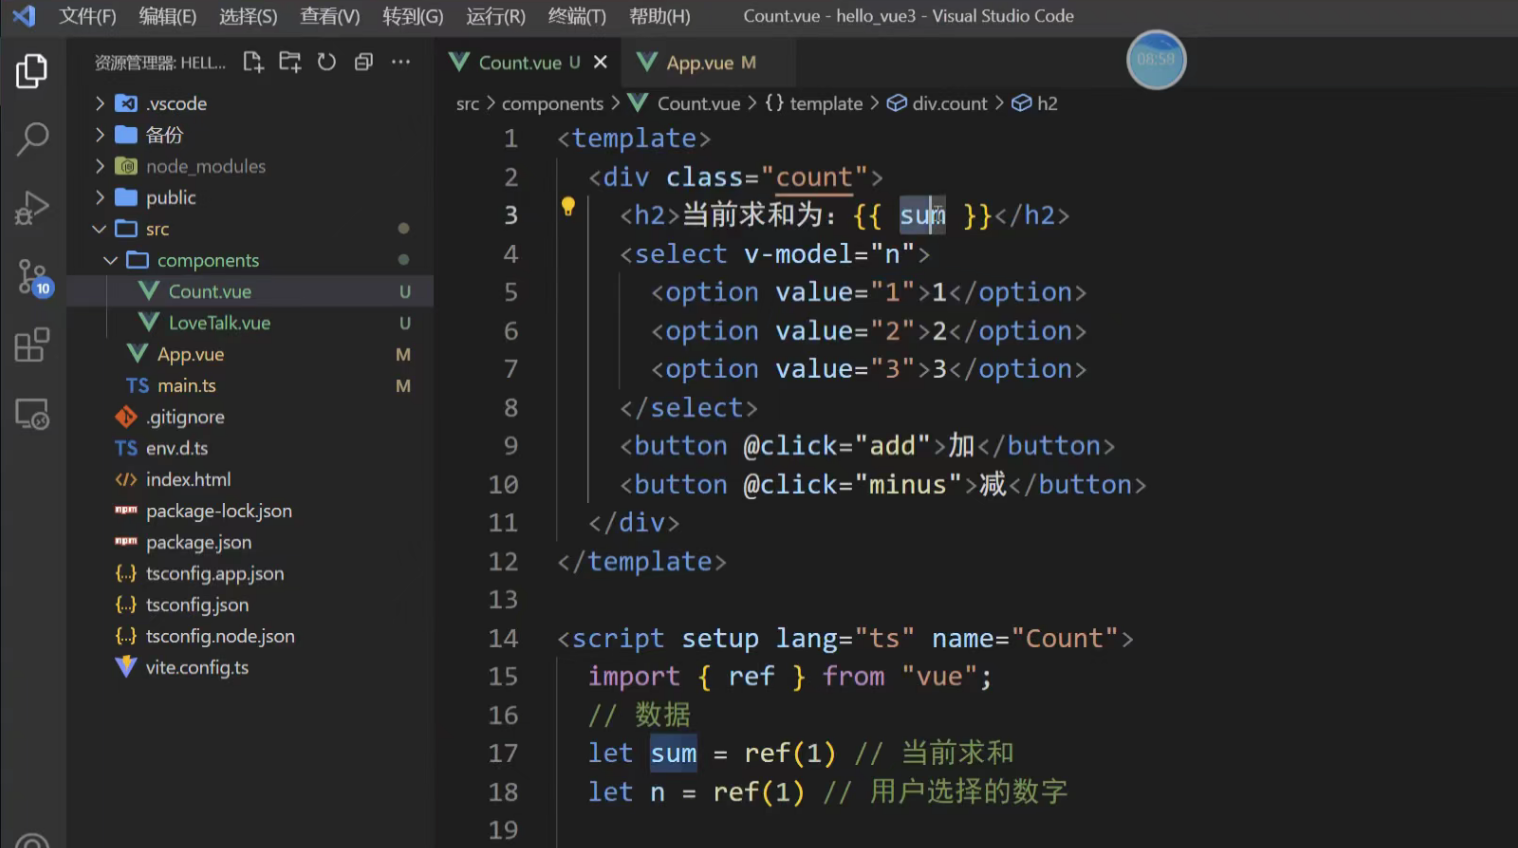
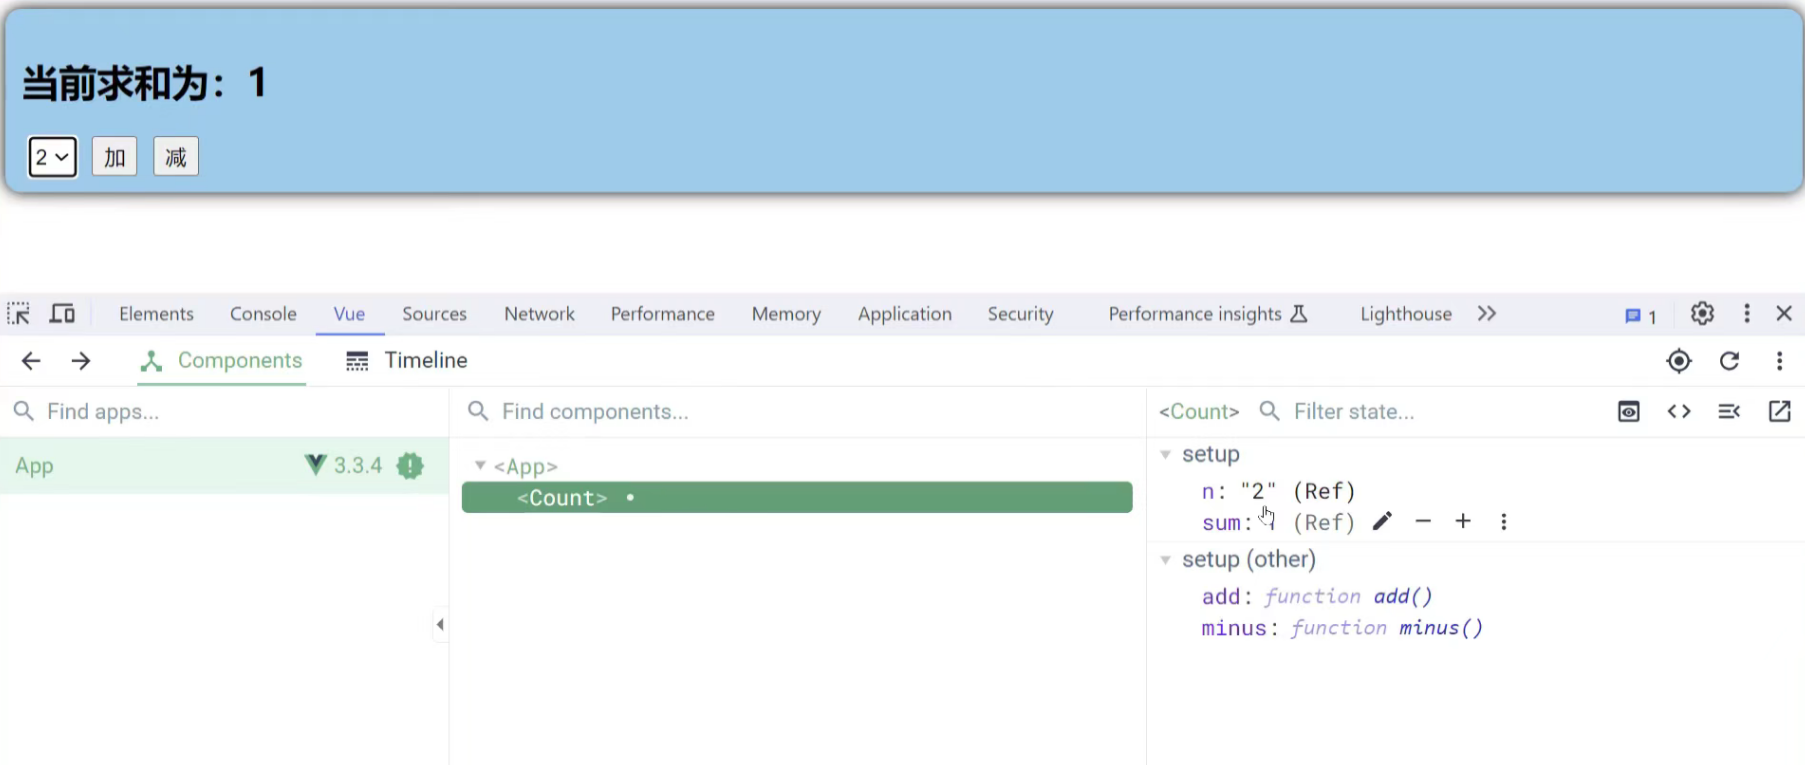
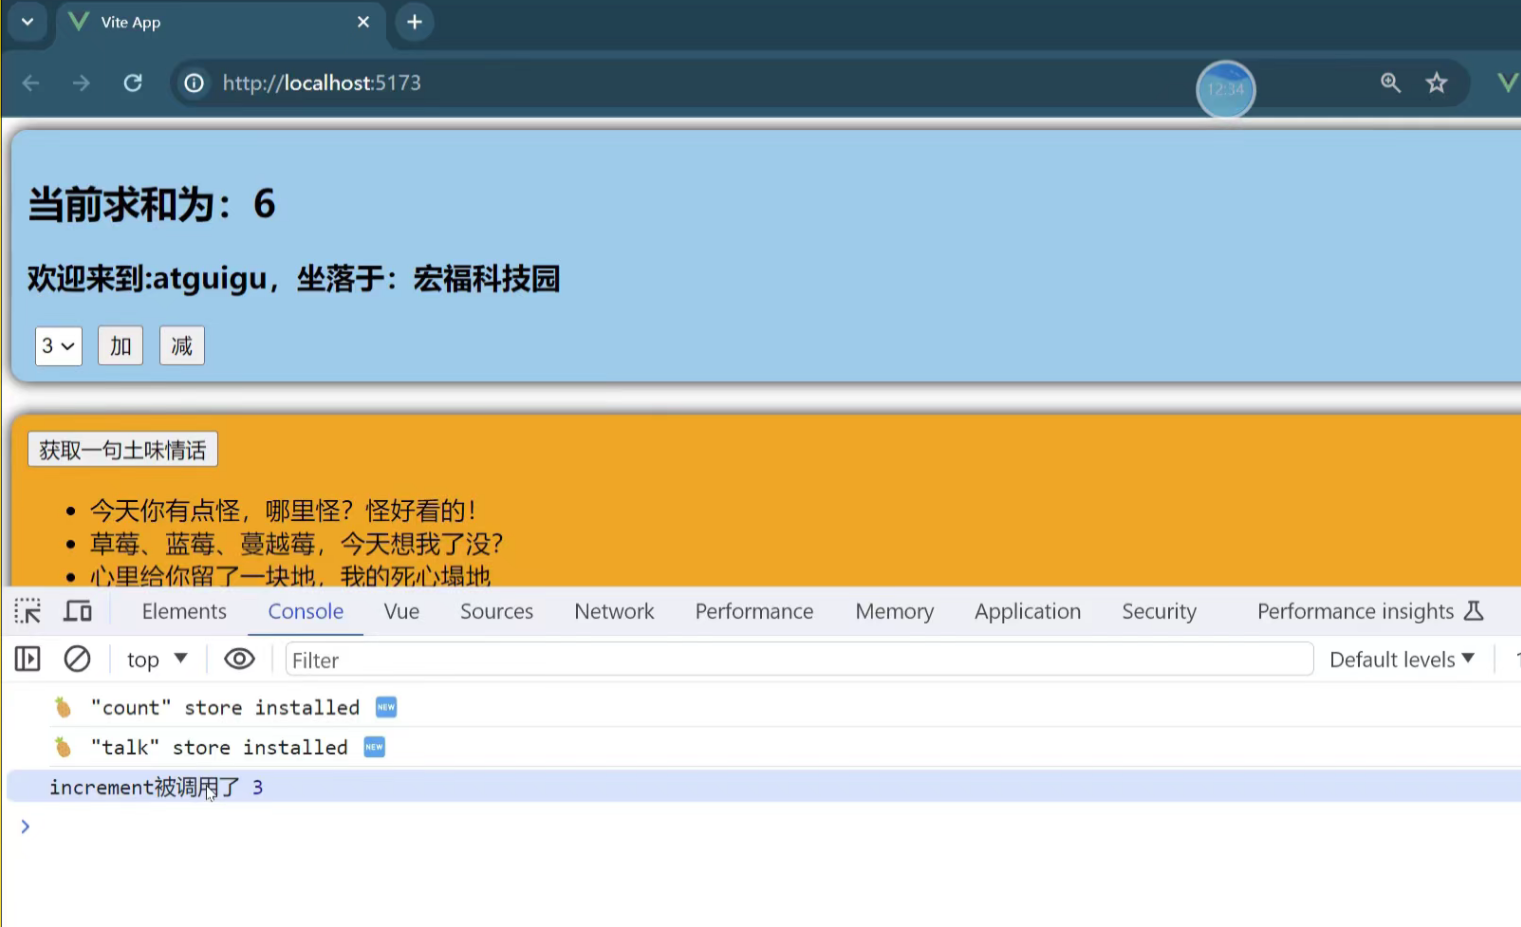
最终效果:用户点击按钮,计数器和双倍值区域会实时响应;任何状态变化都会在控制台和页面的日志区域留下记录。
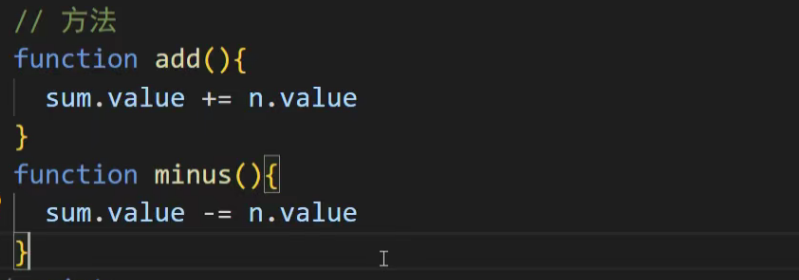
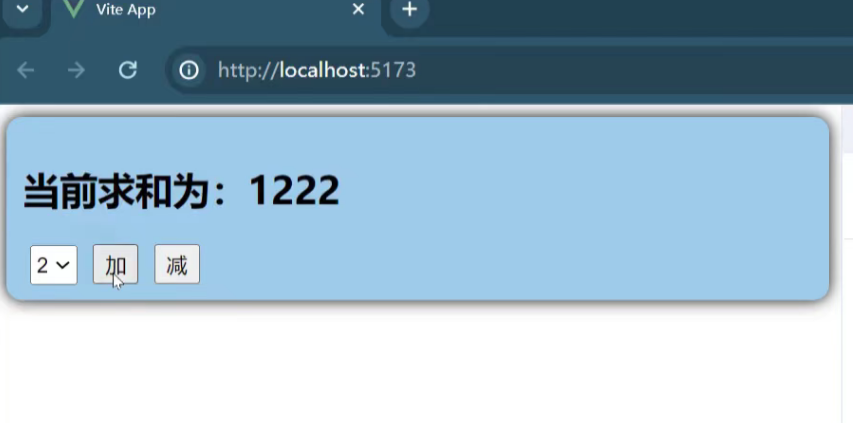
注意:
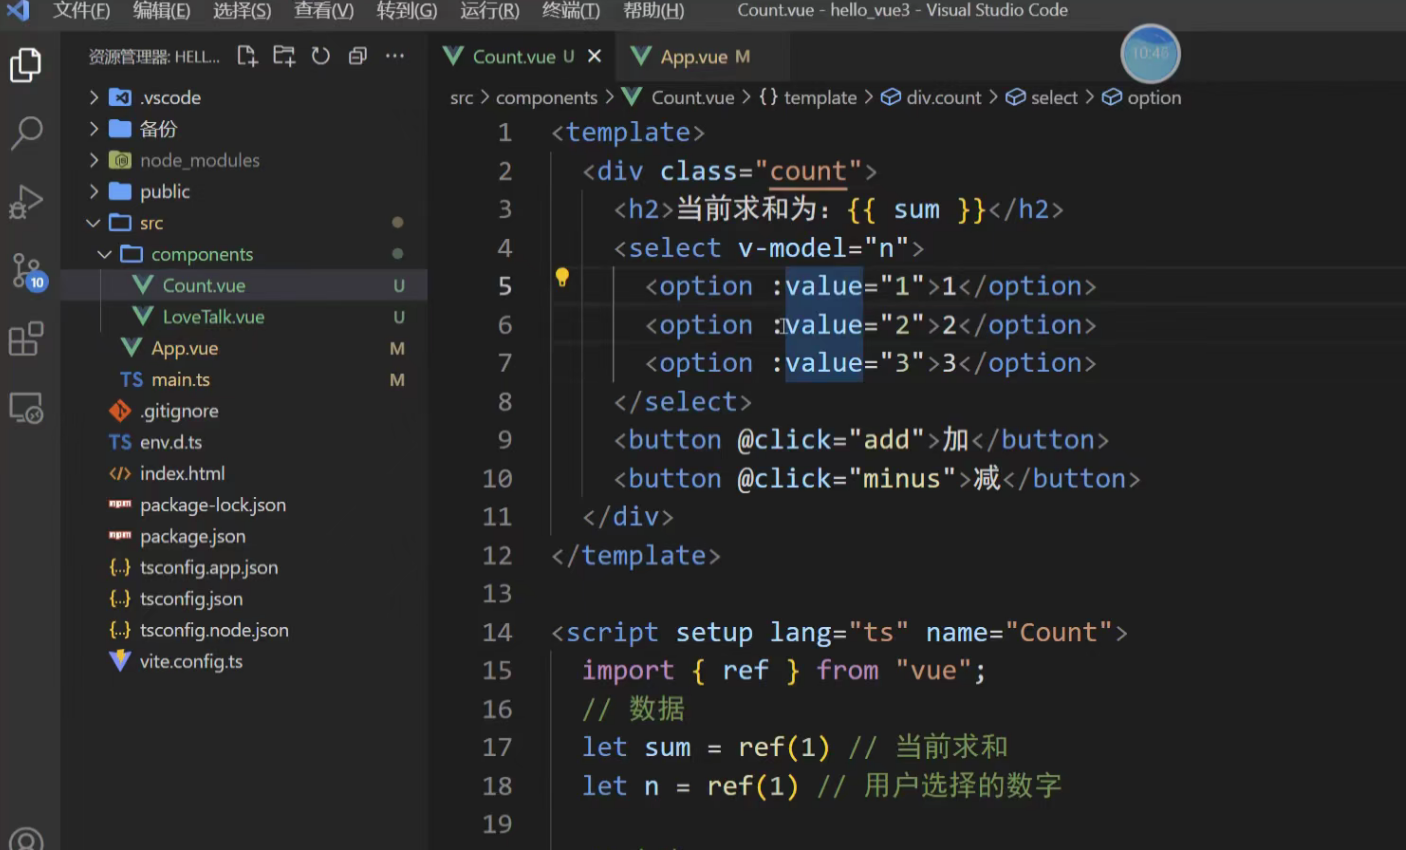
1、只有在点第一下的时候是响应的数组型
之后就会变成字符串拼接
解决方法 1、加引号:
2、使用number限制类型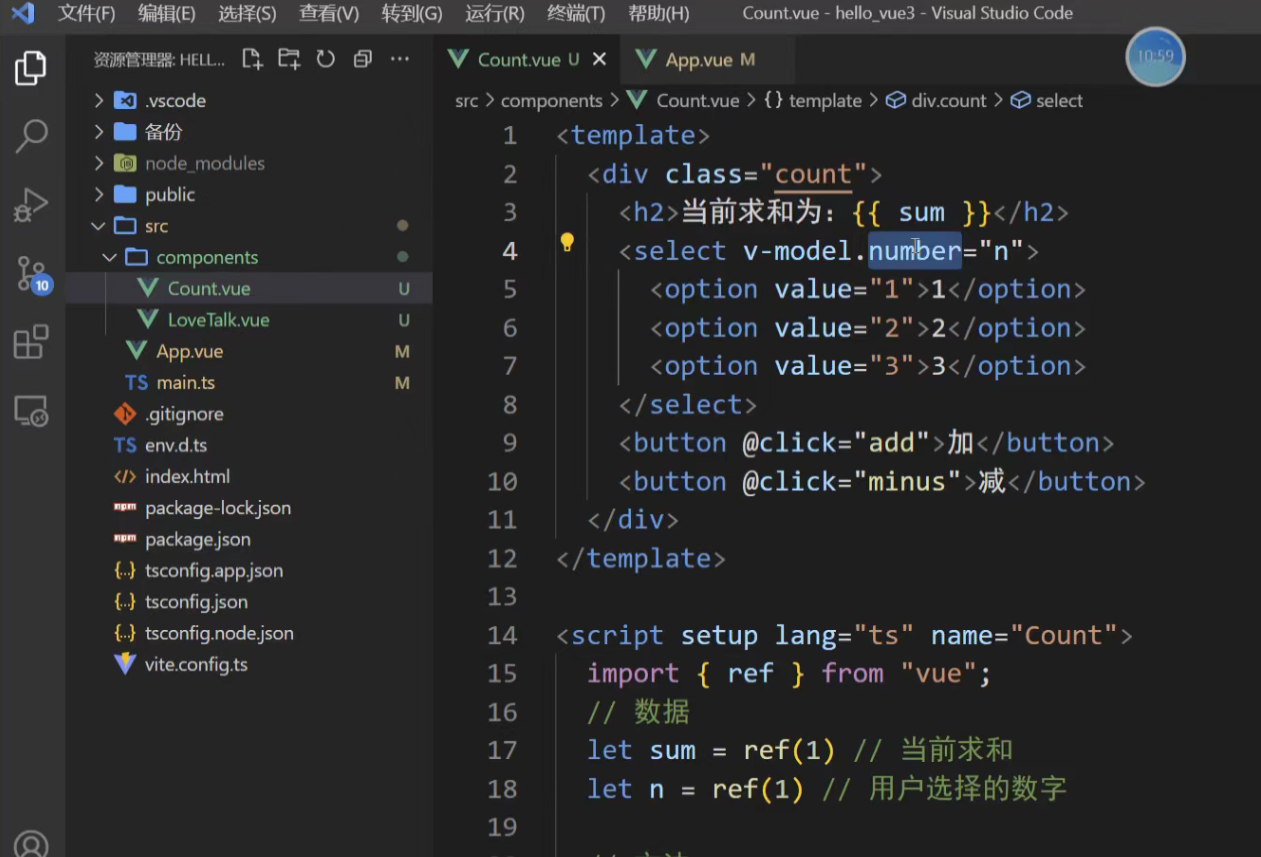
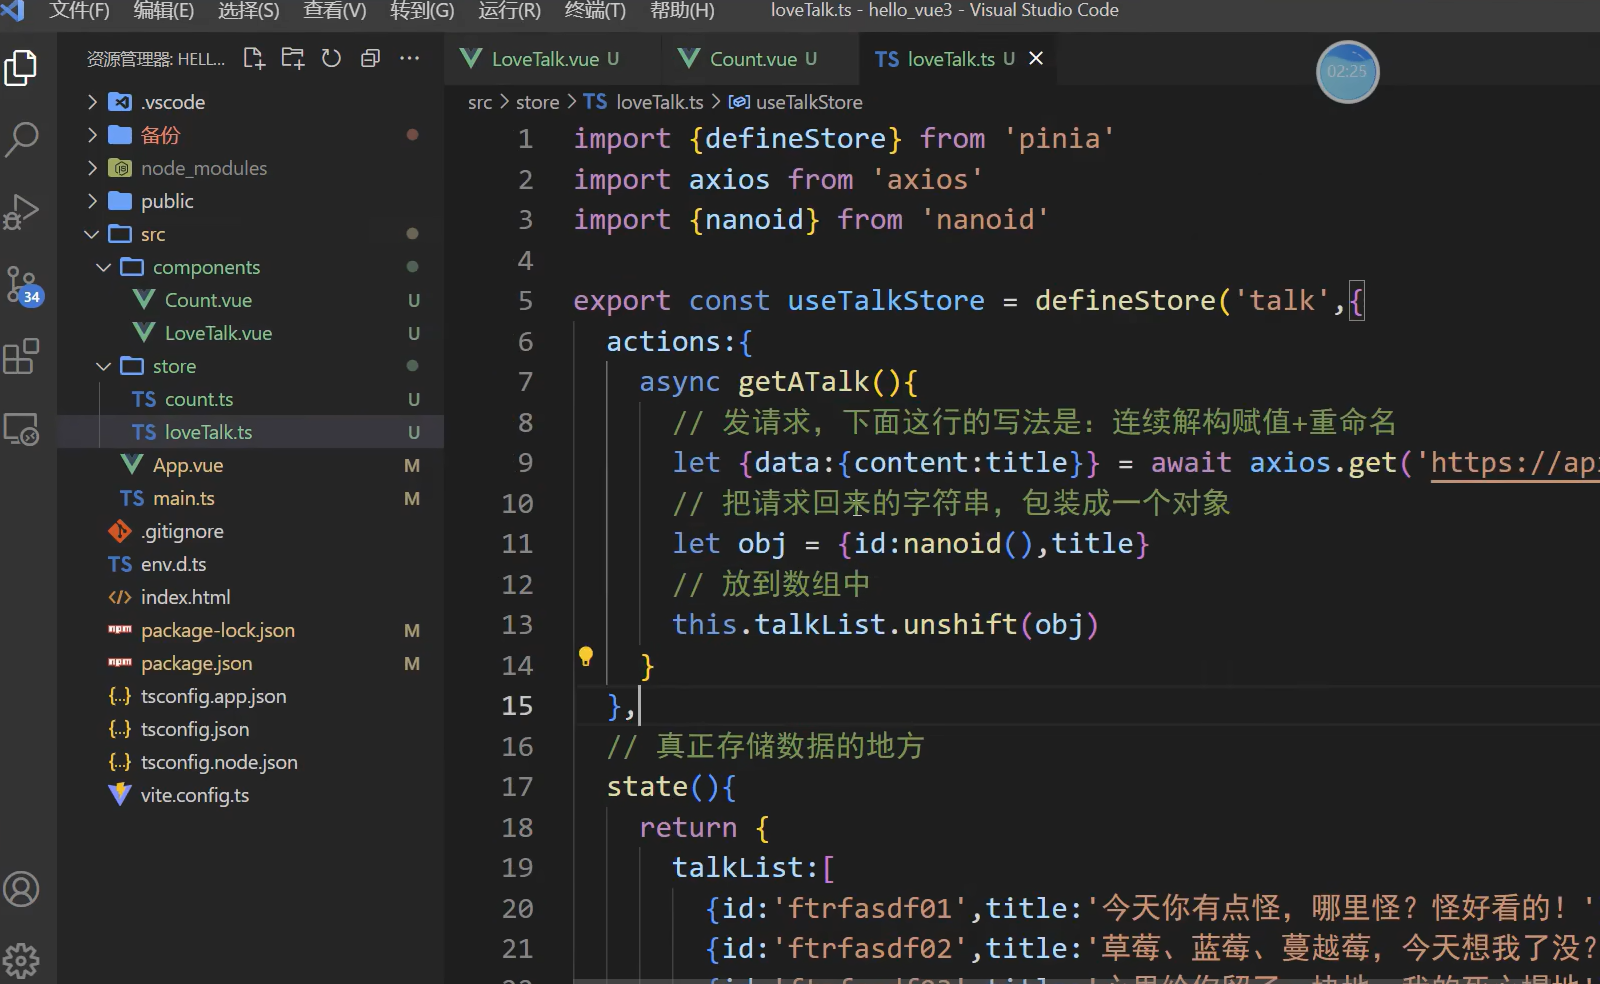
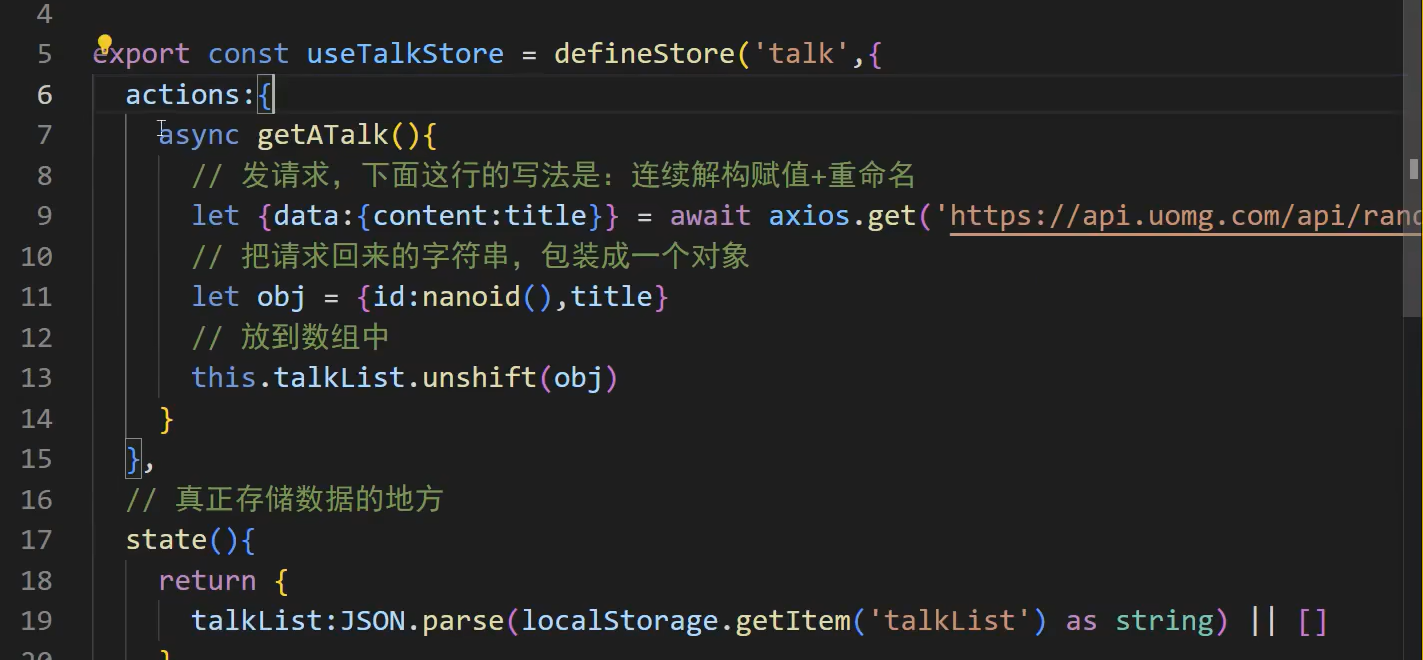
案例二:添加一个短句
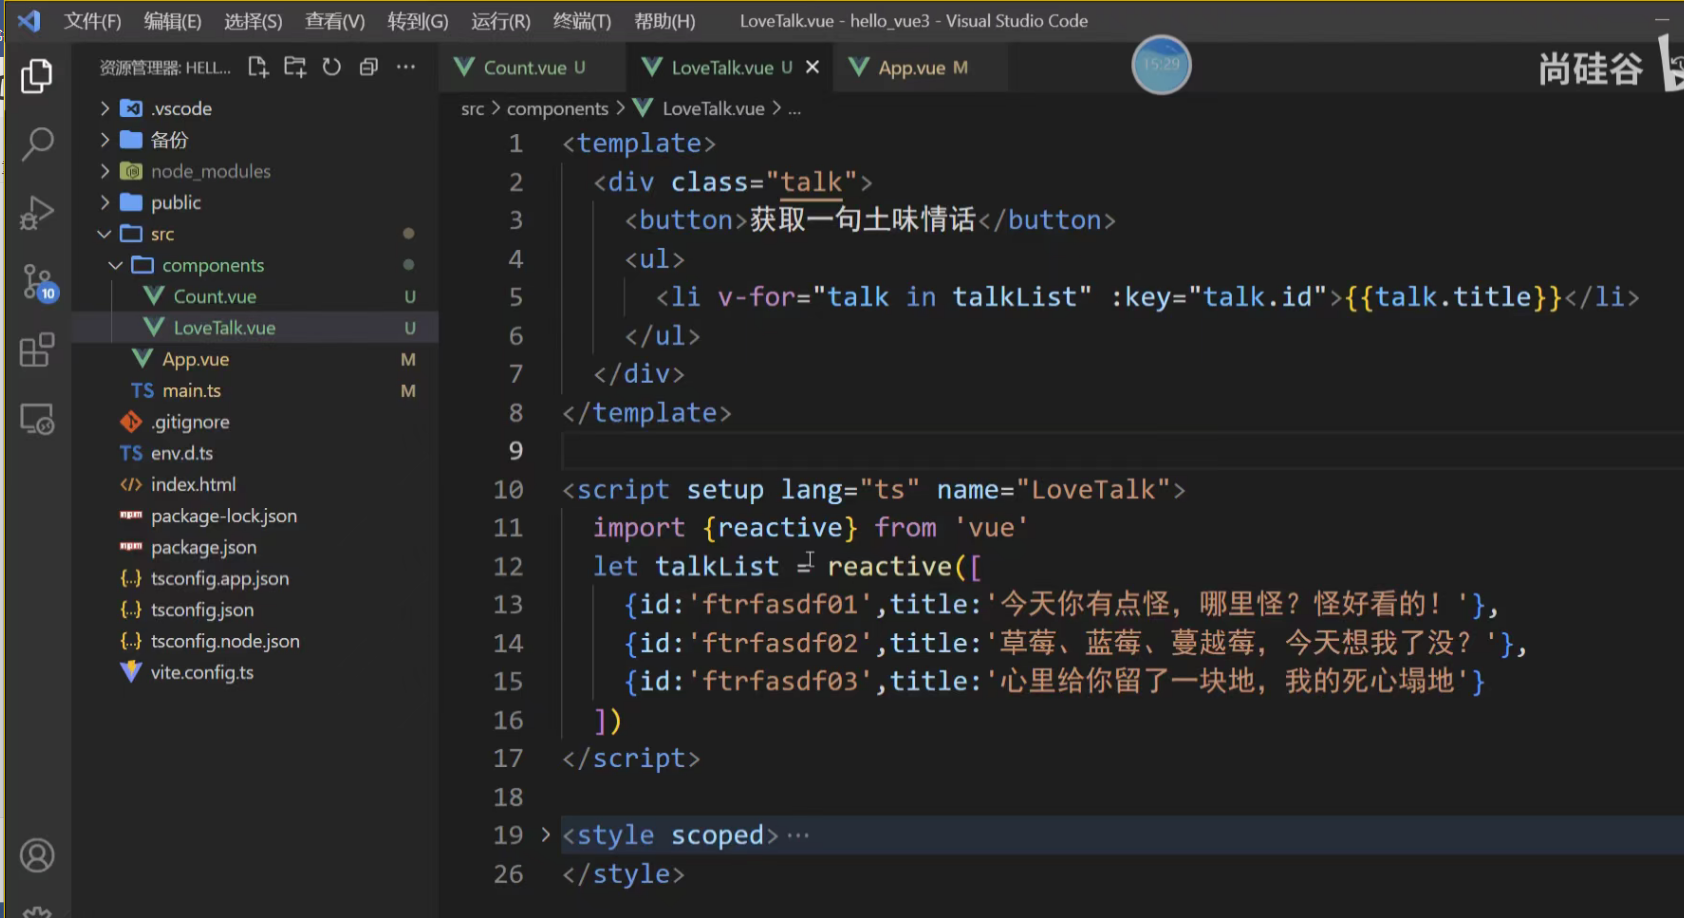
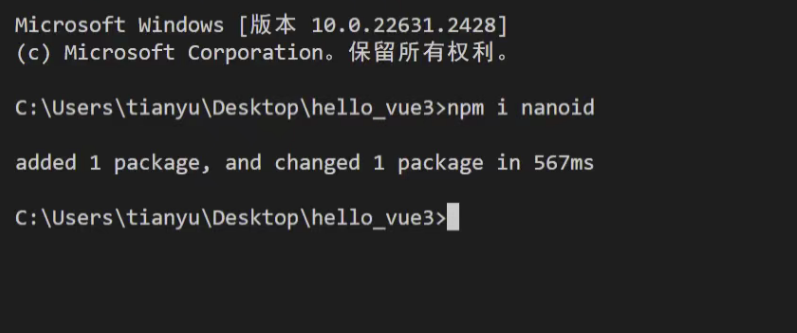
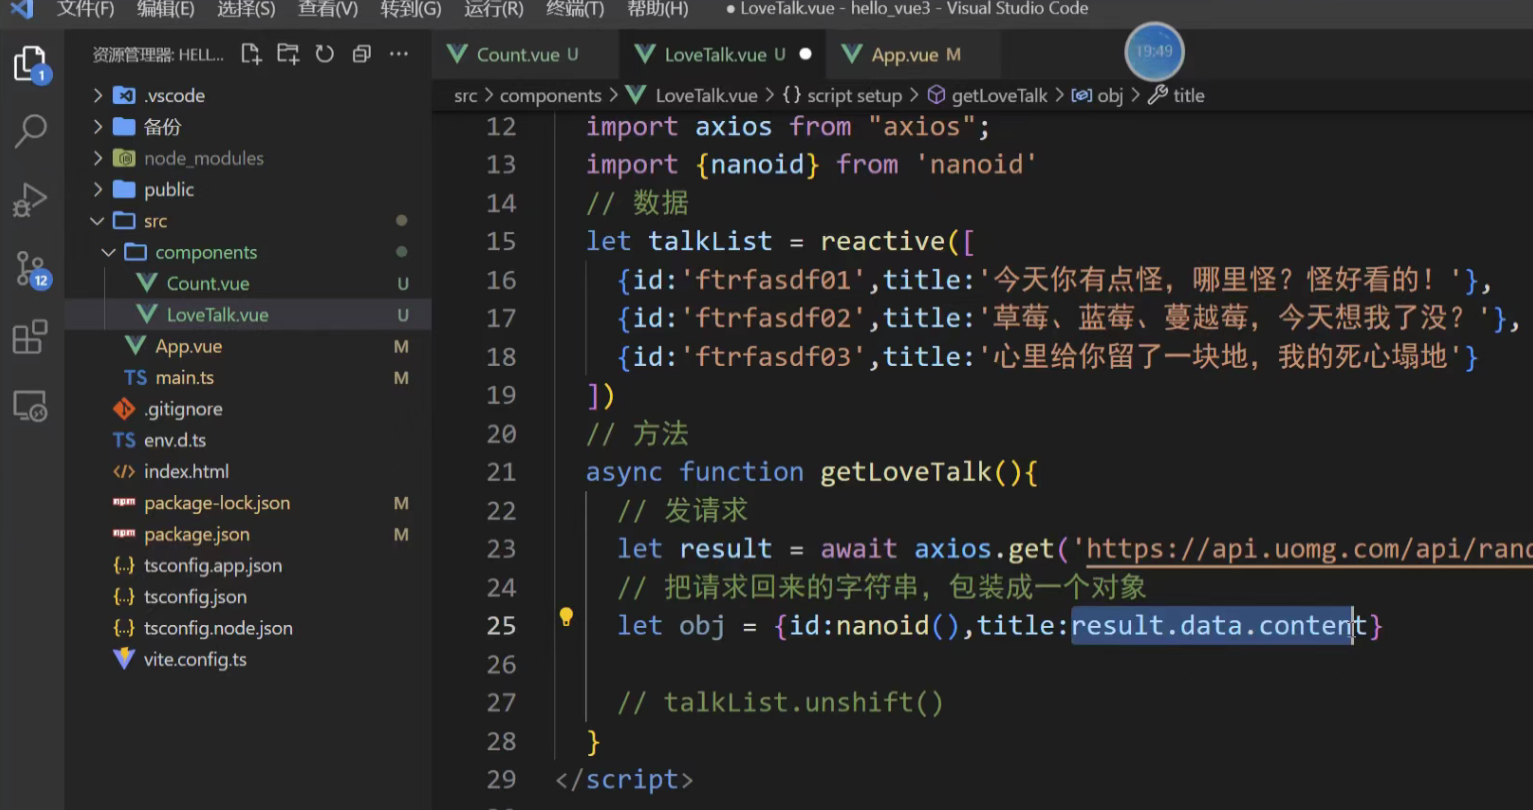
nanoid:随机生成id(也可以用uuid)
使用axios请求返回一段短句,记得要用await,async
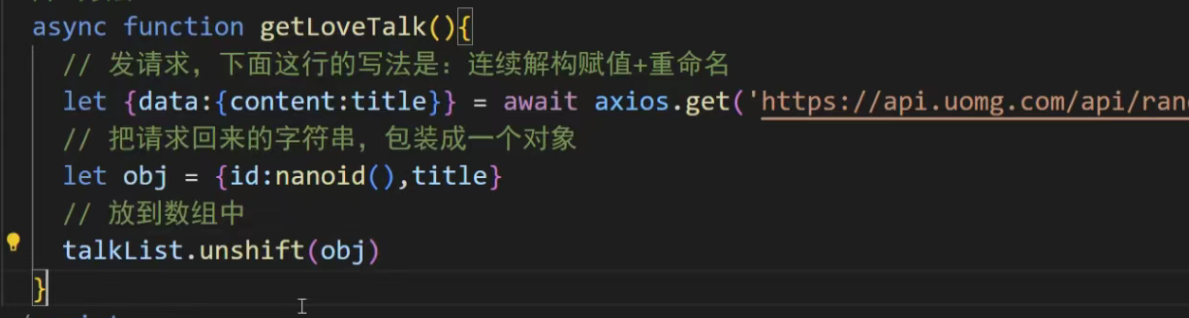
title还可以继续解构,直接用data接收数据
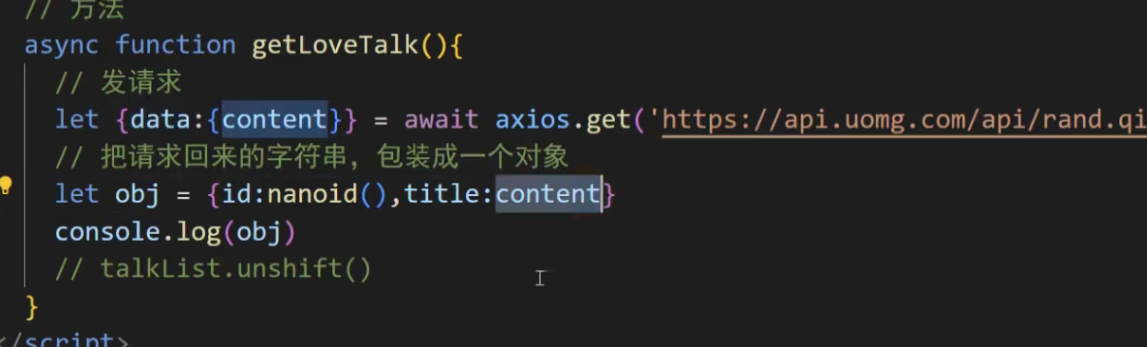
甚至还能继续解构把定位到的层级数据继续放到data里面
三、搭建 Pinia 环境
1. 安装 Pinia
在你的 Vue 3 项目根目录下,通过 npm 或 yarn 安装 Pinia。
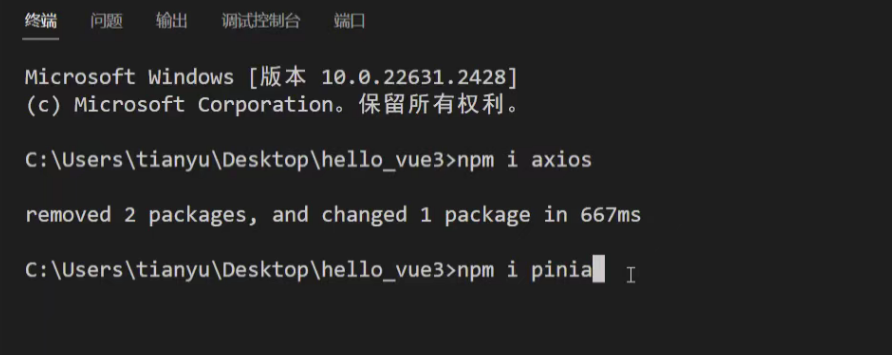
npm install pinia
# 或
yarn add pinia
2. 创建 Pinia 实例并挂载到 Vue
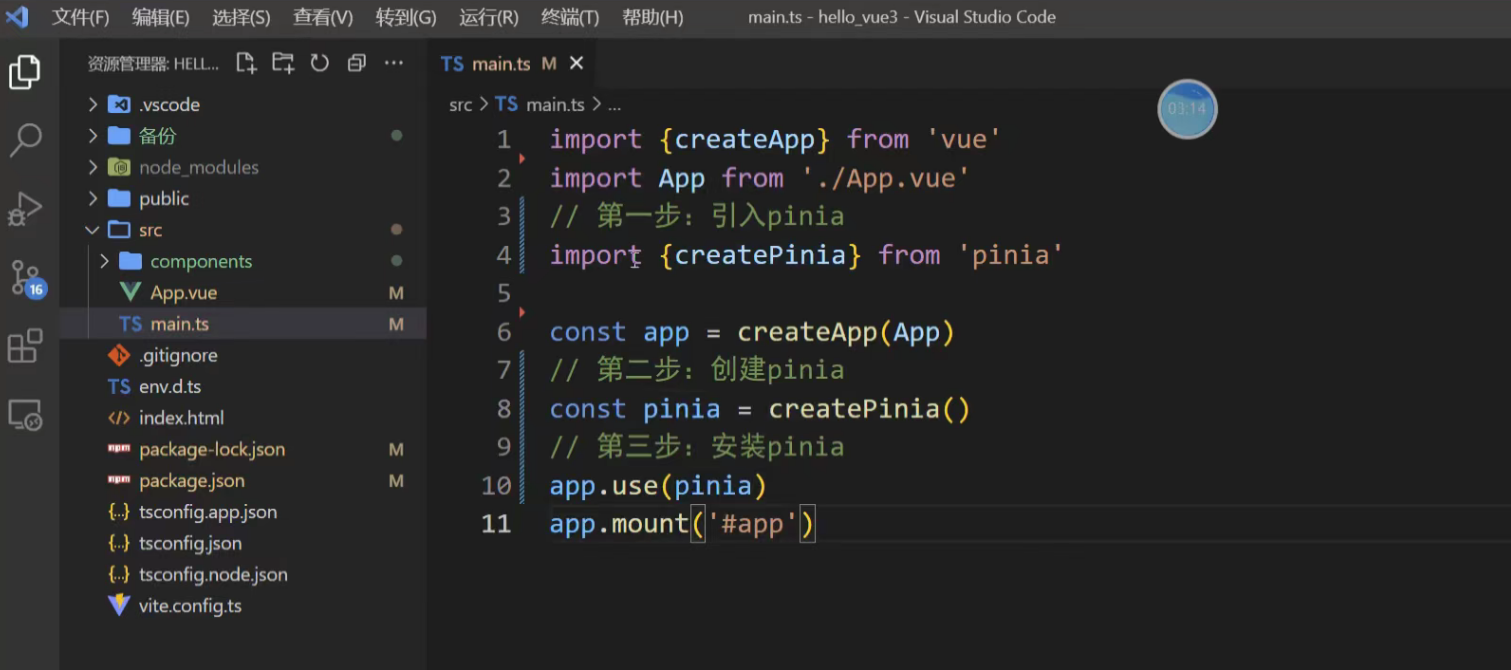
在项目的入口文件(通常是 main.js 或 main.ts)中,引入 createPinia 并配置它。
// main.js
import { createApp } from 'vue'
import { createPinia } from 'pinia' // 导入 createPinia
import App from './App.vue'// 1. 创建 Pinia 实例
const pinia = createPinia()// 2. 创建 Vue 应用实例
const app = createApp(App)// 3. 以插件形式挂载 Pinia 实例
app.use(pinia)// 4. 挂载 Vue 应用
app.mount('#app')
看到这个菠萝,就说明安装成功了
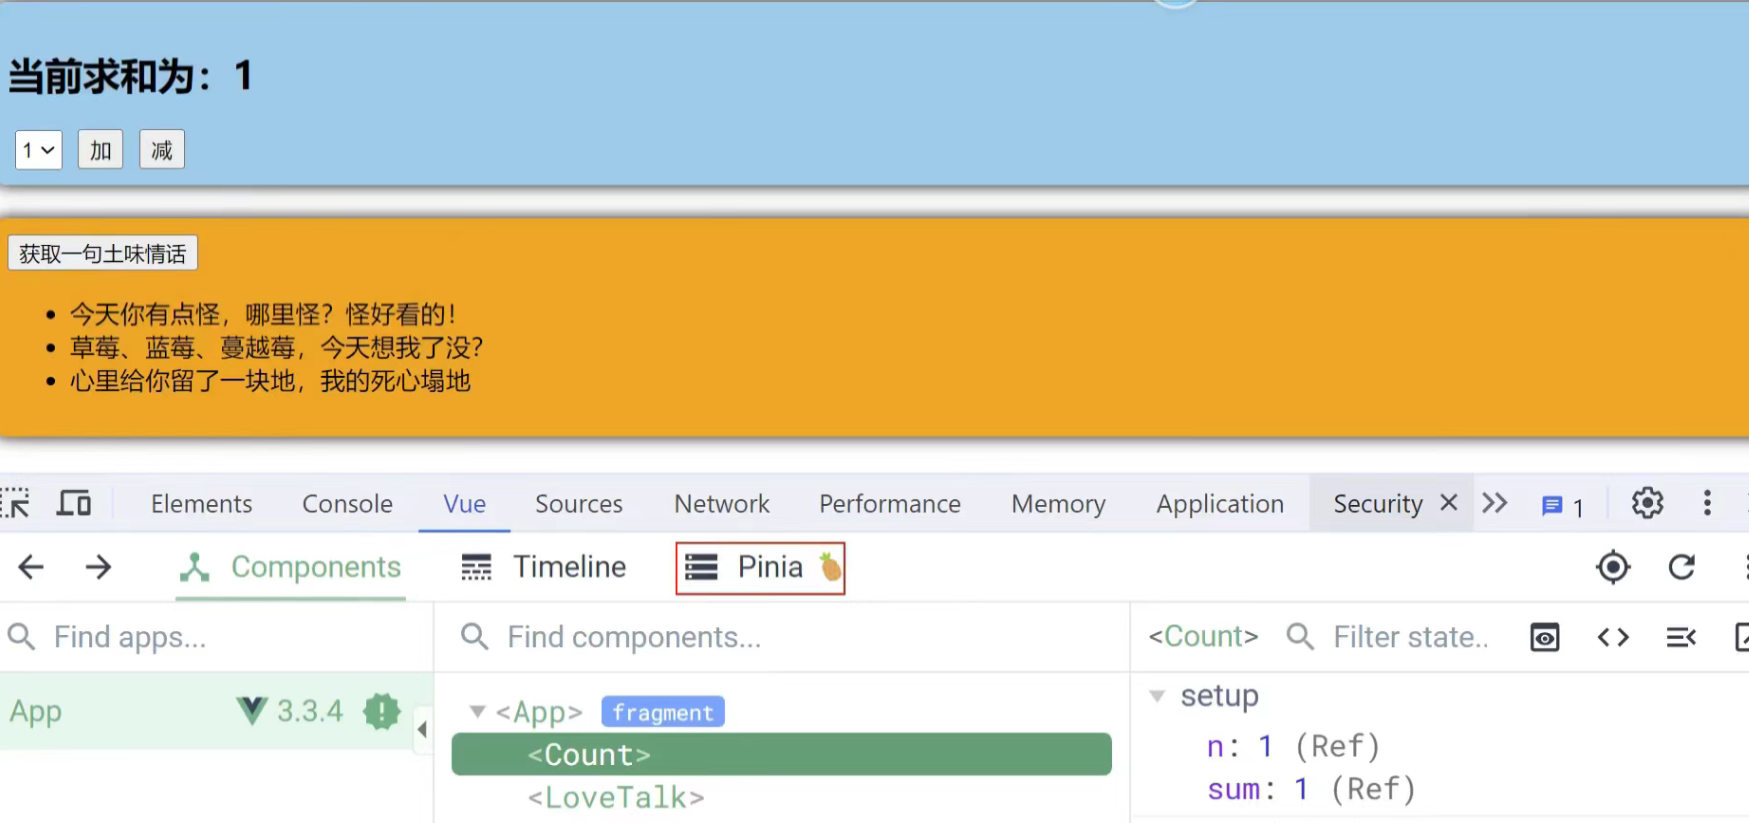
至此,Pinia 就已经集成到你的项目中,可以开始创建 Store 了。
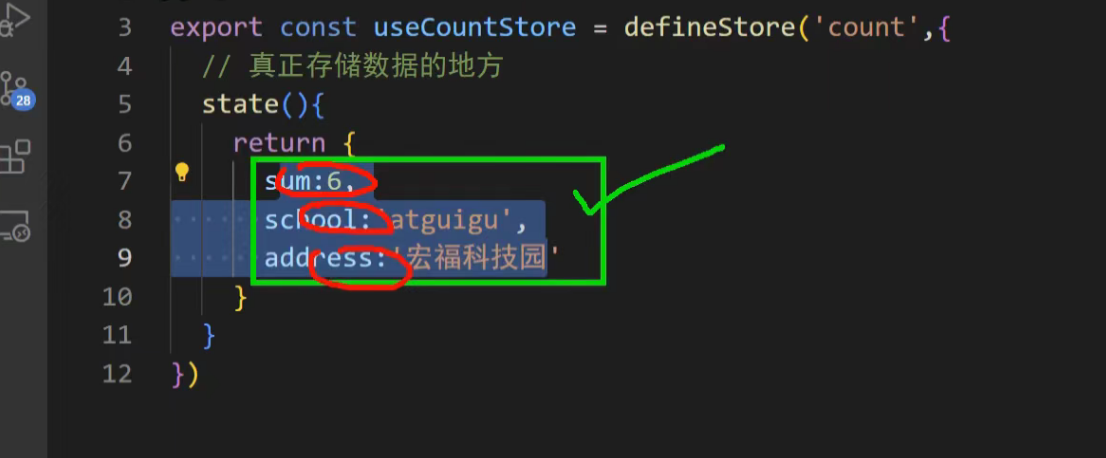
四、存储 + 读取数据
每个组件里面定义了不同的返回数据,现在把他们抽取出来
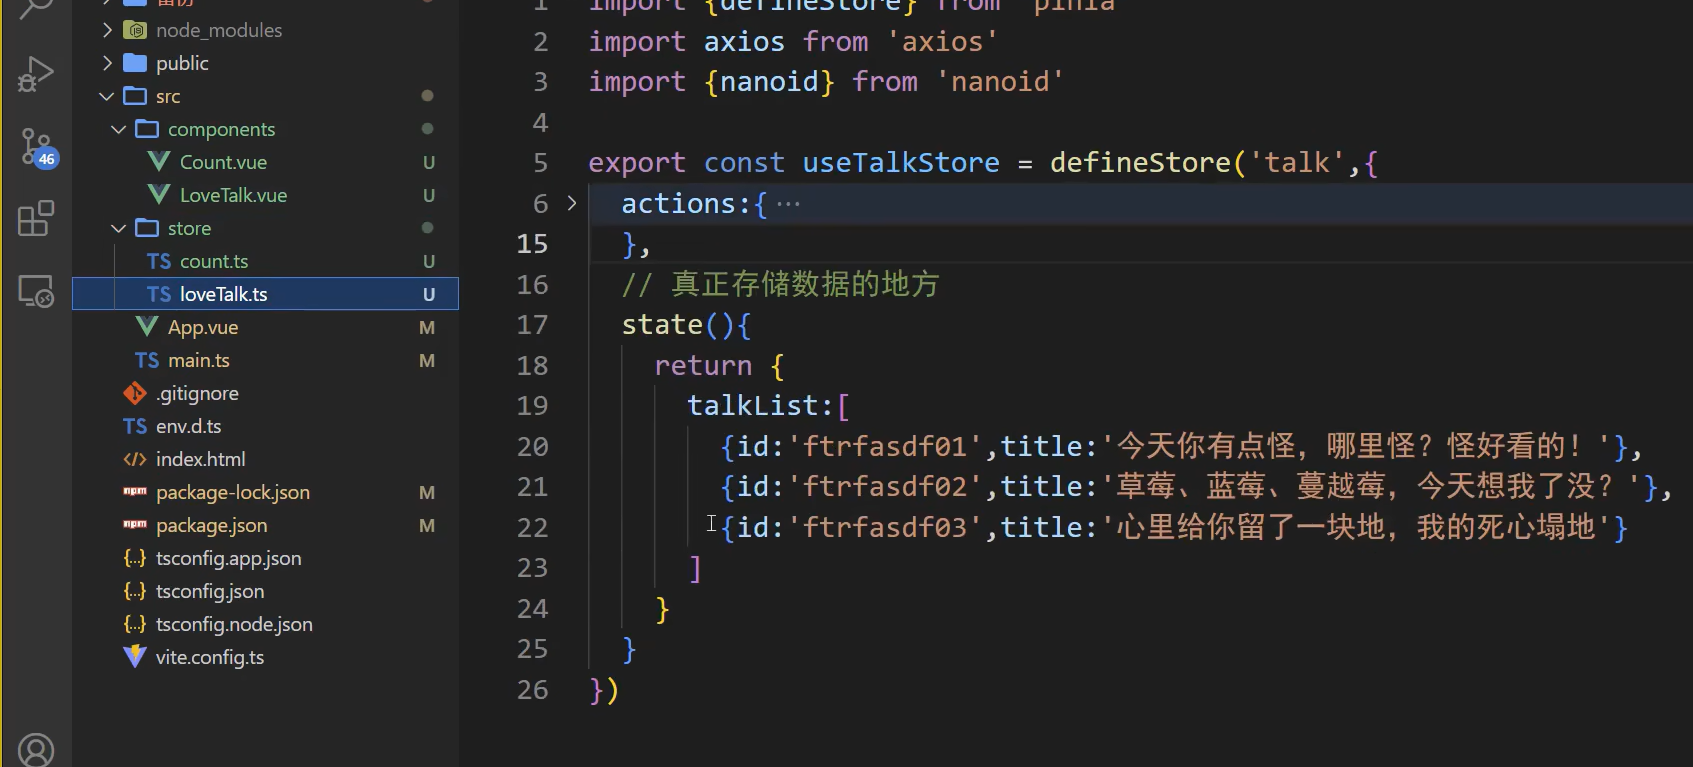
定义 Store (Options API 风格)
创建store目录,存放各种数据,方法
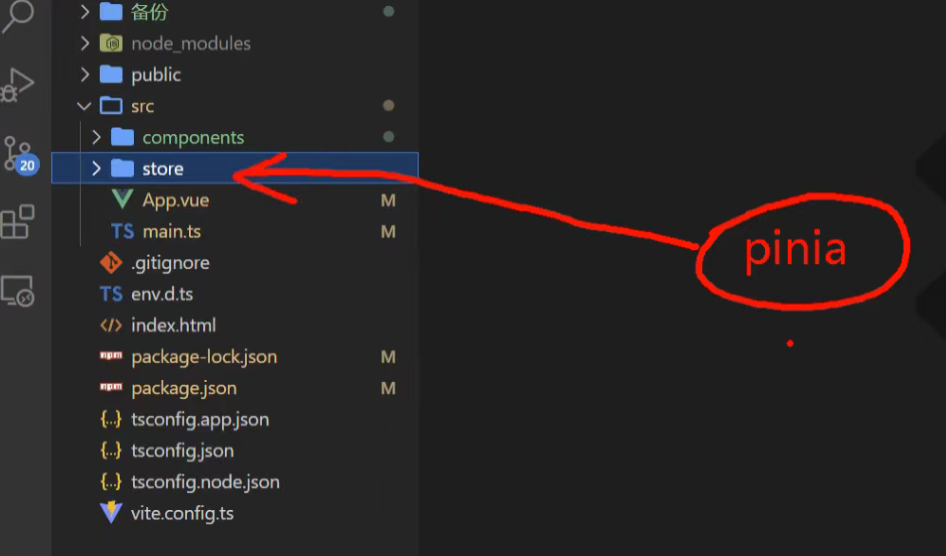
不同组件功能创建不同store文件
官方推荐命名方法像hooks一样
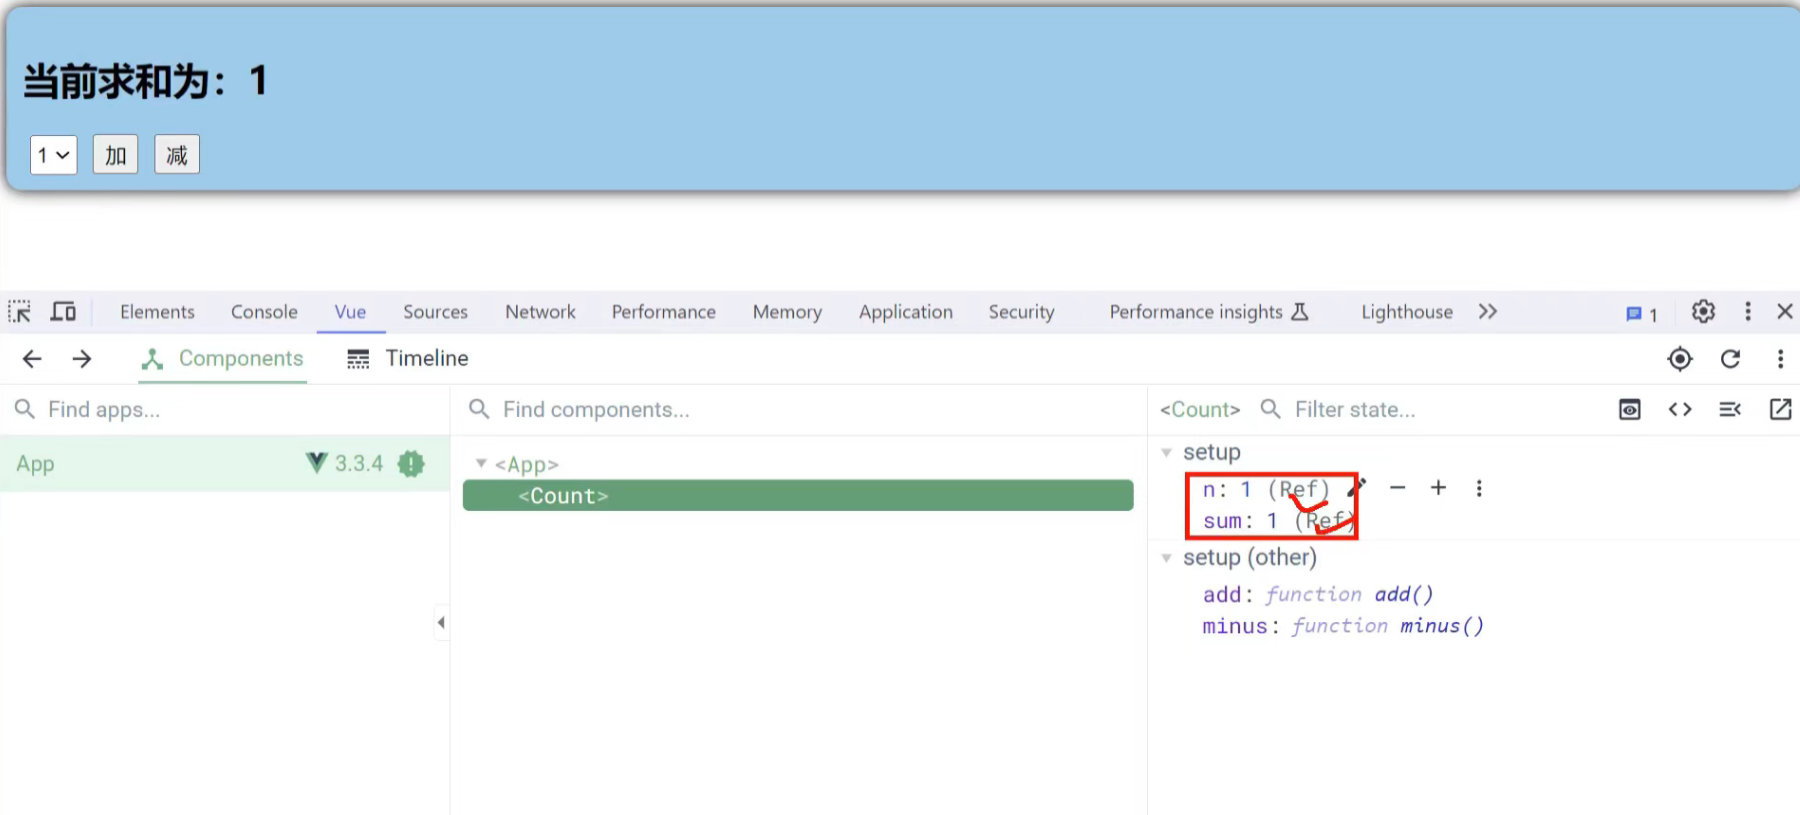
查看return的对象是什么
案例说明
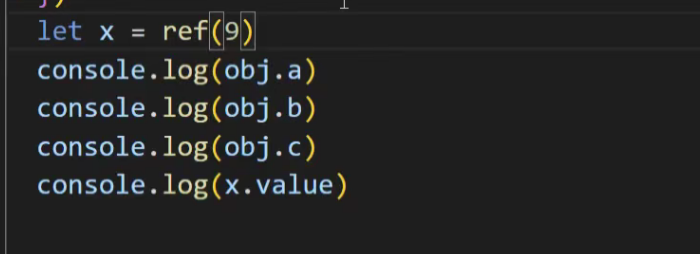
reactive里面的ref不用拆包(.value)
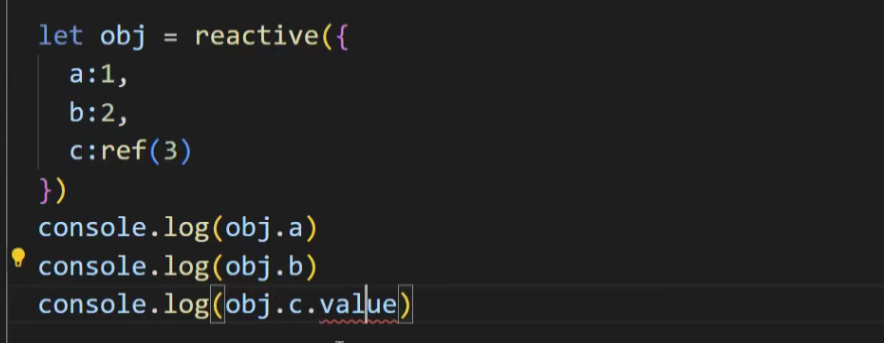
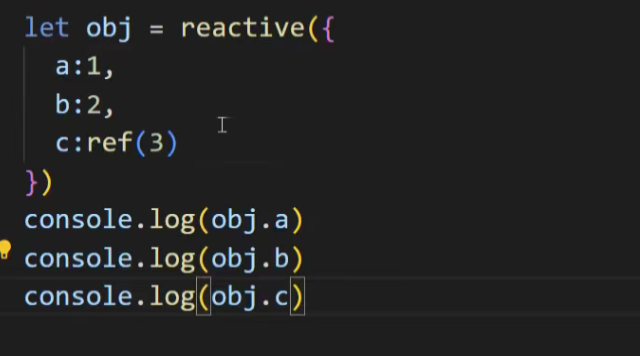
定义响应式数据x
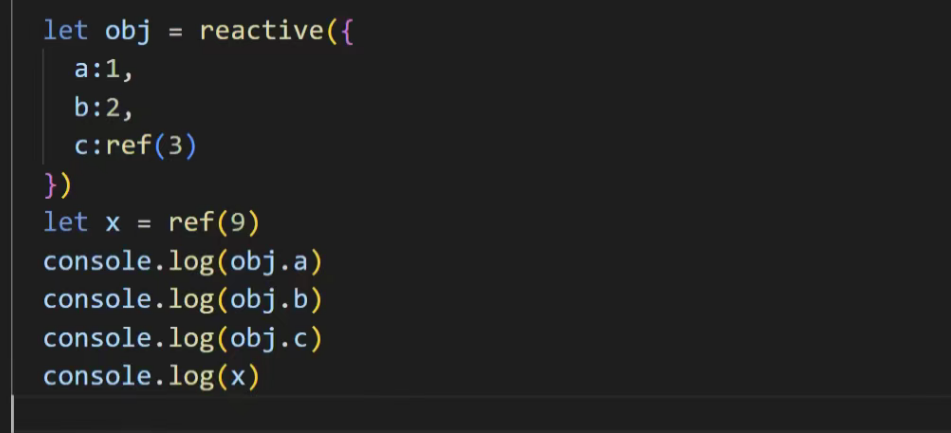
返回的ref对象

.value才能返回9
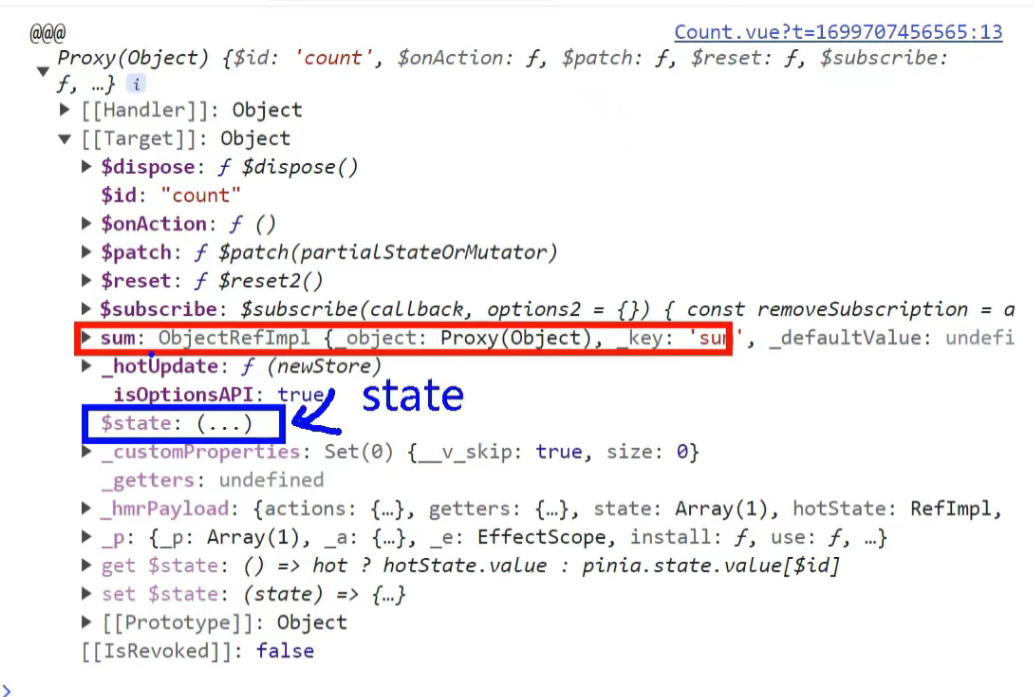
现在再来看countStore返回的是什么
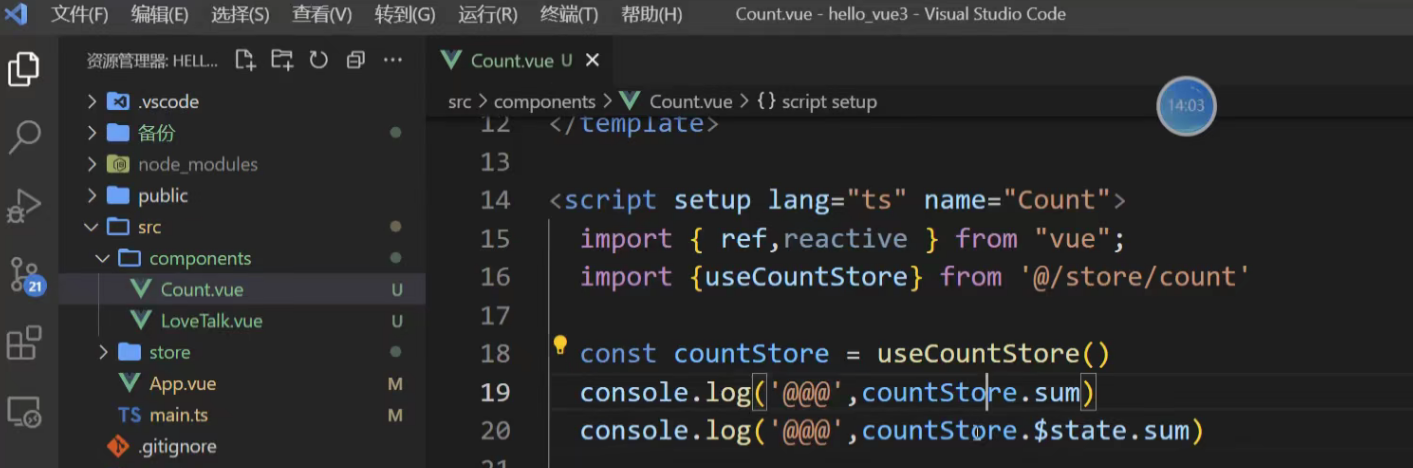
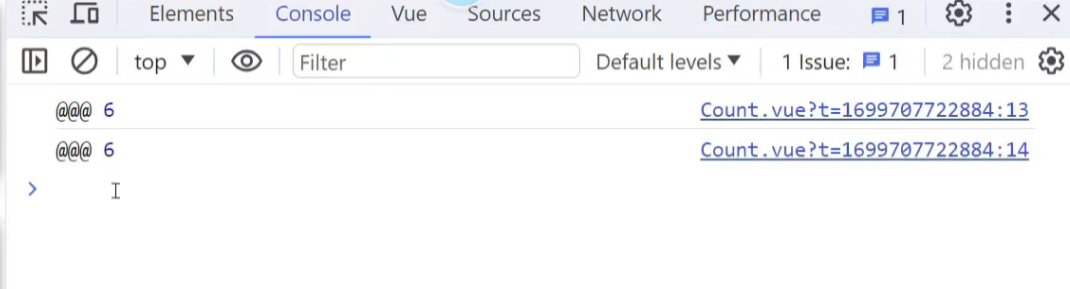
调用过程如图
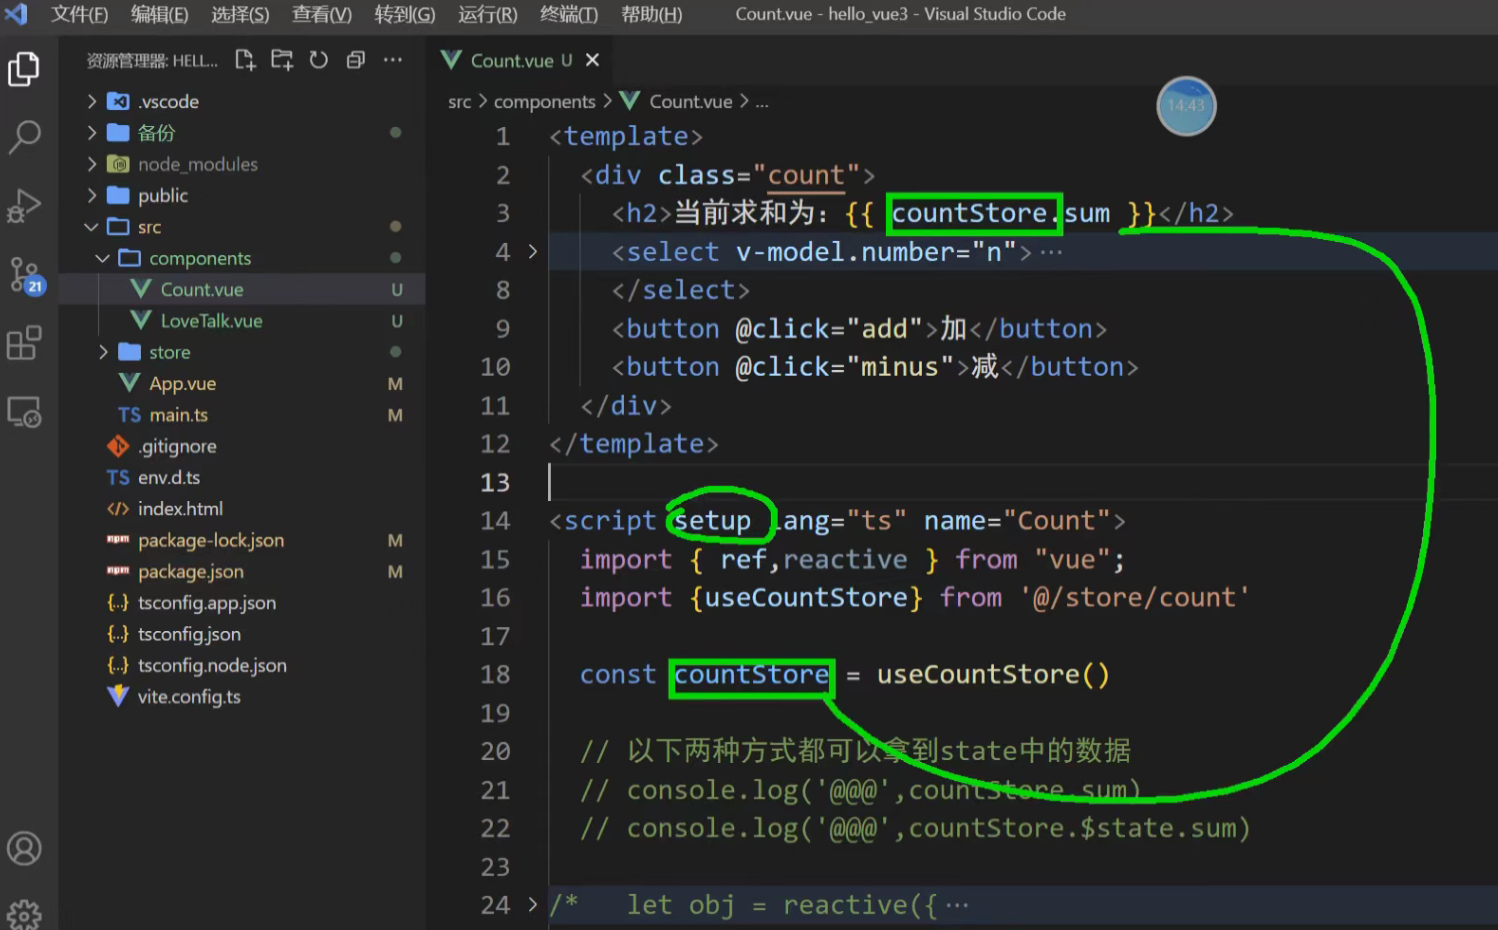

也可以返回其它数据
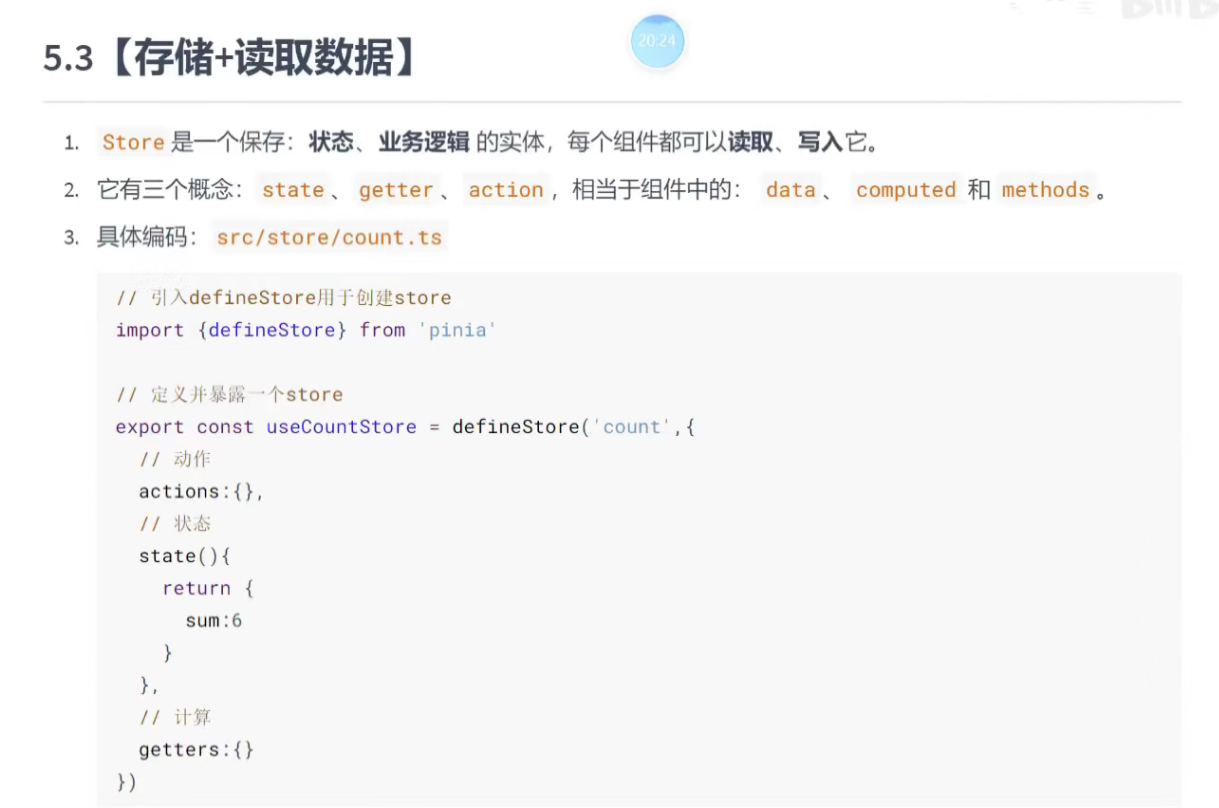
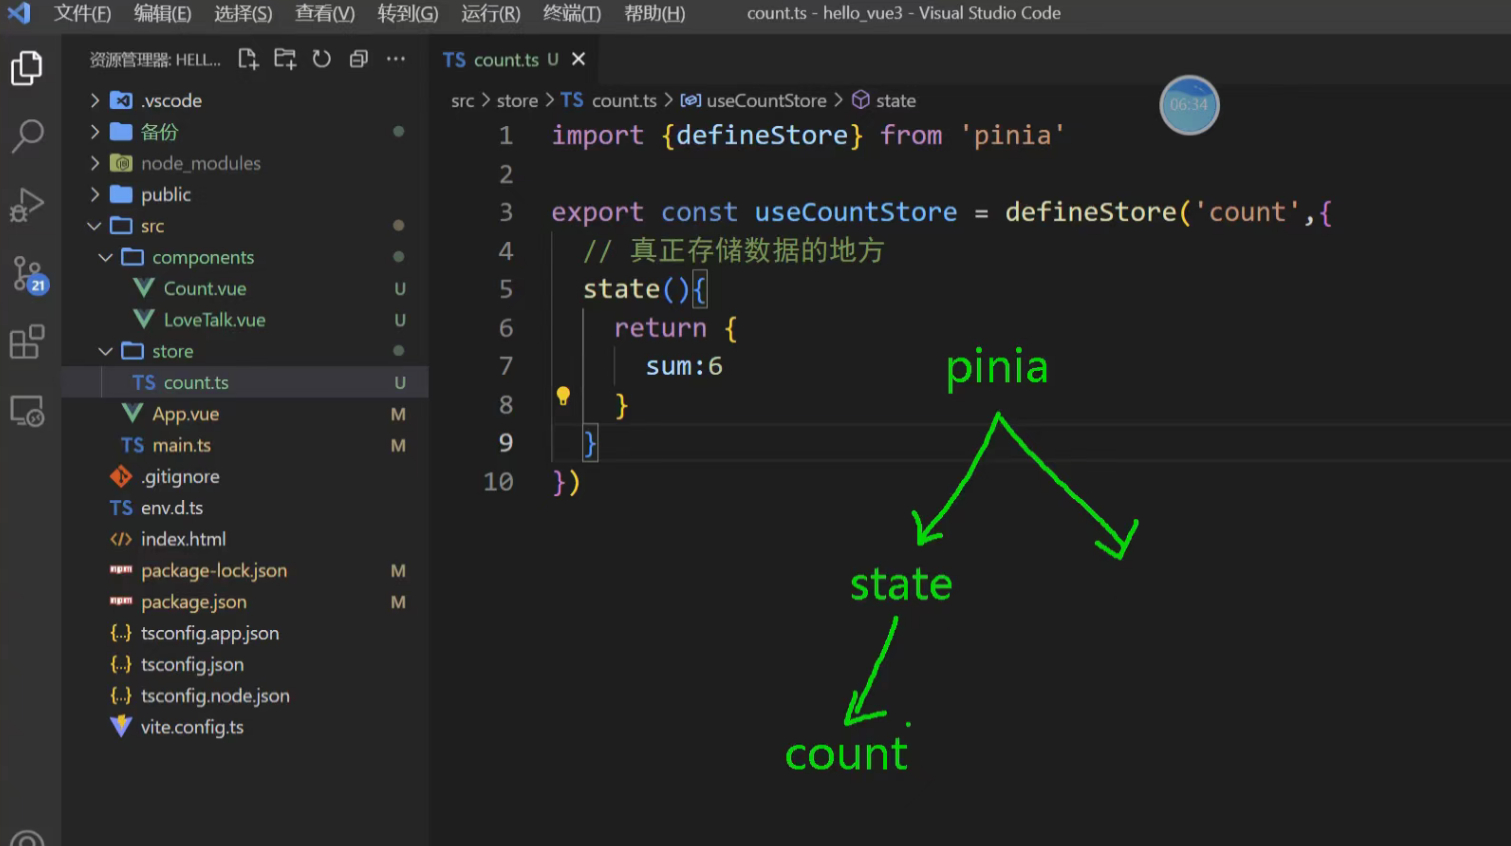
我们首先使用 Options 风格定义一个名为 useCounterStore 的 Store。
// stores/counter.js
import { defineStore } from 'pinia'// 第一个参数是应用程序中 Store 的唯一 ID
export const useCounterStore = defineStore('counter', {// State 是一个返回初始状态的函数state: () => {return {count: 0,history: [] // 用于记录操作历史,演示 $subscribe}},
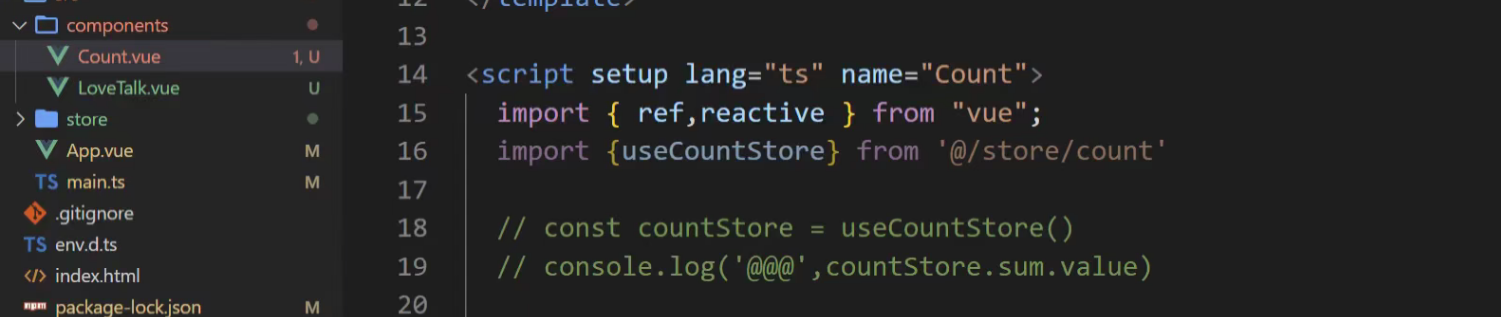
})在组件中读取数据
在 Vue 组件中,导入并实例化 Store,然后就可以像普通对象一样访问其 state。
<!-- components/MyComponent.vue -->
<template><div><h1>Pinia Counter Example</h1><p>Current Count: {{ counterStore.count }}</p><!-- 其他按钮和功能 --></div>
</template><script setup>
import { useCounterStore } from '@/stores/counter'// 在 setup 中调用 use...Store 函数实例化 store
const counterStore = useCounterStore()
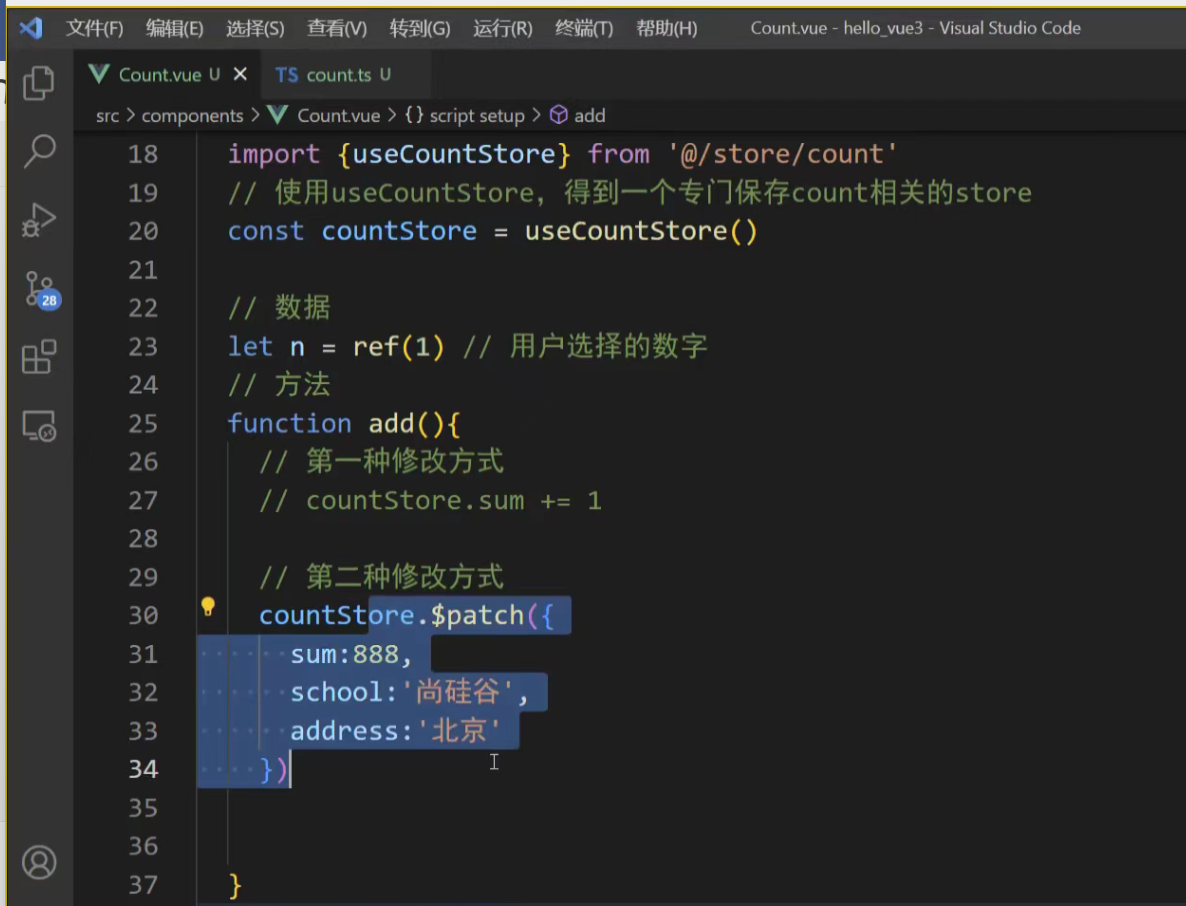
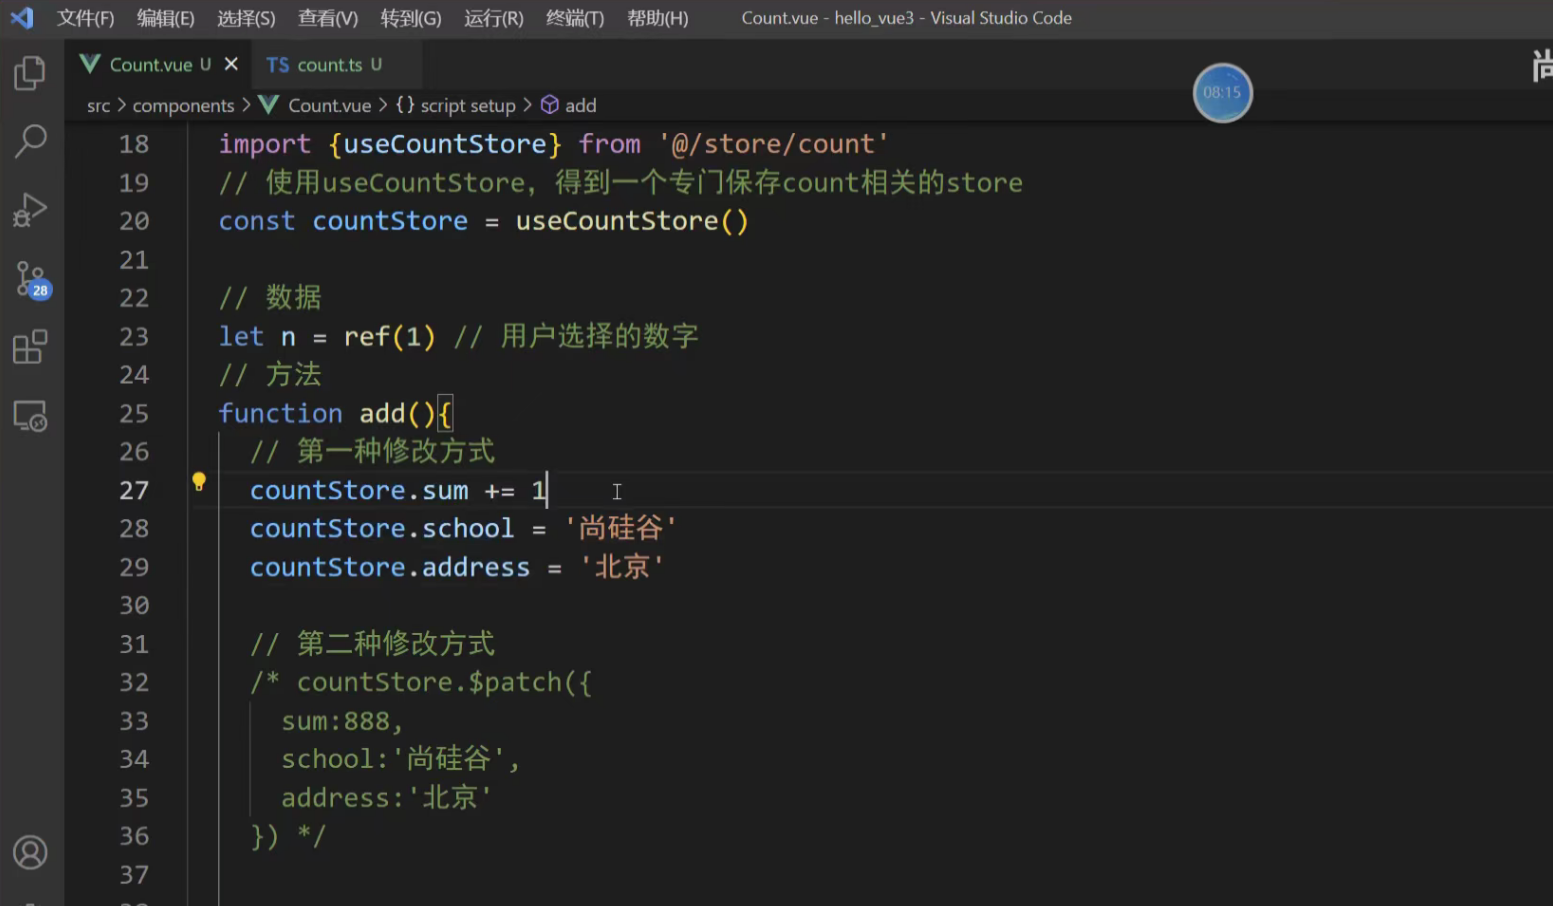
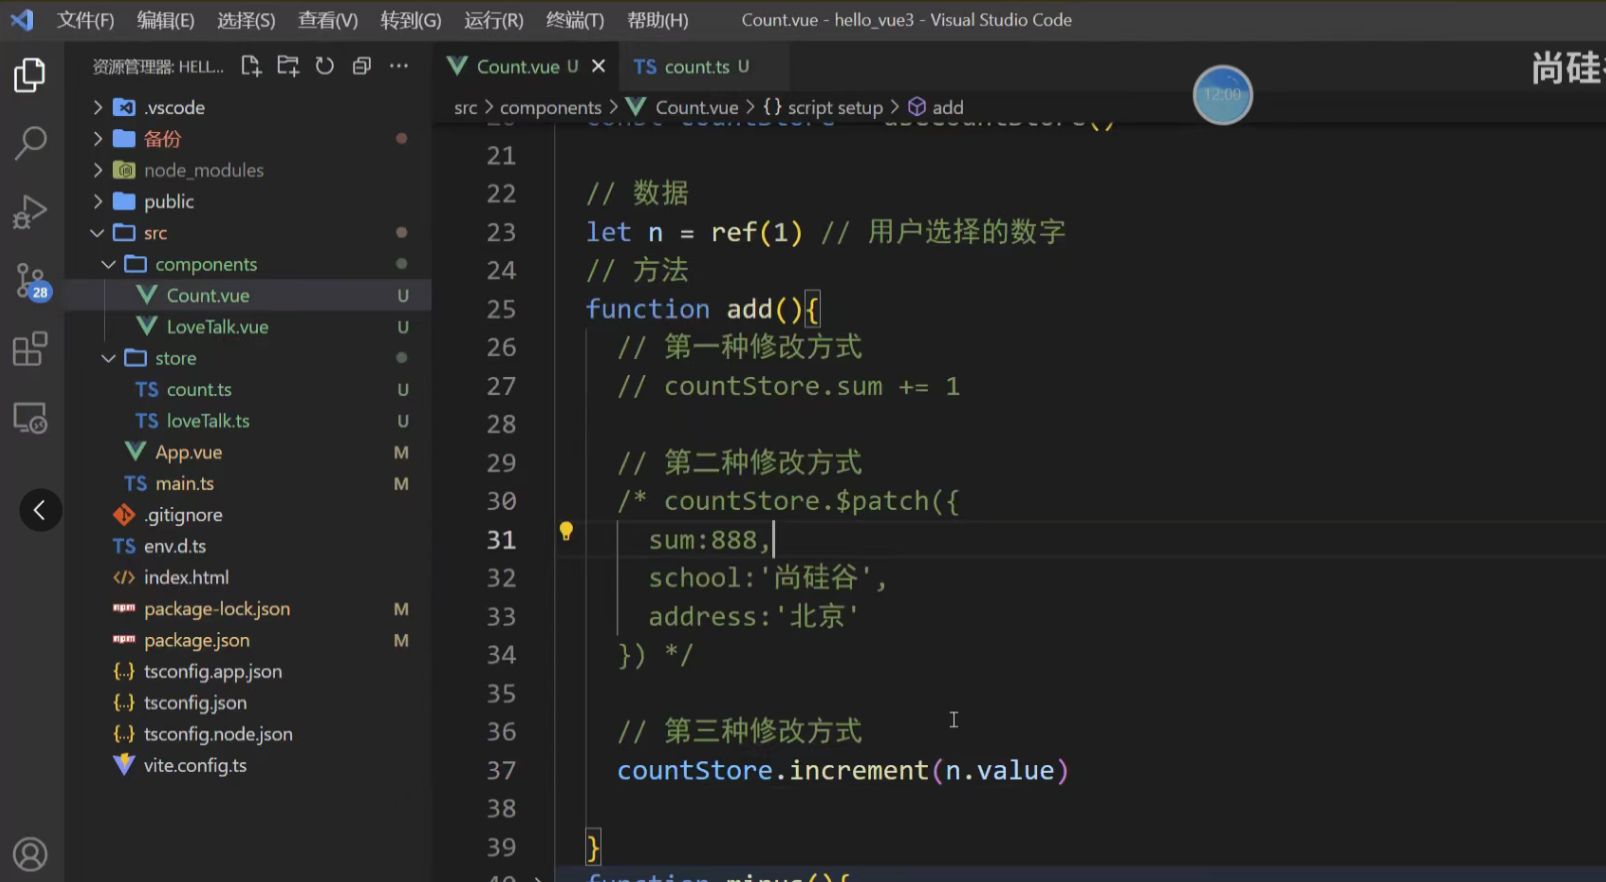
</script>五、修改数据 (三种方式)
1. 直接修改 最简单的方式是直接对 state 的属性赋值。

<button @click="counterStore.count++">+</button>
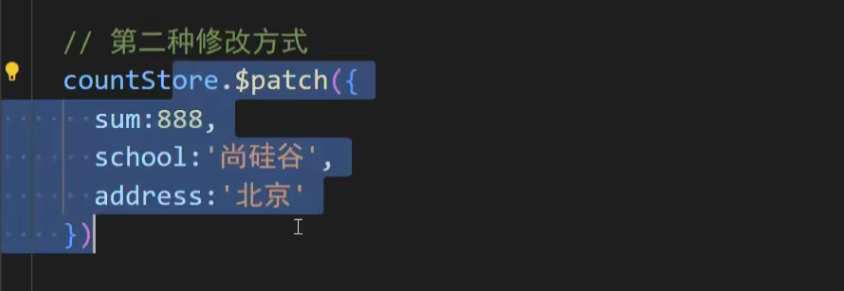
<button @click="counterStore.count--">-</button>2. 使用 $patch 方法 当需要修改多个状态项时,推荐使用 $patch。它接受一个对象或一个函数,并且会进行批量更新,性能更好且有利于 DevTools 追踪。
<button @click="counterStore.$patch({ count: counterStore.count + 1 })">$patch + (Object)
</button><!-- 函数形式更强大,可以包含逻辑 -->
<button @click="addWithHistory(10)">Add 10 (with History)</button>
// 在组件 script 中
const addWithHistory = (n) => {counterStore.$patch((state) => {state.count += nstate.history.push(`Added ${n} via $patch function`)})
}
注意点:
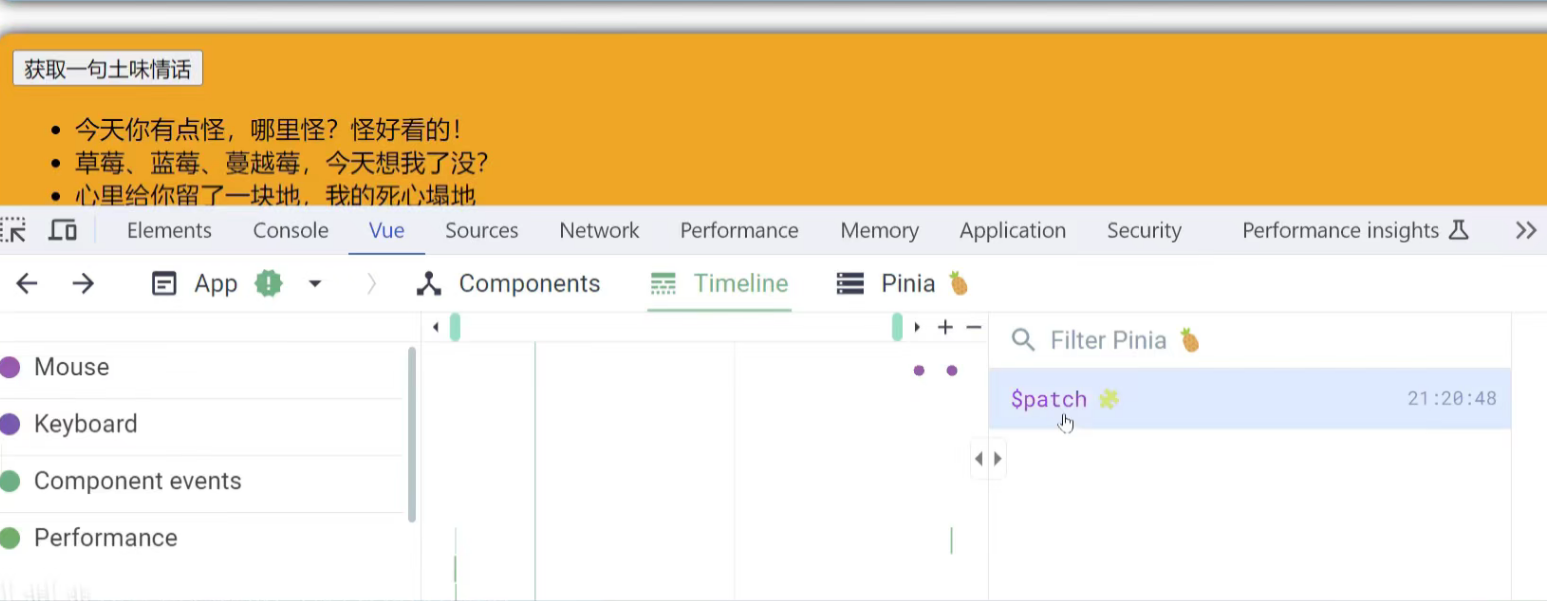
timeline:时间线,主要看component events(组件相关事件)
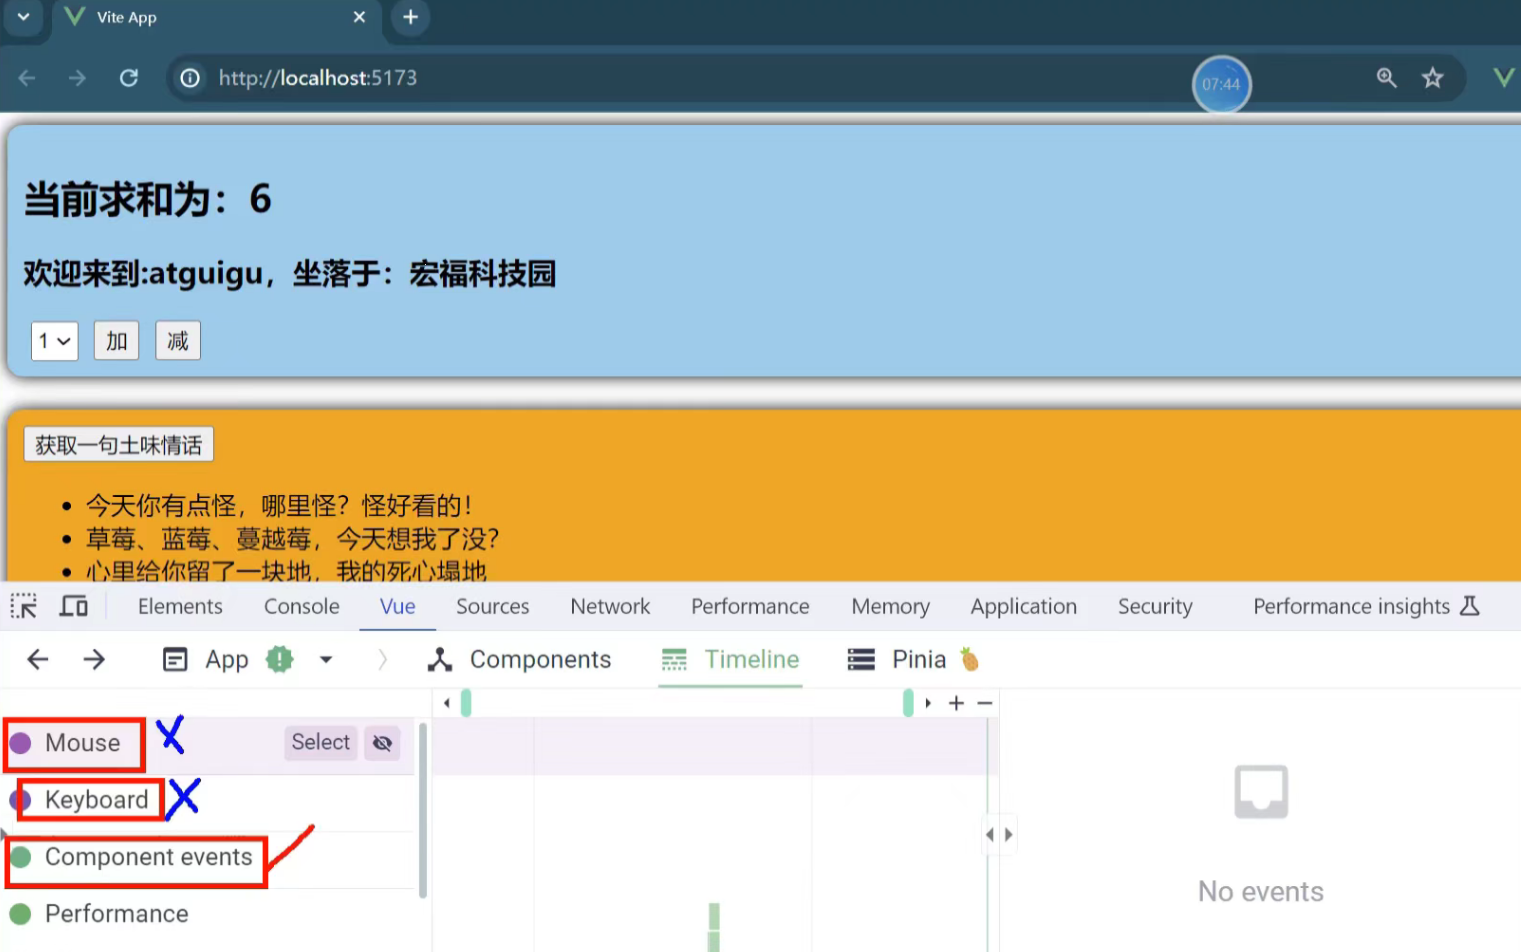
执行了三次
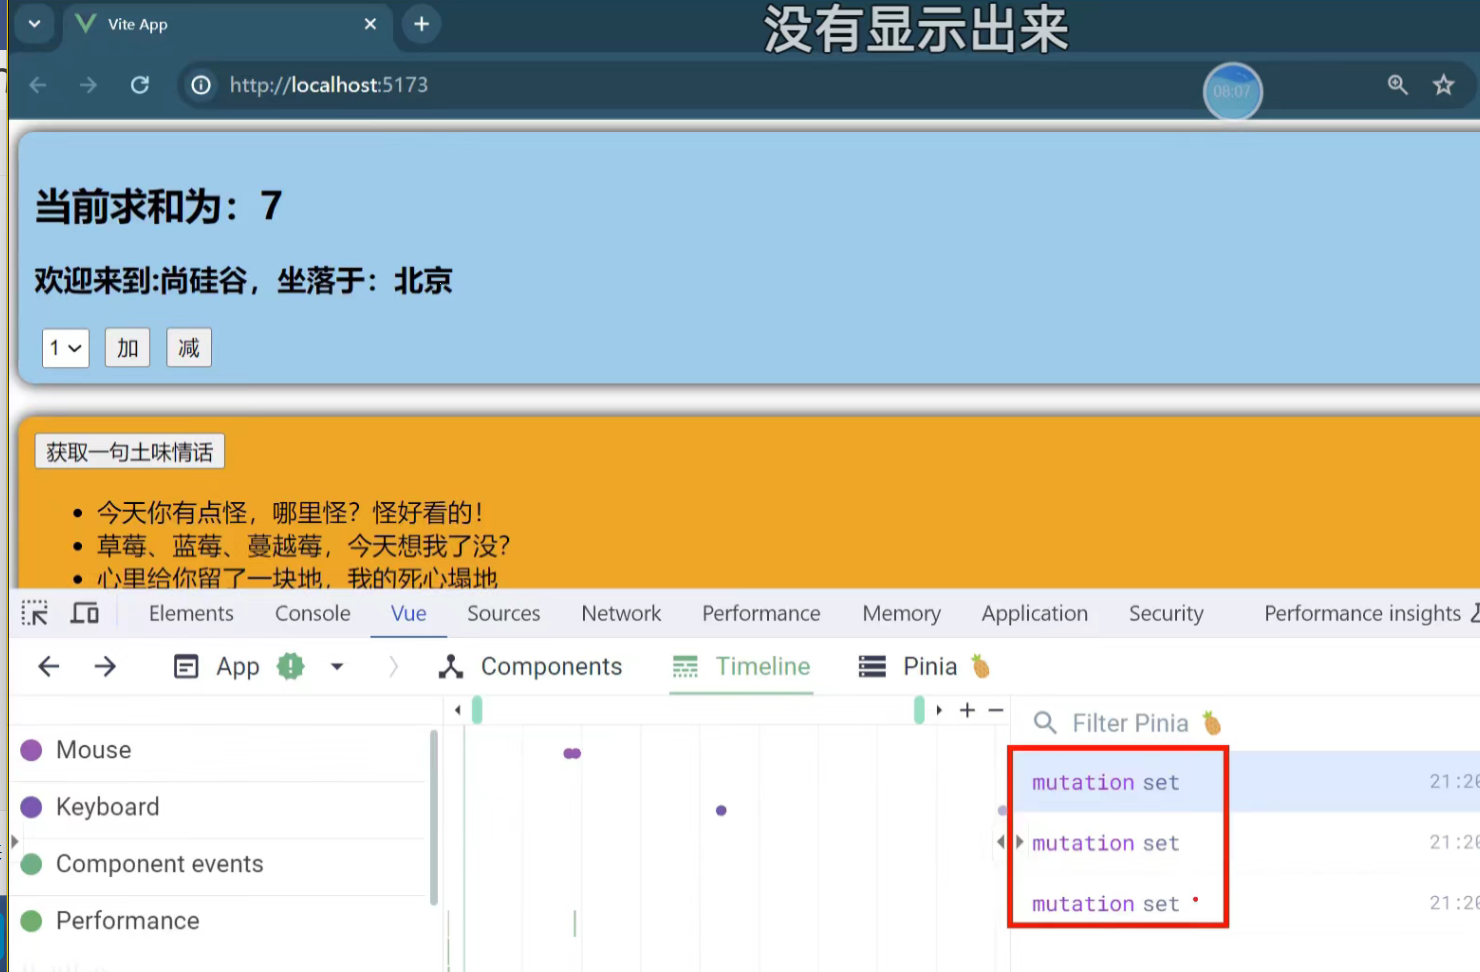
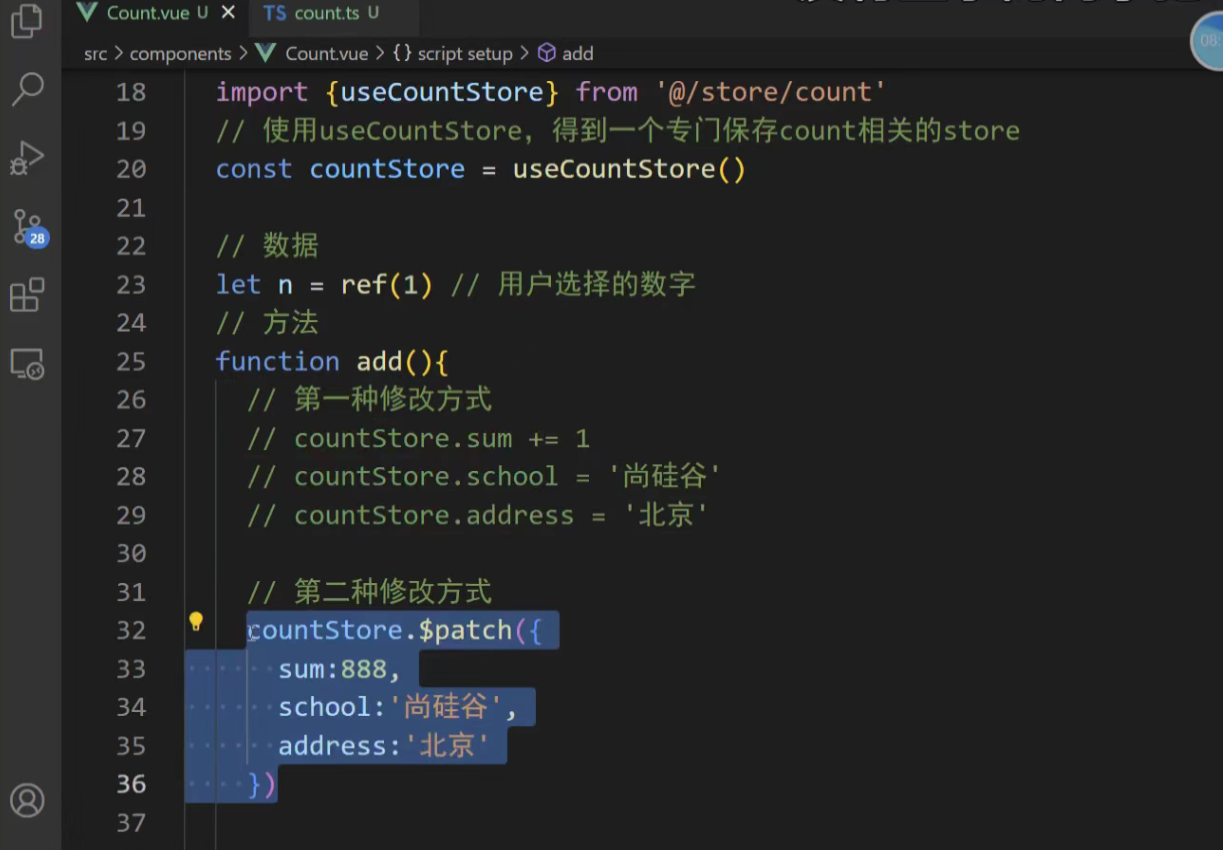
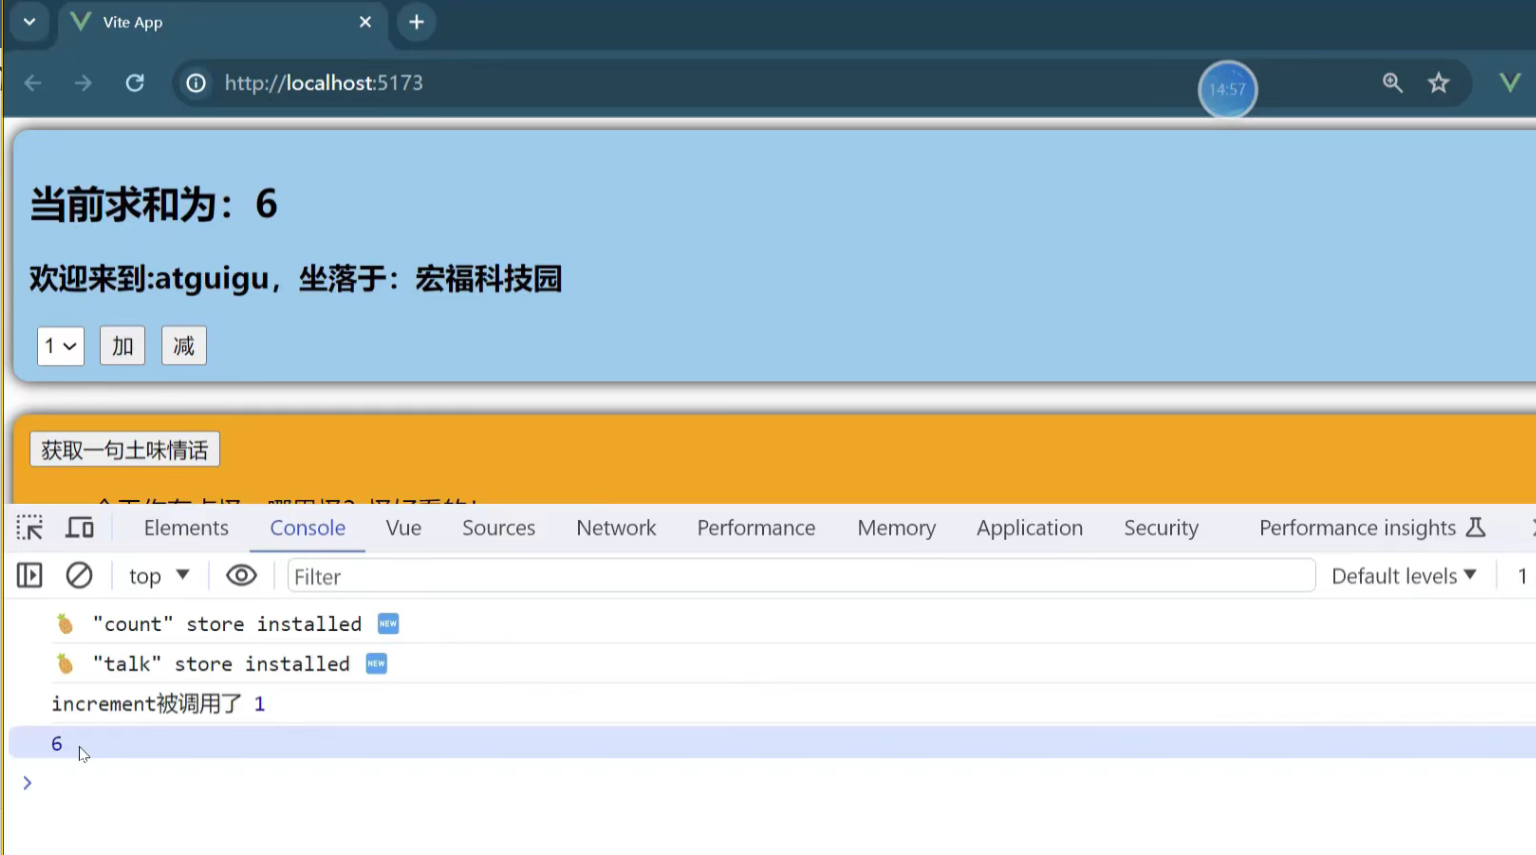
执行一次
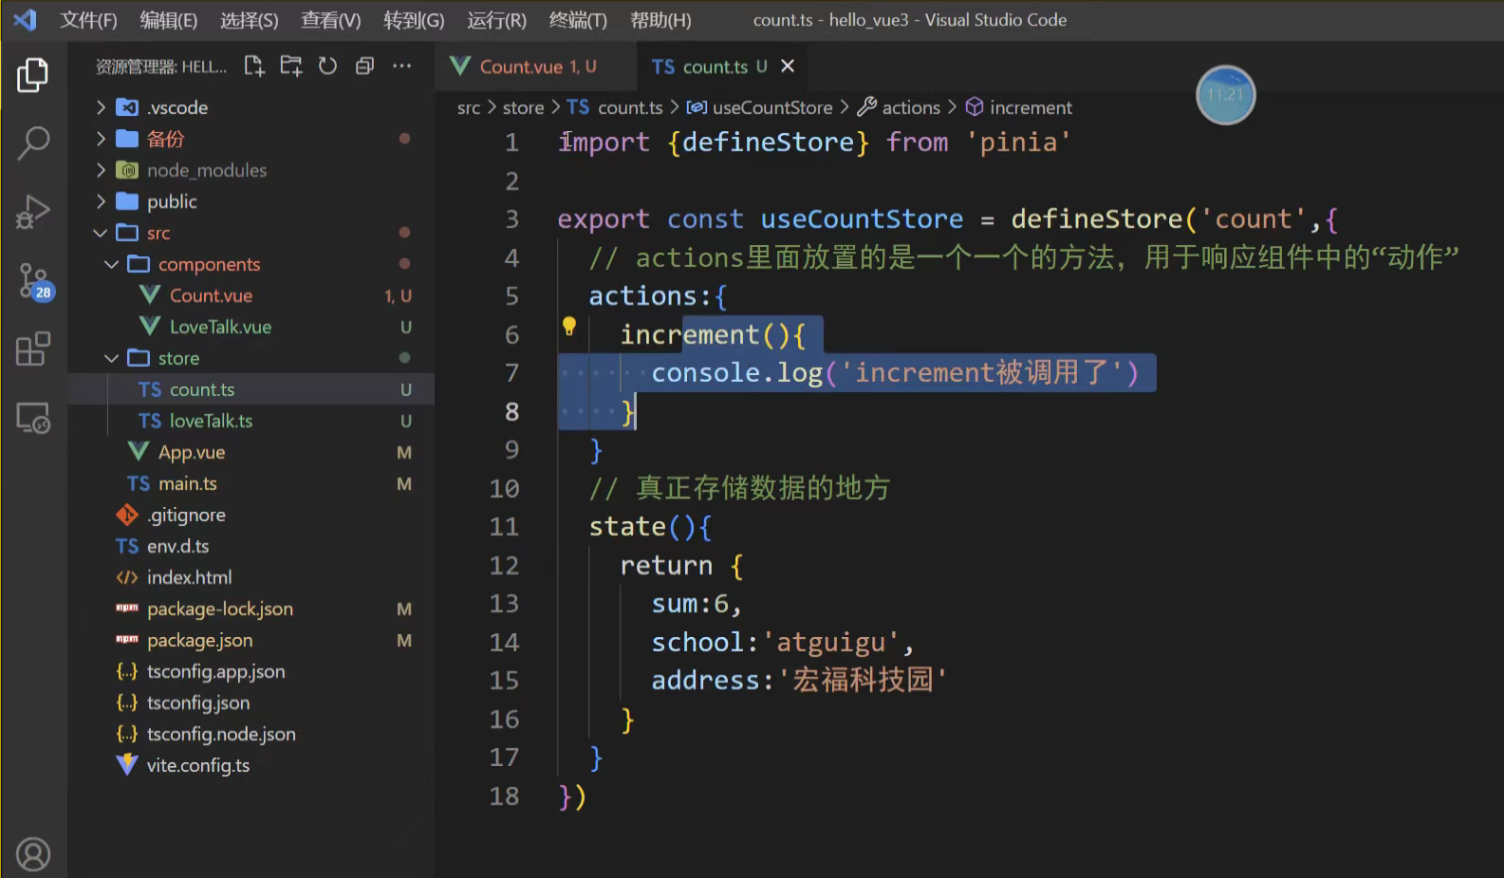
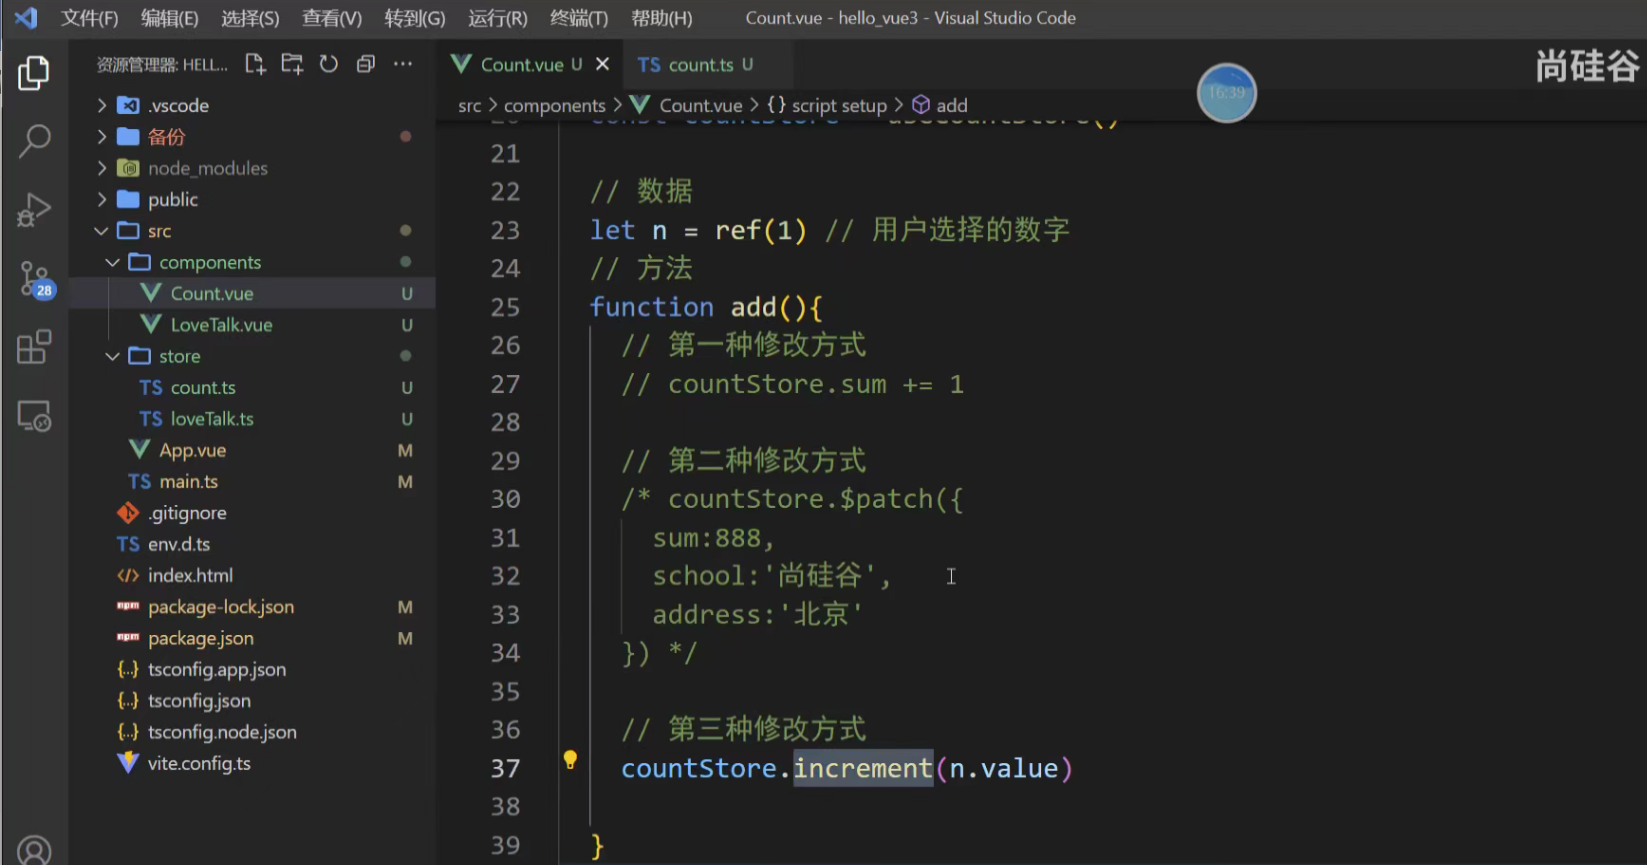
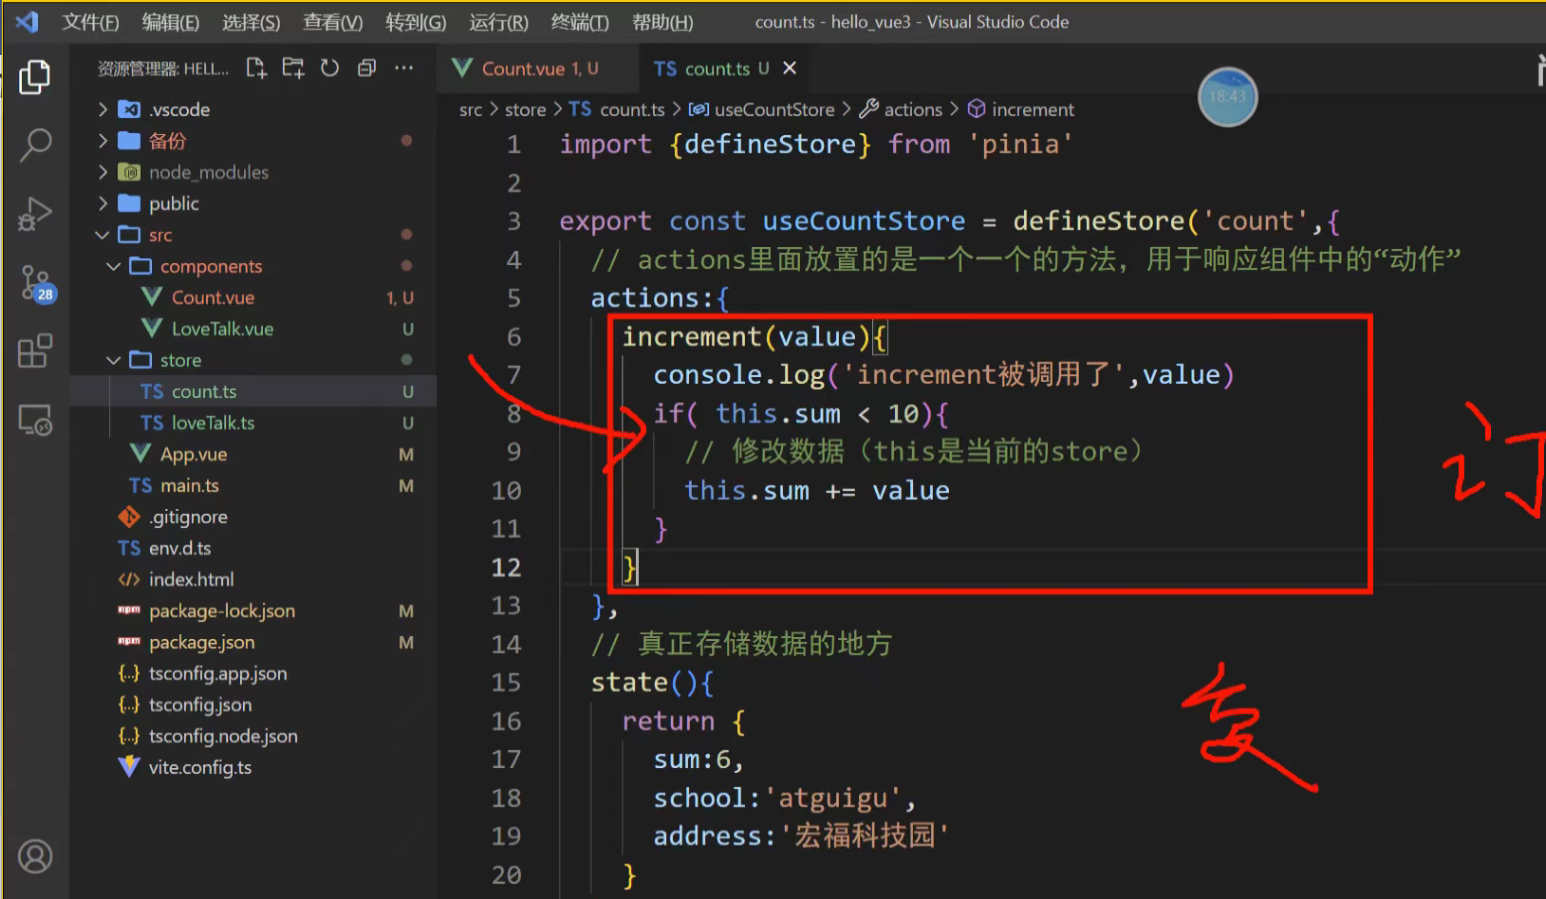
3. 使用 actions 方法 这是最推荐的方式。将复杂的业务逻辑封装在 Store 的 actions 中,使组件代码更简洁且可复用。
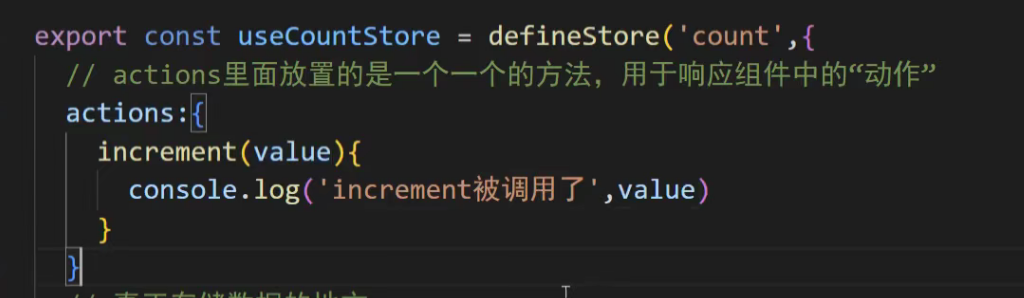
也可以传递一个参数
示例
拓展:
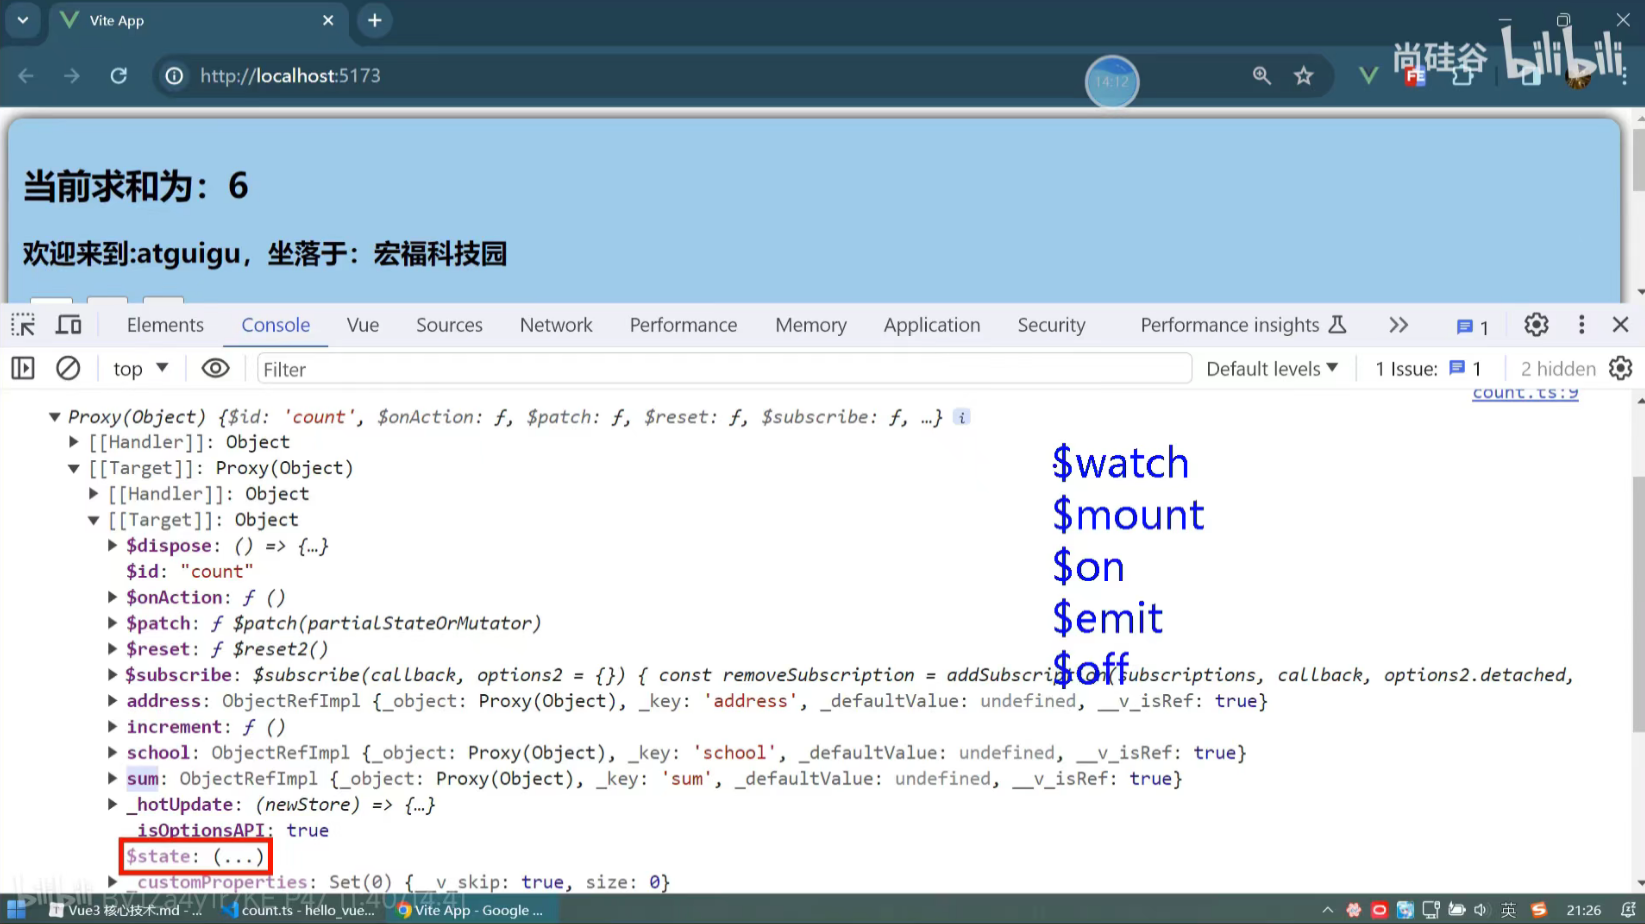
查看"count"里面的数据
给程序员设计的api往往都是$xxx
actions里面的动作是不能访问state里面的数据的

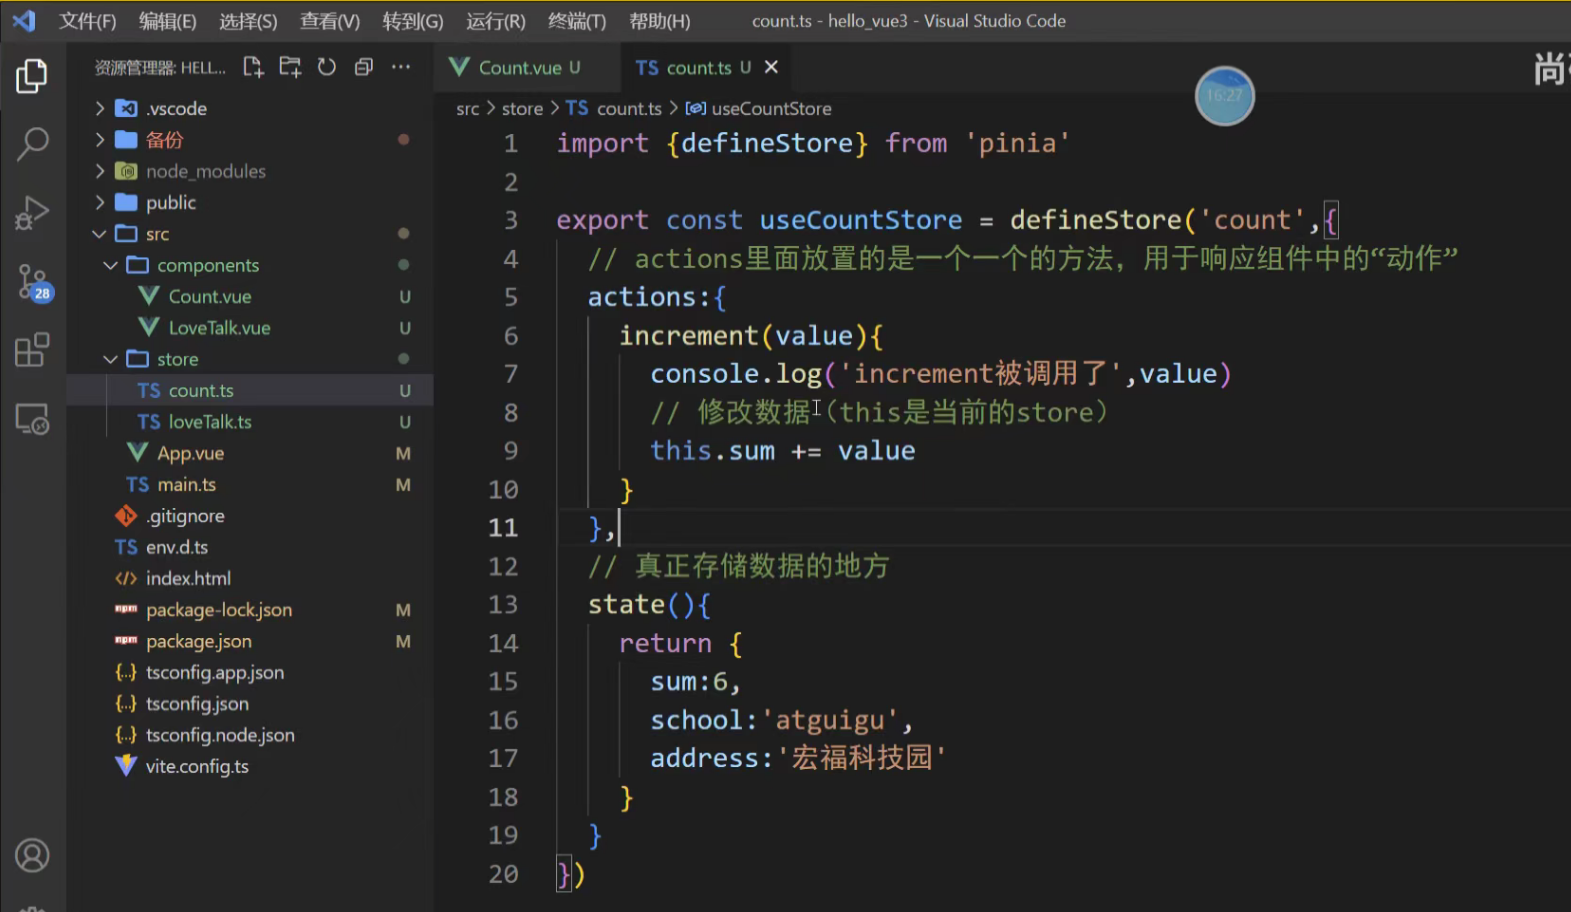
actions的意义:相当于函数,可以复用,让调用他的组件美观一点
// stores/counter.js
export const useCounterStore = defineStore('counter', {state: () => ({ count: 0, history: [] }),// 定义 actionsactions: {increment() {this.count++ // 通过 `this` 访问整个 store 实例},decrement() {this.count--},randomReset() {const newCount = Math.round(Math.random() * 100)this.count = newCountthis.history.push(`Randomly reset to ${newCount}`)}}
})
<!-- 在组件中使用 -->
<button @click="counterStore.increment()">Action +</button>
<button @click="counterStore.decrement()">Action -</button>
<button @click="counterStore.randomReset()">Random Reset</button>
六、storeToRefs
当从 Store 中解构 state 属性时,这些属性会失去响应性。Pinia 提供了 storeToRefs 工具函数来解决这个问题,它会为每个响应式属性创建 ref 引用。
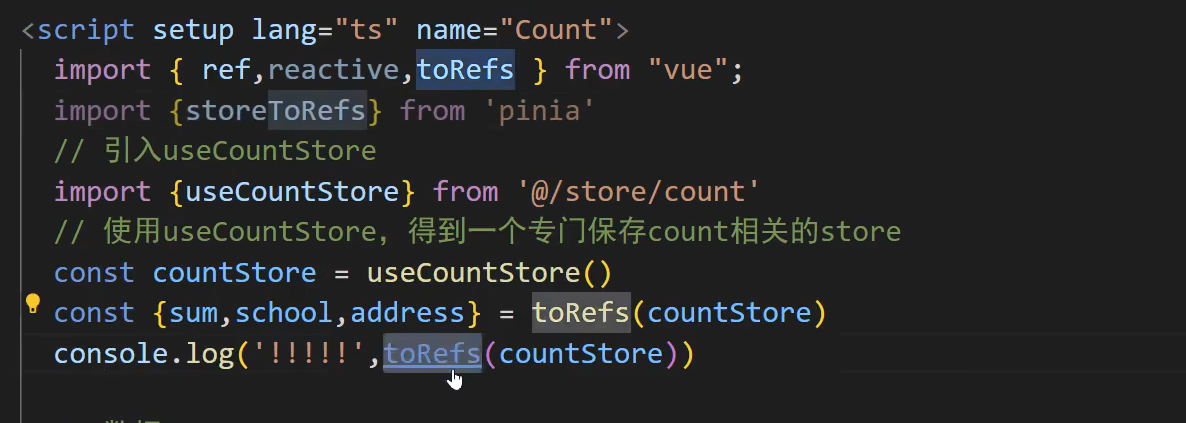
使用案例说明
结构数据

使用torefs()包围,可以实现保存响应式,但是代价大
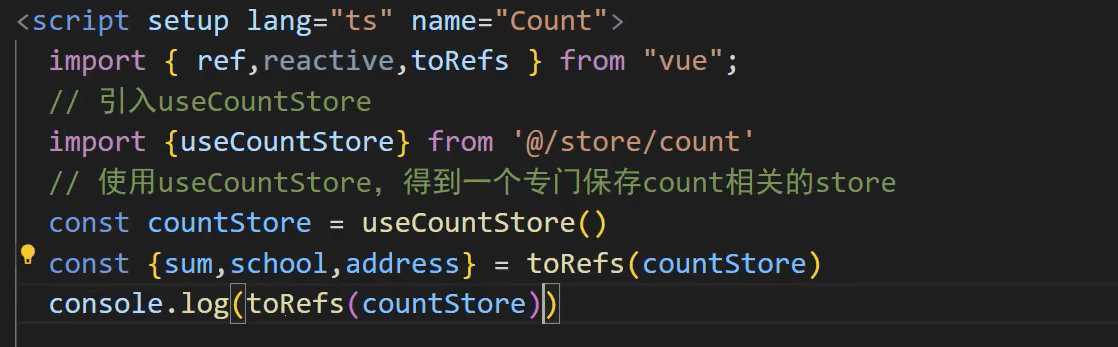
全部都变成了ref,我们只需要数据是响应式的
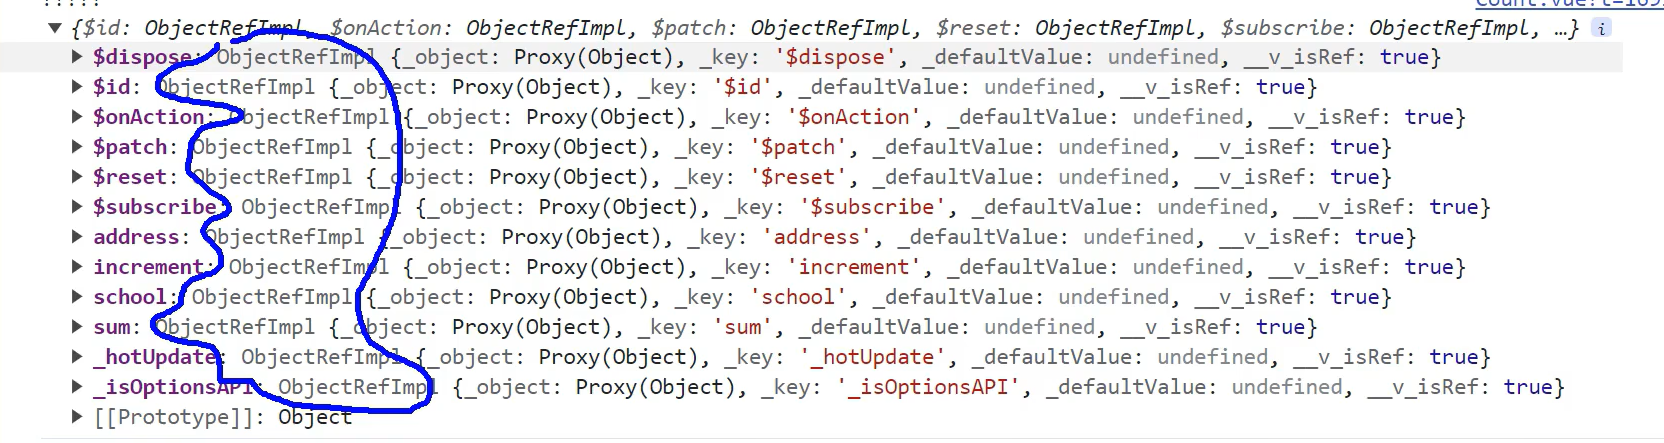
使用storetorefs,他就只会关注store数据,不会把方法也改不了
<template><p>Double Count: {{ count }} - {{ doubleCount }}</p>
</template><script setup>
import { storeToRefs } from 'pinia'
import { useCounterStore } from '@/stores/counter'const counterStore = useCounterStore()// ❌ 错误:直接解构会失去响应性
// const { count, doubleCount } = counterStore// ✅ 正确:使用 storeToRefs 保持响应性
const { count, doubleCount } = storeToRefs(counterStore)// 注意:actions 不需要也不应该通过 storeToRefs 解构,直接通过原 store 调用即可
// const { increment } = counterStore
</script>
七、getters 的使用
Getters 等同于 Store 的计算属性,用于从 state 中派生数据。它们有很好的缓存机制,只有当依赖的状态改变时才会重新计算。
// stores/counter.js
export const useCounterStore = defineStore('counter', {state: () => ({ count: 0 }),getters: {// 1. 常规函数写法,通过 `this` 访问 statedoubleCount: (state) => state.count * 2,// 2. 使用 `this` 访问其他 getters (必须用常规函数而非箭头函数)doubleCountPlusOne() {return this.doubleCount + 1}}
})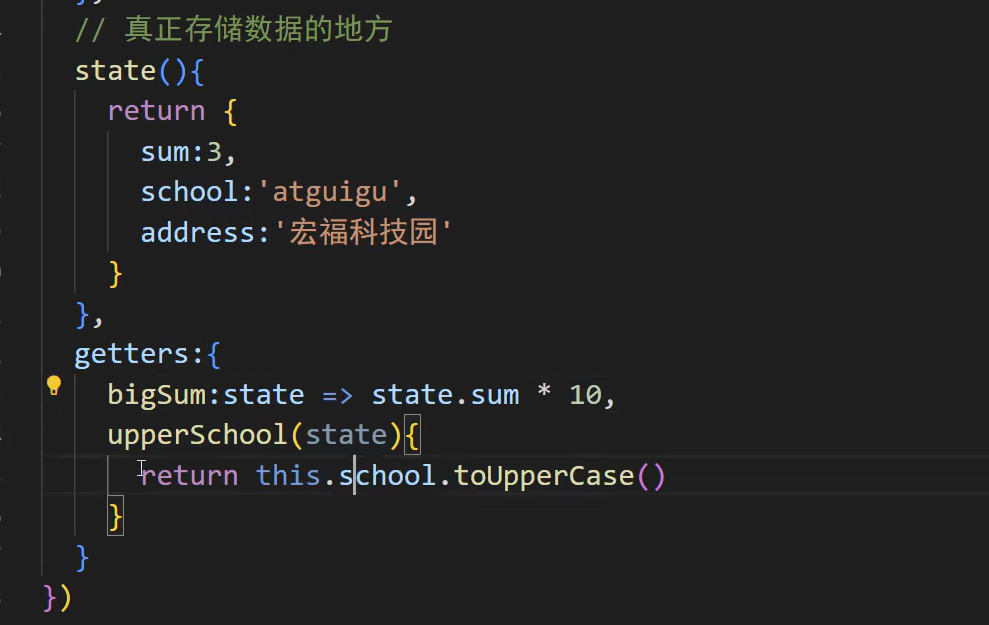
getters相当于再次对数据进行一次加工。
注意点:
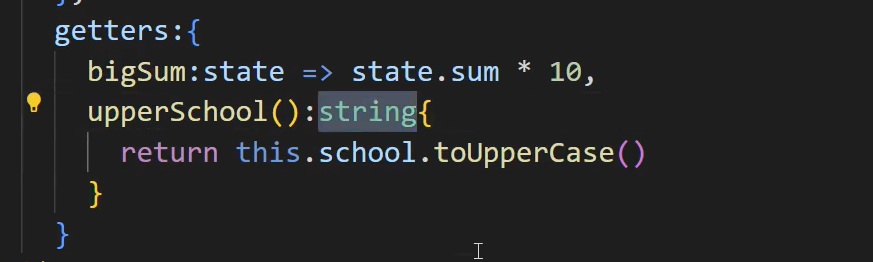
1、如果不使用this可以写成箭头函数,要使用this不行
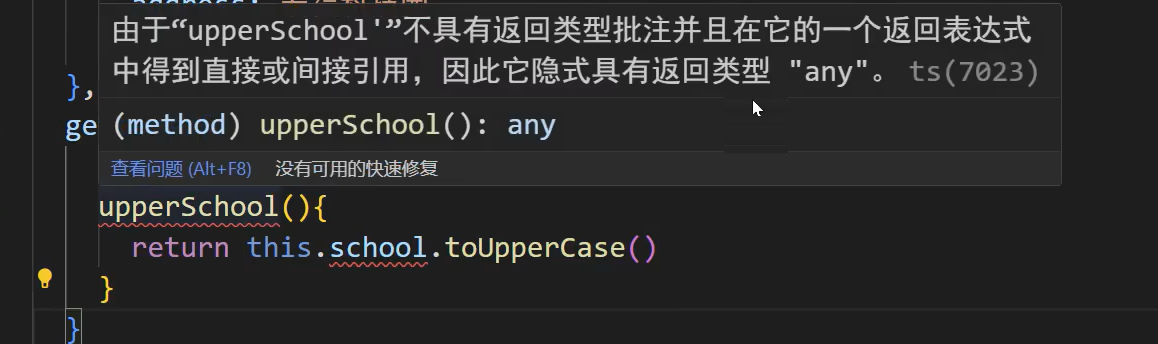
2、报这个错一遍再加上泛型就好了
在组件中使用 Getter 就像使用 state 属性一样:

<p>Double Count: {{ counterStore.doubleCount }}</p>
<p>Double Count + 1: {{ counterStore.doubleCountPlusOne }}</p>
八、$subscribe 的使用
$subscribe 方法用于订阅 Store 的状态变化,类似于 Vuex 的 subscribe。它非常适用于持久化状态、调试或执行与特定状态变化相关的副作用。
通常在组件的 setup 中进行订阅。
案例说明:
1、

查看两个参数mutate,state,数据保存在state里面

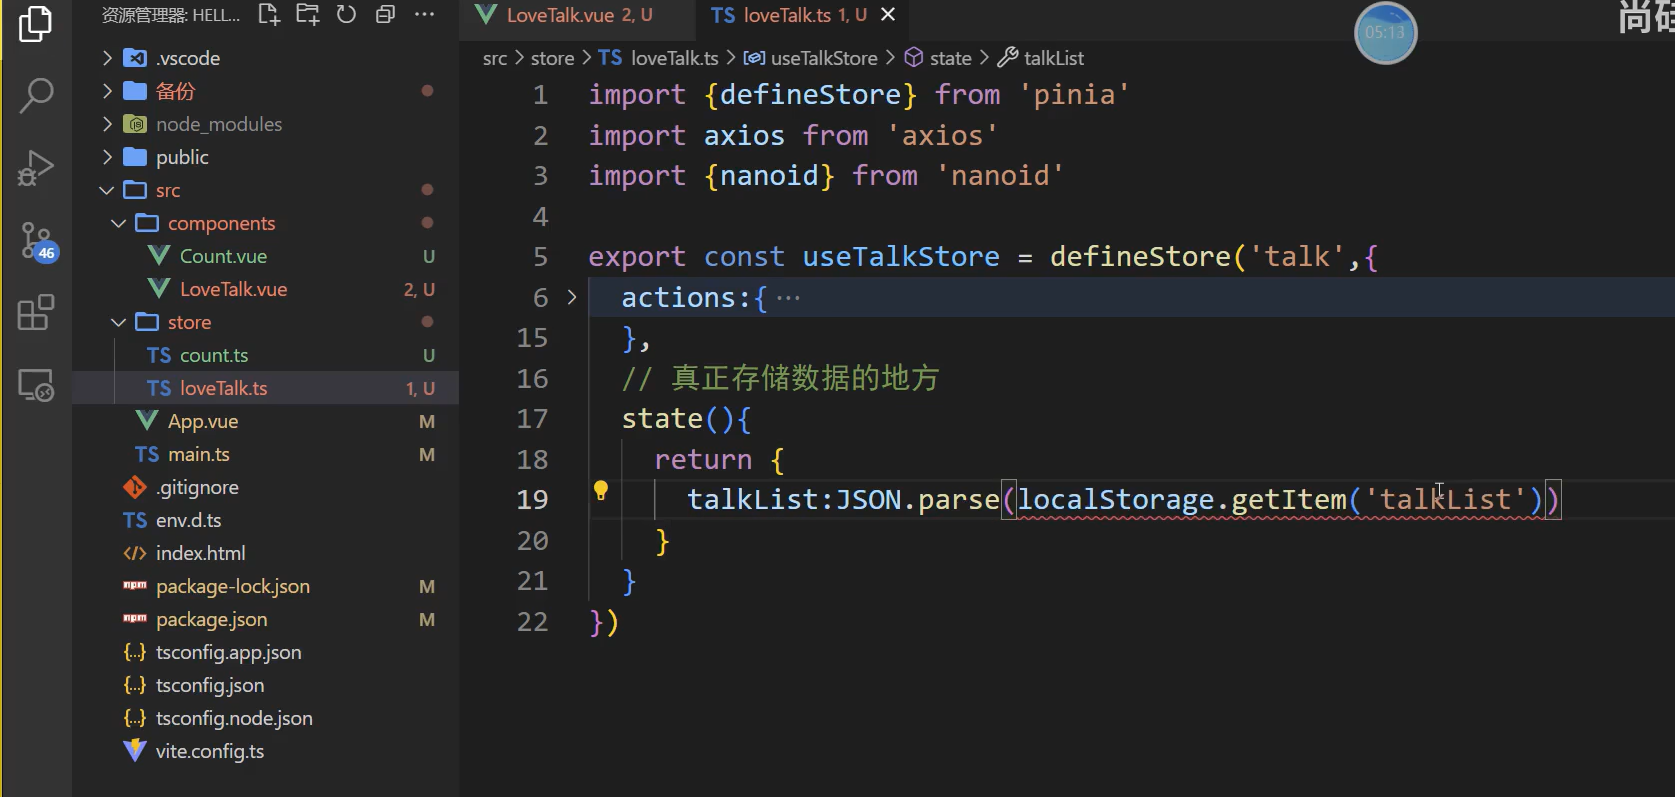
2、localstorage: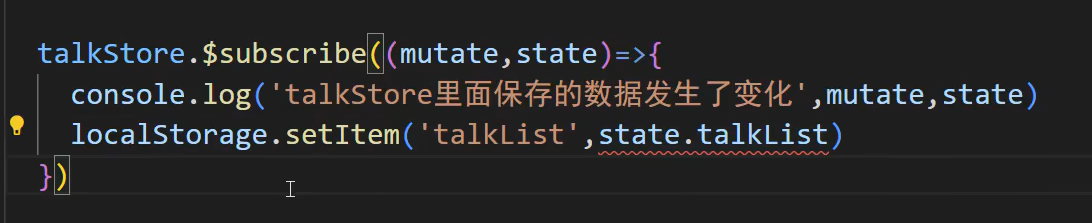
localstorage底层都是字符串,如果不是字符串会调用tostring方法,如果传的数组里面都是对象就会变成下面这样
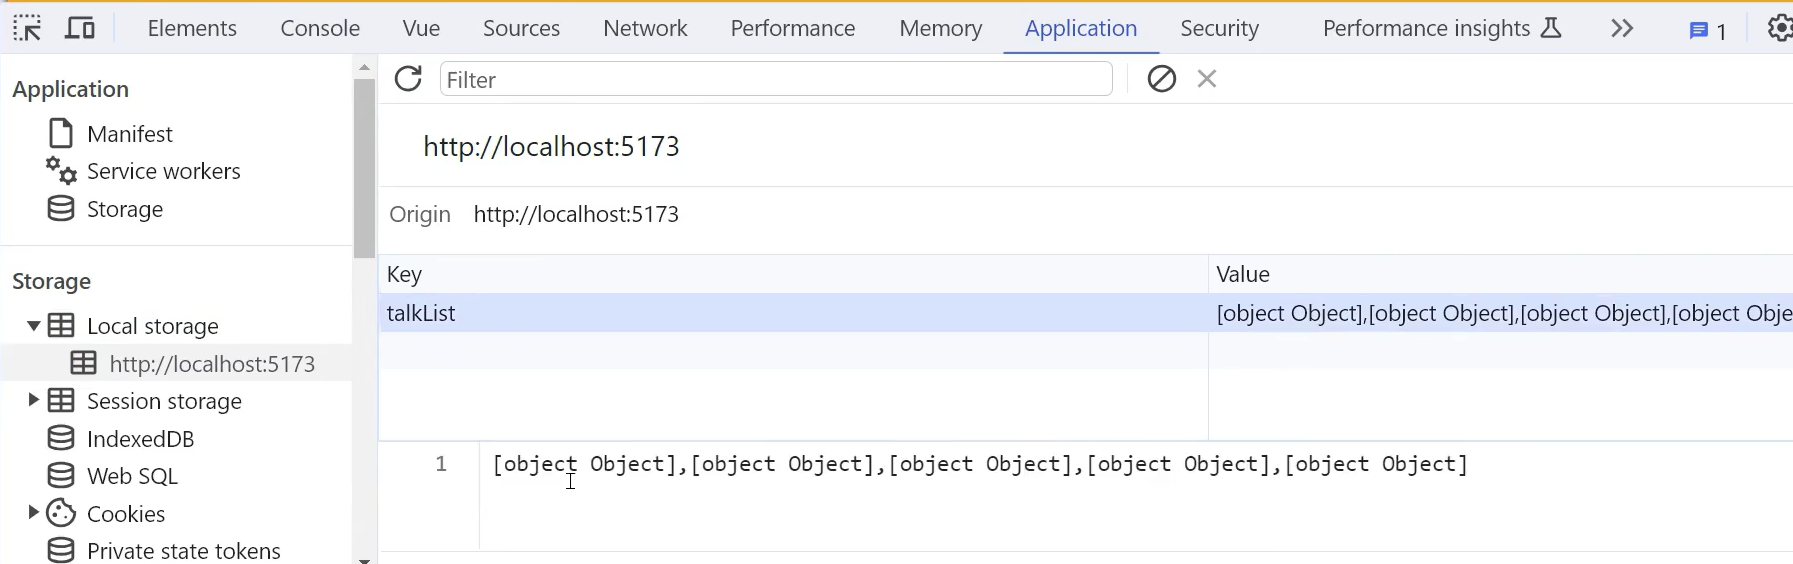
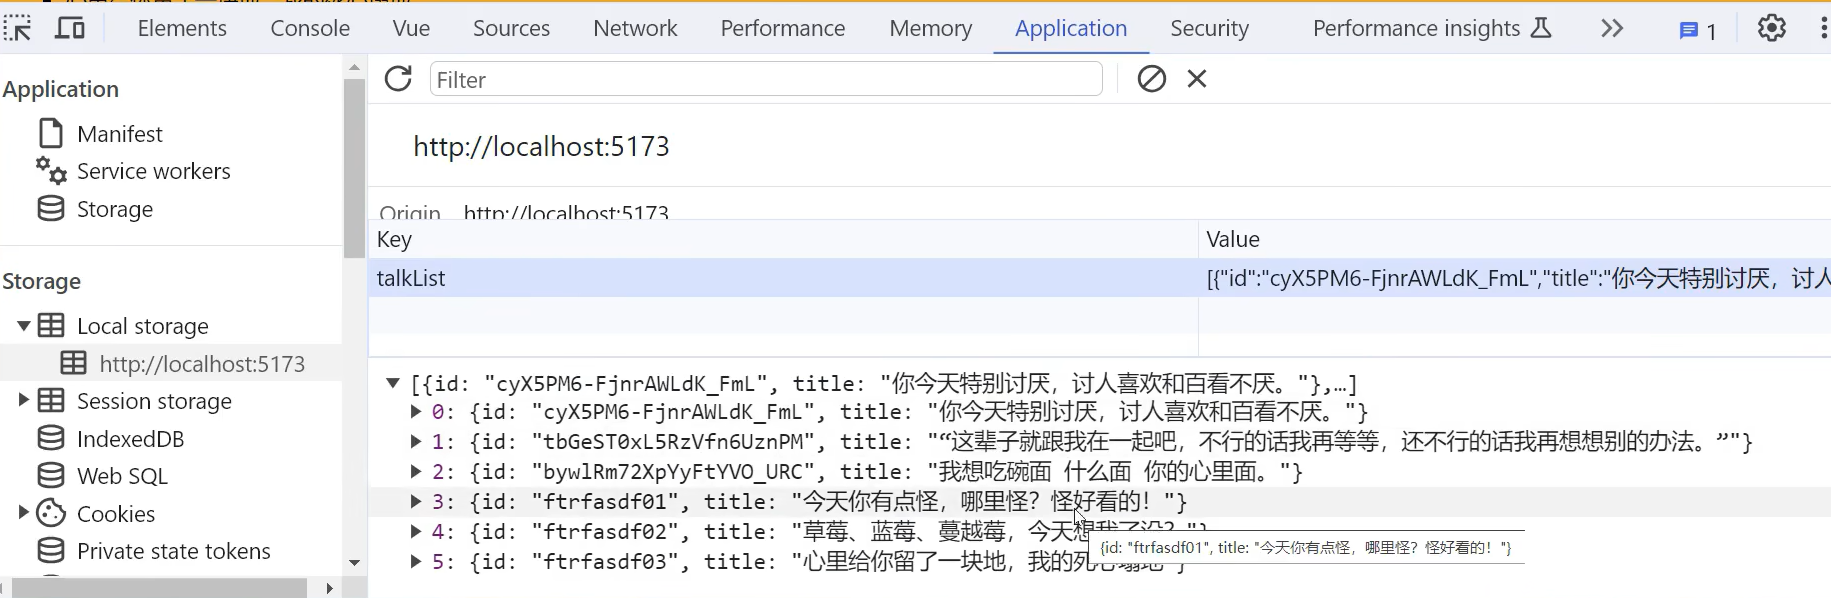
使用json修改

这样存了数据以及就不会丢失数据
使用localstorage完善代码
注意之前转为了json现在要.parse()转回来
这个报错就是说不一定可以取出数据
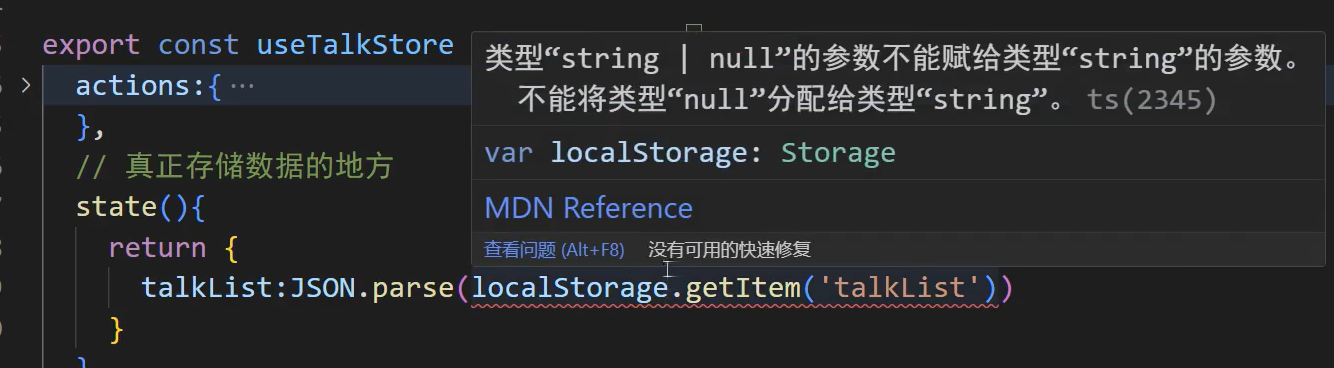
可以使用断言(as)

再加条件或定义空数据
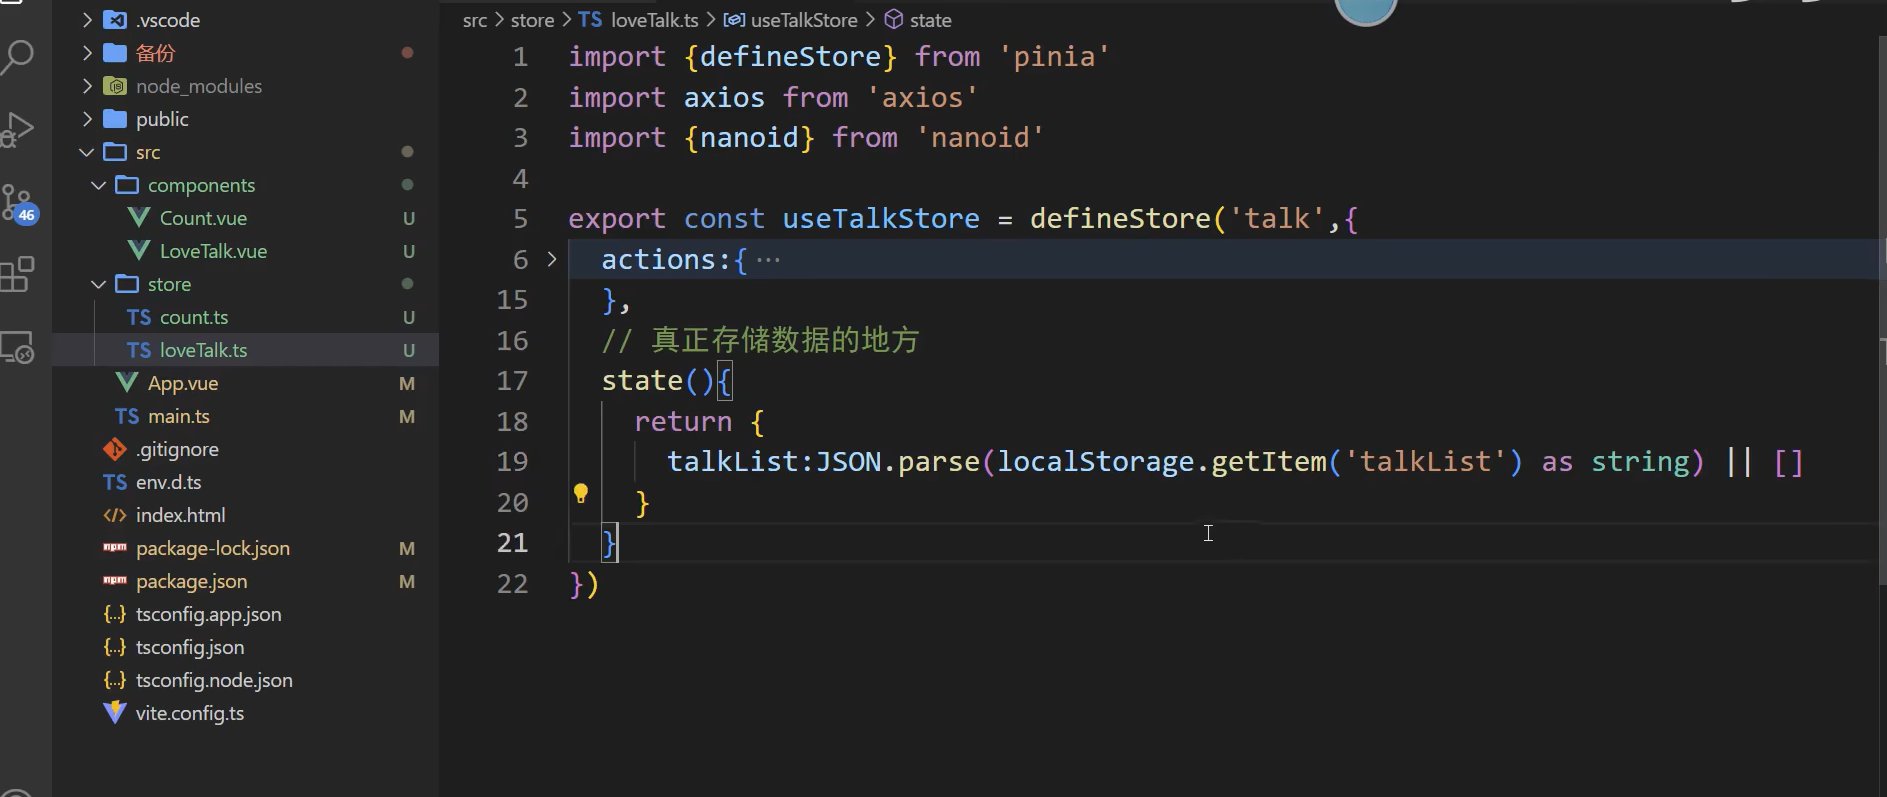
还有一个问题:如果初始化数据什么都没有localstorage里面就就是null,经过json解析后仍然是null
,这时候点击添加就是null.unshift
<!-- components/MyComponent.vue -->
<template><div>...<h3>History Logs (via $subscribe):</h3><ul><li v-for="(event, index) in logEvents" :key="index">{{ event }}</li></ul></div>
</template><script setup>
import { ref } from 'vue';
import { useCounterStore } from '@/stores/counter'const counterStore = useCounterStore()
const logEvents = ref([])// 订阅 store 的变化
counterStore.$subscribe((mutation, state) => {// mutation 主要包含:events, storeId, type ('direct' | 'patch object' | 'patch function')// state 是变更后的新状态console.log(`[${mutation.type}]`, mutation, state)// 将操作记录到组件的 logEvents 中用于显示if (mutation.type === 'patch object' || mutation.type === 'patch function') {// 这里我们简单地将最新的一条历史记录显示出来if (state.history.length > 0) {logEvents.value.push(state.history[state.history.length - 1])}} else {// 直接修改或 action 修改,可能没有记录 history,我们简单记录一下logEvents.value.push(`Count was set to ${state.count} via ${mutation.type}`)}
})
</script>
九、store 组合式写法
除了 Options API 风格,Pinia 也支持使用 setup() 函数的语法来定义 Store,这与 Vue 3 的 Composition API 思想一致。
选项式的写法:
定义 Store (Composition API 风格)
组合式写法
数据直接使用reactive定义
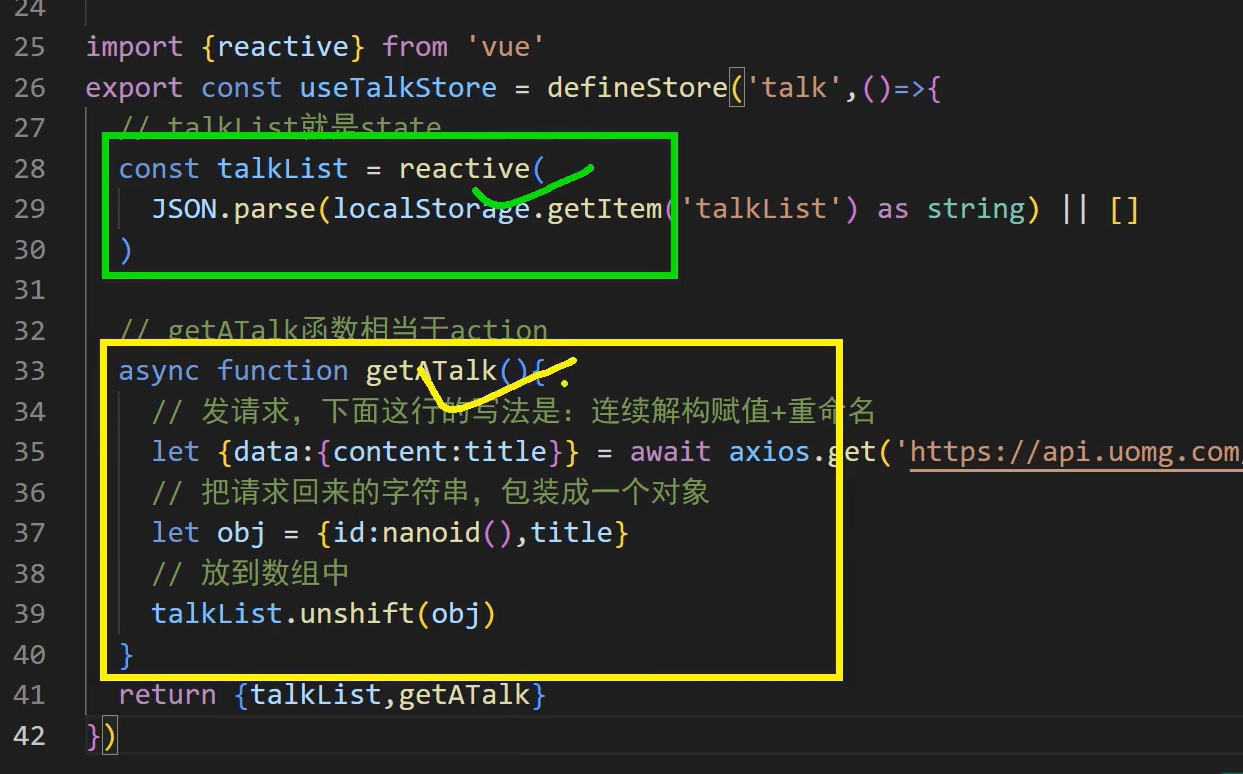
// stores/counter-composition.js
import { defineStore } from 'pinia'
import { ref, computed } from 'vue'export const useCounterStore = defineStore('counterComposition', () => {// State (相当于 state)const count = ref(0)const history = ref([])// Getters (相当于 getters)const doubleCount = computed(() => count.value * 2)const doubleCountPlusOne = computed(() => doubleCount.value + 1)// Actions (相当于 actions)function increment() {count.value++}function decrement() {count.value--}function randomReset() {const newCount = Math.round(Math.random() * 100)count.value = newCounthistory.value.push(`Randomly reset to ${newCount}`)}// 必须返回要在组件中使用的所有变量和函数return {count,history,doubleCount,doubleCountPlusOne,increment,decrement,randomReset}
})
在组件中使用 使用方式与 Options 风格定义的 Store 完全一致,没有任何区别。这是 Pinia 设计的一大优点。
<script setup>
import { useCounterStore } from '@/stores/counter-composition'const counterStore = useCounterStore()
// 用法完全相同!
</script>
如何选择?
- Options 风格:对于从 Vuex 迁移过来的项目或习惯于选项式 API 的开发者来说更熟悉。
- Composition 风格:更灵活,可以像写
setup组件一样组织代码,更容易在不同 Store 之间组合和复用逻辑。
总结
Pinia 以其简洁的 API、完美的 TypeScript 集成和模块化设计,成为了 Vue 状态管理的新标准。它通过抛弃 mutations、提供直观的 actions、灵活的修改方式(直接修改、$patch、actions)以及强大的 getters 和 $subscribe,极大地提升了开发体验。
无论你选择 Options 风格还是 Composition 风格来编写 Store,都能享受到一致且愉悦的使用方式。对于新项目,强烈建议直接从 Pinia 开始。