视频抽帧完全指南:使用PowerShell批量提取与优化图片序列

文章目录
- 前言:什么是抽帧?为什么需要抽帧?
- 环境准备
- 基础环境要求
- 可选工具(增强功能)
- 方案一:基础抽帧与压缩脚本
- 完整代码
- 使用方法
- 方案二:智能均匀抽帧算法
- 均匀分布的优势
- 方案三:基于FFmpeg的专业级抽帧
- 安装FFmpeg
- 直接从视频抽帧
- 实际应用案例
- 案例1:监控视频分析
- 案例2:动画制作预览
- 案例3:机器学习数据集准备
- 性能优化技巧
- 1. 批量处理优化
- 2. 内存管理
- 3. 进度显示
- 故障排除
- 常见问题及解决方案
- 抽帧后序列号重排如何实现
- 完整的抽帧+重排一体化脚本
- 使用示例
- 基础用法
- 高级用法
- 处理效果对比
- 处理前(抽帧后不连续)
- 处理后(连续序列)
- 技术要点
- 1. 安全重命名策略
- 2. 智能排序保障
- 3. 灵活的命名模式
前言:什么是抽帧?为什么需要抽帧?
抽帧(Frame Extraction)是指从视频文件中按一定间隔提取静态图片的过程。这在很多场景下都非常有用:
- 🎬 视频剪辑预览:快速浏览视频关键画面
- 🤖 机器学习:为AI训练准备图像数据
- 📊 视频分析:分析镜头变化、运动轨迹
- 💾 存储优化:用关键帧代表整个视频内容
- 🎨 艺术创作:将视频转化为序列图片进行二次创作
本文将教你如何使用PowerShell实现智能抽帧——删除3/4的图片并压缩画质,大幅优化存储效率。
实现效果:
环境准备
基础环境要求
- Windows PowerShell 5.1 或更高版本
- .NET Framework 4.5+(用于图片处理)
- 足够的磁盘空间存放临时文件
可选工具(增强功能)
- ImageMagick:更高效的图片处理工具
- FFmpeg:专业的视频处理工具(用于从视频直接抽帧)
方案一:基础抽帧与压缩脚本
完整代码
# 抽帧压缩大师 v1.0
# 功能:智能保留25%图片 + 画质压缩
param([string]$FolderPath = "C:\Your\ImageSequence",  # 图片序列文件夹[int]$Quality = 50,                             # 压缩质量 1-100[switch]$Preview                                # 预览模式
)# 导入图片处理库
Add-Type -AssemblyName System.Drawingfunction Start-FrameExtraction {Write-Host "=== 抽帧压缩大师开始工作 ===" -ForegroundColor Cyan# 设置工作目录if (-not (Test-Path $FolderPath)) {Write-Host "错误:文件夹不存在!" -ForegroundColor Redreturn}Set-Location $FolderPath# 获取图片序列$files = Get-ChildItem "CDZCQ_*.png" | Sort-Object { [int]($_.BaseName -replace 'CDZCQ_', '') }if ($files.Count -eq 0) {Write-Host "未找到CDZCQ_*.png格式的图片文件!" -ForegroundColor Redreturn}Display-ProcessingInfo $filesif ($Preview) { return }  # 预览模式提前退出# 执行备份$backupFolder = Backup-Files $files# 执行抽帧压缩Process-FrameExtraction $files $QualityWrite-Host "`n=== 处理完成! ===" -ForegroundColor GreenWrite-Host "备份位置: $backupFolder" -ForegroundColor Cyan
}function Display-ProcessingInfo {param($files)$totalFiles = $files.Count$filesToKeep = [math]::Ceiling($totalFiles / 4)$filesToDelete = $totalFiles - $filesToKeep$compressionRatio = "约$((100-$Quality))%"Write-Host "`n📊 处理统计:" -ForegroundColor YellowWrite-Host "   总文件数: $totalFiles" -ForegroundColor WhiteWrite-Host "   保留文件: $filesToKeep (25%)" -ForegroundColor GreenWrite-Host "   删除文件: $filesToDelete (75%)" -ForegroundColor RedWrite-Host "   压缩质量: $Quality (体积减少$compressionRatio)" -ForegroundColor Blueif ($Preview) {Write-Host "`n👀 预览保留的文件:" -ForegroundColor Magentafor ($i = 0; $i -lt $files.Count; $i += 4) {Write-Host "   ✓ $($files[$i].Name)" -ForegroundColor Green}}
}function Backup-Files {param($files)$backupFolder = "Backup_Frames_$(Get-Date -Format 'yyyyMMdd_HHmmss')"Write-Host "`n📦 创建备份: $backupFolder" -ForegroundColor CyanNew-Item -ItemType Directory -Path $backupFolder -Force | Out-NullCopy-Item "CDZCQ_*.png" $backupFolderreturn $backupFolder
}function Process-FrameExtraction {param($files, $quality)$keepCount = 0$deleteCount = 0Write-Host "`n🔄 开始处理..." -ForegroundColor Yellowfor ($i = 0; $i -lt $files.Count; $i++) {$file = $files[$i]# 每4帧保留第1帧if ($i % 4 -eq 0) {if (Compress-Image -InputPath $file.FullName -Quality $quality) {Write-Host "   ✓ 保留: $($file.Name)" -ForegroundColor Green$keepCount++}}else {Remove-Item $file.FullName -ForceWrite-Host "   ✗ 删除: $($file.Name)" -ForegroundColor Gray$deleteCount++}}Write-Host "`n📈 处理结果:" -ForegroundColor YellowWrite-Host "   成功保留: $keepCount 个文件" -ForegroundColor GreenWrite-Host "   已删除: $deleteCount 个文件" -ForegroundColor Red
}function Compress-Image {param([string]$InputPath, [int]$Quality)try {$bitmap = [System.Drawing.Bitmap]::FromFile($InputPath)# 获取编码器$codecInfo = [System.Drawing.Imaging.ImageCodecInfo]::GetImageEncoders() | Where-Object { $_.MimeType -eq 'image/jpeg' }$encoderParams = New-Object System.Drawing.Imaging.EncoderParameters(1)$encoderParams.Param[0] = New-Object System.Drawing.Imaging.EncoderParameter([System.Drawing.Imaging.Encoder]::Quality, $Quality)# 临时文件$tempFile = [System.IO.Path]::ChangeExtension($InputPath, ".tmp")$bitmap.Save($tempFile, $codecInfo, $encoderParams)$bitmap.Dispose()# 替换原文件Remove-Item $InputPath -ForceMove-Item $tempFile $InputPath -Forcereturn $true}catch {Write-Host "   压缩失败: $($_.Exception.Message)" -ForegroundColor Redreturn $false}
}# 启动处理
Start-FrameExtraction
使用方法
# 基本用法
.\FrameExtraction.ps1 -FolderPath "C:\MyFrames"# 自定义质量
.\FrameExtraction.ps1 -FolderPath "C:\MyFrames" -Quality 75# 预览模式(不实际执行)
.\FrameExtraction.ps1 -FolderPath "C:\MyFrames" -Preview
方案二:智能均匀抽帧算法
均匀分布的优势
基础方案采用"每4帧保留1帧"的简单策略,但可能造成内容分布不均。智能算法确保在整个时间轴上均匀采样:
function Smart-FrameExtraction {param($files, $quality)$totalFiles = $files.Count$filesToKeep = [math]::Ceiling($totalFiles / 4)# 计算均匀分布的索引$keepIndices = @()$step = $totalFiles / $filesToKeepWrite-Host "`n🎯 智能均匀抽帧算法" -ForegroundColor MagentaWrite-Host "   采样间隔: $([math]::Round($step, 2)) 帧" -ForegroundColor Whitefor ($i = 0; $i -lt $filesToKeep; $i++) {$index = [math]::Round($i * $step)if ($index -ge $totalFiles) { $index = $totalFiles - 1 }$keepIndices += $index}# 处理文件for ($i = 0; $i -lt $files.Count; $i++) {if ($keepIndices -contains $i) {Compress-Image -InputPath $files[$i].FullName -Quality $qualityWrite-Host "   ✓ 保留[$i]: $($files[$i].Name)" -ForegroundColor Green}else {Remove-Item $files[$i].FullName -Force}}
}
方案三:基于FFmpeg的专业级抽帧
安装FFmpeg
# Windows使用choco安装
choco install ffmpeg# 或手动下载添加到PATH
直接从视频抽帧
function Extract-FramesFromVideo {param([string]$VideoPath,[string]$OutputFolder,[int]$FrameRate = 6  # 每秒抽取6帧)if (-not (Get-Command "ffmpeg" -ErrorAction SilentlyContinue)) {Write-Host "请先安装FFmpeg!" -ForegroundColor Redreturn}New-Item -ItemType Directory -Path $OutputFolder -Force | Out-Null# 抽帧命令$outputPattern = Join-Path $OutputFolder "frame_%04d.png"& ffmpeg -i $VideoPath -r $FrameRate -qscale:v 2 $outputPatternWrite-Host "抽帧完成!输出到: $OutputFolder" -ForegroundColor Green
}# 使用示例
Extract-FramesFromVideo -VideoPath "input.mp4" -OutputFolder "extracted_frames"
实际应用案例
案例1:监控视频分析
# 监控视频通常帧率较高,需要大幅抽帧
.\FrameExtraction.ps1 -FolderPath "C:\SecurityCam" -Quality 40
# 从30fps抽到约2fps,适合行为分析
案例2:动画制作预览
# 动画序列需要较高质量
.\FrameExtraction.ps1 -FolderPath "C:\AnimationFrames" -Quality 80
# 保留更多细节,便于艺术审查
案例3:机器学习数据集准备
# AI训练需要平衡质量和数量
.\FrameExtraction.ps1 -FolderPath "C:\TrainingData" -Quality 60
# 均匀采样确保数据代表性
性能优化技巧
1. 批量处理优化
# 使用工作流提高大文件处理效率
workflow Optimized-Processing {param($files, $quality)foreach -parallel ($file in $files) {# 并行处理}
}
2. 内存管理
# 及时释放图片资源
function Safe-Compress {param($filePath, $quality)$bitmap = $nulltry {$bitmap = [System.Drawing.Bitmap]::FromFile($filePath)# 处理图片...}finally {if ($bitmap) { $bitmap.Dispose() }}
}
3. 进度显示
# 显示处理进度
function Show-Progress {param($current, $total, $activity)$percent = [math]::Round(($current / $total) * 100, 2)Write-Progress -Activity $activity -Status "进度: $percent%" -PercentComplete $percent
}
故障排除
常见问题及解决方案
-
“程序集加载失败”
# 解决方案:使用.NET Core替代 Add-Type -AssemblyName System.Drawing.Common -
“文件被占用”
# 解决方案:重试机制 function Safe-FileOperation {param($filePath)for ($i = 0; $i -lt 3; $i++) {try {# 文件操作break}catch {Start-Sleep -Seconds 1}} } -
内存不足
# 解决方案:分块处理
$chunks = $files | Group-Object -Property { [math]::Floor($i++ / 50) }
foreach ($chunk in $chunks) {Process-Chunk $chunk.Group[GC]::Collect()  # 强制垃圾回收
}
抽帧后序列号重排如何实现
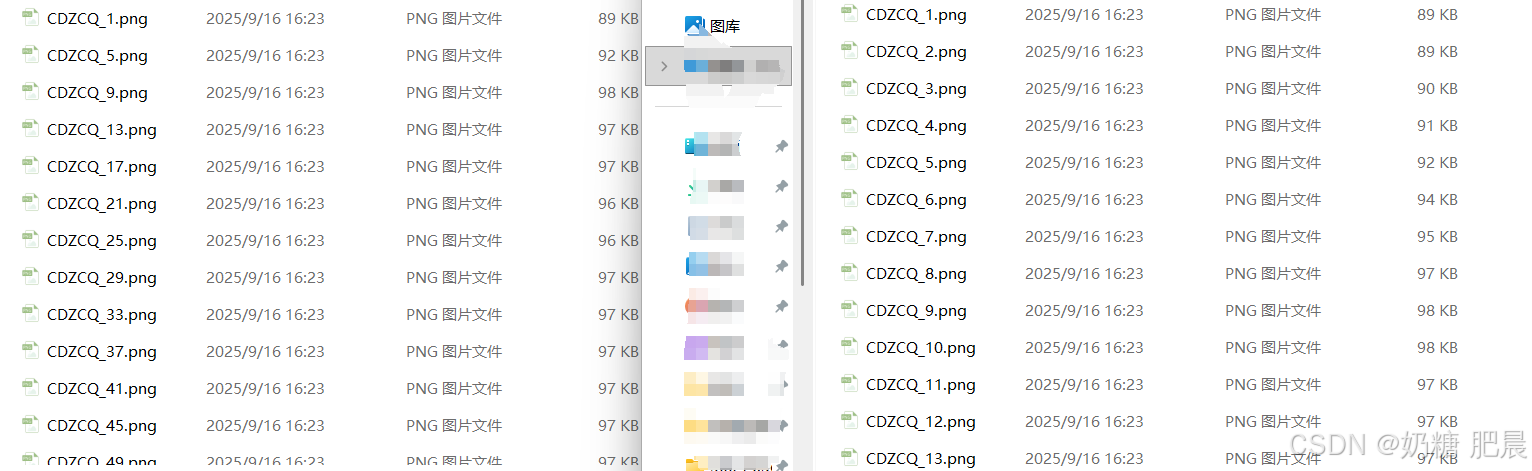
抽帧处理后,原始序列:
CDZCQ_1.png
CDZCQ_2.png
CDZCQ_3.png
CDZCQ_4.png
...
CDZCQ_125.png
抽帧后(保留25%):
CDZCQ_1.png
CDZCQ_5.png
CDZCQ_9.png
CDZCQ_13.png
...
问题:序列号不连续,影响后续处理和使用
目标:重命名为连续序列
CDZCQ_1.png
CDZCQ_2.png
CDZCQ_3.png
CDZCQ_4.png
...
完整的抽帧+重排一体化脚本
# 抽帧压缩与序列重排一体化解决方案
param([string]$FolderPath = "C:\Your\ImageSequence",[int]$Quality = 50,[switch]$Preview,[int]$StartNumber = 1  # 起始序列号
)Add-Type -AssemblyName System.Drawingfunction Start-IntelligentFrameExtraction {Write-Host "=== 智能抽帧与序列重排 ===" -ForegroundColor Cyan# 初始化if (-not (Test-Path $FolderPath)) {Write-Host "错误:文件夹不存在!" -ForegroundColor Redreturn}Set-Location $FolderPath# 获取并排序原始文件$originalFiles = Get-ChildItem "CDZCQ_*.png" | Sort-Object { [int]($_.BaseName -replace 'CDZCQ_', '') }if ($originalFiles.Count -eq 0) {Write-Host "未找到CDZCQ_*.png格式的图片文件!" -ForegroundColor Redreturn}Display-ProcessingPlan $originalFilesif ($Preview) { return }# 执行处理流程$backupFolder = Backup-OriginalFiles $originalFiles$remainingFiles = Extract-AndCompressFrames $originalFiles $Quality$renamedFiles = Renumber-Sequence $remainingFiles $StartNumberShow-FinalResult $originalFiles $renamedFiles $backupFolder
}function Display-ProcessingPlan {param($files)$totalFiles = $files.Count$filesToKeep = [math]::Ceiling($totalFiles / 4)Write-Host "`n📊 处理计划:" -ForegroundColor YellowWrite-Host "   原始文件数: $totalFiles" -ForegroundColor WhiteWrite-Host "   保留文件数: $filesToKeep (25%)" -ForegroundColor GreenWrite-Host "   起始序列号: $StartNumber" -ForegroundColor Blueif ($Preview) {Write-Host "`n👀 预览处理效果:" -ForegroundColor MagentaWrite-Host "   原始序列 → 抽帧后 → 重排后" -ForegroundColor CyanWrite-Host "   " + "-" * 50 -ForegroundColor Gray$newIndex = $StartNumberfor ($i = 0; $i -lt $files.Count; $i += 4) {if ($i -lt $files.Count) {$originalName = $files[$i].Name$afterRename = "CDZCQ_$newIndex.png"Write-Host "   $originalName → 保留 → $afterRename" -ForegroundColor White$newIndex++}}}
}function Backup-OriginalFiles {param($files)$backupFolder = "Original_Backup_$(Get-Date -Format 'yyyyMMdd_HHmmss')"Write-Host "`n📦 创建原始文件备份: $backupFolder" -ForegroundColor CyanNew-Item -ItemType Directory -Path $backupFolder -Force | Out-NullCopy-Item "CDZCQ_*.png" $backupFolderreturn $backupFolder
}function Extract-AndCompressFrames {param($files, $quality)Write-Host "`n🔄 开始抽帧与压缩..." -ForegroundColor Yellow$remainingFiles = @()for ($i = 0; $i -lt $files.Count; $i++) {$file = $files[$i]if ($i % 4 -eq 0) {# 压缩并记录保留的文件if (Compress-Image -InputPath $file.FullName -Quality $quality) {$remainingFiles += $fileWrite-Host "   ✓ 保留: $($file.Name)" -ForegroundColor Green}}else {Remove-Item $file.FullName -ForceWrite-Host "   ✗ 删除: $($file.Name)" -ForegroundColor Gray}}return $remainingFiles
}function Renumber-Sequence {param($files, $startNumber)Write-Host "`n🔢 开始序列号重排..." -ForegroundColor Yellow$renamedFiles = @()$currentNumber = $startNumber# 先按原始序列号排序确保顺序正确$sortedFiles = $files | Sort-Object { [int]($_.BaseName -replace 'CDZCQ_', '') }foreach ($file in $sortedFiles) {$newName = "CDZCQ_$currentNumber$($file.Extension)"$newPath = Join-Path $file.Directory.FullName $newNametry {# 检查目标文件名是否已存在(处理冲突)if (Test-Path $newPath) {Write-Host "   ⚠ 跳过: $newName 已存在" -ForegroundColor Yellow$renamedFiles += Get-Item $newPath}else {Rename-Item -Path $file.FullName -NewName $newNameWrite-Host "   🔄 重命名: $($file.Name) → $newName" -ForegroundColor Cyan$renamedFiles += Get-Item $newPath}$currentNumber++}catch {Write-Host "   ❌ 重命名失败: $($file.Name) → $newName" -ForegroundColor RedWrite-Host "      错误: $($_.Exception.Message)" -ForegroundColor Red}}return $renamedFiles
}function Compress-Image {param([string]$InputPath, [int]$Quality)try {$bitmap = [System.Drawing.Bitmap]::FromFile($InputPath)$codecInfo = [System.Drawing.Imaging.ImageCodecInfo]::GetImageEncoders() | Where-Object { $_.MimeType -eq 'image/jpeg' }$encoderParams = New-Object System.Drawing.Imaging.EncoderParameters(1)$encoderParams.Param[0] = New-Object System.Drawing.Imaging.EncoderParameter([System.Drawing.Imaging.Encoder]::Quality, $Quality)$tempFile = [System.IO.Path]::ChangeExtension($InputPath, ".tmp")$bitmap.Save($tempFile, $codecInfo, $encoderParams)$bitmap.Dispose()Remove-Item $InputPath -ForceMove-Item $tempFile $InputPath -Forcereturn $true}catch {Write-Host "   压缩失败: $($_.Exception.Message)" -ForegroundColor Redreturn $false}
}function Show-FinalResult {param($originalFiles, $renamedFiles, $backupFolder)Write-Host "`n🎉 处理完成!" -ForegroundColor GreenWrite-Host "📊 最终统计:" -ForegroundColor YellowWrite-Host "   原始文件数: $($originalFiles.Count)" -ForegroundColor WhiteWrite-Host "   最终文件数: $($renamedFiles.Count)" -ForegroundColor GreenWrite-Host "   备份位置: $backupFolder" -ForegroundColor CyanWrite-Host "`n📁 最终文件列表:" -ForegroundColor Magenta$renamedFiles | Sort-Object { [int]($_.BaseName -replace 'CDZCQ_', '') } | ForEach-Object { Write-Host "   ✓ $($_.Name)" -ForegroundColor Green }
}# 启动处理
Start-IntelligentFrameExtraction
使用示例
基础用法
# 一体化处理(推荐)
.\FrameExtractionWithRenumber.ps1 -FolderPath "C:\MyFrames" -Quality 60 -StartNumber 1# 仅重排已抽帧的文件
.\RenumberSequence.ps1 -FolderPath "C:\AlreadyExtracted" -StartNumber 1# 预览模式
.\RenumberSequence.ps1 -FolderPath "C:\MyFrames" -Preview
高级用法
# 自定义命名模式
.\AdvancedRenumber.ps1 -Pattern "frame_*.jpg" -NewPattern "scene_{0:000}" -StartIndex 1# 设置步长
.\AdvancedRenumber.ps1 -Pattern "IMG*.png" -NewPattern "photo_{0}" -StartIndex 10 -Step 2
处理效果对比
处理前(抽帧后不连续)
CDZCQ_1.png
CDZCQ_5.png
CDZCQ_9.png
CDZCQ_13.png
CDZCQ_17.png
处理后(连续序列)
CDZCQ_1.png
CDZCQ_2.png
CDZCQ_3.png
CDZCQ_4.png
CDZCQ_5.png
技术要点
1. 安全重命名策略
- 使用临时文件夹避免文件覆盖
- 先复制后删除确保数据安全
- 异常处理保证流程完整性
2. 智能排序保障
# 确保按数字顺序排序
Sort-Object { [int]($_.BaseName -replace 'CDZCQ_', '') }
3. 灵活的命名模式
支持各种命名约定:
CDZCQ_1,CDZCQ_2…frame_001,frame_002…scene_1,scene_2…
您好,我是肥晨。
欢迎关注我获取前端学习资源,日常分享技术变革,生存法则;行业内幕,洞察先机。