pci总线pci_dev的创建和匹配
pci总线注册
在pci-driver.c文件里会初始化注册pci总线
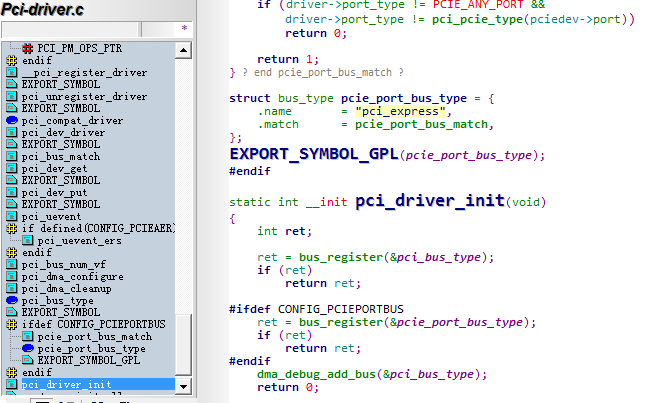
看pci总线结构体的申明
struct bus_type pci_bus_type = {.name		= "pci",.match		= pci_bus_match,.uevent		= pci_uevent,.probe		= pci_device_probe,.remove		= pci_device_remove,.shutdown	= pci_device_shutdown,.dev_groups	= pci_dev_groups,.bus_groups	= pci_bus_groups,.drv_groups	= pci_drv_groups,.pm		= PCI_PM_OPS_PTR,.num_vf		= pci_bus_num_vf,.dma_configure	= pci_dma_configure,.dma_cleanup	= pci_dma_cleanup,
};
这里重点看下pci-dev和pci-driver匹配的规则match回调函数
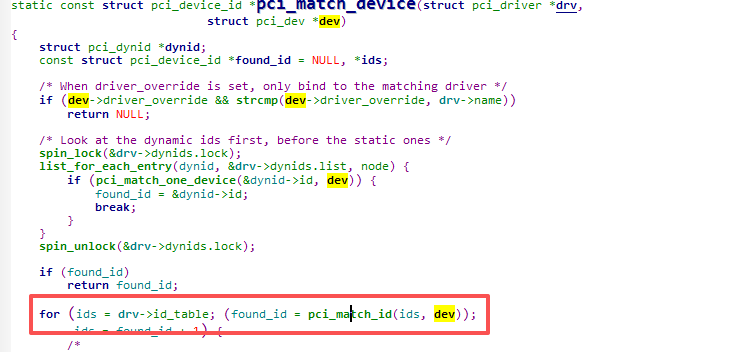
这里会从驱动定义的id_table数组里依次轮循
const struct pci_device_id *pci_match_id(const struct pci_device_id *ids,struct pci_dev *dev)
{if (ids) {while (ids->vendor || ids->subvendor || ids->class_mask) {if (pci_match_one_device(ids, dev))return ids;ids++;}}return NULL;
}
static inline const struct pci_device_id *
pci_match_one_device(const struct pci_device_id *id, const struct pci_dev *dev)
{if ((id->vendor == PCI_ANY_ID || id->vendor == dev->vendor) &&(id->device == PCI_ANY_ID || id->device == dev->device) &&(id->subvendor == PCI_ANY_ID || id->subvendor == dev->subsystem_vendor) &&(id->subdevice == PCI_ANY_ID || id->subdevice == dev->subsystem_device) &&!((id->class ^ dev->class) & id->class_mask))return id;return NULL;
}
上面pci_match_one_device函数明确定义了匹配的规则,vendor device subsystem_vendor subsystem_device四个数据成员如果不是定义成PCI_ANY_ID,则需要全部相等才能匹配成功。class和class_mask一般没定义为0自动为真
pci总线device的扫描和生成
大体的流程图如下:
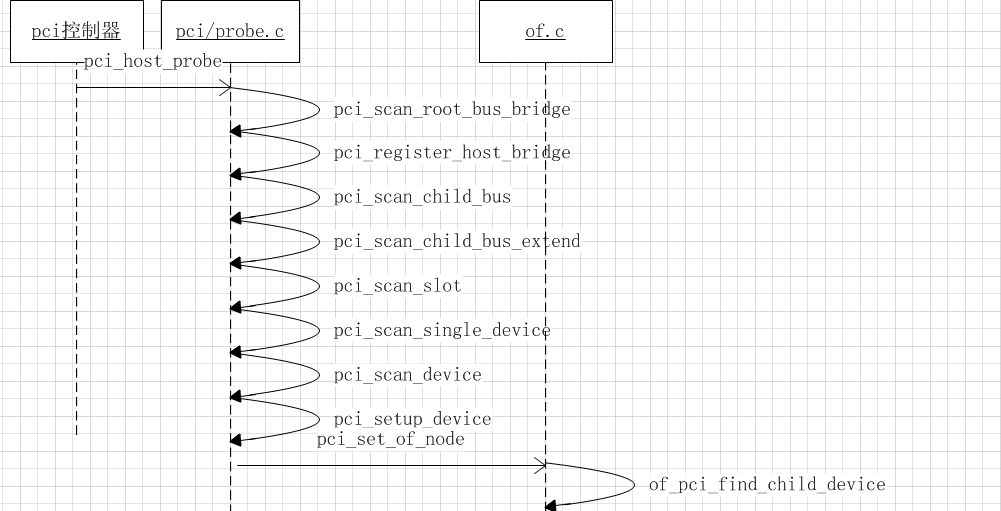
与其它子系统一样,pci控制器一般也是platform_device.其调用pci_host_probe开始扫描当总adapter下的所有子节点
pci_host_probe:
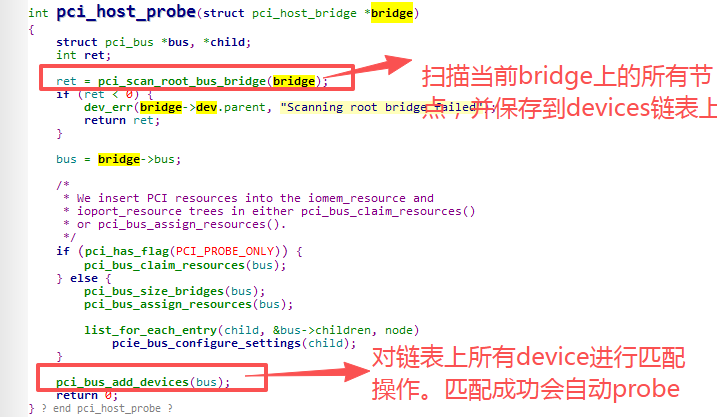
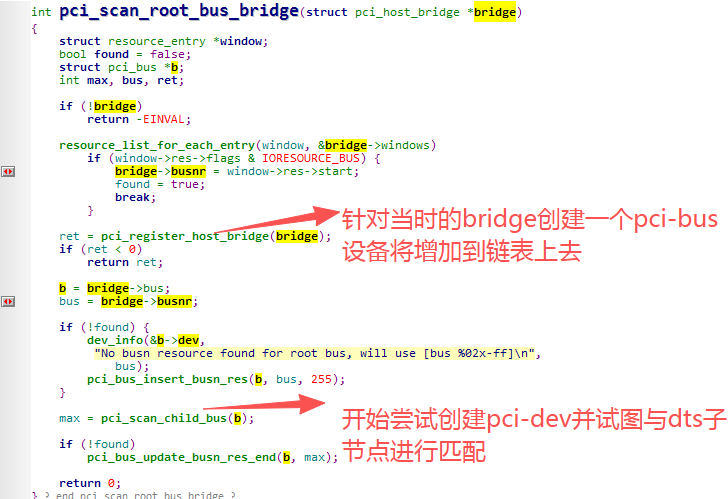
pci_scan_root_bus_bridge:
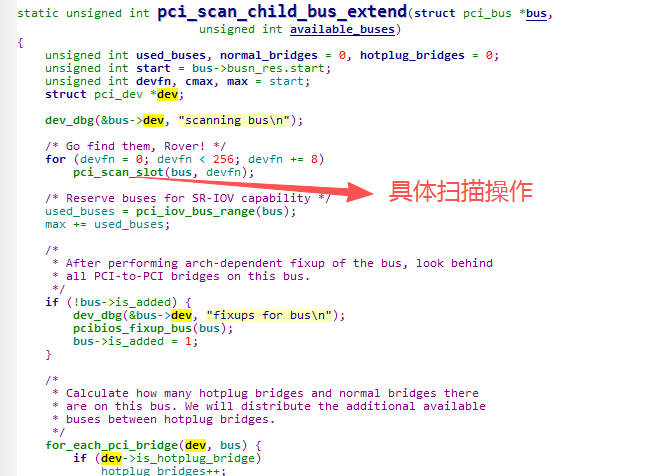
pci_scan_child_bus_extend:
PCI最多可支持单个设备含有8个Function、每路总线含有32个设备、单个系统包含256路总线。所以这里正对应这个for循环操作,这个函数会尝试对256个设备号一一增加
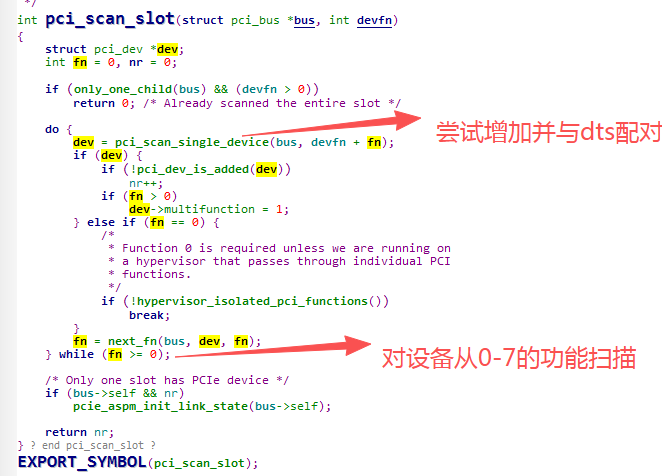
pci_scan_slot:
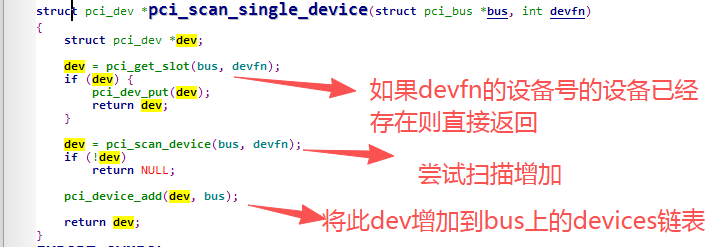
pci_scan_single_device:
pci_scan_device:
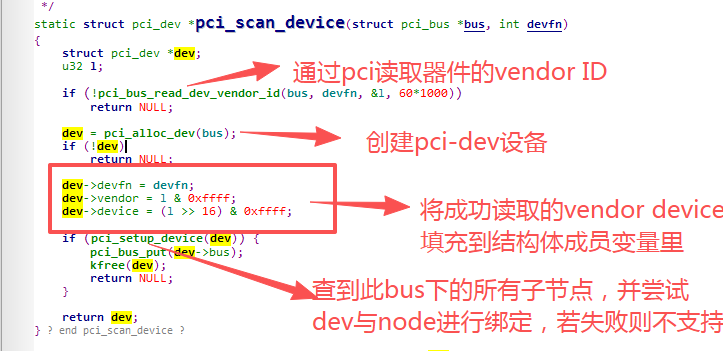
pci_setup_device:
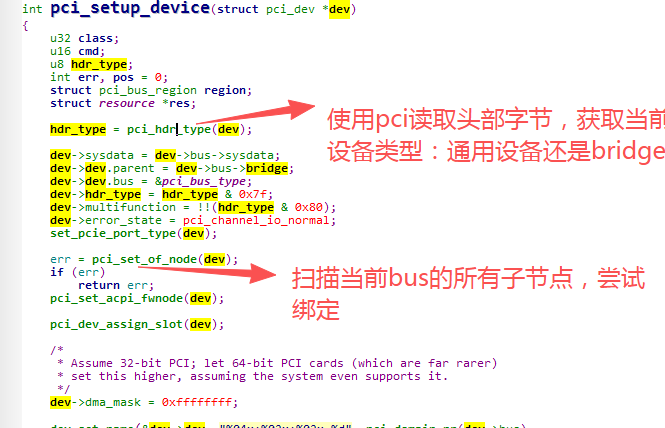
如果是通用设备则会读取subsystem_vendor和subsystem_device并填充结构体成员
这里贴一张从其它博客引用的图片:PCI配置空间Header
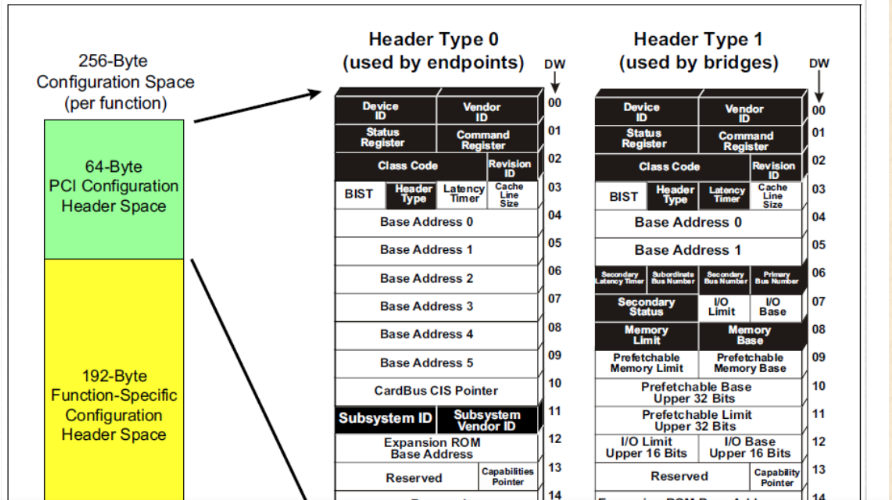
引用链接地址:https://blog.csdn.net/itnan110/article/details/135086262
pci_set_of_node:
int pci_set_of_node(struct pci_dev *dev)
{struct device_node *node;if (!dev->bus->dev.of_node)return 0;node = of_pci_find_child_device(dev->bus->dev.of_node, dev->devfn);//查找节点if (!node)return 0;if (!of_device_is_available(node)) { //此节点staue 是否ok/okayof_node_put(node);return -ENODEV;}dev->dev.of_node = node;dev->dev.fwnode = &node->fwnode;return 0;
}struct device_node *of_pci_find_child_device(struct device_node *parent,unsigned int devfn)
{struct device_node *node, *node2;for_each_child_of_node(parent, node) {//轮循当前节点下的所有子节点if (__of_pci_pci_compare(node, devfn))//尝试节点匹配return node;/** Some OFs create a parent node "multifunc-device" as* a fake root for all functions of a multi-function* device we go down them as well.*/if (of_node_name_eq(node, "multifunc-device")) {for_each_child_of_node(node, node2) {if (__of_pci_pci_compare(node2, devfn)) {of_node_put(node);return node2;}}}}return NULL;
}
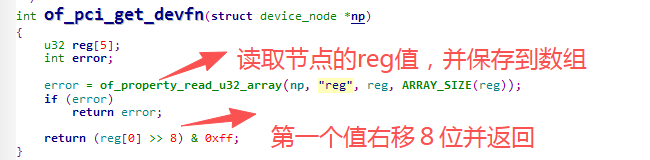
static inline int __of_pci_pci_compare(struct device_node *node,unsigned int data)
{int devfn;devfn = of_pci_get_devfn(node);if (devfn < 0)return 0;return devfn == data; //当读取的数据与当前的设备号相当则匹配成功
}
到这里基本就能够明白这里pci-dev与dts节点的匹配规则,是pci-dev的设备号与节点reg第一值按相关逻辑进行比较。所以到这里我们就能够知道,一个pci-dev能不能成功创建则完全依赖于我们dts配置是否正确。
到这里基本上pci-dev设备扫描增加的流程基本结束了,所有的pci-device都会保存到 pci-bus上的klist_device链表,后续就坐等各个器件驱动调用pci_register_driver来注册driver到 pci-bus上klist_drivers链表,然后device与driver进行匹配加载驱动了。