LNMP环境配置指南(Linux, Nginx, MySQL, PHP)
LNMP是一种流行的Web服务器架构,下面我将详细介绍如何在Linux系统上配置LNMP环境。本指南适用于主流Linux发行版(如Ubuntu/CentOS)。
准备工作
1. 系统更新
# Ubuntu/Debian
sudo apt update && sudo apt upgrade -y# CentOS/RHEL
sudo yum update -y
2. 安装必要工具
# Ubuntu/Debian
sudo apt install -y wget curl git vim# CentOS/RHEL
sudo yum install -y wget curl git vim
安装Nginx
Ubuntu/Debian
sudo apt install -y nginx
sudo systemctl start nginx
sudo systemctl enable nginx
CentOS/RHEL
# 添加Nginx官方仓库
sudo rpm -Uvh http://nginx.org/packages/centos/7/noarch/RPMS/nginx-release-centos-7-0.el7.ngx.noarch.rpm
sudo yum install -y nginx
sudo systemctl start nginx
sudo systemctl enable nginx
验证:访问服务器IP地址,应该看到Nginx欢迎页面
安装MySQL
Ubuntu/Debian (以MySQL 8.0为例)
sudo apt install -y mysql-server
sudo mysql_secure_installation
CentOS/RHEL (以MySQL 8.0为例)
# 添加MySQL官方仓库
sudo rpm -Uvh https://dev.mysql.com/get/mysql80-community-release-el7-3.noarch.rpm
sudo yum install -y mysql-server
sudo systemctl start mysqld
sudo systemctl enable mysqld# 获取临时密码并安全配置
sudo grep 'temporary password' /var/log/mysqld.log
sudo mysql_secure_installation
安装PHP
Ubuntu/Debian (以PHP 8.1为例)
sudo apt install -y software-properties-common
sudo add-apt-repository ppa:ondrej/php
sudo apt update
sudo apt install -y php8.1 php8.1-fpm php8.1-mysql php8.1-curl php8.1-gd php8.1-mbstring php8.1-xml php8.1-xmlrpc php8.1-zip php8.1-bcmath
sudo systemctl start php8.1-fpm
sudo systemctl enable php8.1-fpm
CentOS/RHEL (以PHP 8.1为例)
# 安装EPEL和Remi仓库
sudo yum install -y https://dl.fedoraproject.org/pub/epel/epel-release-latest-7.noarch.rpm
sudo yum install -y https://rpms.remirepo.net/enterprise/remi-release-7.rpm# 启用PHP 8.1
sudo yum install -y yum-utils
sudo yum-config-manager --enable remi-php81
sudo yum install -y php php-fpm php-mysqlnd php-curl php-gd php-mbstring php-xml php-xmlrpc php-zip php-bcmathsudo systemctl start php-fpm
sudo systemctl enable php-fpm
配置Nginx与PHP集成
创建测试站点配置
sudo vim /etc/nginx/conf.d/default.conf
替换为以下内容:
server {listen 80;server_name localhost;root /var/www/html;index index.php index.html index.htm;location / {try_files $uri $uri/ /index.php?$query_string;}location ~ \.php$ {include fastcgi_params;fastcgi_pass unix:/var/run/php/php8.1-fpm.sock;  # 根据实际PHP版本修改fastcgi_index index.php;fastcgi_param SCRIPT_FILENAME $document_root$fastcgi_script_name;include fastcgi_params;}location ~ /\.ht {deny all;}
}
创建测试目录和文件
sudo mkdir -p /var/www/html
sudo chmod -R 755 /var/www/html
sudo chown -R www-data:www-data /var/www/html  # Ubuntu/Debian
# 或
sudo chown -R nginx:nginx /var/www/html  # CentOS/RHEL# 创建PHP测试文件
echo "<?php phpinfo(); ?>" | sudo tee /var/www/html/info.php
重启服务
sudo systemctl restart nginx
sudo systemctl restart php8.1-fpm  # 或 php-fpm
测试LNMP环境
- 访问
http://服务器IP- 应该看到Nginx默认页面 - 访问
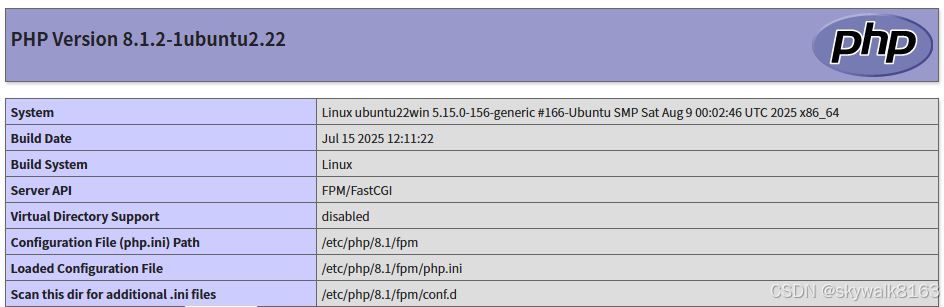
http://服务器IP/info.php- 应该看到PHP信息页面
常见问题解决
502 Bad Gateway错误
- 检查PHP-FPM是否运行:
systemctl status php-fpm - 检查Nginx配置中的
fastcgi_pass路径是否正确
- 检查PHP-FPM是否运行:
权限问题
- 确保Web目录权限正确:
chown -R www-data:www-data /var/www/html(Ubuntu) 或chown -R nginx:nginx /var/www/html(CentOS)
- 确保Web目录权限正确:
SELinux问题 (CentOS)
sudo setsebool -P httpd_can_network_connect 1
sudo setsebool -P httpd_execmem 1
优化建议
- Nginx优化:编辑
/etc/nginx/nginx.conf,调整worker_processes和worker_connections - PHP优化:编辑
/etc/php/8.1/fpm/php.ini,调整memory_limit、upload_max_filesize等 - MySQL优化:使用
mysqltuner工具分析并优化MySQL配置
希望这个指南对您有所帮助!根据您的具体需求,可能还需要安装其他PHP扩展或调整配置参数。
实践
在Ubuntu22.04安装LNMP环境
系统更新
# Ubuntu/Debian
sudo apt update && sudo apt upgrade -y
更新完毕
Setting up ubuntu-server (1.481.4) ...
Processing triggers for install-info (6.8-4build1) ...
Processing triggers for mailcap (3.70+nmu1ubuntu1) ...
Processing triggers for desktop-file-utils (0.26-1ubuntu3) ...
Processing triggers for hicolor-icon-theme (0.17-2) ...
Processing triggers for libc-bin (2.35-0ubuntu3.11) ...
Processing triggers for man-db (2.10.2-1) ...
Processing triggers for plymouth-theme-ubuntu-text (0.9.5+git20211018-1ubuntu3) ...
update-initramfs: deferring update (trigger activated)
Processing triggers for dbus (1.12.20-2ubuntu4.1) ...
Processing triggers for udev (249.11-0ubuntu3.16) ...
Processing triggers for initramfs-tools (0.140ubuntu13.5) ...
update-initramfs: Generating /boot/initrd.img-5.15.0-156-generic
Scanning processes...
Scanning candidates...
Scanning linux images...Running kernel seems to be up-to-date.Restarting services.../etc/needrestart/restart.d/systemd-manager/etc/needrestart/restart.d/systemd-managersystemctl restart fwupd.service irqbalance.service multipathd.service polkit.service ssh.service systemd-journald.service systemd-networkd.service systemd-resolved.service systemd-timesyncd.service udisks2.service upower.service
Service restarts being deferred:systemctl restart networkd-dispatcher.servicesystemctl restart systemd-logind.servicesystemctl restart unattended-upgrades.servicesystemctl restart user@1000.serviceNo containers need to be restarted.No user sessions are running outdated binaries.No VM guests are running outdated hypervisor (qemu) binaries on this host.
安装Nginx
Ubuntu/Debian
sudo apt install -y nginx
sudo systemctl start nginx
sudo systemctl enable nginx
安装完毕
The following packages were automatically installed and are no longer required:bridge-utils containerd dns-root-data dnsmasq-base pigz runc ubuntu-fan
Use 'sudo apt autoremove' to remove them.
Get more security updates through Ubuntu Pro with 'esm-apps' enabled:exo-utils redis-server libzvbi-common libzbar0 libnode72 libjs-jquery-uinode-ip libavdevice58 ffmpeg libopenexr25 libpostproc55 libsoup-3.0-0 nodejslibavcodec58 libgstreamer-plugins-bad1.0-0 libavutil56 libswscale5redis-tools libexo-2-0 libnode-dev libswresample3 nodejs-doclibsoup-3.0-common libavformat58 libzvbi0 gstreamer1.0-plugins-badlibpmix-dev libde265-0 libpmix2 libexo-common libavfilter7
Learn more about Ubuntu Pro at https://ubuntu.com/pro
The following NEW packages will be installed:python3-packaging ubuntu-pro-client
The following packages will be upgraded:apt apt-utils base-files bind9-dnsutils bind9-host bind9-libs coreutils cryptsetup cryptsetup-bin cryptsetup-initramfs dconf-gsettings-backend dconf-service distro-info-datadmeventd dmidecode dmsetup e2fsprogs ethtool gir1.2-packagekitglib-1.0 initramfs-tools initramfs-tools-bin initramfs-tools-core landscape-common libapt-pkg6.0 libcom-err2libcryptsetup12 libdconf1 libdevmapper-event1.02.1 libdevmapper1.02.1 libext2fs2 libglib2.0-0 libglib2.0-bin libglib2.0-data libgpgme11 libldap-2.5-0 libldap-commonliblvm2cmd2.03 libmbim-glib4 libmbim-proxy libmm-glib0 libmysqlclient-dev libmysqlclient21 libopeniscsiusr libpackagekit-glib2-18 libpcap0.8 libseccomp2 libss2 linux-baselogsave lvm2 modemmanager motd-news-config mysql-client-8.0 mysql-client-core-8.0 mysql-server mysql-server-8.0 mysql-server-core-8.0 open-iscsi packagekit packagekit-toolspci.ids pollinate powermgmt-base python-apt-common python3-apt python3-distupgrade python3-update-manager snapd sosreport systemd-hwe-hwdb tcpdump ubuntu-advantage-toolsubuntu-minimal ubuntu-pro-client-l10n ubuntu-release-upgrader-core ubuntu-server ubuntu-server-minimal ubuntu-standard update-manager-core update-notifier-common xfsprogs
81 upgraded, 2 newly installed, 0 to remove and 0 not upgraded.
Need to get 72.1 MB of archives.
After this operation, 13.8 MB of additional disk space will be used.
Get:1 http://mirrors.tuna.tsinghua.edu.cn/ubuntu jammy-updates/main amd64 motd-news-config all 12ubuntu4.7 [3,822 B]
安装MySQL
Ubuntu/Debian (以MySQL 8.0为例)
sudo apt install -y mysql-server
sudo mysql_secure_installation
其中第二句是增强mysql的安全性,执行如下:
sudo mysql_secure_installationSecuring the MySQL server deployment.Connecting to MySQL using a blank password.VALIDATE PASSWORD COMPONENT can be used to test passwords
and improve security. It checks the strength of password
and allows the users to set only those passwords which are
secure enough. Would you like to setup VALIDATE PASSWORD component?Press y|Y for Yes, any other key for No: yThere are three levels of password validation policy:LOW    Length >= 8
MEDIUM Length >= 8, numeric, mixed case, and special characters
STRONG Length >= 8, numeric, mixed case, special characters and dictionary                  filePlease enter 0 = LOW, 1 = MEDIUM and 2 = STRONG: 0Skipping password set for root as authentication with auth_socket is used by default.
If you would like to use password authentication instead, this can be done with the "ALTER_USER" command.
See https://dev.mysql.com/doc/refman/8.0/en/alter-user.html#alter-user-password-management for more information.By default, a MySQL installation has an anonymous user,
allowing anyone to log into MySQL without having to have
a user account created for them. This is intended only for
testing, and to make the installation go a bit smoother.
You should remove them before moving into a production
environment.Remove anonymous users? (Press y|Y for Yes, any other key for No) : y
Success.Normally, root should only be allowed to connect from
'localhost'. This ensures that someone cannot guess at
the root password from the network.Disallow root login remotely? (Press y|Y for Yes, any other key for No) : y
Success.By default, MySQL comes with a database named 'test' that
anyone can access. This is also intended only for testing,
and should be removed before moving into a production
environment.Remove test database and access to it? (Press y|Y for Yes, any other key for No) : y- Dropping test database...
Success.- Removing privileges on test database...
Success.Reloading the privilege tables will ensure that all changes
made so far will take effect immediately.Reload privilege tables now? (Press y|Y for Yes, any other key for No) : y
Success.All done!
安装PHP
Ubuntu/Debian (以PHP 8.1为例)
sudo apt install -y software-properties-common
sudo add-apt-repository ppa:ondrej/php
sudo apt update
sudo apt install -y php8.1 php8.1-fpm php8.1-mysql php8.1-curl php8.1-gd php8.1-mbstring php8.1-xml php8.1-xmlrpc php8.1-zip php8.1-bcmath
sudo systemctl start php8.1-fpm
sudo systemctl enable php8.1-fpm
配置Nginx与PHP集成
创建测试站点配置
sudo vi /etc/nginx/conf.d/default.conf
替换为以下内容:
server {listen 8080;server_name localhost;root /var/www/html;index index.php index.html index.htm;location / {try_files $uri $uri/ /index.php?$query_string;}location ~ \.php$ {include fastcgi_params;fastcgi_pass unix:/var/run/php/php8.1-fpm.sock;  # 根据实际PHP版本修改fastcgi_index index.php;fastcgi_param SCRIPT_FILENAME $document_root$fastcgi_script_name;include fastcgi_params;}location ~ /\.ht {deny all;}
}
创建测试目录和文件
sudo mkdir -p /var/www/html
sudo chmod -R 755 /var/www/html
sudo chown -R www-data:www-data /var/www/html  # Ubuntu/Debian
# 或
sudo chown -R nginx:nginx /var/www/html  # CentOS/RHEL# 创建PHP测试文件
echo "<?php phpinfo(); ?>" | sudo tee /var/www/html/info.php
注意,如果这里黏贴执行有问题,就需要单独语句黏贴,比如这句一开始没有生效,后来单独执行的:
sudo chown -R www-data:www-data /var/www/html执行效果
(base) skywalk@ubuntu22win:/etc/nginx/conf.d$ ls -l /var/www/html
total 8
-rw-r--r-- 1 root root 612 Sep 27 01:55 index.nginx-debian.html
-rw-r--r-- 1 root root  20 Sep 27 02:08 info.php
(base) skywalk@ubuntu22win:/etc/nginx/conf.d$ sudo chown -R www-data:www-data /var/www/html
(base) skywalk@ubuntu22win:/etc/nginx/conf.d$ ls -l /var/www/html
total 8
-rw-r--r-- 1 www-data www-data 612 Sep 27 01:55 index.nginx-debian.html
-rw-r--r-- 1 www-data www-data  20 Sep 27 02:08 info.php
重启服务
sudo systemctl restart nginx
sudo systemctl restart php8.1-fpm  # 或 php-fpm
浏览器测试
重启后,用浏览器进行测试
http://192.168.0.16:8080/info.php前面文档里是使用了80端口,因为nginx本身就启动了80端口的服务,所以配置会失效。这里我们启动了8080端口,测试通过。
调试
安装完成后,测试info.php没有执行,而是下载
http://192.168.0.16/info.php目录的执行权限或者用户权限有问题,修改权限
sudo chown -R www-data:www-data /var/www/html后来还是一直下载。最后发现,是因为配置的80端口,没有用域名访问.....本机用域名(也就是localhost)是ok的。因为在另一台机器的浏览器进行测试,不方便配置域名,就将php放置到8080端口,问题解决:
server{listen 8080;#server_name localhost;root /var/www/html;index index.php index.html index.htm;vi启动后,启动了vim,导致黏贴配置文件排版乱了
进入vim后,按冒号,然后执行:set compatible