Spring 依赖注入
一、基础知识
SpringDI:
依赖注入,将对象,或者数据之间的依赖关系,以注入的方式由spring维护,粘合在一起
spring第一大核心思想实现两步骤:
1.使用SpringIOC容器以解耦的方式管理并创建所有对象
2.使用SpringDI将创建好的对象或数据以注入的方式维护依赖关系,粘合在一起
SpringDI实现方式:
1.构造器注入
2.set注入 <property 属性名=“属性值”></property>
3.注解注入
SpringDI支持的数据类型:
1.基本类型与String
2.javaBean类型
3.复杂类型
二、SpringDI实现:set注入
1.基本类型与String
1.导入依赖
<dependencies><dependency><groupId>org.springframework</groupId><artifactId>spring-context</artifactId><version>5.3.29</version></dependency><dependency><groupId>junit</groupId><artifactId>junit</artifactId><version>3.8.1</version><scope>test</scope></dependency>
</dependencies>
2.创建使用的实体类
package com.ape.pojo;public class Teacher {private String name;private int age;private String hobby;//省略get/set方法、toString方法的构建
}
3.编写spring配置文件
name:属性名
value:属性值
<!-- 注入Teacher -->
<bean id="teacher" class="com.ape.pojo.Teacher"><property name="name" value="弗洛洛"/><property name="age" value="20"/><property name="hobby" value="演奏音乐"/>
</bean>
4.编写测试类
public class Test01
{public static void main( String[] args ) {ApplicationContext applicationContext=new ClassPathXmlApplicationContext("applicationcontext.xml");Teacher teacher= (Teacher) applicationContext.getBean("teacher");System.out.println(teacher);}
}
2.javaBean类型
1.创建Dao层接口
public interface IUserDao {public void save();
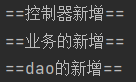
}2.创建Dao层实现类
public class UserDaoImp implements IUserDao{public void save() {System.out.println("==dao的新增==");}
}
3.创建service层接口
public interface IUserService {public void save();
}
4.创建service层实现类
其中要调用dao层中定义的方法。
public class UserServiceImp implements IUserService{IUserDao userDao;public void setUserDao(IUserDao userDao) {this.userDao = userDao;}public void save(){System.out.println("==业务的新增==");userDao.save();}
}
5.创建controller层接口
public interface IUserController {public void save();
}
6.创建controller层实现类
其中要调用service层中定义的方法。
public class UserControllerImp implements IUserController{IUserService userService;public void setUserService(IUserService userService) {this.userService = userService;}public void save(){System.out.println("==控制器新增==");userService.save();}
}
7.在spring配置文件中注入三层架构
name:属性名
value:属性值
ref:引用其他bean的id属性值
<!-- 注入Dao -->
<bean class="com.ape.dao.UserDaoImp" id="daoImp"/>
<!-- 注入Service -->
<bean class="com.ape.service.UserServiceImp" id="serviceImp"><property name="userDao" ref="daoImp"/>
</bean>
<!-- 注入Controller -->
<bean class="com.ape.controller.UserControllerImp" id="controllerImp"><property name="userService" ref="serviceImp"/>
</bean>
8.编写测试类
public class Test01
{public static void main( String[] args ) {ApplicationContext applicationContext=new ClassPathXmlApplicationContext("applicationContext.xml");IUserController userController=(IUserController) applicationContext.getBean("controllerImp");userController.save();}
}
3.复杂类型
1.创建student实体类
public class Student {private String[] myArray;private List<String> myList;private Set<String> mySet;private Map<String,String> myMap;private Properties myProperties;//省略set/get方法、toString方法的构建
}
2.在spring配置文件中为属性赋值
<!--=====================================3.set注入复杂类型================================================-->
<!-- 注入Student -->
<bean class="com.ape.pojo.Student" id="student"><property name="myArray"><array><value>煌珑</value><value>今州</value><value>黎那汐塔</value><value>七丘</value></array></property><property name="myList"><list><value>中秋节</value><value>重阳节</value><value>国庆节</value><value>春节</value></list></property><property name="mySet"><set><value>鸣潮</value><value>明日方舟</value><value>云顶之弈</value><value>金庸群侠传</value></set></property><property name="myMap"><map><entry key="春物" value="比企谷八幡"/><entry key="猪头少年" value="梓川咲太"/><entry key="实教" value="绫小路清隆"/><entry key="冰菓" value="折木奉太郎"/></map></property><property name="myProperties"><props><prop key="乔治">34</prop><prop key="韦德">40</prop><prop key="乔丹">55</prop></props></property>
</bean>
3.测试类编写方法进行测试
public class Test01
{public static void main( String[] args ) {ApplicationContext applicationContext=new ClassPathXmlApplicationContext("applicationContext.xml");Student student=applicationContext.getBean(Student.class);System.out.println(student);}
}
三、SpringDI实现:构造注入
构造注入语法:
<constructor-arg 属性名="属性值"></constructor-arg>
name 参数名
index 参数索引
type 参数类型
value 参数值
ref 引用其他bean对象
1.构造注入基本类型
1.创建teacher实体类
public class Teacher {private String name;private int age;private String hobby;public Teacher(String name, int age, String hobby) {this.name = name;this.age = age;this.hobby = hobby;}public Teacher() {}
}
2.编写spring配置文件
<!--=======================================1.构造注入基本类型=================================================-->
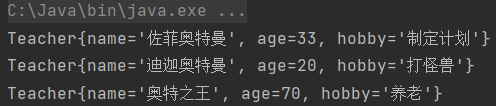
<bean class="com.ape.pojo.Teacher" id="teacher1"><constructor-arg name="name" value="佐菲奥特曼"></constructor-arg><constructor-arg name="age" value="33"></constructor-arg><constructor-arg name="hobby" value="制定计划"></constructor-arg>
</bean>
<bean class="com.ape.pojo.Teacher" id="teacher2"><constructor-arg index="0" value="迪迦奥特曼"></constructor-arg><constructor-arg index="2" value="打怪兽"></constructor-arg><constructor-arg index="1" value="20"></constructor-arg>
</bean>
<bean class="com.ape.pojo.Teacher" id="teacher3"><constructor-arg type="java.lang.String" value="奥特之王"></constructor-arg><constructor-arg type="int" value="70"></constructor-arg><constructor-arg type="java.lang.String" value="养老"></constructor-arg>
</bean>3.编写测试类进行测试
public class Test01
{public static void main( String[] args ) {ApplicationContext applicationContext=new ClassPathXmlApplicationContext("applicationContext.xml");Teacher teacher1= (Teacher) applicationContext.getBean("teacher1");Teacher teacher2= (Teacher) applicationContext.getBean("teacher2");Teacher teacher3= (Teacher) applicationContext.getBean("teacher3");System.out.println(teacher1);System.out.println(teacher2);System.out.println(teacher3);}
}
2.构造注入javaBean
1.创建Dao层接口
public interface IUserDao {public void save();
}
2.创建Dao层实现类
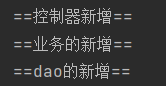
public class UserDaoImp implements IUserDao{public void save() {System.out.println("==dao的新增==");}
}
3.创建service层接口
public interface IUserService {public void save();
}
4.创建service层实现类
其中要调用dao层中定义的方法。
public class UserServiceImp implements IUserService{IUserDao userDao;public UserServiceImp(IUserDao userDao) {this.userDao = userDao;}public UserServiceImp() {}public void save(){System.out.println("==业务的新增==");userDao.save();}
}
5.创建controller层接口
public interface IUserController {public void save();
}
6.创建controller层实现类
其中要调用service层中定义的方法。
public class UserControllerImp implements IUserController{IUserService userService;public UserControllerImp(IUserService userService) {this.userService = userService;}public UserControllerImp() {}public void save(){System.out.println("==控制器新增==");userService.save();}
}
7.编写spring配置文件
<!--===========================2.构造注入javaBean=====================================-->
<!-- 注入Dao -->
<bean class="com.ape.dao.UserDaoImp" id="daoImp"/>
<!-- 注入Service -->
<bean class="com.ape.service.UserServiceImp" id="serviceImp"><constructor-arg name="userDao" ref="daoImp"></constructor-arg>
</bean>
<!-- 注入Controller -->
<bean class="com.ape.controller.UserControllerImp" id="controllerImp"><constructor-arg name="userService" ref="serviceImp"></constructor-arg>
</bean>
8.编写测试类
public class Test01
{public static void main( String[] args ) {ApplicationContext applicationContext=new ClassPathXmlApplicationContext("applicationContext.xml");IUserController controller= (IUserController) applicationContext.getBean("controllerImp");controller.save();}
}