Ubuntu20.04复现ReKep论文详细指南,记录自用
安装环境需知
- isaac-sim版本4.1 + omnigibson版本1.1.1
- python版本 3.10
isaac-sim4.5版本+omnigibson版本3.7.1没跑通该代码
配置isaac-sim要求:linux的话要Ubuntu20.04及以上;
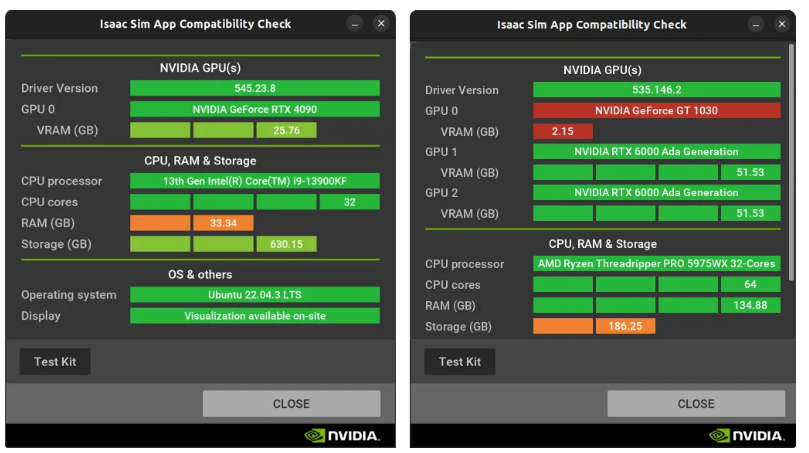
【可选】Isaac Sim Compatibility Checker 检查当前机器是否适合跑 Isaac Sim
官方安装文档说明
# 下载
wget https://download.isaacsim.omniverse.nvidia.com/isaac-sim-comp-check%404.5.0-rc.6%2Brelease.675.f1cca148.gl.linux-x86_64.release.zip# 解压缩
unzip "isaac-sim-comp-check@4.5.0-rc.6+release.675.f1cca148.gl.linux-x86_64.release.zip"# 运行脚本检查
bash omni.isaac.sim.compatibility_check.sh
检查结果说明
颜色代表状态,green (excellent), light-green (good), orange (enough, more is recommended) and red (not enough/unsupported)。红色不行,绿色很好。
点击Test Kit 按钮,进行检查。
一、配置环境,下载behavior-1k数据集:conda + pytorch + isaac-sim + omnigibson
# 1. 创建 conda 环境
# 注意不能直接用命令安装环境
# conda create -n omnigibson python=3.10 -y
# 上面命令安装会引入一系列libxcb xorg-libx11与系统自带xcb x11不兼容,使用下面命令重新用conda-forge通道安装python即可解决
# conda remove libxcb xorg-libx11 xorg-libxau xorg-libxdmcp xorg-xorgproto pthread-stubs libstdcxx-ng
# conda install -c conda-forge python=3.10.18
# 使用Conda-Forge 通道避免拉入 libxcb 这样的底层 X 依赖!!!
conda create -n omnigibson python=3.10 -c conda-forge -y# 2. 激活环境
conda activate omnigibson# 3. 安装pytorch
# cu124 根据nvidia-smi命令支持的cuda来修改
pip install torch torchvision torchaudio --index-url https://download.pytorch.org/whl/cu124# 测试安装pytorch
python -c "import torch; print(torch.cuda.is_available(), torch.cuda.get_device_name(0) if torch.cuda.is_available() else 'No CUDA')"# 4.安装omnigibson版本1.1.1
pip install omnigibson# 5. 安装 Isaac Sim4.1.0 + behavior-1k omnigibson数据集
python -m omnigibson.install
# 可选:若需跳过数据集安装(仅安装 Isaac Sim),添加 --no-install-datasets  flag
# python -m omnigibson.install --no-install-datasets# 测试omnigibson
python -m omnigibson.examples.robots.robot_control_example --quickstart
二、拉取rekep项目代码,配置环境
# 进入上面创建的conda环境
conda activate omnigibsongit clone https://github.com/Bailey-24/Rekep.gitcd ReKep
pip install -r requirements.txt# 爆红就pillow降级
# pip install "Pillow<10.0"
三、接入VLM模型 qwen-vl-max-latest API
阿里百炼平台:大模型服务平台百炼控制台,官方会送免费tokens
具体参考教程,调用qwen大模型API
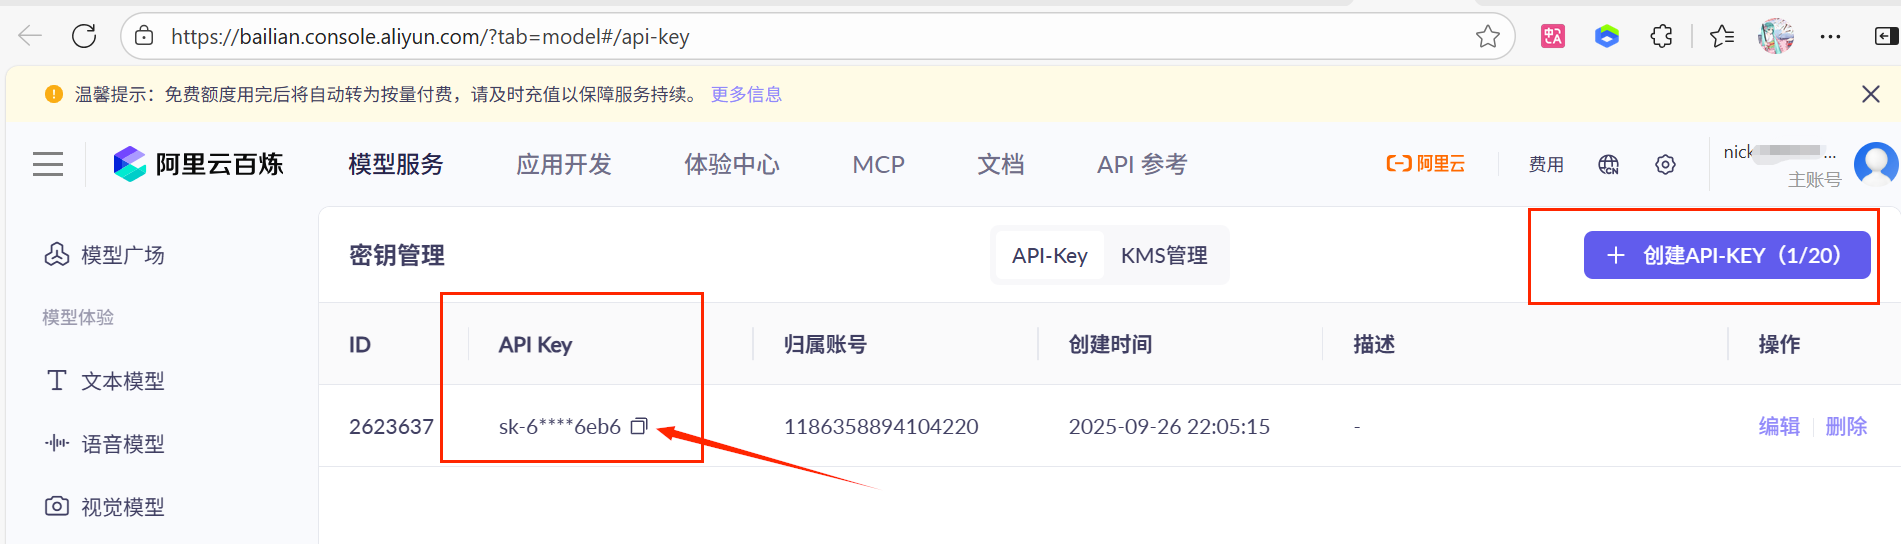
创建API Key并复制
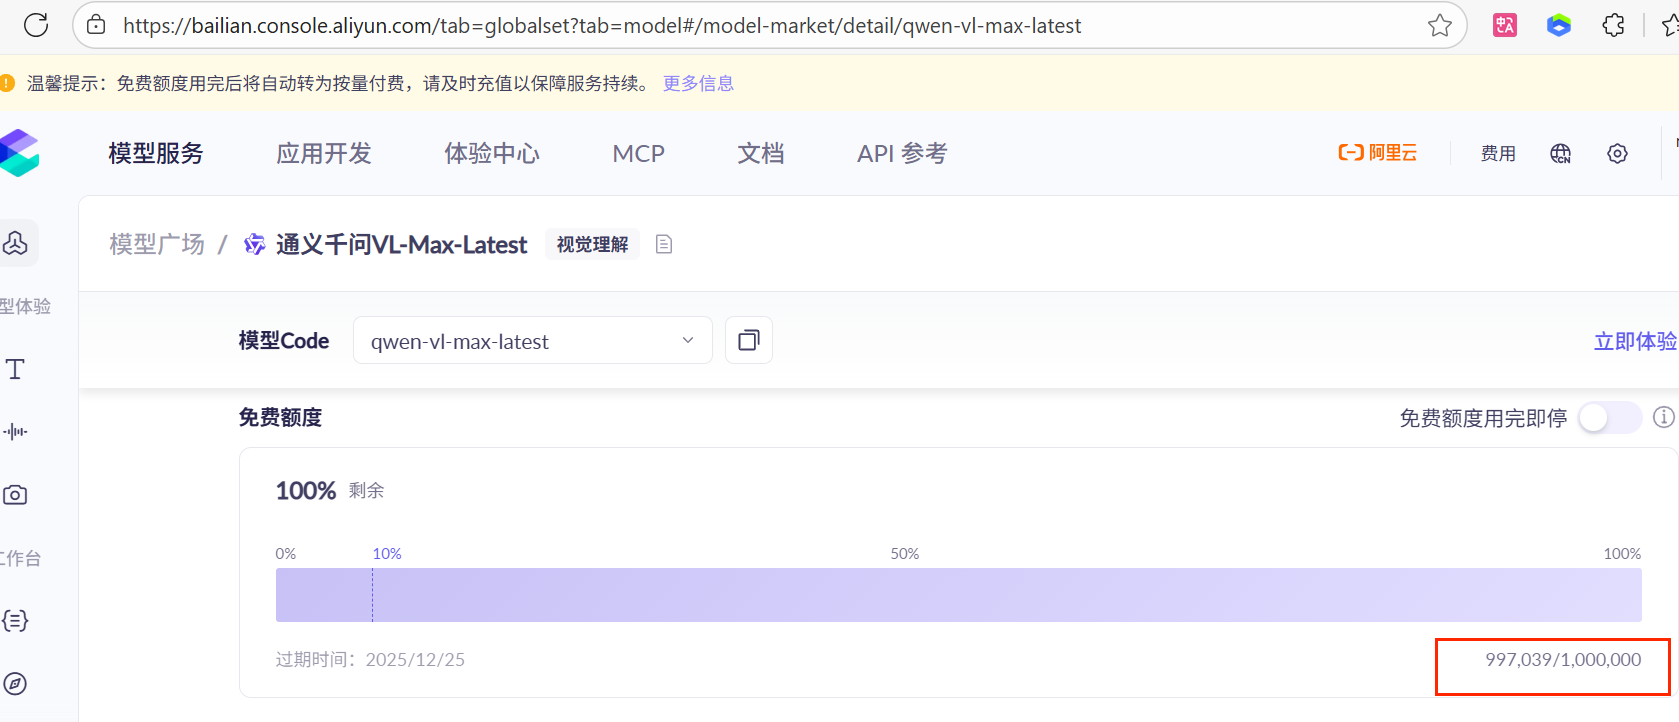
查看剩余免费token额度
修改rekep项目中调用模型代码
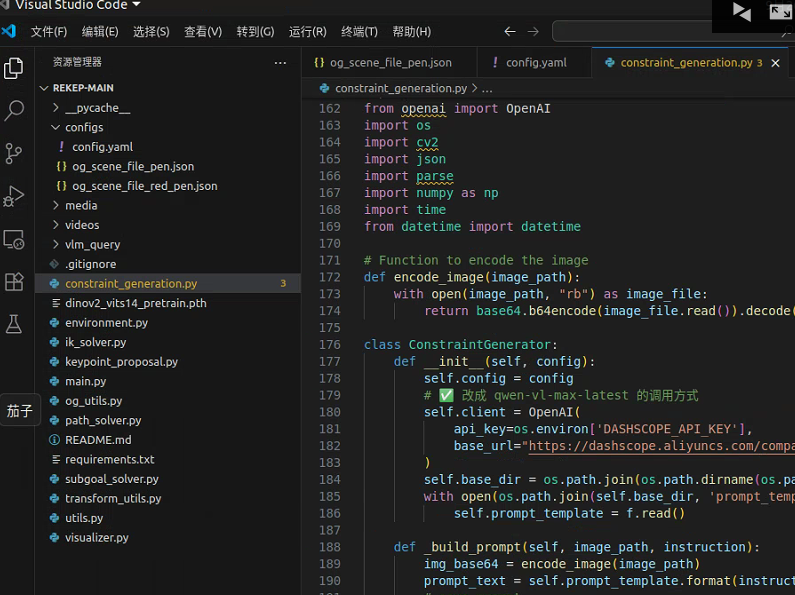
改为下面的:
# Rekep-main/constraint_generation.pyimport base64
from openai import OpenAI
import os
import cv2
import json
import parse
import numpy as np
import time
from datetime import datetime# Function to encode the image
def encode_image(image_path):with open(image_path, "rb") as image_file:return base64.b64encode(image_file.read()).decode('utf-8')class ConstraintGenerator:def __init__(self, config):self.config = config# ✅ 改成 qwen-vl-max-latest 的调用方式self.client = OpenAI(api_key=os.environ['DASHSCOPE_API_KEY'],base_url="https://dashscope.aliyuncs.com/compatible-mode/v1")self.base_dir = os.path.join(os.path.dirname(os.path.abspath(__file__)), './vlm_query')