人脸模型训练-推理完整过程附代码
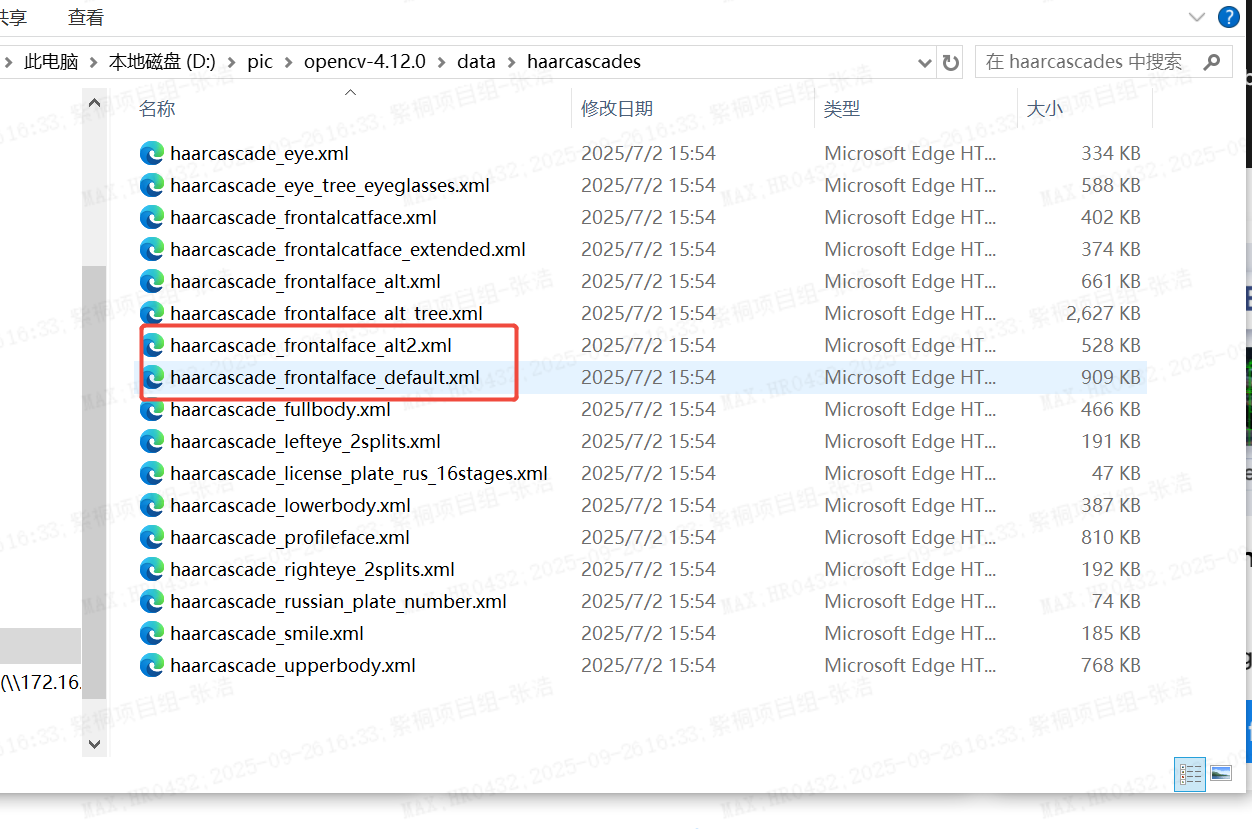
1、下载opencv 源码
官网地址:http://opencv.org

下载后找到下面文件 代码中会引用
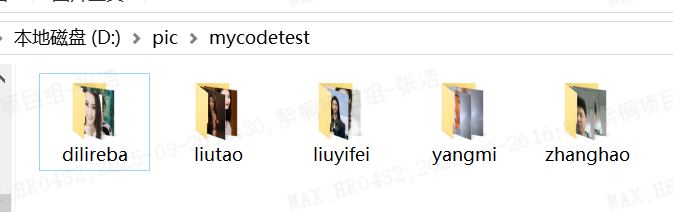
2、准备训练集
如下图我准备了五个人的训练集,每个人一个文件夹
3、模型训练完整代码:
import cv2
import os
import numpy as np
import pickledef train_model(dataset_path):# 初始化人脸检测器face_detector = cv2.CascadeClassifier('D:/pic/opencv-4.12.0/data/haarcascades/haarcascade_frontalface_default.xml')# 准备训练数据faces = []labels = []label_dict = {}current_label = 0# 遍历数据集文件夹for person_name in os.listdir(dataset_path):person_path = os.path.join(dataset_path, person_name)if os.path.isdir(person_path):label_dict[current_label] = person_namefor image_name in os.listdir(person_path):image_path = os.path.join(person_path, image_name)img = cv2.imread(image_path)gray = cv2.cvtColor(img, cv2.COLOR_BGR2GRAY)# 检测人脸faces_rect = face_detector.detectMultiScale(gray, scaleFactor=1.1, minNeighbors=5)for (x, y, w, h) in faces_rect:face_roi = gray[y:y + h, x:x + w]faces.append(face_roi)labels.append(current_label)current_label += 1# 训练模型recognizer = cv2.face.LBPHFaceRecognizer_create()recognizer.train(faces, np.array(labels))# 保存模型recognizer.save('face_model.yml')with open('label_dict.pickle', 'wb') as f:pickle.dump(label_dict, f)print(f"训练完成! 共训练 {len(label_dict)} 个人的数据")if __name__ == '__main__':#图片路径path = 'd:/pic/mycodetest/'train_model(path)
4、摄像头实时推理完整代码
import cv2
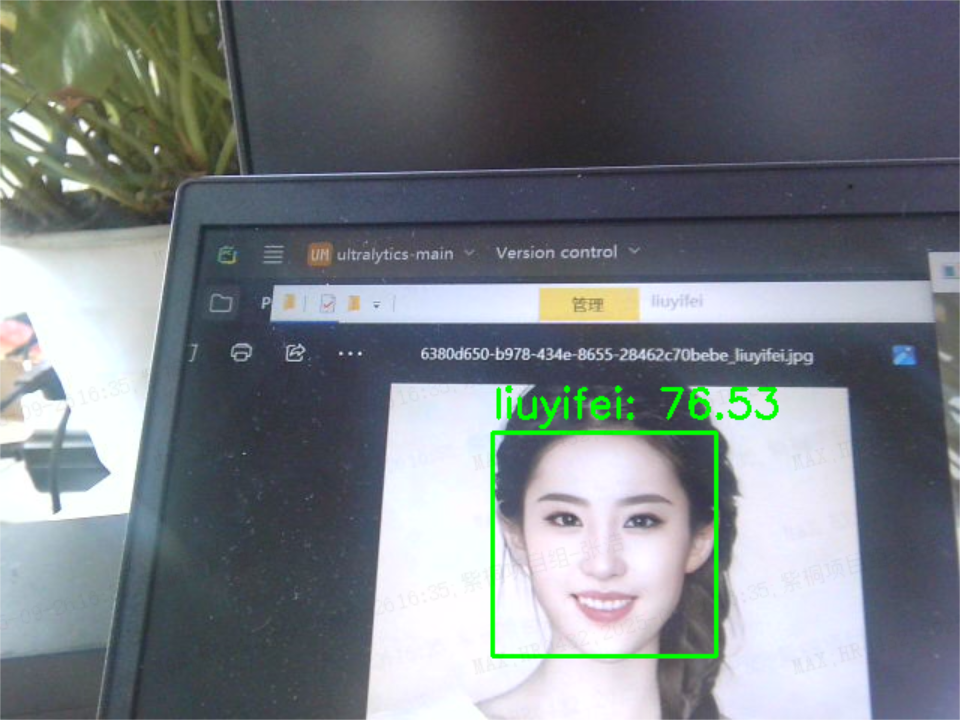
import pickledef recognize_faces():# 加载模型recognizer = cv2.face.LBPHFaceRecognizer_create()recognizer.read('face_model.yml')with open('label_dict.pickle', 'rb') as f:label_dict = pickle.load(f)# 初始化摄像头cap = cv2.VideoCapture(0)face_detector = cv2.CascadeClassifier('D:/pic/opencv-4.12.0/data/haarcascades/haarcascade_frontalface_default.xml')while True:ret, frame = cap.read()gray = cv2.cvtColor(frame, cv2.COLOR_BGR2GRAY)# 检测人脸faces = face_detector.detectMultiScale(gray, scaleFactor=1.1, minNeighbors=5)for (x, y, w, h) in faces:face_roi = gray[y:y + h, x:x + w]# 预测label, confidence = recognizer.predict(face_roi)# 绘制矩形和标签cv2.rectangle(frame, (x, y), (x + w, y + h), (0, 255, 0), 2)text = f"{label_dict[label]}: {round(confidence, 2)}"cv2.putText(frame, text, (x, y - 10), cv2.FONT_HERSHEY_SIMPLEX, 0.9, (0, 255, 0), 2)cv2.imshow('Face Recognition', frame)if cv2.waitKey(1) & 0xFF == ord('q'):breakcap.release()cv2.destroyAllWindows()if __name__ == '__main__':recognize_faces()
5、服务端上传
package com.auto.robot.controller;import com.auto.robot.bean.ImageResult;
import com.auto.robot.result.ResultCodeDataObj;
import com.auto.robot.service.ImageResultService;
import com.auto.robot.util.MonthUtils;
import jakarta.servlet.http.HttpServletRequest;
import jakarta.servlet.http.HttpServletResponse;
import org.slf4j.Logger;
import org.slf4j.LoggerFactory;
import org.springframework.beans.factory.annotation.Autowired;
import org.springframework.beans.factory.annotation.Value;
import org.springframework.web.bind.annotation.*;
import org.springframework.web.multipart.MultipartFile;import java.nio.file.Files;
import java.nio.file.Path;
import java.nio.file.Paths;
import java.nio.file.StandardCopyOption;
import java.util.ArrayList;
import java.util.List;
import java.util.UUID;@RestController
@RequestMapping("/api/robot/image/face")
public class FaceUploadController {/*** 获取日志对象,构造函数传入当前类,查找日志方便定位*/private final Logger log = LoggerFactory.getLogger(this.getClass());@Value("${face.upload-dir}")private String uploadDir;@Autowiredprivate ImageResultService imageResultServiceImpl;/*** 文件批量上传* @param files 多文件* @param username 用户名称* @return ResultCodeDataObj* @Author zhanghao*/@PostMapping("/upload")public ResultCodeDataObj uploadFiles(@RequestParam("files") MultipartFile[] files,@RequestParam("username") String username) {List<String> fileNames = new ArrayList<>();try {// 创建上传目录(如果不存在)Path uploadPath = Paths.get(uploadDir + "/" + username);if (!Files.exists(uploadPath)) {Files.createDirectories(uploadPath);}// 处理每个文件for (MultipartFile file : files) {if (file.isEmpty()) continue;// 生成唯一文件名String fileName = UUID.randomUUID() + "_" + file.getOriginalFilename();Path filePath = uploadPath.resolve(fileName);log.info("save path:" + filePath);// 保存文件Files.copy(file.getInputStream(), filePath, StandardCopyOption.REPLACE_EXISTING);fileNames.add(fileName);//写入数据库//ImageResult imageResult = new ImageResult();//imageResult.setImagePath(String.valueOf(filePath));// imageResult.setImageResult(String.valueOf(annoPath));//int res = imageResultServiceImpl.addObject(imageResult);// if (res == 1) {// Thread.sleep(1500);//imageResult = imageResultServiceImpl.getObjectById(null);// log.info("save image db success:" + filePath);// return ResultCodeDataObj.SUCCESS(imageResult);}// return ResponseEntity.ok(fileNames);} catch (Exception e) {return ResultCodeDataObj.ERROR("error" + e);}return ResultCodeDataObj.SUCCESS(null);}/*** 做一些初始话操作,但是 输出、中断 都无效。*/@ModelAttributeprivate void init(HttpServletRequest request, HttpServletResponse response) {response.setHeader("Access-Control-Allow-Origin", "*");}
}
6、前端上传界面
<!DOCTYPE html>
<html>
<head><meta charset="UTF-8"><meta name="viewport" content="width=device-width, initial-scale=1.0"><title>人脸识别系统</title><style>body { font-family: Arial, sans-serif; max-width: 800px; margin: 0 auto; padding: 20px; }.section { margin-bottom: 30px; border: 1px solid #ddd; padding: 15px; border-radius: 5px; }button { background-color: #4CAF50; color: white; padding: 10px 15px; border: none; border-radius: 4px; cursor: pointer; }button:hover { background-color: #45a049; }#preview { max-width: 100%; margin-top: 10px; }#results { margin-top: 20px; }.face-box { border: 2px solid green; position: absolute; }</style>
</head>
<body>
<h1>人脸识别系统</h1><div class="section"><h2>人脸录入</h2><input type="file" id="uploadInput" accept="image/*" capture="camera"><input type="text" id="username" placeholder="输入姓名"><button onclick="uploadFace()">上传人脸</button><div id="uploadStatus"></div>
</div><div class="section"><h2>人脸识别</h2><input type="file" id="recognizeInput" accept="image/*" capture="camera"><button onclick="recognizeFace()">识别</button><div id="results"></div>
</div><script>function uploadFace() {const fileInput = document.getElementById('uploadInput');const nameInput = document.getElementById('username');if (!fileInput.files[0]) {alert('请选择照片');return;}if (!nameInput.value) {alert('请输入姓名');return;}const formData = new FormData();formData.append('files', fileInput.files[0], `${nameInput.value}.jpg`);formData.append('username', nameInput.value);fetch('http://localhost:8080/api/robot/image/face/upload', {method: 'POST',body: formData}).then(response => response.json()).then(data => {document.getElementById('uploadStatus').innerHTML =data.error ? `错误: ${data.error}` : `上传成功: ${data.msg}`;}).catch(error => {console.error('Error:', error);document.getElementById('uploadStatus').innerHTML = '上传失败';});}function recognizeFace() {const fileInput = document.getElementById('recognizeInput');if (!fileInput.files[0]) {alert('请选择照片');return;}const formData = new FormData();formData.append('file', fileInput.files[0]);fetch('/recognize', {method: 'POST',body: formData}).then(response => response.json()).then(data => {let resultHTML = '<h3>识别结果</h3>';if (data.results && data.results.length > 0) {data.results.forEach(result => {resultHTML += `<p>姓名: ${result.name}, 置信度: ${(result.confidence*100).toFixed(2)}%</p>`;});} else {resultHTML += '<p>未识别到已知人脸</p>';}document.getElementById('results').innerHTML = resultHTML;}).catch(error => {console.error('Error:', error);document.getElementById('results').innerHTML = '识别失败';});}
</script>
</body>
</html>
可以通过上面界面进行人员的录入
恭喜你,成功完成人脸模型训练和推理