分布式专题——18 Zookeeper选举Leader源码剖析
1 单机源码启动 ZooKeeper
-
下载源码:github.com/apache/zookeeper;
- 此处选择的版本哦是 3.5.8;
-
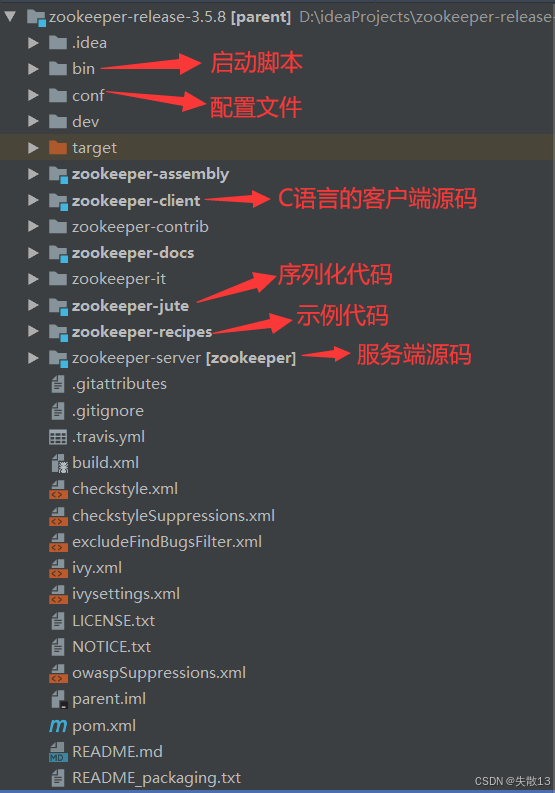
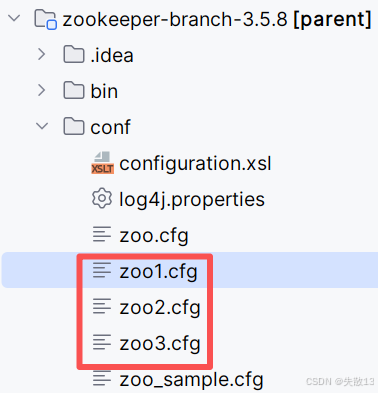
项目结构如下:
-
在下图的文件夹下,新建一个类:
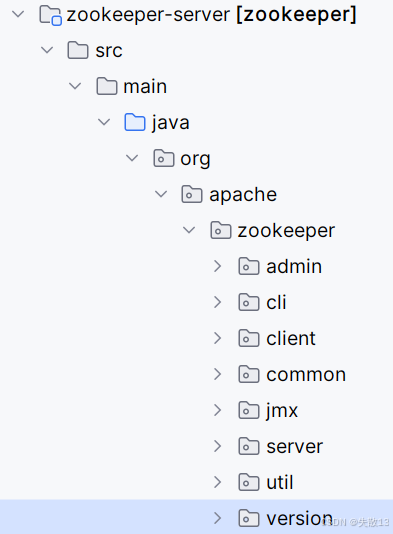
package org.apache.zookeeper.version;public interface Info {int MAJOR = 1;int MINOR = 0;int MICRO = 0;String QUALIFIER = null;int REVISION = -1;String REVISION_HASH = "1";String BUILD_DATE = "2020-10-15"; } -
将
zookeeper-server子模块的pom.xml文件里依赖的包(除了 jline)的scope为provided这一行全部注释掉(共 6 处),如下: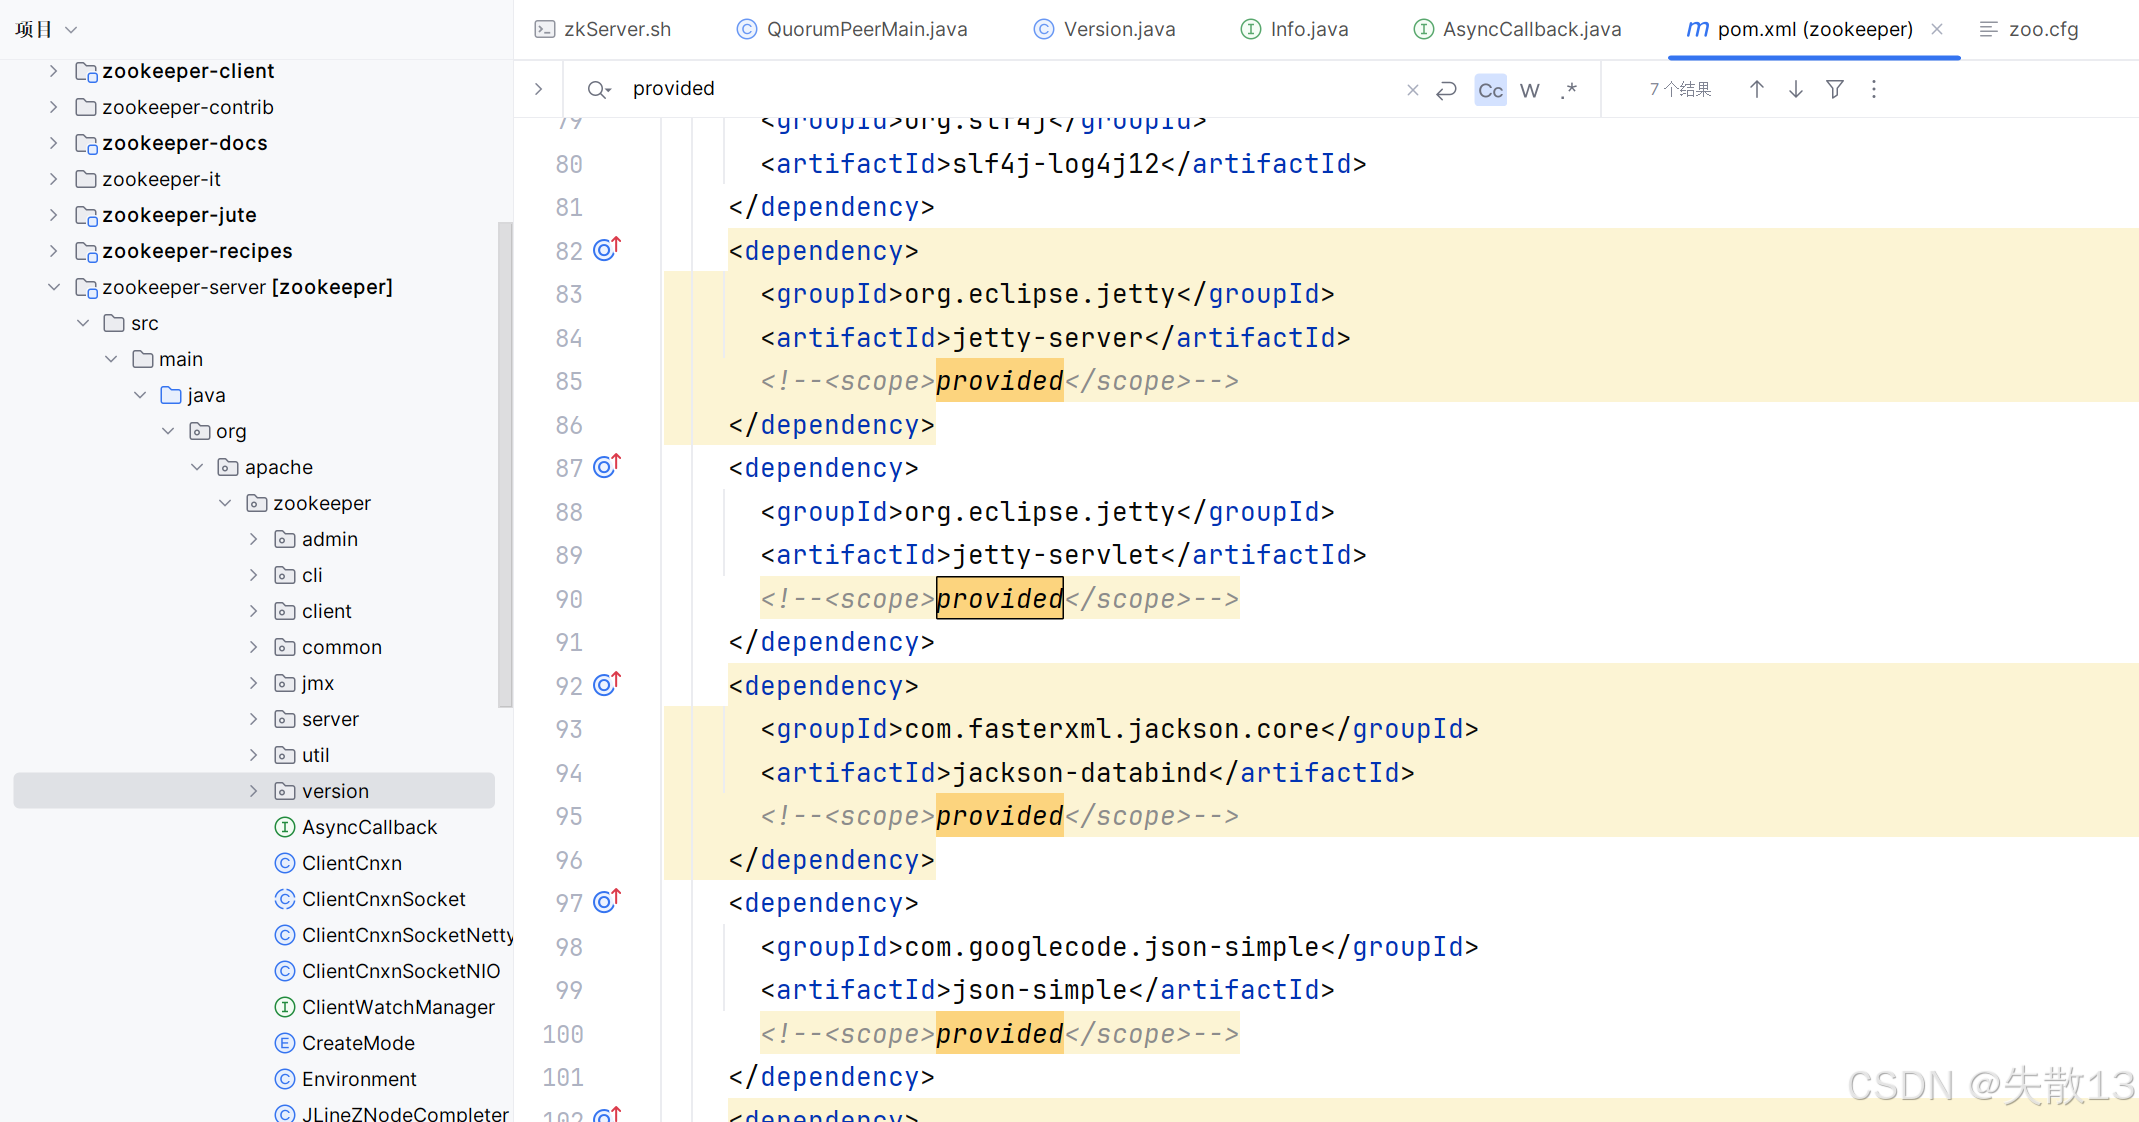
-
新建:

-
将
conf文件夹里的zoo_sample.cfg文件复制一份,改名为zoo.cfg,修改一下配置,再将zoo.cfg文件位置配置到启动参数里: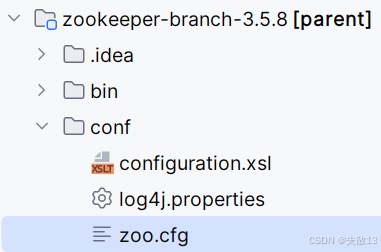
# The number of milliseconds of each tick
tickTime=2000
# The number of ticks that the initial
# synchronization phase can take
initLimit=10
# The number of ticks that can pass between
# sending a request and getting an acknowledgement
syncLimit=5
# the directory where the snapshot is stored.
# do not use /tmp for storage, /tmp here is just
# example sakes.
dataDir=C:\\Users\\22263\\Desktop\\zookeeper-branch-3.5.8\\data\\zk
# the port at which the clients will connect
clientPort=2181
# the maximum number of client connections.
# increase this if you need to handle more clients
#maxClientCnxns=60
#
# Be sure to read the maintenance section of the
# administrator guide before turning on autopurge.
#
# http://zookeeper.apache.org/doc/current/zookeeperAdmin.html#sc_maintenance
#
# The number of snapshots to retain in dataDir
#autopurge.snapRetainCount=3
# Purge task interval in hours
# Set to "0" to disable auto purge feature
#autopurge.purgeInterval=1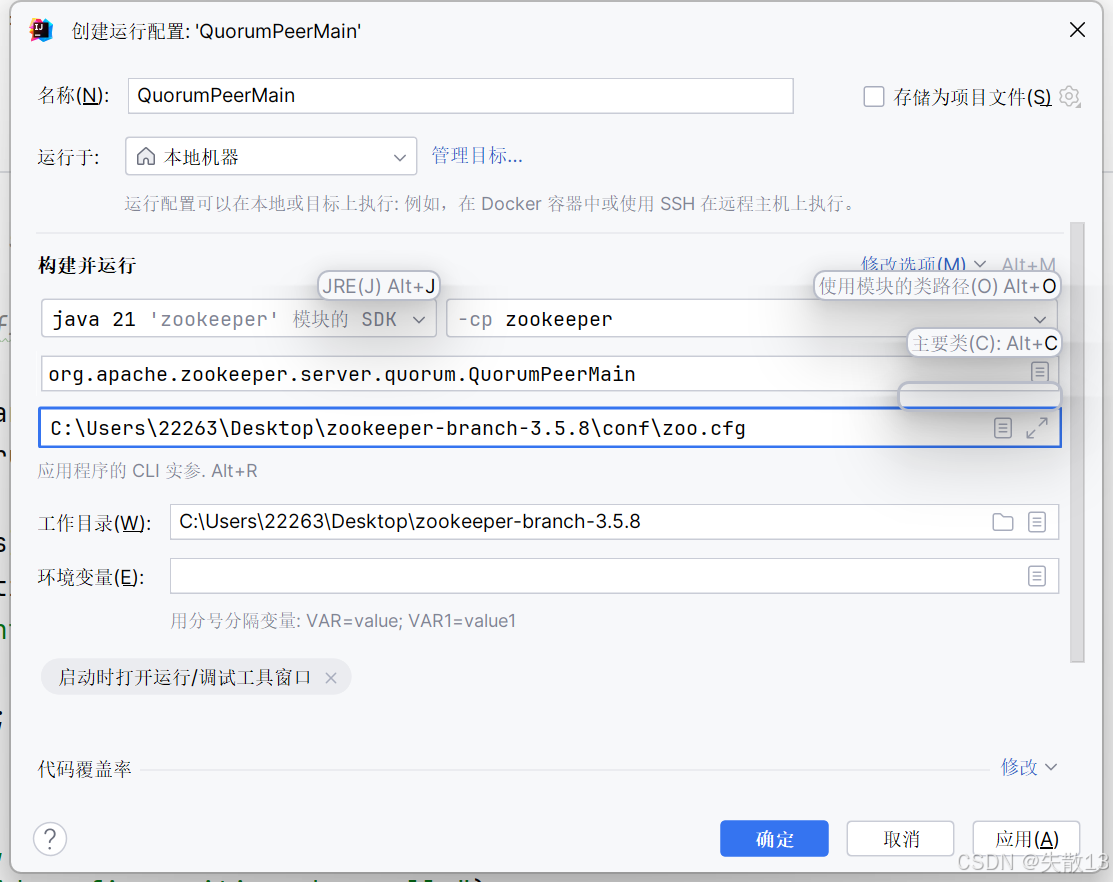
-
将
conf文件夹里的log4j.properties文件复制一份到zookeeper-server子模块的\target\classes目录下,这样项目启动时才会打印日志:
-
然后在根目录编译执行:
mvn clean install -DskipTests -
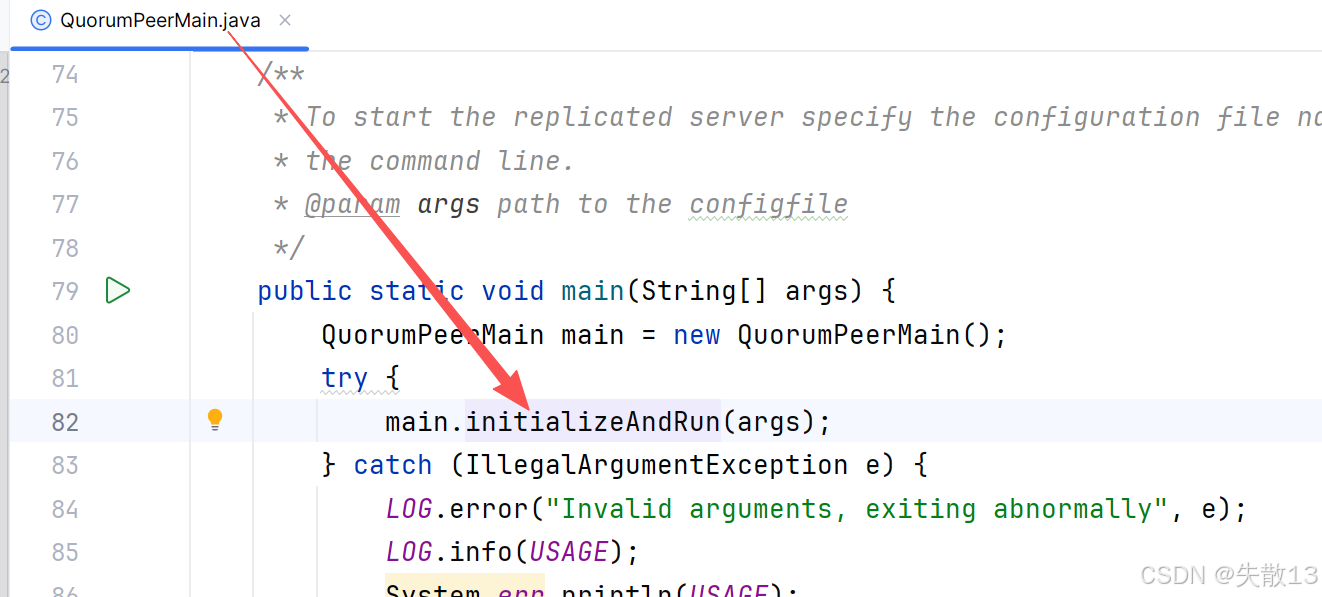
开源项目的入口类一般都可以从启动脚本中找到,可以从
bin目录下的zkServer.sh中找到启动主类,然后进入启动类启动项目即可;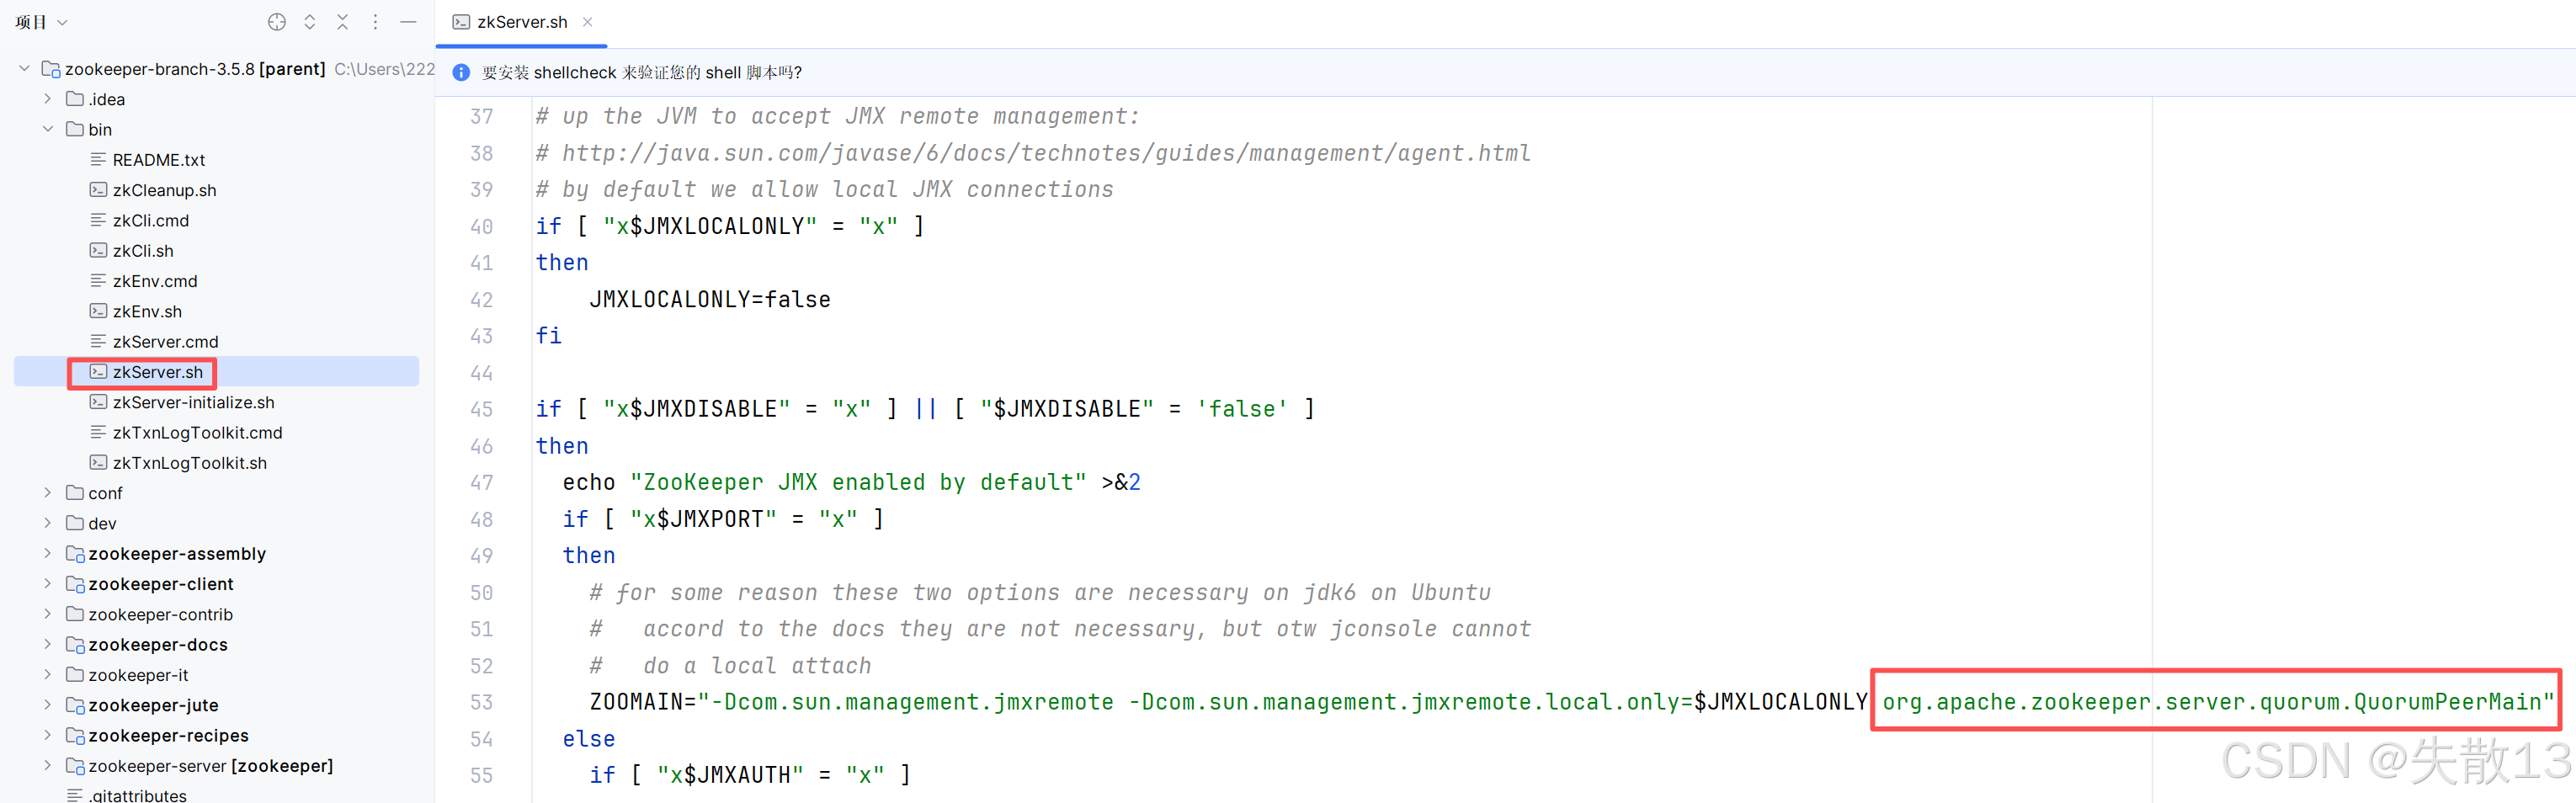
2 集群源码启动 ZooKeeper
-
新建:
-
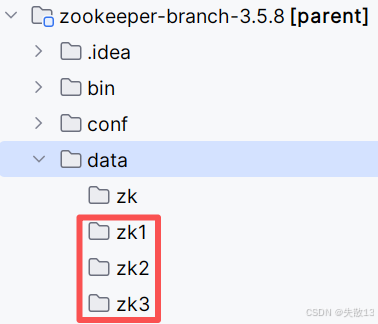
在每个目录下新建一个
myid文件,分别填入1、2、3:
-
新建:
-
以
zoo1.cfg的配置为例:# The number of milliseconds of each tick tickTime=2000 # The number of ticks that the initial # synchronization phase can take initLimit=10 # The number of ticks that can pass between # sending a request and getting an acknowledgement syncLimit=5 # the directory where the snapshot is stored. # do not use /tmp for storage, /tmp here is just # example sakes. dataDir=C:\\Users\\22263\\Desktop\\zookeeper-branch-3.5.8\\data\\zk1 # the port at which the clients will connect clientPort=2181 # the maximum number of client connections. # increase this if you need to handle more clients #maxClientCnxns=60 # # Be sure to read the maintenance section of the # administrator guide before turning on autopurge. # # http://zookeeper.apache.org/doc/current/zookeeperAdmin.html#sc_maintenance # # The number of snapshots to retain in dataDir #autopurge.snapRetainCount=3 # Purge task interval in hours # Set to "0" to disable auto purge feature #autopurge.purgeInterval=1 server.1=127.0.0.1:2888:3888 server.2=127.0.0.1:2889:3889 server.3=127.0.0.1:2890:3890zoo2.cfg的dataDir就改成zk2,clientPort就改成2182,zoo3.cfg同理; -
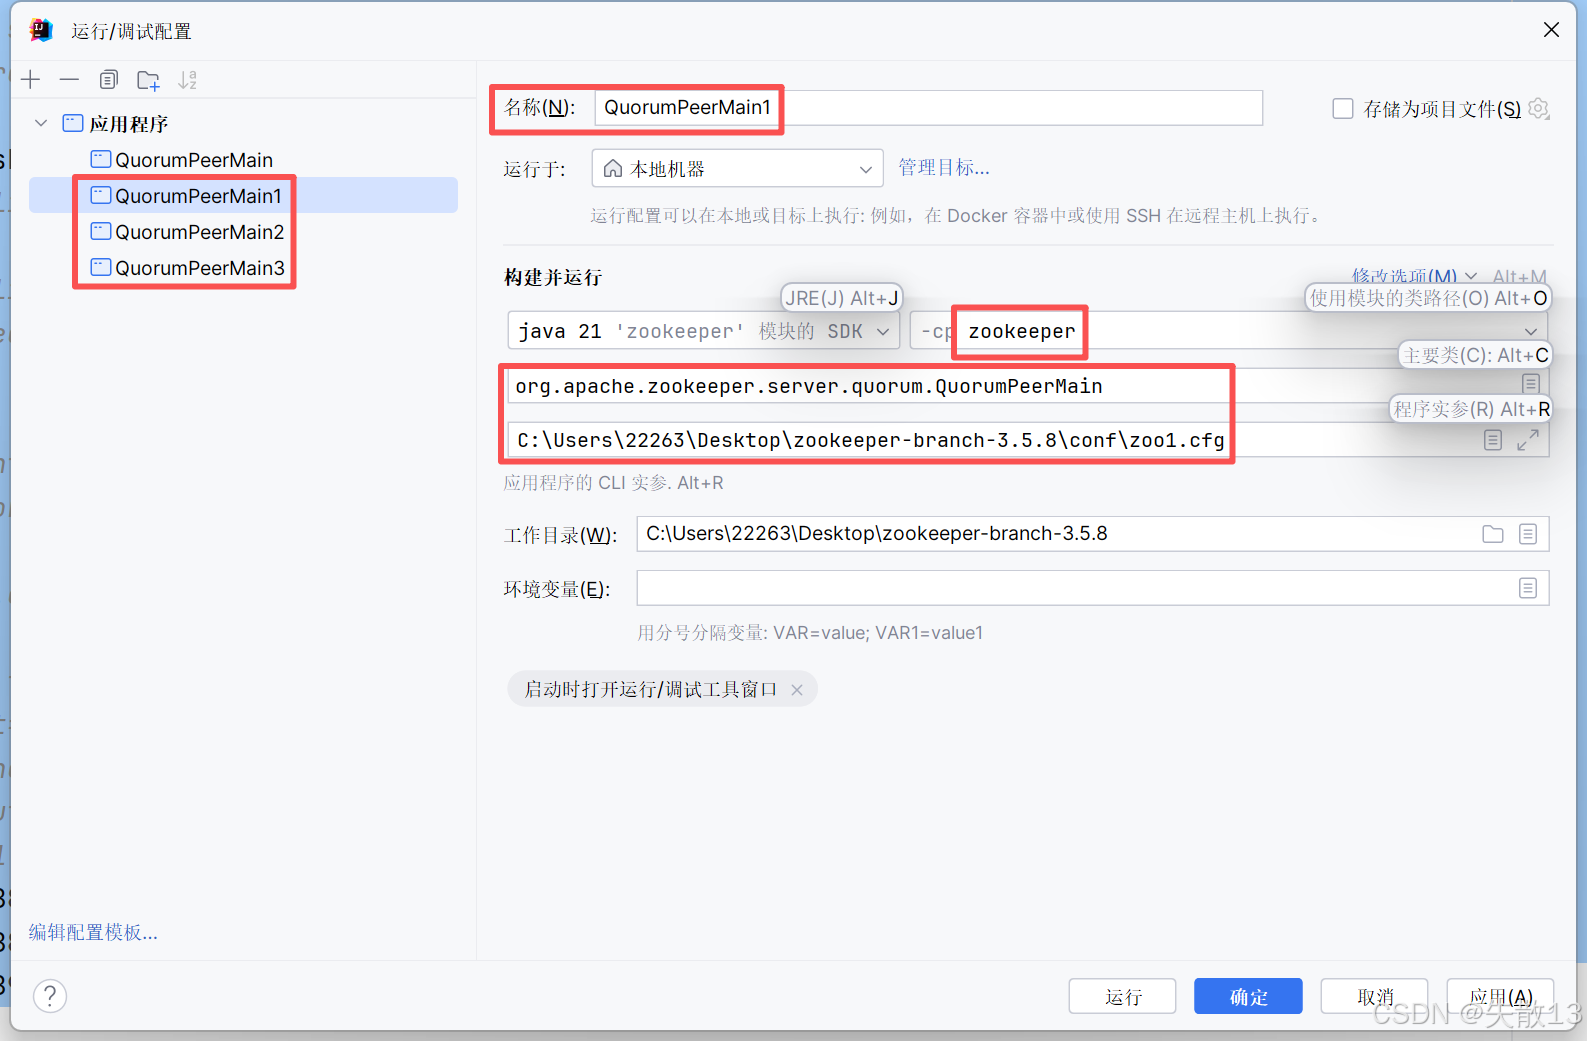
配置启动项:
-
分别运行每个节点即可;
运行第一个节点的时候可能会报错,那是因为在进行选举。
3 启动或Leader宕机时选举Leader的流程
-
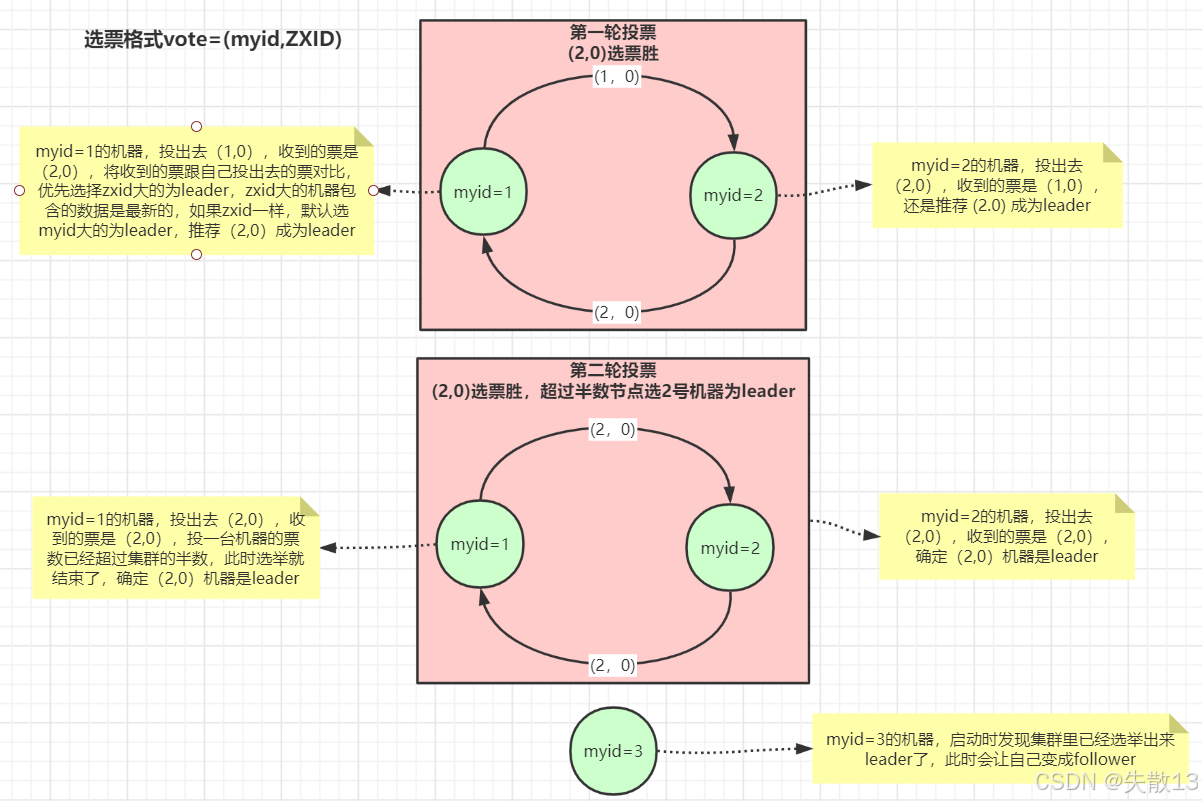
选票格式为
vote=(myid, ZXID),其中myid是节点的唯一标识,ZXID是事务ID,用于标识数据的新旧程度,ZXID越大,代表该节点的数据越新; -
第一轮投票:
-
myid=1的节点:
- 投出选票
(1, 0)(自己投自己); - 收到
myid=2节点投出的(2, 0)选票后,对比自己投出的选票; - 因为
ZXID相同(都为0),按照规则,默认选择myid大的节点作为Leader,所以推荐(2, 0)成为Leader,后续投出的选票变为(2, 0);
- 投出选票
-
myid=2的节点:
- 投出选票
(2, 0)(自己投自己); - 收到
myid=1节点投出的(1, 0)选票后,由于自己的ZXID与对方相同,但myid更大,所以仍然推荐(2, 0)成为Leader;
- 投出选票
-
-
第二轮投票:
-
myid=1的节点:
- 投出选票
(2, 0),同时收到的选票也是(2, 0); - 此时,投给
(2, 0)的票数已经超过集群节点数的半数(集群有3个节点,这里已有2个节点支持(2, 0)),选举结束,确定(2, 0)对应的节点为Leader;
- 投出选票
-
myid=2的节点:投出选票
(2, 0),收到的选票同样是(2, 0),因此确定自己为Leader;
-
-
myid=3的节点启动时,发现集群已经选举出Leader(myid=2对应的节点),于是自己成为Follower(跟随者),接受Leader的管理,同步数据等。
4 Leader选举多层队列架构

-
选举应用层
-
选举核心逻辑:是Leader选举的“大脑”,负责生成选票、处理接收到的选票,并依据选票规则判断Leader候选;
-
sendqueue与recvqueue:sendqueue(发送队列):存储待发送的选票,供后续发送线程取用;recvqueue(接收队列):暂存接收到的选票,供选举核心逻辑处理;
-
WorkerSender线程:从sendqueue中取出选票,向下层的queueSendMap发送队列传递,触发选票的发送流程; -
WorkerReceiver线程:从下层的recvQueue中获取接收到的“数据转换为选票”后的结果,传递给recvqueue,供选举核心逻辑处理;
-
-
queueSendMap发送队列:- 每台机器(参与选举的节点)对应一个发送队列;
- 作用是为不同机器的选票发送做“初步排队”,确保每台机器的选票能有序进入后续发送流程,从
WorkerSender线程获取选票后,传递给更下层的senderWorkerMap消息发送线程;
-
senderWorkerMap消息发送线程-
结构:是
<sid, SenderWorker>的映射(sid可理解为机器标识),即每个参与选举的机器(通过sid区分)都对应一个SenderWorker线程; -
功能:从
queueSendMap发送队列获取选票后,通过**Socket(BIO,同步阻塞IO)**将选票发送出去。BIO在此处保证了发送过程的可靠性(虽性能不如NIO,但在选举这类对可靠性要求高、并发量可控的场景下适用);
-
-
Socket(BIO)层
- 作为底层通信通道,负责在不同机器的发送、接收线程之间传递数据;
- 机器1的
senderWorkerMap通过Socket发送选票,机器2的RecvWorker消息接收线程通过Socket接收选票; - 反之,机器2发送、机器1接收的流程也同理;
-
RecvWorker消息接收线程-
结构:是
<sid, RecvWorker>的映射,每个参与选举的机器对应一个RecvWorker线程; -
功能:通过Socket接收其他机器发送的选票数据,将数据转换为选票格式后,放入
recvQueue,供上层的WorkerReceiver线程获取;
-
-
整体流程(以“机器1发送选票,机器2接收选票”为例)
-
机器1的选举核心逻辑生成选票,放入
sendqueue; -
WorkerSender线程从sendqueue取出选票,传递给queueSendMap中对应机器2的发送队列; -
senderWorkerMap中对应机器2的SenderWorker线程,从queueSendMap获取选票,通过**Socket(BIO)**发送给机器2; -
机器2的
RecvWorker线程通过Socket接收数据,将数据转换为选票,放入recvQueue; -
机器2的
WorkerReceiver线程从recvQueue取出选票,传递给recvqueue,供机器2的选举核心逻辑处理; -
机器2的选举核心逻辑依据选票规则判断后,也会生成自己的选票,重复上述“发送”流程,与其他机器(包括机器1)交互,最终通过多轮选票交换,选出Leader。
-
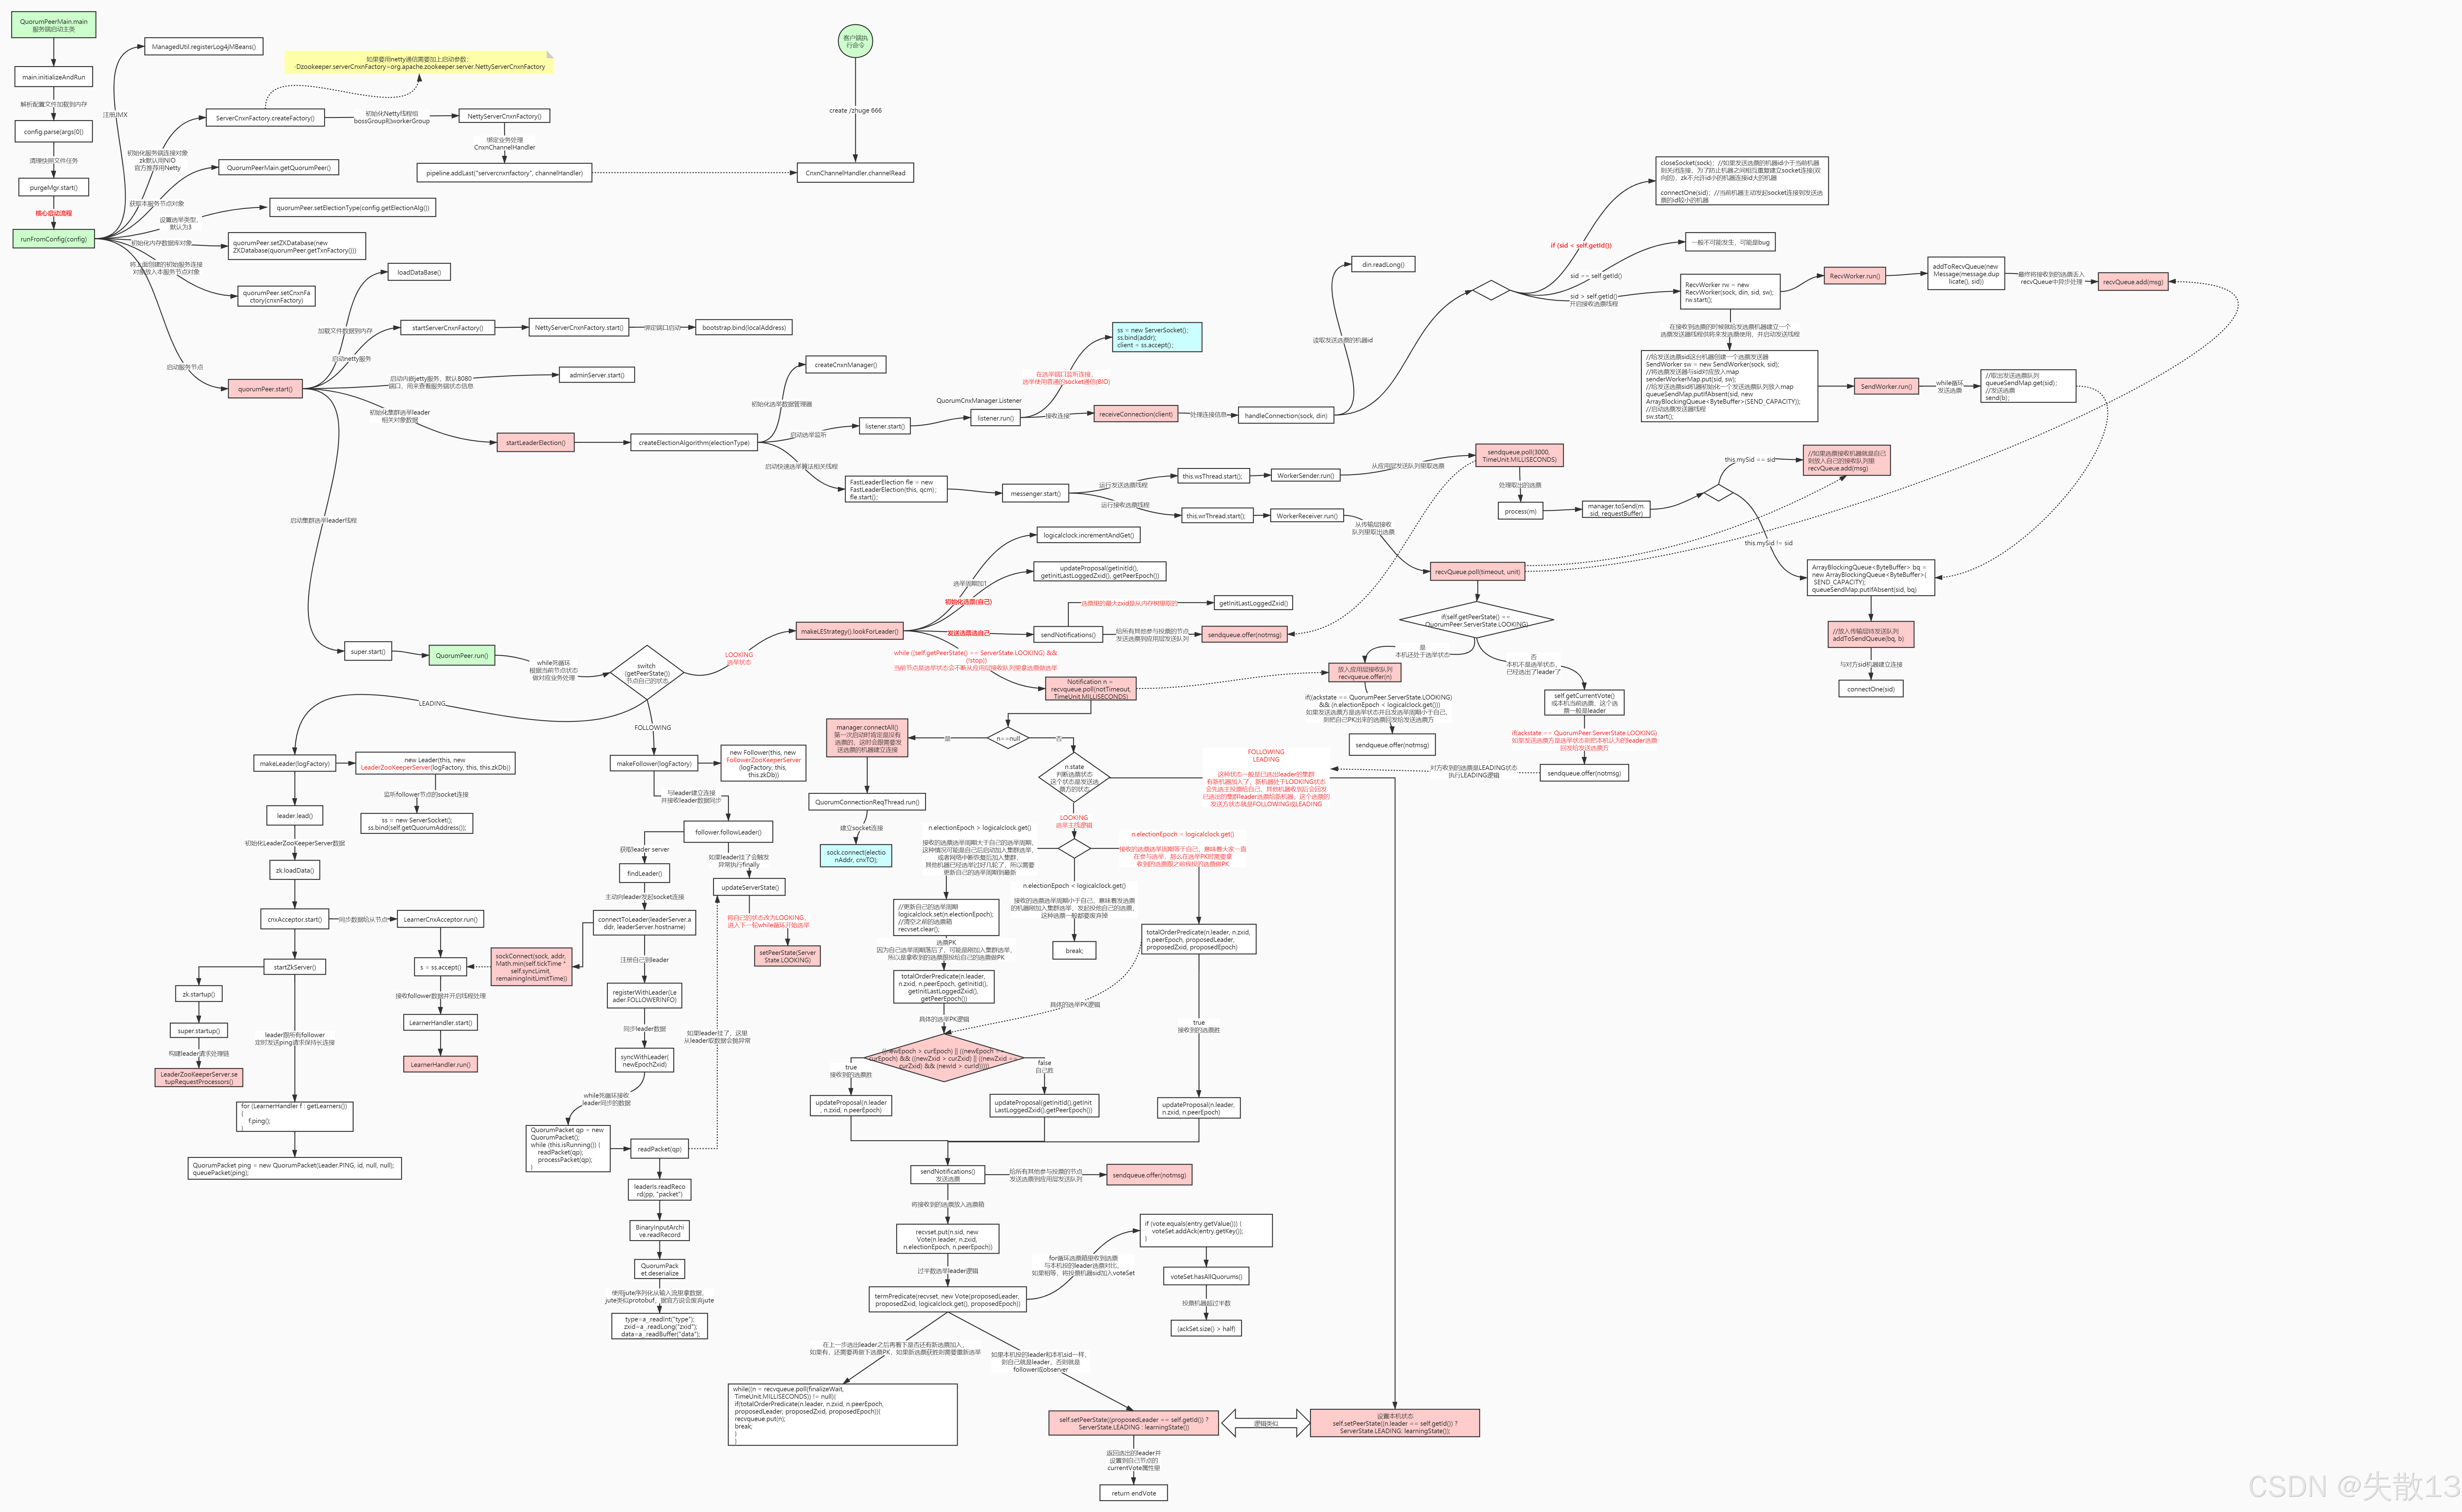
5 Leader选举源码流程图
-
源码阅读入口: