SpringAMQP
项目依赖引入
首先是 SpringWeb 和 rabbitmq 的依赖引入
<dependency><groupId>org.springframework.boot</groupId><artifactId>spring-boot-starter-amqp</artifactId></dependency><dependency><groupId>org.springframework.boot</groupId><artifactId>spring-boot-starter-web</artifactId></dependency><dependency><groupId>org.springframework.boot</groupId><artifactId>spring-boot-starter-test</artifactId><scope>test</scope></dependency><dependency><groupId>org.springframework.amqp</groupId><artifactId>spring-rabbit-test</artifactId><scope>test</scope></dependency>
通用方法介绍
首先就是声明队列和交换机,如果使用默认的交换机就不用声明交换机,使用默认的交换机的话routingkey 就是队列的名字
首先我们需要设置交换机和队列的名称,这部分代码我们一般会放在常量类中:
public class MQConstants {//工作模式public static final String WORK_QUEUE = "WORK_QUEUE";//路由模式public static final String ROUTING_QUEUE1 = "ROUTING_QUEUE1";public static final String ROUTING_QUEUE2 = "ROUTING_QUEUE2";public static final String ROUTING_EXCHANGE = "ROUTING_EXCHANGE";//通配符模式public static final String TOPIC_QUEUE1 = "TOPIC_QUEUE1";public static final String TOPIC_QUEUE2 = "TOPIC_QUEUE2";public static final String TOPIC_EXCHANGE = "TOPIC_EXCHANGE";//发布订阅模式(广播模式)public static final String FANOUT_QUEUE1 = "FANOUT_QUEUE1";public static final String FANOUT_QUEUE2 = "FANOUT_QUEUE2";public static final String FANOUT_EXCHANGE = "FANOUT_EXCHANGE";//确认模式public static final String ACK_QUEUE = "ACK_QUEUE";public static final String ACK_EXCHANGE = "ACK_EXCHANGE";
}
声明队列和交换机:使用 QueueBuilder 和 ExchangeBuilder
QueueBuilder.durable(MQConstants.FANOUT_QUEUE1).build();
durable 用于将队列设置为持久化,里面需要添加队列的名称
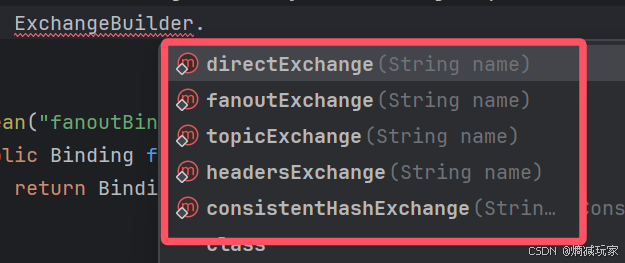
ExchangeBuilder 可以用于设置交换机类型:路由模式的交换机,发布订阅(广播)模式的交换机,通配符模式的交换机等等
里面依旧要传入交换机名称这个参数
代码演示:
@Configuration
public class MQConfig {//广播模式@Bean("fanoutQueue1")public Queue fanoutQueue1() {return QueueBuilder.durable(MQConstants.FANOUT_QUEUE1).build();}@Bean("fanoutQueue2")public Queue fanoutQueue2() {return QueueBuilder.durable(MQConstants.FANOUT_QUEUE2).build();}@Bean("fanoutExchange")public FanoutExchange fanoutExchange() {return ExchangeBuilder.fanoutExchange(MQConstants.FANOUT_EXCHANGE).build();}}
接着就是要建立绑定关系
@Bean("fanoutBinding1")public Binding fanoutBinding1(@Qualifier("fanoutExchange") FanoutExchange exchange, @Qualifier("fanoutQueue1") Queue queue) {return BindingBuilder.bind(queue).to(exchange);}@Bean("directBinding1")public Binding directBinding1(@Qualifier("directExchange") DirectExchange exchange, @Qualifier("routingQueue1") Queue queue) {return BindingBuilder.bind(queue).to(exchange).with("a");}
绑定交换机和队列,使用BindingBuilder方法,bind传入队列,to 传入交换机,with 传入rontingkey,如果不需要routingkey,就不用进行设置,例如广播模式,或者使用默认交换机(连交换机都不用声明,并且 routingkey 默认为队列名称)
最好要使用@Qualifier设置你要绑定的交换机和队列
生产者发送消息,需要使用 RabbitTemplate ,需要提前注入进去,使用 convertAndSend 方法来发送消息
rabbitTemplate.convertAndSend("", MQConstants.WORK_QUEUE, "work" + i);
rabbitTemplate.convertAndSend(MQConstants.ROUTING_EXCHANGE, "a", "a" + i);
参数介绍,第一个是交换机的名称,如果是默认交换机就是空字符串,接着是队列的名称,然后是routingkey(如果使用默认交换机则不用设置),最后就是要发送的消息了(这是 Object 类型的,不一定是字符串)
消费者消费消息,这里有两种写法:
第一种:
@Component
public class MQListener {@RabbitListener(queues = MQConstants.WORK_QUEUE)public void wordConsumer(Message message) {String str = new String(message.getBody());System.out.println("接收到的消息为:" + str);}
}
一定要在类上加上五大类注解,交给 Spring 管理,接着就是消费者的方法需要加上@RabbitListener(queues = xxxx),queues 需要传入参数就是消费的队列的名称
第二种写法:
@Component
@RabbitListener(queues = MQConstants.WORK_QUEUE)
public class MQListener2 {@RabbitHandlerpublic void handle1(String message) {System.out.println("handle1 接收到的消息为:" + message);}@RabbitHandlerpublic void handle2(byte[] message) {String str = new String(message);System.out.println("handle2 接收到的消息为:" + str);}
}
首先使用五大类注解,然后还要加上@RabbitListener标记你要监听的队列,在方法上加上@RabbitHandler注解,Spring 会根据不同的消息类型去处理消息
下面是四种常用的模式的生产者和消费者的代码演示:
工作模式
声明配置:
@RabbitListener(queues = MQConstants.WORK_QUEUE)public void wordConsumer(Message message) {String str = new String(message.getBody());System.out.println("接收到的消息为:" + str);}
生产者:
//工作模式@RequestMapping("/work")public String work() {//发送消息for (int i = 0; i < 10; i++) {rabbitTemplate.convertAndSend("", MQConstants.WORK_QUEUE, "work" + i);}return "发送消息成功";}
消费者:
@RabbitListener(queues = MQConstants.WORK_QUEUE)public void wordConsumer1(Message message) {String str = new String(message.getBody());System.out.println("wordConsumer1 接收到的消息为:" + str);}@RabbitListener(queues = MQConstants.WORK_QUEUE)public void wordConsumer2(Message message) {String str = new String(message.getBody());System.out.println("wordConsumer2 接收到的消息为:" + str);}
简单工作模式就是一个消费者,工作模式就是多个消费者共同消费这一个队列
广播模式
声明配置:
//广播模式@Bean("fanoutQueue1")public Queue fanoutQueue1() {return QueueBuilder.durable(MQConstants.FANOUT_QUEUE1).build();}@Bean("fanoutQueue2")public Queue fanoutQueue2() {return QueueBuilder.durable(MQConstants.FANOUT_QUEUE2).build();}@Bean("fanoutExchange")public FanoutExchange fanoutExchange() {return ExchangeBuilder.fanoutExchange(MQConstants.FANOUT_EXCHANGE).build();}@Bean("fanoutBinding1")public Binding fanoutBinding1(@Qualifier("fanoutExchange") FanoutExchange exchange, @Qualifier("fanoutQueue1") Queue queue) {return BindingBuilder.bind(queue).to(exchange);}@Bean("fanoutBinding2")public Binding fanoutBinding2(@Qualifier("fanoutExchange") FanoutExchange exchange, @Qualifier("fanoutQueue2") Queue queue) {return BindingBuilder.bind(queue).to(exchange);}
生产者:
//广播模式@RequestMapping("fanout")public String fanout() {for (int i = 0; i < 10; i++) {rabbitTemplate.convertAndSend(MQConstants.FANOUT_EXCHANGE, "", "fanout" + i);}return "发送消息成功";}
消费者:
@RabbitListener(queues = MQConstants.FANOUT_QUEUE1)public void fanoutConsumer1(Message message) {String str = new String(message.getBody());System.out.println("fanoutConsumer1 接收到的消息为:" + str);}@RabbitListener(queues = MQConstants.FANOUT_QUEUE1)public void fanoutConsumer3(Message message) {String str = new String(message.getBody());System.out.println("fanoutConsumer3 接收到的消息为:" + str);}@RabbitListener(queues = MQConstants.FANOUT_QUEUE2)public void fanoutConsumer2(Message message) {String str = new String(message.getBody());System.out.println("fanoutConsumer2 接收到的消息为:" + str);}
这里主要是想说:如果多个消费者绑定同一个队列,那么这多个消费者就会共同消费这个队列,消息不会重复消费,也就说工作模式
路由模式
声明配置:
@Bean("routingQueue1")public Queue routingQueue1() {return QueueBuilder.durable(MQConstants.ROUTING_QUEUE1).build();}@Bean("routingQueue2")public Queue routingQueue2() {return QueueBuilder.durable(MQConstants.ROUTING_QUEUE2).build();}@Bean("directExchange")public DirectExchange directExchange() {return ExchangeBuilder.directExchange(MQConstants.ROUTING_EXCHANGE).build();}@Bean("directBinding1")public Binding directBinding1(@Qualifier("directExchange") DirectExchange exchange, @Qualifier("routingQueue1") Queue queue) {return BindingBuilder.bind(queue).to(exchange).with("a");}@Bean("directBinding2")public Binding directBinding2(@Qualifier("directExchange") DirectExchange exchange, @Qualifier("routingQueue2") Queue queue) {return BindingBuilder.bind(queue).to(exchange).with("a");}@Bean("directBinding3")public Binding directBinding3(@Qualifier("directExchange") DirectExchange exchange, @Qualifier("routingQueue2") Queue queue) {return BindingBuilder.bind(queue).to(exchange).with("b");}
生产者:
//路由模式@RequestMapping("rout")public String rout() {for (int i = 0; i < 10; i++) {rabbitTemplate.convertAndSend(MQConstants.ROUTING_EXCHANGE, "a", "a" + i);}for (int i = 0; i < 10; i++) {rabbitTemplate.convertAndSend(MQConstants.ROUTING_EXCHANGE, "b", "b" + i);}return "发送消息成功";}
消费者:
@RabbitListener(queues = MQConstants.ROUTING_QUEUE1)public void routingConsumer1(Message message) {String str = new String(message.getBody());System.out.println("routingConsumer1 接收到的消息为:" + str);}@RabbitListener(queues = MQConstants.ROUTING_QUEUE2)public void routingConsumer2(Message message) {String str = new String(message.getBody());System.out.println("routingConsumer2 接收到的消息为:" + str);}
通配符模式
声明配置:
@Bean("topicQueue1")public Queue topicQueue1() {return QueueBuilder.durable(MQConstants.TOPIC_QUEUE1).build();}@Bean("topicQueue2")public Queue topicQueue2() {return QueueBuilder.durable(MQConstants.TOPIC_QUEUE2).build();}@Bean("topicExchange")public TopicExchange topicExchange() {return ExchangeBuilder.topicExchange(MQConstants.TOPIC_EXCHANGE).build();}@Bean("topicBinding1")public Binding topicBinding1(@Qualifier("topicExchange") TopicExchange exchange, @Qualifier("topicQueue1") Queue queue, TopicExchange topicExchange) {return BindingBuilder.bind(queue).to(exchange).with("*.orange.*");}@Bean("topicBinding2")public Binding topicBinding2(@Qualifier("topicExchange") TopicExchange exchange, @Qualifier("topicQueue2") Queue queue) {return BindingBuilder.bind(queue).to(exchange).with("*.*.rabbit");}@Bean("topicBinding3")public Binding topicBinding3(@Qualifier("topicExchange") TopicExchange exchange, @Qualifier("topicQueue2") Queue queue) {return BindingBuilder.bind(queue).to(exchange).with("lazy.#");}
生产者:
//通配符模式@RequestMapping("/topic")public String topic() {for (int i = 0; i <10; i++) {rabbitTemplate.convertAndSend(MQConstants.TOPIC_EXCHANGE, "a.orange.rabbit", "topic" + i);}return "发送消息成功";}@RequestMapping("/lazy")public String lazy() {for (int i = 0; i < 10; i++) {rabbitTemplate.convertAndSend(MQConstants.TOPIC_EXCHANGE, "lazy", "lazy" + i);rabbitTemplate.convertAndSend(MQConstants.TOPIC_EXCHANGE, "lazy.45.78.78", "lazy" + i);}return "发送消息成功";}
消费者:
@RabbitListener(queues = MQConstants.TOPIC_QUEUE1)public void topicConsumer1(Message message) {String str = new String(message.getBody());System.out.println("topicConsumer1 接收到消息为:" + str);}@RabbitListener(queues = MQConstants.TOPIC_QUEUE2)public void topicConsumer2(Message message) {String str = new String(message.getBody());System.out.println("topicConsumer2 接收到消息为:" + str);