MCP tutorials
tutorials
mcp-servers
Using MCP
Connect to Remote MCP Servers
远程 MCP 服务器扩展了 AI 应用的能力,使其不仅局限于本地环境,还可以访问托管在互联网上的工具、服务和数据源。
目前,许多客户端已经支持远程 MCP 服务器,从而实现广泛的集成可能性。本指南以
Claude为例,展示如何通过远程 MCP 服务器进行连接。
远程 MCP 服务器的关键优势是其可访问性。与需要在每个设备上安装和配置的本地服务器不同,远程服务器只需有网络连接,就能通过任何 MCP 客户端访问。这使它们非常适合:
• 基于 Web 的 AI 应用
• 强调易用性的集成场景
• 需要服务端处理或认证的服务
什么是 Custom Connectors?
Custom Connectors 是 Claude 与远程 MCP 服务器之间的桥梁。它们允许你将 Claude 直接连接到与你工作流程最相关的工具和数据源,使 Claude 能在你常用的软件中运行,并从外部工具的完整上下文中获取洞察。
通过 Custom Connectors,你可以:
• 将 Claude 连接到第三方开发者提供的远程 MCP 服务器
• 自建远程 MCP 服务器,与任何工具集成
Connecting to a Remote MCP Server
略.
Connect to Local MCP Servers
Model Context Protocol (MCP) 服务器通过提供对本地资源和工具的安全、受控访问,扩展了 AI 应用程序的能力。
理解local MCP 服务器
MCP 服务器是运行在你电脑上的程序,通过标准协议为 Claude Desktop 提供特定功能。每个服务器会暴露一组工具,Claude 可以在获得你的批准后使用这些工具。
以 Host Infra Server 为例,它提供以下工具:
• 查看主机的型号
• 查看主机的内存使用情况
• 查看主机的CPU使用情况
实现Host Infra MCP Server
环境依赖:
- Claude Desktop
- Node.js
- uv
代码结构
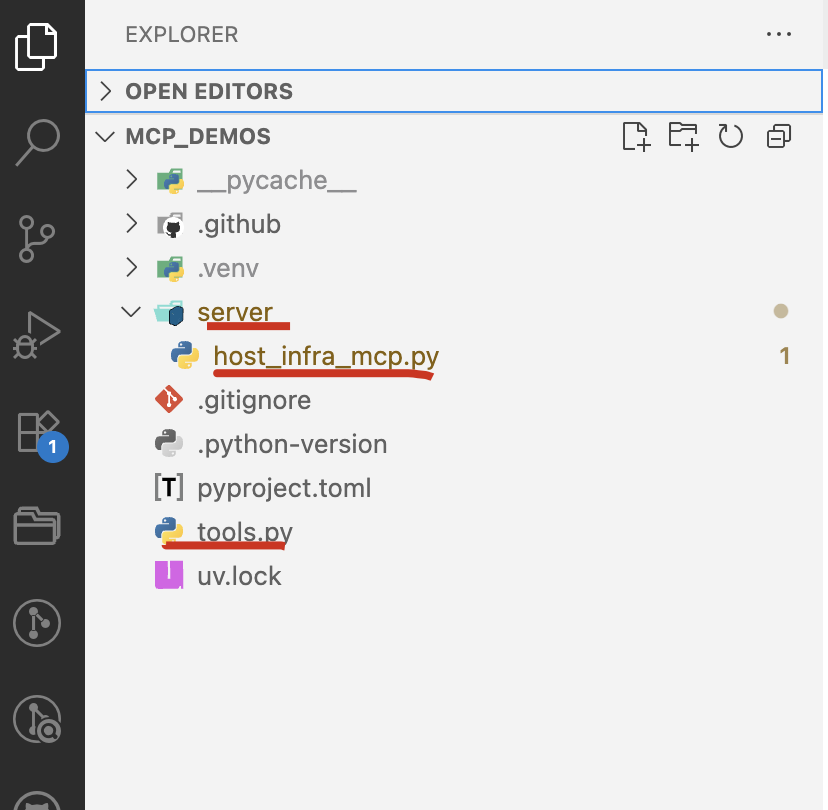
tools.py
import platform
import os
import psutil
import jsondef get_host_info() -> str:"""get host informationReturns:str : the host information in JSON format"""info: dict[str, str ] = {"System": platform.system(),"Release": platform.release(),"Machine": platform.machine(),"Processor": platform.processor()}info["cpu_count"] = psutil.cpu_count(logical=False)info["memory_total"] = __to_gib(psutil.virtual_memory().total)return json.dumps(info, indent=4)def __to_gib(bytes_value):return str(round(bytes_value / (1024 ** 3), 2)) + " GiB"def get_memory_detail_info() -> str:"""get memory informationReturns:str: The memory information in JSON format"""memory_info = psutil.virtual_memory()info = {"total": __to_gib(memory_info.total),"available": __to_gib(memory_info.available),"used": __to_gib(memory_info.used),"percent": str(memory_info.percent) + "%"}return json.dumps(info, indent=4)def get_cpu_detail_info() -> str:"""get cpu informationReturns:str: The cpu information in JSON format"""cpu_info = psutil.cpu_times()cpu_percent = psutil.cpu_percent(interval=1)info = {"user": cpu_info.user,"system": cpu_info.system,"idle": cpu_info.idle,"cpu_percent": str(cpu_percent) + "%"}return json.dumps(info, indent=4)if __name__ == "__main__":print(get_host_info())print(get_memory_detail_info())print(get_cpu_detail_info())
host_infra_mcp.py
import sys
import os
sys.path.append(os.path.dirname(os.path.dirname(os.path.abspath(__file__))))
import toolsfrom mcp.server.fastmcp import FastMCP
import loggingmcp = FastMCP("host infra mcp server ")
mcp.add_tool(tools.get_host_info, "get_host_info")
mcp.add_tool(tools.get_memory_detail_info, "get_memory_detail_info")
mcp.add_tool(tools.get_cpu_detail_info, "get_cpu_detail_info")@mcp.tool() # 使用注解注入 tool
def foo() -> str:return "Hello from foo!"def main() -> None:mcp.run(transport='stdio')  # or sselogging.info("mcp server started")if __name__ == "__main__":main()
config MCP server to Claude Desktop
Access Developer Settings
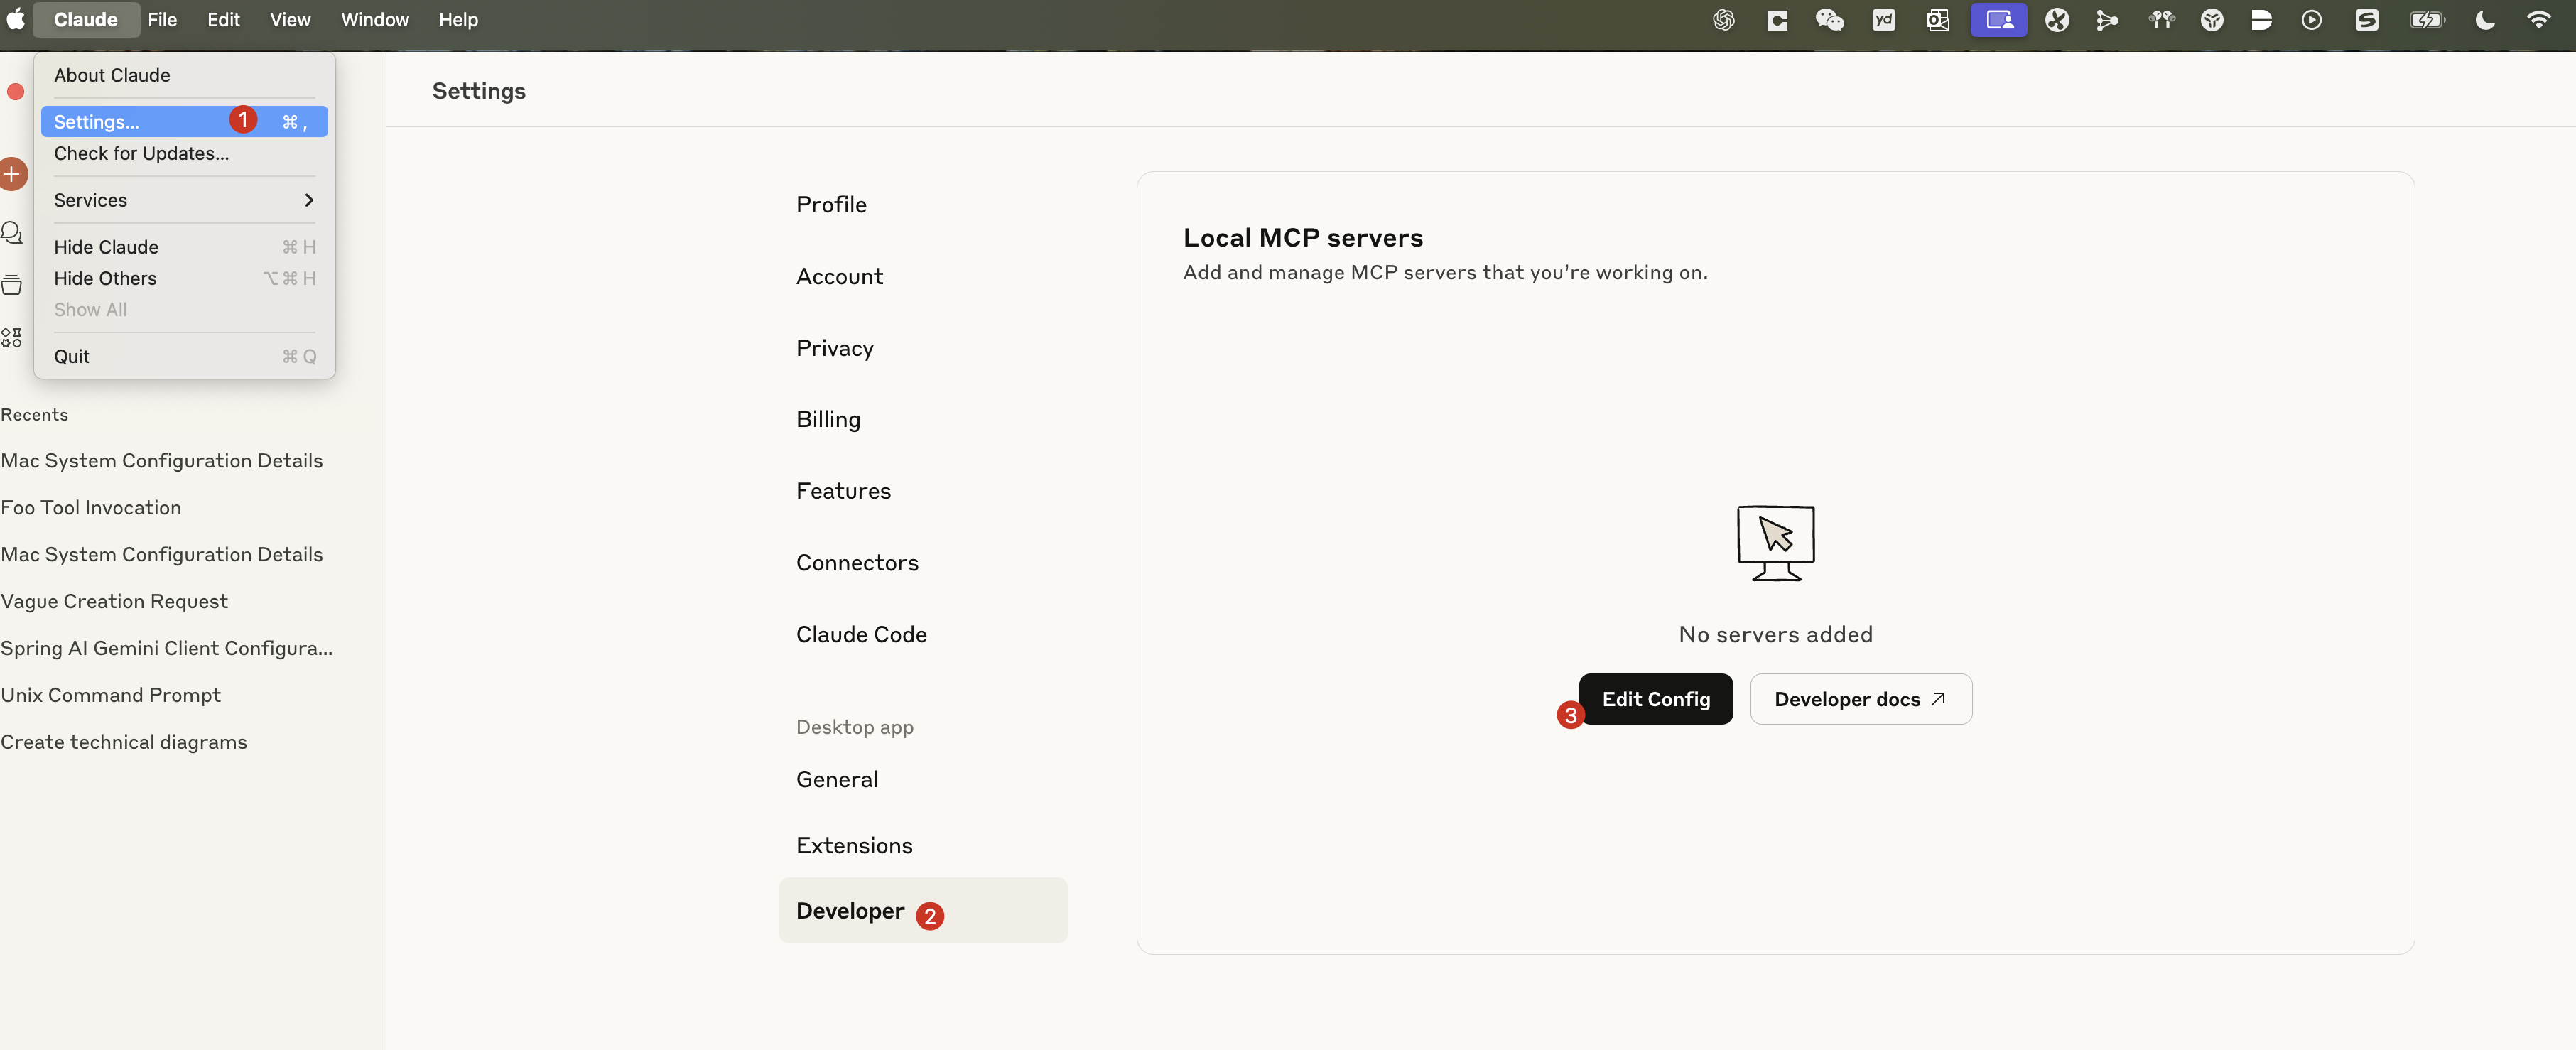
Configure claude_desktop_config.json
{"mcpServers": {"host_infra_mcp": {"command": "uv","args": ["--directory","~/workspaces/mcp_demos/server","run","host_infra_mcp.py"]}}
}
restart claude_desktop and test
case1
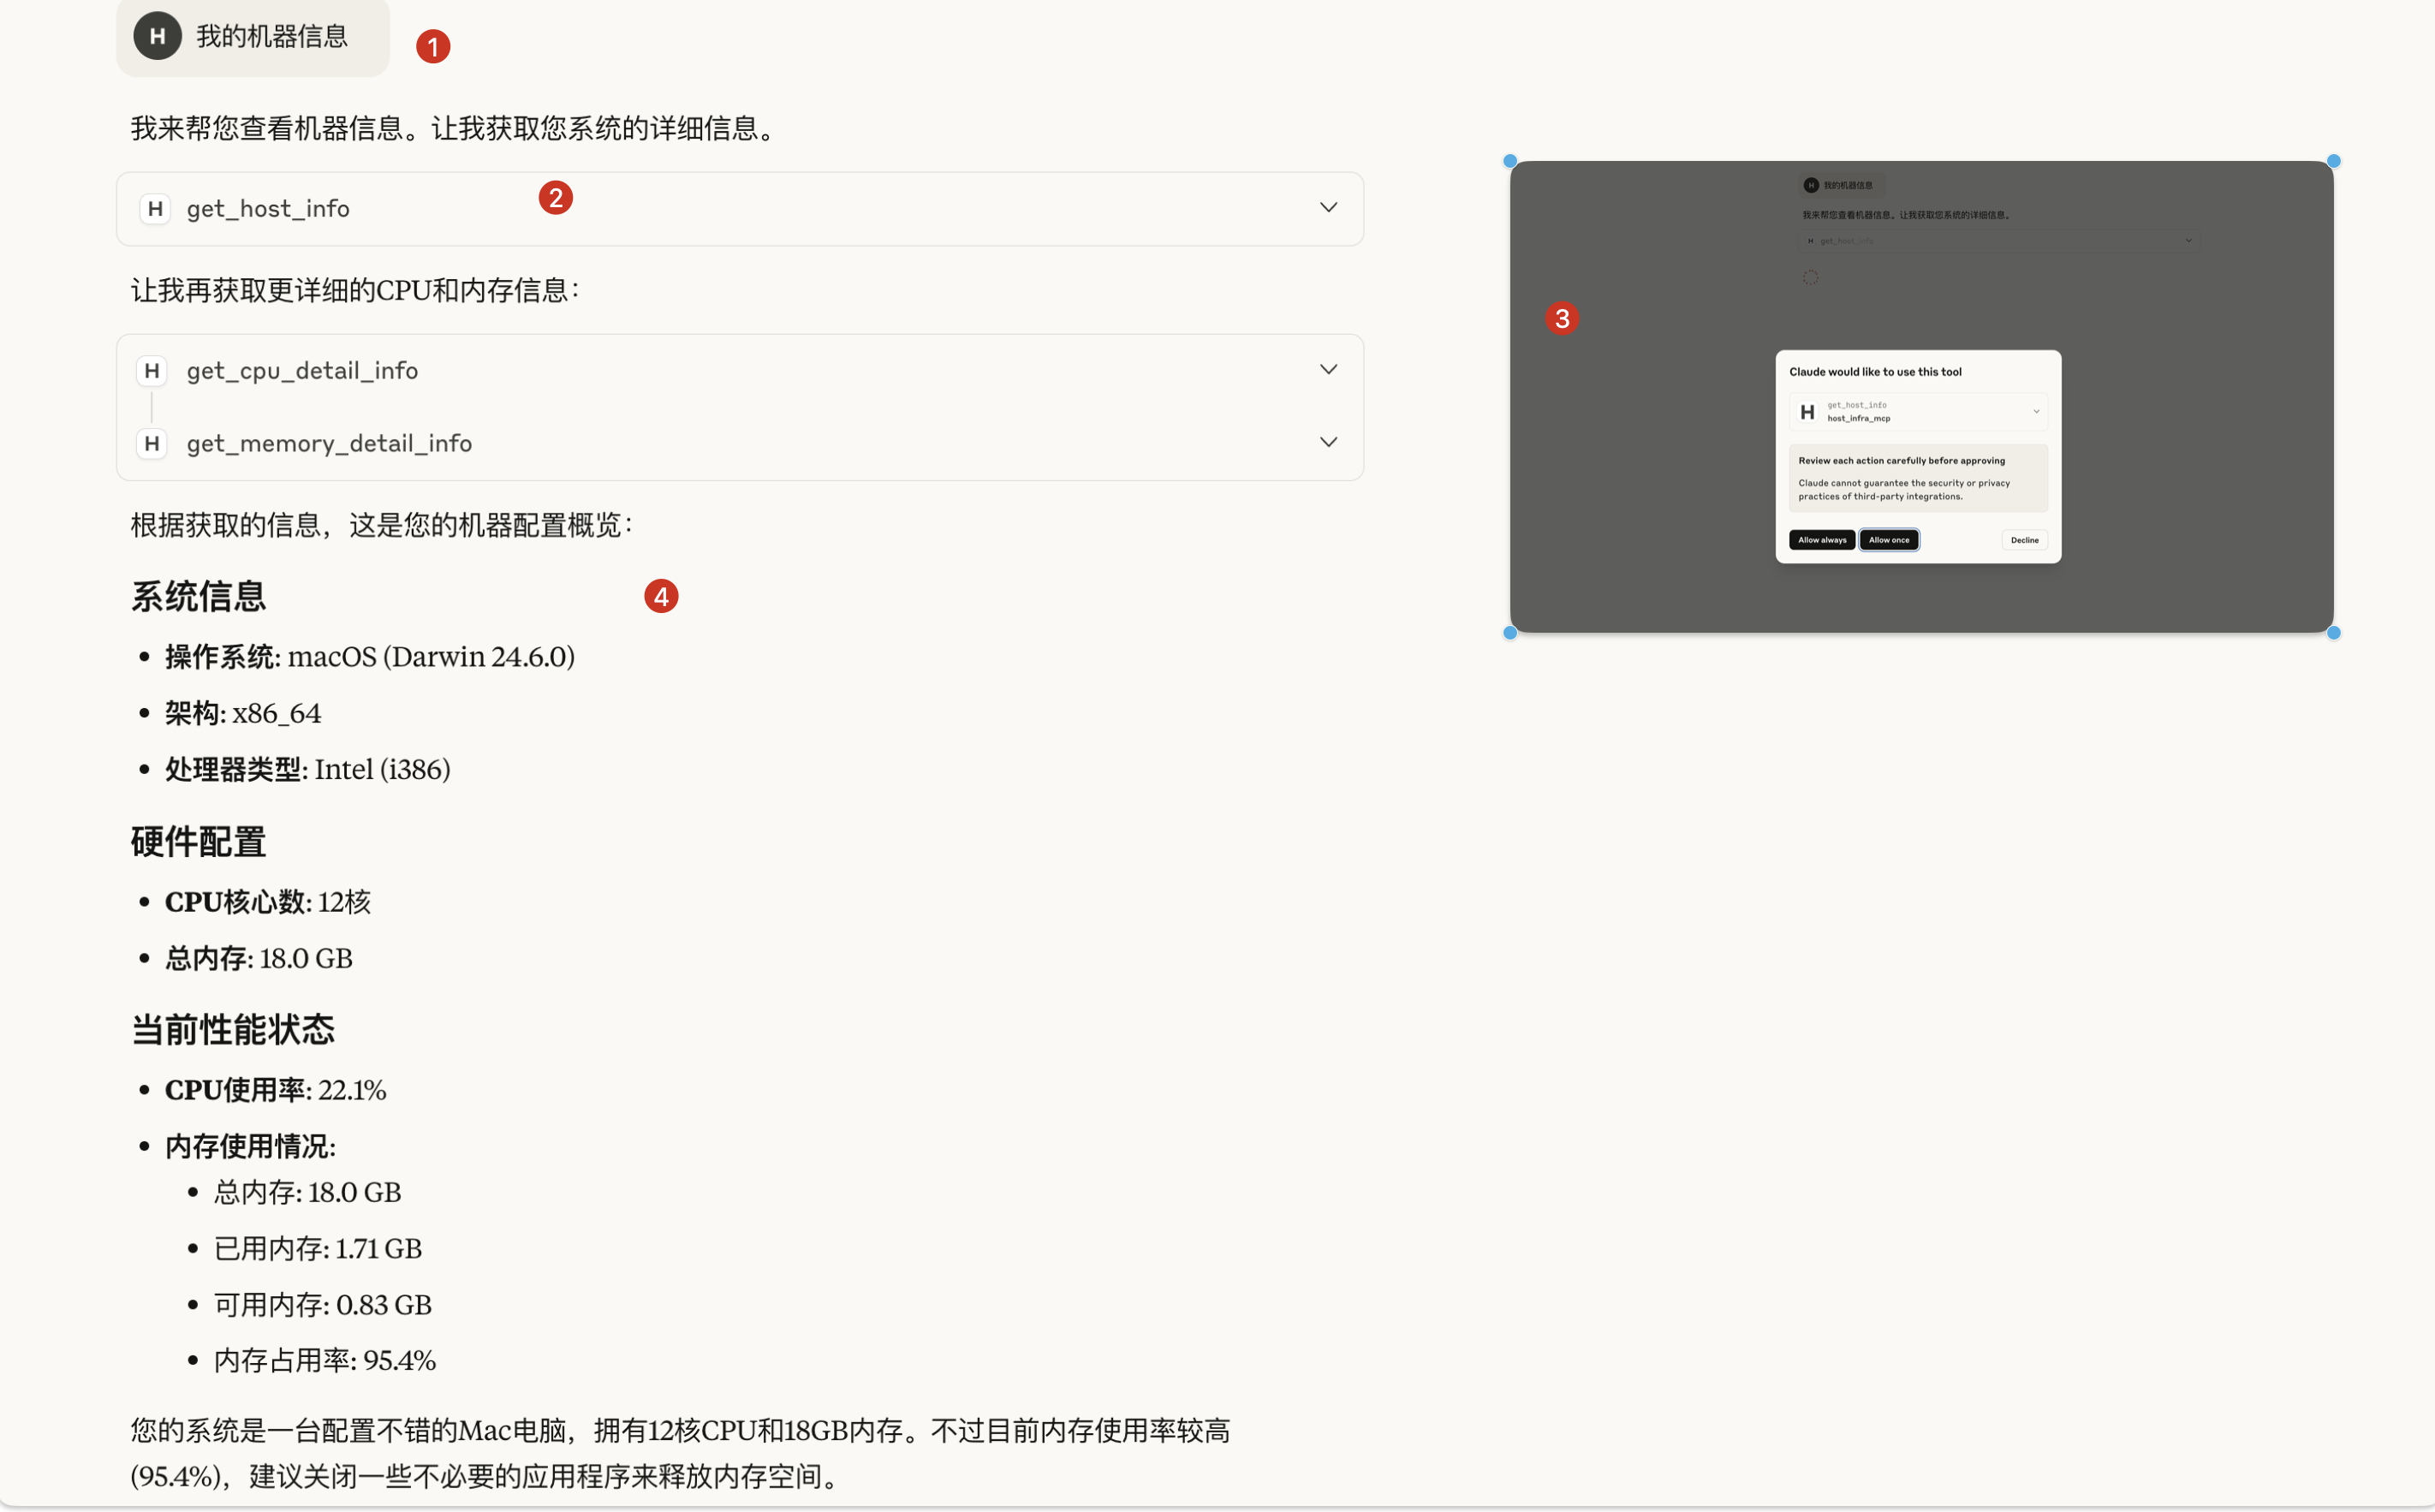
case2
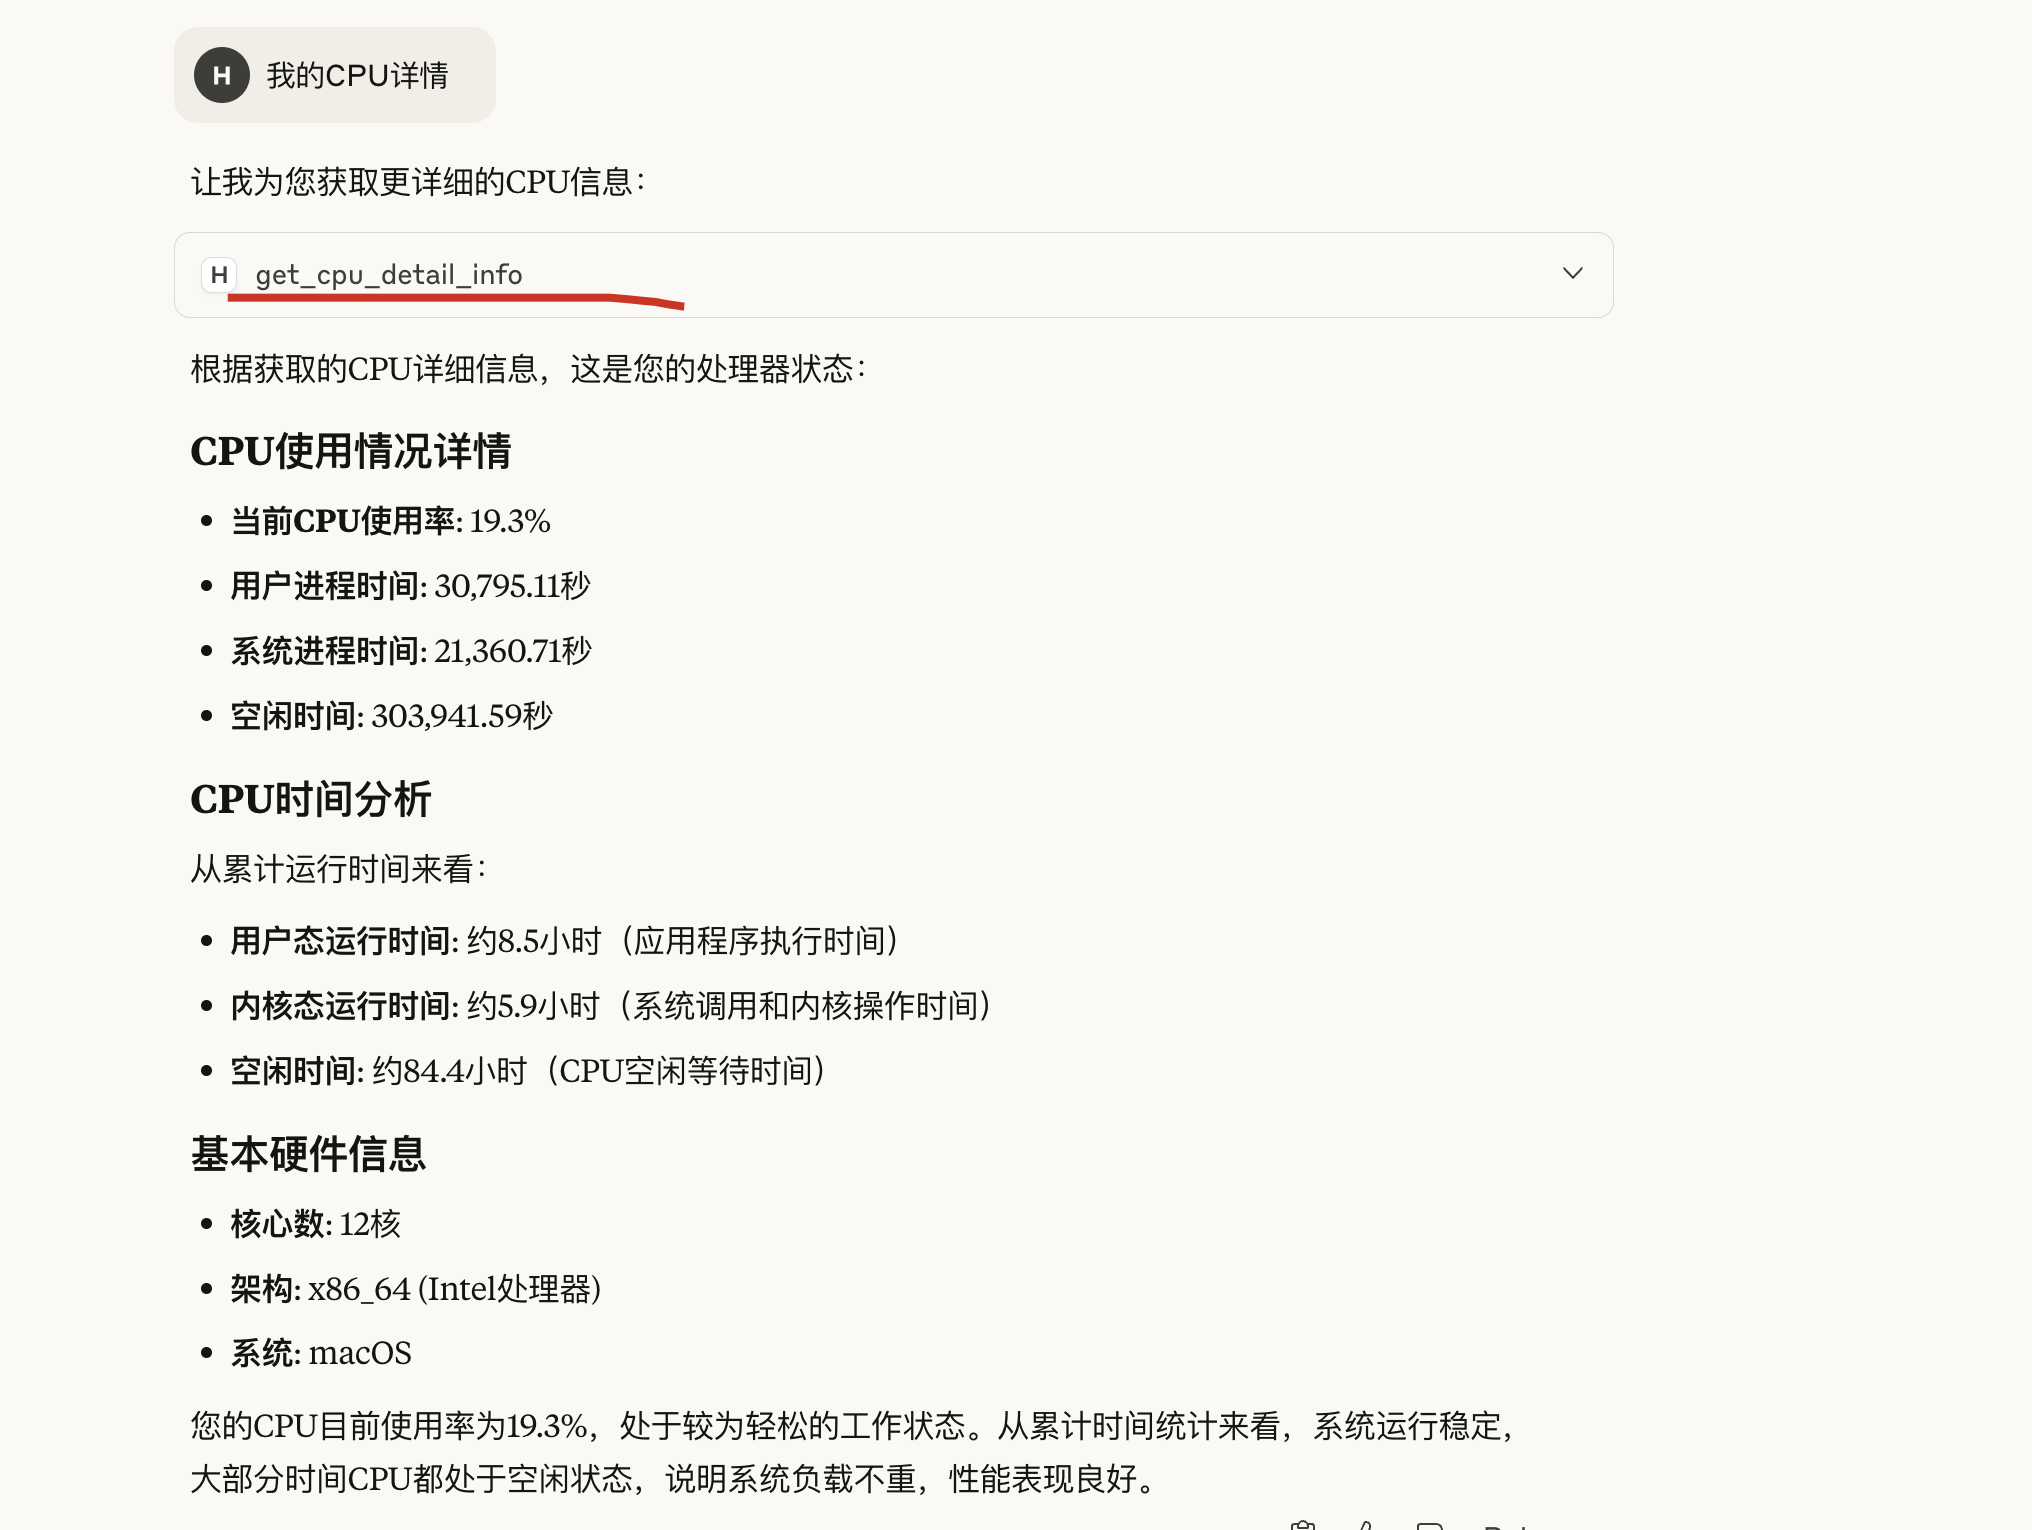
case3

inspector
Build an MCP Client
环境依赖:
uv add fastmcp
code structure
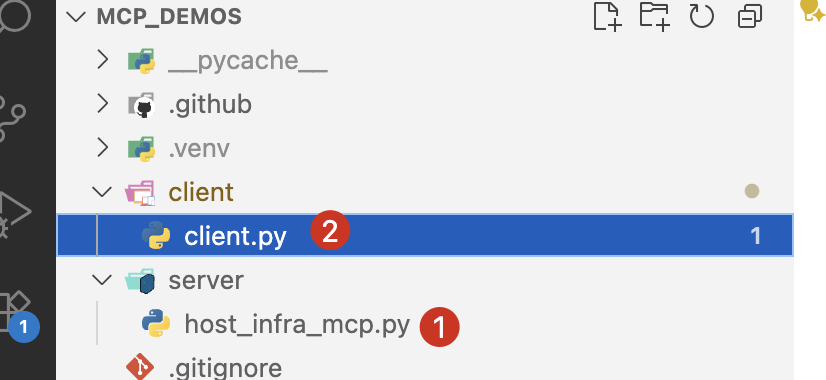
client.py
import os
import asyncio
from fastmcp import Clientasync def main():server_path = os.path.abspath(os.path.join(os.path.dirname(__file__), '../server/host_infra_mcp.py'))client = Client(server_path)async with client:host_info = await client.call_tool("get_host_info")print(f"Host Info: {host_info.data}")memory_info = await client.call_tool("get_memory_detail_info")print(f"Memory Info: {memory_info.data}")cpu_info = await client.call_tool("get_cpu_detail_info")print(f"CPU Info: {cpu_info.data}")if __name__ == "__main__":asyncio.run(main())
结果
---
Host Info: get_host_infoOutput(result='{\n    "System": "Darwin",\n    "Release": "24.6.0",\n    "Machine": "x86_64",\n    "Processor": "i386",\n    "cpu_count": 12,\n    "memory_total": "18.0 GiB"\n}')---
Memory Info: get_memory_detail_infoOutput(result='{\n    "total": "18.0 GiB",\n    "available": "1.02 GiB",\n    "used": "1.7 GiB",\n    "percent": "94.3%"\n}')---
CPU Info: get_cpu_detail_infoOutput(result='{\n    "user": 53391.42,\n    "system": 40173.91,\n    "idle": 501844.89,\n    "cpu_percent": "8.7%"\n}')
