CentOS 7.6安装崖山23.4.1.102企业版踩坑实战记录(单机)
已同步发到墨天伦,地址链接:CentOS 7.6安装崖山23.4.1.102企业版踩坑实战记录(单机) - 墨天轮:
2025年7月5日记
YashanDB 安装-初始环境调整
准备测试环境
准备一台L inux主机,测试环境的配置需求,使用2C/4G/50G即可
确定1688端口不被占用
[root@pg-xc3 ~]# netstat -anp|grep 1688关闭防火墙(建议)
[root@pg-xc3 ~]# systemctl stop firewalld
[root@pg-xc3 ~]# systemctl status firewalld
获取安装包
企业版:https://download.yashandb.com/download
调整自动分配本地端口范围 –其实不配也能安装
# echo "net.ipv4.ip_local_port_range = 32768 60999" >> /etc/sysctl.confecho "vm.max_map_count=2000000" >> /etc/sysctl.confsysctl –p调整资源限制值
[root@pg-xc3 ~]# ulimit -n 65536[root@pg-xc3 ~]# ulimit -u 65536[root@pg-xc3 ~]# ulimit -m unlimited[root@pg-xc3 ~]# ulimit -s 8192# 关闭透明大页
###############################################################################
# grubby --args="transparent_hugepage=never" --update-kernel ALL
# grubby --info DEFAULT
args="ro crashkernel=auto rd.lvm.lv=centos/root rd.lvm.lv=centos/swap rhgb quiet LANG=en_US.UTF-8 transparent_hugepage=never"
修改 /etc/security/limits.conf 资源配置文件
添加:
yashan soft nofile 65536yashan hard nofile 65536yashan soft nproc 65536yashan hard nproc 65536yashan soft rss unlimitedyashan hard rss unlimitedyashan soft stack 8192yashan hard stack 8192YashanDB 安装-创建安装用户
#创建YashanDB用户[root@pg-xc3 ~]# useradd yashan[root@pg-xc3 ~]#[root@pg-xc3 ~]# echo "yashan" |passwd --stdin yashanChanging password for user yashan.passwd: all authentication tokens updated successfully.#配置sudo权限[root@pg-xc3 ~]# chmod +w /etc/sudoers[root@pg-xc3 ~]#[root@pg-xc3 ~]# vi /etc/sudoers添加:yashan ALL=(ALL)NOPASSWD:ALL[root@pg-xc3 ~]# chmod -w /etc/sudoers[root@pg-xc3 ~]##创建用户组,注意用户组 YASDBA 必须是大写,不能小写[root@pg-xc3 ~]# groupadd YASDBA[root@pg-xc3 ~]# usermod -a -G YASDBA yashan[root@pg-xc3 ~]# su – yashan[yashan@pg-xc3 ~]$ mkdir install想办法传文件进服务器
YashanDB 安装-目录规划
目录规划
l /home/yashan/install:软件包上传目录。
l /home/yashan/yasdb_home:软件安装目录,即$YASDB_HOME。包含YashanDB所提供的命令、数据库运行所需的库及各关键组件。
l /home/yashan/yasdb_data:数据目录,即$YASDB_DATA。包含数据库的各类系统数据文件、部分日志文件和配置文件,用户数据也缺省存储在该目录下。
创建目录&上传软件包&解压
[yashan@pg-xc3 ~]$ cd install/
[yashan@pg-xc3 install]$ ll
[root@pg-xc3 install]# chown yashan:yashan yashandb-23.4.1.102-linux-x86_64.tar.gz解压:
[yashan@pg-xc3 install]$ tar -zxf yashandb-23.4.1.102-linux-x86_64.tar.gz
在家目录新建目录:
[yashan@pg-xc3 ~]$ mkdir yasdb_home[yashan@pg-xc3 ~]$[yashan@pg-xc3 ~]$ mkdir yasdb_data步骤1:生成配置文件:
./bin/yasboot package se gen --cluster yashandb -u yashan -p yashan --ip 192.168.18.113 --port 22 --install-path /home/yashan/yasdb_home --data-path /home/yashan/yasdb_data --begin-port 1688
步骤2:执行安装
./bin/yasboot package install -t hosts.toml -i yashandb-personal-23.2.1.100-linux-x86_64.tar.gz

官方说这个告警没关系,ps -ef 看看yasom 和yasagent进程启动起来了就没问题
步骤3:部署数据库
./bin/yasboot cluster deploy -t yashandb.toml --sys-password 12345678
步骤4:配置环境变量
cd /home/yashan/yasdb_home/23.4.1.102/conf
[yashan@pg-xc3 conf]$ source yashandb.bashrc
[yashan@pg-xc3 conf]$ cat yashandb.bashrc >> ~/.bashrc
[yashan@pg-xc3 conf]$
步骤5:初始化sys用户密码
$ yasboot c lus ter pas sword set -n yasdb_123 - c yashandb yasdb_123为sys用户的密码,可以自定义。执行 yasboot cluster password set -n yasdb_123 -c yashandb[yashan@pg-xc3 conf]$ yasboot cluster password set -n yasdb_123 -c yashandb
+----------------------------------------------------------------------------------------------------------+
| type | uuid             | name             | hostid | index    | status  | return_code | progress | cost |
+----------------------------------------------------------------------------------------------------------+
| task | cd199651e94df8b0 | YasdbPasswordSet | -      | yashandb | SUCCESS | 0           | 100      | 1    |
+------+------------------+------------------+--------+----------+---------+-------------+----------+------+
task completed, status: SUCCESS[yashan@pg-xc3 conf]$
验证安装是否成功
yasql / as sysdba
yasboot election config show -c yashandb
env|grep YAS
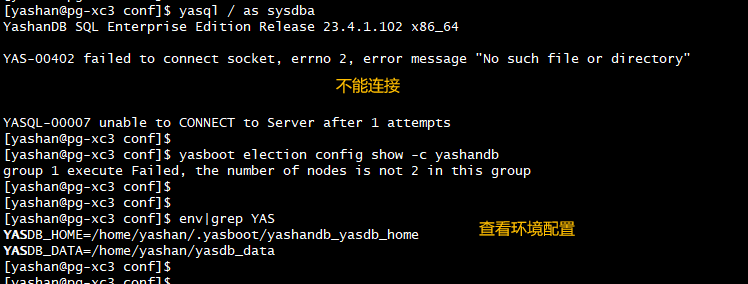
查看状态:
yasboot cluster status -c yashandb -d

发现没启动数据库
启动数据库
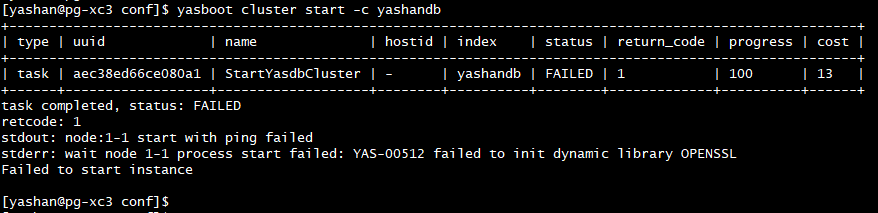
yasboot cluster start -c yashandb
报错:
步骤1:检查并关闭仲裁模式
执行如下命令,检查yasom仲裁选主是否开启:
$ yasboot election config show -c yashandb
若已开启,需执行如下命令关闭仲裁:
$ yasboot election enable off -c yashandb
卸载数据库:
yasboot cluster clean --cluster yashandb --purge
[yashan@pg-xc3 conf]$ yasboot election enable off -c yashandb然后重启部署数据库:
cd /home/yashan/install
./bin/yasboot cluster deploy -t yashandb.toml --sys-password Yasdb_123
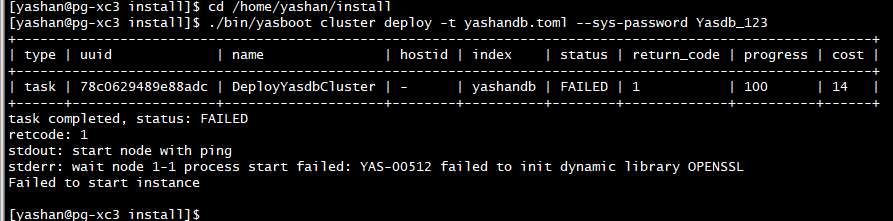
报错YAS-00512 failed to init dynamic library OPENSSL,不能启动实例。
查看openssh版本:
![]()
这里安装前的准备关于依赖项的官方文档描述,需要保证libcrypto.so和libssl.so存在,所以需要创建同名的软连接。
在root用户执行:
ln -s /lib64/libcrypto.so.10 /lib64/libcrypto.so
ln -s /lib64/libssl.so.10 /lib64/libssl.so
ldconfig
然后切换到yashan用户
su - yashan
卸载数据库
$yasboot cluster clean --cluster yashandb --purge
yasboot cluster clean --cluster yashandb –purge
部署数据库:
cd /home/yashan/install
./bin/yasboot cluster deploy -t yashandb.toml --sys-password Yasdb_123
初始化sys用户密码
$ yasboot c lus ter pas sword set -n yasdb_123 - c yashandb yasdb_123为sys用户的密码,可以自定义。
执行 yasboot cluster password set -n yasdb_123 -c yashandb
登录验证
yasql / as sysdba
SQL> select status from v$instance;
SQL> select database_name from v$database;
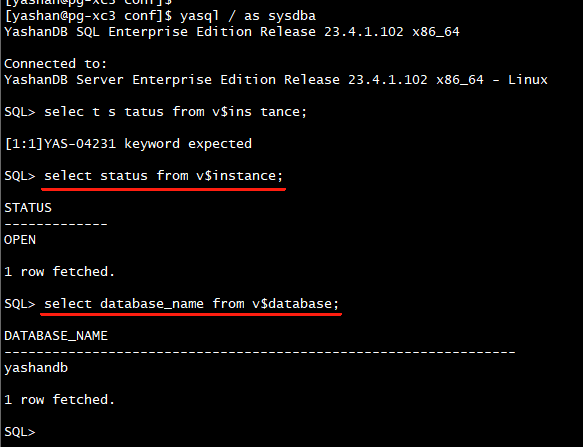
select DATABASE_ID from v$database;
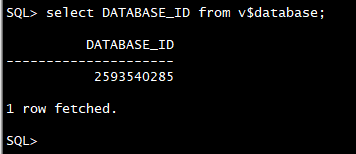
可见操作方式和Oracle相似
再次配置:配置环境变量
$ cd /home/ yashan/ yasdb_home/ yashandb/23.2.1.100/ conf /
$ source yashandb.bashrc
$ cat yashandb.bashrc >> ~/.bashrc
把之前的注释掉:
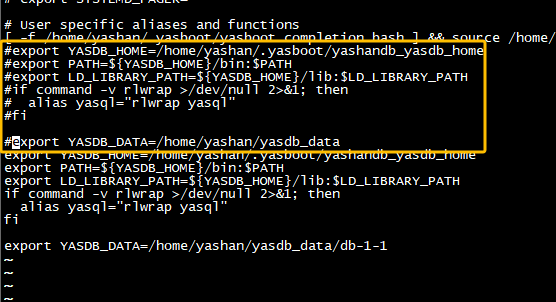
这个路径才对:YASDB_DATA=/home/yashan/yasdb_data/db-1-1
更新环境变量,其实不用前面的操作,直接把路径改为 export YASDB_DATA=/home/yashan/yasdb_data/db-1-1就行。
进程里有路径地址。
关闭数据库
SQL> shutdown immediate;
或者 :yasboot cluster stop - c yashandb
注意,如果数据库名称写错会报以下错:
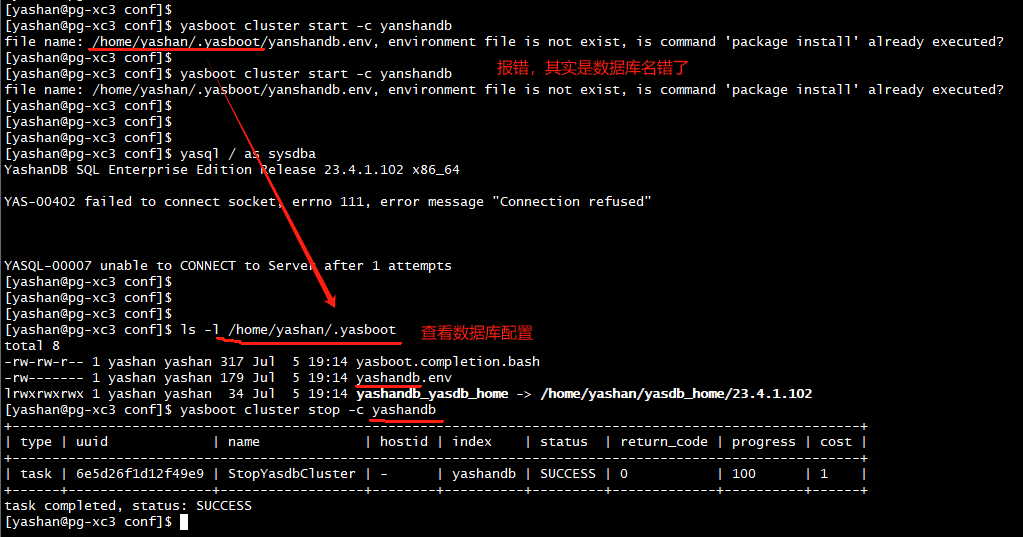
启动数据库:
yasboot cluster start -c yashandb
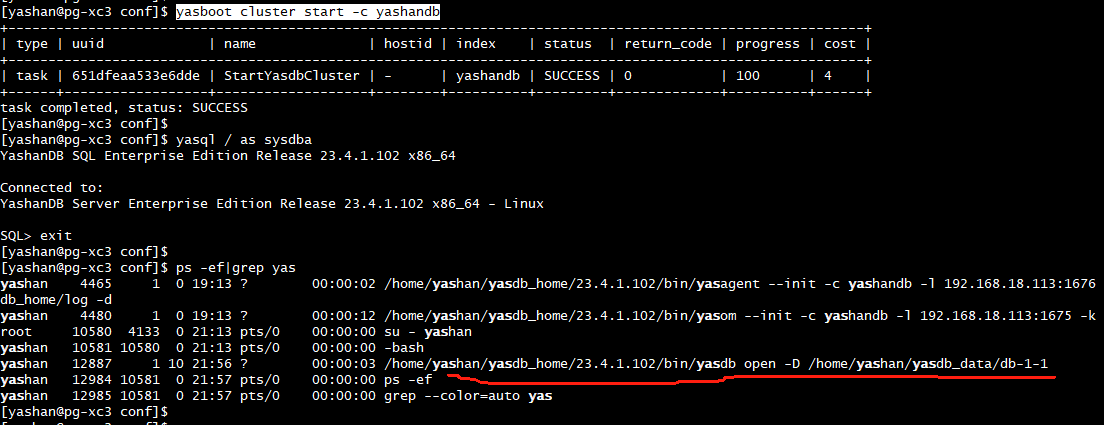
可以看到,启动数据库后,进程出现了数据库的进程
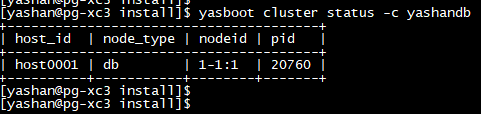
查看数据库状态:
yasboot cluster status -c 数据库名称
yasboot cluster status -c yashandb
查看更详细状态:yasboot cluster status -c 数据库名称 -d
yasboot cluster status -c yashandb –d

服务器重启后,需执行如下命令手动启动进程:
切换到yashan用户 : su - yashan
$ yasboot process yasom start -c yashandb
$ yasboot process yasagent start -c yashandb
## 待yasom和yasagent进程启动后,才能启动数据库
$ yasboot cluster start -c yashandb