【pxe】通过pxe批量安装centos系统(传统Legacy启动+uefi启动)
【pxe】通过pxe批量安装centos系统(传统Legacy启动+uefi启动)
- 1 pxe 预启动执行环境
- 1.1 pxe简介
- 1.2 参考资料
- 1.3 pxe服务器信息
- 1.4 centos 7 传统Legacy启动
- 关闭 防火墙、selinux
- 安装软件包
- 配置tftp服务
- 配置dhcp服务-Legacy
- 配置httpd服务
- 启动服务
- 拷贝文件到tftp目录-Legacy
- 配置本地yum源
- 配置kickstart文件
- 启动菜单修改-Legacy
- 配置光驱自动挂载
- 1.5 centos 7 uefi启动
- 配置dhcp服务-uefi
- 拷贝文件到tftp目录-uefi
- 启动菜单修改-uefi
- 1.6 报错
- 文件权限问题
- efi启动问题
- 启动 starting timeout scripts
1 pxe 预启动执行环境
1.1 pxe简介
预启动执行环境(Preboot eXecution Environment,PXE)也被称为预执行环境,提供了一种使用网络接口(Network Interface)启动计算机的机制。这种机制让计算机的启动可以不依赖本地数据存储设备(如硬盘)或本地已安装的操作系统。
工作原理(传统Legacy启动)
- 客户端启动系统,选择从网卡启动
- 客户端从DHCP服务器(10.0.0.26)中获取到IP地址等信息(10.0.0.100)
- 还获取到了tftpserver(10.0.0.26)及网络引导程序pxelinux.0
- 通过网卡读取到tftpserver(/var/lib/tftpboot)上的pxelinux.0,读取到内存中
- 在内存中执行引导程序
- 读取引导程序的配置文件(/var/lib/tftpboot/pxelinux.cfg/default)
- 读取default中的内容
- vmlinuz内核
- initrd.img驱动程序(一定要匹配OS,不通用)
- 。。。
PXE工作原理(有图有真相)-阿里云开发者社区
1.2 参考资料
保姆级使用PXE方法安装centos系统各类踩坑成功经验分享–(1)_wx63ec6f40cd038的技术博客_51CTO博客
【手把手宝宝教程】PXE批量安装centos_pxe安装centos-CSDN博客
Openeuler搭建PXE 批量装机环境(uefi启动)_pxe uefi-CSDN博客
1.3 pxe服务器信息
系统:centos7
IP:10.0.0.26
要安装的镜像是centos7.9
1.4 centos 7 传统Legacy启动
关闭 防火墙、selinux
# 关闭 防火墙
systemctl stop firewalld
systemctl disable firewalld# 查看 selinux
getenforce
# 关闭 selinux
setenforce 0
sed -i 's/SELINUX=enforcing/SELINUX=disabled/g' /etc/sysconfig/selinux
# 验证 selinux
getenforce
grep SELINUX= /etc/sysconfig/selinux
安装软件包
yum install dhcp tftp-server xinetd syslinux httpd -y
httpd负责传输安装包tftp负责传输引导和内核文件dhcp负责为客户端分配地址,并指定tftp服务器地址xinetd动态管理tftp的软件
配置tftp服务
把 disable = yes 改成 disable = no
TFTP服务的根目录 /var/lib/tftpboot
vim /etc/xinetd.d/tftp
[root@centos7 dhcp]# vim /etc/xinetd.d/tftp # default: off
# description: The tftp server serves files using the trivial file transfer \
#       protocol.  The tftp protocol is often used to boot diskless \
#       workstations, download configuration files to network-aware printers, \
#       and to start the installation process for some operating systems.
service tftp
{socket_type             = dgramprotocol                = udpwait                    = yesuser                    = rootserver                  = /usr/sbin/in.tftpd# TFTP服务的根目录(PXE 启动文件需要放在这里)。-s 安全模式server_args             = -s /var/lib/tftpboot# 把 disable = yes 改成 disable = nodisable                 = noper_source              = 11cps                     = 100 2flags                   = IPv4
}
配置dhcp服务-Legacy
把模板文件复制过来
rm -f /etc/dhcp/dhcpd.conf
cp /usr/share/doc/dhcp-4.2.5/dhcpd.conf.example /etc/dhcp/dhcpd.conf
vi /etc/dhcp/dhcpd.conf
传统Legacy启动 是用
pxelinux.0;
uefi启动 是用grubx64.efi
# option definitions common to all supported networks...
option domain-name "example.org";
option domain-name-servers ns1.example.org, ns2.example.org;# 在这里添加一下2行【一行写完要加分号 ;】
# 指定了PXE启动过程中的 TFTP服务器IP地址(10.0.0.26),客户端获取 IP 后会从这台服务器下载启动文件
next-server 10.0.0.26;
# 指定了客户端从 TFTP服务器的根目录 下载 pxelinux.0 这个文件
filename "/pxelinux.0";
这段用vi粘贴,vim粘贴格式会乱
设置dhcp 【这里只配了部分,没用上的注释掉了】 删除原来的 10dd
# A slightly different configuration for an internal subnet.
subnet 10.0.0.0 netmask 255.255.255.0 {# 定义 分配的IP地址范围range 10.0.0.100 10.0.0.200;# 指定nds# option domain-name-servers 10.0.0.26;# 指定客户端的默认域名# option domain-name "internal.example.org";# 指定 默认网关IP# option routers 10.5.5.1;# 指定子网的广播地址option broadcast-address 10.0.0.255;# 默认租约时间(单位:秒)default-lease-time 600;# 最大租约时间(单位:秒)max-lease-time 7200;
}
配置httpd服务
mkdir /var/www/html/cento7-iso
把安装的centos7系统镜像挂载到 /var/www/html/cento7-iso
umount /dev/cdrom
mount /dev/cdrom /var/www/html/cento7-iso
ls /var/www/html/cento7-iso
[root@centso7 ~]# mkdir /var/www/html/cento7-iso
[root@centso7 ~]#
[root@centso7 ~]# lsblk
NAME            MAJ:MIN RM  SIZE RO TYPE MOUNTPOINT
sda               8:0    0  120G  0 disk
├─sda1            8:1    0    1G  0 part /boot
└─sda2            8:2    0  119G  0 part ├─centos-root 253:0    0   50G  0 lvm  /├─centos-swap 253:1    0  7.9G  0 lvm  [SWAP]└─centos-home 253:2    0 61.1G  0 lvm  /home
sr0              11:0    1  4.4G  0 rom  /mnt
[root@centso7 ~]# umount /dev/cdrom
[root@centso7 ~]#
[root@centso7 ~]# mount /dev/cdrom /var/www/html/cento7-iso
mount: /dev/sr0 写保护,将以只读方式挂载
[root@centso7 ~]#
[root@centso7 ~]# ls /var/www/html/cento7-iso
CentOS_BuildTag  GPL       LiveOS    RPM-GPG-KEY-CentOS-7
EFI              images    Packages  RPM-GPG-KEY-CentOS-Testing-7
EULA             isolinux  repodata  TRANS.TBL
[root@centso7 ~]#
启动服务
# 启动dhcp服务
systemctl enable dhcpd --now
# 启动tftp服务
systemctl enable xinetd --now
# 启动httpd
systemctl enable httpd --now# 验证
systemctl status dhcpdsystemctl status xinetdsystemctl status httpd
重启服务
# dhcp服务
systemctl restart dhcpd
# tftp服务
systemctl restart xinetd
# httpd
systemctl restart httpd
拷贝文件到tftp目录-Legacy
# 拷贝 pxelinux.0 文件
cp /usr/share/syslinux/pxelinux.0 /var/lib/tftpboot/# 创建 pxelinux.cfg 目录
mkdir /var/lib/tftpboot/pxelinux.cfg# 把启动文件拷过来
cp /var/www/html/cento7-iso/isolinux/*  /var/lib/tftpboot/cp /var/www/html/cento7-iso/isolinux/isolinux.cfg  /var/lib/tftpboot/pxelinux.cfg/default
# 目录结构
[root@centso7 ~]# tree /var/www/html/cento7-iso/isolinux/
/var/www/html/cento7-iso/isolinux/
├── boot.cat
├── boot.msg
├── grub.conf
├── initrd.img
├── isolinux.bin
├── isolinux.cfg
├── memtest
├── pxelinux.0
├── pxelinux.cfg
│ └── default
├── splash.png
├── TRANS.TBL
├── vesamenu.c32
└── vmlinuz1 directory, 13 files
[root@centso7 ~]#
配置本地yum源
配置这个是给使用 kickstart图形化配置工具 用的,不配置development仓库,工具里的软件包是看不了的,不用可以跳过
用http版本
cat <<EOF > /etc/yum.repos.d/pxe.repo
# 仓库名一定得是 development
[development]
name=pxe
baseurl=http://10.0.0.26/cento7-iso
enabled=1
gpgcheck=0
EOFcat /etc/yum.repos.d/pxe.repo
本地镜像版本
cat <<EOF > /etc/yum.repos.d/pxe.repo
# 仓库名一定得是 development
[development]
name=pxe
baseurl=file:///var/www/html/cento7-iso
enabled=1
gpgcheck=0
EOFcat /etc/yum.repos.d/pxe.repo
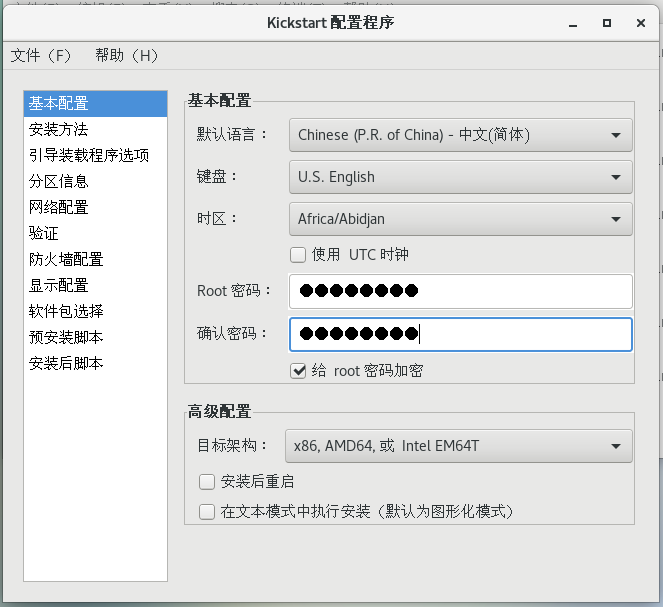
配置kickstart文件
建议把 系统镜像 手动安装一遍(如果要手动设置分区,bios里要改 传统Legacy启动 或者 UEFI启动。自动分区就忽略),安装过程中进行的所有选择 都会保存到名为
anaconda-ks.cfg(root目录中)
然后再把这个 ks文件拿到 kickstart图形化配置工具中改
mkdir /var/www/html/cento7-ks
vim /var/www/html/cento7-ks/ks.cfg
ks.cfg 文件内容概要
root用户的密码"123456"
创建user用户,密码'redhat@123'
默认语言:中文
时区:上海
第一个链路up的网口,设置为dhcp
使用自动分区(LVM),不自动创建 /home 分区
使用网络安装源:"http://10.0.0.26/cento7-iso"
指定了内核参数
#platform=x86, AMD64, 或 Intel EM64T
#version=DEVEL
# Install OS instead of upgrade
install
# Keyboard layouts
keyboard 'us'
# Root password
rootpw --iscrypted $1$jlSVGbmc$D2w02una566sowaKkqnB61
# System language
lang zh_CN
# System authorization information
auth  --useshadow  --passalgo=sha512
# Use graphical install
graphical
firstboot --disable
# SELinux configuration
selinux --disabled# Firewall configuration
firewall --disabled
# Network information
network --bootproto=dhcp --device=link
# Reboot after installation
reboot
# System timezone
timezone Asia/Shanghai
# Use network installation
url --url="http://10.0.0.26/cento7-iso"
# System bootloader configuration
bootloader --append=" crashkernel=auto"
# Clear the Master Boot Record
zerombr
# Partition clearing information
clearpart --all --initlabel
# 分区设置
autopart --type=lvm --nohome%post
#!/bin/bash
useradd user
echo 'redhat@123' | passwd --stdin user
%end%packages
@^gnome-desktop-environment
@base
@core
@desktop-debugging
@dial-up
@directory-client
@fonts
@gnome-apps
@gnome-desktop
@guest-agents
@guest-desktop-agents
@input-methods
@internet-browser
@java-platform
@multimedia
@network-file-system-client
@networkmanager-submodules
@office-suite
@print-client
@x11
chrony
kexec-tools%end%addon com_redhat_kdump --enable --reserve-mb='auto'%end
启动菜单修改-Legacy
要手动新增启动菜单
vim /var/lib/tftpboot/pxelinux.cfg/default
配置文件内容
# 启动选项倒计时:6秒【原来是60秒(600)】
timeout 60# 手动安装 启动项【不想用ks自动安装,要像iso那样手动一步一步来】
LABEL linux7.9-manualmenu label ^Install CentOS 7(Manual)KERNEL vmlinuz# inst.repo 安装源、ip=dhcp 系统进入安装环境后,继续使用 DHCPappend initrd=initrd.img inst.repo=http://10.0.0.26/cento7-iso ip=dhcp# 使用ks自动安装 启动项
LABEL linux7.9-automenu label ^Install CentOS 7(Auto)# 默认启动项,只能一个menu defaultKERNEL vmlinuzappend initrd=initrd.img ks=http://10.0.0.26/cento7-ks/ks.cfg# 以下2个为原来的菜单
label linuxmenu label ^Install CentOS 7kernel vmlinuzappend initrd=initrd.img inst.stage2=hd:LABEL=CentOS\x207\x20x86_64 quietlabel checkmenu label Test this ^media & install CentOS 7kernel vmlinuzappend initrd=initrd.img inst.stage2=hd:LABEL=CentOS\x207\x20x86_64 rd.live.check quiet
配置光驱自动挂载
可选,不想pxe重启了重新挂镜像,就设置 挂载/dev/cdrom
[root@localhost ~]# cat /etc/fstab#
# /etc/fstab
# Created by anaconda on Tue May 27 13:02:57 2025
#
# Accessible filesystems, by reference, are maintained under '/dev/disk'
# See man pages fstab(5), findfs(8), mount(8) and/or blkid(8) for more info
#
UUID=1c87fa92-f938-4d26-9093-63040ef4e570 /                       ext4    defaults        1 1
UUID=4cff2764-6049-4703-bc00-13f8476302fb /boot                   xfs     defaults        0 0
/dev/cdrom      /var/www/html/cento7-iso        auto defaults        0 0
[root@localhost ~]#
1.5 centos 7 uefi启动
步骤基本一致,不一致的步骤如下
备注:如果一定要手动分区,要额外创建efi分区
配置dhcp服务-uefi
把模板文件复制过来
rm -f /etc/dhcp/dhcpd.conf
cp /usr/share/doc/dhcp-4.2.5/dhcpd.conf.example /etc/dhcp/dhcpd.conf
vi /etc/dhcp/dhcpd.conf
传统Legacy启动 是用
pxelinux.0;
uefi启动 是用grubx64.efi
# option definitions common to all supported networks...
option domain-name "example.org";
option domain-name-servers ns1.example.org, ns2.example.org;# 在这里添加一下2行【一行写完要加分号 ;】
# 指定了PXE启动过程中的 TFTP服务器IP地址(10.0.0.26),客户端获取 IP 后会从这台服务器下载启动文件
next-server 10.0.0.26;
# 指定了客户端从 TFTP服务器的根目录 下载 grubx64.efi 这个文件
filename "/grubx64.efi";
这段用vi粘贴,vim粘贴格式会乱
设置dhcp 【这里只配了部分,没用上的注释掉了】
# A slightly different configuration for an internal subnet.
subnet 10.0.0.0 netmask 255.255.255.0 {# 定义 分配的IP地址范围range 10.0.0.100 10.0.0.200;# 指定nds# option domain-name-servers 10.0.0.26;# 指定客户端的默认域名# option domain-name "internal.example.org";# 指定 默认网关IP# option routers 10.5.5.1;# 指定子网的广播地址option broadcast-address 10.0.0.255;# 默认租约时间(单位:秒)default-lease-time 600;# 最大租约时间(单位:秒)max-lease-time 7200;
}
拷贝文件到tftp目录-uefi
如果是arm构架的系统,只需要将grubx64.efi 更换成 grubaa64.efi 即可
cp /var/www/html/cento7-iso/EFI/BOOT/grubx64.efi /var/lib/tftpboot/
cp /var/www/html/cento7-iso/EFI/BOOT/grub.cfg /var/lib/tftpboot/
cp /var/www/html/cento7-iso/images/pxeboot/vmlinuz /var/lib/tftpboot/
cp /var/www/html/cento7-iso/images/pxeboot/initrd.img /var/lib/tftpboot/
ls /var/lib/tftpboot/[root@centos7 yum.repos.d]# ls /var/lib/tftpboot/
grub.cfg grubx64.efi initrd.img vmlinuz
[root@centos7 yum.repos.d]#
grubx64.efi: EFI系统分区中的一个可执行文件,负责在系统启动时提供GRUB菜单和引导加载程序的功能。当UEFI固件寻找可启动的EFI应用程序时,它会加载这个文件来启动GRUB。
vmlinuz:vmlinuz是压缩的Linux内核映像,它是启动Linux系统的核心,它包含了启动系统所需的所有内核代码和模块。
initrd.img:initrd是一个临时的根文件系统,它被加载到内存中,直到真正的根文件系统被挂载。initrd.img是initrd的镜像文件,它包含了系统启动初期所需的驱动和工具,用于支持挂载根文件系统。
grub.cfg:UEFI启动配置文件,定义了内核的路径、启动参数、initramfs的路径等。当系统启动时,GRUB会读取这个文件来确定如何加载操作系统。
启动菜单修改-uefi
要手动新增启动菜单
vim /var/lib/tftpboot/grub.cfg
配置文件内容
set default="1"# 启动选项倒计时:6秒【原来是60秒】
set timeout=6### BEGIN /etc/grub.d/10_linux ###
# 定义菜单项
menuentry 'Install CentOS 7 (Manual)' {# 内核路径(TFTP上的vmlinuz)linuxefi /vmlinuz inst.repo=http://10.0.0.26/cento7-iso ip=dhcp# 初始化镜像路径(TFTP上的initrd.img)initrdefi /initrd.img
}menuentry 'Install CentOS 7 (Auto)' {# 内核路径(TFTP上的vmlinuz)linuxefi /vmlinuz inst.repo=http://10.0.0.26/cento7-iso ip=dhcp ks=http://10.0.0.26/cento7-ks/ks.cfg# 初始化镜像路径(TFTP上的initrd.img)initrdefi /initrd.img
}# 原来的菜单启动项
### BEGIN /etc/grub.d/10_linux ###
menuentry 'Install CentOS 7' --class fedora --class gnu-linux --class gnu --class os {linuxefi /images/pxeboot/vmlinuz inst.stage2=hd:LABEL=CentOS\x207\x20x86_64 quietinitrdefi /images/pxeboot/initrd.img
}
menuentry 'Test this media & install CentOS 7' --class fedora --class gnu-linux --class gnu --class os {linuxefi /images/pxeboot/vmlinuz inst.stage2=hd:LABEL=CentOS\x207\x20x86_64 rd.live.check quietinitrdefi /images/pxeboot/initrd.img
}
1.6 报错
文件权限问题
# 直接全改最快
[root@centos7 lib]# chmod 655 /var/lib/tftpboot/*
[root@centos7 lib]#
[root@centos7 lib]# ll /var/lib/tftpboot
总用量 60868
-rw-r-xr-x 1 root root     2048 8月   7 16:22 boot.cat
-rw-r-xr-x 1 root root       84 8月   7 16:22 boot.msg
-rw-r-xr-x 1 root root      281 8月   7 16:22 grub.conf
-rw-r-xr-x 1 root root 55129656 8月   7 16:23 initrd.img
-rw-r-xr-x 1 root root    24576 8月   7 16:23 isolinux.bin
-rw-r-xr-x 1 root root     3032 8月   7 16:23 isolinux.cfg
-rw-r-xr-x 1 root root   190896 8月   7 16:23 memtest
-rw-r-xr-x 1 root root    26759 8月   7 16:30 pxelinux.0
drw-r-xr-x 2 root root       21 8月   7 17:10 pxelinux.cfg
-rw-r-xr-x 1 root root      186 8月   7 16:23 splash.png
-rw-r-xr-x 1 root root     2215 8月   7 16:23 TRANS.TBL
-rw-r-xr-x 1 root root   153104 8月   7 16:23 vesamenu.c32
-rw-r-xr-x 1 root root  6769256 8月   7 16:23 vmlinuz
[root@centos7 lib]#
使用传统Legacy启动时,/var/lib/tftpboot 下的 pxelinux.cfg目录 要确保可以执行,不然可能会如下报错
Network boot from Intel E1000, Inc.
Copyright (C) 2003-2021 VMware, Inc.
Copyright (C) 1997-2000 Intel CorporationCLIENT MAC ADDR: 00 0C 29 E4 AA 17  GUID: 564D21E9-5672-D10E-AA30-816D6EE4AA17
CLIENT IP: 10.0.0.100  MASK: 255.255.255.0  DHCP IP: 10.0.0.26PXELINUX 4.05 0x5bd8f633  Copyright (C) 1994-2011 H. Peter Anvin et al
PXE entry point found (we hope) at 9DDB:0106 via plan A
UNDI code segment at 9DDB len 0BCE
UNDI data segment at 9845 len 5960
Getting cached packet 01 02 03
My IP address seems to be 00000064 10.0.0.100
ip=10.0.0.100-10.0.0.26:10.0.0.0:255.255.255.0
BOOTIF=01-00-29-e4-aa-17
SYSUUID=564d21e9-5672-d10e-aa30-816d6ee4aa17
# TFTP 前缀:无法找到配置文件
TFTP prefix:
Unable to locate configuration fileBoot failed: press a key to retry, or wait for reset...
efi启动问题
虚拟机的uefi启动,不会显示有没有拿到dhcp地址
要确保dhcp指定的文件正确、tftp目录下的文件都正确,它才会进到界面
启动 starting timeout scripts
Started Dracut initqueue hook 后报错
检查启动菜单的安装源,是不是没改,还是默认的【对着启动项按下 tab键就可以看】
 [  OK  ] Started Show Plymouth Boot Screen.[  OK  ] Reached target Paths.[  OK  ] Started Forward Password Requests to Plymouth Directory Watch.[  OK  ] Reached target Basic System.[  OK  ] Started Device-Mapper Multipath Device Controller.[  OK  ] Started open-iscsi.[  OK  ] Starting Dracut initqueue hook...Started Dracut initqueue hook.
15.2453491 sd 2:0:0:0: [sda] Assuming drive cache: write through
。。。。。
230.7796491 dracut-initqueue[701]: Warning: dracut-initqueue timeout - starting timeout scripts
231.2397061 dracut-initqueue[701]: Warning: dracut-initqueue timeout - starting timeout scripts
231.2980911 dracut-initqueue[701]: Warning: Could not boot.
231.3187181 dracut-initqueue[701]: Warning: /dev/root does not existStarting Dracut Emergency Shell...
Warning: /dev/root does not existGenerating "/run/initramfs/rdsosreport.txt"Entering emergency mode. Exit the shell to continue.
Type "journalctl" to view system logs.
You might want to save "/run/initramfs/rdsosreport.txt" to a USB stick or /boot
after mounting them and attach it to a bug report.dracut:/#