深度学习-ResNet50V2训练
一、导入数据
import torch
import torch.nn as nn
from torchvision import transforms, datasets
import os,PIL,pathlib,warnings
warnings .filterwarnings("ignore")
data_dir=r"D:\xiangkeyi\Downloads\data"
train_transforms=transforms.Compose([transforms.Resize([224,224]),transforms.ToTensor(),transforms.Normalize(mean=[0.485,0.456,0.406],std=[0.229,0.224,0.225])
])
total_data =datasets.ImageFolder(data_dir, transform=train_transforms)
total_data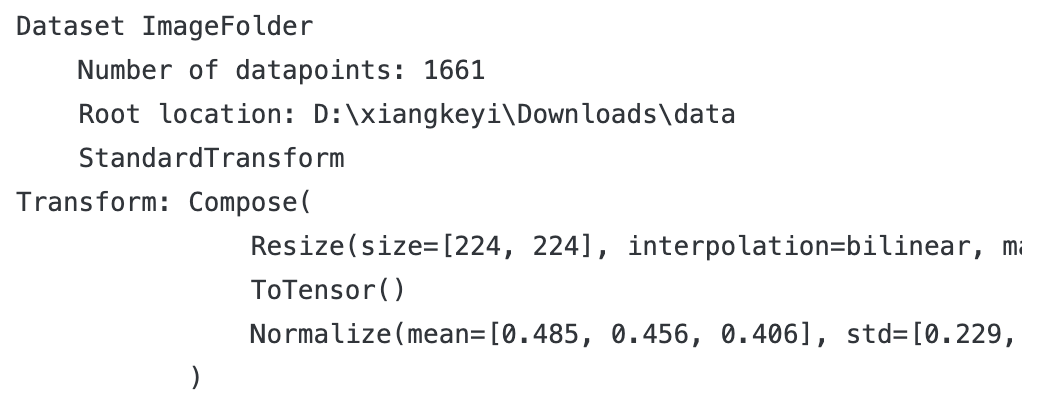
1train_size = int(len(total_data) * 0.8)
test_size = len(total_data)- train_size
train_dataset,test_dataset = torch.utils.data.random_split(total_data,[train_size,test_size])
train_dataset,test_dataset
for x,y in train_dl:print("Shape of x [N,C,H,W]:",x.shape)print("Shape of y:",y.shape,y.dtype)break
二、构建模型
1.搭建ResNet50V2模型
1import torch
import torch.nn as nn
import torchvision.models as models
def identity_block_v2(input_tensor, kernel_size, filters, stage, block):"""ResNetV2恒等映射块(预激活结构)"""filters1, filters2, filters3 = filters# 预激活:BN -> ReLUx = nn.BatchNorm2d(input_tensor.size(1))(input_tensor)x = nn.ReLU(inplace=True)(x)# 1x1卷积x = nn.Conv2d(input_tensor.size(1), filters1, 1, bias=False)(x)x = nn.BatchNorm2d(filters1)(x)x = nn.ReLU(inplace=True)(x)# 3x3卷积x = nn.Conv2d(filters1, filters2, kernel_size, padding=kernel_size//2, bias=False)(x)x = nn.BatchNorm2d(filters2)(x)x = nn.ReLU(inplace=True)(x)# 1x1卷积(无激活)x = nn.Conv2d(filters2, filters3, 1, bias=False)(x)# 残差连接(无额外激活)x = x + input_tensorreturn xdef conv_block_v2(input_tensor, kernel_size, filters, stage, block, strides=(2,2)):"""ResNetV2卷积块(预激活结构,用于维度调整)"""filters1, filters2, filters3 = filters# 主路径预激活x = nn.BatchNorm2d(input_tensor.size(1))(input_tensor)x = nn.ReLU(inplace=True)(x)# 1x1卷积(带步长)x = nn.Conv2d(input_tensor.size(1), filters1, 1, stride=strides, bias=False)(x)x = nn.BatchNorm2d(filters1)(x)x = nn.ReLU(inplace=True)(x)# 3x3卷积x = nn.Conv2d(filters1, filters2, kernel_size, padding=kernel_size//2, bias=False)(x)x = nn.BatchNorm2d(filters2)(x)x = nn.ReLU(inplace=True)(x)# 1x1卷积x = nn.Conv2d(filters2, filters3, 1, bias=False)(x)# 投影路径(shortcut)shortcut = nn.BatchNorm2d(input_tensor.size(1))(input_tensor)shortcut = nn.ReLU(inplace=True)(shortcut)shortcut = nn.Conv2d(input_tensor.size(1), filters3, 1, stride=strides, bias=False)(shortcut)# 残差连接x = x + shortcutreturn xdef ResNet50V2(input_shape=[224,224,3], num_classes=1000):"""构建ResNet50V2模型(预激活结构)"""class ResNetV2(nn.Module):def __init__(self, input_channels, num_classes):super(ResNetV2, self).__init__()# 初始卷积层self.init_conv = nn.Conv2d(input_channels, 64, 7, stride=2, padding=3, bias=False)self.init_bn = nn.BatchNorm2d(64)self.init_relu = nn.ReLU(inplace=True)self.max_pool = nn.MaxPool2d(3, stride=2, padding=1)# 分类层self.final_bn = nn.BatchNorm2d(2048)self.final_relu = nn.ReLU(inplace=True)self.avg_pool = nn.AdaptiveAvgPool2d((1,1))self.fc = nn.Linear(2048, num_classes)def forward(self, x):# 初始层x = self.init_conv(x)x = self.init_bn(x)x = self.init_relu(x)x = self.max_pool(x)# Stage 2x = conv_block_v2(x, 3, [64, 64, 256], stage=2, block='a', strides=(1,1))x = identity_block_v2(x, 3, [64, 64, 256], stage=2, block='b')x = identity_block_v2(x, 3, [64, 64, 256], stage=2, block='c')# Stage 3x = conv_block_v2(x, 3, [128, 128, 512], stage=3, block='a')x = identity_block_v2(x, 3, [128, 128, 512], stage=3, block='b')x = identity_block_v2(x, 3, [128, 128, 512], stage=3, block='c')x = identity_block_v2(x, 3, [128, 128, 512], stage=3, block='d')# Stage 4x = conv_block_v2(x, 3, [256, 256, 1024], stage=4, block='a')x = identity_block_v2(x, 3, [256, 256, 1024], stage=4, block='b')x = identity_block_v2(x, 3, [256, 256, 1024], stage=4, block='c')x = identity_block_v2(x, 3, [256, 256, 1024], stage=4, block='d')x = identity_block_v2(x, 3, [256, 256, 1024], stage=4, block='e')x = identity_block_v2(x, 3, [256, 256, 1024], stage=4, block='f')# Stage 5x = conv_block_v2(x, 3, [512, 512, 2048], stage=5, block='a')x = identity_block_v2(x, 3, [512, 512, 2048], stage=5, block='b')x = identity_block_v2(x, 3, [512, 512, 2048], stage=5, block='c')# 最终分类x = self.final_bn(x)x = self.final_relu(x)x = self.avg_pool(x)x = torch.flatten(x, 1)x = self.fc(x)return xinput_channels = input_shape[2]model = ResNetV2(input_channels, num_classes)return modelmodel = ResNet50V2()
model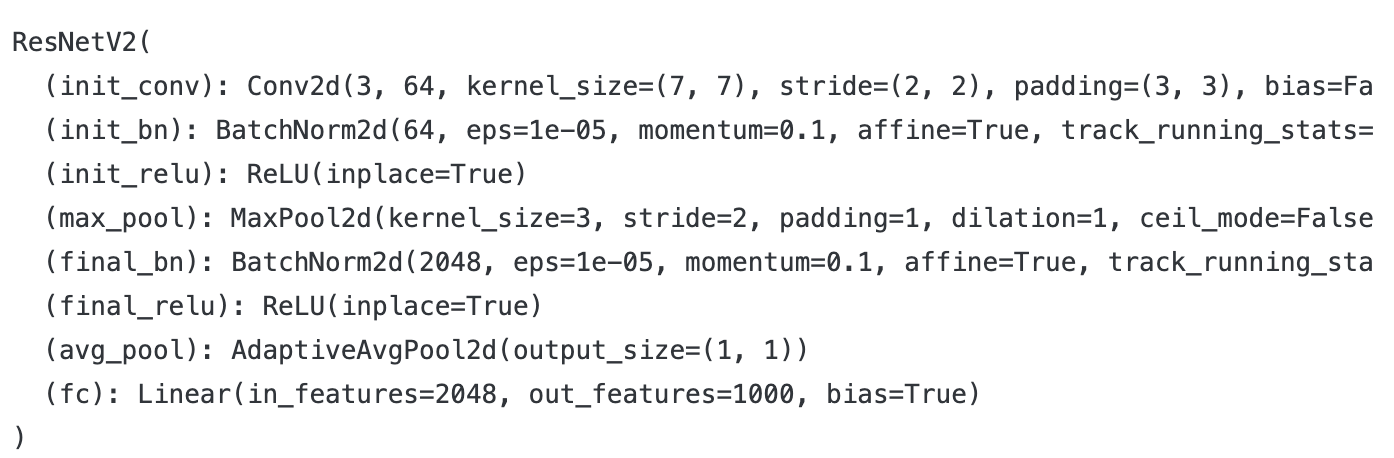
#统计模型参数量以及其他指标
import torchsummary as summary
summary.summary(model,(3,224,224)) 
2.构建训练函数
def train(dataloader,model,optimizer,loss_fn):size = len(dataloader.dataset)num_batches = len(dataloader)train_acc,train_loss = 0,0for X,y in dataloader:pred = model(X)loss = loss_fn(pred,y)optimizer.zero_grad()loss.backward()optimizer.step()train_loss += loss.item()train_acc += (pred.argmax(1) == y).type(torch.float).sum().item()train_loss /= num_batchestrain_acc /= sizereturn train_acc,train_loss3.构建测试函数
def test (dataloader, model, loss_fn):size= len(dataloader.dataset)#测试集的大小num_batches = len(dataloader)#批次数目,(size/batch_size,向上取整)test_loss, test_acc = 0,0#当不进行训练时,停止梯度更新,节省计算内存消耗with torch.no_grad():for imgs, target in dataloader:#计算losstarget_pred = model(imgs)loss=loss_fn(target_pred, target)test_loss += loss.item()test_acc+= (target_pred.argmax(1) == target).type(torch.float).sum().item()test_acc/=sizetest_loss /= num_batchesreturn test_acc, test_loss4.正式训练
import copy
optimizer= torch.optim.AdamW(model.parameters(), lr= 1e-4)
loss_fn= nn.CrossEntropyLoss()#创建损失函数
epochs=10
train_loss =[]
train_acc=[]
test_loss=[]
test_acc=[]
best_acc =0 #设置一个最佳准确率,作为最佳模型的判别指标
for epoch in range(epochs):model.train()epoch_train_acc, epoch_train_loss = train(train_dl, model,optimizer,loss_fn)model.eval()epoch_test_acc, epoch_test_loss = test(test_dl, model, loss_fn)#保存最佳模型到best_modelif epoch_test_acc > best_acc:best_acc= epoch_test_accbest_model = copy.deepcopy(model)train_acc.append(epoch_train_acc)train_loss.append(epoch_train_loss)test_acc.append(epoch_test_acc)test_loss.append(epoch_test_loss)#获取当前的学习率lr = optimizer.state_dict()['param_groups'][0]['lr']template=('Epoch:{:2d},Train_acc:{:.1f},Train_loss:{:.3f},Test_acc:{:.1f}%,Test_loss:{:.3f},Lr:{:.2E}')print(template.format(epoch+1, epoch_train_acc*100, epoch_train_loss,epoch_test_acc*100, epoch_test_loss, lr))
#保存最佳模型到文件中
PATH='./best_model.pth'#保存的参数文件名
torch.save(best_model.state_dict(), PATH)
print('Done')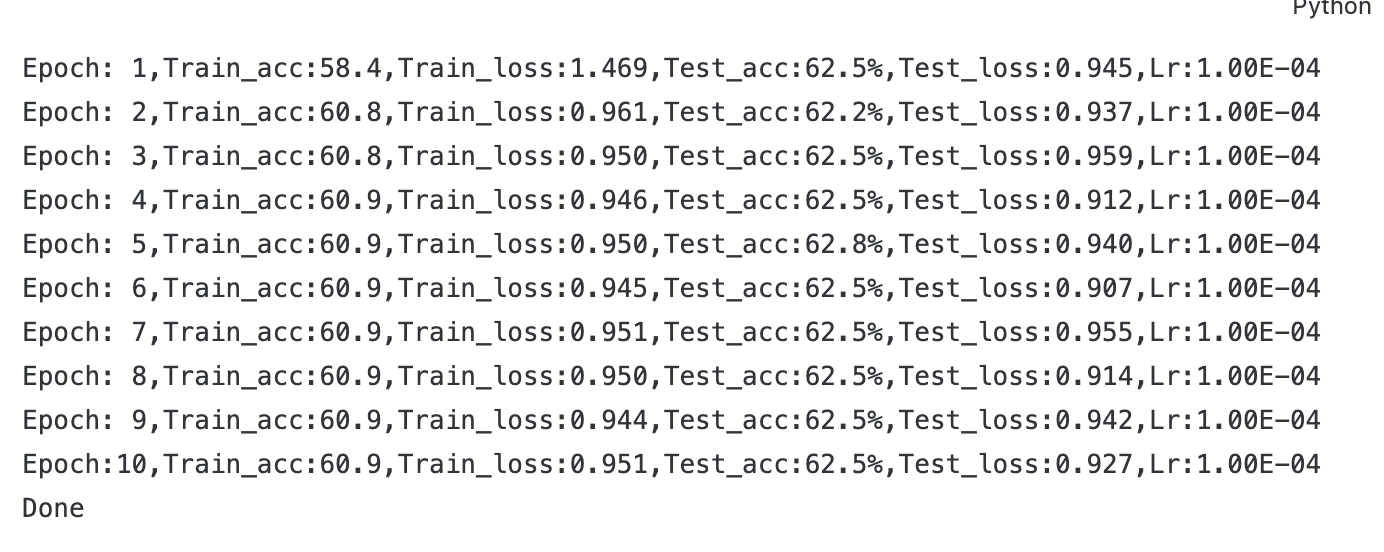 三、模型评估
1.Loss 和Accuracy图
import matplotlib.pyplot as plt
from datetime import datetime
warnings.filterwarnings("ignore") #忽略警告信息
plt.rcParams['font.sans-serif']=['SimHei'] #用来正常显示中文标签
plt.rcParams['axes.unicode_minus'] = False #用来正常显示负号
plt.rcParams['figure.dpi']= 100 #分辩率
current_time=datetime.now()#获取当前时间epochs_range = range(epochs)plt.figure(figsize=(12, 3))
plt.subplot(1,2,1)plt.plot(epochs_range, train_acc, label='Training Accuracy')
plt.plot(epochs_range, test_acc, label='Test Accuracy')
plt.legend(loc='lower right')
plt.title('Training and Validation Accuracy')
plt.xlabel(current_time)#打卡请带上时间戳,否则代码截图无效
plt.subplot(1, 2,2)
plt.plot(epochs_range, train_loss, label='Training Loss')
plt.plot(epochs_range, test_loss, label='Test Loss')
plt.legend(loc='upper right')
plt.title('Training and Validation Loss')
plt.show()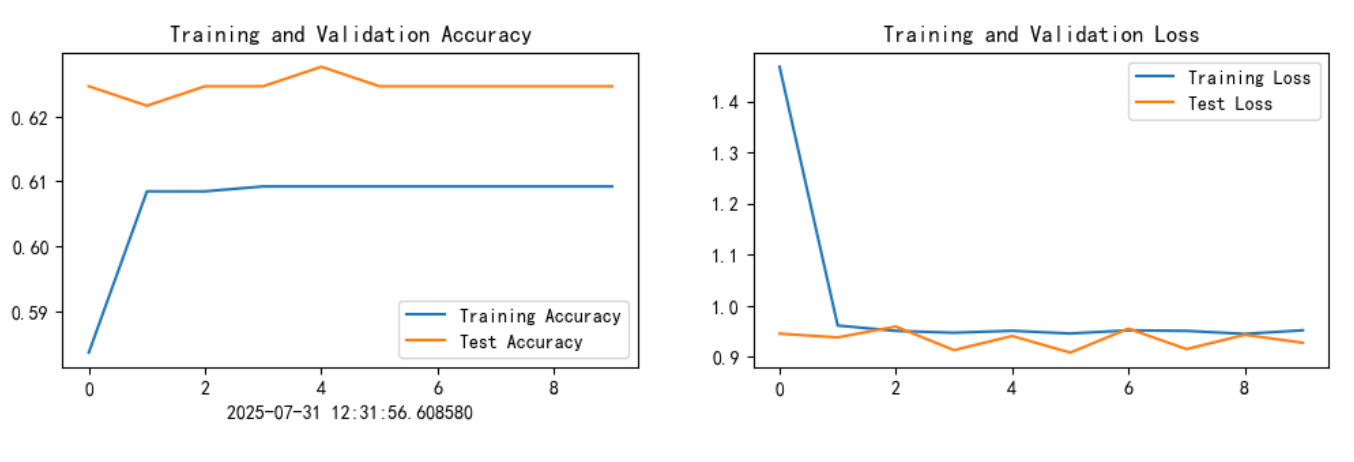
#将参数加载到model当中
best_model.load_state_dict(torch.load(PATH))
epoch_test_acc, epoch_test_loss = test(test_dl, best_model, loss_fn)
epoch_test_acc, epoch_test_loss
四、总结
1. 激活函数与批归一化的位置(核心差异)
- 原始 ResNet:采用 “卷积→批归一化(BN)→激活函数(ReLU)” 的顺序,激活函数位于卷积操作之后。
- ResNetV2:采用 “预激活” 设计,顺序为 “批归一化(BN)→激活函数(ReLU)→卷积”,激活函数位于卷积操作之前。
这一设计能缓解深层网络的梯度消失问题,使模型在训练时更稳定,尤其适合更深的网络结构。
2. 残差连接的处理方式
- 原始 ResNet:残差块的输入直接与卷积序列的输出相加(即 “卷积序列输出 + 原始输入”),相加后再经过激活函数。
- ResNetV2:残差块的输入先经过 BN 和 ReLU 处理(预激活),再与主路径的卷积输出相加,且相加后不额外添加激活函数,激活仅在每个卷积阶段的开头进行。
这种方式使梯度传播更直接,提升了特征融合效率。
3. 卷积块的 shortcut 设计
- 原始 ResNet:当需要调整特征图尺寸或通道数时,shortcut 路径通过 1x1 卷积 + BN 实现维度匹配,且卷积操作在激活函数之前。
- ResNetV2:shortcut 路径同样使用 1x1 卷积,但卷积前会对输入进行 BN 和 ReLU 处理(与主路径保持一致的预激活逻辑),确保主路径与 shortcut 的特征分布更一致。
4. 训练与性能特性
- ResNetV2 的预激活结构使网络在反向传播时梯度流动更顺畅,训练更深的网络(如 1000 层以上)时收敛性更好。
- 在相同深度下,ResNetV2 通常比原始 ResNet 具有更高的特征表达能力,尤其在 ImageNet 等大规模数据集上表现更优。
简言之,ResNetV2 是对原始 ResNet 的结构性优化,通过调整激活和 BN 的位置,解决了深层网络训练中的稳定性问题,同时保持了残差网络 “跳过连接” 的核心优势。