vue3实战九、vue3+vue-cropper实现头像修改
vue3实战九、vue3+elementPlus+cropper实现头像修改
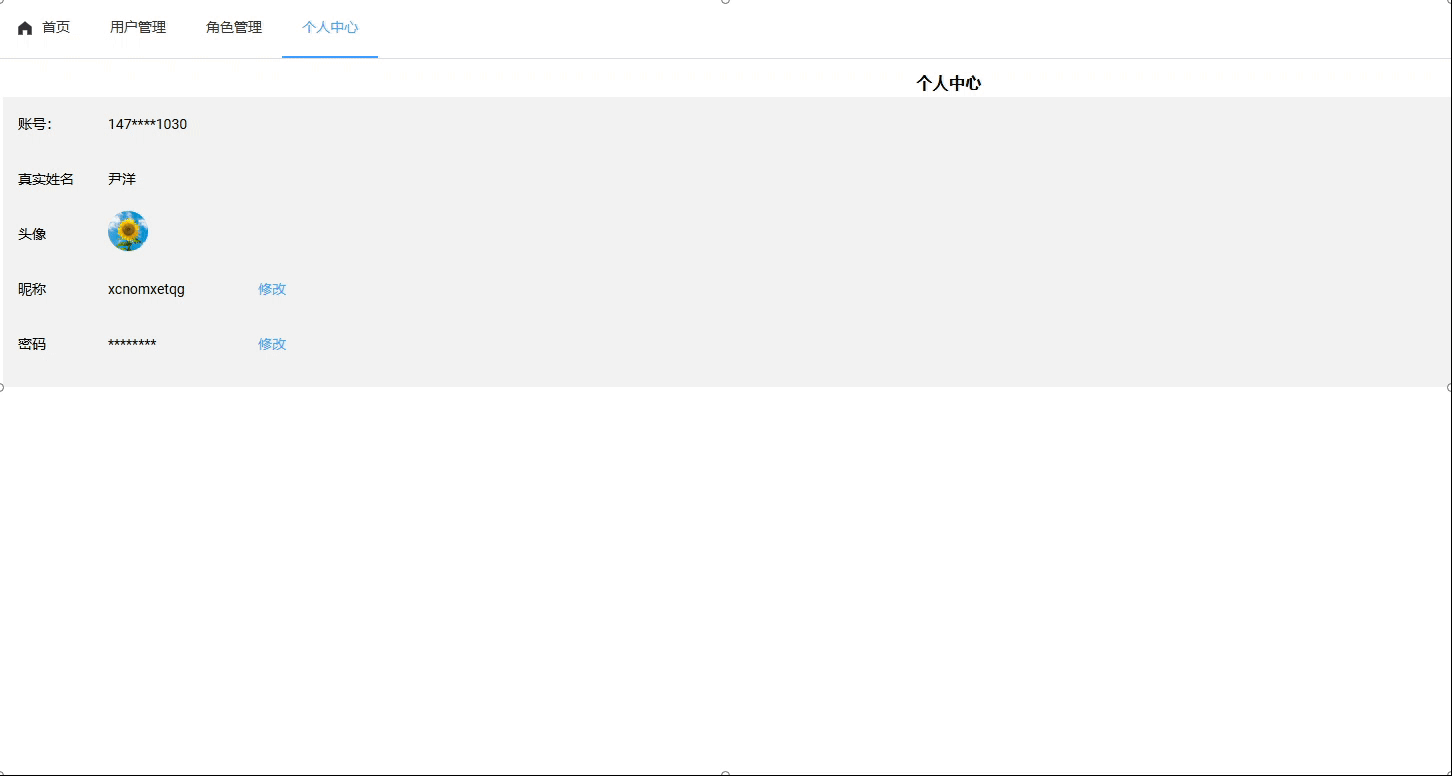
效果
实现步骤
第一步、安装vue-cropper
npm install vue-cropper@next -d --save
第二步、组件引入vue-cropper
import "vue-cropper/dist/index.css";
import { VueCropper } from "vue-cropper";
第三步、实现点击修改弹窗布局
使用img环境elementPlus的el-dialog弹窗组件,分为两个区域,一个是裁剪区,一个是结果区域,底部添加向左旋转,向右旋转,放大,缩小的功能。
<template><div><!-- 点击头像区域打开裁剪器 --><div class="user-info-head" @click="editCropper"><img :src="options.img" title="点击上传头像" class="img-circle img-lg" /></div><!-- 裁剪弹窗 --><el-dialogv-model="open":title="title"width="800px"append-to-body@opened="modalOpened"@close="closeDialog"><el-row><!-- 裁剪区域 --><el-col :xs="24" :md="12" :style="{ height: '350px' }"><vue-cropperref="cropperRef":img="options.img":info="true":auto-crop="options.autoCrop":auto-crop-width="options.autoCropWidth":auto-crop-height="options.autoCropHeight":fixed-box="options.fixedBox":output-type="options.outputType"@real-time="realTime"v-if="visible"/></el-col><!-- 预览区域 --><el-col :xs="24" :md="12" :style="{ height: '350px' }"><div class="avatar-upload-preview"><img :src="previews.url" :style="previews.img" /></div></el-col></el-row><br /><!-- 操作按钮 --><el-row><!-- 选择图片 --><el-col :lg="2" :sm="3" :xs="3"><el-uploadaction="#":http-request="requestUpload":show-file-list="false":before-upload="beforeUpload"><el-button size="small">选择<SvgIcon name="ele-UploadFilled" size="small"></SvgIcon><!-- <el-icon class="el-icon--right"><Upload /></el-icon> --></el-button></el-upload></el-col><!-- 缩放 --><el-col :lg="{ span: 1, offset: 2 }" :sm="2" :xs="2"><el-buttonstyle="text-align: center"size="small"@click="changeScale(1)"><SvgIcon size="small" name="ele-Plus"></SvgIcon></el-button></el-col><el-col :lg="{ span: 1, offset: 1 }" :sm="2" :xs="2"><el-buttonstyle="text-align: center"size="small"@click="changeScale(-1)"><SvgIcon size="small" name="ele-Minus"></SvgIcon></el-button></el-col><!-- 旋转 --><el-col :lg="{ span: 1, offset: 1 }" :sm="2" :xs="2"><el-button size="small" style="text-align: center" @click="rotateLeft"><SvgIcon size="small" name="ele-RefreshLeft"></SvgIcon></el-button></el-col><el-col :lg="{ span: 1, offset: 1 }" :sm="2" :xs="2"><el-buttonsize="small"style="text-align: center"@click="rotateRight"><SvgIcon size="small" name="ele-RefreshRight"></SvgIcon></el-button></el-col><!-- 提交 --><el-col :lg="{ span: 2, offset: 6 }" :sm="2" :xs="2"><el-button type="primary" size="small" @click="uploadImg">提 交</el-button></el-col></el-row></el-dialog></div>
</template>
第四步、实现图片裁剪及上传逻辑
-
导入必要的模块和依赖
首先导入了Vue 3的基本钩子函数(如ref,reactive, 生命周期钩子等)以及vue-cropper插件相关的资源,引入了项目中使用的状态管理库Pinia的store模块 (useAuthStore)。使用了防抖函数debounce来优化resize事件的处理。引入了Element Plus UI库中的图标组件Upload。mport { ref, reactive, onMounted, onBeforeUnmount } from "vue"; import "vue-cropper/dist/index.css"; import { VueCropper } from "vue-cropper"; // 假设你使用 Pinia 并已创建了 authStore import { useAuthStore } from "../../stores/auth"; // import { uploadAvatar } from "@/api/system/user"; import { debounce } from "@/utils/index.js"; // Element Plus 图标 (用于 Upload 按钮) import { Upload } from "@element-plus/icons-vue"; -
定义
Props和Refs
定义了一个Prop user,用于接收用户信息对象,默认为空对象,使用ref和reactive创建响应式变量来控制弹窗显示、裁剪器配置选项、预览数据等。const props = defineProps({user: {type: Object,default: () => ({}),}, });const authStore = useAuthStore(); const open = ref(false); // 控制弹窗显示 const visible = ref(false); // 控制 vue-cropper 组件的显示 (解决 resize 问题) const cropperRef = ref(null); // 引用 vue-cropper 组件 const resizeHandler = ref(null); // 存储防抖后的 resize 事件处理器 const title = "修改头像"; -
初始化裁剪器配置
options对象初始化了裁剪器的基本设置,包括图片来源、自动裁剪尺寸、固定裁剪框等。
const options = reactive({img: authStore.userInfo?.imageUrl || "", // 使用 Pinia store 的 userInfo.imageUrlautoCrop: true,autoCropWidth: 200,autoCropHeight: 200,fixedBox: true,outputType: "png",
});
const previews = ref({}); // 预览数据
- 实现功能方法
editCropper: 方法用于打开编辑头像的弹窗。modalOpened:方法在弹窗打开时调用,添加窗口大小调整监听器以刷新裁剪器。- 提供了几个方法用于操作裁剪器:
refresh刷新裁剪器,rotateLeft向左旋转图片,rotateRight向右旋转图片,changeScale调整图片缩放比例。beforeUpload:方法用于验证上传文件格式,并将选择的图片转换为Base64格式以便在裁剪器中显示。uploadImg: 方法负责获取裁剪后的图片Blob数据并通过表单提交更新用户的头像(注释部分显示了如何与后端API进行交互,但实际代码被注释掉了)。realTime:方法用于实时预览裁剪效果。closeDialog:方法在关闭对话框时恢复原始头像并清理resize事件监听器。
<script setup>
// 编辑头像 - 打开弹窗
const editCropper = () => {open.value = true;
};
// 弹窗打开后回调
const modalOpened = () => {visible.value = true;// 添加 resize 事件监听器 (带防抖)if (!resizeHandler.value) {resizeHandler.value = debounce(() => {refresh();}, 100);}window.addEventListener("resize", resizeHandler.value);
};// 刷新裁剪器
const refresh = () => {cropperRef.value?.refresh();
};
// 覆盖默认上传行为 (空函数)
const requestUpload = () => {// do nothing, use beforeUpload instead
};
// 向左旋转
const rotateLeft = () => {cropperRef.value?.rotateLeft();
};
// 向右旋转
const rotateRight = () => {cropperRef.value?.rotateRight();
};
// 图片缩放
const changeScale = (num = 1) => {cropperRef.value?.changeScale(num);
};// 上传前处理
const beforeUpload = (file) => {if (!file.type.startsWith("image/")) {ElMessage.error("文件格式错误,请上传图片类型,如:JPG,PNG后缀的文件。");return false; // 阻止上传}const reader = new FileReader();reader.readAsDataURL(file);reader.onload = () => {options.img = reader.result;};return false; // 阻止 el-upload 的默认上传,使用 requestUpload 或这里处理
};// 上传图片
const uploadImg = () => {cropperRef.value?.getCropBlob(async (data) => {const formData = new FormData();formData.append("avatarfile", data, "avatar.png"); // 添加文件名和类型// try {//   const response = await uploadAvatar(formData);//   // 假设 response 包含新的图片 URL//   const newImageUrl = response.imgUrl; // 或 response.data.imgUrl, 根据你的 API 响应结构调整//   // 更新本地状态和 Store//   open.value = false;//   options.img = import.meta.env.VITE_APP_BASE_API + newImageUrl; // 使用 Vite 环境变量//   // 假设你的 authStore 有一个 action 来更新用户信息或头像//   // 方式1: 直接更新 imageUrl (如果 store 允许)//   // authStore.userInfo.imageUrl = options.img//   // 方式2: 调用一个 action 来更新 (推荐)//   await authStore.updateUserInfo({ imageUrl: options.img }); // 假设有一个 updateUserInfo action//   ElMessage.success("修改成功");//   visible.value = false;// } catch (error) {//   console.error("上传头像失败:", error);//   ElMessage.error("修改失败");//   // 可选: 根据需要处理错误// }});
};// 实时预览
const realTime = (data) => {previews.value = data;
};// 关闭弹窗
const closeDialog = () => {// 关闭时恢复原始头像 (如果上传未完成或取消)options.img = authStore.userInfo?.imageUrl || "";visible.value = false;// 移除 resize 事件监听器if (resizeHandler.value) {window.removeEventListener("resize", resizeHandler.value);resizeHandler.value = null;}
};
</script>
第五步、房东方法处理
/*** @param {Function} func* @param {number} wait* @param {boolean} immediate* @return {*}*/
export function debounce(func, wait, immediate) {let timeout, args, context, timestamp, resultconst later = function () {// 据上一次触发时间间隔const last = +new Date() - timestamp// 上次被包装函数被调用时间间隔 last 小于设定时间间隔 waitif (last < wait && last > 0) {timeout = setTimeout(later, wait - last)} else {timeout = null// 如果设定为immediate===true,因为开始边界已经调用过了此处无需调用if (!immediate) {result = func.apply(context, args)if (!timeout) context = args = null}}}return function (...args) {context = thistimestamp = +new Date()const callNow = immediate && !timeout// 如果延时不存在,重新设定延时if (!timeout) timeout = setTimeout(later, wait)if (callNow) {result = func.apply(context, args)context = args = null}return result}
}
第六步、调用方式
  <AvatarCropper />
const AvatarCropper = defineAsyncComponent(() => import("../../components/userAvatar/index.vue")
);
第七步、查看效果
总体代码:
<template><div><!-- 点击头像区域打开裁剪器 --><div class="user-info-head" @click="editCropper"><img :src="options.img" title="点击上传头像" class="img-circle img-lg" /></div><!-- 裁剪弹窗 --><el-dialogv-model="open":title="title"width="800px"append-to-body@opened="modalOpened"@close="closeDialog"><el-row><!-- 裁剪区域 --><el-col :xs="24" :md="12" :style="{ height: '350px' }"><vue-cropperref="cropperRef":img="options.img":info="true":auto-crop="options.autoCrop":auto-crop-width="options.autoCropWidth":auto-crop-height="options.autoCropHeight":fixed-box="options.fixedBox":output-type="options.outputType"@real-time="realTime"v-if="visible"/></el-col><!-- 预览区域 --><el-col :xs="24" :md="12" :style="{ height: '350px' }"><div class="avatar-upload-preview"><img :src="previews.url" :style="previews.img" /></div></el-col></el-row><br /><!-- 操作按钮 --><el-row><!-- 选择图片 --><el-col :lg="2" :sm="3" :xs="3"><el-uploadaction="#":http-request="requestUpload":show-file-list="false":before-upload="beforeUpload"><el-button size="small">选择<SvgIcon name="ele-UploadFilled" size="small"></SvgIcon><!-- <el-icon class="el-icon--right"><Upload /></el-icon> --></el-button></el-upload></el-col><!-- 缩放 --><el-col :lg="{ span: 1, offset: 2 }" :sm="2" :xs="2"><el-buttonstyle="text-align: center"size="small"@click="changeScale(1)"><SvgIcon size="small" name="ele-Plus"></SvgIcon></el-button></el-col><el-col :lg="{ span: 1, offset: 1 }" :sm="2" :xs="2"><el-buttonstyle="text-align: center"size="small"@click="changeScale(-1)"><SvgIcon size="small" name="ele-Minus"></SvgIcon></el-button></el-col><!-- 旋转 --><el-col :lg="{ span: 1, offset: 1 }" :sm="2" :xs="2"><el-button size="small" style="text-align: center" @click="rotateLeft"><SvgIcon size="small" name="ele-RefreshLeft"></SvgIcon></el-button></el-col><el-col :lg="{ span: 1, offset: 1 }" :sm="2" :xs="2"><el-buttonsize="small"style="text-align: center"@click="rotateRight"><SvgIcon size="small" name="ele-RefreshRight"></SvgIcon></el-button></el-col><!-- 提交 --><el-col :lg="{ span: 2, offset: 6 }" :sm="2" :xs="2"><el-button type="primary" size="small" @click="uploadImg">提 交</el-button></el-col></el-row></el-dialog></div>
</template><script setup>
import { ref, reactive, onMounted, onBeforeUnmount } from "vue";
import "vue-cropper/dist/index.css";
import { VueCropper } from "vue-cropper";
// 假设你使用 Pinia 并已创建了 authStoreimport { useAuthStore } from "../../stores/auth";
// import { uploadAvatar } from "@/api/system/user";
import { debounce } from "@/utils/index.js";
// Element Plus 图标 (用于 Upload 按钮)
import { Upload } from "@element-plus/icons-vue";// --- Props ---
const props = defineProps({user: {type: Object,default: () => ({}),},
});const authStore = useAuthStore();
const open = ref(false); // 控制弹窗显示
const visible = ref(false); // 控制 vue-cropper 组件的显示 (解决 resize 问题)
const cropperRef = ref(null); // 引用 vue-cropper 组件
const resizeHandler = ref(null); // 存储防抖后的 resize 事件处理器const title = "修改头像";
const options = reactive({img: authStore.userInfo?.imageUrl || "", // 使用 Pinia store 的 userInfo.imageUrlautoCrop: true,autoCropWidth: 200,autoCropHeight: 200,fixedBox: true,outputType: "png",
});
const previews = ref({}); // 预览数据
// 编辑头像 - 打开弹窗
const editCropper = () => {open.value = true;
};// 弹窗打开后回调
const modalOpened = () => {visible.value = true;// 添加 resize 事件监听器 (带防抖)if (!resizeHandler.value) {resizeHandler.value = debounce(() => {refresh();}, 100);}window.addEventListener("resize", resizeHandler.value);
};// 刷新裁剪器
const refresh = () => {cropperRef.value?.refresh();
};
// 覆盖默认上传行为 (空函数)
const requestUpload = () => {// do nothing, use beforeUpload instead
};
// 向左旋转
const rotateLeft = () => {cropperRef.value?.rotateLeft();
};
// 向右旋转
const rotateRight = () => {cropperRef.value?.rotateRight();
};
// 图片缩放
const changeScale = (num = 1) => {cropperRef.value?.changeScale(num);
};// 上传前处理
const beforeUpload = (file) => {if (!file.type.startsWith("image/")) {ElMessage.error("文件格式错误,请上传图片类型,如:JPG,PNG后缀的文件。");return false; // 阻止上传}const reader = new FileReader();reader.readAsDataURL(file);reader.onload = () => {options.img = reader.result;};return false; // 阻止 el-upload 的默认上传,使用 requestUpload 或这里处理
};// 上传图片
const uploadImg = () => {cropperRef.value?.getCropBlob(async (data) => {const formData = new FormData();formData.append("avatarfile", data, "avatar.png"); // 添加文件名和类型// try {//   const response = await uploadAvatar(formData);//   // 假设 response 包含新的图片 URL//   const newImageUrl = response.imgUrl; // 或 response.data.imgUrl, 根据你的 API 响应结构调整//   // 更新本地状态和 Store//   open.value = false;//   options.img = import.meta.env.VITE_APP_BASE_API + newImageUrl; // 使用 Vite 环境变量//   // 假设你的 authStore 有一个 action 来更新用户信息或头像//   // 方式1: 直接更新 imageUrl (如果 store 允许)//   // authStore.userInfo.imageUrl = options.img//   // 方式2: 调用一个 action 来更新 (推荐)//   await authStore.updateUserInfo({ imageUrl: options.img }); // 假设有一个 updateUserInfo action//   ElMessage.success("修改成功");//   visible.value = false;// } catch (error) {//   console.error("上传头像失败:", error);//   ElMessage.error("修改失败");//   // 可选: 根据需要处理错误// }});
};// 实时预览
const realTime = (data) => {previews.value = data;
};// 关闭弹窗
const closeDialog = () => {// 关闭时恢复原始头像 (如果上传未完成或取消)options.img = authStore.userInfo?.imageUrl || "";visible.value = false;// 移除 resize 事件监听器if (resizeHandler.value) {window.removeEventListener("resize", resizeHandler.value);resizeHandler.value = null;}
};
</script><style scoped lang="scss">
.user-info-head {position: relative;display: inline-block;height: 40px;text-align: center;
}.user-info-head:hover:after {content: "+";position: absolute;left: 0;right: 0;top: 0;bottom: 0;color: #eee;background: rgba(0, 0, 0, 0.5);font-size: 24px;font-style: normal;-webkit-font-smoothing: antialiased;-moz-osx-font-smoothing: grayscale;cursor: pointer;margin: 0px auto;line-height: 40px;border-radius: 50%;
}/* image */
.img-circle {border-radius: 50%;
}.img-lg {width: 40px;height: 40px;
}.avatar-upload-preview {position: relative;top: 50%;left: 50%;transform: translate(-50%, -50%);width: 200px;height: 200px;border-radius: 50%;box-shadow: 0 0 4px #ccc;overflow: hidden;
}
</style>
防抖代码:
/*** @param {Function} func* @param {number} wait* @param {boolean} immediate* @return {*}*/
export function debounce(func, wait, immediate) {let timeout, args, context, timestamp, resultconst later = function () {// 据上一次触发时间间隔const last = +new Date() - timestamp// 上次被包装函数被调用时间间隔 last 小于设定时间间隔 waitif (last < wait && last > 0) {timeout = setTimeout(later, wait - last)} else {timeout = null// 如果设定为immediate===true,因为开始边界已经调用过了此处无需调用if (!immediate) {result = func.apply(context, args)if (!timeout) context = args = null}}}return function (...args) {context = thistimestamp = +new Date()const callNow = immediate && !timeout// 如果延时不存在,重新设定延时if (!timeout) timeout = setTimeout(later, wait)if (callNow) {result = func.apply(context, args)context = args = null}return result}
}