Linux之shell脚本篇(二)
一、shell编程之if语句
引言
Linux在shell编程中,通常都是以自上而下运行,但是为了提高其代码严谨性,我们即引入了多条件 控制语句例如:if、for、while、case等语句,有时候针对条件我们还会结合正则表达式去运用。将这些流程控制语句进行熟练掌握,必然对shell脚本编写有很大的帮助
if表达式结构(三种)
| 结构形式 | 语法 |
| 单表达式 | if 表达式;then 语句1 fi |
| 双表达式 | if 表达式;then 语句1 else: 语句2 fi |
| 多表达式 | if 表达式;then 语句1 elif 表达式 语句2 else 语句3 fi |
二、示例分析
大小比较分析单分支、对分支语法
### if单语句#####引用单个数字比较
#!/bin/bash if (( 5 > 2 ));then echo "hello"###引用变量比较#!/bin/bash
$NUM1="$1"
$NUM2="$2"if (( $NUM1 > $NUMM2 ));then echo "=================="echo "$NUM1 greter than $NUM2"
fi## if多条件和双条件判断###引用变量比较#!/bin/bash
NUM1=$1
NUM2=$2if (( $NUM1 > $NUM2 ));then echo "=================="echo "$NUM1 greter than $NUM2"
else if [ $NUM1 == $NUM2 ];thenecho "$NUM1 is equal $NUM2"exitfiecho  "$NUM1 less than $NUM2"
fi
除了上述表达式可以用((表达式))之外,还可以使用test命令来表示表达式,除次之外还能判断文件是否存在(-f 参数 -d参数),我们通常会将test = [ ] 表示为等效的,【 】中不支持数学运算(>、<、=),但是可以用(gt、lt、eq)
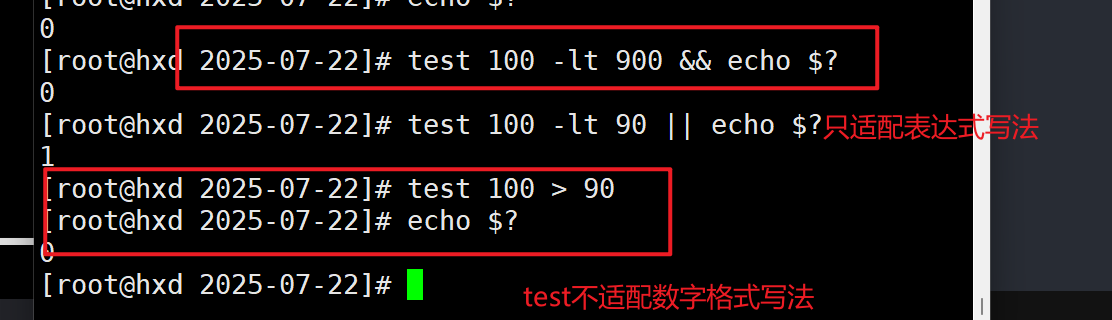
上面的$?表示若执行结果为真那么返回结果为0,但如果非真,即结果不为0
我这里使用了test 的另一种等效写法做了修改(【 】)
#!/bin/bash
NUM1=$1
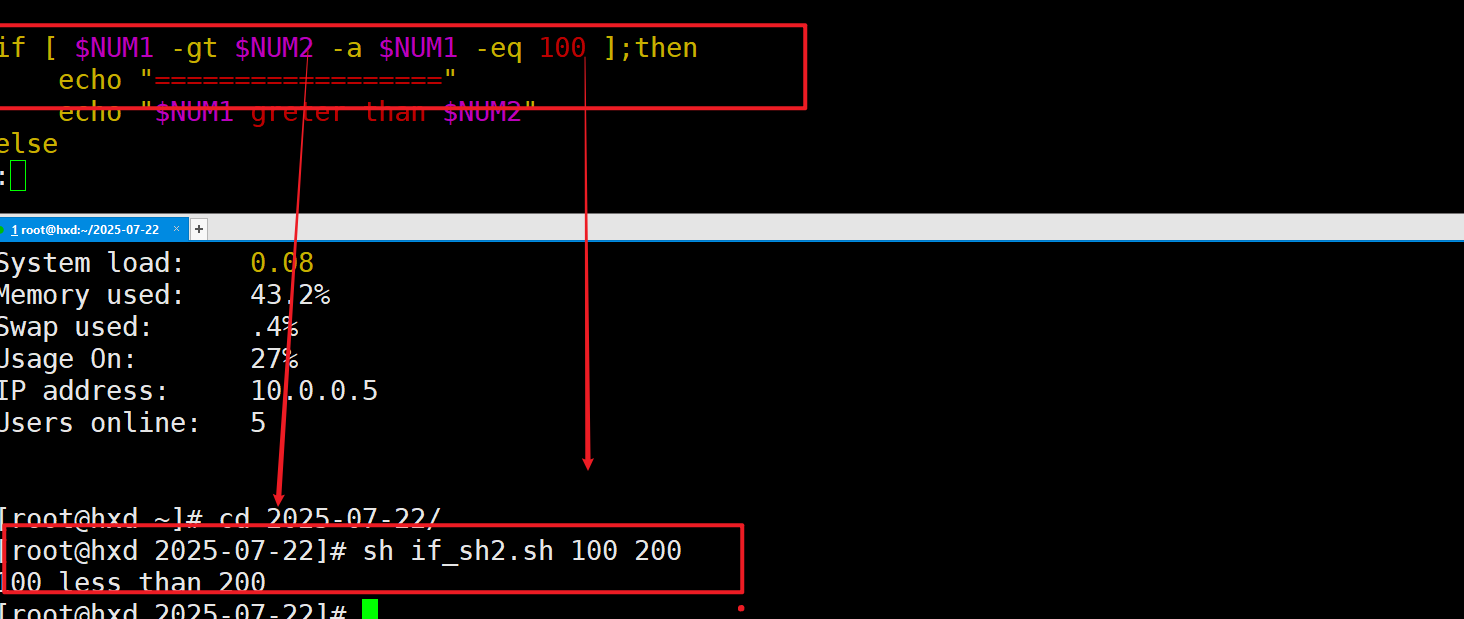
NUM2=$2if [ $NUM1 -gt $NUM2 ];then echo "=================="echo "$NUM1 greter than $NUM2"
else if [ $NUM1 -eq $NUM2 ];thenecho "$NUM1 is equal $NUM2"exitfiecho "$NUM1 less than $NUM2"
fi
虽然一个[ express] 和[ [ express ] ],中的表达式都能用-eq、-gt、lt,但是在逻辑关系表示时的情况确截然不同
[ [ express ] ]中只能填写&&(逻辑与) 和 ||(逻辑或)
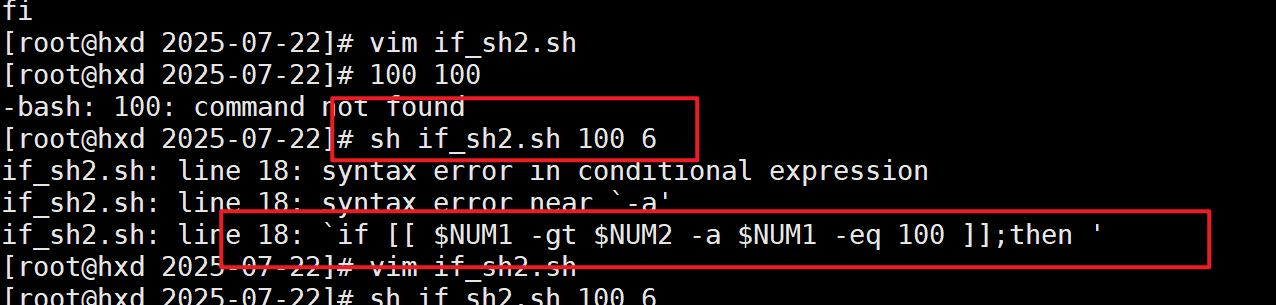
[ express] 只能填写-a(逻辑与),-o(逻辑或)
创建不存在的目录
#!/bin/bash
if [ ! -d /tmp/hello ];thenmkdir -p /tmp/helloecho "ok!!!!"
fi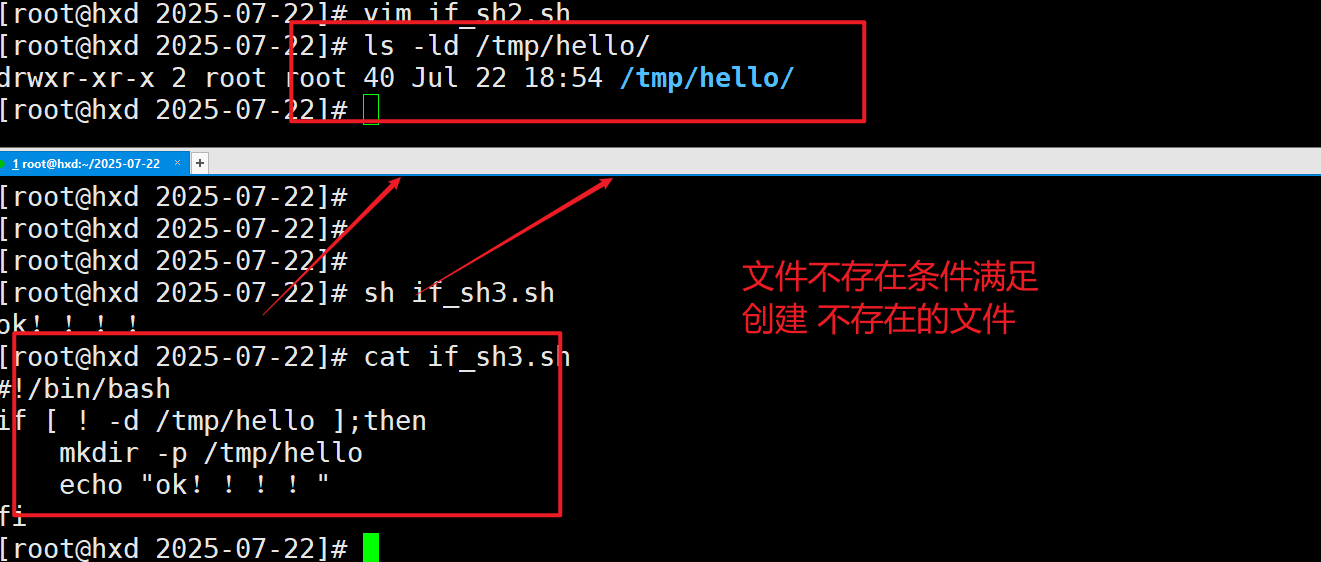
if 多个条件测试判断成绩
#!/bin/bash
NUM=$1
if [ $NUM -ge 100 ];thenecho "vary good."elseif [ $NUM -ge 85 ];thenecho "good."elseif [ $NUM -ge 60 ];thenecho "pass."elseecho  "no pass."fifi
fiNUM=$1
if [ $NUM -ge 100 ];thenecho "vary good."
elif [ $NUM -ge 85 ];thenecho "good."
elif [ $NUM -ge 60 ];thenecho "pass."
elseecho  "no pass."
Nginx之v3脚本优化引用(位置参数)
严格规范参数表达
vim可视化块快捷使用技巧
(ctrl +v --------- 上下键选择----------大写I----------------修改----------- 2 Esc)
## 对help参数和位置参数的限制if [ $1 == "help" -o $1 == "-h"];then echo -e "\033[32m-----------------\033[0m"echo -e "\033[32mUsage:{/bin/sh $0 1.24.0|1.26.1|help}\033[0m"exit
fi## 避免重复性安装软件包
CHECK_NUM=$(rpm -qa | grep -wE "gcc|pcre-devel|zlib-devel|wget"|wc -l)
if [ $CHECK_NUM -lt 4 ];thenyum -y install wget tar make gccyum -y install pcre-devel zlib-devel openssl-devel
fi## 避免重复性编译,对于文件不存在编译安装if [ ! -f $NGX_DIR/sbin/nginx ];then
CHECK_NUM=$(rpm -qa | grep -wE "gcc|pcre-devel|zlib-devel|wget"|wc -l)
if [ $CHECK_NUM -lt 4 ];thenyum -y install wget tar make gccyum -y install pcre-devel zlib-devel openssl-devel
fi## 若软件已部署,提示已经部署了(若存在软件文件夹)
else  echo -e "\033--软件已经部署完成!!!!!无需重复部署,请输入是否重装?yes/no--\033[0m"ls -ld $NGX_DIRll $NGX_DIRread INPUT if [ $INPUT == "yes" -o $INPUT == "Y" ];then重装逻辑## 由于防火墙报错问题,需要先关闭nginx,然后对防火墙对外端口进行判断CHECK_FIRE=$(firewalld-cmd --list-all | grep -w "80" | wc -l)if [ $CHECK_FIRE -ne 1 ];thenfirewalld-cmd -add-port=80/tcp --permanentsystemctl reload firewalld.service
fi
如果想要对预编译、编译结果进行隐藏,可以使用黑洞文件 >> /dev/null 2>&1(这里2表示标准输出。1表示错误输出)
三、条件判断符号的使用
单引号和双引号本质区别在于内置变量引用必须使用双引号,单引号默认是字符串格式
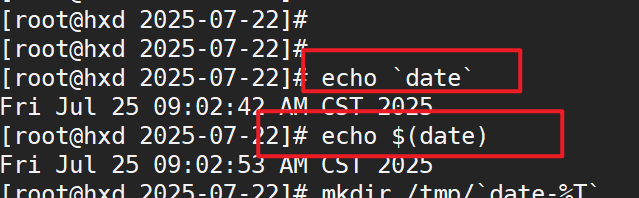
$( command ) 和`command`执行脚本命令结果是一样的

Nginx:v4版本更新之虚拟主机(多网站)的添加
虚拟主机完成构建
echo -e "\033[32m----正在配置虚拟主机--$NGX_VHOST-----\033[0m"
## 切换到Nginx目录
cd $NGX_DIR/conf## 备份Nginx配置文件
\cp nginx.conf nginx.conf.bak
echo "
worker_processes 1;
events {worker_connections 1024;
}
http {include mime.types;default_type application/octet-stream;sendfile on;keepalive_timeout 65;include domains/*;
}
">nginx.conf## 创建虚拟主机配置文件目录mkdir -p domains/## cd切换到domains目录
cd domains/echo "
server{listen 80;server_name v1.nginx;location / {root /data/webapp/v1.nginx;index index.html index.htm index.php;}
}">v1.nginx.conf## 创建虚拟主机发布目录,写入测试页面######## 多虚拟主机创建 添加位置参数$1($NGX_VHOST)
mkdir -p /data/webapp/v1.nginx
echo "v1.nginx test pages." > /data/webapp/v1.nginx/index.html## 判断是否重启
$NGX_DIR/sbin/nginx -t > /dev/null 2>&1if [ $? -eq 0 ];then
## 重启nginx服务$NGX_DIR/sbin/nginx -s reload
fi
cat $NGX_VHOST
echo -e "\033[32m------------------\033[0m"
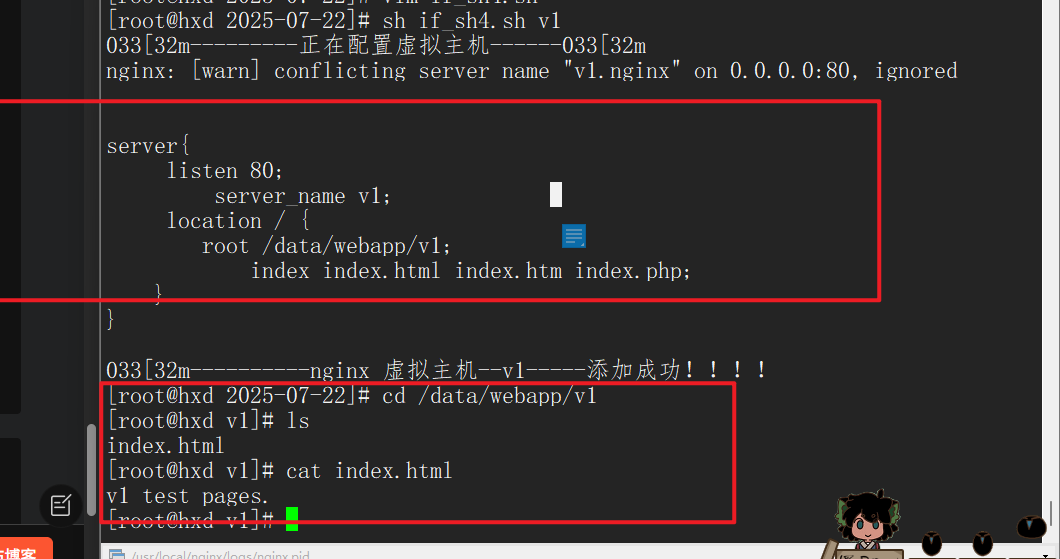
echo -e "\033[32m----nginx虚拟主机--$NGX_VHOST-----添加成功\033[0m"添加成功效果如下:
添加nginx_host虚拟主机脚本位置优化之后脚本
#!/bin/bash# ***************************************************************************
# *
# * @file:auto_install_nginx_v1.sh
# * @author:www.hxd666.cn
# * @date:2025-07-22 09:47
# * @version 1.0
# * @description: Shell script
# * @Copyright (c)  all right reserved
#*
#**************************************************************************/ NGX_VER="$1"
NGX_URL="http://nginx.org/download"
NGX_SOFT="nginx-${NGX_VER}.tar.gz"
NGX_DIR="/usr/local/nginx"
NGX_ARGS="--user=www --group=www --with-http_stub_status_module"
NGX_SRC=$(echo $NGX_SOFT | sed 's/.tar.gz//g')
NGX_VHOST=$1
## 创建虚拟主机echo -e "033[32m---------正在配置虚拟主机------033[32m"cd $NGX_DIR/conf\cp nginx.conf nginx.conf.bak## 创建nginx配置文件
echo "
worker_processes  1;
events {worker_connections  1024;
}
http {include       mime.types;default_type  application/octet-stream;sendfile        on;keepalive_timeout  65;include domains/*;
}" > nginx.conf## 创建 虚拟主机配置文件
mkdir -p domains/cd domainsecho "server{listen 80;server_name $NGX_VHOST;location / {root /data/webapp/$NGX_VHOST;index index.html index.htm index.php;}
}
" > $NGX_VHOST.conf## 创建虚拟主机目录mkdir -p /data/webapp/$NGX_VHOST
echo "$NGX_VHOST test pages." > /data/webapp/"$NGX_VHOST"/index.html## 判断是否重启if [ $? -eq 0 ];then $NGX_DIR/sbin/nginx -s reload
ficat $NGX_VHOST.confecho "033[32m----------nginx 虚拟主机--$NGX_VHOST-----添加成功!!!!"