Samba
Samba
文章目录
- Samba
- 1.配置仓库
- 2.建立共享目录
- 3.添加用户和组
- 4.修改配置文件
- 5.设置权限
- 6.关闭SELinux和防火墙
- 7.启动服务
- 8.访问验证
- 9.注意事项
1.配置仓库
[root@localhost ~]# rpm -qa | grep samba
[root@localhost ~]# curl -o /etc/yum.repos.d/CentOS-Base.repo https://mirrors.aliyun.com/repo/Centos-vault-6.10.repo% Total    % Received % Xferd  Average Speed   Time    Time     Time  CurrentDload  Upload   Total   Spent    Left  Speed0     0    0     0    0     0      0      101  2533  101  2533    0     0   7179      0 --:--:-- --:--:-- --:--:-- 13402
[root@localhost ~]# yum install -y samba
......
Complete!
2.建立共享目录
[root@localhost ~]# mkdir /public/test -p
[root@localhost ~]# touch /public/test/smb.txt		# 创建测试文件
3.添加用户和组
[root@localhost ~]# groupadd group-tech
[root@localhost ~]# useradd -p 123456 -g group-tech sam-tech01
[root@localhost ~]# smbpasswd -a sam-tech01			# 添加samba账户
New SMB password:
Retype new SMB password:
Added user sam-tech01.
4.修改配置文件
[root@localhost ~]# cp /etc/samba/smb.conf /etc/samba/smb.conf-bak		# 备份
[root@localhost ~]# vi /etc/samba/smb.conf
[root@localhost ~]# tail -6 /etc/samba/smb.conf		# 在文件最末行添加如下6行内容
[tech]comment = techpath = /public/testwritable = yesbrowseable = yesvalid users = @group-tech
5.设置权限
[root@localhost ~]# chmod -R 777 /public/test/
[root@localhost ~]# ll /public/test/
总用量 0
-rwxrwxrwx. 1 root root 0 6月  20 02:38 smb.txt
[root@localhost ~]# chown -R sam-tech01:group-tech /public/test/
[root@localhost ~]# ll /public/test/
总用量 0
-rwxrwxrwx. 1 sam-tech01 group-tech 0 6月  20 02:38 smb.txt
6.关闭SELinux和防火墙
[root@localhost ~]# setenforce 0
[root@localhost ~]# getenforce
Permissive
[root@localhost ~]# service iptables stop
iptables:清除防火墙规则:                 [确定]
iptables:将链设置为政策 ACCEPT:filter    [确定]
iptables:正在卸载模块:                   [确定]
[root@localhost ~]# service iptables status
iptables:未运行防火墙。
7.启动服务
[root@localhost ~]# service smb reload
重新载入 smb.conf 文件:                   [确定]
[root@localhost ~]# service smb restart
关闭 SMB 服务:                            [确定]
启动 SMB 服务:                            [确定]
8.访问验证
(1)按住Win+R,输入\\服务器IP,回车

(2)输入用户名和密码
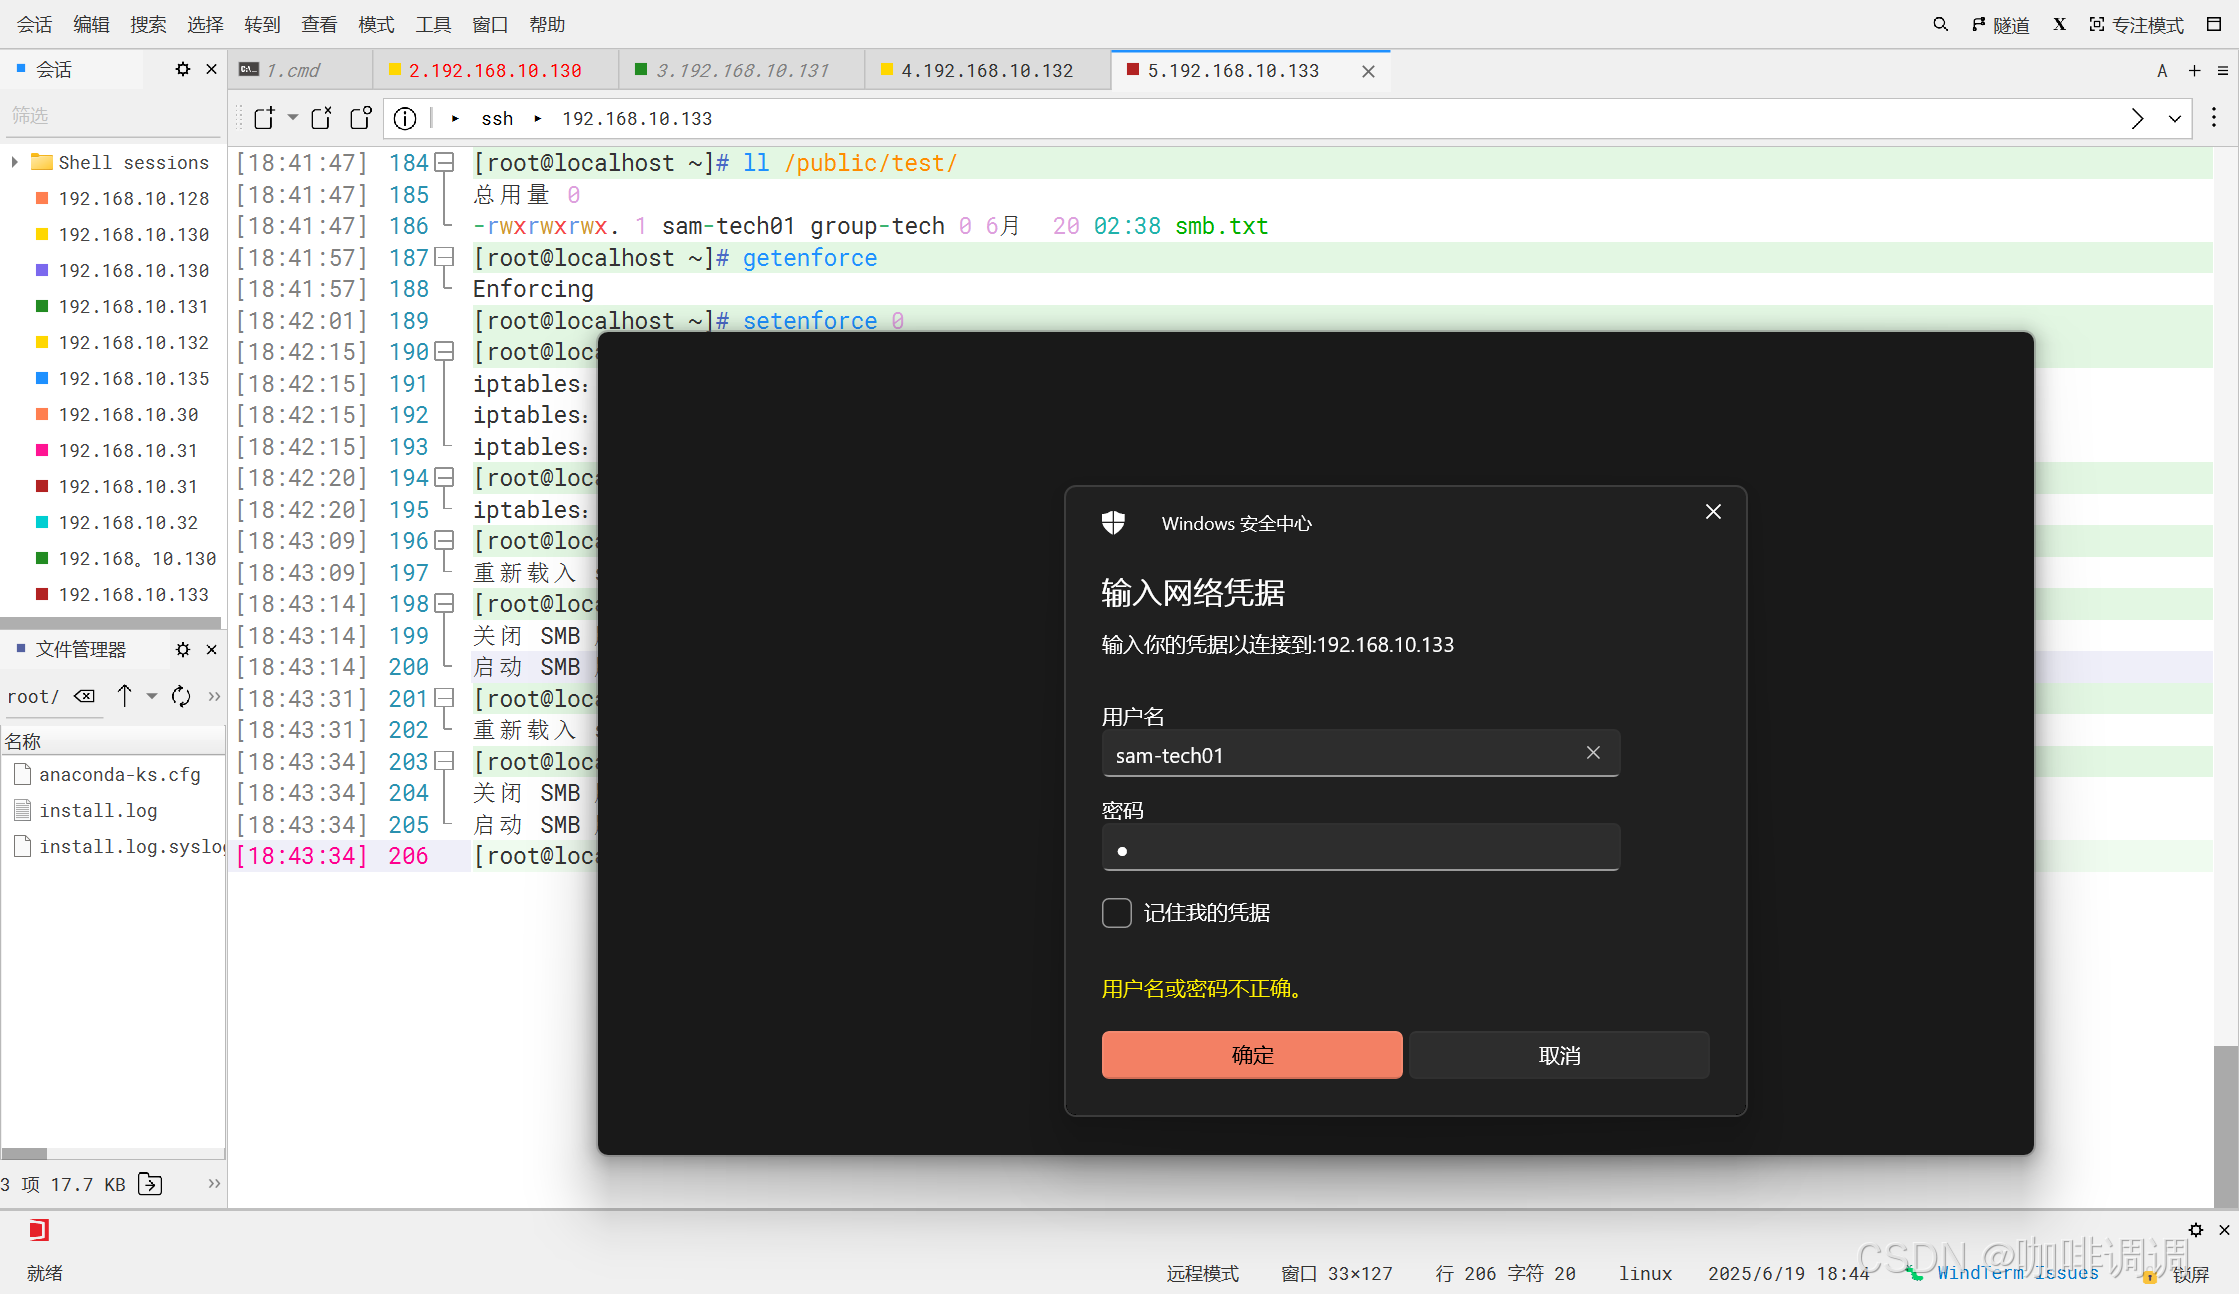
(3)查看测试文件


9.注意事项
记得勾选windows功能
