Linux相关问题整理
一、安装redis时make编译不通过
安装redis6.0.8版本是,make编译时报错,直接原因是gcc版本过低,这里推荐在线安装,通过yum命令。
但是在安装时,发现找不到gcc 9.0 、10.0相关的包。原因是scl没有配置为阿里云的,或者配置为阿里云的方式不正确。
yum install -y devtoolset-10-gcc devtoolset-10-gcc-c++ Loaded plugins:
fastestmirror, langpacks Loading mirror speeds from cached hostfile * base: mirrors.aliyun.com * extras:
mirrors.aliyun.com * updates:
mirrors.aliyun.com No package devtoolset-10-gcc available.
No package devtoolset-10-gcc-c++ available.
Error: Nothing to do
所以要先将Centos7 SCL源更换为阿里云:
先安装 SCL 源:
yum install -y centos-release-scl centos-release-scl-rh
安装完成后在 /etc/yum.repos.d 目录下会出现 CentOS-SCLo-scl.repo 和 CentOS-SCLo-scl-rh.repo 两个文件。安装后源默认启用。
切换到源文件路径,更换镜像为阿里云:
cd /etc/yum.repos.d
编辑相关文件:
CentOS-SCLo-scl.repo:
将 # baseurl=http://mirror.centos.org/centos/7/sclo/$basearch/sclo/ 修改为 baseurl=https://mirrors.aliyun.com/centos/$releasever/sclo/$basearch/sclo/
删除以下行
mirrorlist=http://mirrorlist.centos.org?arch=$basearch&release=7&repo=sclo-sclo
最终为:
name=CentOS-7 - SCLo sclo baseurl=https://mirrors.aliyun.com/centos/$releasever/sclo/$basearch/sclo/
gpgcheck=1
enabled=1
CentOS-SCLo-scl-rh.repo:
将 #baseurl=http://mirror.centos.org/centos/7/sclo/$basearch/rh/ 修改为 baseurl=https://mirrors.aliyun.com/centos/$releasever/sclo/$basearch/rh/
删除以下行
mirrorlist=http://mirrorlist.centos.org?arch=$basearch&release=7&repo=sclo-rh
最终为:
name=CentOS-7 - SCLo rh
baseurl=https://mirrors.aliyun.com/centos/$releasever/sclo/$basearch/rh/
gpgcheck=1
enabled=1
刷新缓存:
yum repolist && yum clean all && yum makecache
上面配置完阿里云镜像之后,在进行gcc的升级。
分别执行以下命令,这里以升级为9的版本为例:
不同gcc版本安装
升级版本:
yum -y install devtoolset-9-gcc devtoolset-9-gcc-c++ devtoolset-9-binutils
更换为新的版本:
scl enable devtoolset-9 bash
echo “source /opt/rh/devtoolset-9/enable” >> /etc/profile
查看版本是否更换完成:
gcc -v
可见版本已经升级成功:
[root@node1 redis-6.0.8]# gcc -v
Using built-in specs.
COLLECT_GCC=gcc
COLLECT_LTO_WRAPPER=/opt/rh/devtoolset-9/root/usr/libexec/gcc/x86_64-redhat-linux/9/lto-wrapper
Target: x86_64-redhat-linux
Configured with: ../configure --enable-bootstrap --enable-languages=c,c++,fortran,lto --prefix=/opt/rh/devtoolset-9/root/usr --mandir=/opt/rh/devtoolset-9/root/usr/share/man --infodir=/opt/rh/devtoolset-9/root/usr/share/info --with-bugurl=http://bugzilla.redhat.com/bugzilla --enable-shared --enable-threads=posix --enable-checking=release --enable-multilib --with-system-zlib --enable-__cxa_atexit --disable-libunwind-exceptions --enable-gnu-unique-object --enable-linker-build-id --with-gcc-major-version-only --with-linker-hash-style=gnu --with-default-libstdcxx-abi=gcc4-compatible --enable-plugin --enable-initfini-array --with-isl=/builddir/build/BUILD/gcc-9.3.1-20200408/obj-x86_64-redhat-linux/isl-install --disable-libmpx --enable-gnu-indirect-function --with-tune=generic --with-arch_32=x86-64 --build=x86_64-redhat-linux
Thread model: posix
gcc version 9.3.1 20200408 (Red Hat 9.3.1-2) (GCC)
继续执行make命令安装redis:
进入redis6.0.8文件夹,并执行make命令:
#cd到解压目录
cd redis-6.0.8
#清除缓存
make distclean
#执行make
make
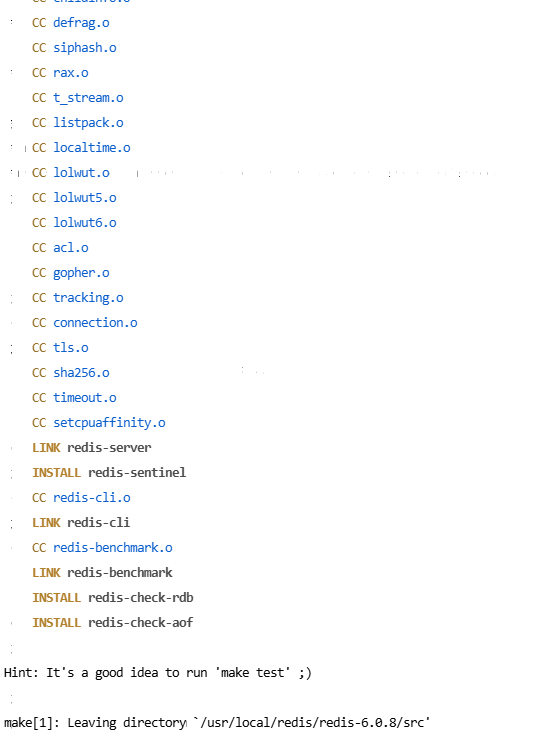
执行成功: