【网页端数字人开发】基于模型SAiD实现嘴型同步
一、项目介绍
SAiD是一种基于扩散模型的语音嘴型同步方法,通过一段语音就可以生成包含32个blendshape参数的数据,通过制作对应的数字人面部blendshape进行映射,能够实现嘴型同步功能。
效果展示:
SAiD嘴型同步效果
模型框架图为:

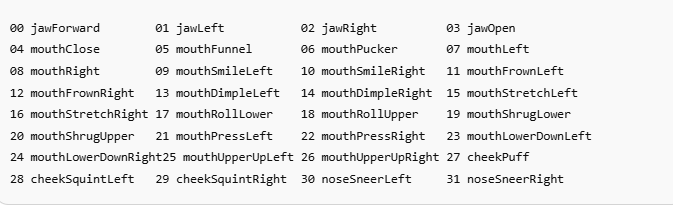
输出的blendshape列表为:
二、项目部署
1.下载项目
项目链接:https://github.com/yunik1004/SAiD
2.创建环境及安装需要的库
(1)安装依赖的库

(2)成功安装

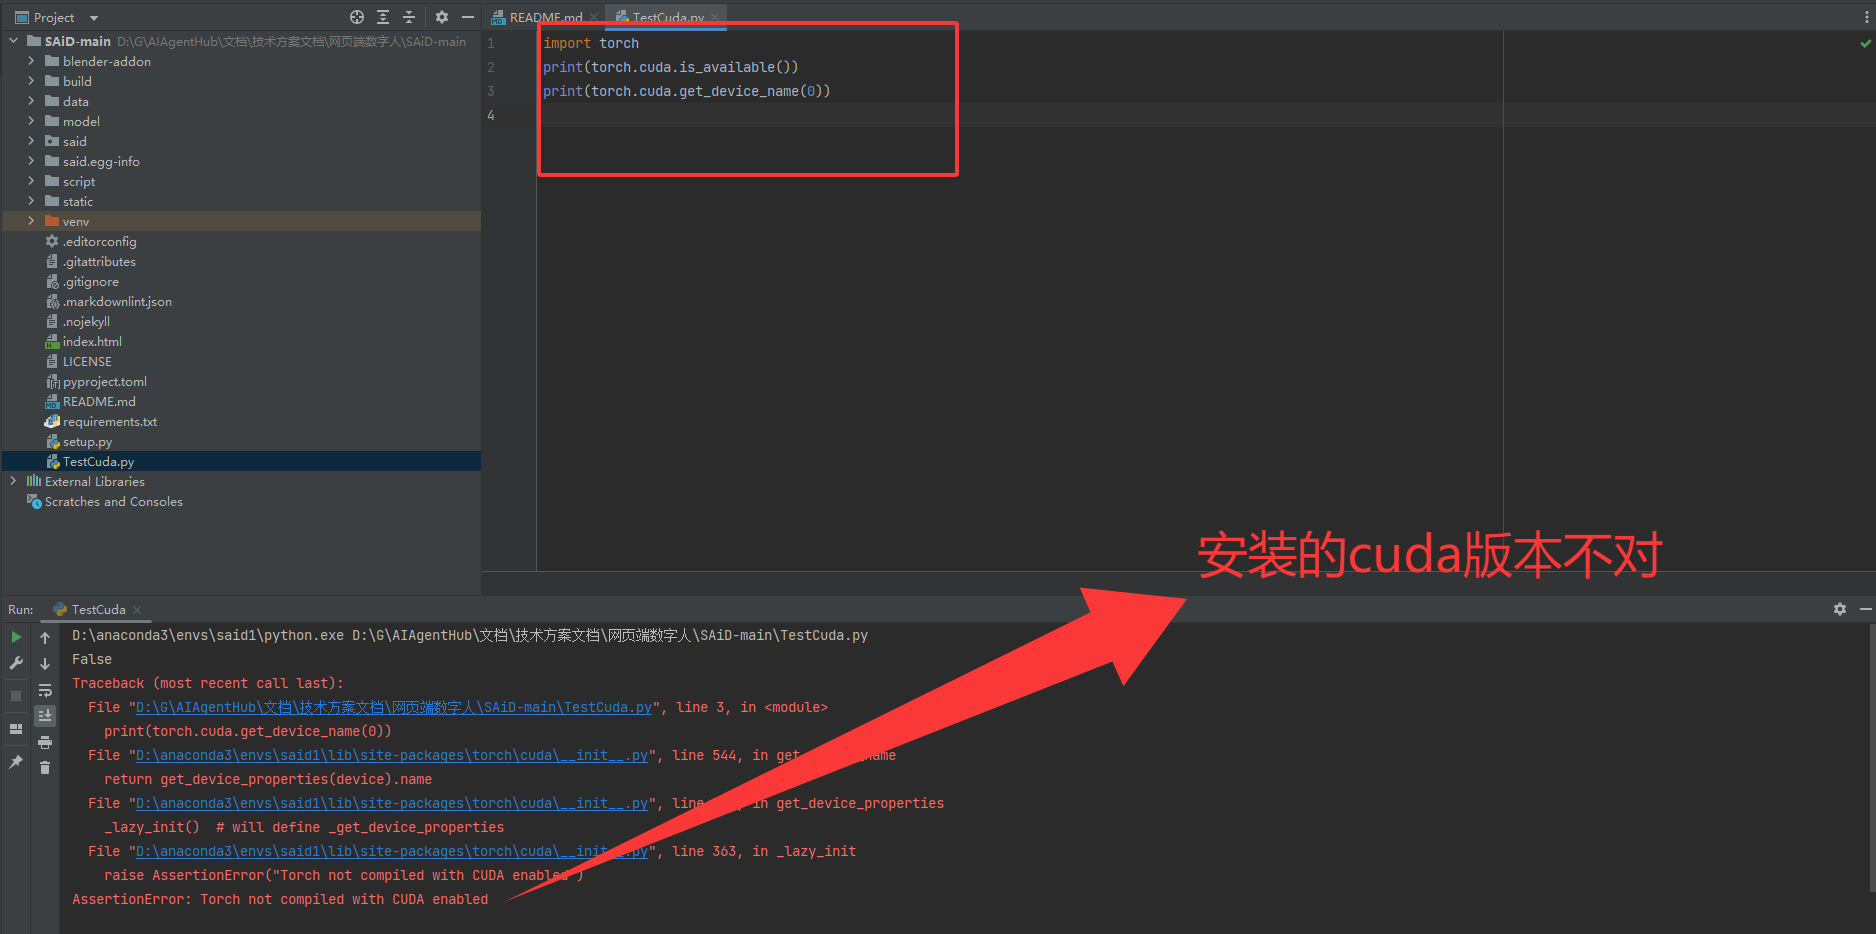
3.判断cuda是否安装成功
(1)没有成功安装cuda,大概率是版本不对,查询自己电脑所适配的cuda版本,重新安装
安装失败
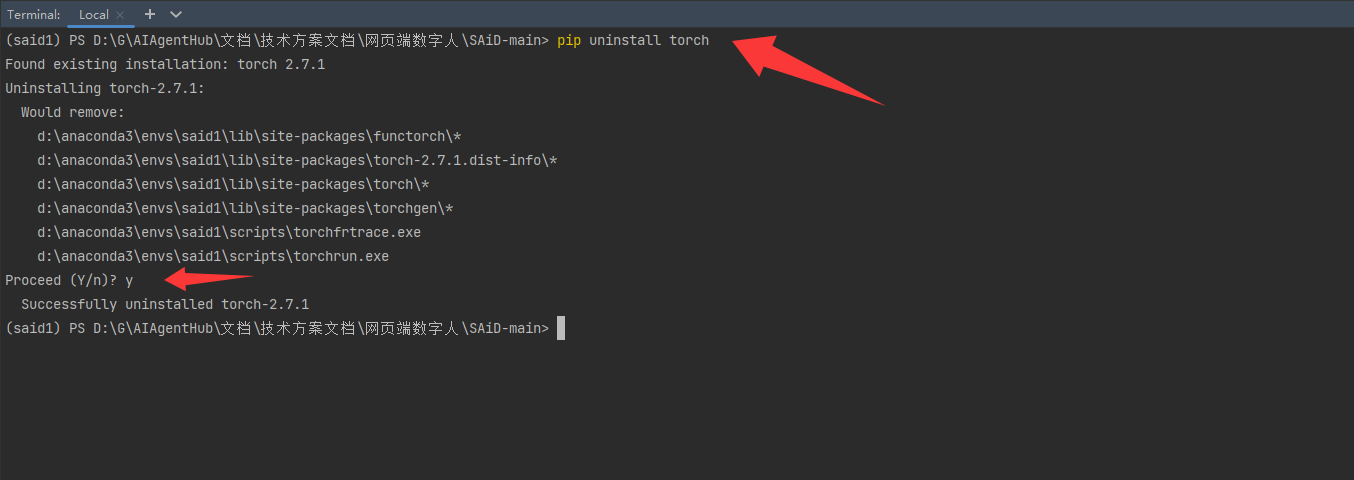
卸载当前的cuda版本
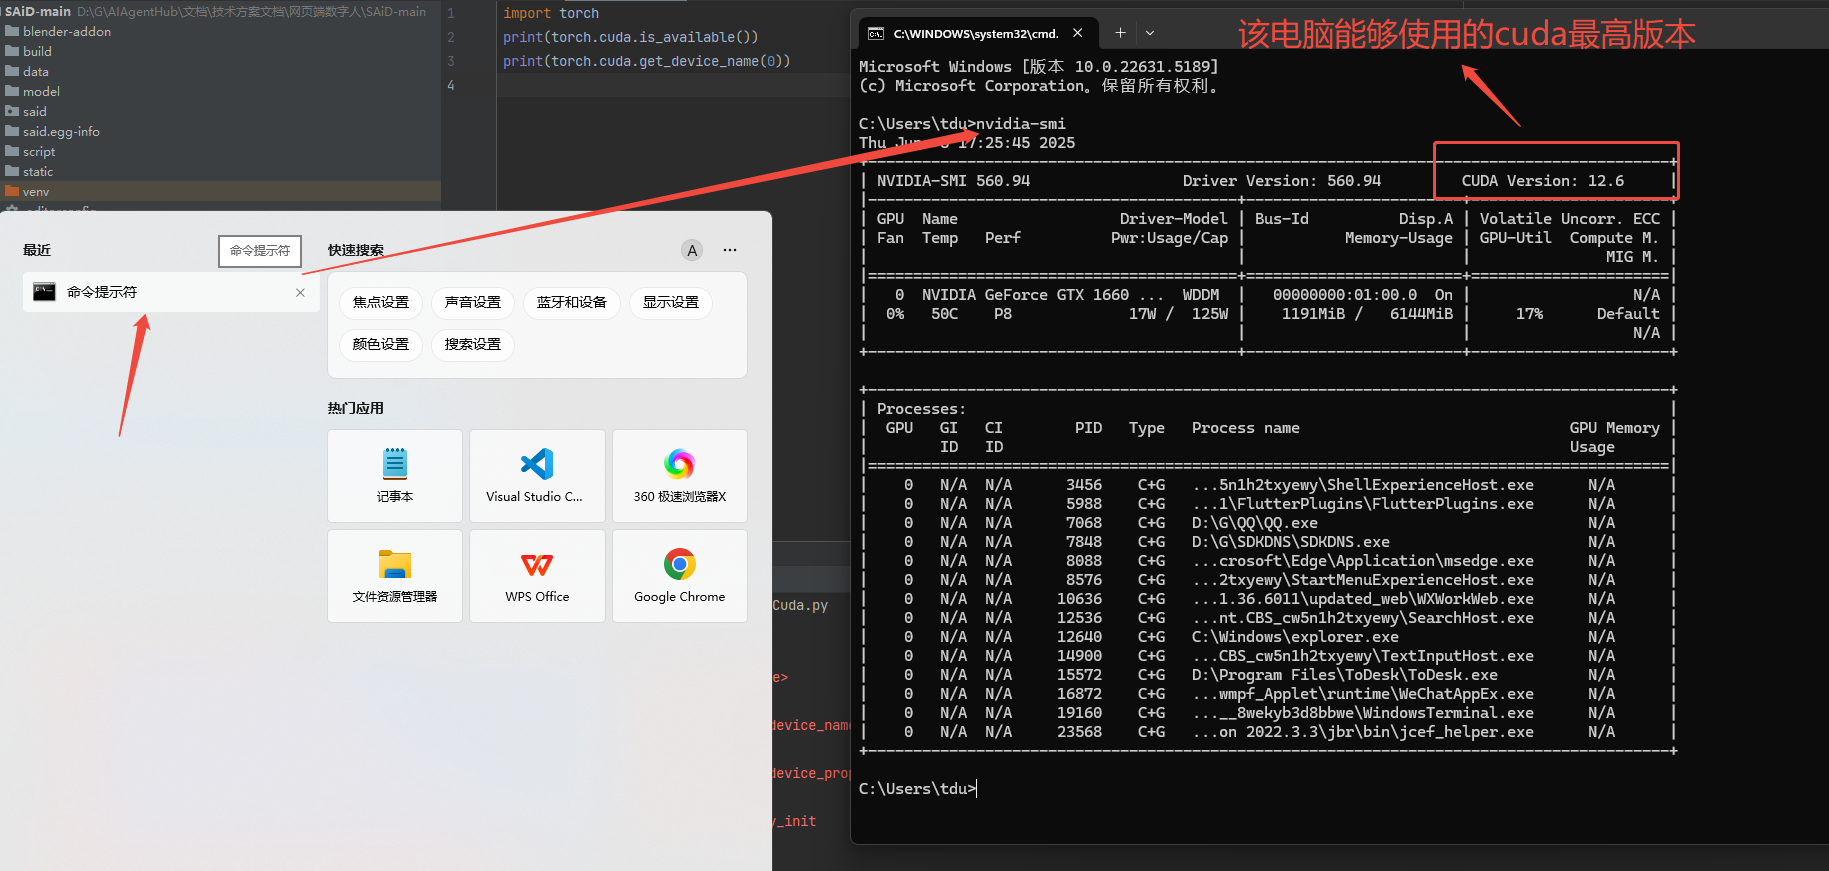
查询自己电脑所适配的cuda版本,尽量越接近越好
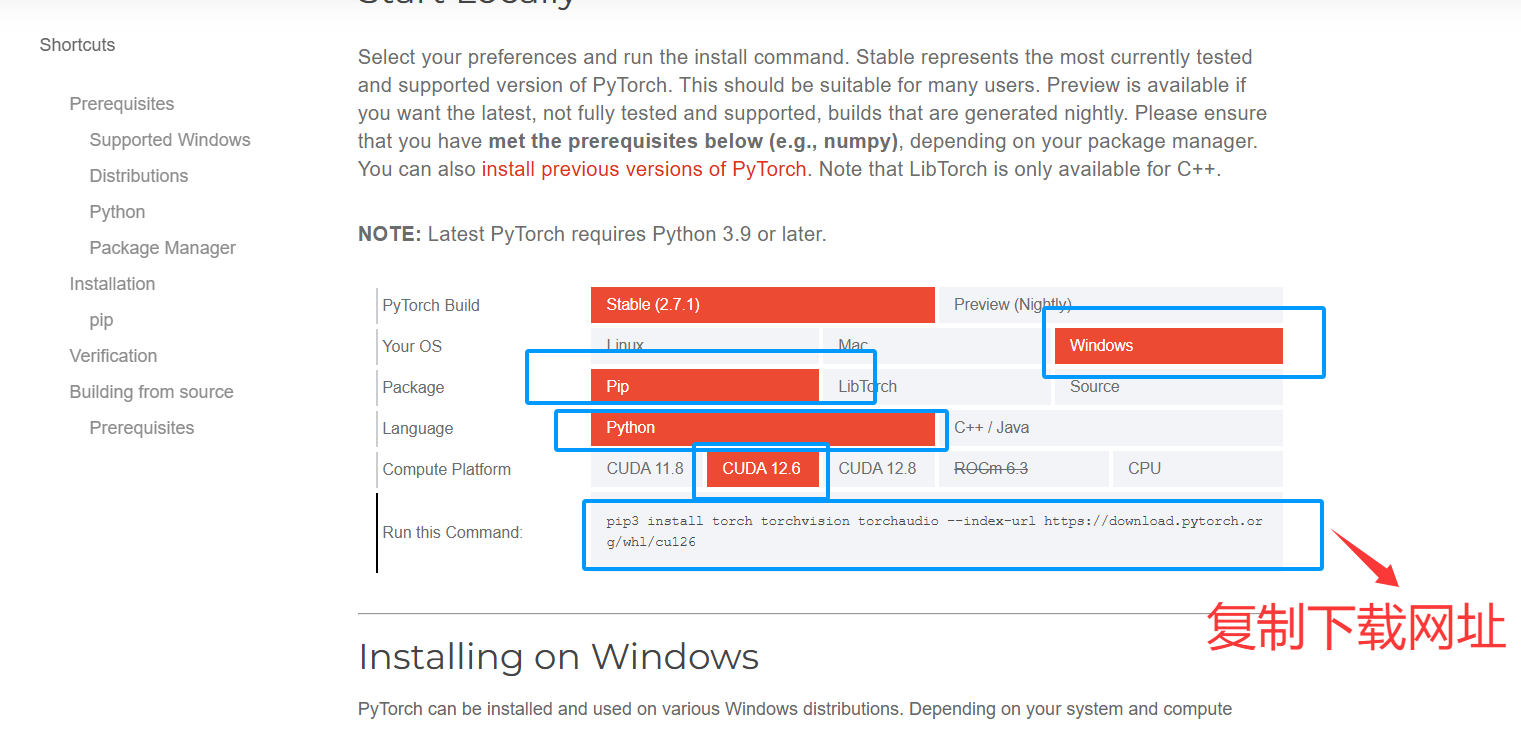
到官网选择适合自己电脑的cuda版本,并复制下载网址,官网:https://pytorch.org/get-started/locally/
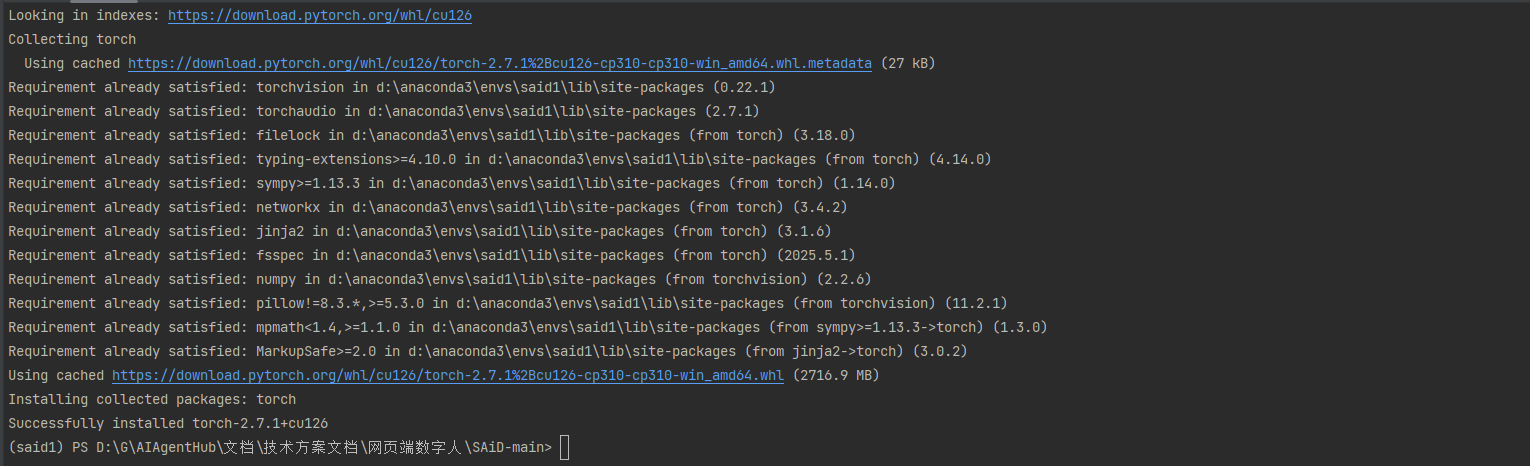
进行cuda安装

安装成功
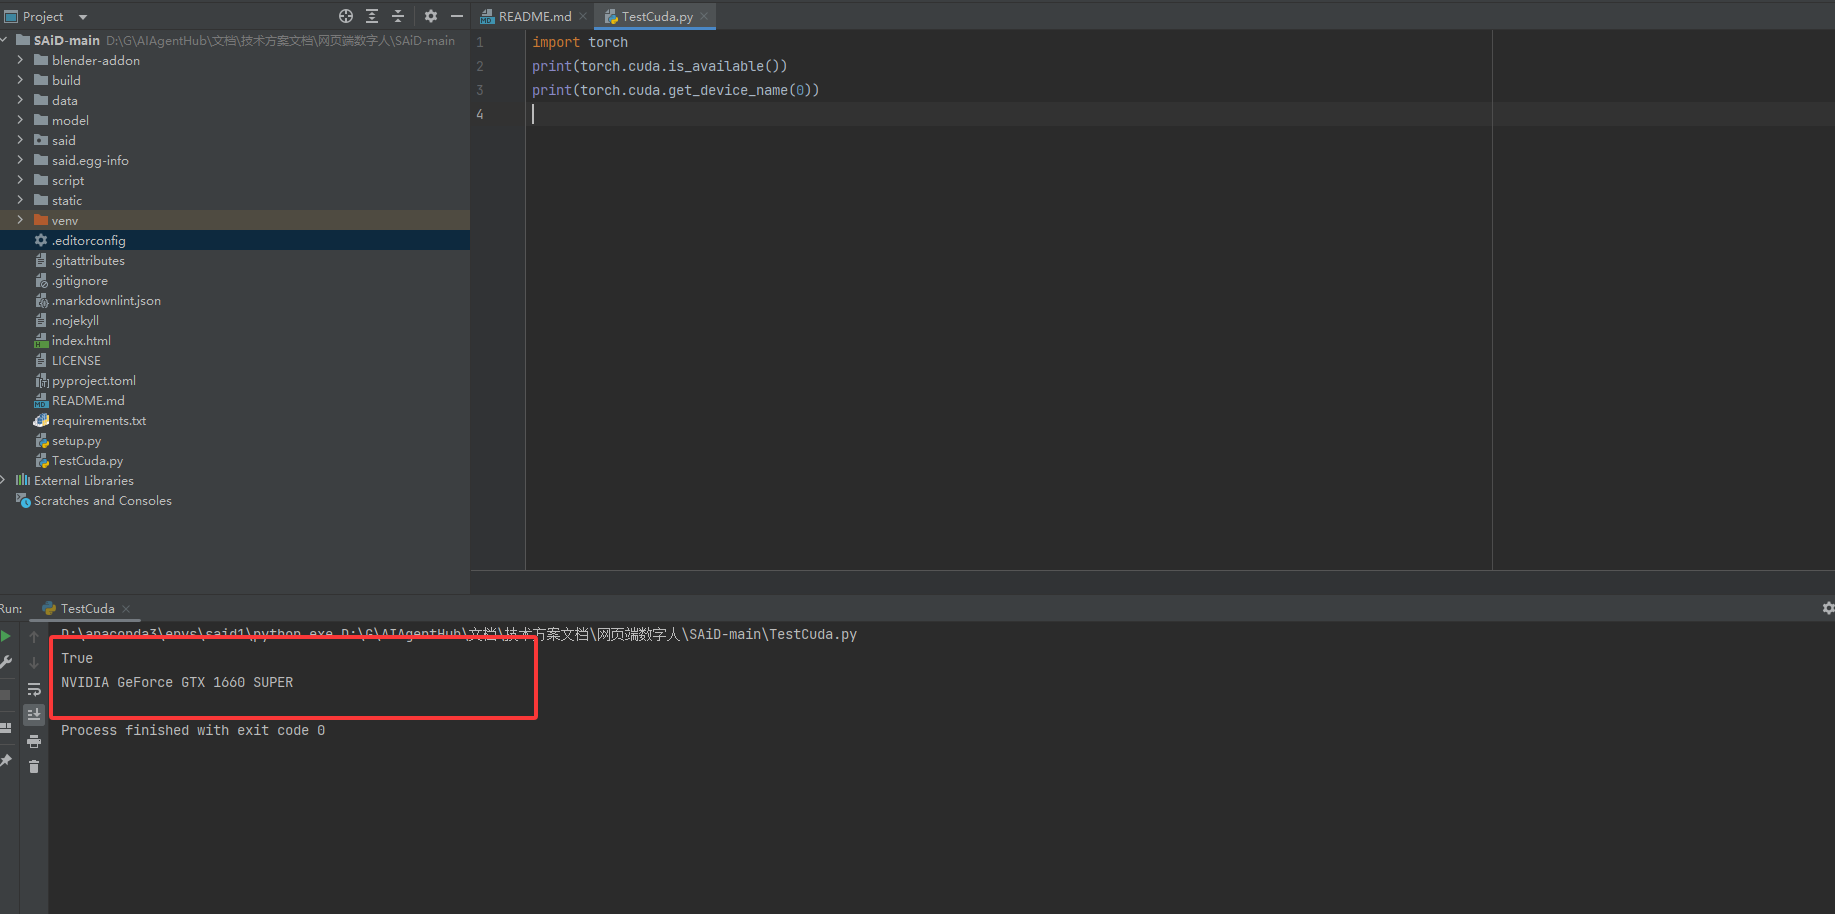
能够正常调用cuda
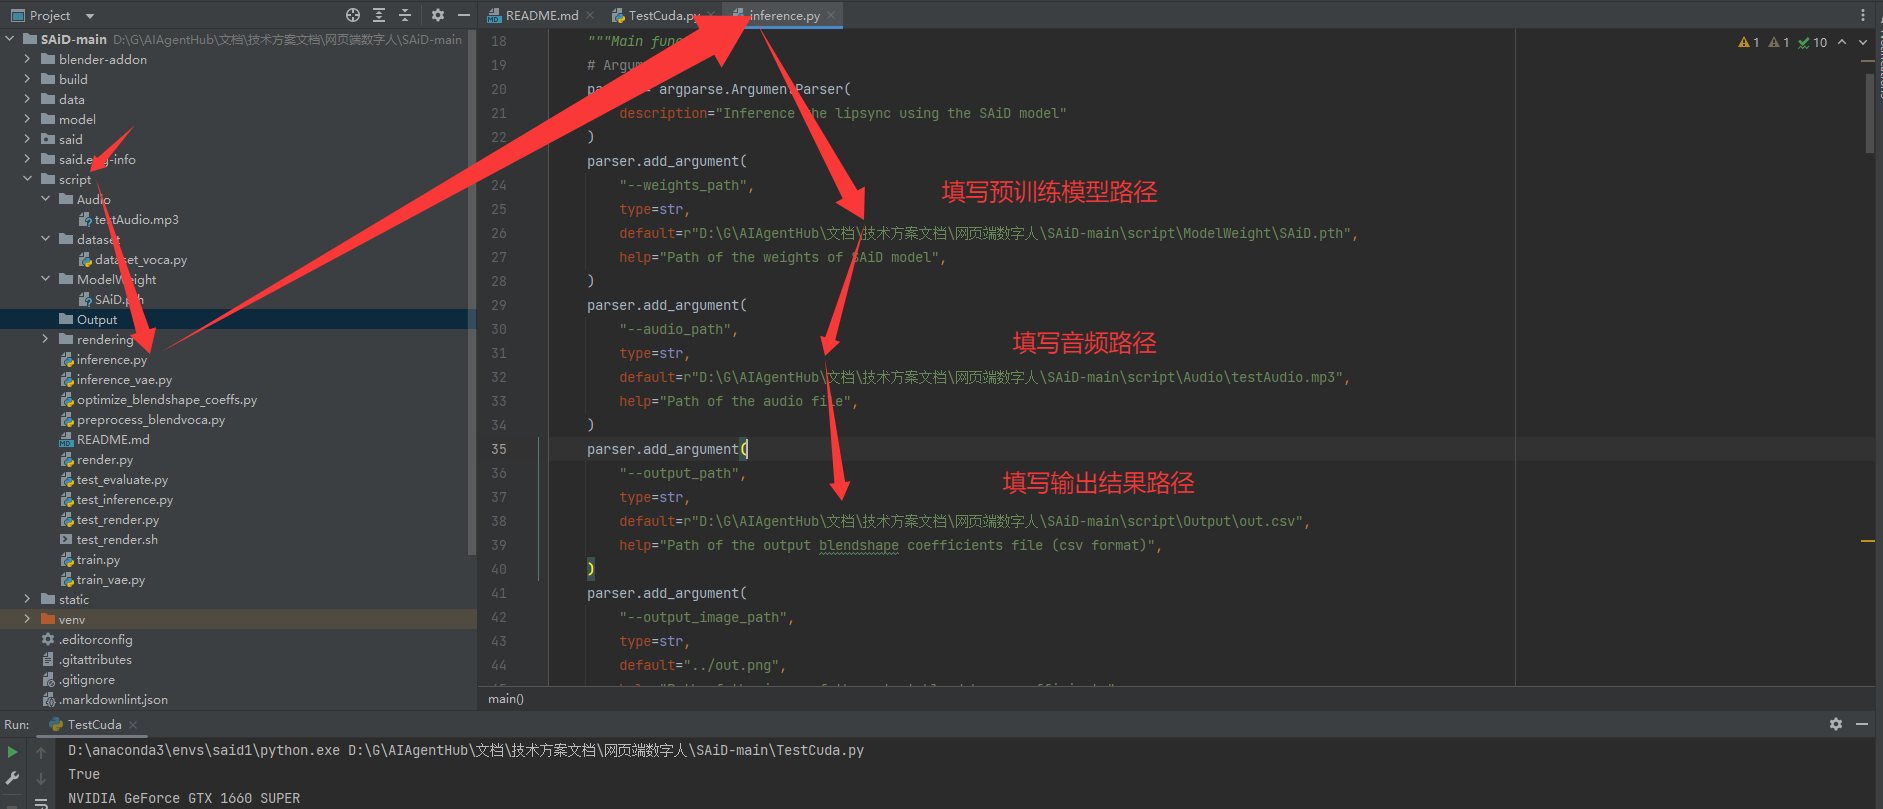
4.下载好预训练的模型,并放在合适的位置
模型下载地址:https://huggingface.co/yunik1004/SAiD
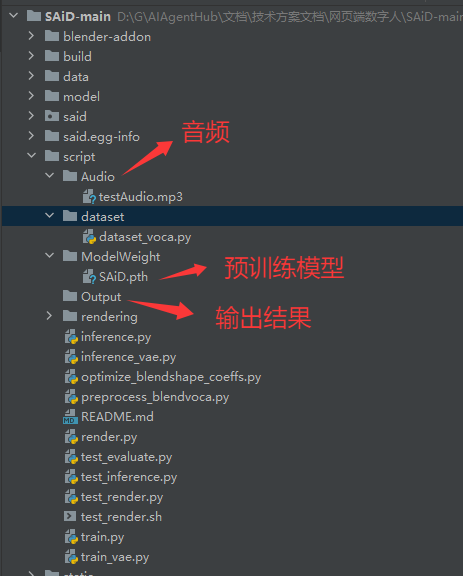
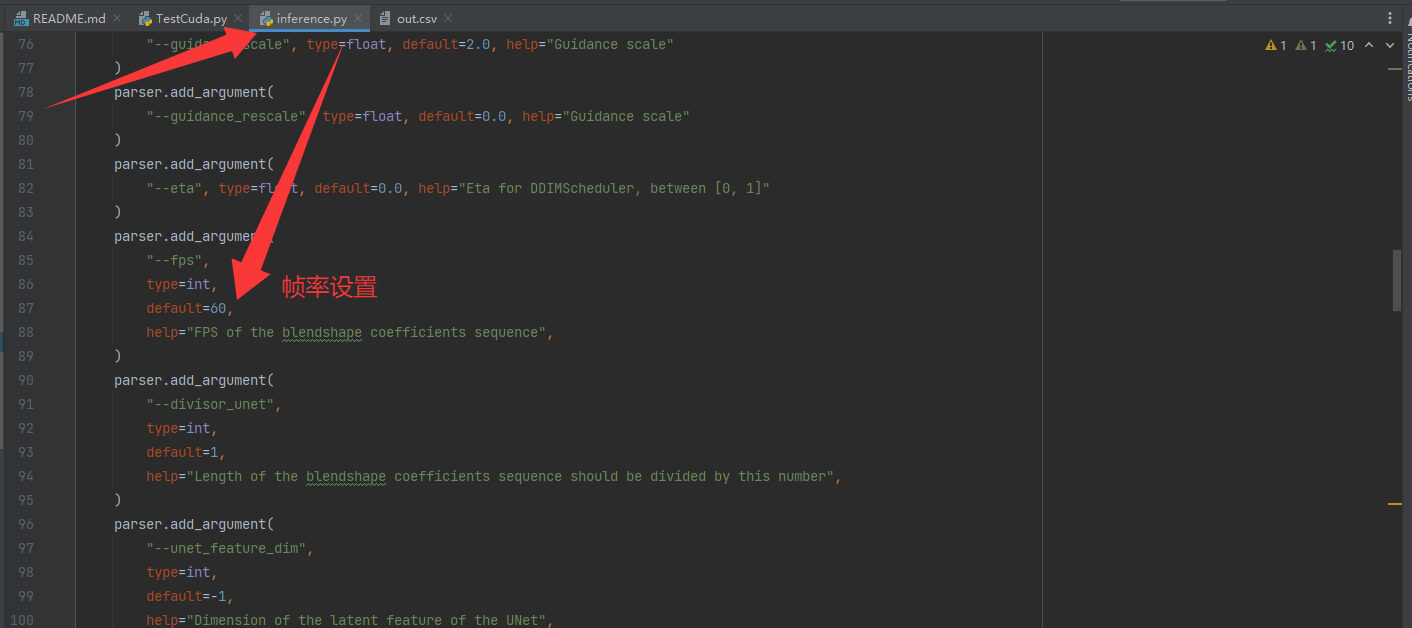
5.进行blendshape数据生成
生成的数据最好不要低于60帧,低于60帧嘴型同步效果不好
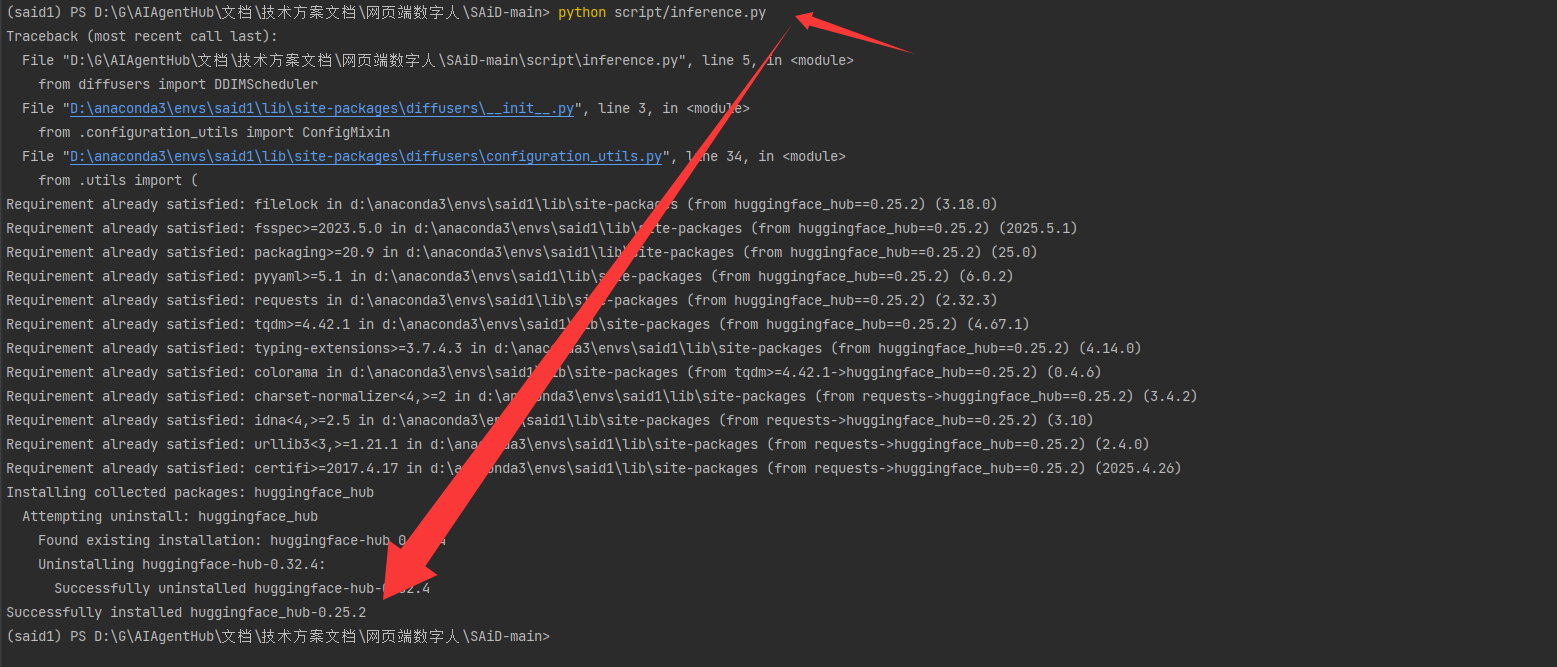
开始运行,运行失败,出现问题
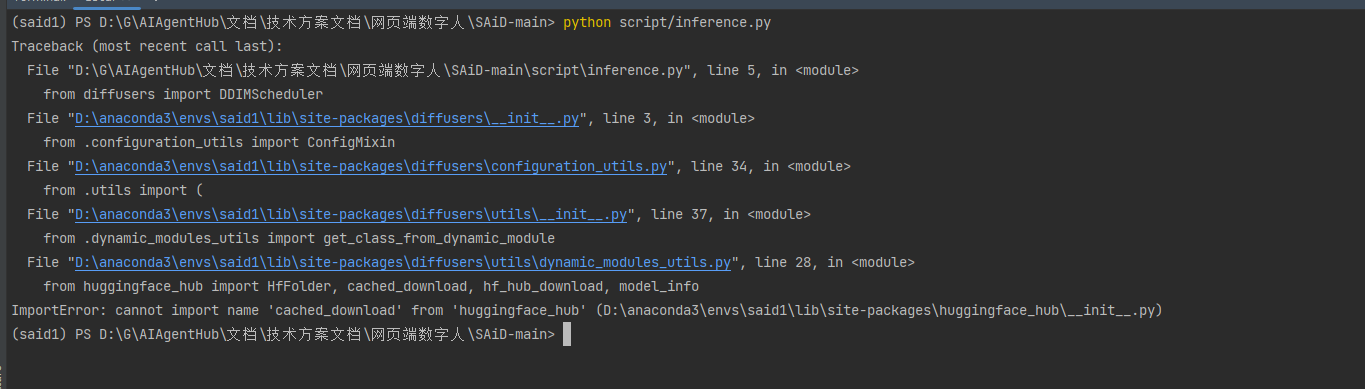
6.解决ImportError: cannot import name ‘cached_download’ from ‘huggingface_hub’ (D:\anaconda3\envs\said1\lib\site-packages\huggingface_hub_init_.py)
原因:在huggingface_hub 0.26 中移除了该函数
解决方法:将huggingface_hub版本回退到0.25.2
7.重新进行生成
仍存在问题

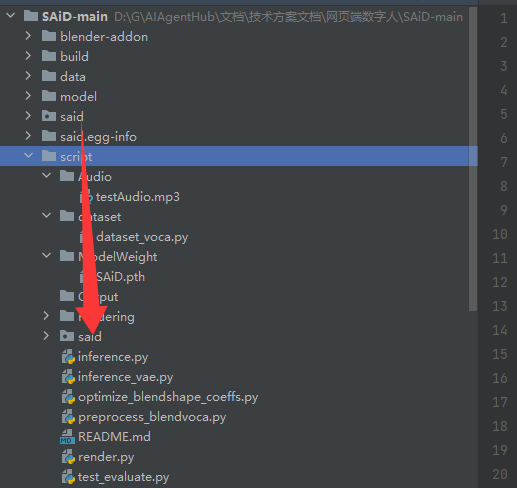
8.解决ImportError: cannot import name ‘metric’ from partially initialized module ‘said’ (most likely due to a circular import) (D:\anaconda3\envs\said1\lib\site-packages\said_init_.py)
问题:在模块导入过程中发生了循环依赖或者模块初始化过程中的某些问题
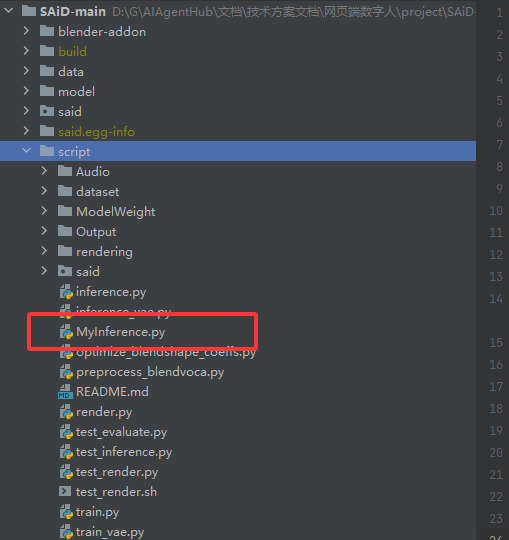
解决方法:将一整个said文件夹复制一份到script文件夹中
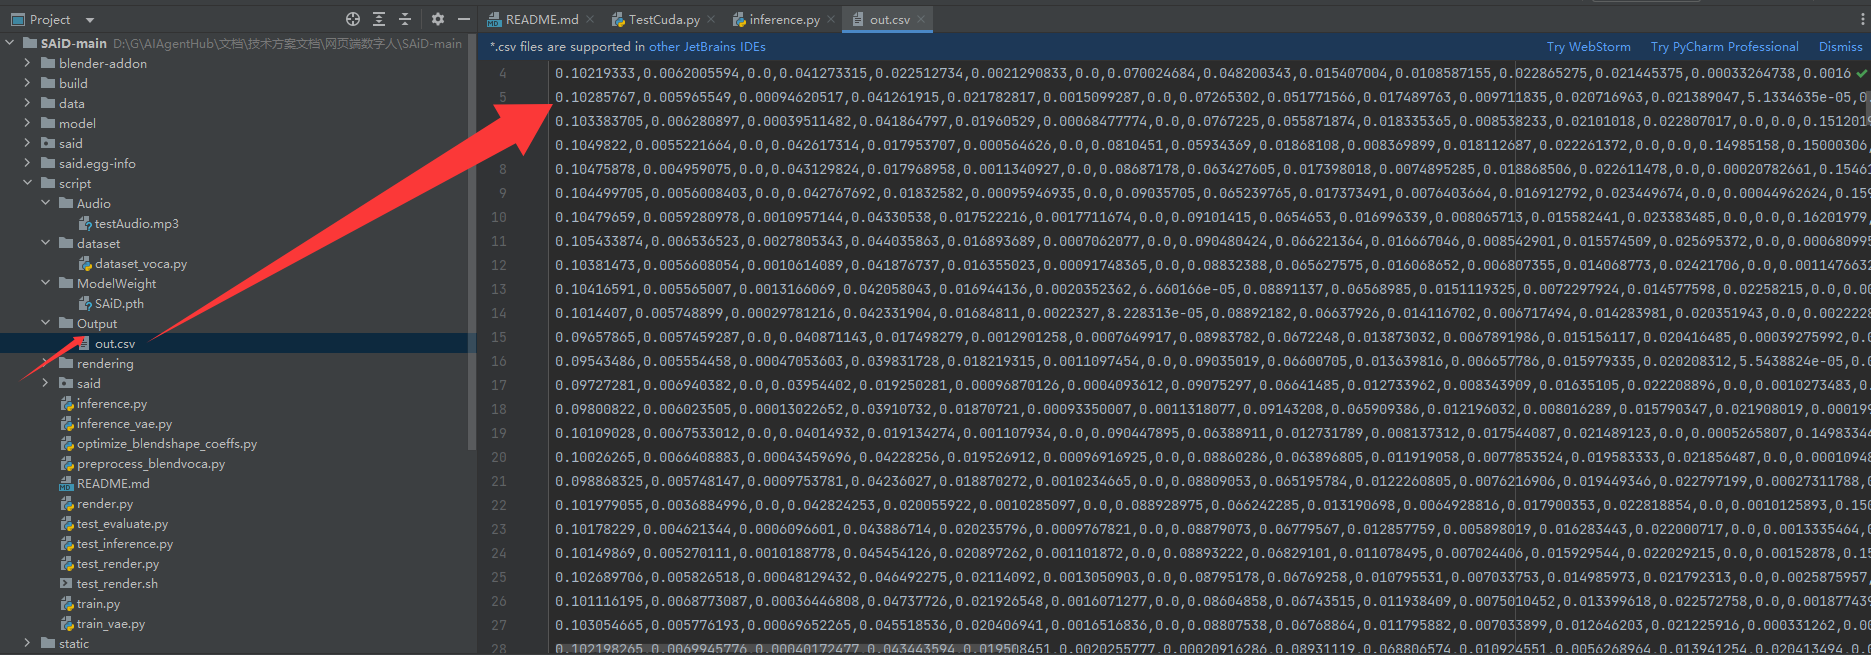
9.继续生成
成功生成

查看生成的数据
三、API调用
1.基于Flask实现api调用
封装方法,实现接口调用
import argparse
import os
from diffusers import DDIMScheduler
import torch
import numpy as np
from said.model.diffusion import SAID_UNet1D
from said.util.audio import fit_audio_unet, load_audio
from said.util.blendshape import (load_blendshape_coeffs,save_blendshape_coeffs,save_blendshape_coeffs_image,
)
from dataset.dataset_voca import BlendVOCADatasetdef infer_blendshape_from_audio(audio_path: str,weights_path: str = r"D:\G\AIAgentHub\文档\技术方案文档\网页端数字人\project\SAiD-main\script\ModelWeight\SAiD.pth",output_path: str = r"D:\G\AIAgentHub\文档\技术方案文档\网页端数字人\project\SAiD-main\script\Output\test_ch.csv",device: str = "cuda:0",fps: int = 60,num_steps: int = 1000,strength: float = 1.0,guidance_scale: float = 2.0,guidance_rescale: float = 0.0,eta: float = 0.0,prediction_type: str = "epsilon",divisor_unet: int = 1,unet_feature_dim: int = -1,init_sample_path: str = None,mask_path: str = None,save_intermediate: bool = False,intermediate_dir: str = "./interm",save_image: bool = False,output_image_path: str = "./out.png",
) -> np.ndarray:"""从音频中推理生成 blendshape 数据"""# 加载初始样本和 maskinit_samples = (load_blendshape_coeffs(init_sample_path).unsqueeze(0).to(device)if init_sample_path else None)mask = (load_blendshape_coeffs(mask_path).unsqueeze(0).to(device)if mask_path else None)# 加载模型said_model = SAID_UNet1D(noise_scheduler=DDIMScheduler,feature_dim=unet_feature_dim,prediction_type=prediction_type,)said_model.load_state_dict(torch.load(weights_path, map_location=device))said_model.to(device)said_model.eval()# 加载并预处理音频waveform = load_audio(audio_path, said_model.sampling_rate)fit_output = fit_audio_unet(waveform, said_model.sampling_rate, fps, divisor_unet)waveform = fit_output.waveformwindow_len = fit_output.window_sizewaveform_processed = said_model.process_audio(waveform).to(device)# 模型推理with torch.no_grad():output = said_model.inference(waveform_processed=waveform_processed,init_samples=init_samples,mask=mask,num_inference_steps=num_steps,strength=strength,guidance_scale=guidance_scale,guidance_rescale=guidance_rescale,eta=eta,save_intermediate=save_intermediate,show_process=True,)# 获取结果result = output.result[0, :window_len].cpu().numpy()save_blendshape_coeffs(coeffs=result,classes=BlendVOCADataset.default_blendshape_classes,output_path=output_path,)return resultfrom flask import Flask, request, jsonify
from flask_cors import CORS  # ✅ 添加这行
import tempfile
import os
import script.MyInference  # 你自己的推理模块app = Flask(__name__)
CORS(app)  # ✅ 允许所有来源跨域访问
# 或者更安全的写法:CORS(app, origins=["http://localhost:5173"])@app.route('/audio2bs', methods=['POST'])
def audio2bs():if 'audio' not in request.files:return jsonify({"error": "No audio file uploaded"}), 400audio_file = request.files['audio']print("收到请求:", audio_file.filename)# 临时保存上传的文件with tempfile.NamedTemporaryFile(delete=False, suffix=".mp3") as tmp:audio_file.save(tmp)tmp_path = tmp.nametry:# 执行推理result = script.MyInference.infer_blendshape_from_audio(tmp_path)print(result)# 转为 list 以便 jsonifyblendshape_data = result.tolist()return jsonify({"blendshape": blendshape_data})except Exception as e:return jsonify({"error": str(e)}), 500finally:os.remove(tmp_path)if __name__ == '__main__':# 默认监听 5000 端口,可改为 host='0.0.0.0' 供局域网访问app.run(debug=True, port=5000)
存放路径