TensorFlow 实现任意风格的快速风格转换
一、什么是风格迁移?
风格迁移(Style Transfer)是一种利用深度学习技术,将一幅图像的内容与另一幅图像的艺术风格相结合,生成新图像的技术。其核心思想是将图像的“内容”和“风格”分离,再重新组合,创造出既有原始内容结构又具有新艺术风格的作品。
关键概念
-
内容(Content)
指图像的主体结构和细节,例如照片中的人物、建筑或风景的轮廓、形状等。 -
风格(Style)
指图像的艺术特征,如颜色分布、笔触纹理、光影效果等,例如梵高的《星夜》中的漩涡笔触或莫奈的印象派色彩。
二、TensorFlow 的基本概念和使用场景
TensorFlow 是一个开源的深度学习框架,由谷歌公司开发。它提供了丰富的工具和接口,用于构建和训练人工神经网络模型。TensorFlow 的核心概念是张量(tensors),即多维数组,用于表示数据。它的计算图(computational graph)机制可以将整个计算过程表示为数据流图,便于优化和执行。
TensorFlow 的使用场景非常广泛,涵盖了许多领域,包括计算机视觉、自然语言处理、推荐系统等。一些常见的应用包括图像分类、目标检测、语音识别、机器翻译等。TensorFlow 提供了丰富的预训练模型和工具,使得开发者可以快速搭建和训练复杂的深度学习模型。
总的来说,TensorFlow 是一款功能强大的深度学习框架,适用于各种复杂的机器学习任务,可帮助开发者加快模型的开发和部署过程。
三、导入 TF2 和相关依赖项
import functools
import os

from matplotlib import gridspec
import matplotlib.pylab as plt
import numpy as np
import tensorflow as tf
import tensorflow_hub as hub

print("TF Version: ", tf.__version__)
print("TF Hub version: ", hub.__version__)
print("Eager mode enabled: ", tf.executing_eagerly())
print("GPU available: ", tf.config.list_physical_devices('GPU'))
输出如下:
TF Version:  2.13.0
TF Hub version:  0.16.1
Eager mode enabled:  True
GPU available:  []
安装依赖,可附上清华源仓库连接进行安装,
# -i https://pypi.tuna.tsinghua.edu.cn/simple
!pip3 install matplotlib
!pip3 install tensorflow-hub
# @title Define image loading and visualization functions { display-mode: "form" }
def crop_center(image):
"""Returns a cropped square image."""
shape = image.shape
new_shape = min(shape[1], shape[2])
offset_y = max(shape[1] - shape[2], 0) // 2
offset_x = max(shape[2] - shape[1], 0) // 2
image = tf.image.crop_to_bounding_box(
image, offset_y, offset_x, new_shape, new_shape)
return image
# @functools.lru_cache(maxsize=None)
# def load_image(image_url, image_size=(256, 256), preserve_aspect_ratio=True):
# """Loads and preprocesses images."""
# # Cache image file locally.
# image_path = tf.keras.utils.get_file(os.path.basename(image_url)[-128:], image_url)
# # Load and convert to float32 numpy array, add batch dimension, and normalize to range [0, 1].
# img = tf.io.decode_image(
# tf.io.read_file(image_path),
# channels=3, dtype=tf.float32)[tf.newaxis, ...]
# img = crop_center(img)
# img = tf.image.resize(img, image_size, preserve_aspect_ratio=True)
# return img
@functools.lru_cache(maxsize=None)
def load_image(image_path, image_size=(256, 256), preserve_aspect_ratio=True):
print(f"loading image {image_path}")
"""Loads and preprocesses images."""
# Load and convert to float32 numpy array, add batch dimension, and normalize to range [0, 1].
img = tf.io.decode_image(
tf.io.read_file(image_path),
channels=3, dtype=tf.float32)[tf.newaxis, ...]
img = crop_center(img)
img = tf.image.resize(img, image_size, preserve_aspect_ratio=True)
return img
def show_n(images, titles=('',)):
n = len(images)
image_sizes = [image.shape[1] for image in images]
w = (image_sizes[0] * 6) // 320
plt.figure(figsize=(w * n, w))
gs = gridspec.GridSpec(1, n, width_ratios=image_sizes)
for i in range(n):
plt.subplot(gs[i])
plt.imshow(images[i][0], aspect='equal')
plt.axis('off')
plt.title(titles[i] if len(titles) > i else '')
plt.show()加载一些图像来看看效果,
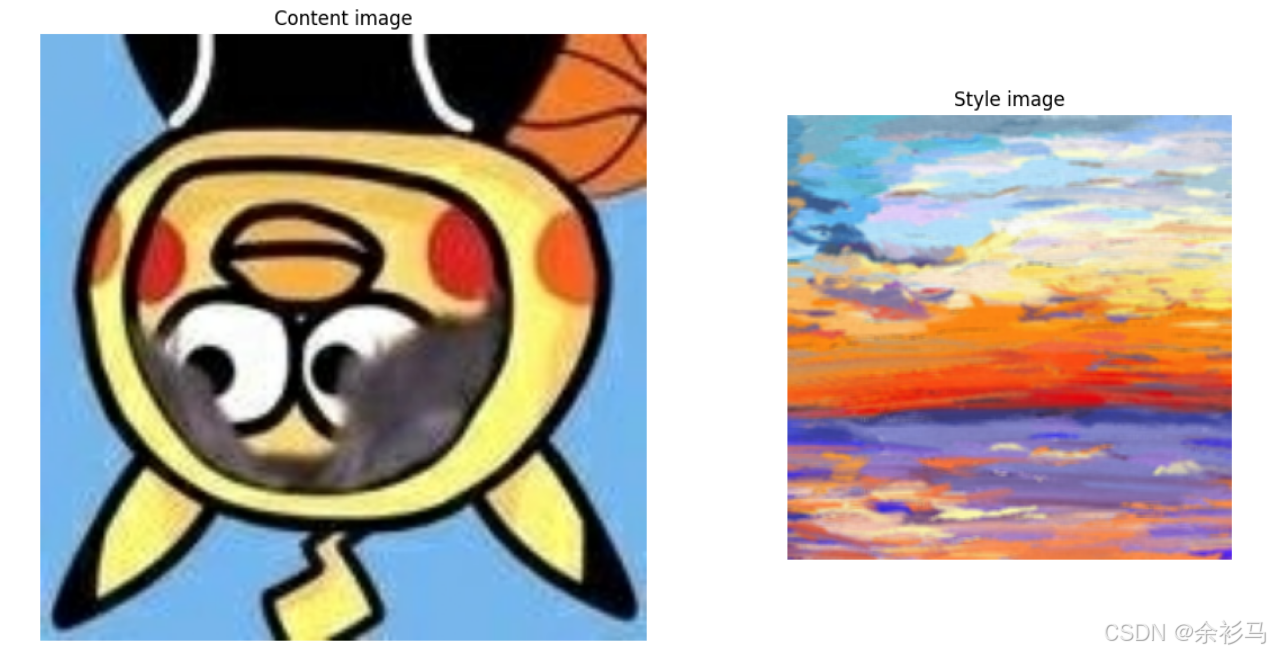
# @title Load example images  { display-mode: "form" }

content_image_path = 'data/input/thunderkun.jpg'  # @param {type:"string"}
style_image_path = 'data/style/style28.jpg'  # @param {type:"string"}
output_image_size = 384  # @param {type:"integer"}

# The content image size can be arbitrary.
content_img_size = (output_image_size, output_image_size)
# The style prediction model was trained with image size 256 and it's the
# recommended image size for the style image (though, other sizes work as
# well but will lead to different results).
style_img_size = (256, 256)  # Recommended to keep it at 256.

content_image = load_image(content_image_path, content_img_size)
style_image = load_image(style_image_path, style_img_size)
style_image = tf.nn.avg_pool(style_image, ksize=[3,3], strides=[1,1], padding='SAME')
show_n([content_image, style_image], ['Content image', 'Style image'])
loading image data/input/thunderkun.jpg
loading image data/style/style28.jpg输出如下:
四、导入 TF Hub 模块
# Load TF Hub module.
hub_handle = 'https://tfhub.dev/google/magenta/arbitrary-image-stylization-v1-256/2'
hub_module = hub.load(hub_handle)
该 Hub 模块用于图像风格化的签名为:
outputs = hub_module(content_image, style_image)
stylized_image = outputs[0]
其中,content_image、style_image 和 stylized_image 预期是形状为 [batch_size, image_height, image_width, 3] 的四维张量。
在当前示例中,我们仅提供单个图像,因此,批次维度为 1,但是我们也可以使用同一模块同时处理更多图像。
图像的输入和输出值应在 [0, 1] 范围内。
内容与风格图像的形状不一定要匹配。输出图像形状与内容图像形状相同。
五、演示图像风格化
# Stylize content image with given style image.
# This is pretty fast within a few milliseconds on a GPU.
outputs = hub_module(tf.constant(content_image), tf.constant(style_image))
stylized_image = outputs[0]
# Visualize input images and the generated stylized image.
show_n([content_image, style_image, stylized_image], titles=['Original content image', 'Style image', 'Stylized image'])
参考资料
任意风格的快速风格转换 | TensorFlow Hub