MybatisPlus--核心功能--service接口
Service接口
基本用法
MyBatisPlus同时也提供了service接口,继承后一些基础的增删改查的service代码,也不需要去书写。
接口名为Iservice,而Iservice也继承了IRepository,这里提供的方法跟BaseMapper相比只多不少,整体还是分为增删改查这几大类。只不过查询的类型占大半。
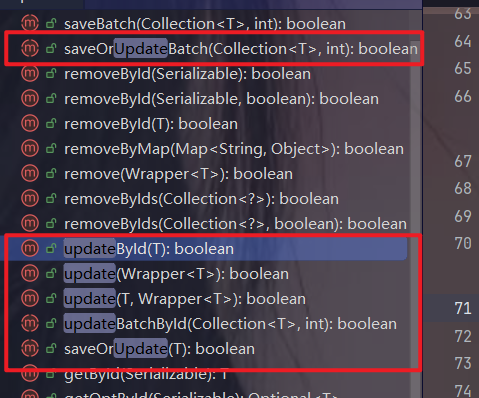
首先先看新增:

save(T):接收一个泛型参数,
saveBatch():接收一个collection集合,用于批量新增。
saveOrUpdate():接受一个泛型参数,会进行判断该对象有无ID,,如果有则认为是一个Update操作,反之则为Insert操作,saveOrUpdateBatch():方法支持批量新增及更新。
再看删除操作:
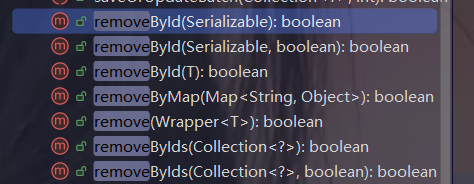
removeById():只删除一个
removeByIds():批量删除,where条件后面用的是in关键字
修改操作:
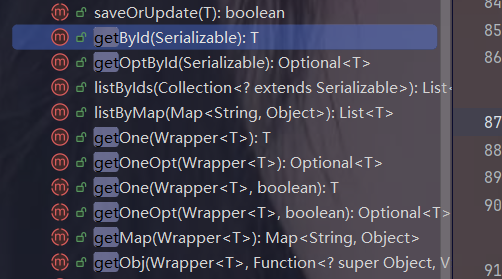
剩下的都是查询操作:
将其分为以下几类:
如果只查一条数据,就调用get开头的方法:
查询多条数据则为list:
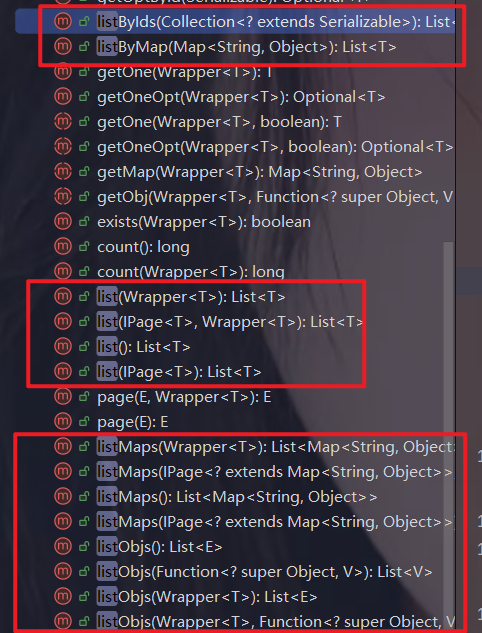
listByIds:传入一个id的集合,返回一个List集合
list():查询全部,或者基于Wrapper做复杂查询
查询数量就调用count开头的方法:

分页查询就调用page开头的方法:

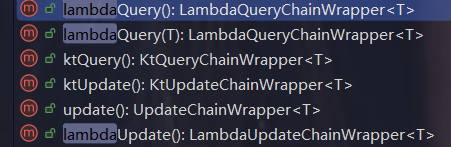
在进行一些复杂查询时,就需要新建Wrapper,步骤较为繁琐,因此提供了LambdaQuery()方法,返回LambdaQueryChainWrapper,即链式编程Wrapper,调用该方法就可以直接基于LambdaWrapper做查询,不需要再次新建。
注意事项:
我们正常开发过程中,都是先编译service接口,在编译接口实现类,然后在接口中添加方法,在实现类中实现方法,但如果service接口去继承IService,那么Iservice接口中的方法,实现类必须全部实现。这与我们原先的白嫖想法冲突。因此官方为Iservice已经提供好了实现类ServiceImpl,所以我们只需要让我们的实现类去继承Iservice的实现类。所以我们的业务接口继承Iservice,而接口实现类继承Iservice的接口实现类。这样我们就达到了白嫖的目的。
代码展示:
public interface UserService extends IService<User> {
}
@Service
public class UserServiceImpl extends ServiceImpl<UserMapper, User> implements UserService {}创建测试类:
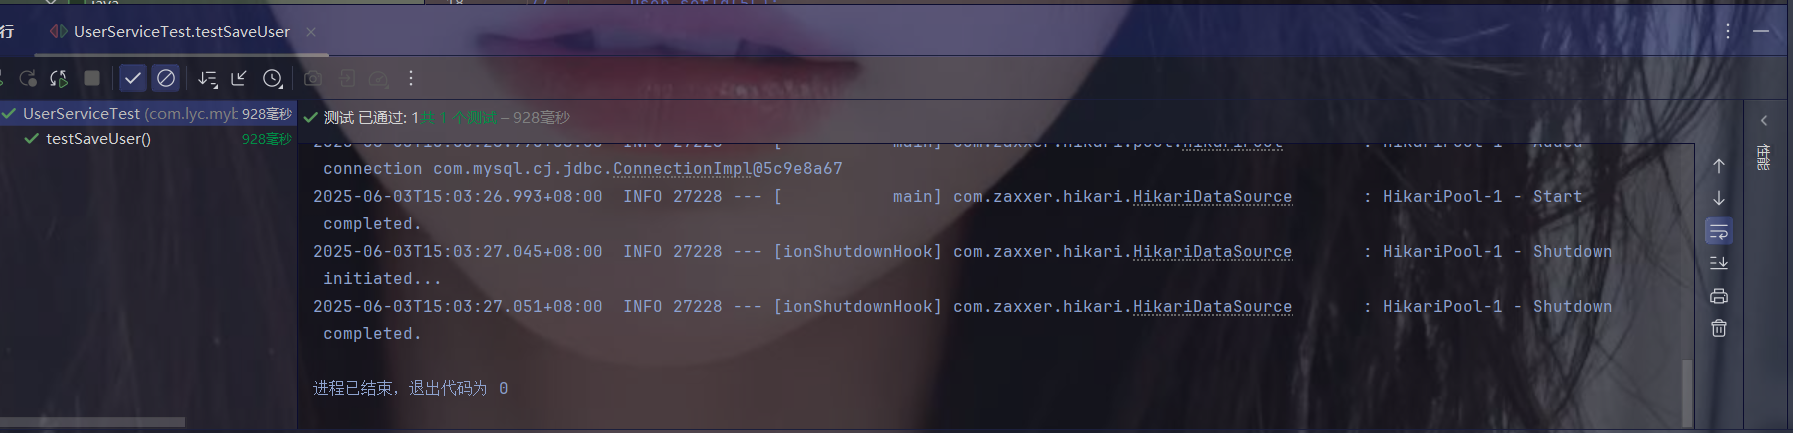
@SpringBootTestclass UserServiceTest {@Autowiredprivate UserService userService;@Testvoid testSaveUser(){User user = new User();// user.setId(5L);user.setUsername("wew");user.setPassword("123456");user.setPhone("12345678901");user.setBalance(200);user.setInfo("{\"age\":24,\"intro\":\"英文老师\",\"gender\":\"female\"}");user.setCreateTime(LocalDateTime.now());user.setUpdateTime(LocalDateTime.now());userService.save(user);}}测试新增操作:
查询操作:

小结:
Service接口使用流程:
-
自定义Service接口继承Iservice接口
-
自定义Service实现类,实现自定义接口不能够继承ServiceImpl类。
进阶用法
在前面学习完Iservice的基本用法后,发现MyBatisPlus中的BaseMapper以及Iservice接口有许多相似的功能,那么在实际开发中应该使用哪个接口提供的方法呢?
接下来通过几个案例去探究实际开发中如何使用:
案例展示:基于RestFul风格实现下面的接口:
| 编号 | 接口 | 请求方式 | 请求路径 | 请求参数 | 返回值 |
|---|---|---|---|---|---|
| 1 | 新增用户 | POST | /users | 用户表单实体 | 无 |
| 2 | 删除用户 | DELETE | /users/{id} | 用户ID | 无 |
| 3 | 根据ID查询用户 | GET | /users/{id} | 用户ID | 用户v0 |
| 4 | 根基ID批量查询 | GET | /users | 用户ID集合 | 用户v0集合 |
| 5 | 根基ID扣减余额 | PUT | /users/{id}/deduction/{money} | 用户id以及扣减金额 | 无 |
前置需求:
引入web与swagger的起步依赖
<dependency><groupId>com.github.xiaoymin</groupId><artifactId>knife4j-openapi3-spring-boot-starter</artifactId><version>4.5.0</version></dependency><dependency><groupId>org.springframework.boot</groupId><artifactId>spring-boot-starter-web</artifactId></dependency><dependency><groupId>org.springdoc</groupId><artifactId>springdoc-openapi-starter-webmvc-ui</artifactId><version>2.5.0</version></dependency><dependency><groupId>org.springdoc</groupId><artifactId>springdoc-openapi-starter-webmvc-api</artifactId><version>2.5.0</version>配置swagger信息:
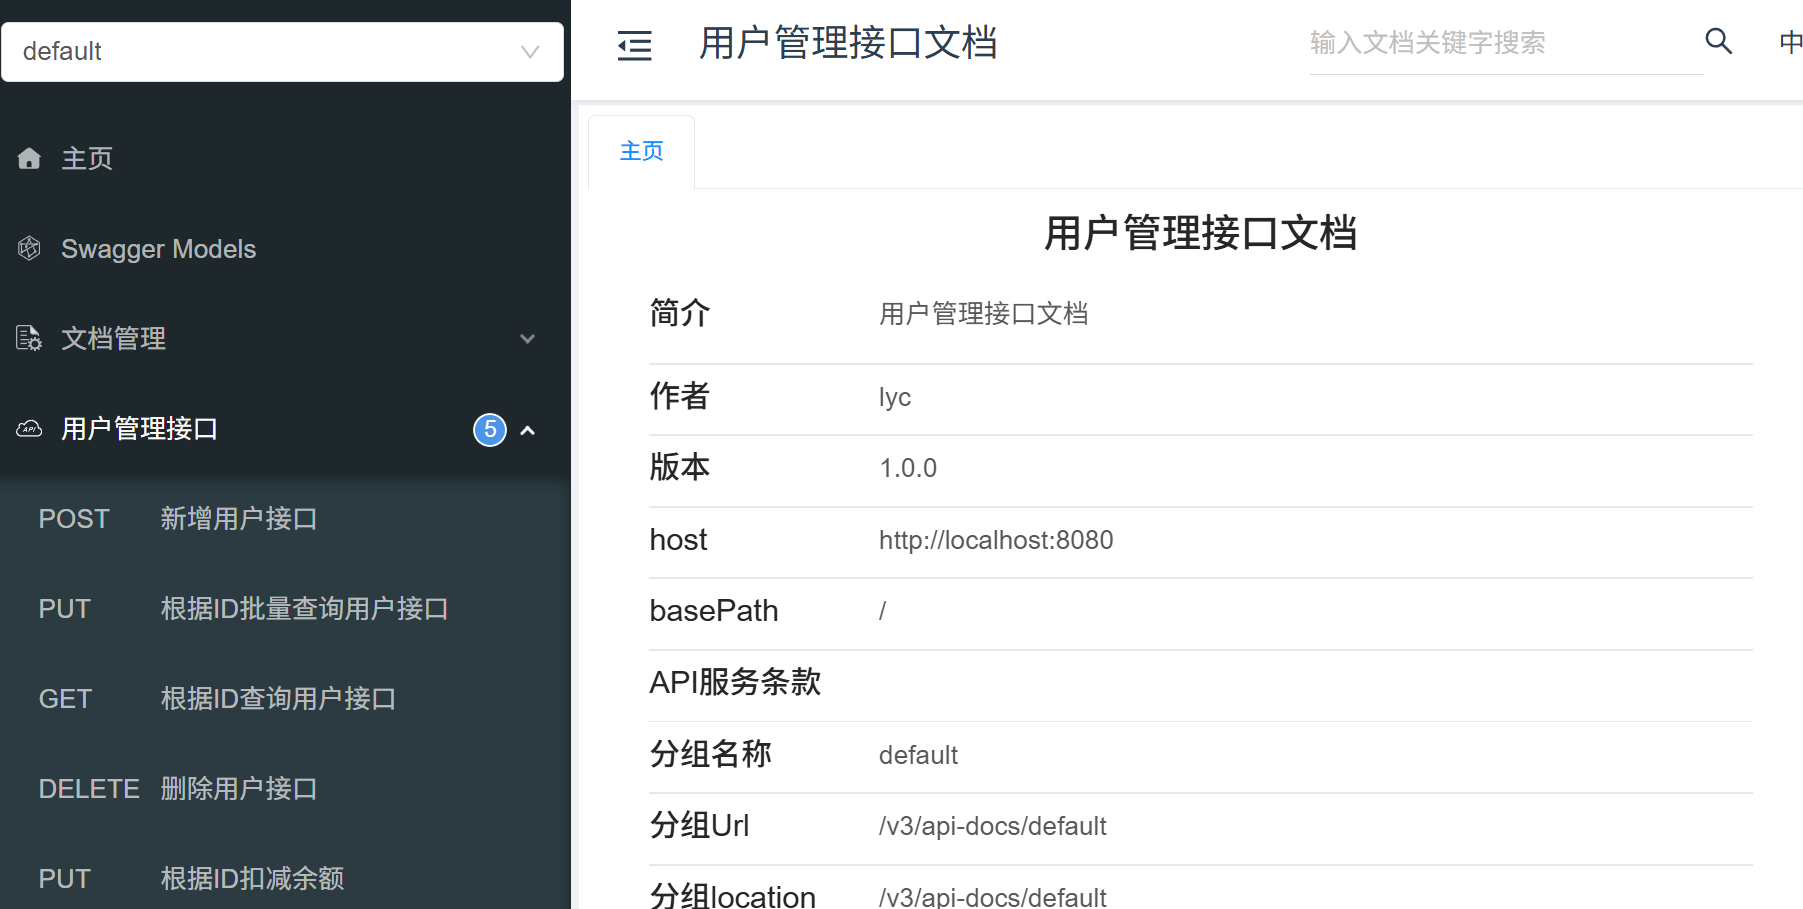
springdoc:swagger-ui:path: /swagger-ui.htmltags-sorter: alphaoperations-sorter: alphaapi-docs:path: /v3/api-docsgroup-configs:- group: defaultpaths-to-match: /**packages-to-scan: com.lyc.mybatisplusdemo.controller @Configurationpublic class SwaggerConfig {@Beanpublic OpenAPI customOpenAPI() {return new OpenAPI().info(new Info().title("用户管理接口文档").version("1.0.0").description("用户管理接口文档").contact(new Contact().name("lyc").email("2089371290@qq.com").url("https://www.dwq.cn")));}@Beanpublic GroupedOpenApi defaultApi() {return GroupedOpenApi.builder().group("default").packagesToScan("com.lyc.mybatisplusdemo.controller").pathsToMatch("/**").build();}}定义VO包,DTO包以及对应的VO类及DTO类、
UserFormDTO.java
@Data@Schema(name = "用户表单实体")public class UserFormDTO {@Schema(description = "id")private Long id;@Schema(description = "用户名")private String username;@Schema(description = "密码")private String password;@Schema(description = "注册手机号")private String phone;@Schema(description = "详细信息,JSON风格")private String info;@Schema(description = "账户余额")private Integer status;UserVO
@Data@Schema(name = "用户VO实体")public class UserVO {@Schema(description = "用户id")private Long id;@Schema(description = "用户名")private String username;@Schema(description = "详细信息")private String info;@Schema(description = "使用状态(1正常,2冻结)")private Integer status;@Schema(description = "账户余额")private Integer balance;然后新建controller包编写UserController。
在UserController类中编写接口,前四个接口业务逻辑较简单,在conroller层即可完成
//编写swagger注解@Tag(name = "用户管理接口")@RestController@RequestMapping("/users")public class UserController {@Resourceprivate UserService userService;@Operation(summary = "新增用户接口")@PostMappingpublic void saveUser(@RequestBody UserFormDTO userDTO){// @RequsetBody 将请求类型定义为json//1.将DTO拷贝到实体中User user = BeanUtil.copyProperties(userDTO, User.class);//2.新增用户userService.save(user);}@Operation(summary = "删除用户接口")@DeleteMapping("{id}")public void deleteUser(@Parameter(description = "用户id") @PathVariable("id") Long id){userService.removeById(id);}@Operation(summary = "根据ID查询用户接口")@GetMapping("{id}")public UserVO updateUser(@Parameter(description = "用户id") @PathVariable("id") Long id){//1.查询用户User user = userService.getById(id);//2.拷贝到VO中并返回return BeanUtil.copyProperties(user, UserVO.class);}@Operation(summary = "根据ID批量查询用户接口")@PutMappingpublic List<UserVO> updateUser(@Parameter(description = "用户id集合") @RequestParam("ids") List<Long> ids){List<User> users = userService.listByIds(ids);return BeanUtil.copyToList(users, UserVO.class);}第五个接口:
conroller层:
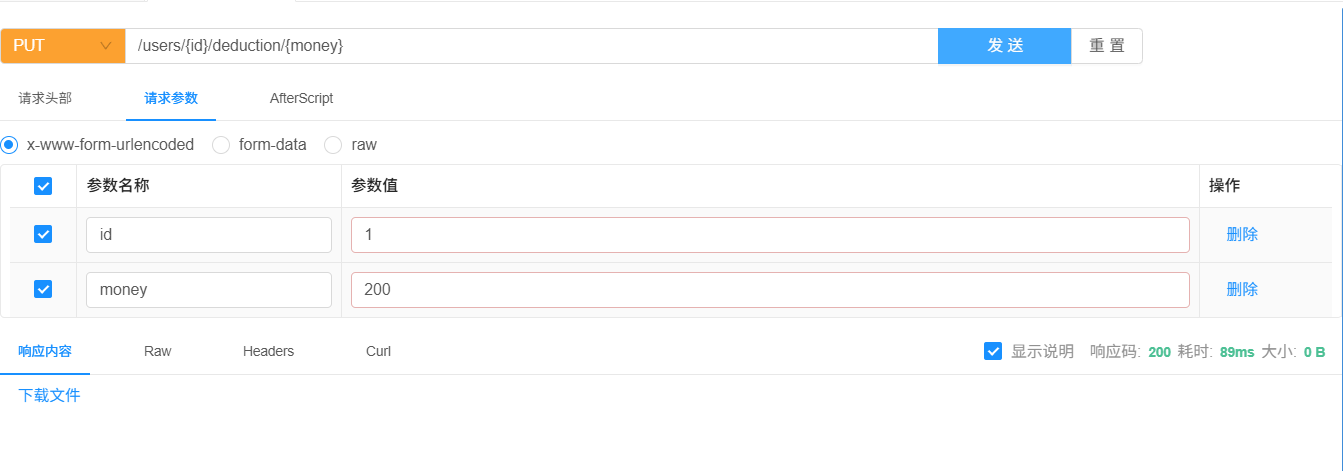
@Operation(summary = "根据ID扣减余额")@PutMapping("{id}/deduction/{money}")public void updateBalanceById(@PathVariable("id") Long id, @PathVariable("money") Integer money){userService.updateBalanceByIds(id, money);}}service层:
public void updateBalanceByIds(Long id, Integer money) {//1,查询用户User user = getById(id);//2.校验用户状态if (user.getStatus() == 2 || user == null) {throw new RuntimeException("用户不存在或者被禁用");}//3。校验余额是否充足if (user.getBalance() < money) {throw new RuntimeException("余额不足");}//4.更新用户余额baseMapper.updateBalanceById(id, money);}mapper层:
@Update("update tb_user set balance = balance - #{money} where id = #{id}")void updateBalanceById(@Param("id") Long id, @Param("money") Integer money);注意事项:在编译简单接口时可以直接在controller层调用MyBatisPlus提供的Iservice接口方法实现,但是遇到一些业务逻辑复杂的业务时,需要编写自定义的业务逻辑时,就需要自定义service方法编写业务逻辑了,当我们的业务需要去编写自定义的SQL语句时,我们还需要去自定义方法,在mapper层实现方法。
启动:在浏览器中进入用户管理接口文档
测试新增接口:
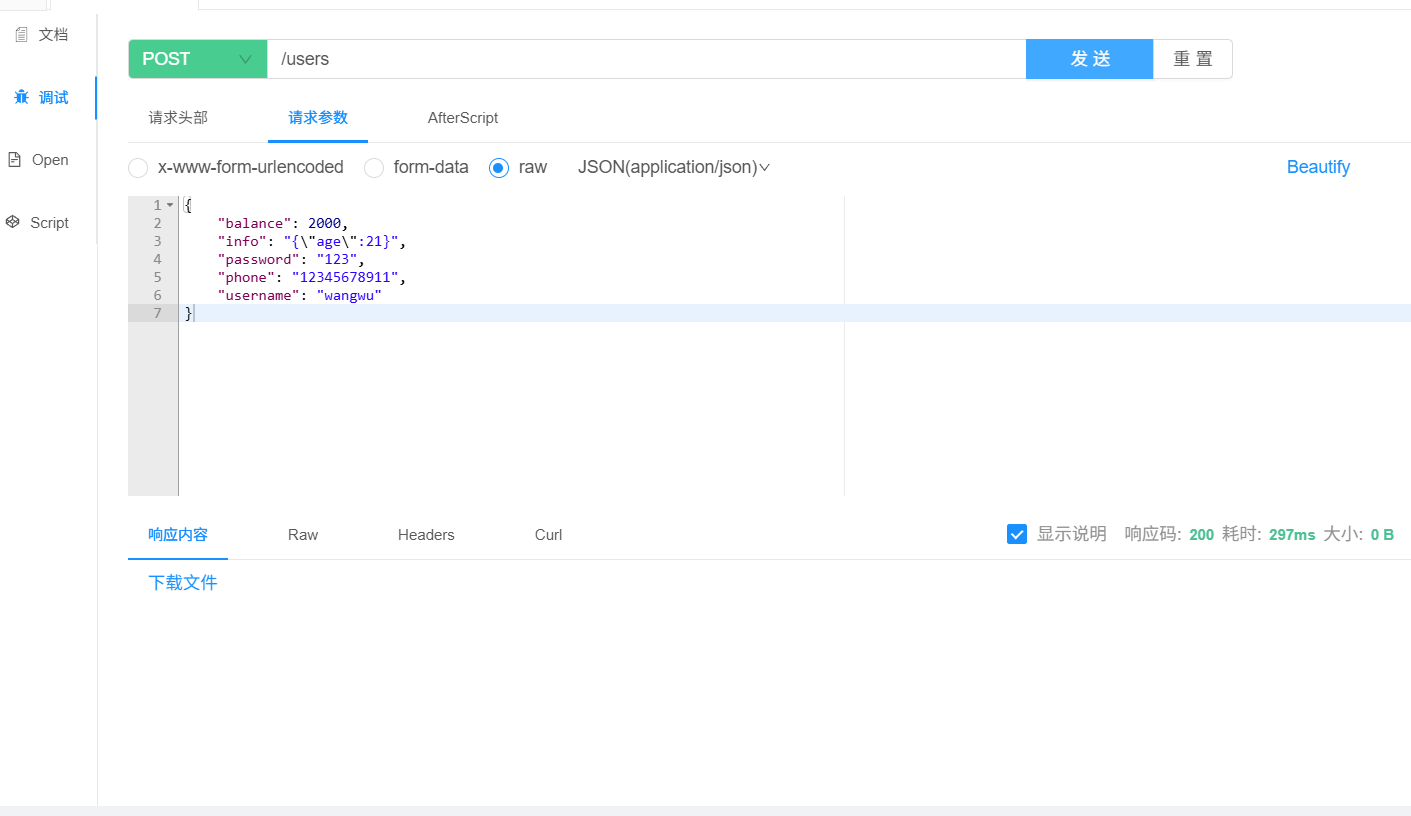
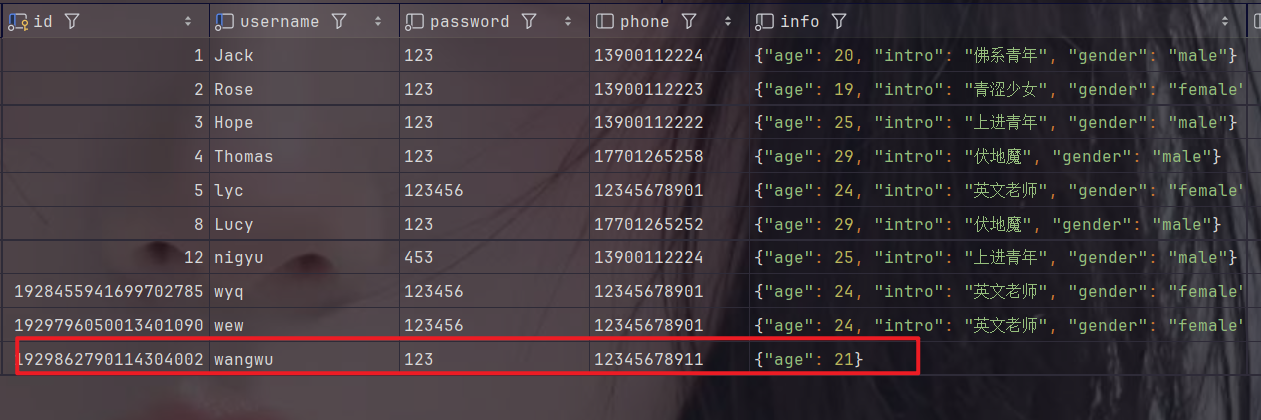
测试成功,查看数据库:
测试查询接口:

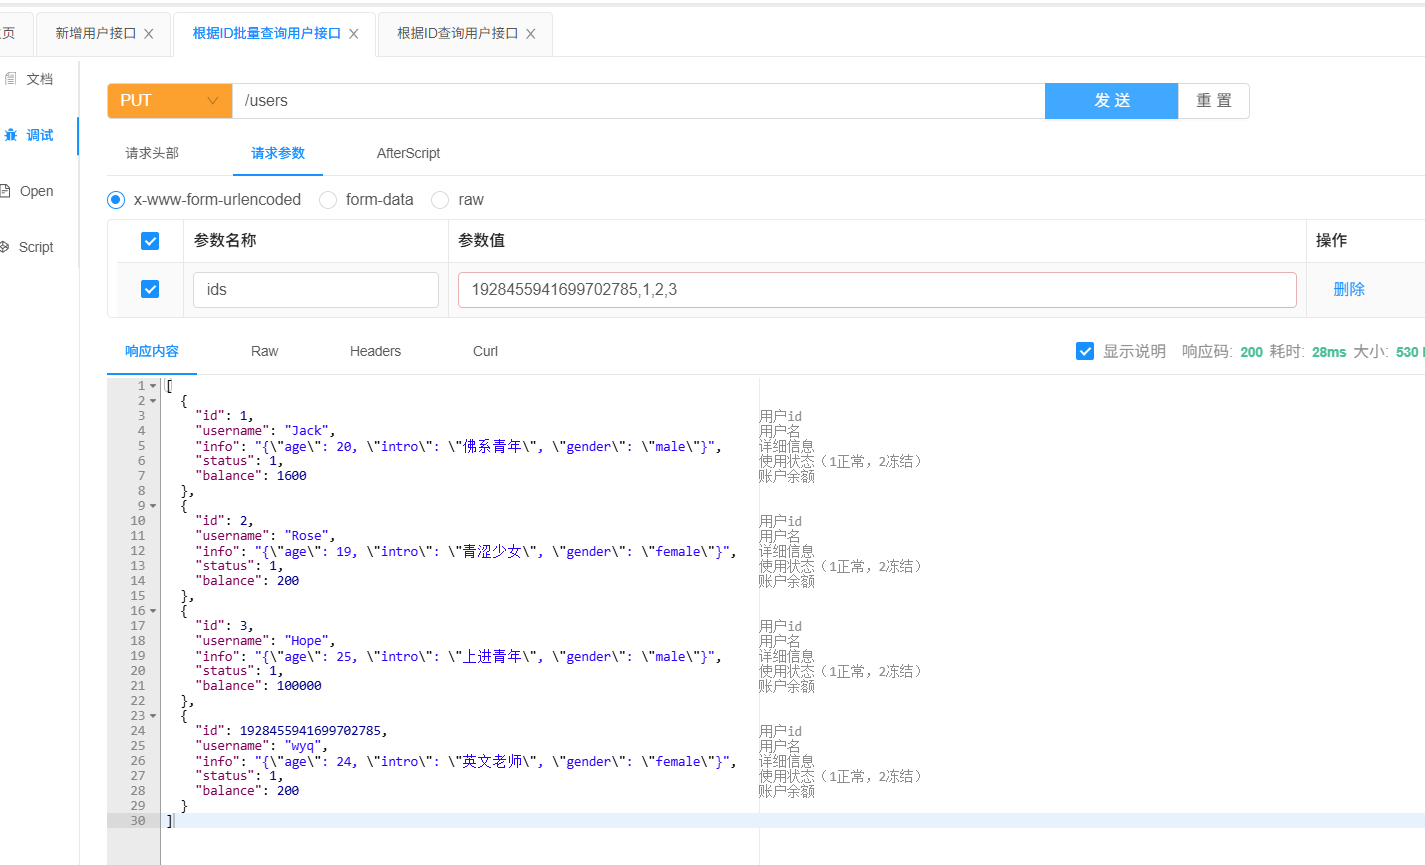
测试批量查询接口:
测试扣减接口:
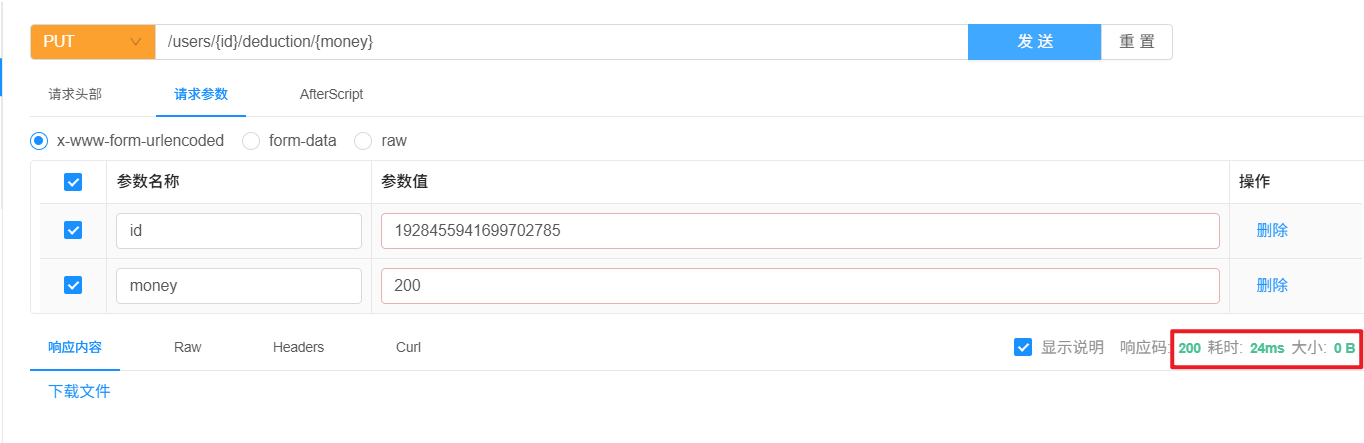
测试成功。
测试删除用户接口:
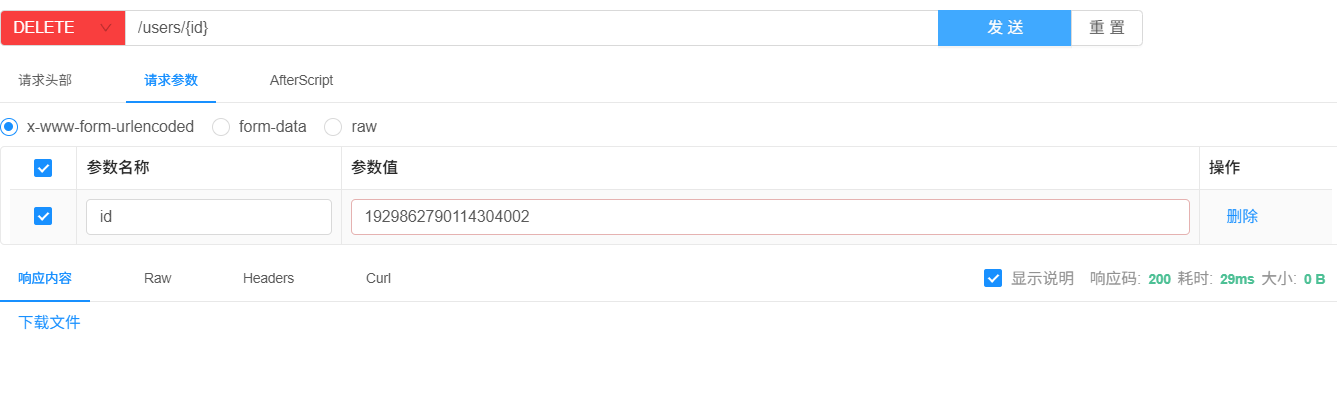
测试成功。
总结:
对于一些简单的增删改查的方法,可以直接在controller层中调用Iservice接口的方法,无需写任何的自定义service或者mapper。
只有在业务逻辑相对复杂,需要自己写一些业务逻辑,而MyBatisPlus只提供基础的增删改查,就需要自定义service方法,在其中编写业务逻辑。
而当BaseMapper中无法提供需要的增删改查方法时,就需要去自定义SQL语句,在mapper层中去定义方法,实现业务逻辑。
Lambda方法
基于案例理解:
需求:实现一个根据复杂条件查询用户的接口,查询条件如下:
-
name: 用户名关键字,可以为空
-
status: 用户状态,可以为空
-
minBalabce: 最小余额,可以为空
-
maxBalance:最大余额,可以为空
就类似于前端页面中的用户列表查询,但是在查询顶部有几个过滤状态,可以对名字过滤,可以对用户状态进行过滤,以及余额的管理。
因此实现该接口就不能直接写条件,就需要加上判断,
SQL语句(全手动):
<select id="queryUsers" resultType="com.lyc.mp.domain.po.user">select * from tb_user<where><if test="name != null">and username like #{name}</if><if test="status != null">and `status` = #{status}</if><if test="minBalance != null and MaxBalance != null">and balance between #{minBalance} and #{maxBalance}and username like #{name}</if></where></select>接下来着手准备编写接口。
注意事项:在传入参数较多时,可以将其封装为对象传入。
前置代码:
UserQuery.java
@Data@Schema(name = "用户查询条件实体")public class UserQuery {@Schema(description = "用户名关键字")private String name;@Schema(description = "用户状态")private Integer status;@Schema(description = "余额最小值")private Integer minBalance;@Schema(description = "余额最大值")private Integer maxBalance;Controller层:
@Operation(summary = "根据复杂条件查询用户接口")@GetMapping("/list")public List<UserVO> getUserList(UserQuery query){//1.查询用户List<User> users = userService.getUserList(query.getName(), query.getStatus(), query.getMinBalance(), query.getMaxBalance());//2.拷贝到VO中并返回return BeanUtil.copyToList(users, UserVO.class);}Service层:
public List<User> getUserList(String name, Integer status, Integer minBalance, Integer maxBalance) {return lambdaQuery()//相当于 <if test="name != null"> and username like #{name} </if>.like(name != null, User::getUsername, name)//相当于 <if test="status != null"> and status = #{status} </if>.eq(status != null, User::getStatus, status)//相当于 <if test="minBalance != null"> and balance > #{minBalance} </if>.gt(minBalance != null, User::getBalance, minBalance)//相当于 <if test="maxBalance != null"> and balance < #{maxBalance} </if>.lt(maxBalance != null, User::getBalance, maxBalance).list();}测试:
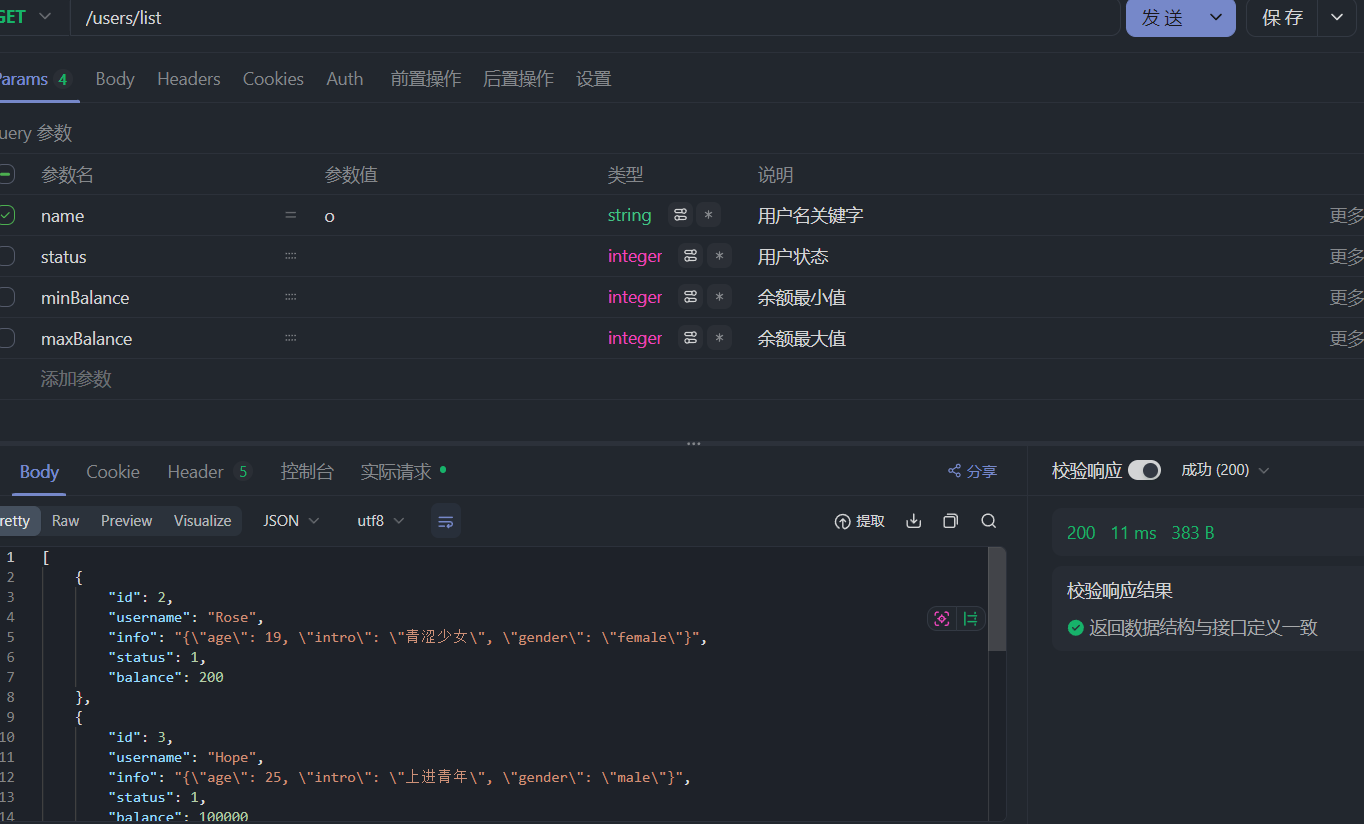
测试成功,
以上演示的是LambdaQuery。
案例展示:Iservice的Lambda更新
需求:改造根据id修改用户余额的接口,要求如下
-
完成对用户的校验
-
完成对用户余额校验
-
如果扣减后余额为0,则将用户status修改为冻结状态(2)
这与我们前面的扣减余额接口一致,直接在该接口上进行修改。
@Transactionalpublic void updateBalanceByIds(Long id, Integer money) {//1,查询用户User user = getById(id);//2.校验用户状态if (user.getStatus() == 2 || user == null) {throw new RuntimeException("用户不存在或者被禁用");}//3。校验余额是否充足if (user.getBalance() < money) {throw new RuntimeException("余额不足");}//4.更新用户余额int remainBalance = user.getBalance() - money;//链式函数 类似于流 需要中间方法 及 结束方法lambdaUpdate()// 相当于 set balance = balance - #{money}.set(User::getBalance, remainBalance)// 相当于 <if test="remainBalance == 0"> set status = 2 </if>.set(remainBalance == 0, User::getStatus, 2)// 相当于 where id = #{id}.eq(User::getId, id).eq(User::getBalance,user.getBalance()) // 乐观锁.update();}在这里结束后会有并发线程安全问题,如果有多个线程同时访问,两个用户,两条线程,都来进行对比,最后减去相同的数据,这样就会导致两条线程中只会被减去一个线程。
我们可以采用乐观锁(CAS),比较并替换,如果余额不相同,就会回滚
进行测试:
测试成功。
案例展示:Iservice的批量新增
需求:批量插入1万条用户数据,并做出对比:
-
普通for循环
-
Iservice的批量插入
普通for循环
private User buildUser(int i){User user = new User();user.setUsername("user" + i);user.setPassword("123456");user.setPhone(""+(12345678901L + i));user.setBalance(2000);user.setInfo("{\"age\":24,\"intro\":\"英文老师\",\"gender\":\"female\"}");user.setCreateTime(LocalDateTime.now());user.setUpdateTime(LocalDateTime.now());return user;}@Testvoid testSaveBatch(){long start = System.currentTimeMillis();for (int i = 0; i < 10000; i++) {userService.save(buildUser(i));}long end = System.currentTimeMillis();System.out.println("耗时:" + (end - start));}测试结果:耗时:11148
Iservice的批量插入
void testSaveBatch2(){//插入100次,每次插入1000条数据long start = System.currentTimeMillis();//准备一个容量为1000的集合List<User> users = new ArrayList<>(1000);for (int i = 0; i < 10000; i++) {users.add(buildUser(i));//每1000条数据插入一次数据库if (i % 1000 == 0) {userService.saveBatch(users);//清空集合users.clear();}}long end = System.currentTimeMillis();System.out.println("耗时:" + (end - start));}耗时:1790
提升了十倍的效率,但还是不够快。
性能分析:
在普通for循环插入是一条一条插入数据库,每一次访问数据库就是一次IO操作,进行了10000网络请求,十分消耗性能
而Iservice的批量插入,MyBatisPlus采用的是JDBC底层的预编译方案,Prepare statement 预编译:这种方案在便利的过程中把用户提交的user数据对其进行编译变成SQL语句 。在代码中就是一千条SQL语句,在执行到saveBatch()时一次性提交到数据库,也就是每1000条数据进行一次IO操作,只进行了10次网络请求。但是这种方案是将数据编译成了SQL语句,数据库在执行时还是一条一条执行的,因此,性能还是有所损耗。
因此最优方案是将1000条数据编译成1条SQL语句,再交于数据库执行,这才是批量插入。
两种方案:
第一种是使用MyBatis使用动态SQL进行foreach遍历1000条数据,在便利的过程中拼接为一条SQL语句,这样性能最佳,但是需要我们去手写SQL语句,还是有些麻烦
第二种:
使用MyBatisPlus的批处理,加入一个参数 ,开启rewriteBathedStatements = true参数,(重写批处理),这并不是MyBatisPlus中的配置,其实是MySQL中的配置。
在数据库配置中添加该参数即可
spring:datasource:driver-class-name: com.mysql.cj.jdbc.Driverurl: jdbc:mysql://localhost:3306/mp?serverTimezone=Asia/Shanghai&useUnicode=true&characterEncoding=utf-8&allowMultiQueries=true&useSSL=false&rewriteBatchedStatements=trueusername: rootpassword: 123456再次测试:
耗时:862,有提升了将近一倍,而且数据量越大,差距越明显。
总结:
在批量插入数据时,提供了三种方案:
-
普通for循环逐条插入速度极差,不推荐(原因:每次只提交一条数据插入数据库,数据库也是逐条执行)
-
默认情况下MyBatisPlus的批量新增,基于预编译的批处理,性能良好(原因:一次性提交100条数据插入数据库,但数据库依旧是逐条插入)
-
配置JDBC参数:
rewriteBathedStatements = true,性能最佳(一次性提交100条数据插入数据库,数据库也是批量插入)
以上就是service接口的全部用法,让我们一起加油!
山不让尘,川不辞盈。