threejs渲染器和前端UI界面
1. three.js Canvas画布布局
学习本节课之前,可以先回顾下第一章节入门部分的6和12两小节关于threejs Canvas画布布局的讲解。
网页上局部特定尺寸:1.6 第一个3D案例—渲染器(opens new window)
全屏,随窗口变化:1.12 Canvas画布布局和全屏(opens new window)
局部,尺寸随窗口变化:在线案例
Canvas元素
Canvas是HTML的元素之一,Canvas元素的CSS布局规律和div、img等其它HTML元素相似,webgl就是依赖于canvas实现,threejs是基于webgl封装的,自然也要依赖canvas,具体说就是把三场场景渲染到canvas画布上。
<!-- canvas元素默认是行内块元素 -->
<canvas style="background-color: #ff0000;" width="300" height="180"></canvas>
threejs渲染结果CSS布局
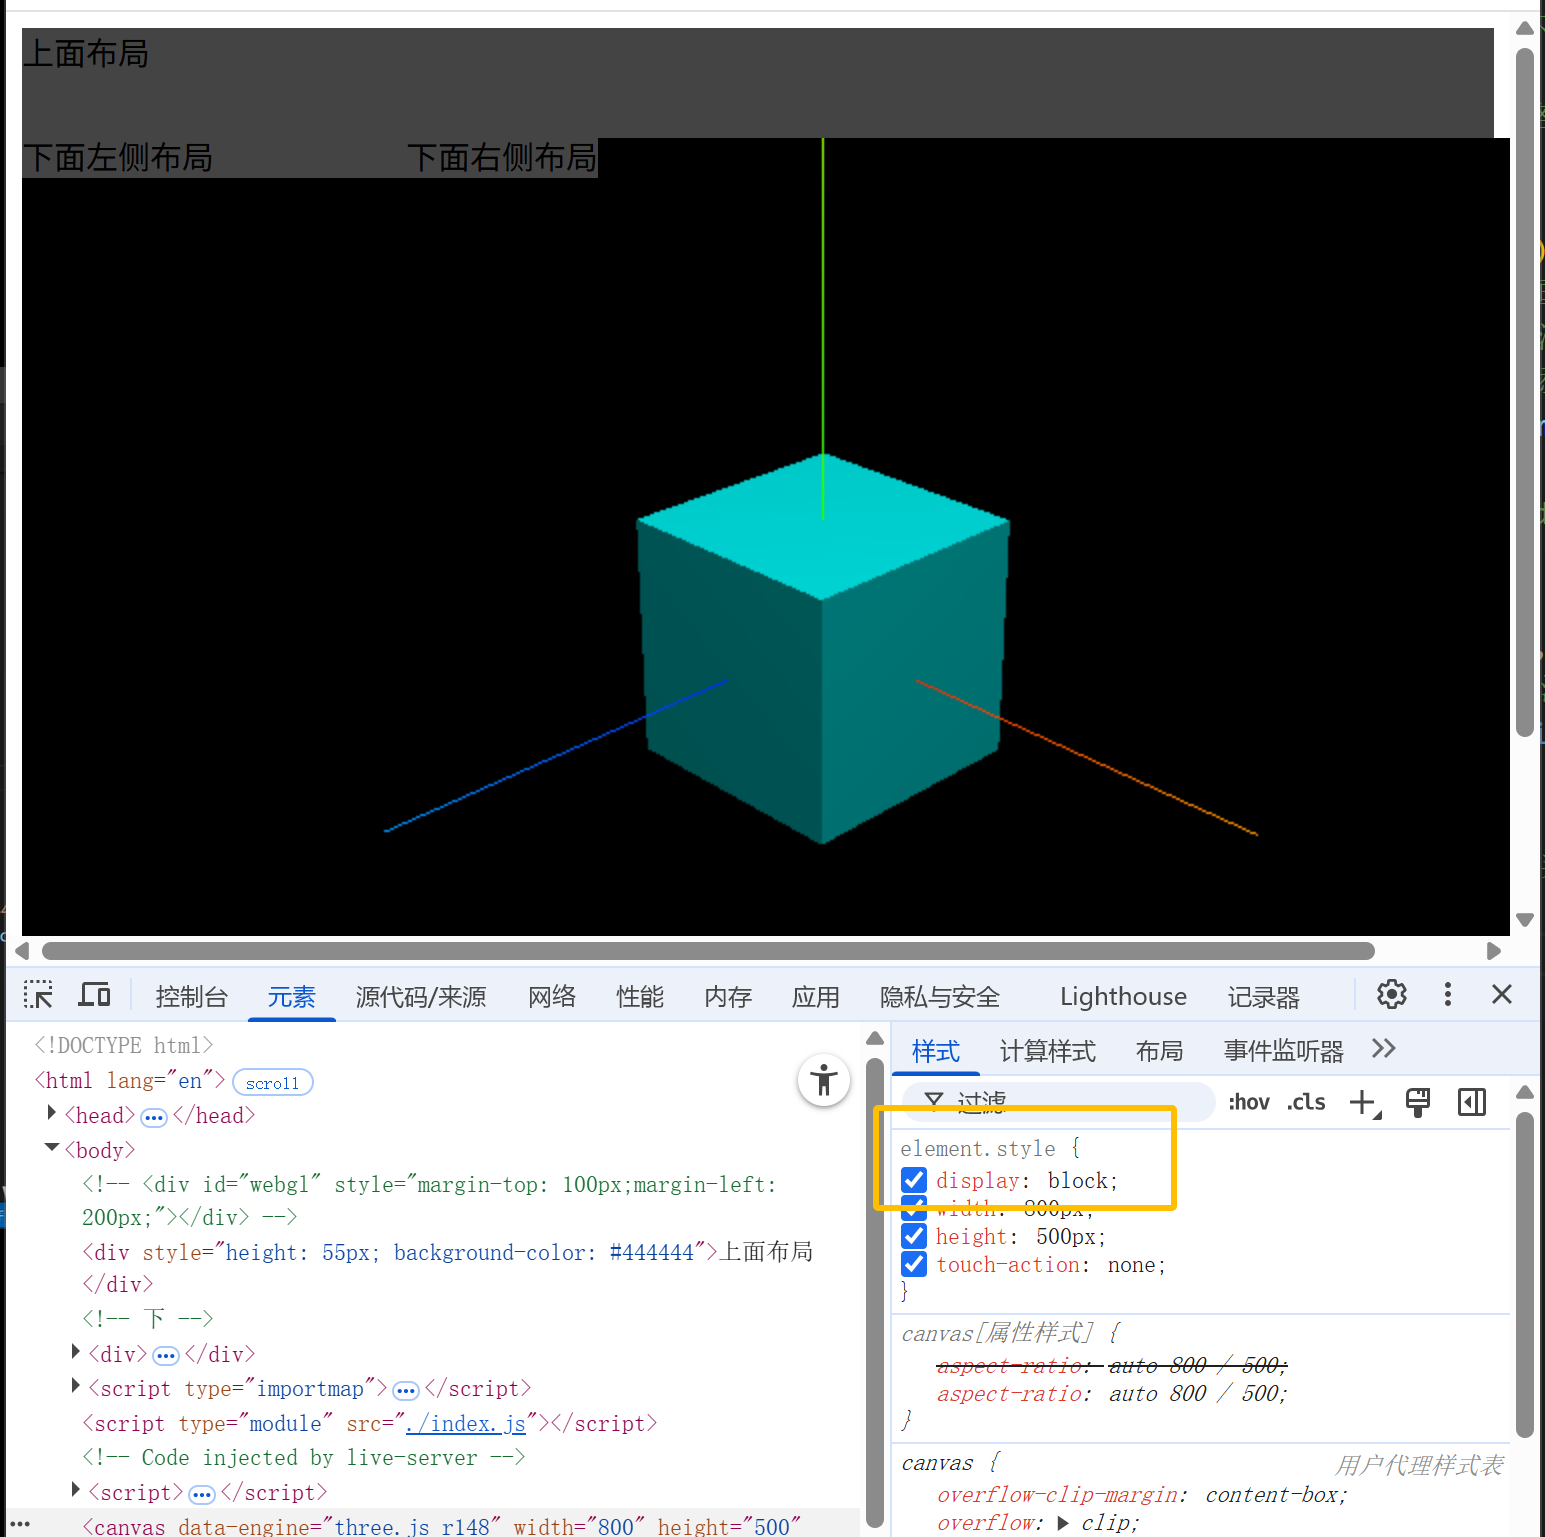
浏览器控制台通过元素选项查看threejs输出的cnavas画布,你可以看到threejs默认把canvas设置为块元素display: block;。
既然three.js渲染输出的Canvas画布本质上就是一个HTML元素,那么你布局的时候,直接使用你的前端CSS知识即可。
案例源码“CSS布局案例.html”
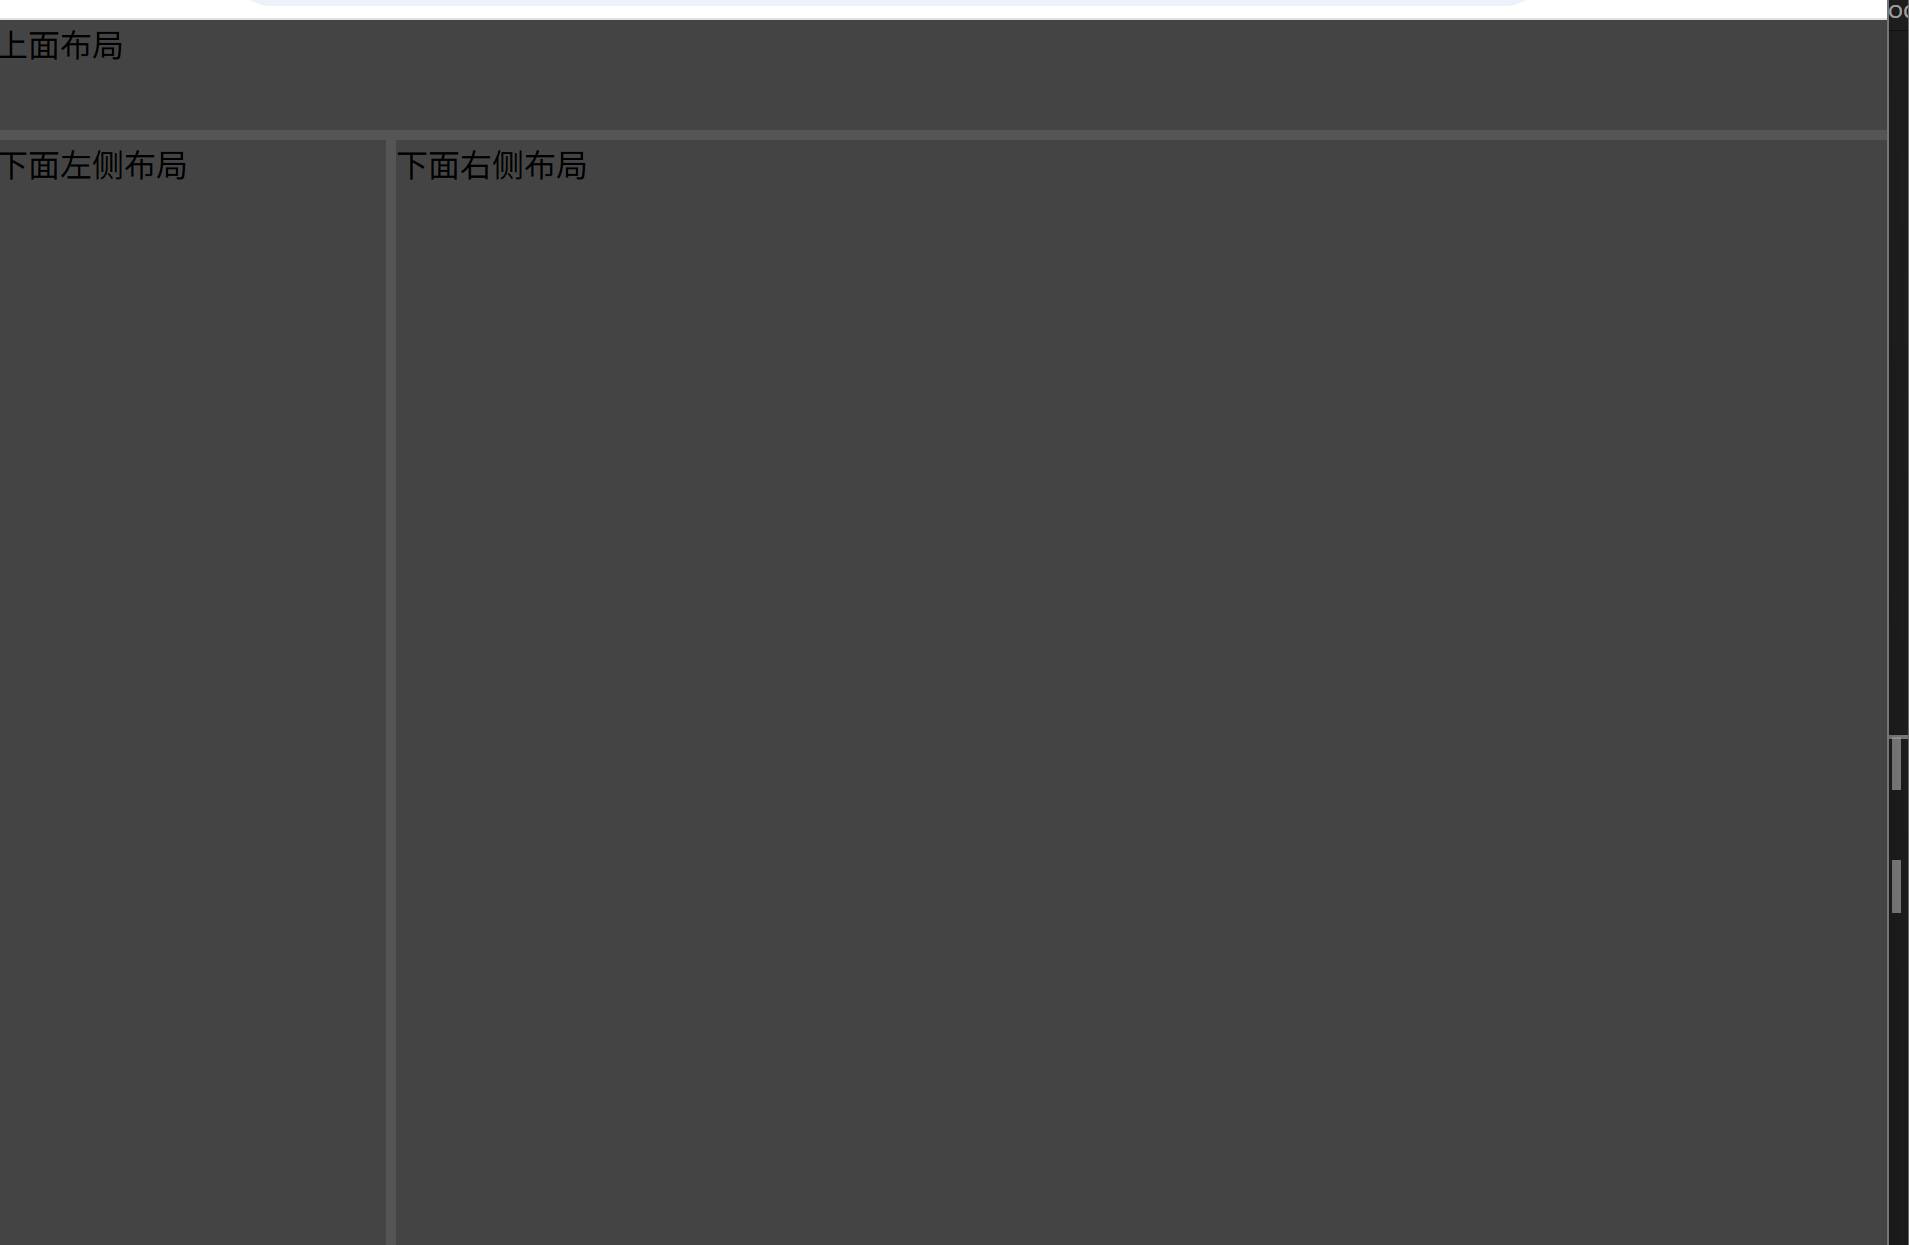
案例源码“CSS布局案例.html”提供了一个CSS的布局案例,你可以把threejs画布插入右下角的div元素中,并完全填充。
案例源码“CSS布局案例.html”的布局效果,你也可以用CSS其它方式实现,不一定和课程中一样,CSS布局是前端知识,这里不展开讲解,咱们把重点放在threejs上面。
<head><style>body {overflow: hidden;margin: 0px;}</style>
</head>
<body style="background: #555555;"><div style="height: 55px;background-color: #444444;">上面布局</div><!-- 下 --><div><div id="left" style="position: absolute;top: 60px;background-color: #444444;width: 195px;">下面左侧布局</div><div id="webgl" style="position: absolute;top: 60px;left: 200px;background-color: #444444;">下面右侧布局</div></div><script>const width = window.innerWidth - 200;const height = window.innerHeight - 60;document.getElementById('left').style.height = height + 'px';document.getElementById('webgl').style.width = width + 'px';document.getElementById('webgl').style.height = height + 'px';</script>
</body>
threejs Canvas画布尺寸设置
设置canvas画布的尺寸,注意在浏览器窗口文档区域整体宽高基础上,减掉其他顶部和左侧div元素和布局间隙的尺寸。
canvas画布的宽度: window.innerWidth减掉左侧div元素宽度195px和布局间距5px
canvas画布的高度: window.innerHeight减掉顶部div元素高度55px和布局间距5px
// 200表示左侧div元素宽度195px+间距5px
const width = window.innerWidth - 200; //canvas画布高度
//60表示顶部div元素高度55px+间距5px
const height = window.innerHeight - 60; //canvas画布宽度
...
const camera = new THREE.PerspectiveCamera(30, width / height, 1, 3000);
renderer.setSize(width, height);
// 200表示左侧div元素宽度195+间距5px
const width = window.innerWidth - 200; //canvas画布高度
//60表示顶部div元素高度55px+间距5px
const height = window.innerHeight - 60; //canvas画布宽度
...
const camera = new THREE.PerspectiveCamera(30, width / height, 1, 3000);
renderer.setSize(width, height);
Canvas随着窗口变化
// 画布跟随窗口变化
window.onresize = function () {const width = window.innerWidth - 200; //canvas画布高度const height = window.innerHeight - 60; //canvas画布宽度renderer.setSize(width, height);camera.aspect = width / height;camera.updateProjectionMatrix();
};
效果:

代码:
<!DOCTYPE html>
<html lang="en"><head><meta charset="UTF-8" /><meta name="viewport" content="width=device-width, initial-scale=1.0" /><title>Document</title></head><body><!-- canvas元素默认是行内块元素 --><canvas style="background-color: #ff0000" width="300" height="180"></canvas><canvas style="background-color: #ff0000" width="300" height="180"></canvas><!-- 如果有布局需要,可以通过display把canvas转化为和div一样块元素 --><canvas style="background-color: #ff0000;display: block;" width="300" height="180"></canvas></body>
</html>
canvas的布局案例:
<!DOCTYPE html>
<html lang="en"><head><style>body {overflow: hidden;margin: 0px;}</style></head><body style="background: #555555"><div style="height: 55px; background-color: #444444">上面布局</div><!-- 下 --><div><divid="left"style="position: absolute;top: 60px;background-color: #444444;width: 195px;">下面左侧布局</div><divid="webgl"style="position: absolute;top: 60px;left: 200px;background-color: #444444;">下面右侧布局</div></div><script>const width = window.innerWidth - 200;const height = window.innerHeight - 60;document.getElementById("left").style.height = height + "px";document.getElementById("webgl").style.width = width + "px";document.getElementById("webgl").style.height = height + "px";// 画布跟随窗口变化window.onresize = function () {const width = window.innerWidth - 200; //canvas画布高度const height = window.innerHeight - 60; //canvas画布宽度document.getElementById("left").style.height = height + "px";document.getElementById("webgl").style.width = width + "px";document.getElementById("webgl").style.height = height + "px";};</script></body>
</html>
效果
threejs的canvas画布默认为block块元素
代码:
index.html
<!DOCTYPE html>
<html lang="en"><head><meta charset="UTF-8" /><meta name="viewport" content="width=device-width, initial-scale=1.0" /><title>Document</title><style>body {overflow: hidden;margin: 0px;}</style></head><body style="background: #555555"><!-- <div id="webgl" style="margin-top: 100px;margin-left: 200px;"></div> --><div style="height: 55px; background-color: #444444">上面布局</div><!-- 下 --><div><divid="left"style="position: absolute;top: 60px;background-color: #444444;width: 195px;">下面左侧布局</div><divid="webgl"style="position: absolute;top: 60px;left: 200px;background-color: #444444;"></div></div><script type="importmap">{"imports": {"three": "../../three.js-r148/build/three.module.js","three/addons/": "../../three.js-r148/examples/jsm/"}}</script><script type="module" src="./index.js"></script><script>const height = window.innerHeight - 60;document.getElementById("left").style.height = height + "px";</script></body>
</html>
index.js
// 引入threejs
import * as THREE from "three";
// 引入轨道控制器扩展库OrbitControls.js
import { OrbitControls } from "three/addons/controls/OrbitControls.js";// 创建一个三维场景scene
const scene = new THREE.Scene();
// 给三维场景添加物体// 定义一个几何体,长方体,长宽高
const geometry = new THREE.BoxGeometry(50, 50, 50);
// 材质对象Material
const material = new THREE.MeshLambertMaterial({color: 0x00ffff, //红色材质,设置材质颜色transparent: false, //开启透明opacity: 1, //透明程度
});
// 创建一个网格模型:用来表示生活中的物体,将定义的体积和外观作为参数
const mesh = new THREE.Mesh(geometry, material);
mesh.position.set(0, 0, 0);
// 把mesh添加到场景中
scene.add(mesh);// 创建一个三维坐标轴
const axesHelper = new THREE.AxesHelper(100);
scene.add(axesHelper); //将坐标轴对象添加到三维场景中// 创建一个光源对象  点光源
const PointLight = new THREE.PointLight(0xffffff, 1.0);
PointLight.decay = 0.0; //不随着距离的改变而衰减
PointLight.position.set(400, 700, 300);
scene.add(PointLight);// 定义相机输出画布的尺寸(单位:像素px)
// const width = 800;
// const height = 500;
const width = window.innerWidth - 200; //canvas画布
const height = window.innerHeight - 60; //canvas画布// 设置相机的四个参数// 创建一个透视投影相机对象
const camera = new THREE.PerspectiveCamera(30, width / height, 0.1, 3000);
// 设置相机的位置
camera.position.set(200, 200, 200); //相机在Three.js三维坐标系中的位置
// camera.position.set(-1000, 0, 0);
// 相机的视线,观察目标点的坐标
camera.lookAt(0, 0, 0); //坐标原点
// 参照透视投影相机PerspectiveCamera:视锥体
// camera.lookAt(-1001, 0, 0); //拍照物体不在照相机可以拍到的范围内,在相机可以拍到的反方向,只要是大于-1000的值都可以拍到
// camera.lookAt(0, 10, 0); //y轴上一点
// camera.lookAt(mesh.position); //指向网格模型mesh// 创建一个WebGL渲染器
const renderer = new THREE.WebGLRenderer();
renderer.setClearColor(0x444444);
renderer.setSize(width, height); //canvas画布的宽高度
renderer.render(scene, camera); //执行一个渲染操作,类比相机的拍照动作 咔
//把渲染结果canvas画布,也就是所谓的“照片”,添加到网页的页面上
// document.body.appendChild(renderer.domElement);
// 插入到任意的html元素中
document.getElementById("webgl").appendChild(renderer.domElement);// 创建一个相机控件对象
const controls = new OrbitControls(camera, renderer.domElement);
// 如果OrbitControls改变了相机参数,重新调用渲染器渲染三维场景
controls.addEventListener("change", function () {// console.log(camera.position);// 每当发生改变的时候就重新渲染renderer.render(scene, camera); //执行渲染操作
});window.onresize = function () {const width = window.innerWidth - 200; //canvas画布const height = window.innerHeight - 60; //canvas画布// 更新canvas画布的尺寸renderer.setSize(width, height);// 相机的视椎体宽高比一定和画布保持一致,否则物体就会扭曲camera.aspect = width / height;camera.updateProjectionMatrix();document.getElementById("left").style.height = height + "px";
};
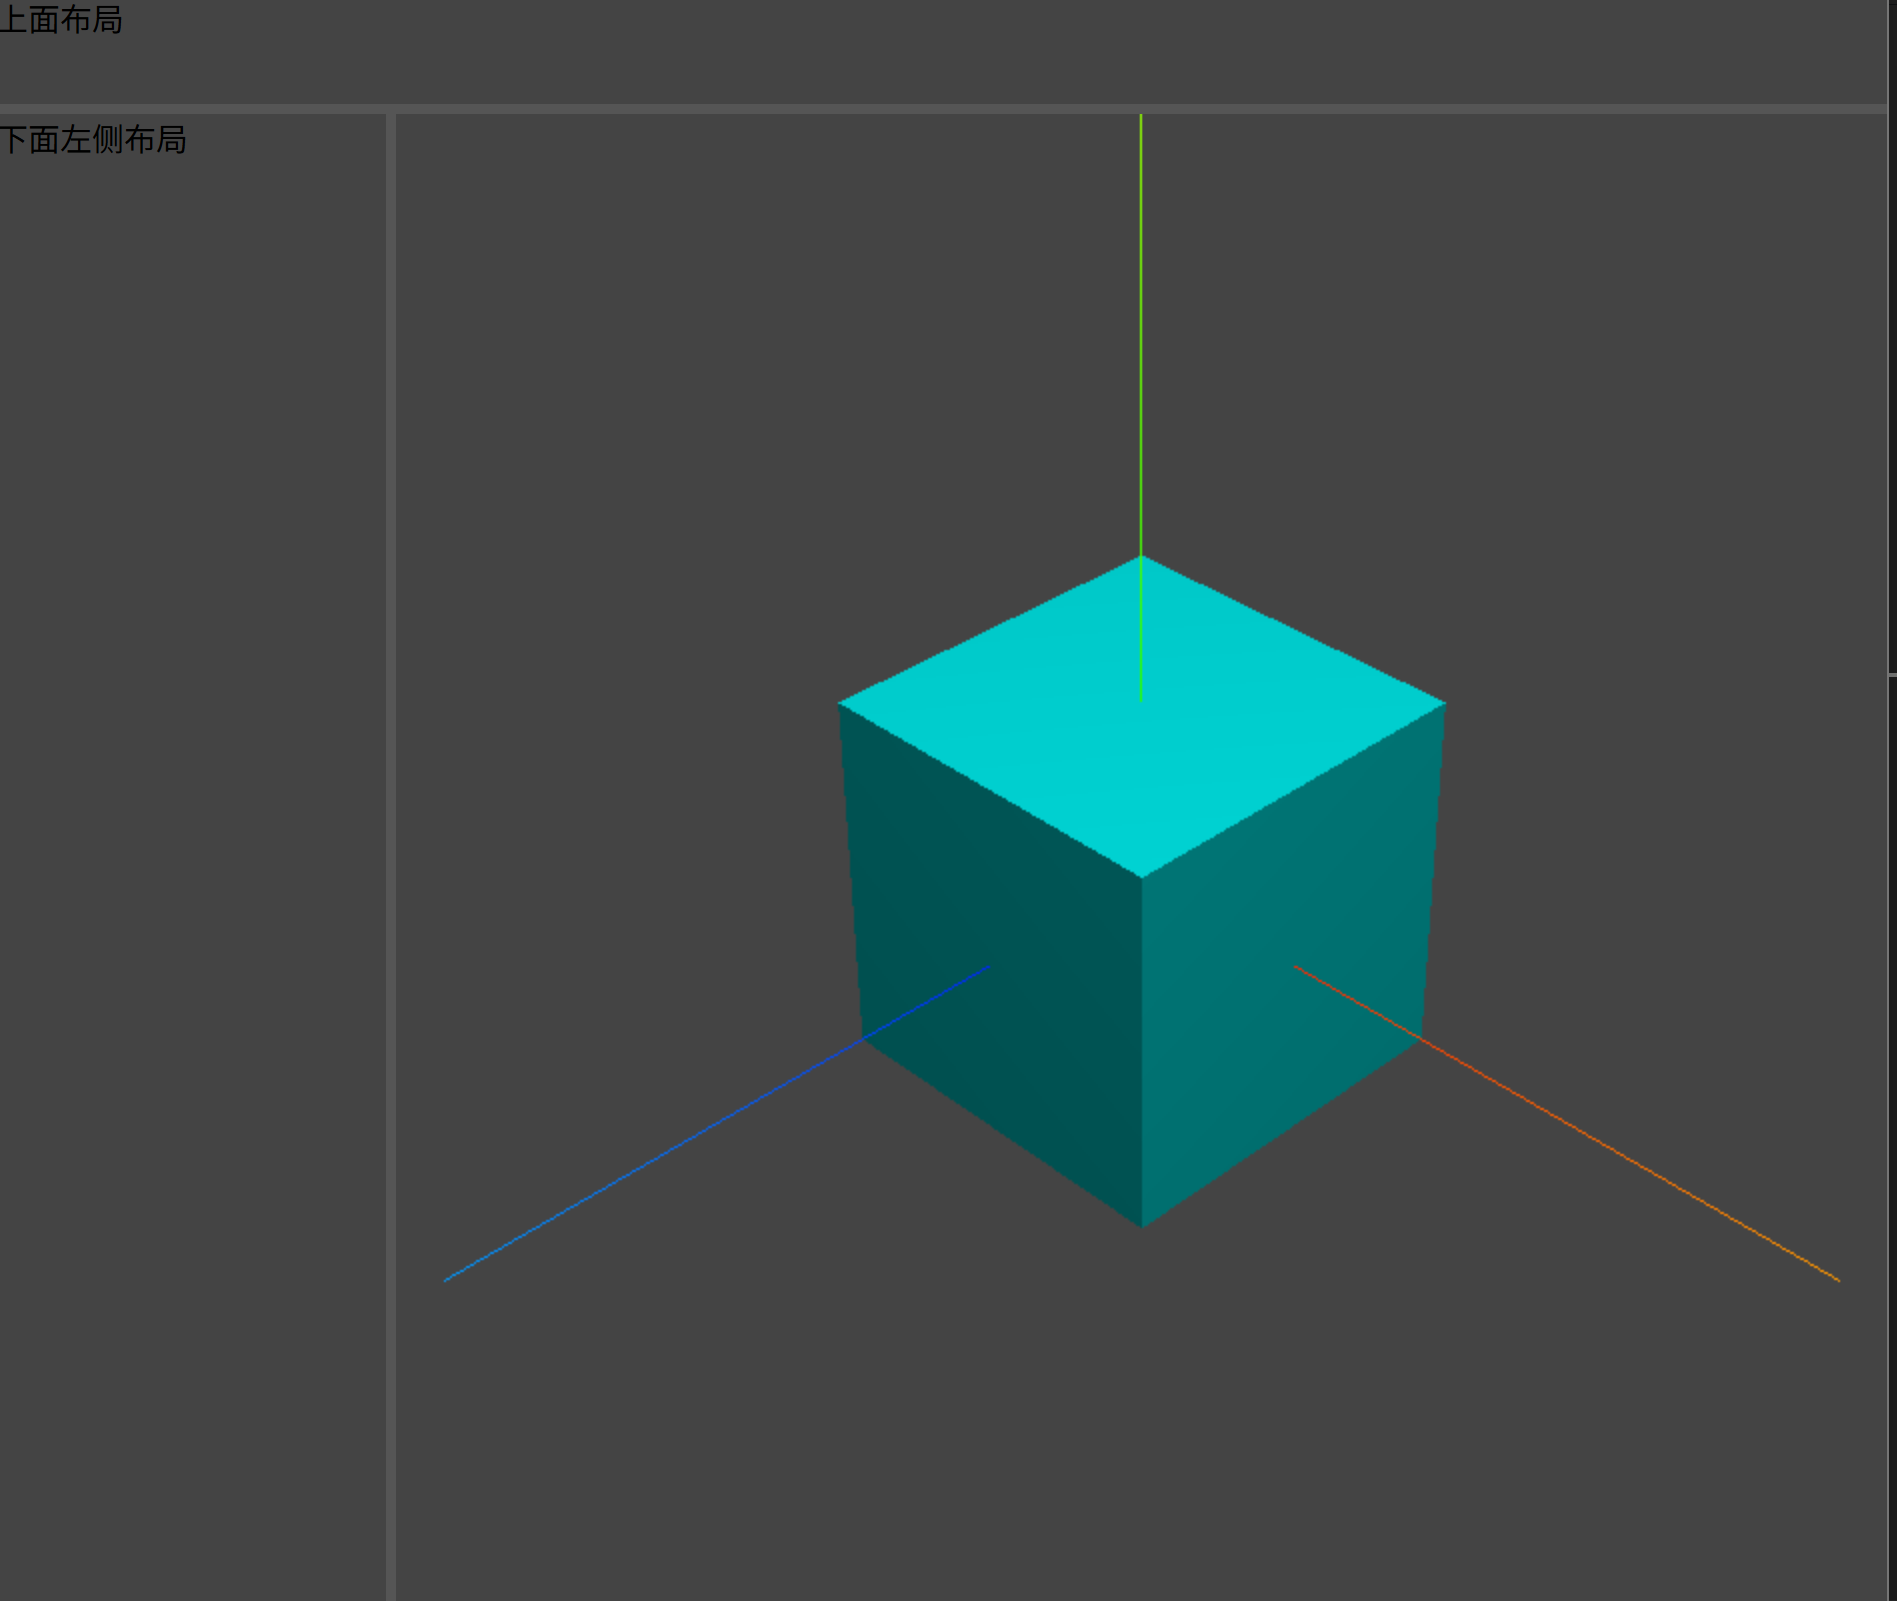
完整实现效果
2. UI交互界面与Canvas画布叠加
本节课把threejs Cavnas画布和HTML元素叠加布局时候,可能遇到问题演示下,以后遇到类似的问题知道怎么排查。
插入div元素
在课程课件演示文件.html中插入一个div元素,你会看到地址元素影响canvas元素布局
<div style="color: #ff0000;">红色</div>
canvas画布绝对定位
如果你想设置threejs Canvas画布的style属性,可以通过renderer.domElement访问。
// canvas画布绝对定位
renderer.domElement.style.position = 'absolute';
renderer.domElement.style.top = '0px';
renderer.domElement.style.left = '0px';
这时候你会发现你插入的div元素看不到了,这涉及到z-index的CSS布局知识点,具体说就是当两个HTML元素位置重合,谁在上谁在下的问题。
设置z-index
通过z-index改变HTML元素上下叠加关系,如果你忘记了CSS该属性,可以复习下。
renderer.domElement.style.zIndex = -1;
<div style="color: #ff0000;z-index:2;position: relative;">红色</div>
注意默认的定位position: static;设置z-index无效。
插入的div元素绝对定位
不设置three.js Canvas元素style,插入的div元素绝对定位,这样也可以把div元素叠加到threejs Canvas花画布上
<div style="color: #ff0000;z-index:2;position: absolute;">红色</div>
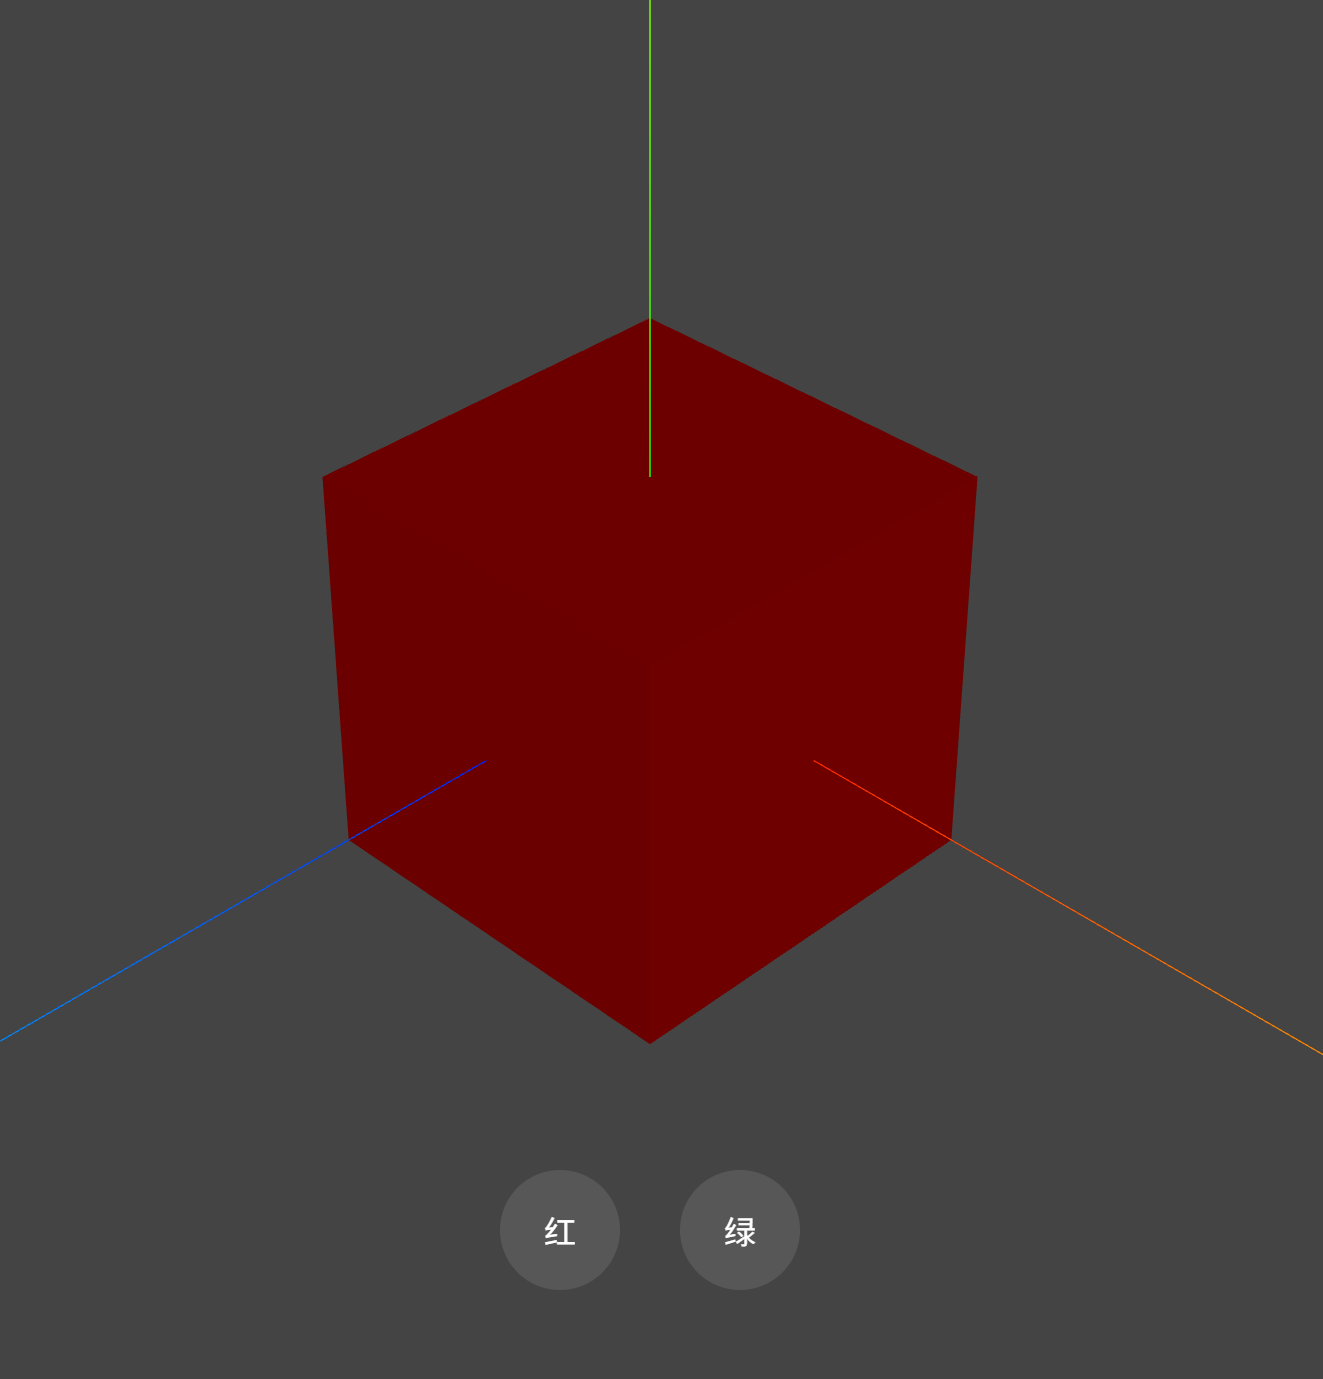
3. UI交互按钮与3D场景交互
实际开发的时候,往往会通过前端的HTML、CSS代码创建按钮等交互界面,用来与3D场景交互。
如果你是用vue或react开发web3d项目,也可以不用HTML、CSS自己写,可以使用UI组件库。
UI按钮改变Mesh颜色
<div  id="red" class="bu">红</div>
<div  id="green" class="bu" style="margin-left: 10px;">绿</div>
通过UI按钮与3D场景交互,改变mesh颜色
document.getElementById('red').addEventListener('click',function(){mesh.material.color.set(0xff0000);
})
document.getElementById('green').addEventListener('click',function(){mesh.material.color.set(0x00ff00);
})
index.html
<!DOCTYPE html>
<html lang="en"><head><meta charset="UTF-8" /><meta name="viewport" content="width=device-width, initial-scale=1.0" /><title>Document</title><style>body {margin: 0;}.pos {width: 100%;position: absolute;bottom: 100px;display: flex;justify-content: center;}.bu {width: 60px;height: 60px;line-height: 60px;text-align: center;color: white;border-radius: 50%;background-color: rgb(255, 255, 255, 0.1);}</style></head><body><!-- <div id="webgl" style="margin-top: 100px;margin-left: 200px;"></div> --><div class="pos"><div id="red" class="bu">红</div><div id="green" class="bu" style="margin-left: 30px">绿</div></div><script type="importmap">{"imports": {"three": "../../three.js-r148/build/three.module.js","three/addons/": "../../three.js-r148/examples/jsm/"}}</script><script type="module" src="./index.js"></script></body>
</html>
index.js
// 引入threejs
import * as THREE from "three";
// 引入轨道控制器扩展库OrbitControls.js
import { OrbitControls } from "three/addons/controls/OrbitControls.js";
import mesh from "./model.js";// 创建一个三维场景scene
const scene = new THREE.Scene();
// console.log(mesh);
scene.add(mesh);// 创建一个三维坐标轴
const axesHelper = new THREE.AxesHelper(100);
scene.add(axesHelper); //将坐标轴对象添加到三维场景中// 创建一个光源对象  点光源
const pointLight = new THREE.PointLight(0xffffff, 1.0);
pointLight.decay = 0.0; //不随着距离的改变而衰减
pointLight.position.set(400, 200, 300); //偏移光源位置,观察渲染效果变化
// scene.add(pointLight); //点光源添加到场景中//可视化点光源
// const pointLightHelper = new THREE.PointLightHelper(pointLight, 10);
// scene.add(pointLightHelper);
// 添加一个环境光
const ambient = new THREE.AmbientLight(0xffffff, 0.4);
scene.add(ambient); //没有方向,也就没有立体的// 添加一个平行光
const directionalLight = new THREE.DirectionalLight(0xfffff, 0.8);
directionalLight.position.set(100, 100, 100); //棱角很弱,跟每个面的夹角都一样
directionalLight.position.set(100, 60, 50); //可以看出每个面的棱角不一样
// directionalLight.target = mesh; //默认坐标原点
scene.add(directionalLight);// 定义相机输出画布的尺寸(单位:像素px)
const width = window.innerWidth;
const height = window.innerHeight;
// 设置相机的四个参数// 创建一个透视投影相机对象
const camera = new THREE.PerspectiveCamera(30, width / height, 0.1, 3000);
// 设置相机的位置
camera.position.set(200, 200, 200); //相机在Three.js三维坐标系中的位置
// 相机的视线,观察目标点的坐标
camera.lookAt(0, 0, 0); //坐标原点// 创建一个WebGL渲染器
const renderer = new THREE.WebGLRenderer({antialias: true, //启用抗锯齿,线条更加流畅,减少锯齿状
});
renderer.setClearColor(0x444444);
renderer.setSize(width, height); //canvas画布的宽高度
renderer.render(scene, camera); //执行一个渲染操作,类比相机的拍照动作 咔
//把渲染结果canvas画布,也就是所谓的“照片”,添加到网页的页面上
document.body.appendChild(renderer.domElement);
// 插入到任意的html元素中
// document.getElementById("webgl").appendChild(renderer.domElement)console.log("查看当前屏幕设备像素比", window.devicePixelRatio); //查看当前屏幕设备像素比 2
// 告诉threejs你的屏幕的设备像素比window.devicePixelRatio,针对与像素接近于1的设置下面的语句可能不是很明显,对于屏幕比例是2的,高清屏这种,设置的效果会很明显,减少模糊
renderer.setPixelRatio(window.devicePixelRatio); //会很清晰,遇到模糊了不要忘记设置这个
// renderer.setClearColor(0x444444);// 渲染循环
function render() {// console.log(obj.bool);// if (obj.bool) mesh.rotateY(0.01); //周期性旋转,每次旋转0.01弧度renderer.render(scene, camera); //周期性执行相机渲染功能,更新canvas画布上的内容requestAnimationFrame(render);
}
render();// 创建一个相机控件对象
const controls = new OrbitControls(camera, renderer.domElement);
// controls.target.set(1000, 0, 1000); //默认为0,0,0
controls.update();
// 如果OrbitControls改变了相机参数,重新调用渲染器渲染三维场景
controls.addEventListener("change", function () {// console.log(camera.position);// 每当发生改变的时候就重新渲染renderer.render(scene, camera); //执行渲染操作
});window.onresize = function () {// 更新canvas画布的尺寸renderer.setSize(window.innerWidth, window.innerHeight);// 相机的视椎体宽高比一定和画布保持一致,否则物体就会扭曲camera.aspect = window.innerWidth / window.innerHeight;camera.updateProjectionMatrix();
};
model.js
import * as THREE from 'three'const geometry = new THREE.BoxGeometry(50,50,50)
const material = new THREE.MeshLambertMaterial({color: 0x00ffff
})
const mesh = new THREE.Mesh(geometry, material)document.getElementById('red').addEventListener('click', function(){mesh.material.color.set(0xff0000)
})
document.getElementById('green').addEventListener('click', function(){mesh.material.color.set(0x00ff00)
})export default mesh
效果图:
4. Three.js背景透明度
通过Three.js渲染一个模型的时候,不希望canvas画布有背景颜色,也就是canvas画布完全透明,可以透过canvas画布看到画布后面叠加的HTML元素图文,呈现出来一种三维模型悬浮在网页上面的效果。
threejs canvas画布插入到web页面上
<div id="webgl"></div>
document.getElementById('webgl').appendChild(renderer.domElement);
.setClearAlpha()方法
改变背景透明度值
renderer.setClearAlpha(0.8);
完全透明
renderer.setClearAlpha(0.0);
背景透明alpha: true
通过Three.js渲染器WebGLRenderer的alpha属性值设置为true就可以,WebGL渲染器的alpha属性默认值是false。
// 在构造函数参数中设置alpha属性的值
var renderer = new THREE.WebGLRenderer({alpha: true
});
.setClearColor()方法
.setClearColor()方法的参数2,可以用来设置背景颜色透明度。
renderer.setClearColor(0xb9d3ff, 0.4); //设置背景颜色和透明度
5. Three.js渲染结果保存为图片
保存three.js渲染结果,其实就是保存three.js对应canvas画布上的图像。那么这个问题就转化为如何把canvas画布保存为一个图片。
超链接元素a下载文件
在学习下面内容之前,如果你有兴趣,可以选择补充下前端相关知识,具体说就是通过超链接元素a合成一个文件,并下载。
你通过下面代码,可以通过点击按钮“下载”,创建一个txt文件,下载到本地,txt文件包含字符串“一些数据”。
<button type="button" name="button" onclick="saveFile()">下载</button>
<script>function saveFile() {// 创建一个超链接元素,用来下载保存数据的文件const link = document.createElement('a');// 通过超链接herf属性,设置要保存到文件中的数据link.href = window.URL.createObjectURL(new Blob(['一些数据']));link.download = '文件名称.txt';//下载文件名link.click();//js代码触发超链接元素a的鼠标点击事件,开始下载文件到本地}
</script>
1. 配置webgl渲染器preserveDrawingBuffer:true
// WebGL渲染器设置
const renderer = new THREE.WebGLRenderer({//想把canvas画布上内容下载到本地,需要设置为truepreserveDrawingBuffer:true,
});
2. 按钮绑定鼠标事件
创建一个UI按钮"下载",绑定一个鼠标单击事件,用于后面点击下载图片。
// 鼠标单击id为download的HTML元素,threejs渲染结果以图片形式下载到本地
document.getElementById('download').addEventListener('click',function(){})
3. 创建超链接元素a:用于保存下载文件
// 鼠标单击id为download的HTML元素,threejs渲染结果以图片形式下载到本地
document.getElementById('download').addEventListener('click',function(){// 创建一个超链接元素,用来下载保存数据的文件const link = document.createElement('a');// 通过超链接herf属性,设置要保存到文件中的数据link.href = ;link.download = 'threejs.png'; //下载文件名link.click(); //js代码触发超链接元素a的鼠标点击事件,开始下载文件到本地
})
4. Cavnas方法.toDataURL()
Canvas画布通过.toDataURL()方法可以获取画布上的像素信息。canvas.toDataURL("image/png");表示以png格式获取像素数据,可以直接赋值给超链接元素a的.herf属性下载到本地。
const link = document.createElement('a');
// 通过超链接herf属性,设置要保存到文件中的数据
const canvas = renderer.domElement; //获取canvas对象
link.href = canvas.toDataURL("image/png");
以不同的格式获取像素信息
canvas.toDataURL("image/png");
canvas.toDataURL("image/jpeg");
canvas.toDataURL("image/bmp");
相关代码:
// 引入threejs
import * as THREE from "three";
// 引入轨道控制器扩展库OrbitControls.js
import { OrbitControls } from "three/addons/controls/OrbitControls.js";
import mesh from "./model.js";// 创建一个三维场景scene
const scene = new THREE.Scene();
// console.log(mesh);
scene.add(mesh);// 创建一个三维坐标轴
const axesHelper = new THREE.AxesHelper(100);
scene.add(axesHelper); //将坐标轴对象添加到三维场景中// 创建一个光源对象  点光源
const pointLight = new THREE.PointLight(0xffffff, 1.0);
pointLight.decay = 0.0; //不随着距离的改变而衰减
pointLight.position.set(400, 200, 300); //偏移光源位置,观察渲染效果变化
// scene.add(pointLight); //点光源添加到场景中//可视化点光源
// const pointLightHelper = new THREE.PointLightHelper(pointLight, 10);
// scene.add(pointLightHelper);
// 添加一个环境光
const ambient = new THREE.AmbientLight(0xffffff, 0.4);
scene.add(ambient); //没有方向,也就没有立体的// 添加一个平行光
const directionalLight = new THREE.DirectionalLight(0xfffff, 0.8);
directionalLight.position.set(100, 100, 100); //棱角很弱,跟每个面的夹角都一样
directionalLight.position.set(100, 60, 50); //可以看出每个面的棱角不一样
// directionalLight.target = mesh; //默认坐标原点
scene.add(directionalLight);// 定义相机输出画布的尺寸(单位:像素px)
const width = window.innerWidth;
const height = window.innerHeight;
// 设置相机的四个参数// 创建一个透视投影相机对象
const camera = new THREE.PerspectiveCamera(30, width / height, 0.1, 3000);
// 设置相机的位置
camera.position.set(200, 200, 200); //相机在Three.js三维坐标系中的位置
// 相机的视线,观察目标点的坐标
camera.lookAt(0, 0, 0); //坐标原点// 创建一个WebGL渲染器
const renderer = new THREE.WebGLRenderer({antialias: true, //启用抗锯齿,线条更加流畅,减少锯齿状preserveDrawingBuffer: true,
});
renderer.setClearColor(0x444444);
renderer.setSize(width, height); //canvas画布的宽高度
renderer.render(scene, camera); //执行一个渲染操作,类比相机的拍照动作 咔
//把渲染结果canvas画布,也就是所谓的“照片”,添加到网页的页面上
document.body.appendChild(renderer.domElement);
// 插入到任意的html元素中
// document.getElementById("webgl").appendChild(renderer.domElement)document.getElementById('download').addEventListener('click', function() {const link = document.createElement('a')const canvas = renderer.domElement; //获取canvas对象link.href = canvas.toDataURL('image/png')link.download = 'threejs.png' //下载文件名link.click() //js代码触发超链接元素a的鼠标点击事件,开始下载文件到本地
})console.log("查看当前屏幕设备像素比", window.devicePixelRatio); //查看当前屏幕设备像素比 2
// 告诉threejs你的屏幕的设备像素比window.devicePixelRatio,针对与像素接近于1的设置下面的语句可能不是很明显,对于屏幕比例是2的,高清屏这种,设置的效果会很明显,减少模糊
renderer.setPixelRatio(window.devicePixelRatio); //会很清晰,遇到模糊了不要忘记设置这个
// renderer.setClearColor(0x444444);
// renderer.setClearAlpha(0.0);// 渲染循环
function render() {// console.log(obj.bool);// if (obj.bool) mesh.rotateY(0.01); //周期性旋转,每次旋转0.01弧度renderer.render(scene, camera); //周期性执行相机渲染功能,更新canvas画布上的内容requestAnimationFrame(render);
}
render();// 创建一个相机控件对象
const controls = new OrbitControls(camera, renderer.domElement);
// controls.target.set(1000, 0, 1000); //默认为0,0,0
controls.update();
// 如果OrbitControls改变了相机参数,重新调用渲染器渲染三维场景
controls.addEventListener("change", function () {// console.log(camera.position);// 每当发生改变的时候就重新渲染renderer.render(scene, camera); //执行渲染操作
});window.onresize = function () {// 更新canvas画布的尺寸renderer.setSize(window.innerWidth, window.innerHeight);// 相机的视椎体宽高比一定和画布保持一致,否则物体就会扭曲camera.aspect = window.innerWidth / window.innerHeight;camera.updateProjectionMatrix();
};
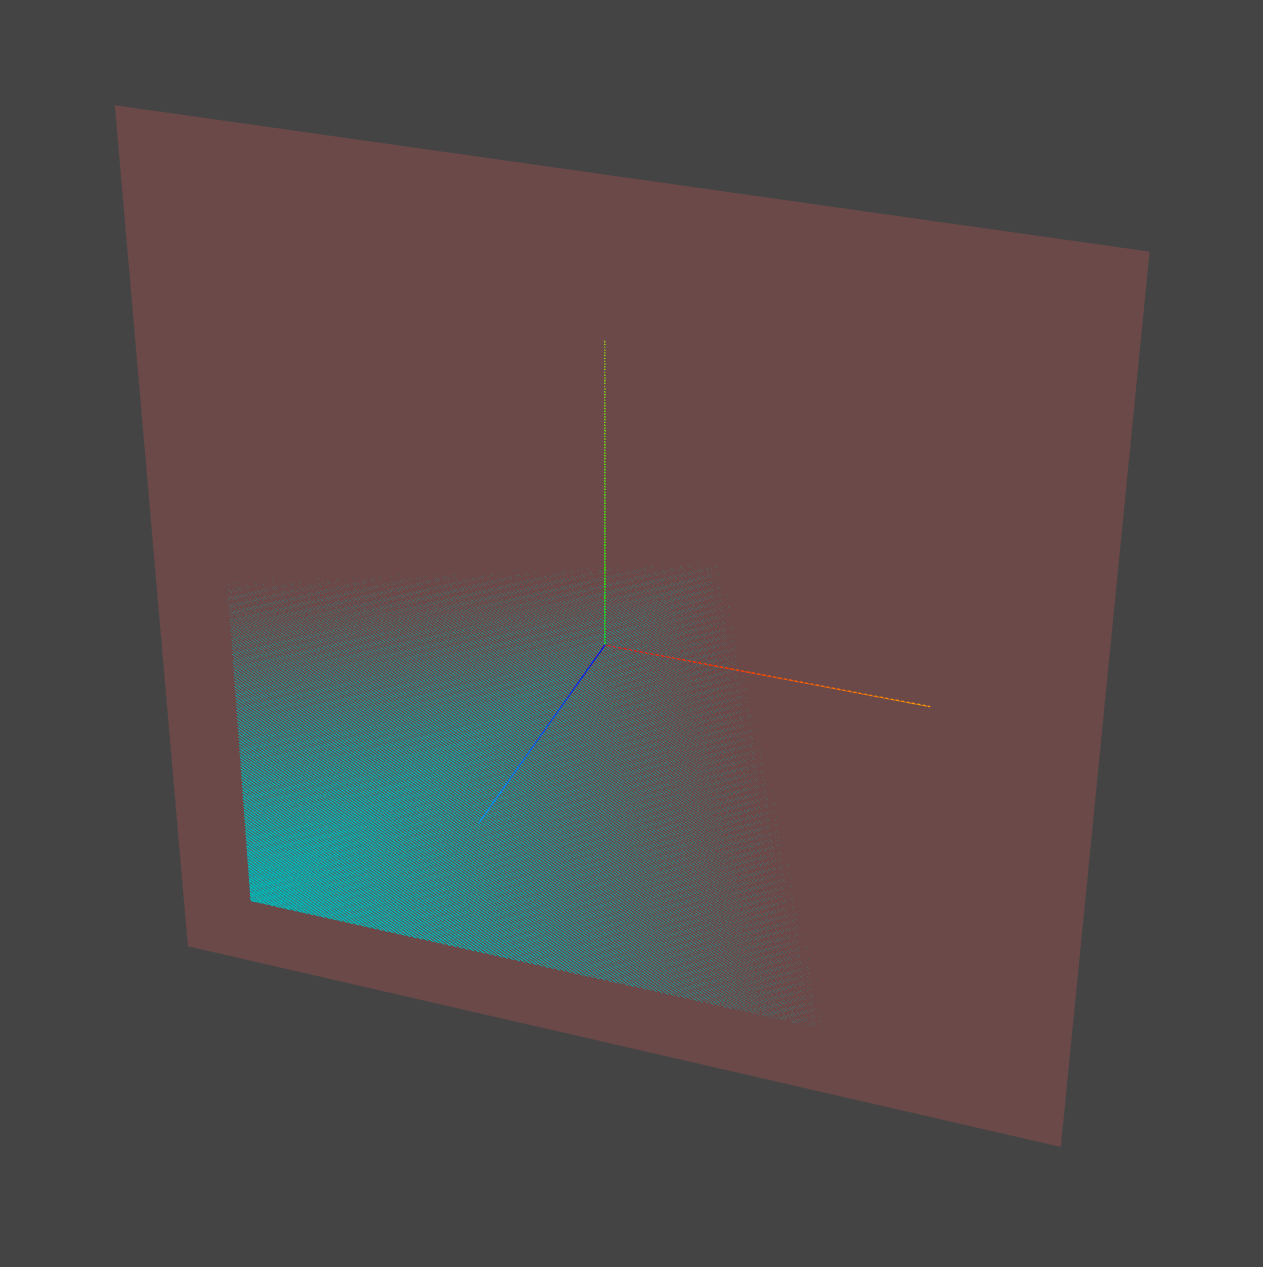
6. 深度冲突(模型闪烁)
本节课通过一个比较简单的案例,来给大家展示一下,实际开发的过程中,你可能会遇到的模型闪烁问题。
对于模型闪烁的原因简单地说就是深度冲突,对应的英文关键词是Z-fighting
Mesh面重合渲染测试
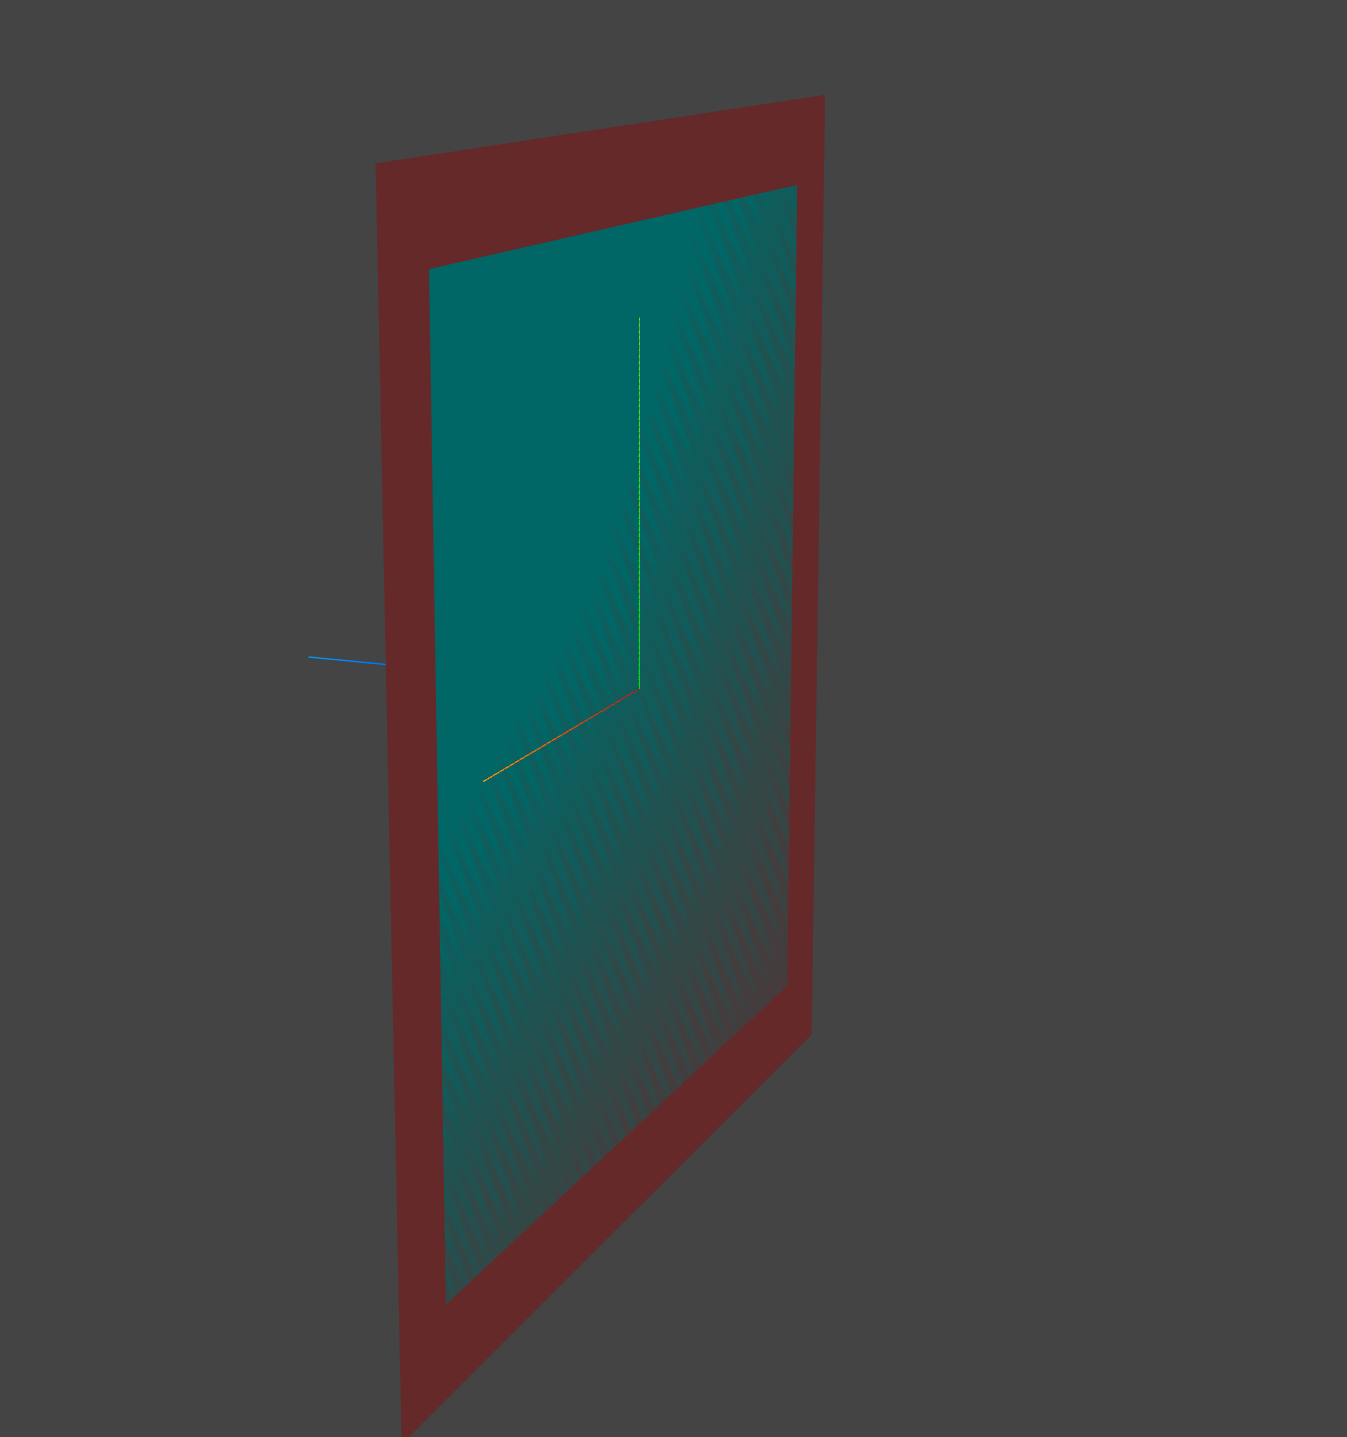
下面代码创建两个重合的矩形平面Mesh,通过浏览器预览,当你旋转三维场景的时候,你会发现模型渲染的时候产生闪烁。
这种现象,主要是两个Mesh重合,电脑GPU分不清谁在前谁在后,这种现象,可以称为深度冲突Z-fighting。
// 两个矩形平面Mesh重合,产生闪烁
// 闪烁原因:两个矩形面位置重合,GPU无法分清谁在前谁在后
const geometry = new THREE.PlaneGeometry(250, 250);
const material = new THREE.MeshLambertMaterial({color: 0x00ffff,side: THREE.DoubleSide,
});
const mesh = new THREE.Mesh(geometry, material);const geometry2 = new THREE.PlaneGeometry(300, 300);
const material2 = new THREE.MeshLambertMaterial({color: 0xff6666,side: THREE.DoubleSide,
});
const mesh2 = new THREE.Mesh(geometry2, material2);
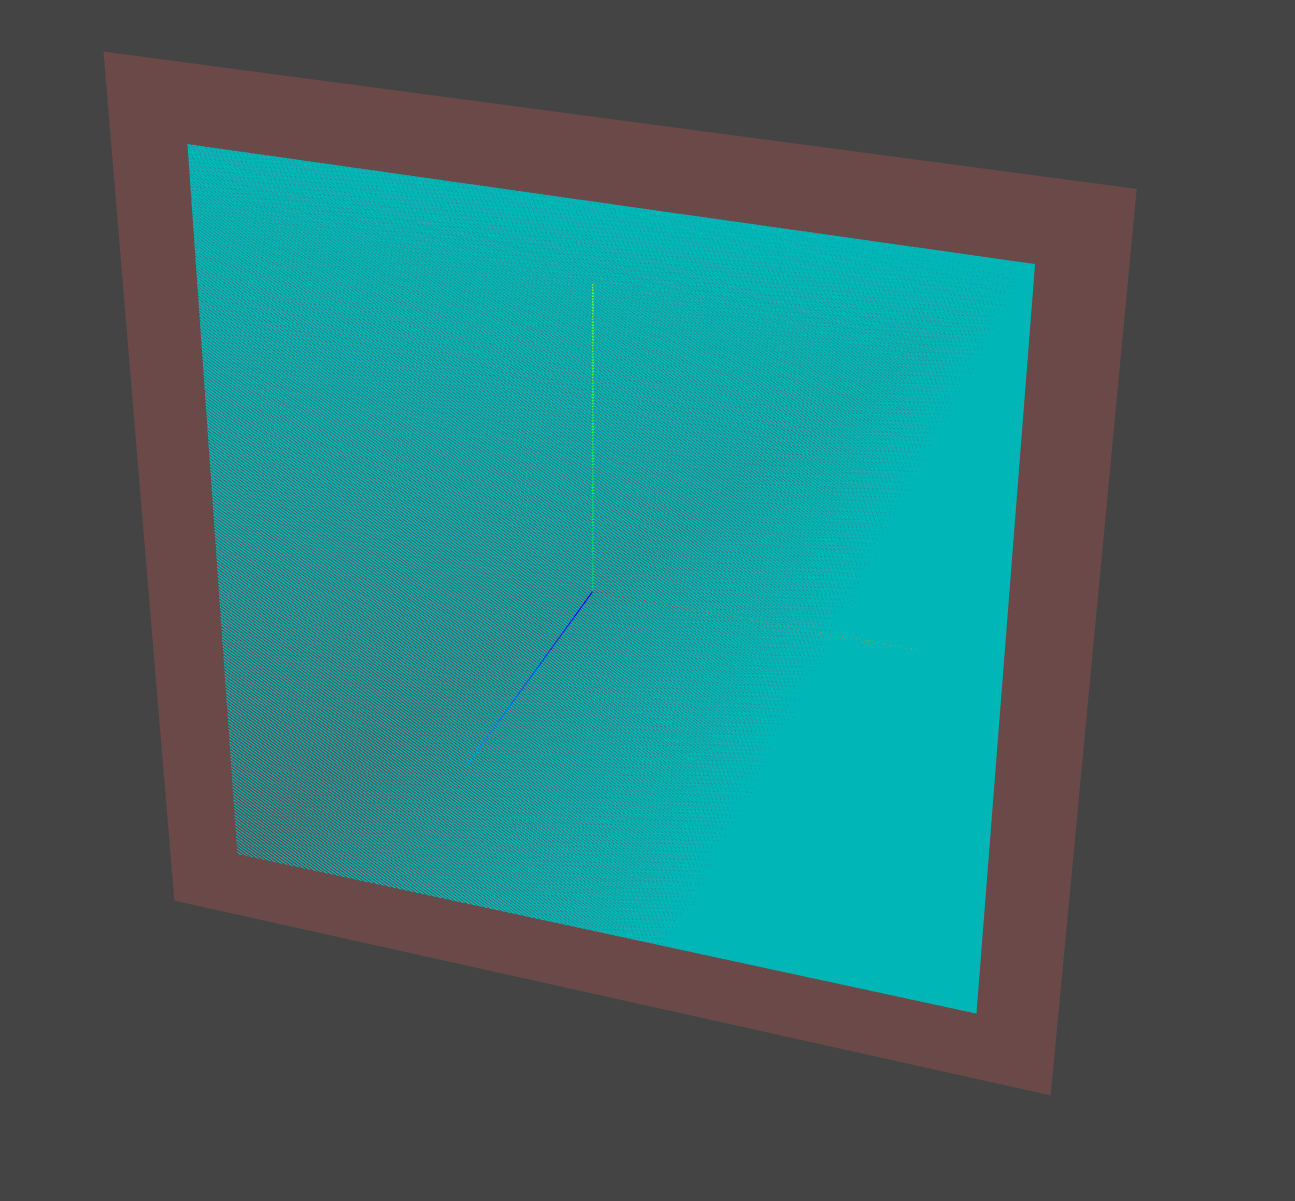
两个矩形Mesh拉开距离
适当偏移,解决深度冲突,偏移尺寸相对模型尺寸比较小,视觉上两个平面近似还是重合效果。
mesh2.position.z = 1;
建模注意
上面代码测试提醒我们,在三维软件中建模的的时候,尽量避免两个Mesh完全重合,可以考虑适当偏移一定的距离。
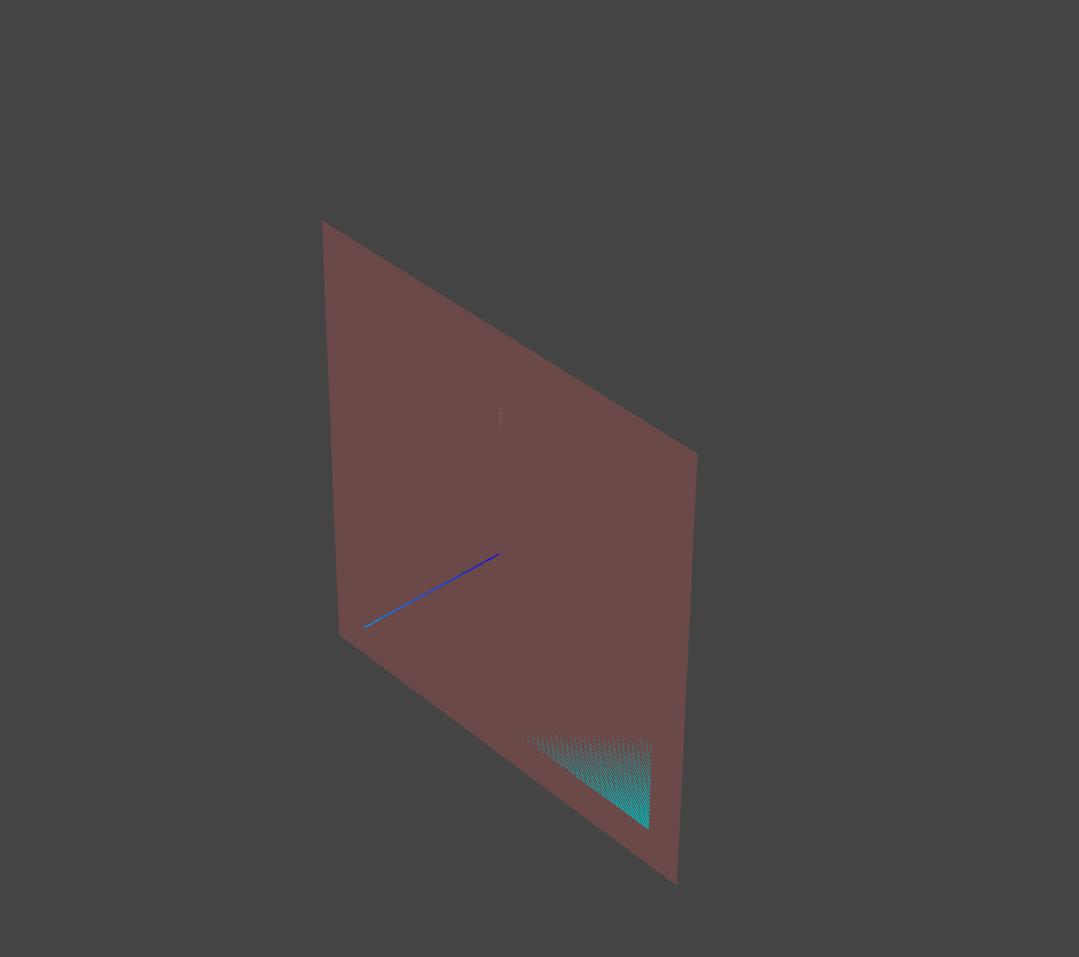
间隙很小,深度冲突
当两个面间隙很小,也可能出现深度冲突。从纯理论的角度,你能分清0和0.0000...0000001的大小,但是实际上,电脑GPU精度是有限的。
// 当两个面间隙很小,也可能出现深度冲突。
mesh2.position.z = 0.0000000000000000000001;
所以也会产生深度冲突
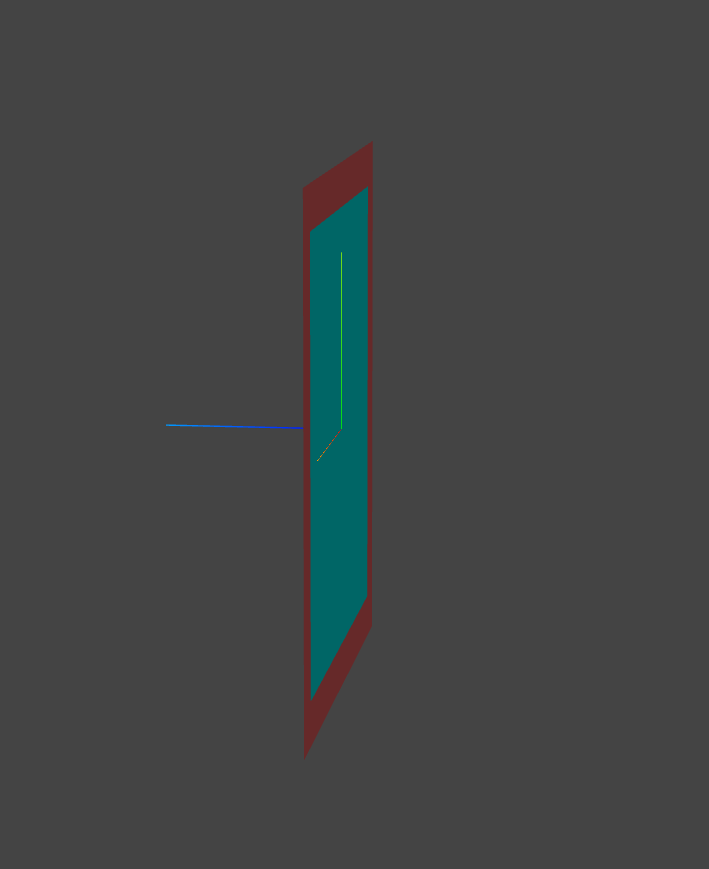
透视投影相机对距离影响(深度冲突)
第1步:设置两个Mesh平面的距离相差0.1,课件中案例源码你可以看到,没有深度冲突导致的模型闪烁问题
mesh2.position.z = 0;
mesh2.position.z = 0.1;
camera.position.set(292, 223, 185);
第2步:改变相机.position属性,你会发现当相机距离三维模型较远的时候,两个面也可能出现深度冲突,当然你也可以通过相机控件OrbitControls缩放功能,改变相机与模型的距离,进行观察。
camera.position.set(292*5, 223*5, 185*5)
透视投影相机的投影规律是远小近大,和人眼观察世界一样,模型距离相机越远,模型渲染的效果越小,两个mesh之间的间距同样也会变小。当两个Mesh和相机距离远到一定程度,两个模型的距离也会无限接近0
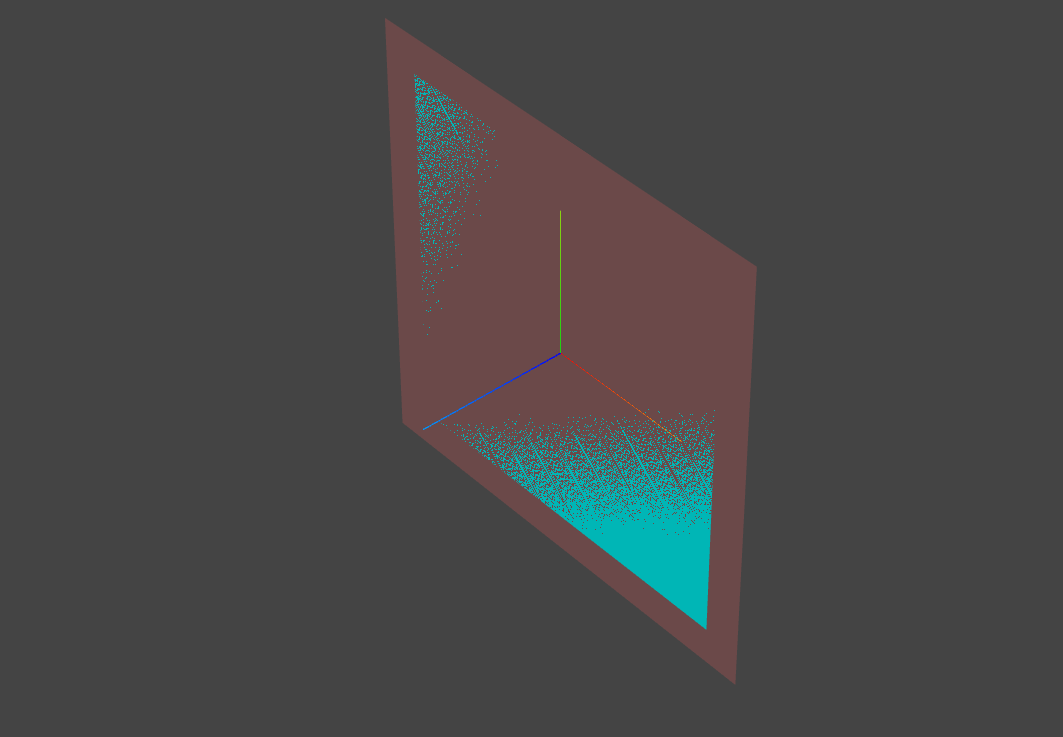
webgl渲染器设置对数深度缓冲区
两个矩形平面距离比较近,相差0.1
mesh2.position.z = 0;
mesh2.position.z = 0.1;
camera.position.set(292*5, 223*5, 185*5);
当一个三维场景中有一些面距离比较近,有深度冲突,你可以尝试设置webgl渲染器设置对数深度缓冲区logarithmicDepthBuffer: true来优化或解决。logarithmicDepthBuffer: true作用简单来说,就是两个面间距比较小的时候,让threejs更容易区分两个面,谁在前,谁在后。
// WebGL渲染器设置
const renderer = new THREE.WebGLRenderer({// 设置对数深度缓冲区,优化深度冲突问题logarithmicDepthBuffer: true
});
有一点要注意,当两个面间隙过小,或者重合,你设置webgl渲染器对数深度缓冲区也是无效的。
mesh2.position.z = 0;
//当两个面重合,logarithmicDepthBuffer: true无效
mesh2.position.z = 0;
//当两个面间隙过小,logarithmicDepthBuffer: true无效
mesh2.position.z = 0.00001;
camera.position.set(292*5, 223*5, 185*5);
效果图:
代码:
model.js
import * as THREE from "three";// 两个矩形平面Mesh重合,产生闪烁
// 闪烁原因:两个矩形面位置重合,GPU无法分清楚谁在前谁在后
const geometry = new THREE.PlaneGeometry(250, 250);
const material = new THREE.MeshLambertMaterial({color: 0x00ffff,side: THREE.DoubleSide,
});
const mesh = new THREE.Mesh(geometry, material);const geometry2 = new THREE.PlaneGeometry(300, 300);
const material2 = new THREE.MeshLambertMaterial({color: 0xff6666,side: THREE.DoubleSide,
});
const mesh2 = new THREE.Mesh(geometry2, material2);
// mesh2.position.z = 1;
mesh2.position.z = 0.1;
// mesh2.position.z = 0.0000000000000000001;const group = new THREE.Group();
group.add(mesh, mesh2);export default group;
index.js
// 引入threejs
import * as THREE from "three";
// 引入轨道控制器扩展库OrbitControls.js
import { OrbitControls } from "three/addons/controls/OrbitControls.js";
import group from "./model.js";// 创建一个三维场景scene
const scene = new THREE.Scene();
// console.log(mesh);
scene.add(group);// 创建一个三维坐标轴
const axesHelper = new THREE.AxesHelper(100);
scene.add(axesHelper); //将坐标轴对象添加到三维场景中// 创建一个光源对象  点光源
const pointLight = new THREE.PointLight(0xffffff, 1.0);
pointLight.decay = 0.0; //不随着距离的改变而衰减
pointLight.position.set(400, 200, 300); //偏移光源位置,观察渲染效果变化
// scene.add(pointLight); //点光源添加到场景中//可视化点光源
// const pointLightHelper = new THREE.PointLightHelper(pointLight, 10);
// scene.add(pointLightHelper);
// 添加一个环境光
const ambient = new THREE.AmbientLight(0xffffff, 0.4);
scene.add(ambient); //没有方向,也就没有立体的// 添加一个平行光
const directionalLight = new THREE.DirectionalLight(0xfffff, 0.8);
directionalLight.position.set(100, 100, 100); //棱角很弱,跟每个面的夹角都一样
directionalLight.position.set(100, 60, 50); //可以看出每个面的棱角不一样
// directionalLight.target = mesh; //默认坐标原点
scene.add(directionalLight);// 定义相机输出画布的尺寸(单位:像素px)
const width = window.innerWidth;
const height = window.innerHeight;
// 设置相机的四个参数// 创建一个透视投影相机对象
const camera = new THREE.PerspectiveCamera(30, width / height, 0.1, 3000);
// 设置相机的位置
camera.position.set(200*5, 200*5, 200*5); //相机在Three.js三维坐标系中的位置
// 相机的视线,观察目标点的坐标
camera.lookAt(0, 0, 0); //坐标原点// 创建一个WebGL渲染器
const renderer = new THREE.WebGLRenderer({antialias: true, //启用抗锯齿,线条更加流畅,减少锯齿状preserveDrawingBuffer: true,logarithmicDepthBuffer: true,
});
renderer.setClearColor(0x444444);
renderer.setSize(width, height); //canvas画布的宽高度
renderer.render(scene, camera); //执行一个渲染操作,类比相机的拍照动作 咔
//把渲染结果canvas画布,也就是所谓的“照片”,添加到网页的页面上
document.body.appendChild(renderer.domElement);
// 插入到任意的html元素中
// document.getElementById("webgl").appendChild(renderer.domElement)document.getElementById('download').addEventListener('click', function() {const link = document.createElement('a')const canvas = renderer.domElement; //获取canvas对象link.href = canvas.toDataURL('image/png')link.download = 'threejs.png' //下载文件名link.click() //js代码触发超链接元素a的鼠标点击事件,开始下载文件到本地
})console.log("查看当前屏幕设备像素比", window.devicePixelRatio); //查看当前屏幕设备像素比 2
// 告诉threejs你的屏幕的设备像素比window.devicePixelRatio,针对与像素接近于1的设置下面的语句可能不是很明显,对于屏幕比例是2的,高清屏这种,设置的效果会很明显,减少模糊
renderer.setPixelRatio(window.devicePixelRatio); //会很清晰,遇到模糊了不要忘记设置这个
// renderer.setClearColor(0x444444);
// renderer.setClearAlpha(0.0);// 渲染循环
function render() {// console.log(obj.bool);// if (obj.bool) mesh.rotateY(0.01); //周期性旋转,每次旋转0.01弧度renderer.render(scene, camera); //周期性执行相机渲染功能,更新canvas画布上的内容requestAnimationFrame(render);
}
render();// 创建一个相机控件对象
const controls = new OrbitControls(camera, renderer.domElement);
// controls.target.set(1000, 0, 1000); //默认为0,0,0
controls.update();
// 如果OrbitControls改变了相机参数,重新调用渲染器渲染三维场景
controls.addEventListener("change", function () {// console.log(camera.position);// 每当发生改变的时候就重新渲染renderer.render(scene, camera); //执行渲染操作
});window.onresize = function () {// 更新canvas画布的尺寸renderer.setSize(window.innerWidth, window.innerHeight);// 相机的视椎体宽高比一定和画布保持一致,否则物体就会扭曲camera.aspect = window.innerWidth / window.innerHeight;camera.updateProjectionMatrix();
};
7. 模型加载进度条
web3d可视化项目开发,很多时候,3D模型的大小要比普通前端项目的文件大得多,这时候往往需要设置一个进度条,表示模型的加载进度。
进度条HTML、CSS、JavaScript代码
课件中提供的是用原生HTML、CSS、JavaScript代码写的一个进度条,当然实际开发的时候,你可以不自己写,选择成熟的UI组件库,比如你使用vue技术栈的Element-ui进度条组件。
建议:正式学习后面threejs代码之前,你可以先自己把下面进度条CSS代码写一遍,然后再学习后面内容。
<head><style>/* 进度条css样式 */#container {position: absolute;width: 400px;height: 16px;top: 50%;left:50%;margin-left: -200px;margin-top: -8px;border-radius: 8px;           border: 1px solid #009999;          overflow: hidden;}#per {height: 100%;width: 0px;background: #00ffff;color: #00ffff;line-height: 15px;          }</style>
</head>
<body style="background-color: #001111;"><div id="container"><!-- 进度条 --><div id="per"> </div></div><script>        const percentDiv = document.getElementById("per");// 获取进度条元素percentDiv.style.width = 0.8*400 + "px";//进度条元素长度percentDiv.style.textIndent = 0.8*400 + 5 +"px";//缩进元素中的首行文本percentDiv.innerHTML =  "80%";//进度百分比</script>
</body>
加载器查看模型加载进度
gltf模型加载进度具体语法可以查看GLTFLoader文档。
loader.load(模型路径,加载完成函数,加载过程函数)
模型本身是有大小的,通过浏览器从服务器加载的时候,本身网络传输是需要时间的。
.load()方法的参数2是一个函数,参数2函数是模型加载完成以后才会被调用执行。
.load()方法的参数3是一个函数,通过函数的参数获取模型加载信息,每当模型加载部分内容,该函数就会被调用,一次加载过程中一般会被调用多次,直到模型加载完成。
loader.load("../工厂.glb", function (gltf) {model.add(gltf.scene);
}, function (xhr) {// 控制台查看加载进度xhr// 通过加载进度xhr可以控制前端进度条进度   const percent = xhr.loaded / xhr.total;console.log('加载进度' + percent);
})
加载进度控制进度条
把案例源码原生HTML、CSS进度条.html中进度条的HTML、CSS、JavaScript代码复制到threejs代码中,修改即可。
loader.load("../工厂.glb", function (gltf) {model.add(gltf.scene);
}, function (xhr) {const percent = xhr.loaded / xhr.total;// console.log('加载进度' + percent);percentDiv.style.width = percent * 400 + "px"; //进度条元素长度percentDiv.style.textIndent = percent * 400 + 5 + "px"; //缩进元素中的首行文本// Math.floor:小数加载进度取整percentDiv.innerHTML = Math.floor(percent * 100) + '%'; //进度百分比
})
加载完成隐藏进度条
threejs模型加载完成后,就不需要显示进度条,可以通过.style.display属性设置,也可以通过.style.visibility属性隐藏进度条。
loader.load("../工厂.glb", function (gltf) {model.add(gltf.scene);// 加载完成,隐藏进度条// document.getElementById("container").style.visibility ='hidden';document.getElementById("container").style.display = 'none';
}, function (xhr) { const percent = xhr.loaded / xhr.total;console.log('加载进度' + percent);
})
相关代码:
index.html
<!DOCTYPE html>
<html lang="en"><head><meta charset="UTF-8" /><meta name="viewport" content="width=device-width, initial-scale=1.0" /><title>Document</title><style>body {margin: 0;}/* 进度条css样式 */#container {position: absolute;width: 400px;height: 16px;top: 50%;left: 50%;margin-left: -200px;margin-top: -8px;border-radius: 8px;border: 1px solid #009999;overflow: hidden;}#per {height: 100%;width: 0px;background: #00ffff;color: #00ffff;line-height: 15px;}</style></head><body><!-- <div id="webgl" style="margin-top: 100px;margin-left: 200px;"></div> --><!-- <div style="position: absolute; top: 0px; left: 0px"><button id="download" type="button" name="button">下载</button></div> --><div id="container"><!-- 进度条 --><div id="per"></div></div><!-- type="importmap"功能:.html文件中也能和nodejs开发环境中一样方式,引入npm安装 --><script type="importmap">{"imports": {"three": "../../three.js-r148/build/three.module.js","three/addons/": "../../three.js-r148/examples/jsm/"}}</script><script type="module" src="./index.js"></script></body>
</html>
model.js
// 引入three.js
import * as THREE from "three";// 引入gltf加载器
import { GLTFLoader } from "three/addons/loaders/GLTFLoader.js";// 实例化一个加载器对象
const loader = new GLTFLoader();
const model = new THREE.Group(); //声明一个组对象,用来添加加载成功的三维场景// "../../ClearcoatTest.glb"
const percentDiv = document.getElementById("per"); // 获取进度条元素
loader.load("../../ClearcoatTest.glb",function (gltf) {console.log("gltf", gltf);model.add(gltf.scene);document.getElementById('container').style.display = 'none'},function (xhr) {// 控制台查看加载进度xhr// 通过加载进度xhr可以控制前端进度条进度const percent = xhr.loaded / xhr.total;console.log("加载进度" + percent);percentDiv.style.width = percent * 400 + "px"; //进度条元素长度percentDiv.style.textIndent = percent * 400 + 5 + "px"; //缩进元素中的首行文本percentDiv.innerHTML = Math.floor(percent*100)+'%'; //进度百分比}
);export default model;